
How to upload local video files to a Video On-Demand (VOD) Channel
Overview
This article explains how to upload video files from your computer to a specific Video On-Demand (VOD) Channel in the Media Cloud.
This article covers the local file upload workflow started from within a VOD Channel. Other upload methods in the Media Cloud can also upload content into a specific Channel.
When to use this article
Use this article when your video files are stored on your computer and you want to upload them to a specific VOD Channel from within the Channel page.
This article is helpful when you want to:
upload one or more local files to a VOD Channel
place uploaded videos at the beginning or end of the Channel playlist
optionally apply a Workflow Preset during upload
optionally apply a Watermark during video encoding
How it works
A Video On-Demand (VOD) Channel in the Media Cloud is used to organize and deliver on-demand video content.
To learn more about the purpose of Channels and how they are used, see Understanding Video On-Demand (VOD), Audio On-Demand (AOD), and LIVE Channels (and Channel IDs).
When you upload a new video file from within a VOD Channel, the file is added to the Media Cloud’s Video Archive and placed into that Channel playlist.
Because this creates a new upload, it uses your account’s available Storage and Transcoding.
This is one way to add content to a VOD Channel. Other upload methods in the Media Cloud can also upload content into a specific Channel during the upload process.
If the video has already been uploaded to the Media Cloud, you do not need to upload it again. Instead, you can assign the existing video item to the VOD Channel. To learn how to assign existing video items, see: How to assign content to a specific Video On-Demand (VOD) Channel
Instructions
Step 1
Log in to your Media Cloud account.
Step 2
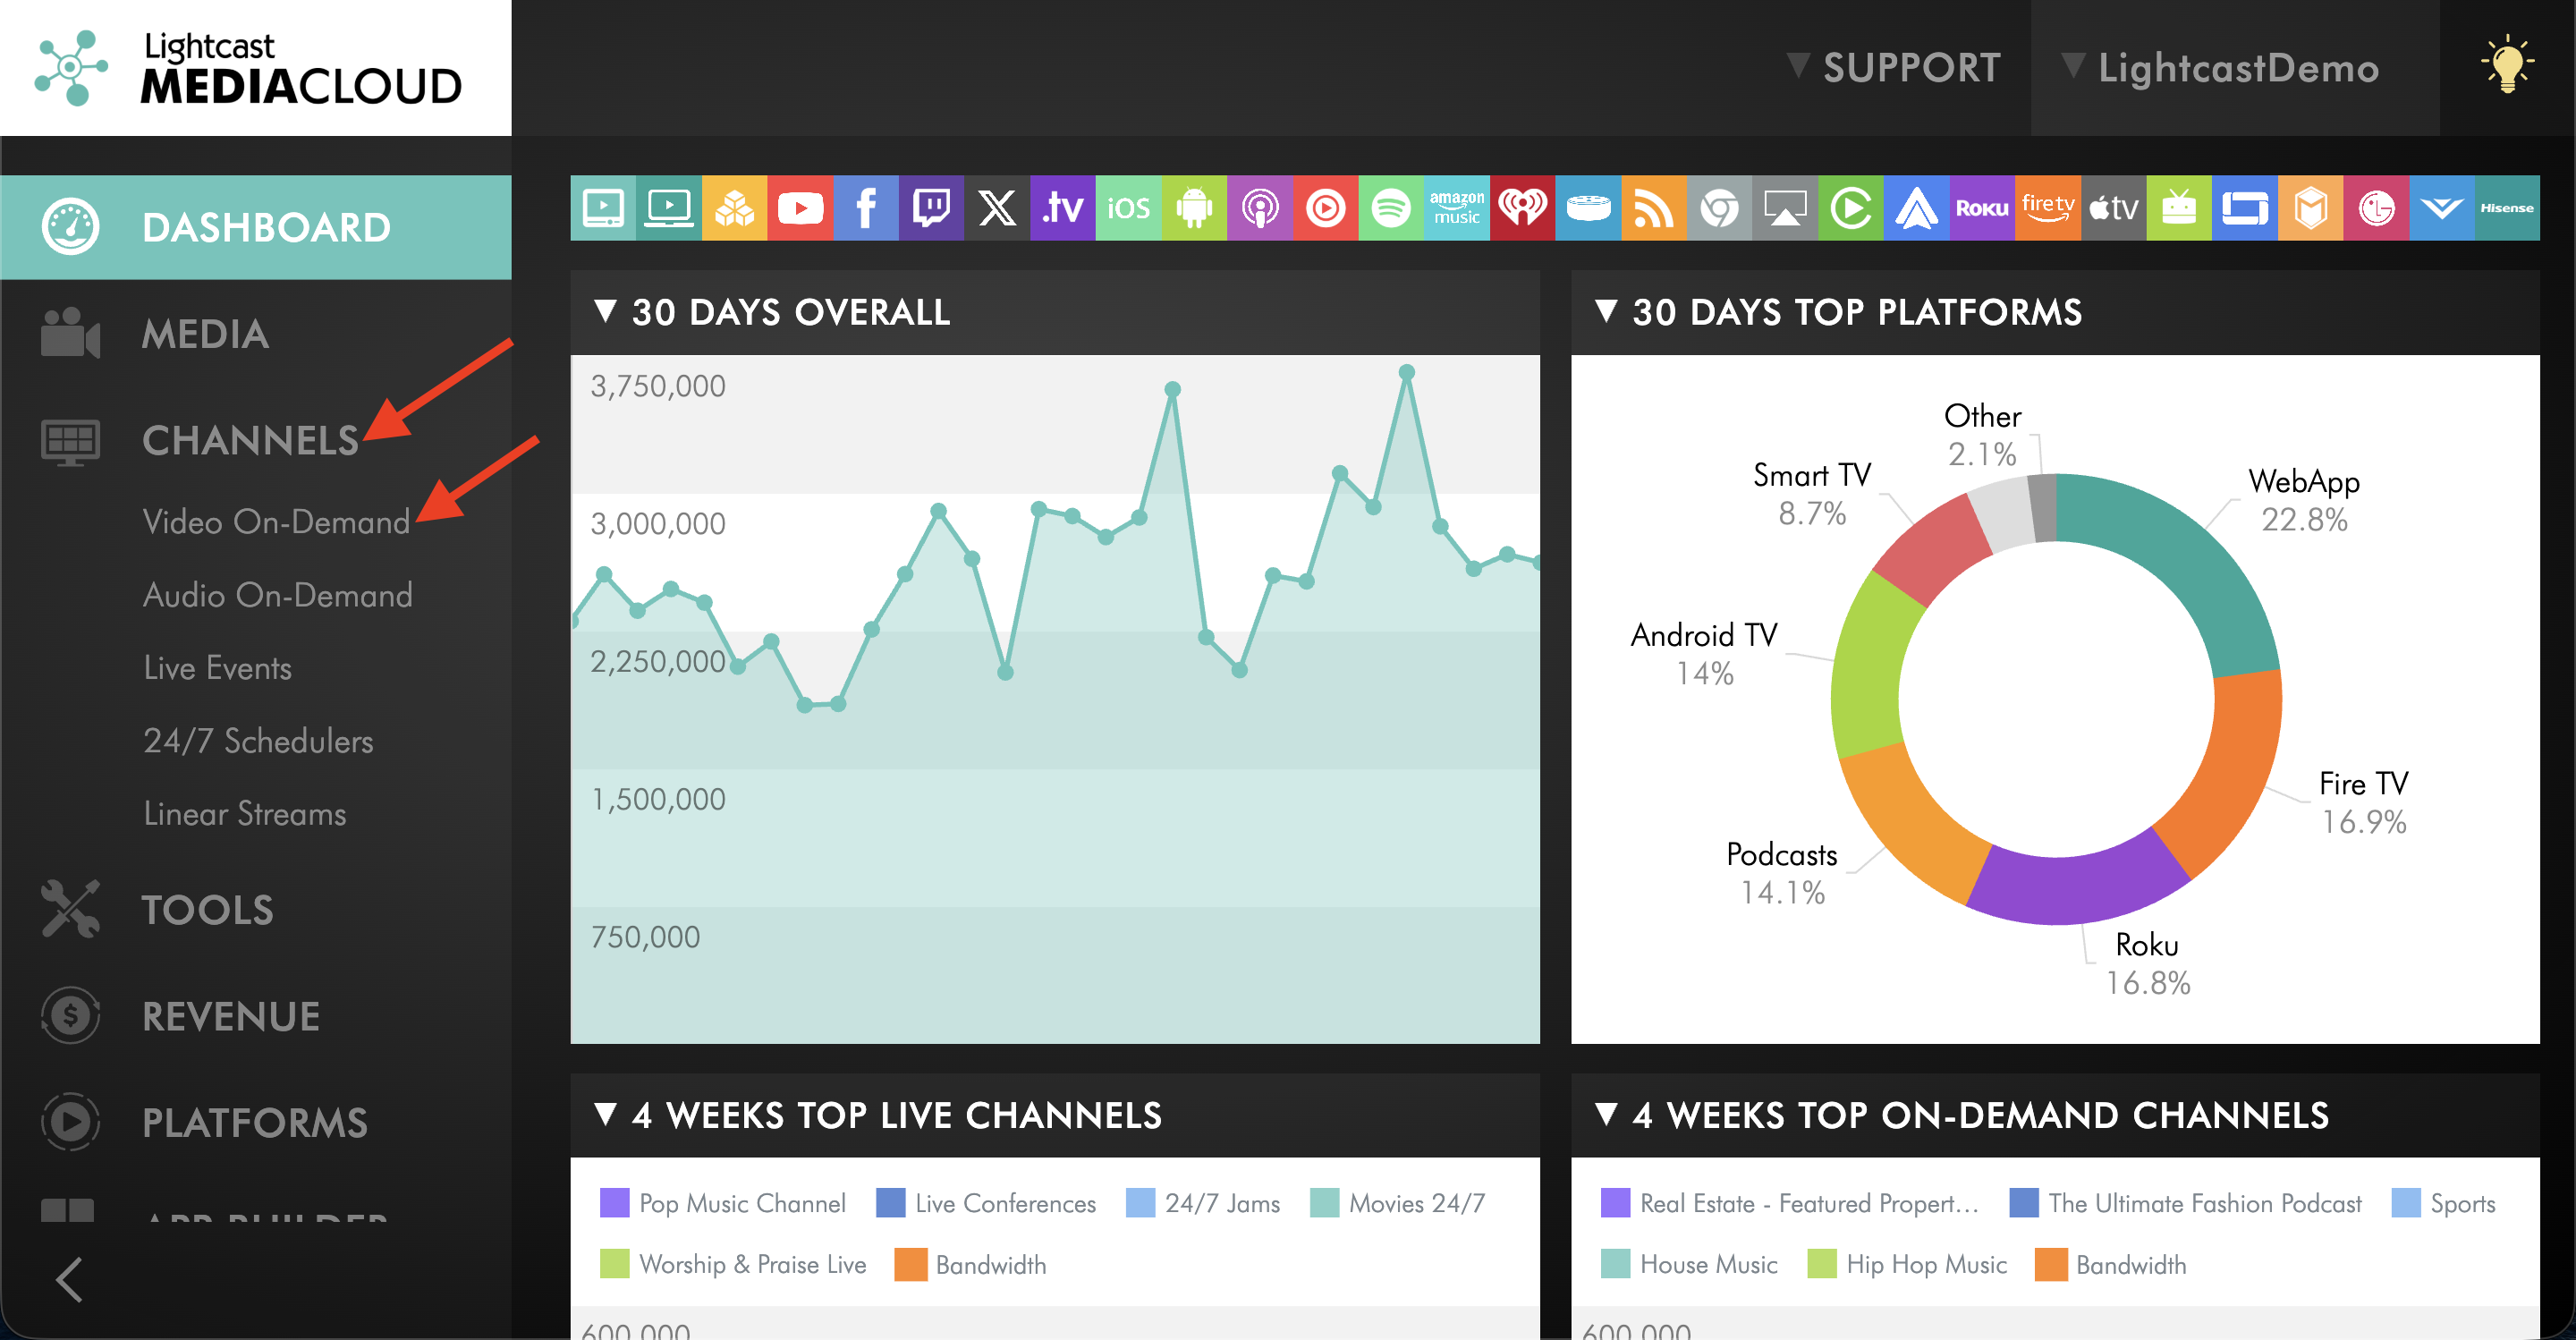
Go to CHANNELS and then Video On-Demand.
Step 3
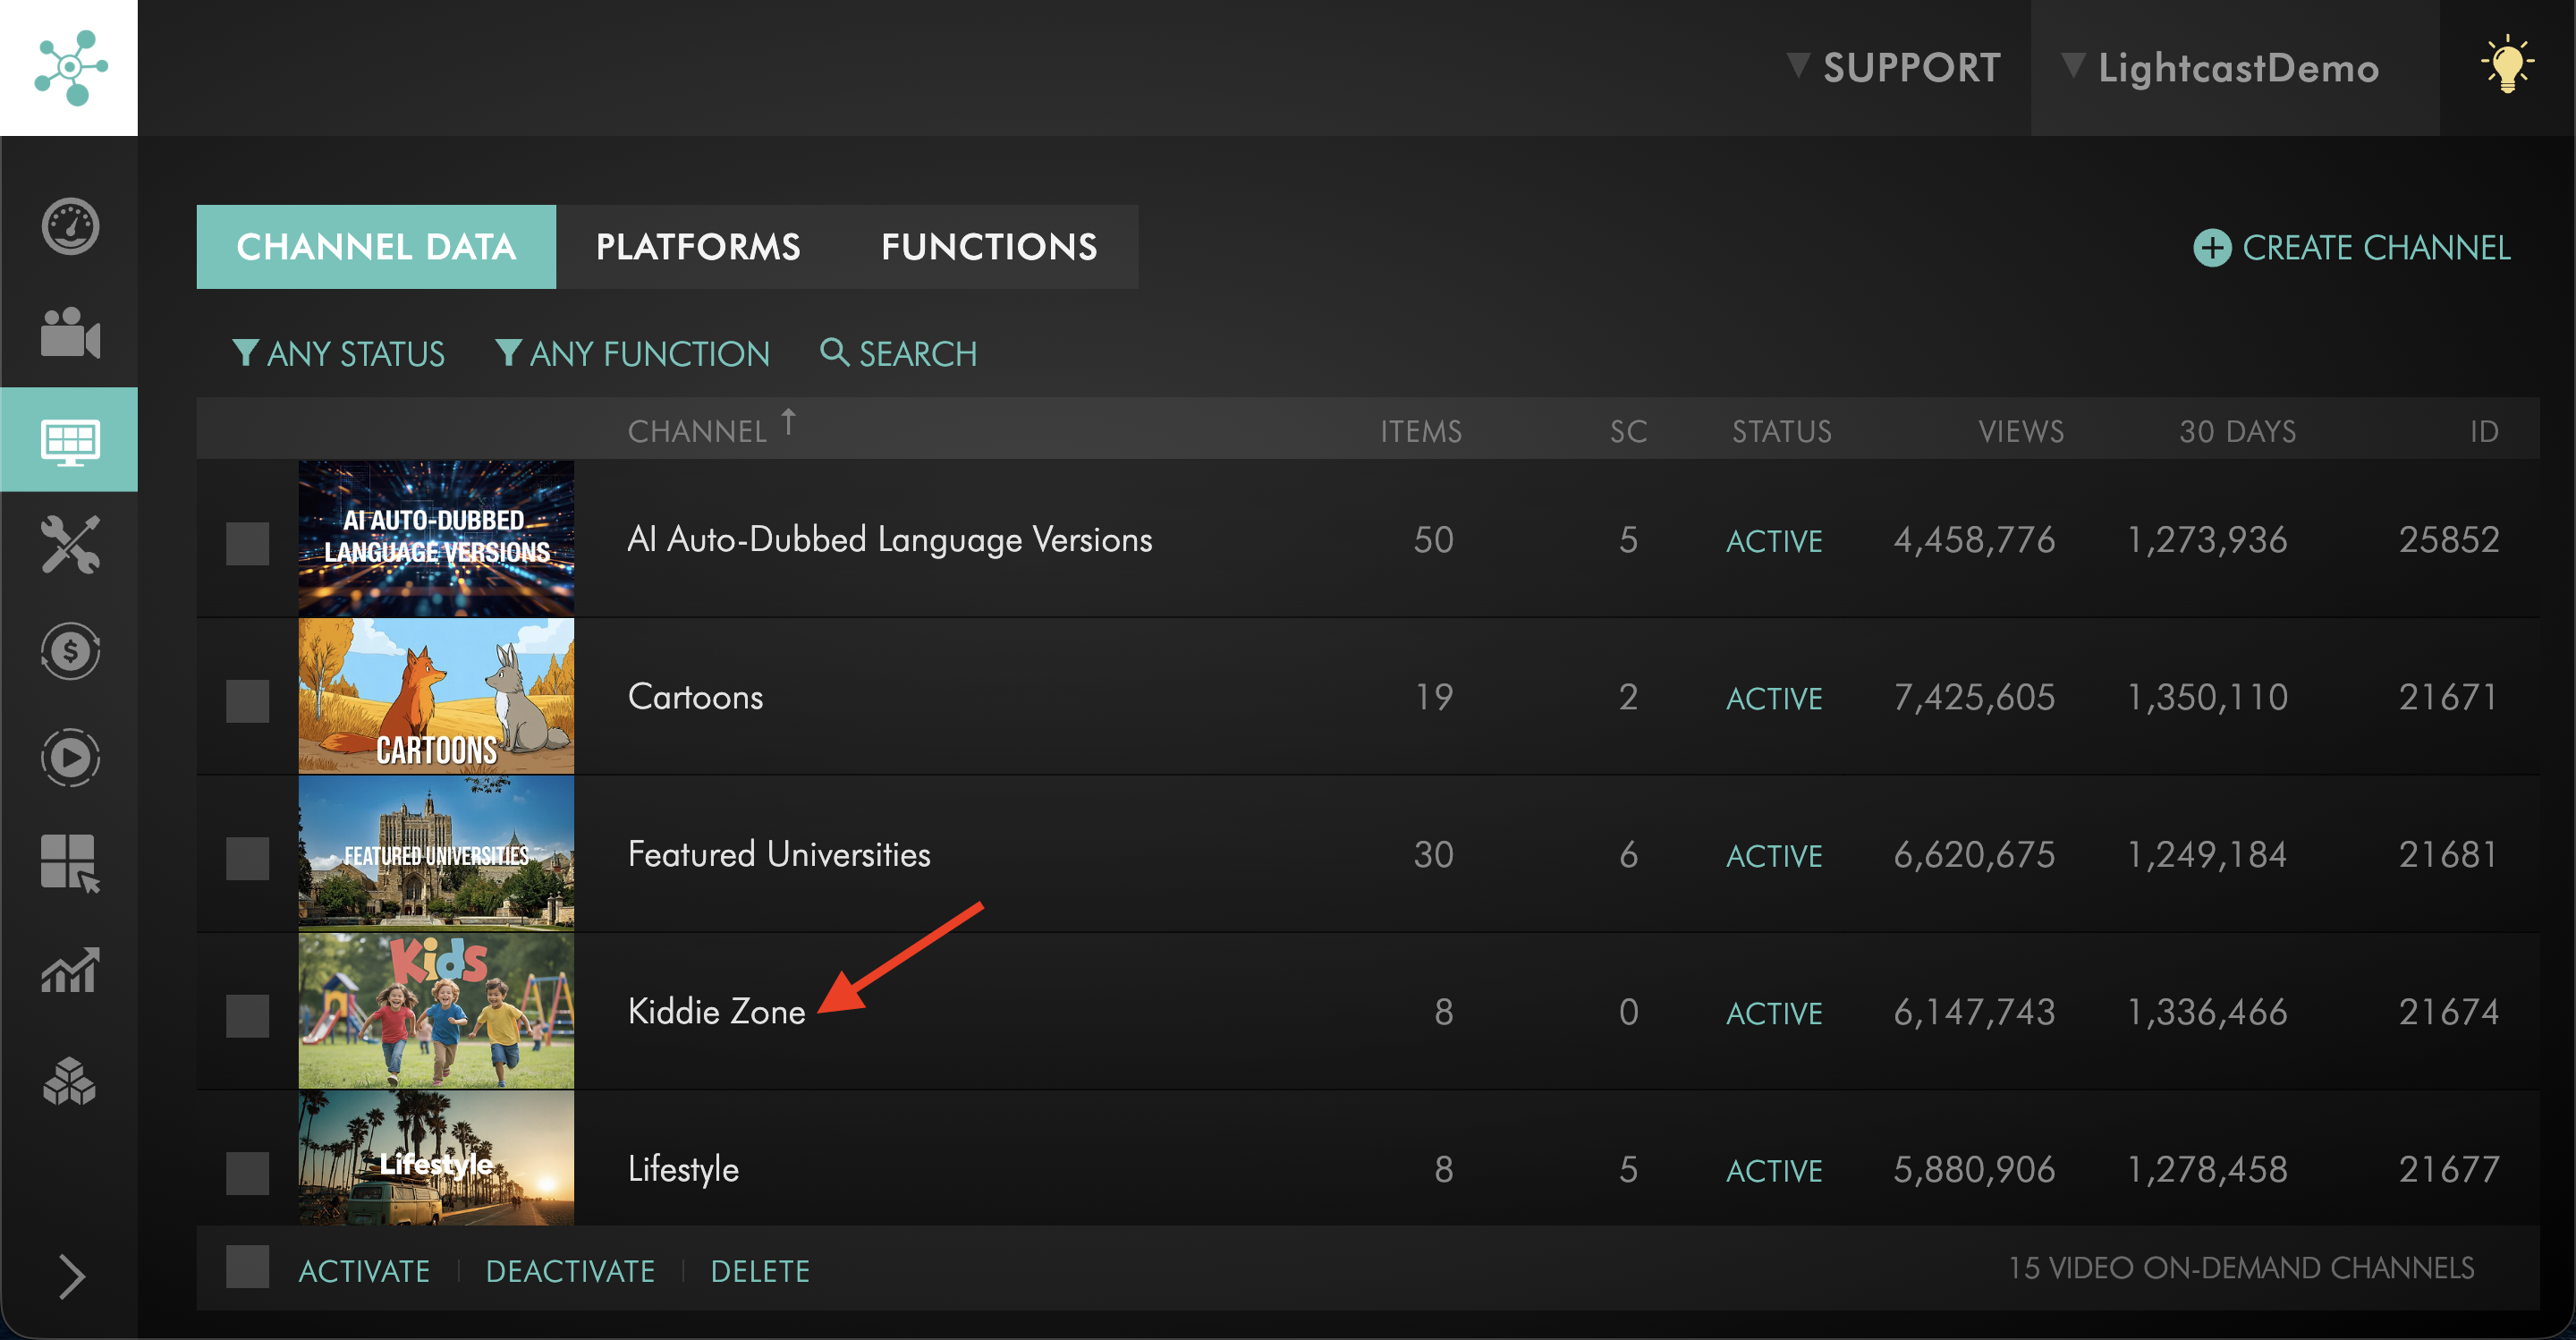
Select the VOD Channel where you want to add content.
Step 4
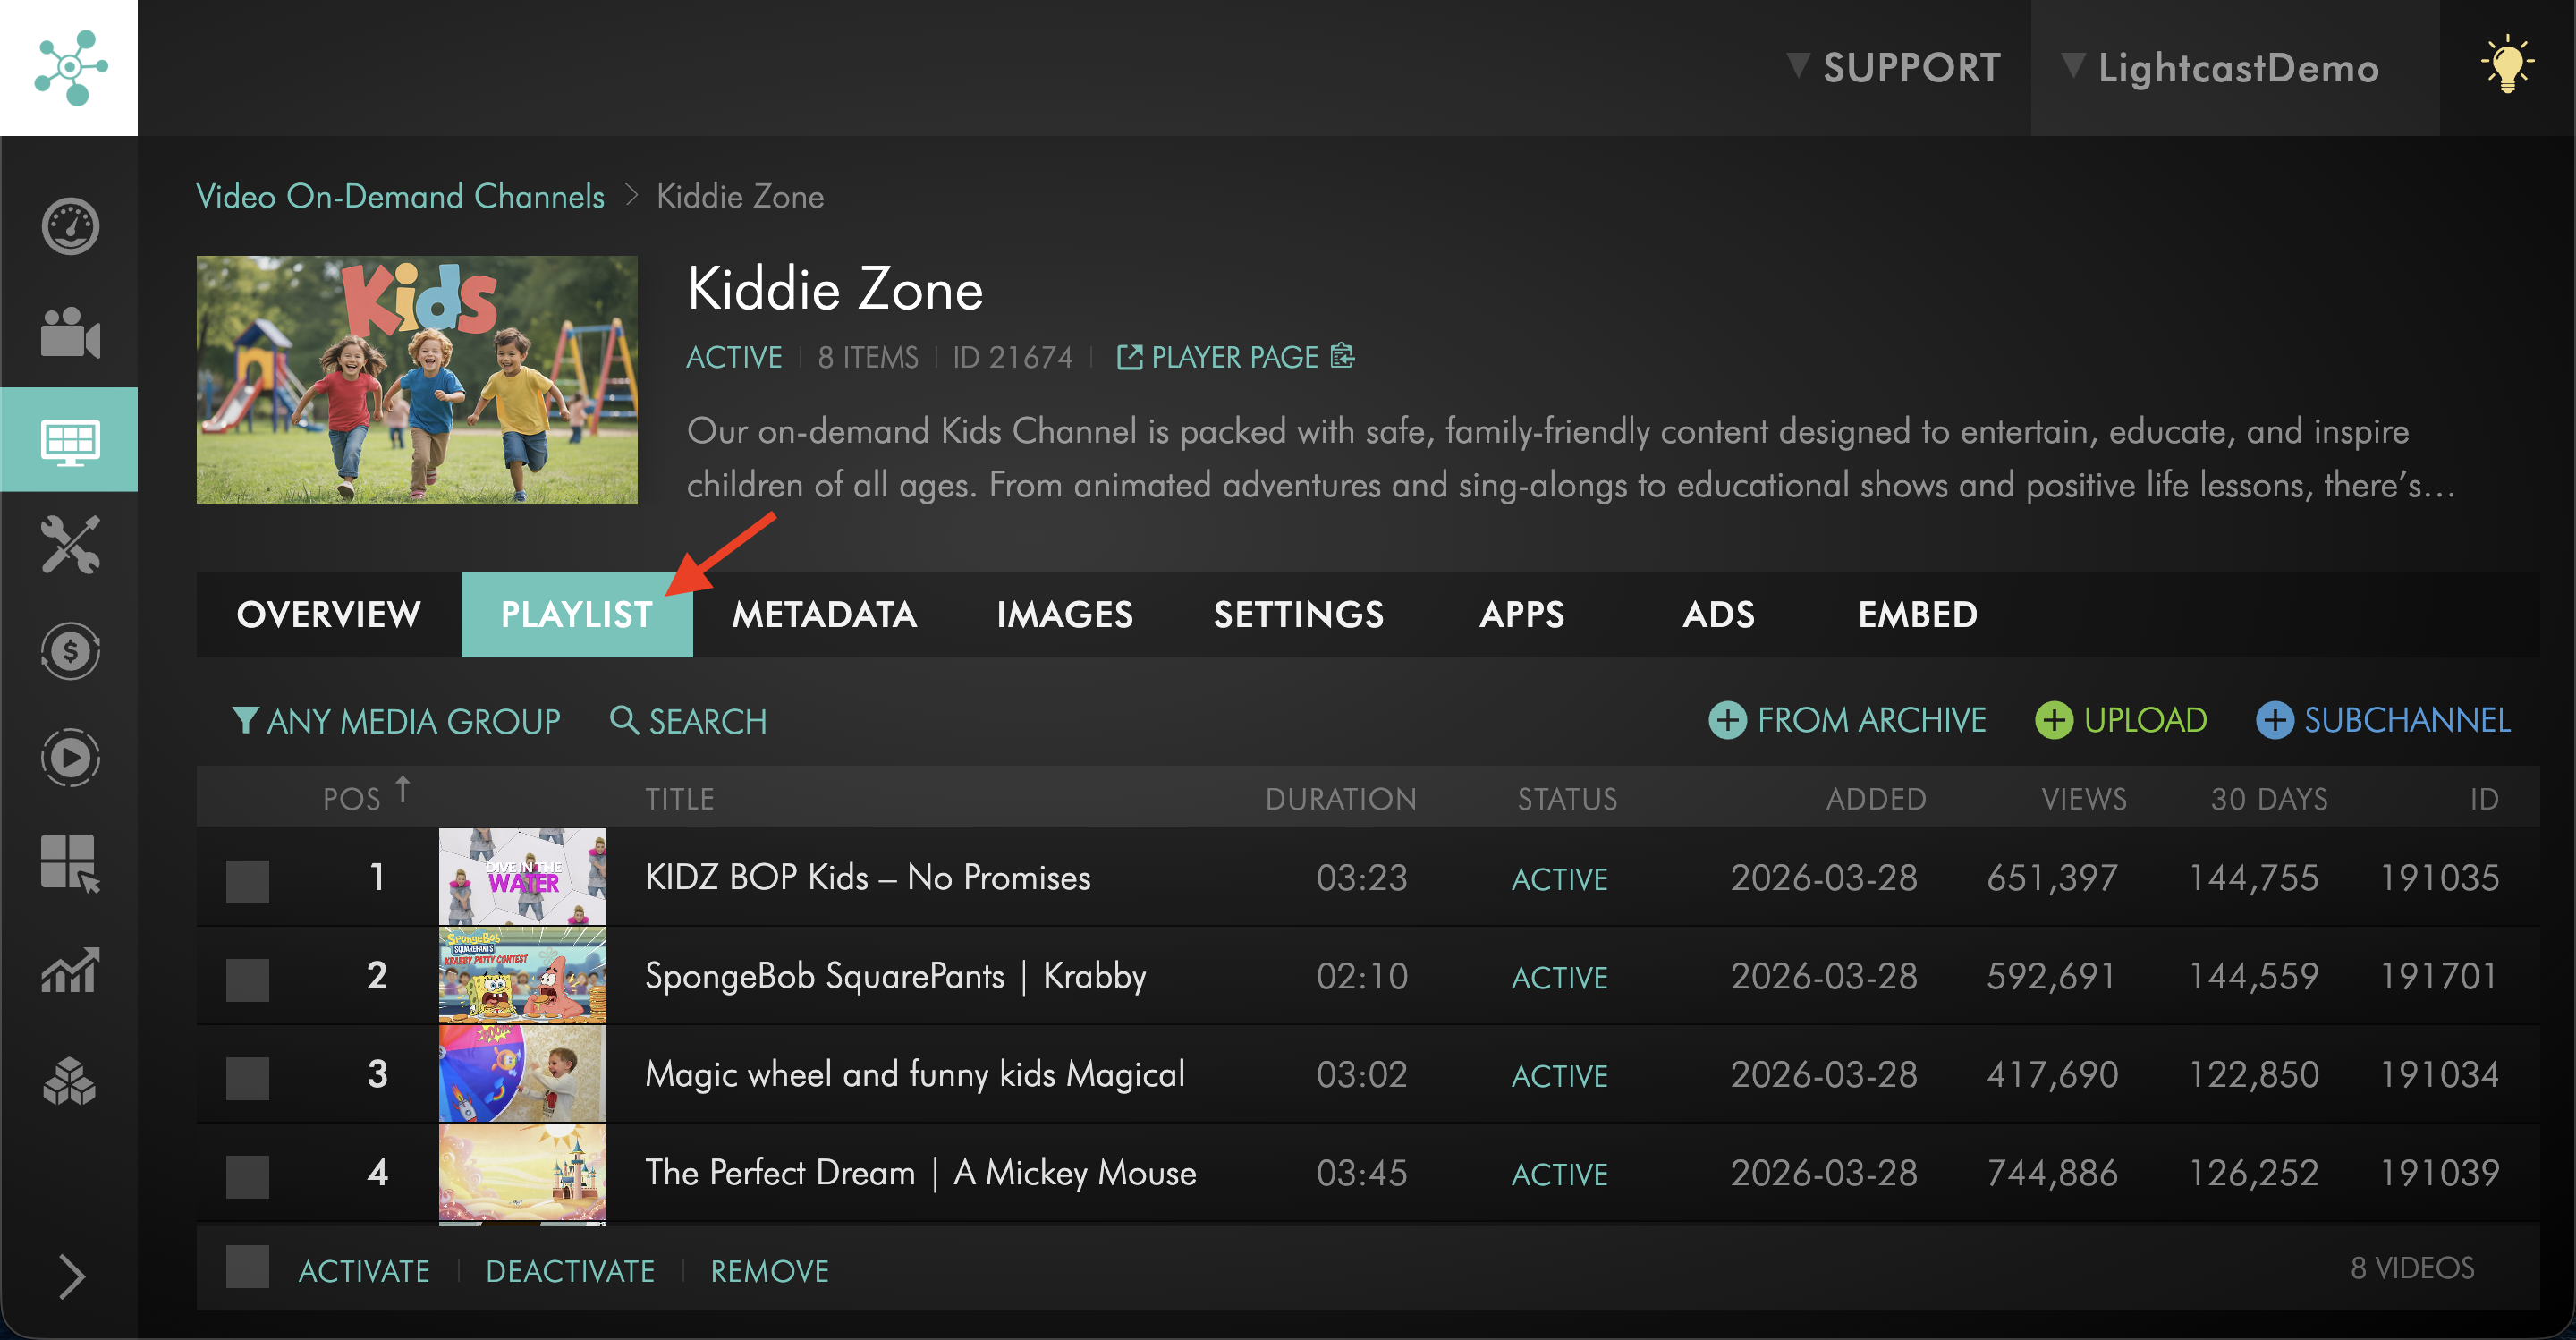
Click the PLAYLIST tab.
Step 5
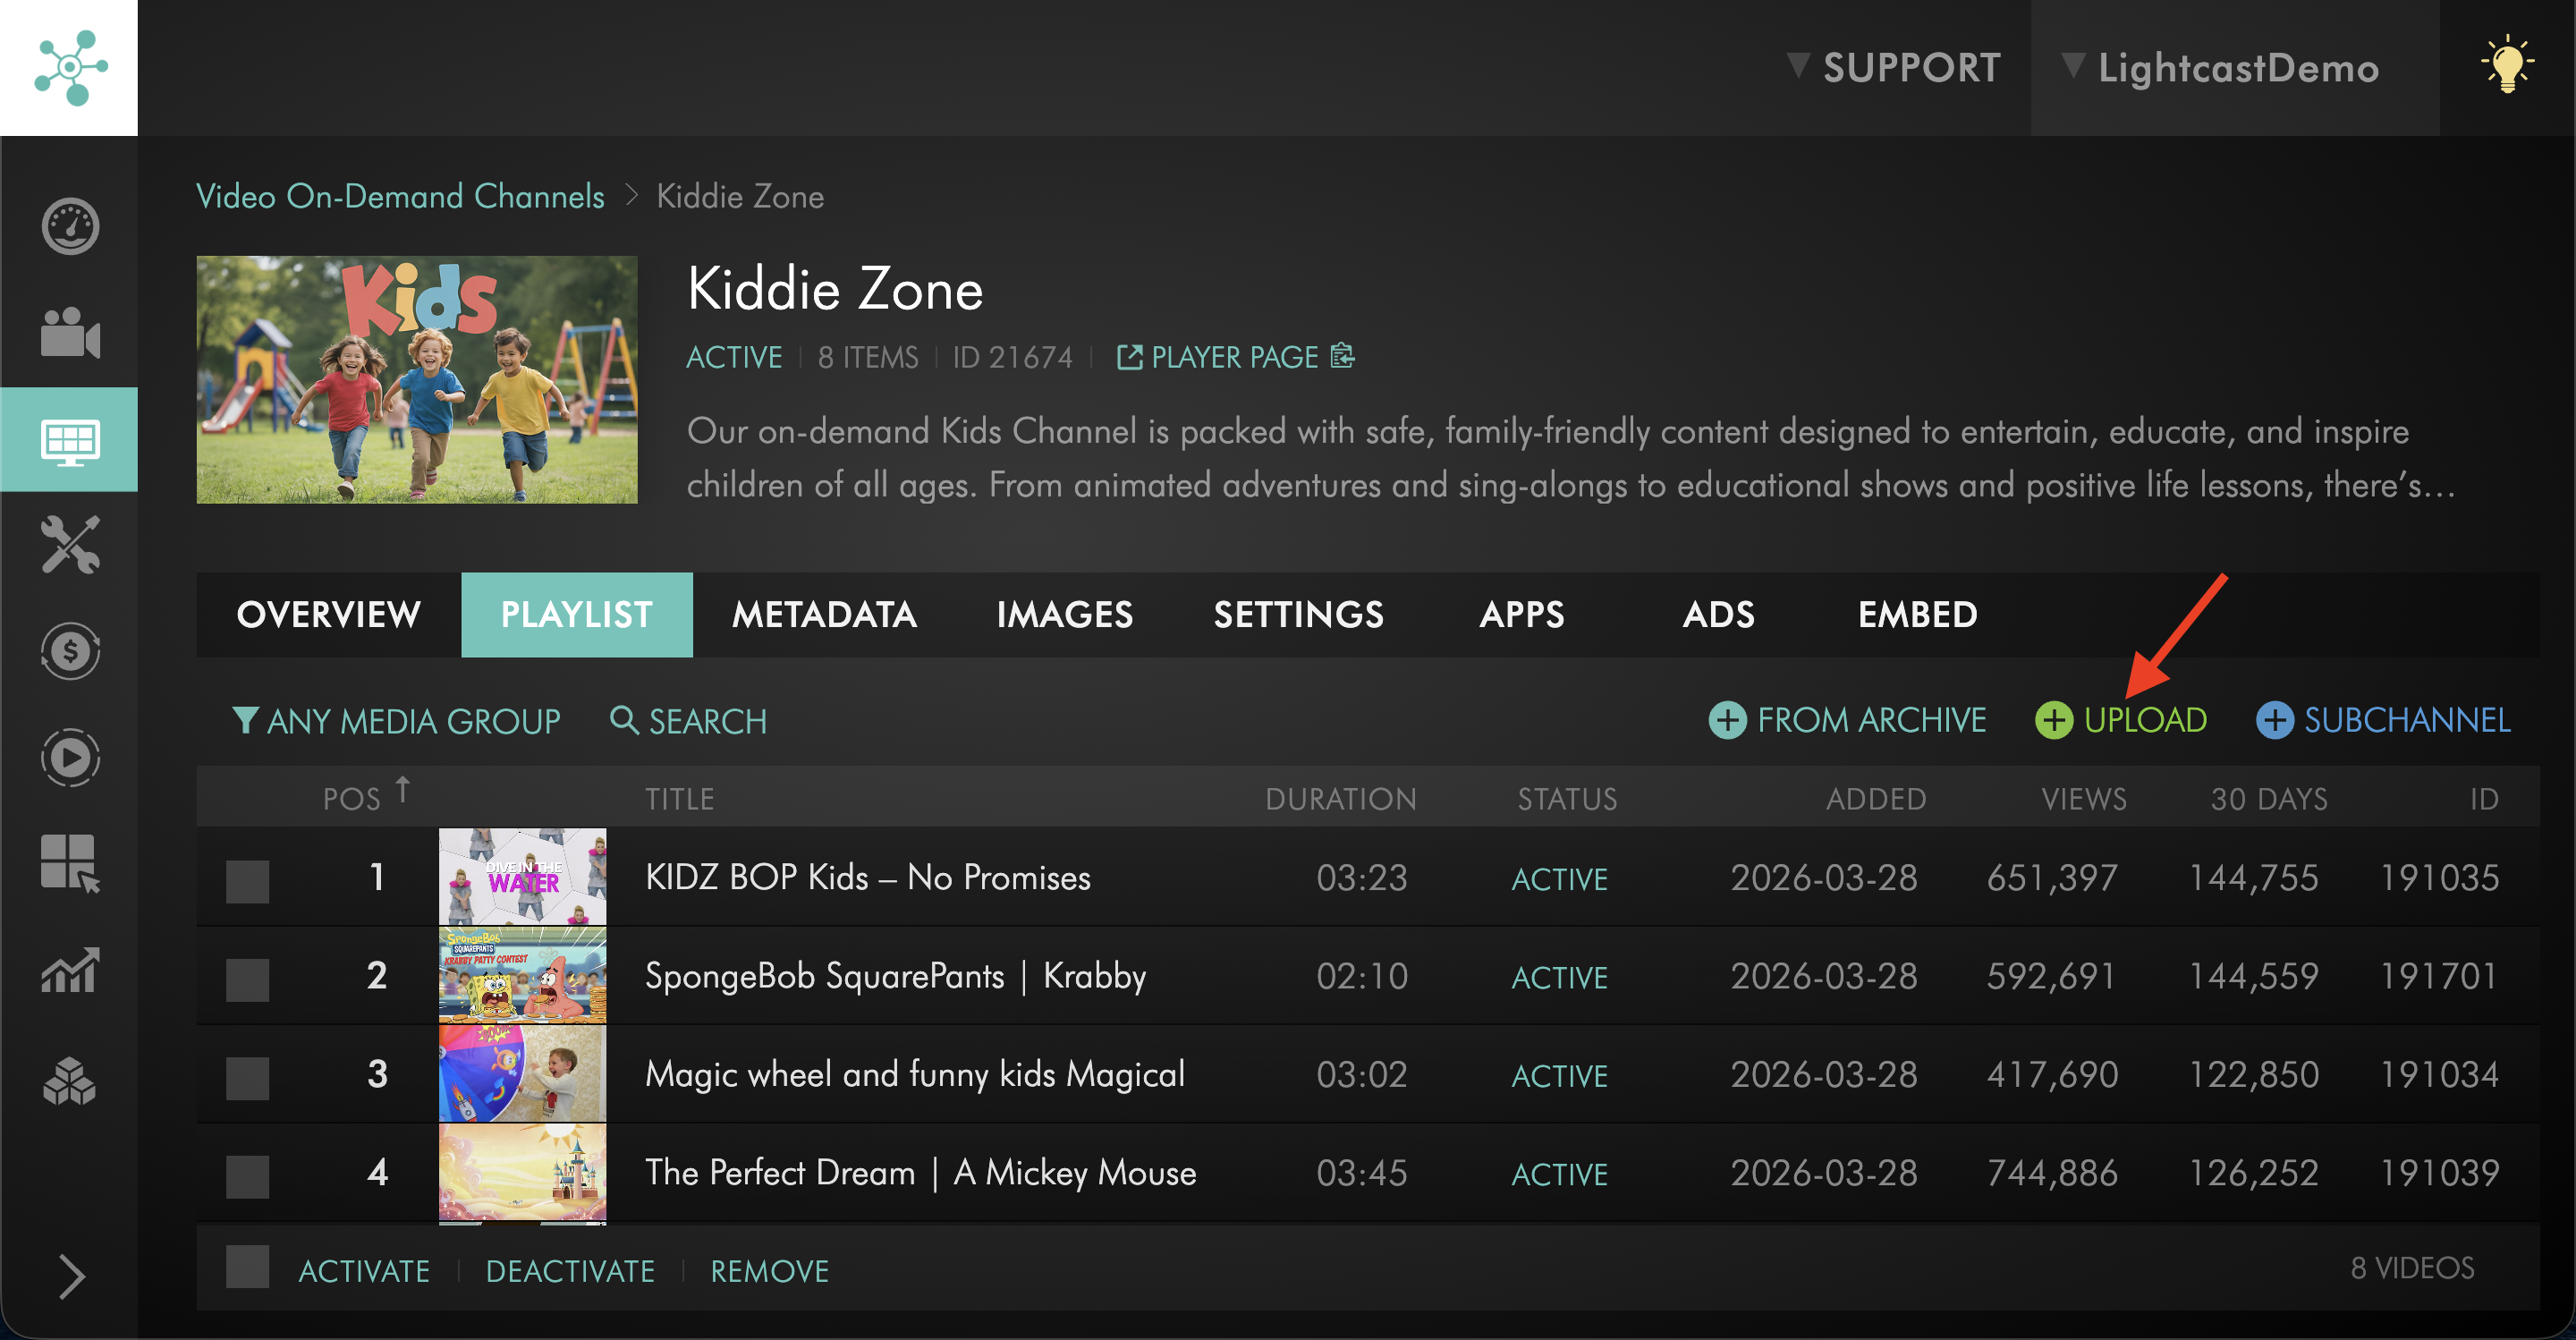
Click + UPLOAD.
Step 6
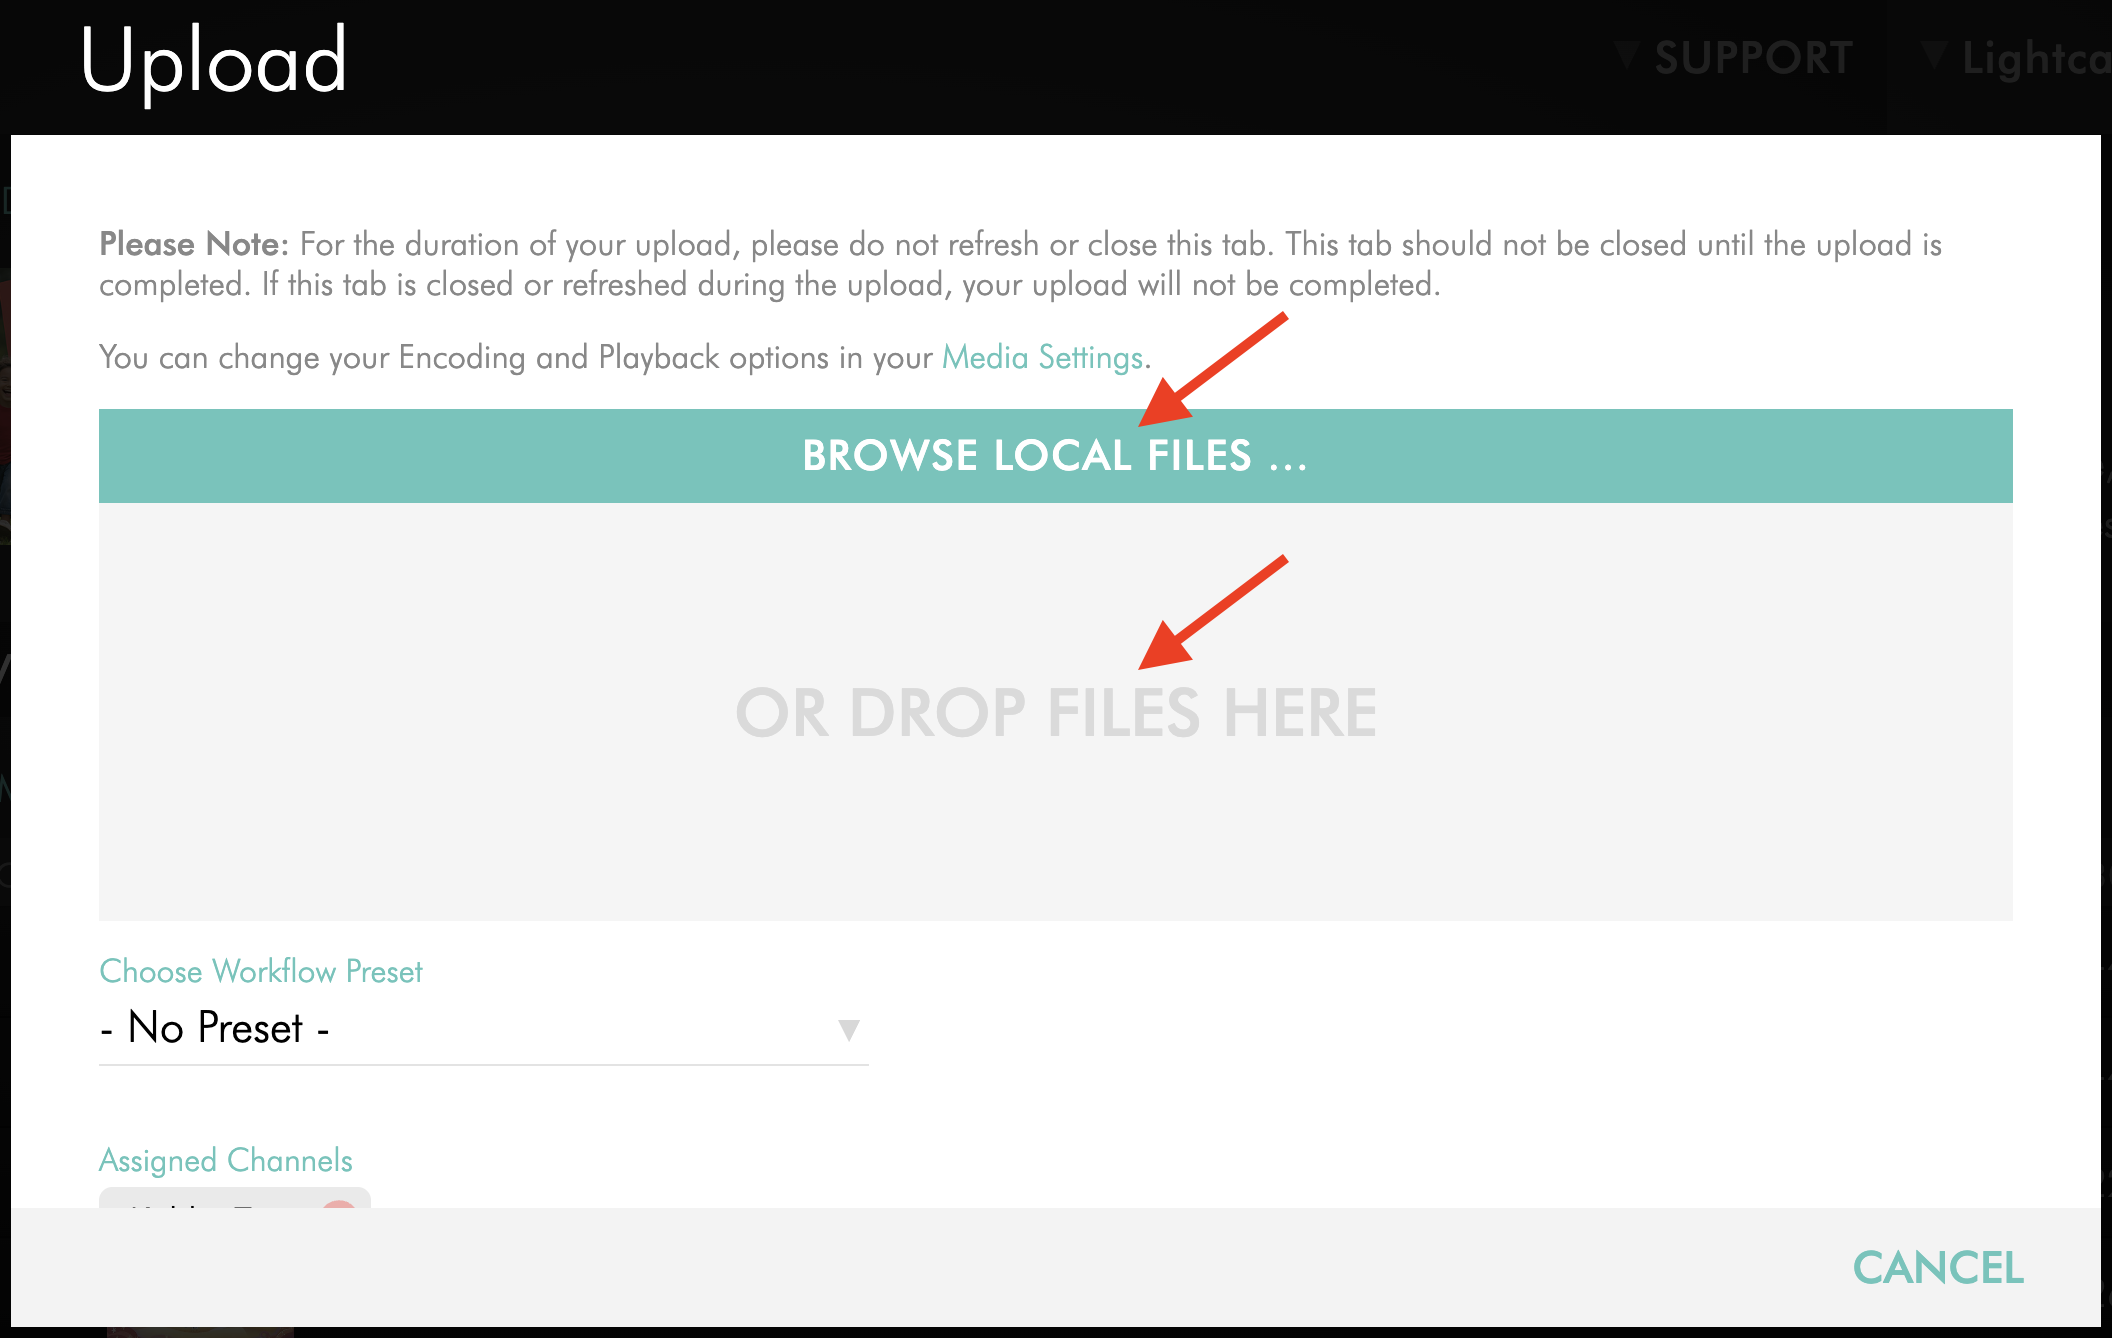
Click BROWSE LOCAL FILES . . . or drag and drop the video files from your computer into the upload window.
Step 7
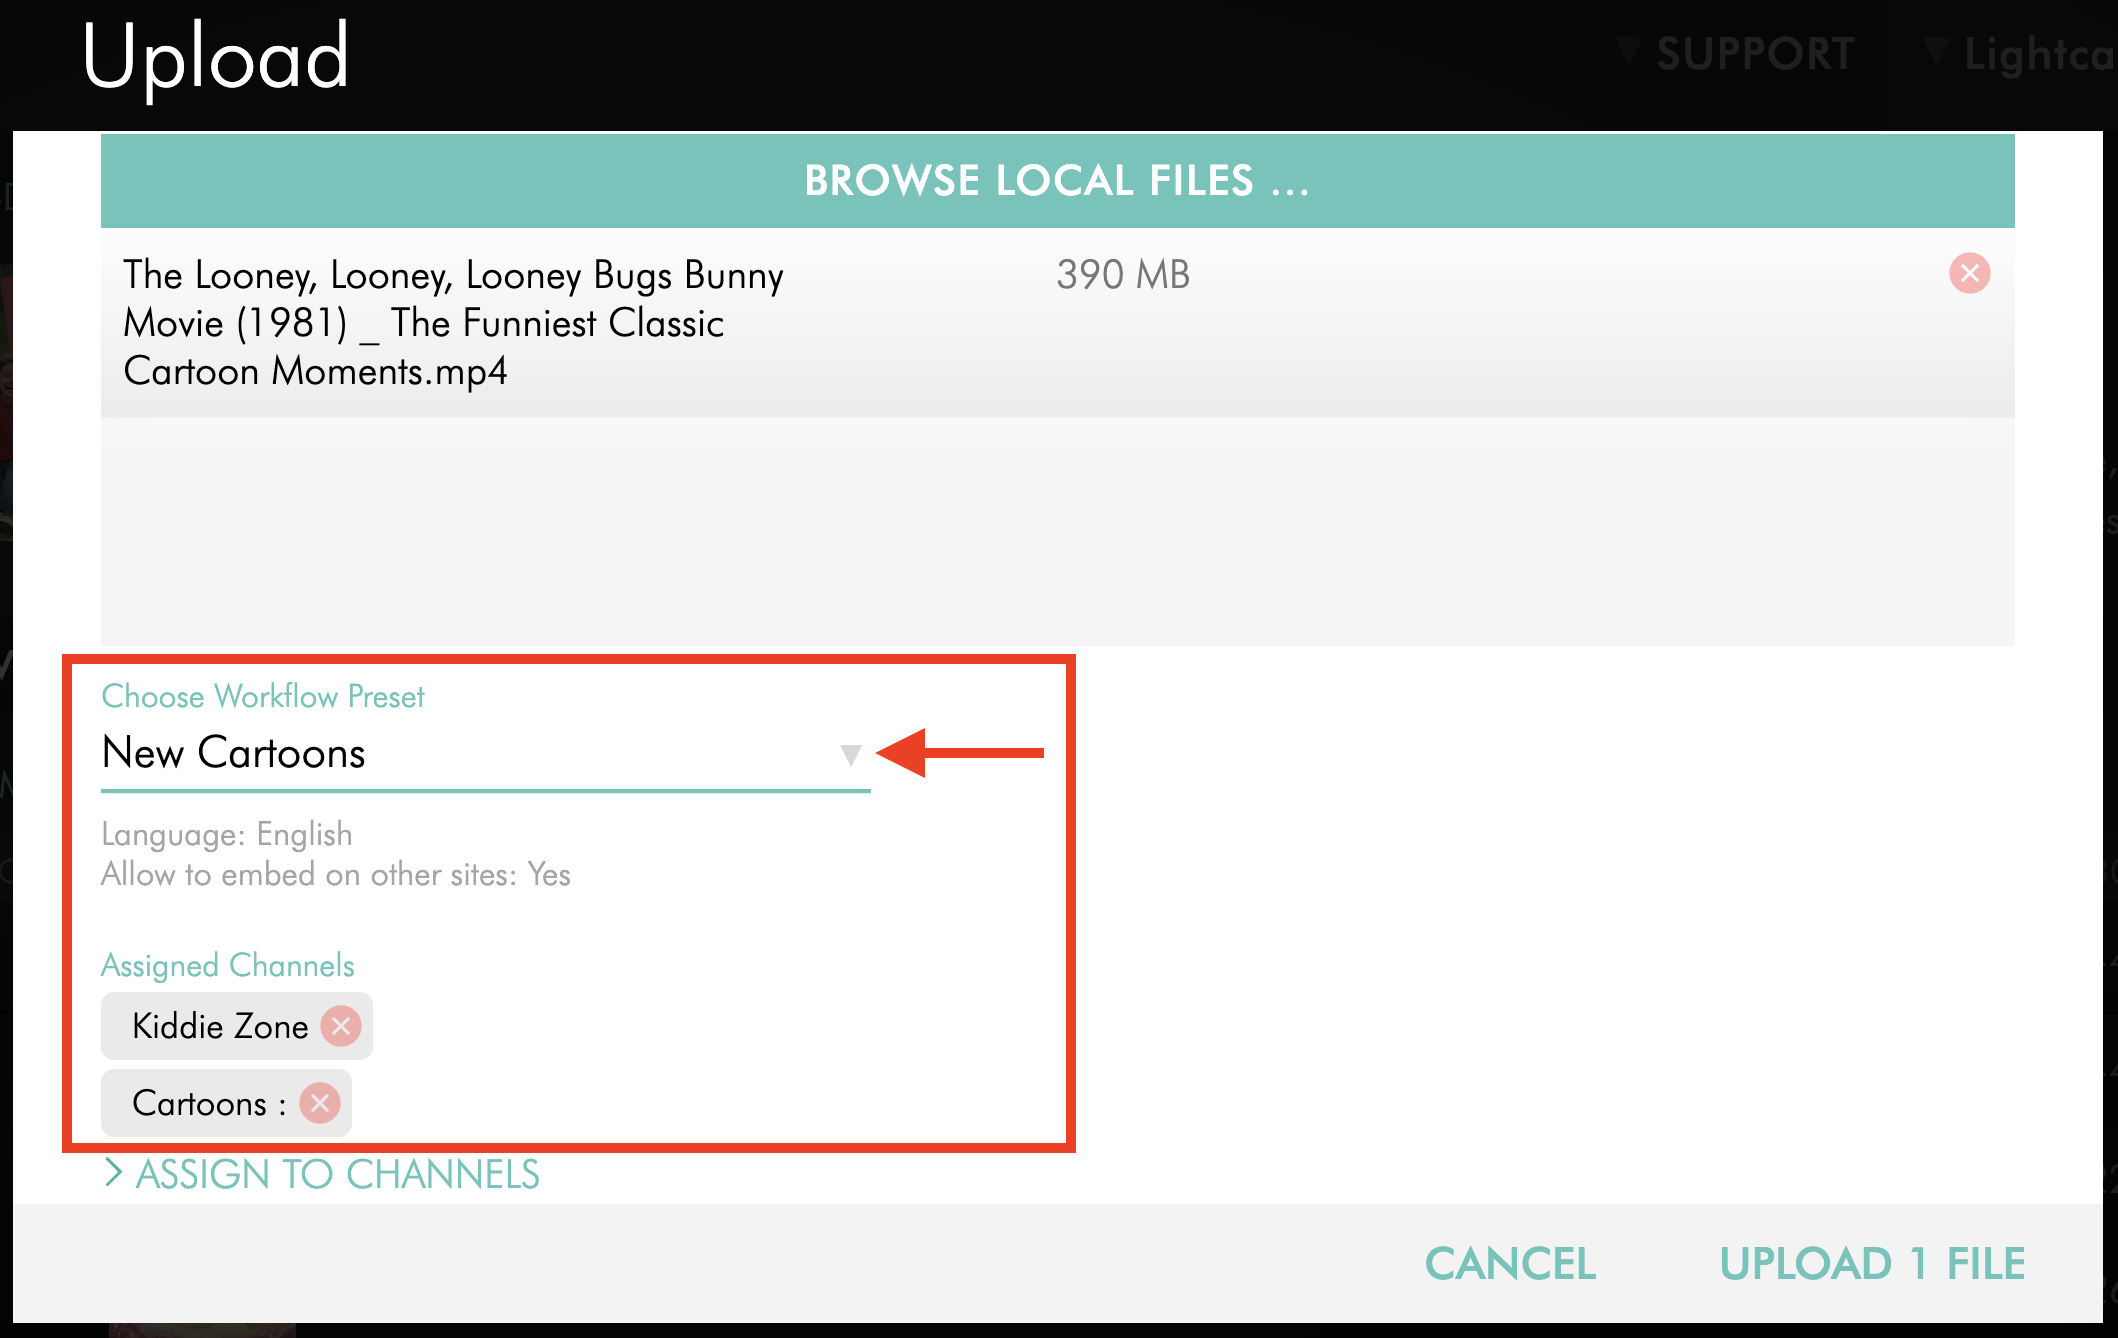
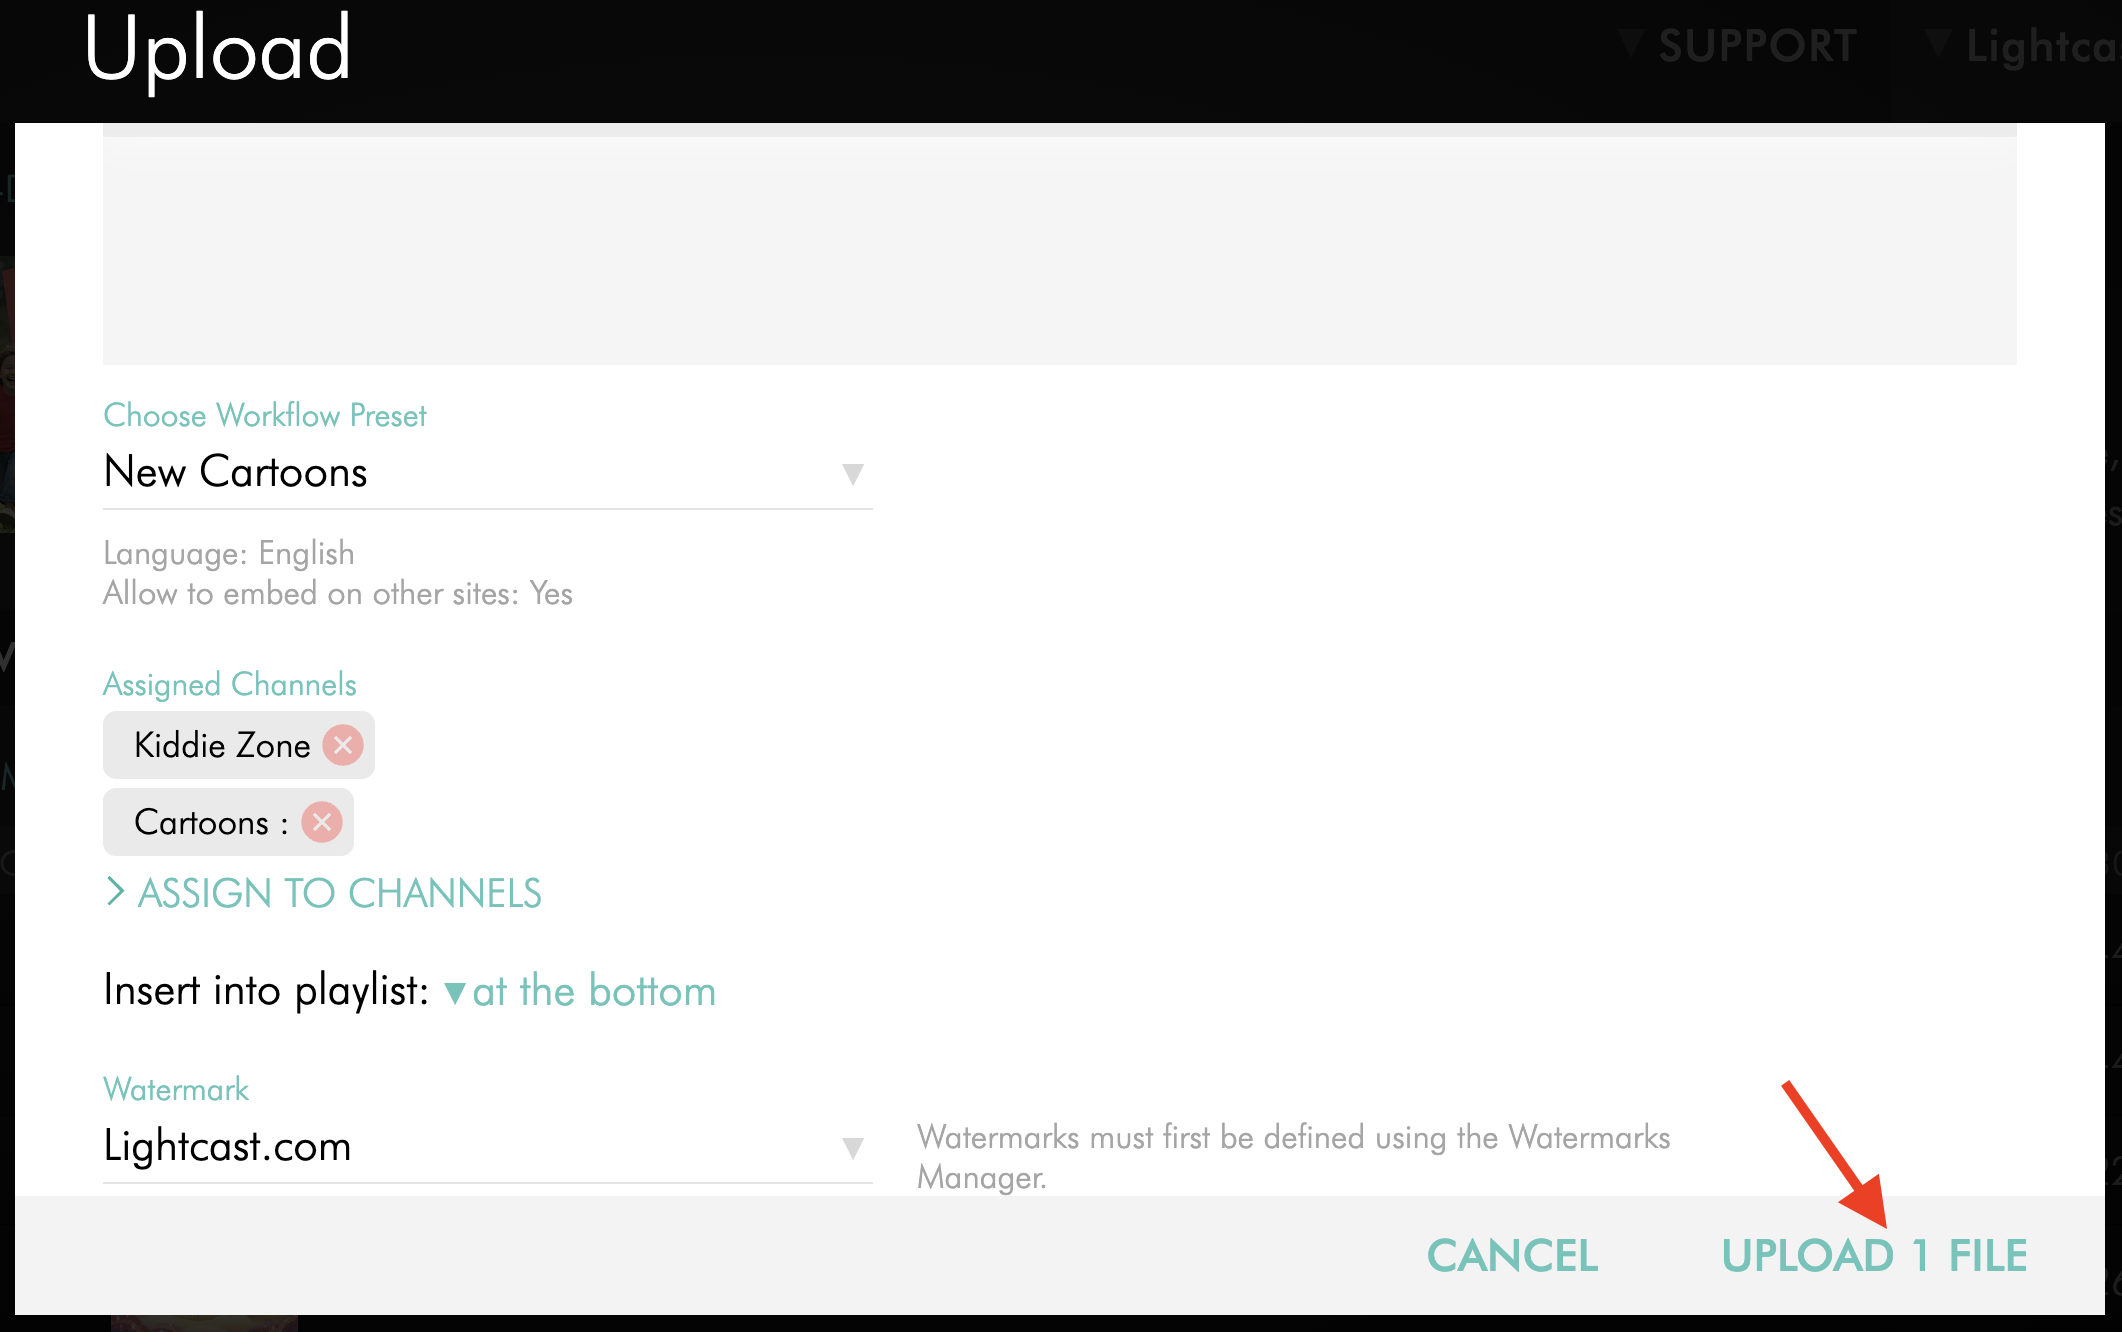
Optional: Select a Workflow Preset.
To learn how to create one, see How to create Workflow Presets.
Step 8
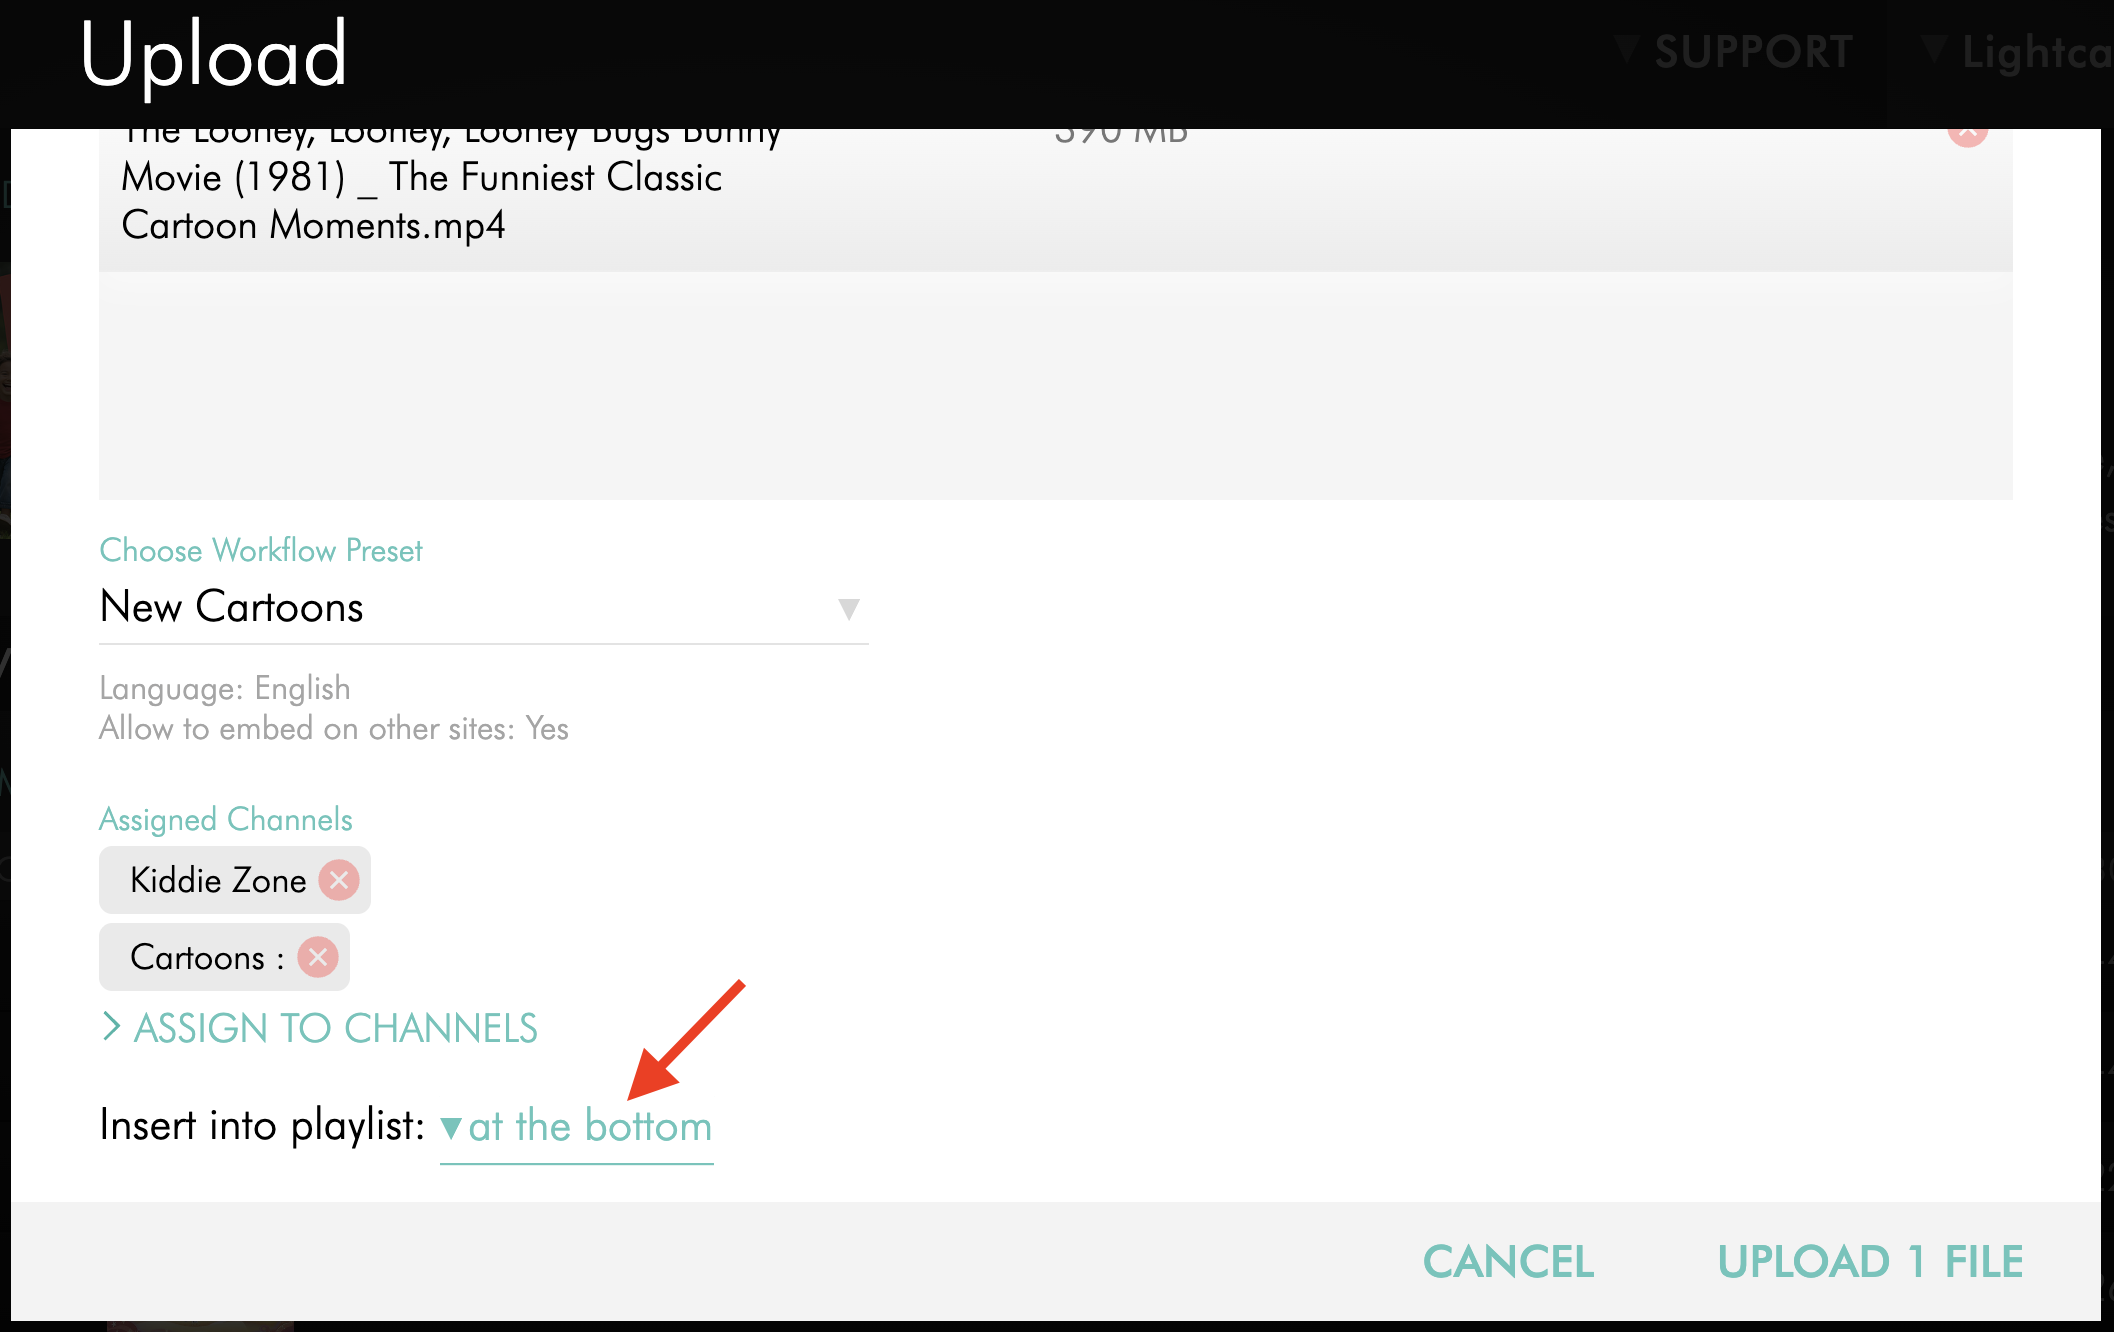
Select the playlist position for the uploaded content.
on top places the content at the beginning of the Channel playlist.
at the bottom places the content at the end of the Channel playlist.
Step 9
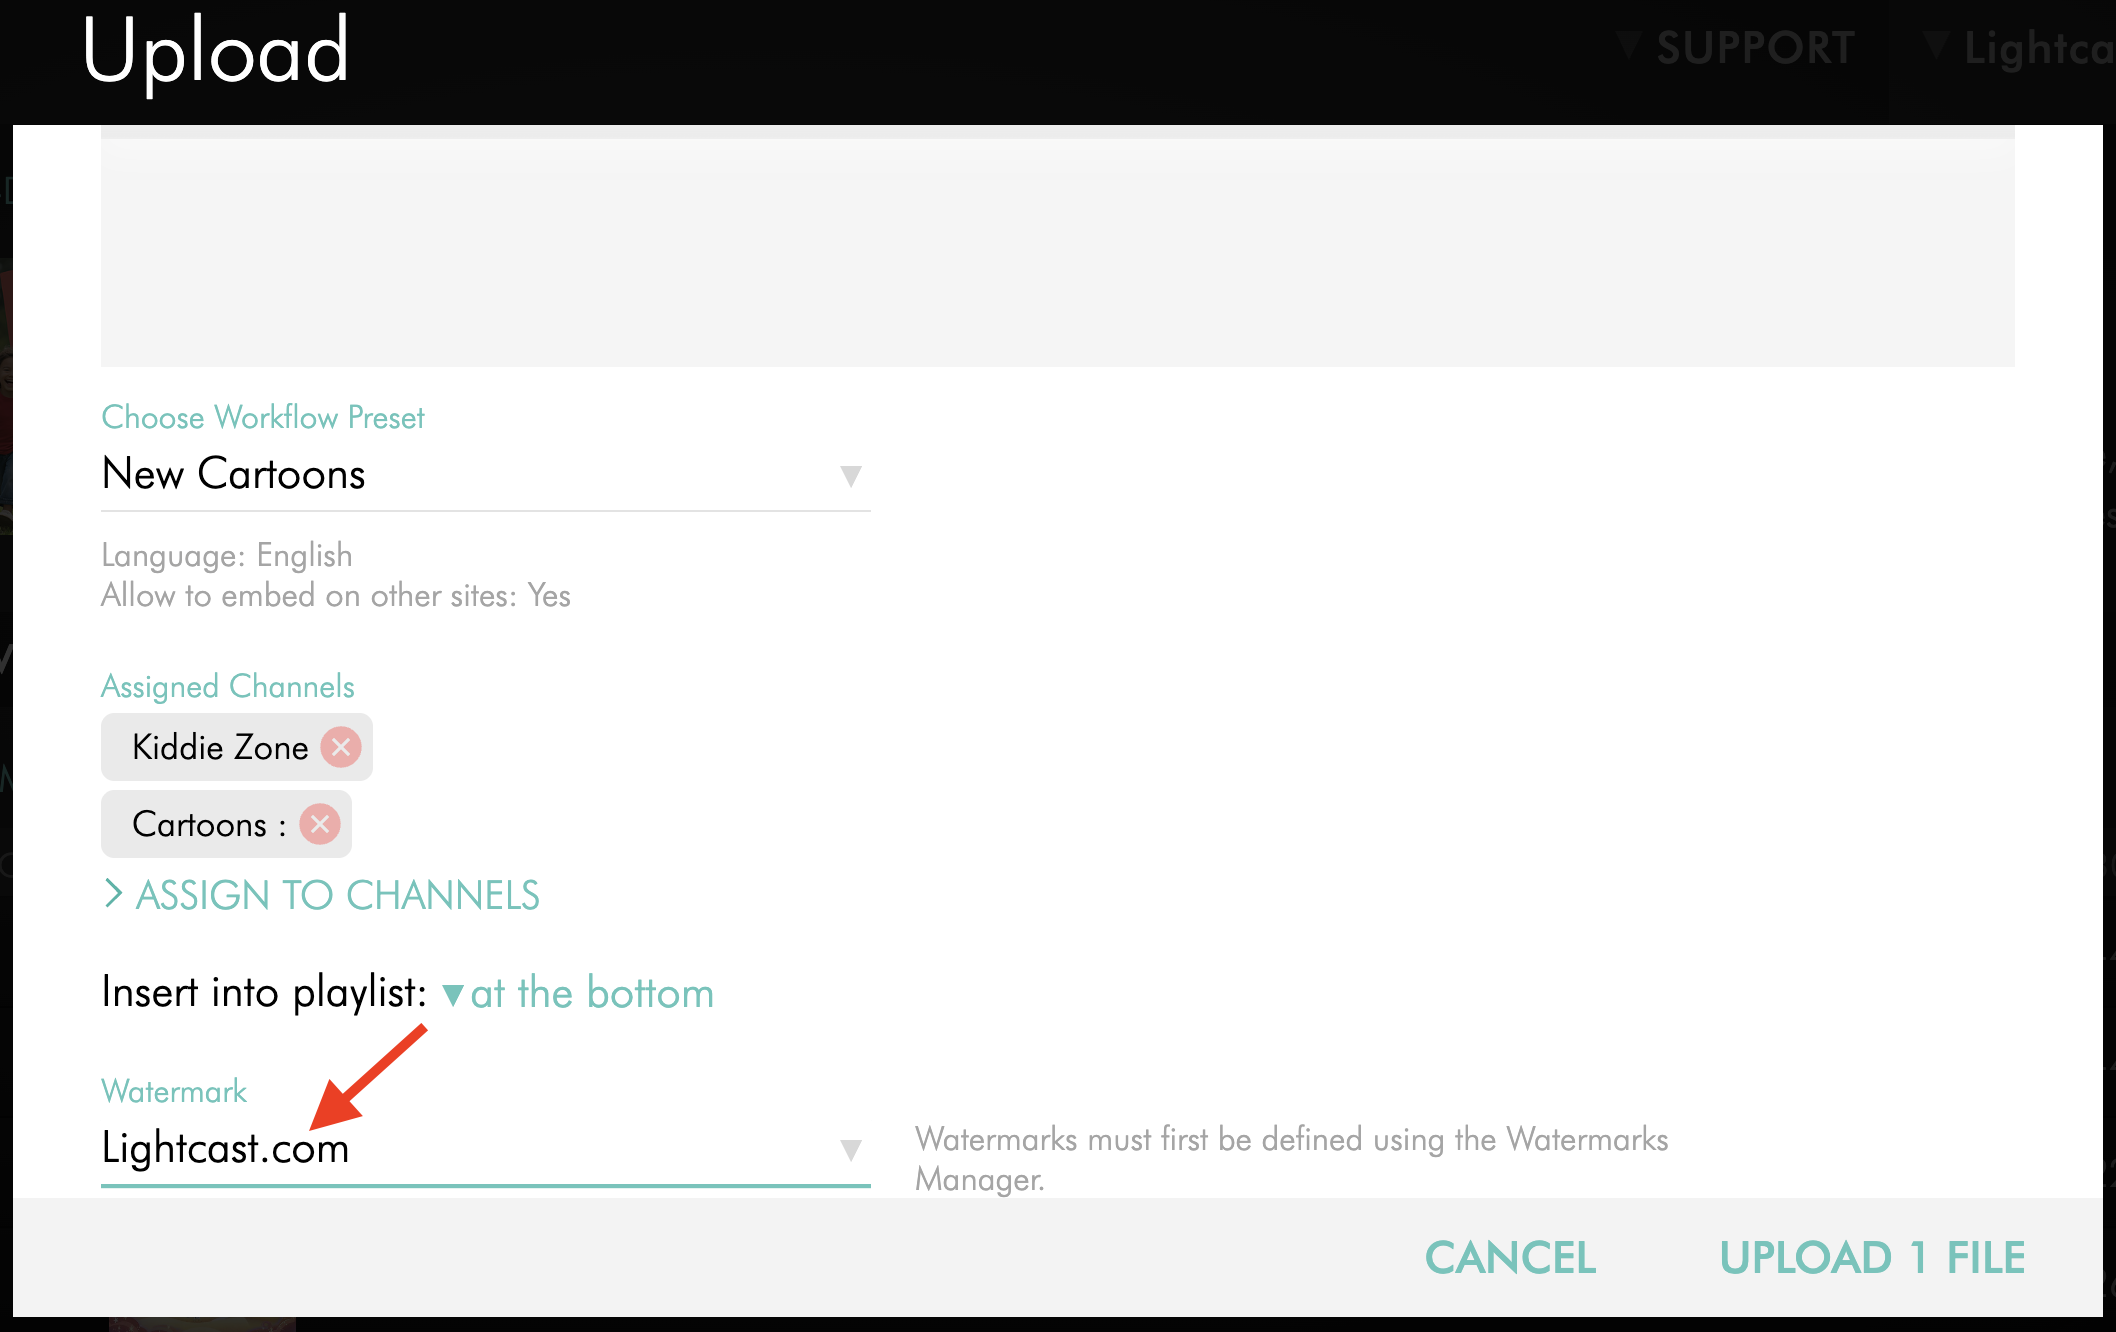
Optional: Select a Watermark to apply during encoding.
To learn how to create one, see How to add a Watermark.
Step 10
Click UPLOAD FILES.
FAQs
Can I upload multiple local video files to a VOD Channel?
Yes. You can upload up to 50 video files to a VOD Channel in the same upload window.
Where do uploaded videos go after I upload them?
Uploaded videos are added to the Media Cloud’s Video Archive and to the VOD Channel playlist you selected.
Does uploading directly to a VOD Channel use Storage and Transcoding?
Yes. Uploading directly to a VOD Channel creates a new upload, so it uses your account’s available Storage and Transcoding.
Can I apply a Workflow Preset when uploading to a VOD Channel?
Yes. You can optionally select a Workflow Preset during the upload process.
Can I apply a Watermark when uploading to a VOD Channel?
Yes. You can optionally apply a Watermark during video encoding.
Can other upload methods also upload content into a specific Channel?
Yes. Other upload methods in the Media Cloud also support uploading content into a specific Channel during upload.
What if my video has already been uploaded to the Media Cloud?
If the video already exists in the Media Cloud, you do not need to upload it again.
To learn how to add an existing video to a VOD Channel, see How to assign content to a specific Video On-Demand (VOD) Channel.
Understanding Video On-Demand (VOD), Audio On-Demand (AOD), and LIVE Channels (and Channel IDs)
How to assign content to a specific Video On-Demand (VOD) Channel
For other ways to upload content and assign it to Channels, see: