
How to add a Watermark to your on-demand video uploads
Overview
This article explains how to create and apply watermarks to your on-demand video uploads in the Media Cloud. It is useful if you want to brand your videos during upload, apply the same watermark to batch uploads, or automate watermark assignment with Workflow Presets.
Watermarks must be assigned before upload processing is complete. Because they are applied during upload and encoding, they cannot be added later through the standard video edit workflow.
How it works
A Watermark is permanently applied to a video during the upload and transcoding process. To use a Watermark, you must first create it in the Watermarks Manager so it is available to select during upload.
After choosing your upload method and video files, you can select a Watermark before clicking UPLOAD FILES. A Watermark can only be applied during the upload process, before the video is sent to encoding.
Once the upload is submitted and the video is sent to encoding, the Watermark cannot be added, changed, or removed.
You can use Watermarks in three main ways:
Assign a Watermark during a single video upload
Apply a Watermark to all videos during batch upload
Use a Workflow Preset to automatically apply a Watermark during upload
To learn more about Workflow Presets, see How to add a Workflow Preset.
If a video has already been uploaded and successfully transcoded without a Watermark, it must go through transcoding again before a Watermark can be applied. Additional transcoding and storage fees may apply.
Instructions
Create a Watermark
Step 1
Log in to your Media Cloud account.
Step 2
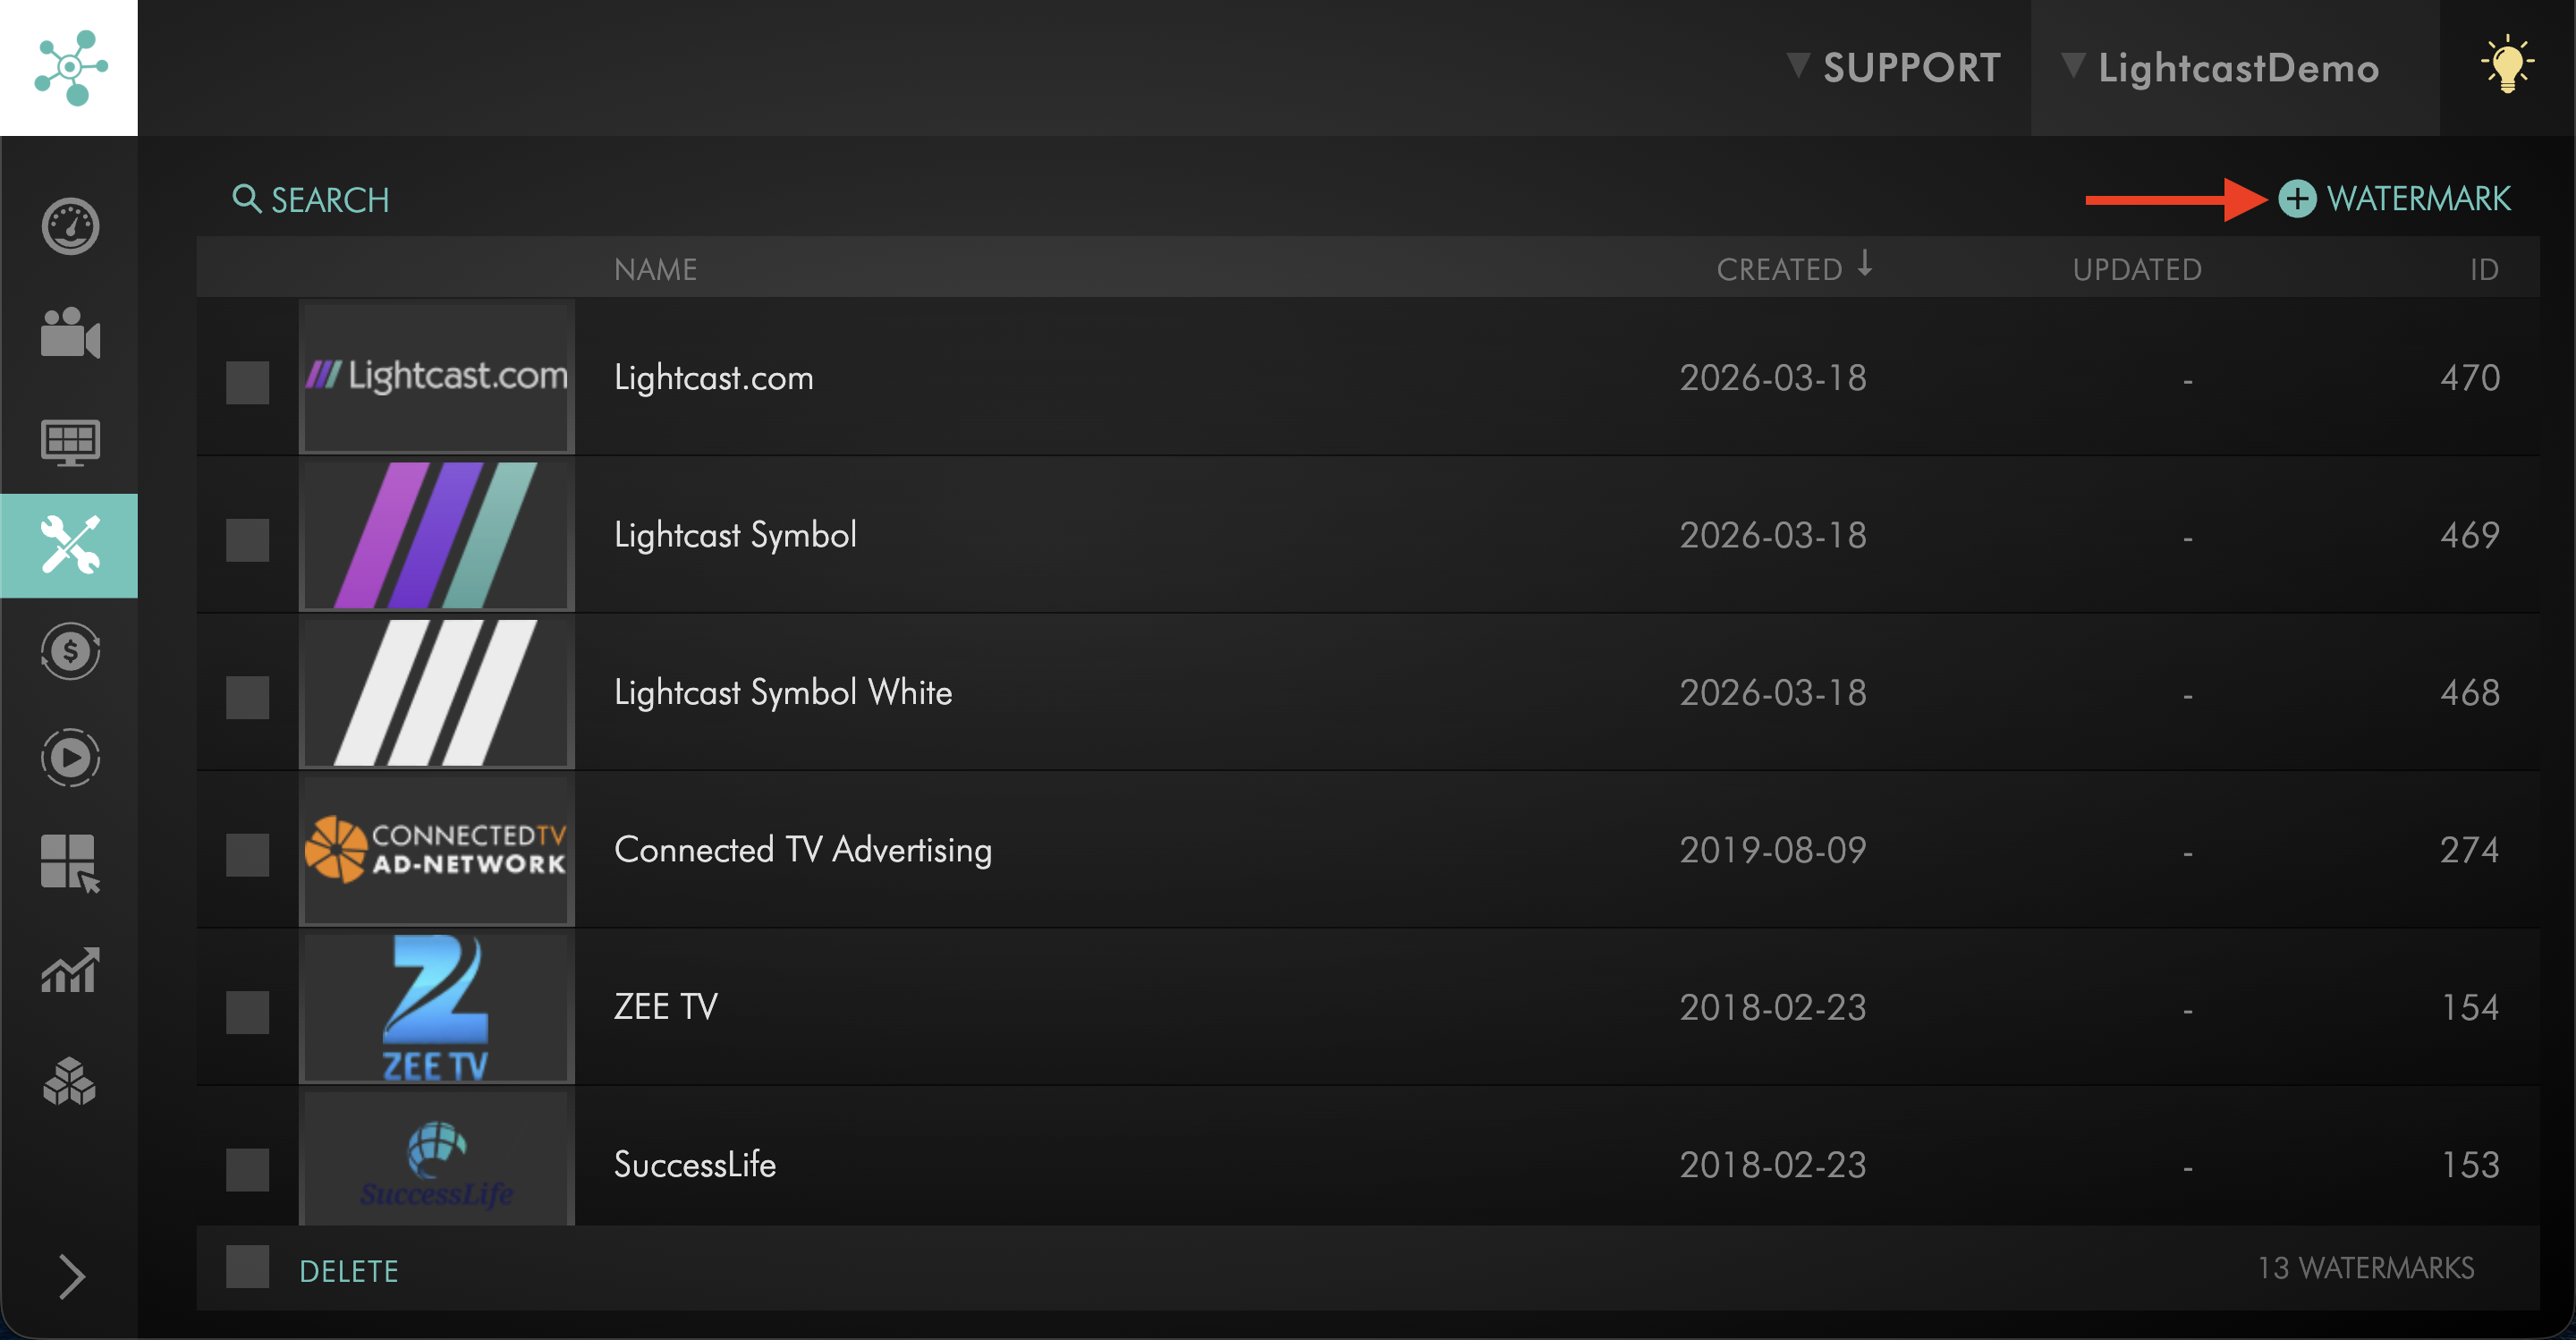
Click on TOOLS, then Watermarks.

Step 3
Click + WATERMARK.
Step 4
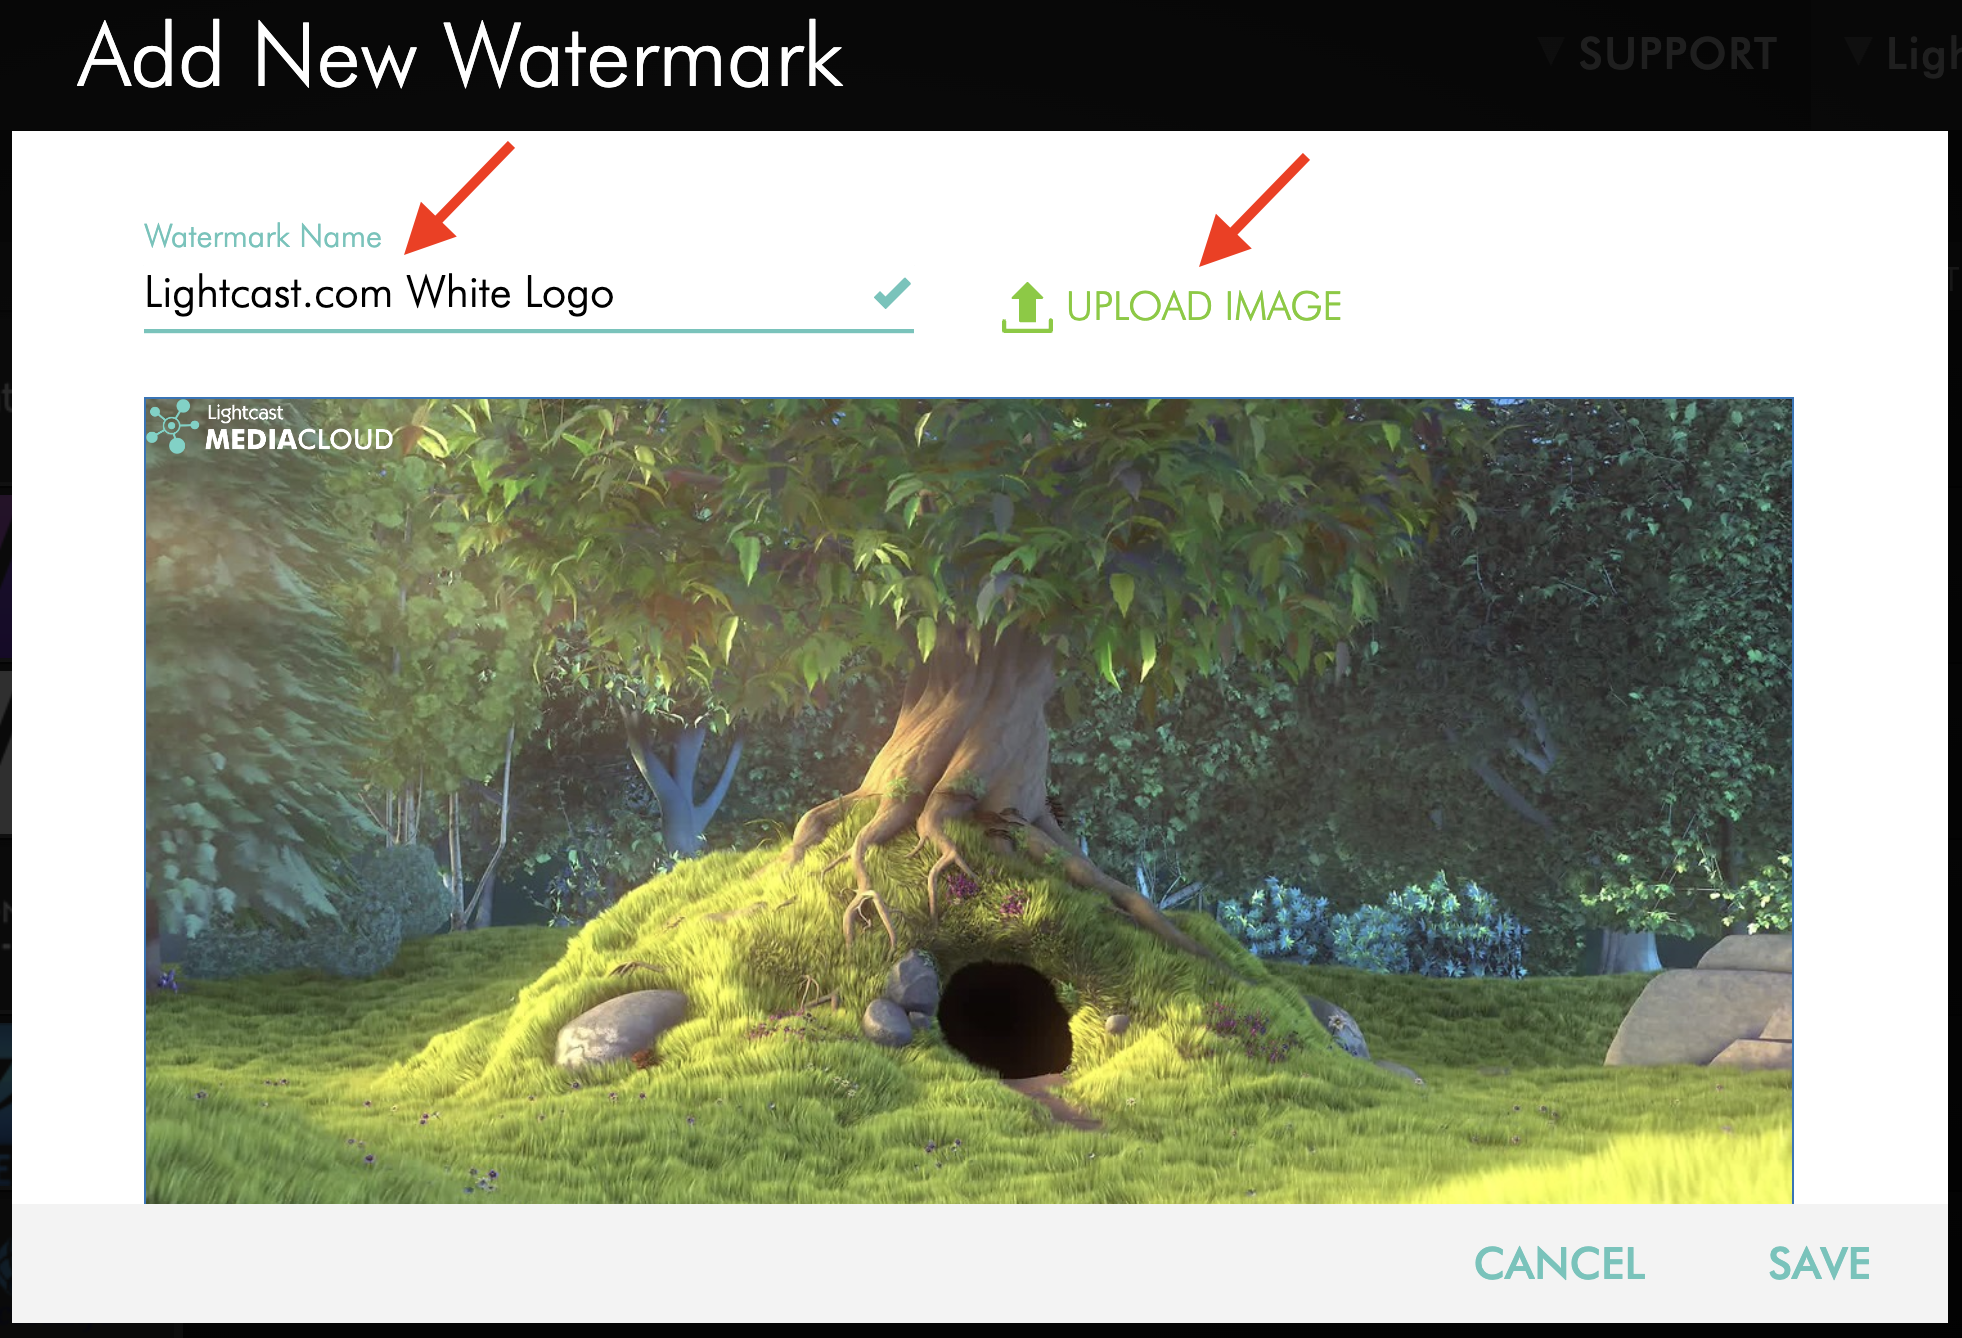
Give your Watermark a name, then click UPLOAD IMAGE and select your Watermark image.
Step 5
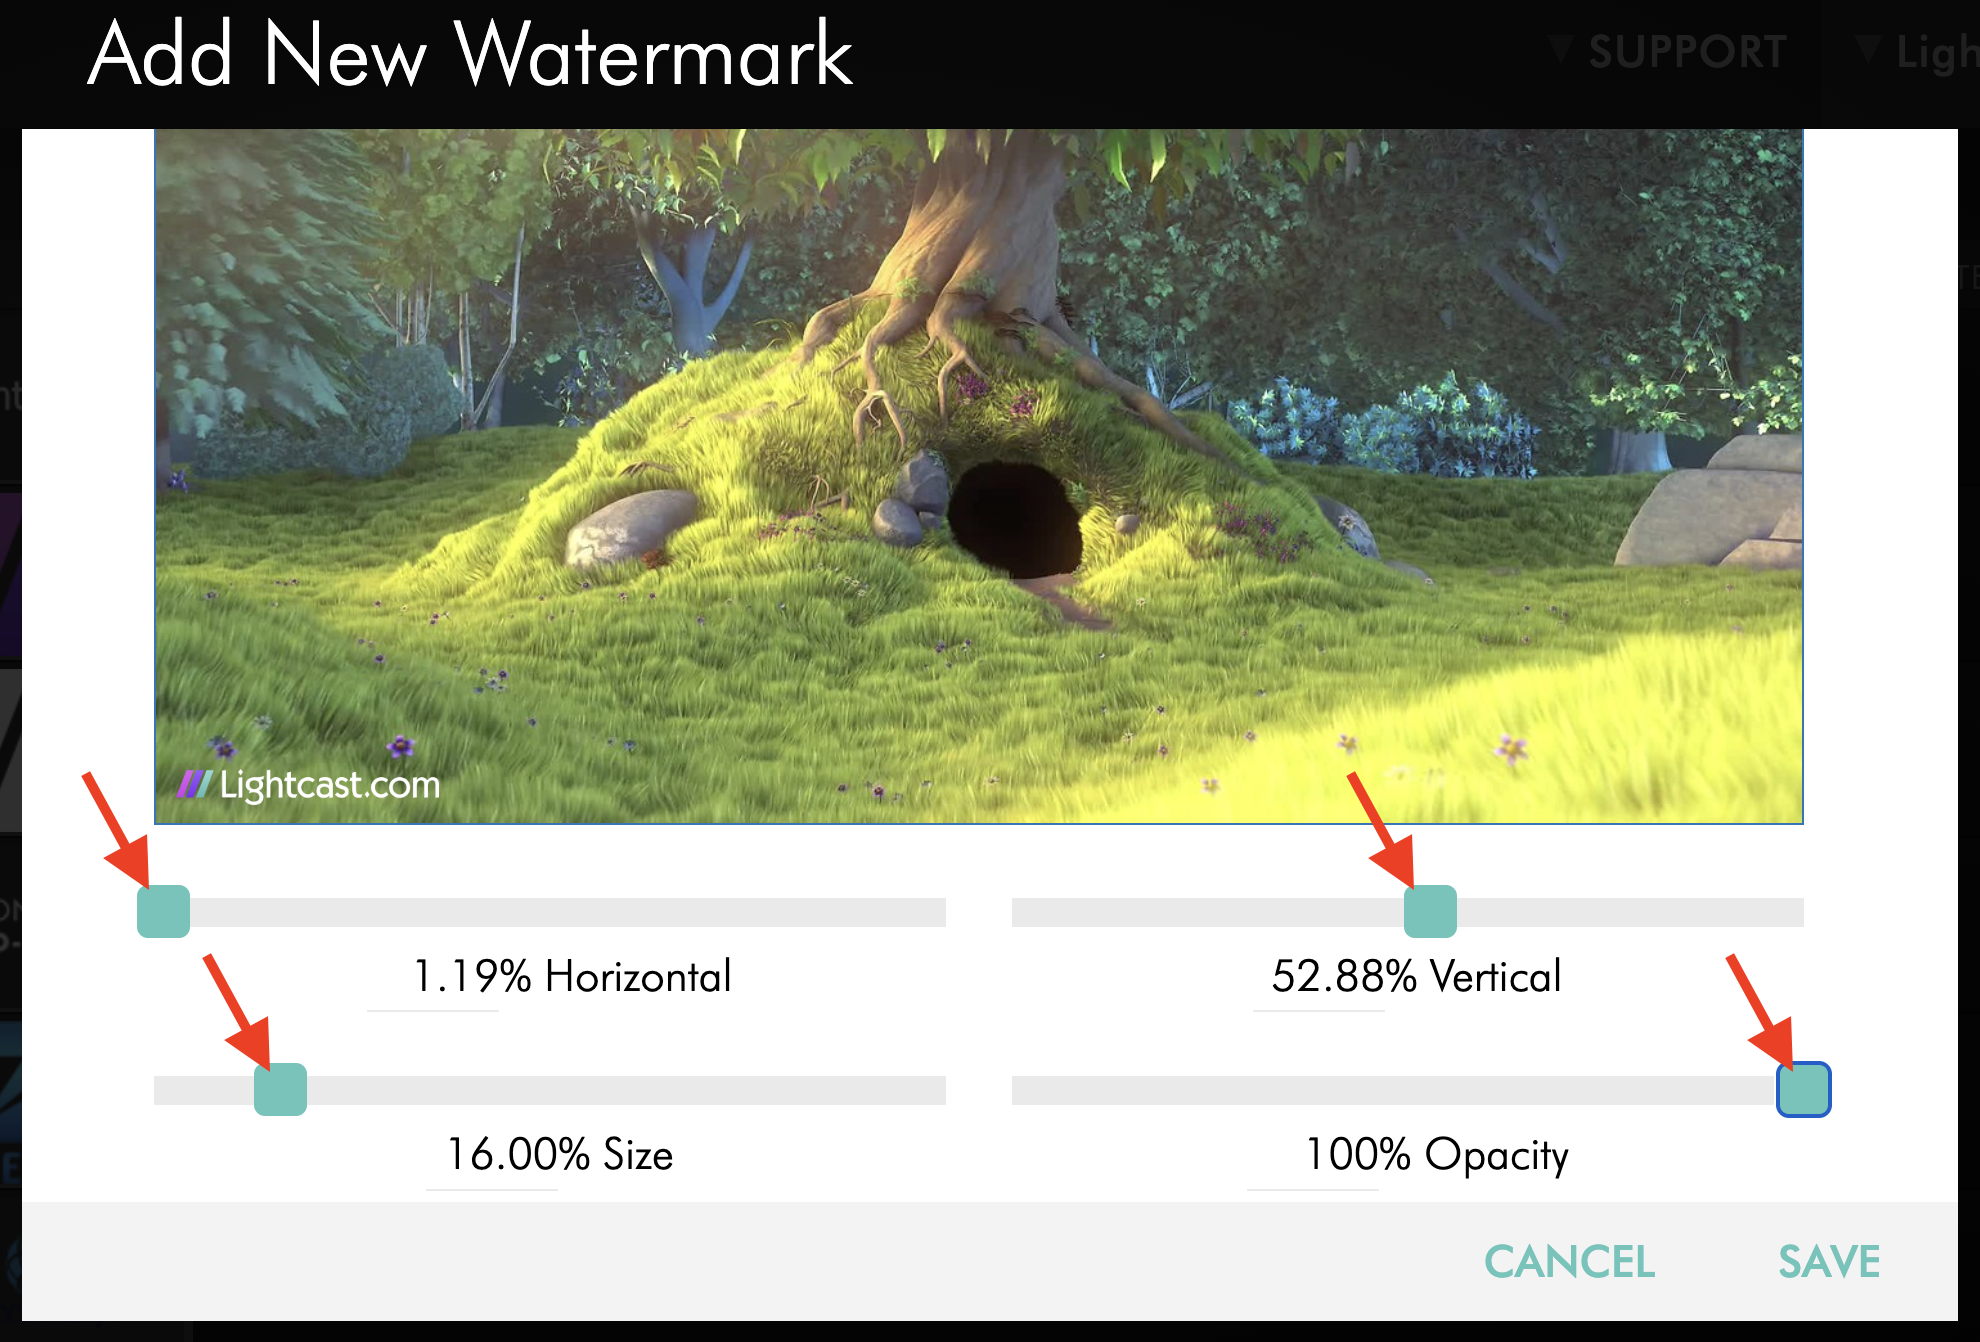
Scroll down and set the Watermark size, opacity, and position.
Step 6
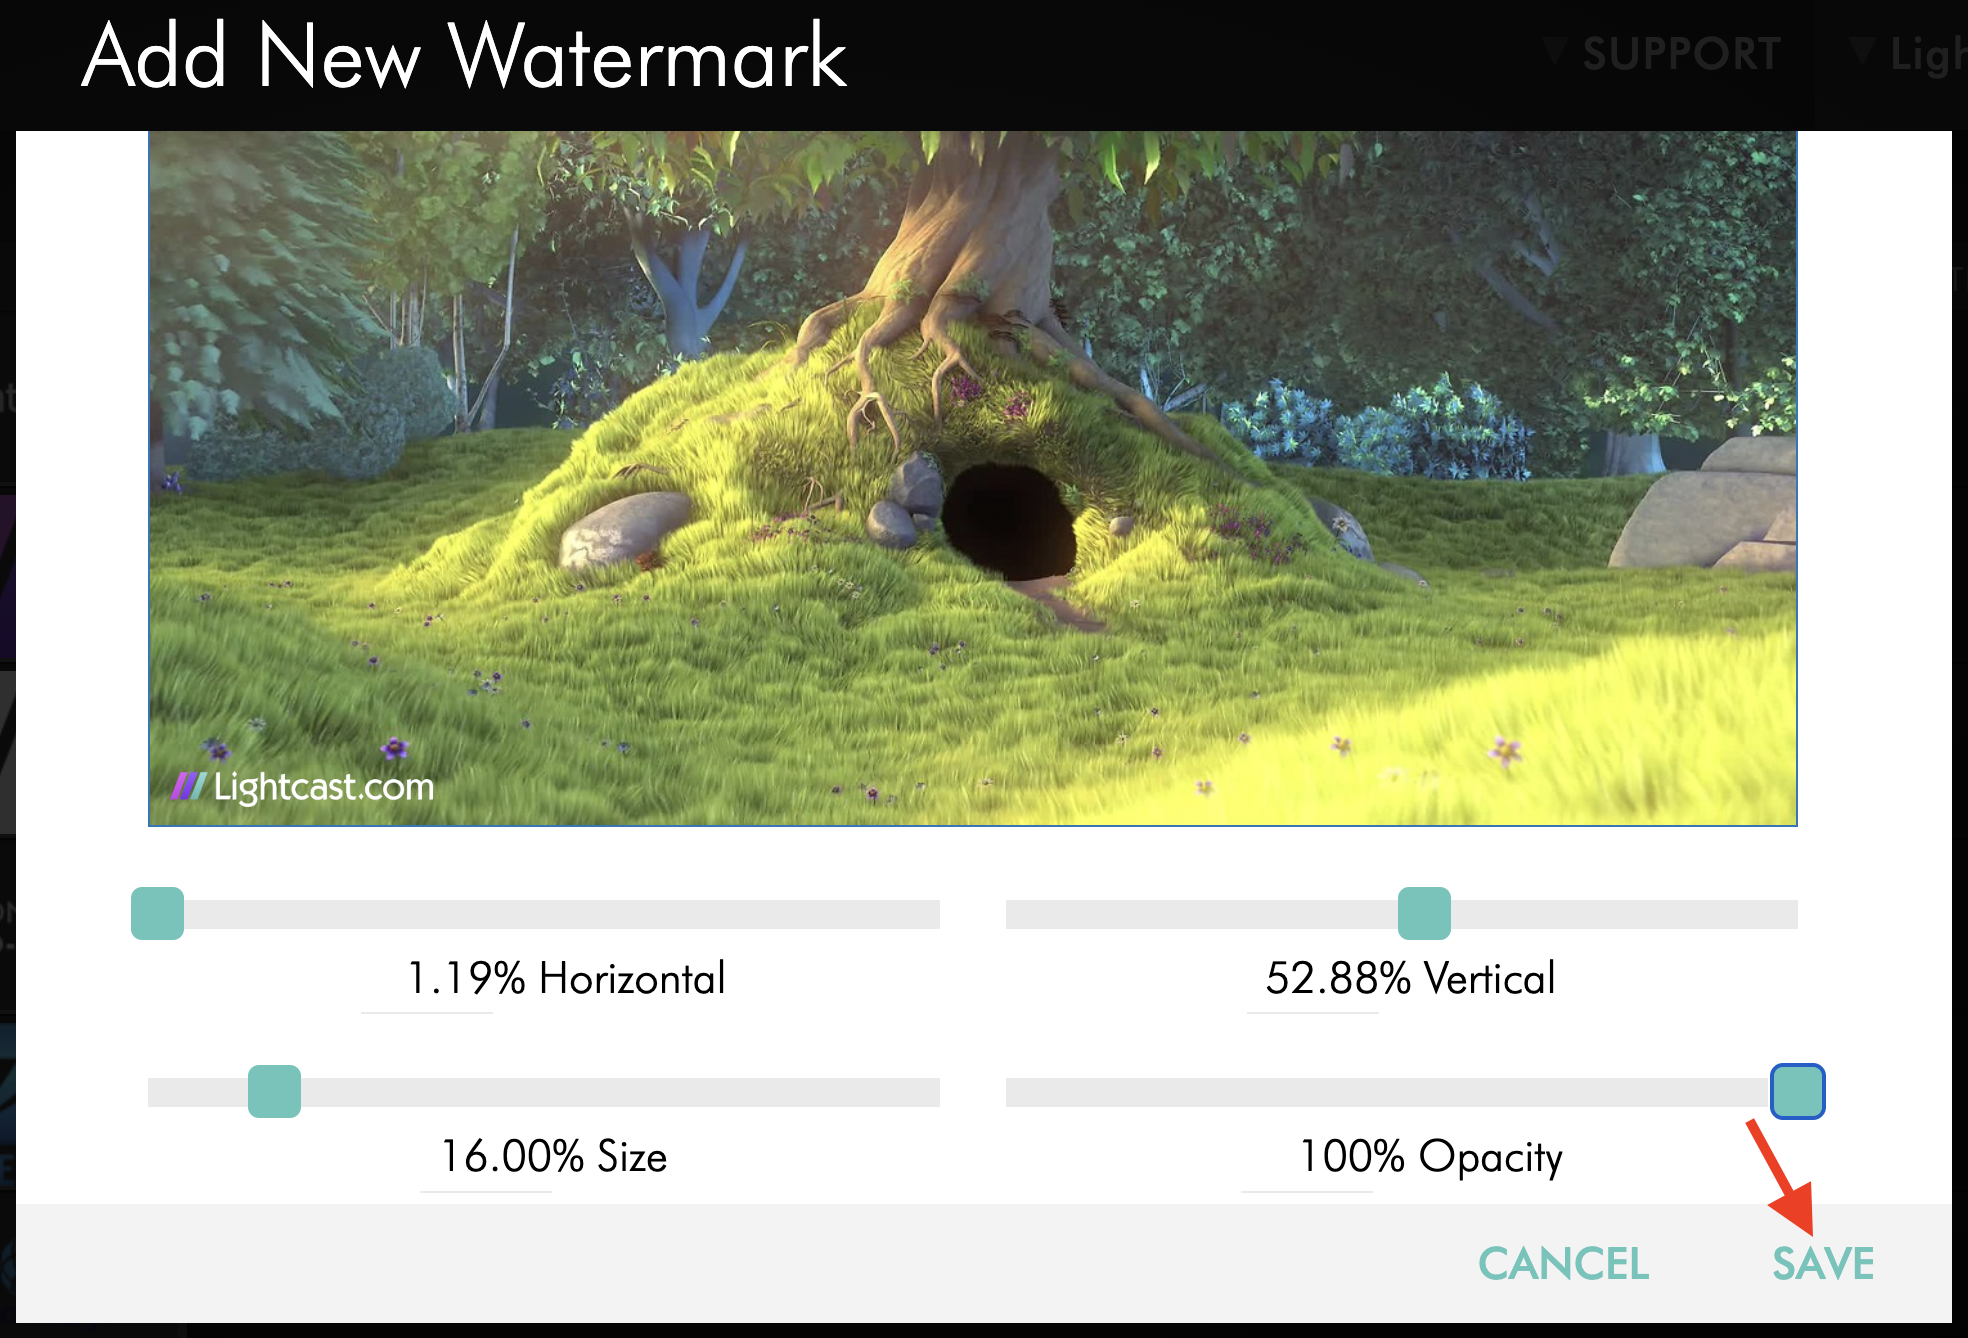
Click SAVE. After the Watermark is saved, it becomes available during the upload process.
Apply a Watermark during video upload
Step 1
Navigate to the MEDIA section, then click Upload.

Step 2
Select your preferred upload method.
Step 3
During the upload process, select the Watermark you want to apply before starting encoding.
To see how to apply a Watermark during the upload process, see: Media Upload
FAQs
Can Watermarks be added to videos that are already uploaded?
A Watermark can only be applied during the upload process, before the video is sent to encoding. If a video is uploaded and encoded without a Watermark, the Watermark cannot be added later.
To apply a Watermark afterward, the video must be uploaded and encoded again. Additional transcoding and storage fees may apply.
Can Watermarks be applied during batch upload?
Yes. You can assign a Watermark before sending a batch upload for encoding. The Watermark will then be applied automatically to all videos in that batch.
Will a Watermark appear when a video is published to Facebook, YouTube, or X?
Yes. If a Watermark is applied during the upload and encoding process, it becomes part of the video itself.
If that video is later published to Facebook, YouTube, or X, the Watermark will still display on those platforms.
Can Workflow Presets add Watermarks automatically?
Yes. Workflow Presets can automatically apply Watermarks during upload. They can also automate other upload settings such as Channel assignment, Media Group assignment, DRM selection, publishing status, third-party embedding settings, and language selection.
Pricing
Watermarks are available on POWER X packages and up.
If you do not have access to this feature, you can upgrade to one of our latest plans or contact your account manager.
Video: How to Add a New Watermark