
How to upload files using the Web Uploader
Overview
This article explains how to upload video and audio files using the Web Uploader in the Media Cloud.
The Web Uploader allows you to upload files directly from your computer into the Media Cloud.
When to use the Web Uploader
Use the Web Uploader when you want to upload files directly from your computer into the Media Cloud.
This option is best for:
individual uploads
small batch uploads
routine day-to-day content uploads
If you need to upload larger files or large batches of files, another upload method may be a better fit.
How it works
The Web Uploader transfers files directly from your computer into the Media Cloud through your browser. It is the fastest option for uploading individual files or small batches from your computer and does not require any additional software.
After the upload finishes, the media moves into processing. You should wait until the media item completes the Uploading phase and moves to Encoding before exiting or refreshing the Media Cloud page. That warning is especially important for web uploads because browser interruptions can affect the transfer process.
The Web Uploader currently supports:
up to 4 GB per file
up to 50 files at one time
Your ability to upload content depends on your account’s available Storage and Transcoding. If your remaining balance is too low, uploads may be limited and you may see an upload warning. Because Storage and Transcoding usage is estimated, balances may also go into the negative in some cases.
To learn more, see:
Instructions
Step 1
Log in to your Media Cloud account.
Step 2
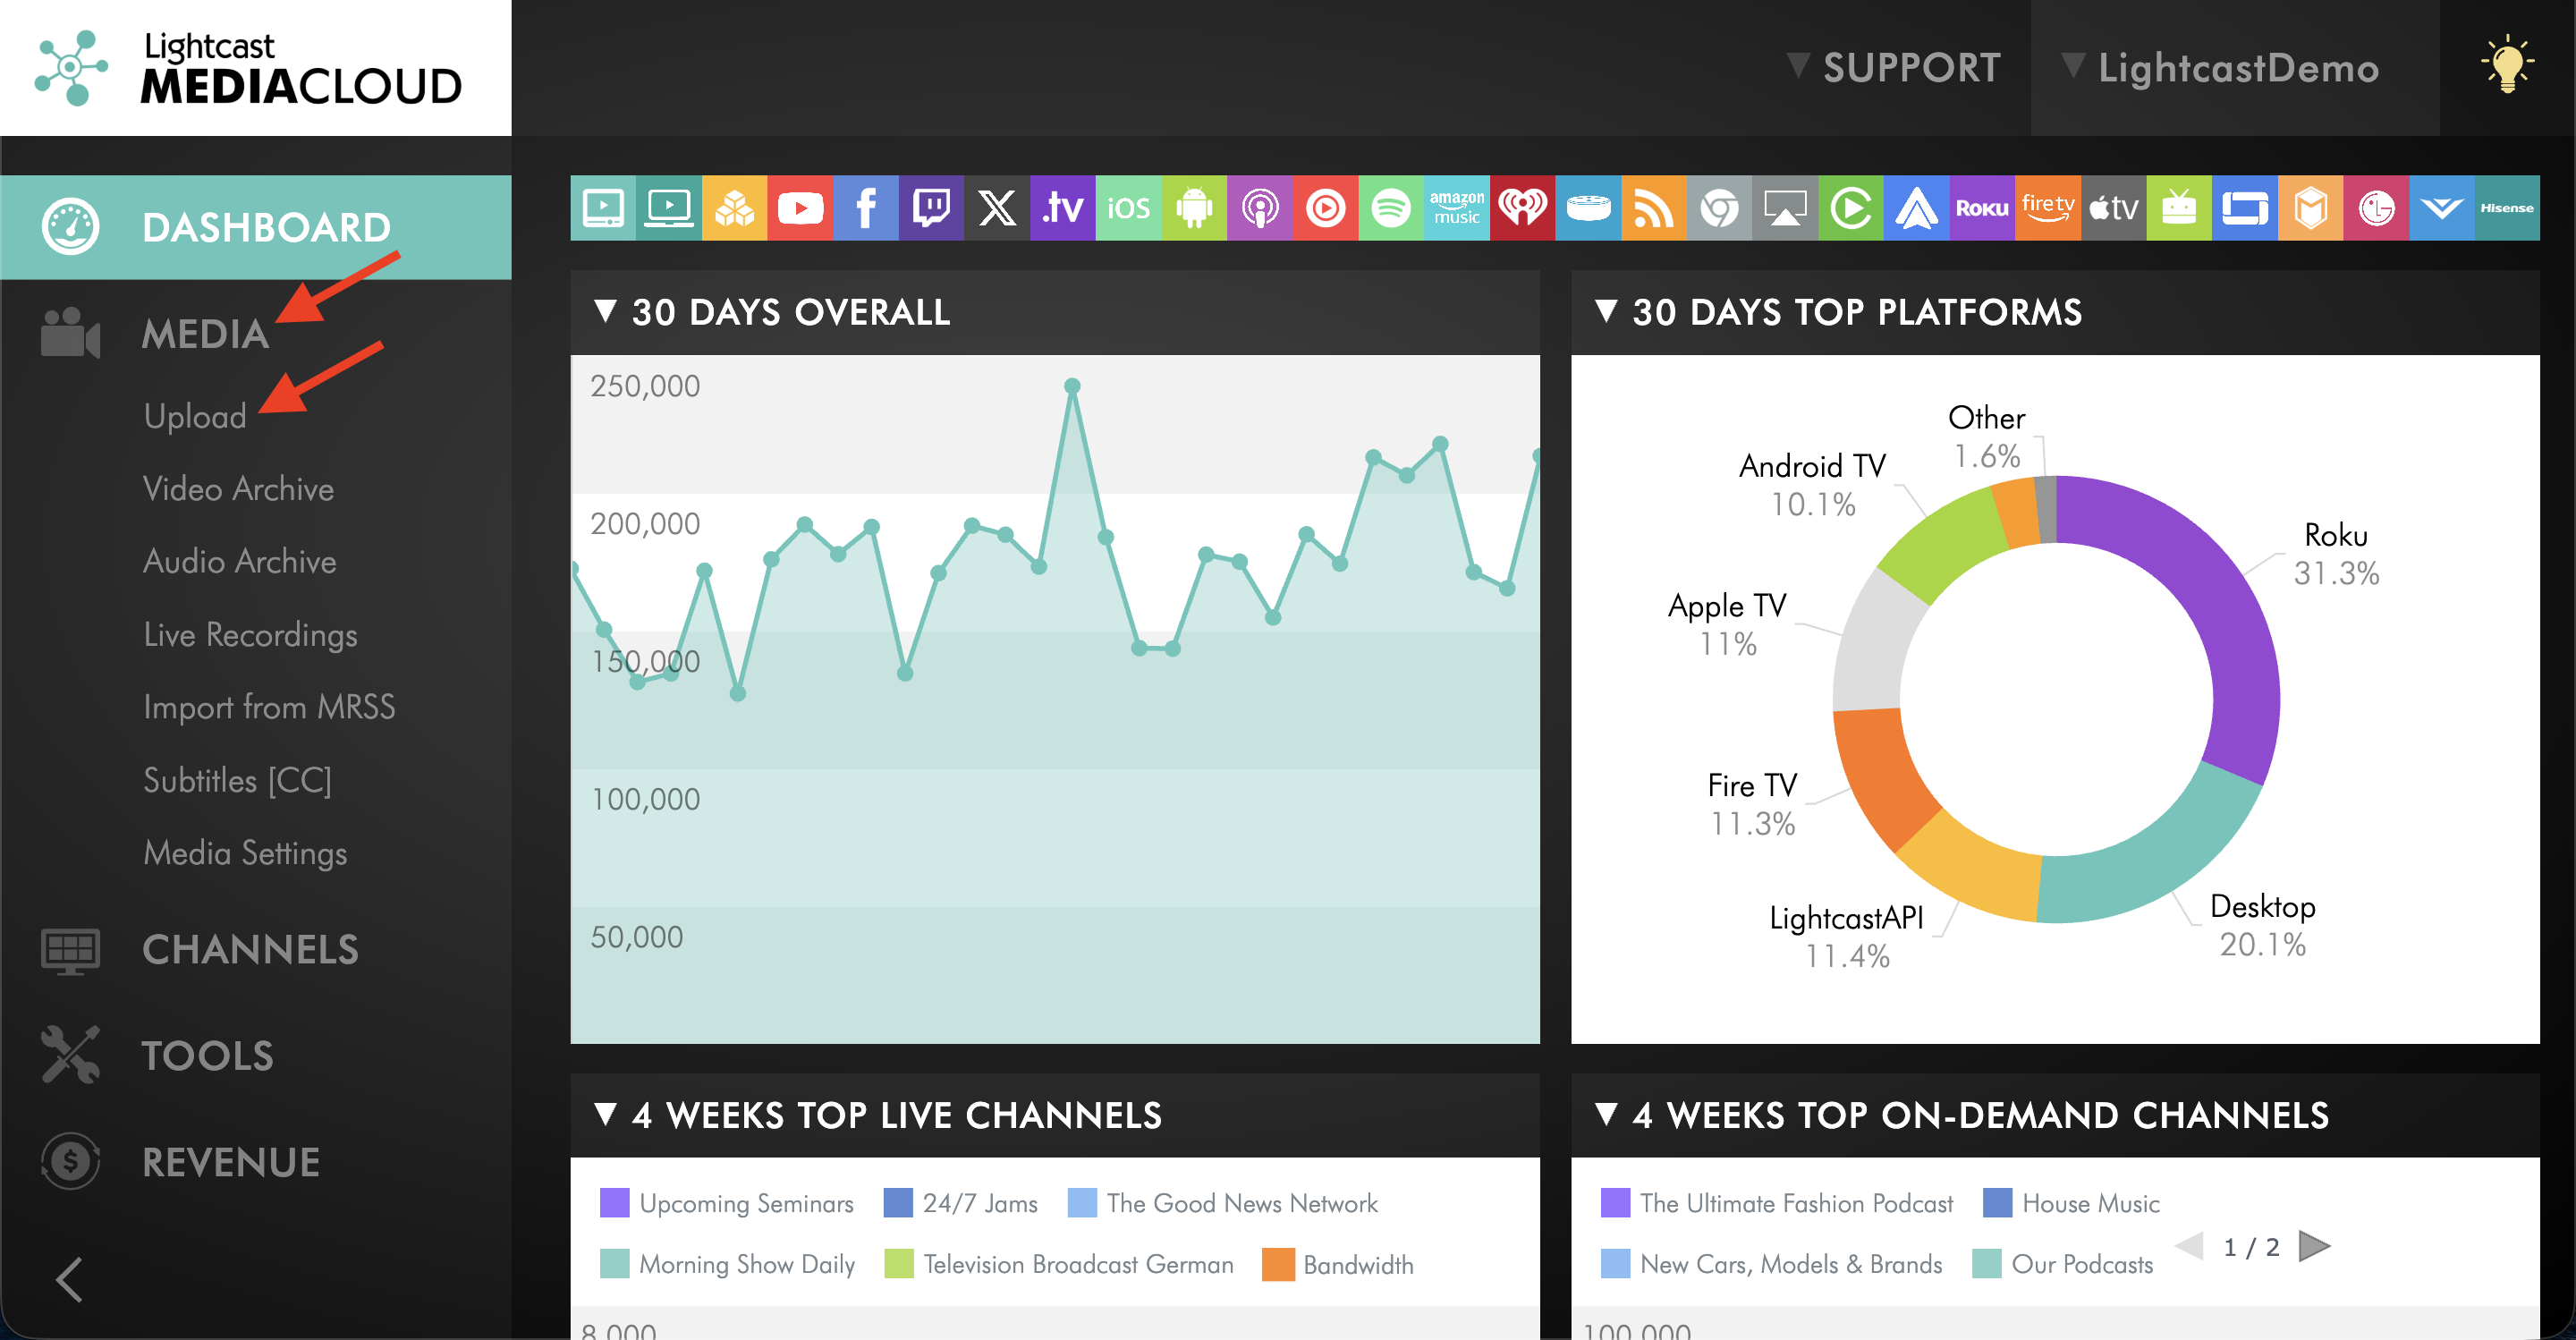
Go to MEDIA and click Upload.
Step 3
Add your files using one of these options:
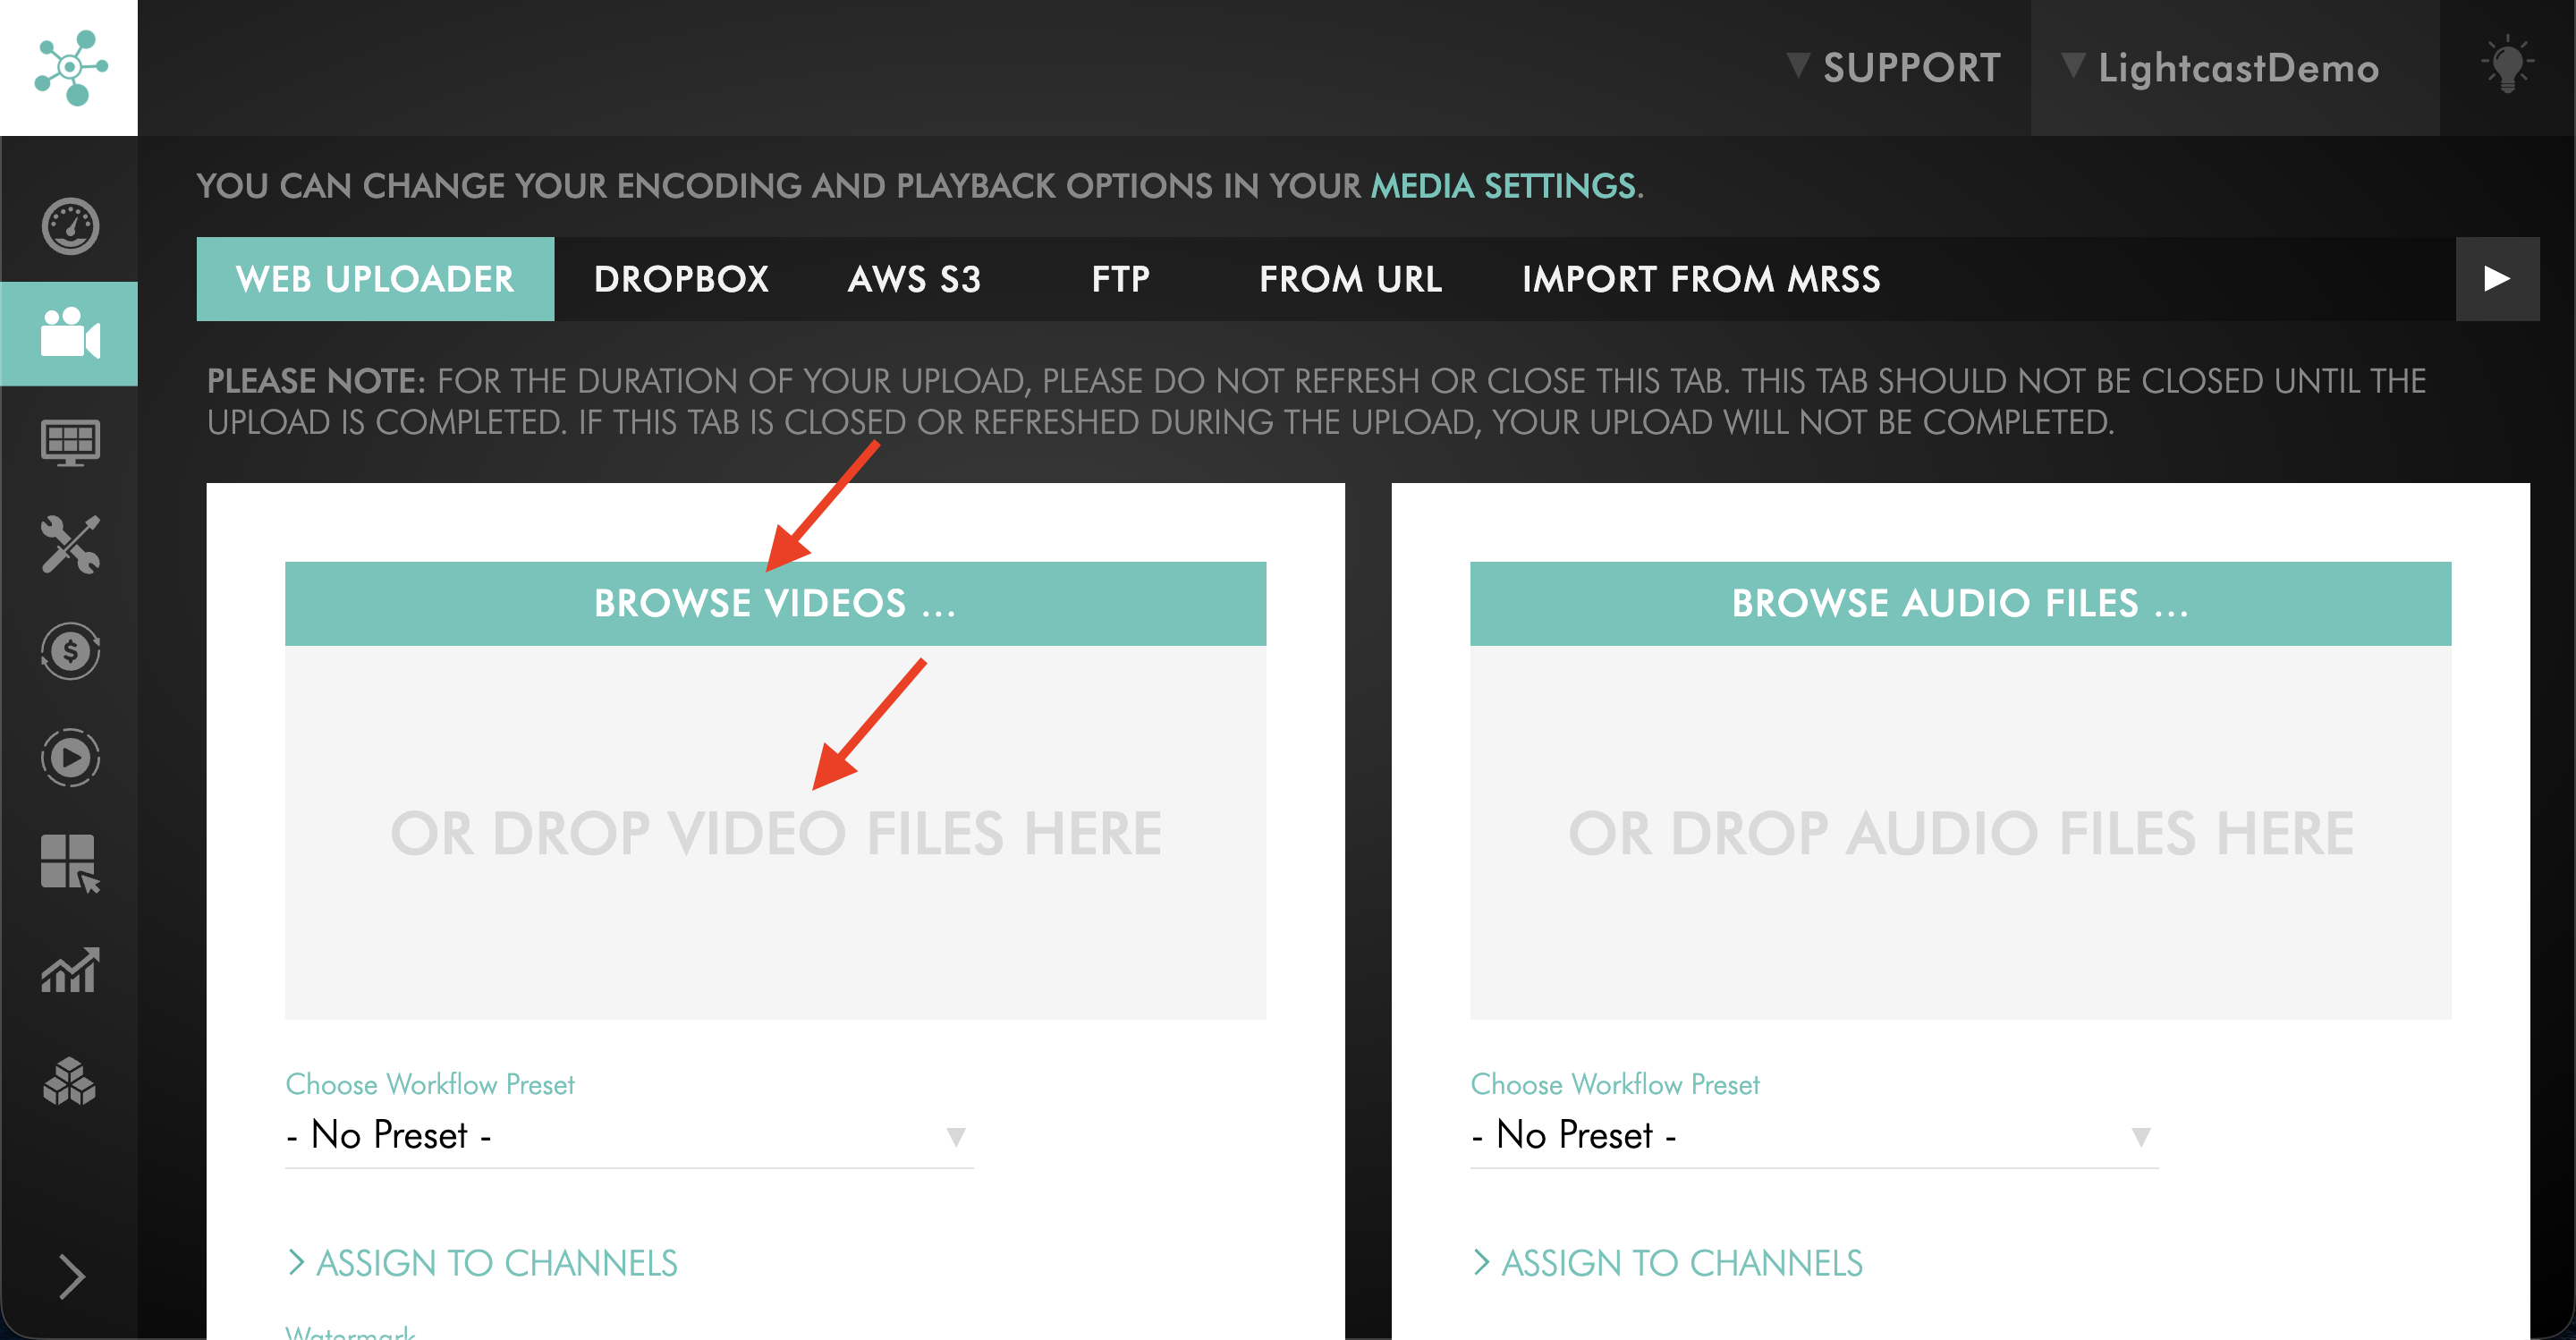
To upload video files, drag and drop them into the Browse Videos area, or click BROWSE VIDEOS… to select files from your computer.
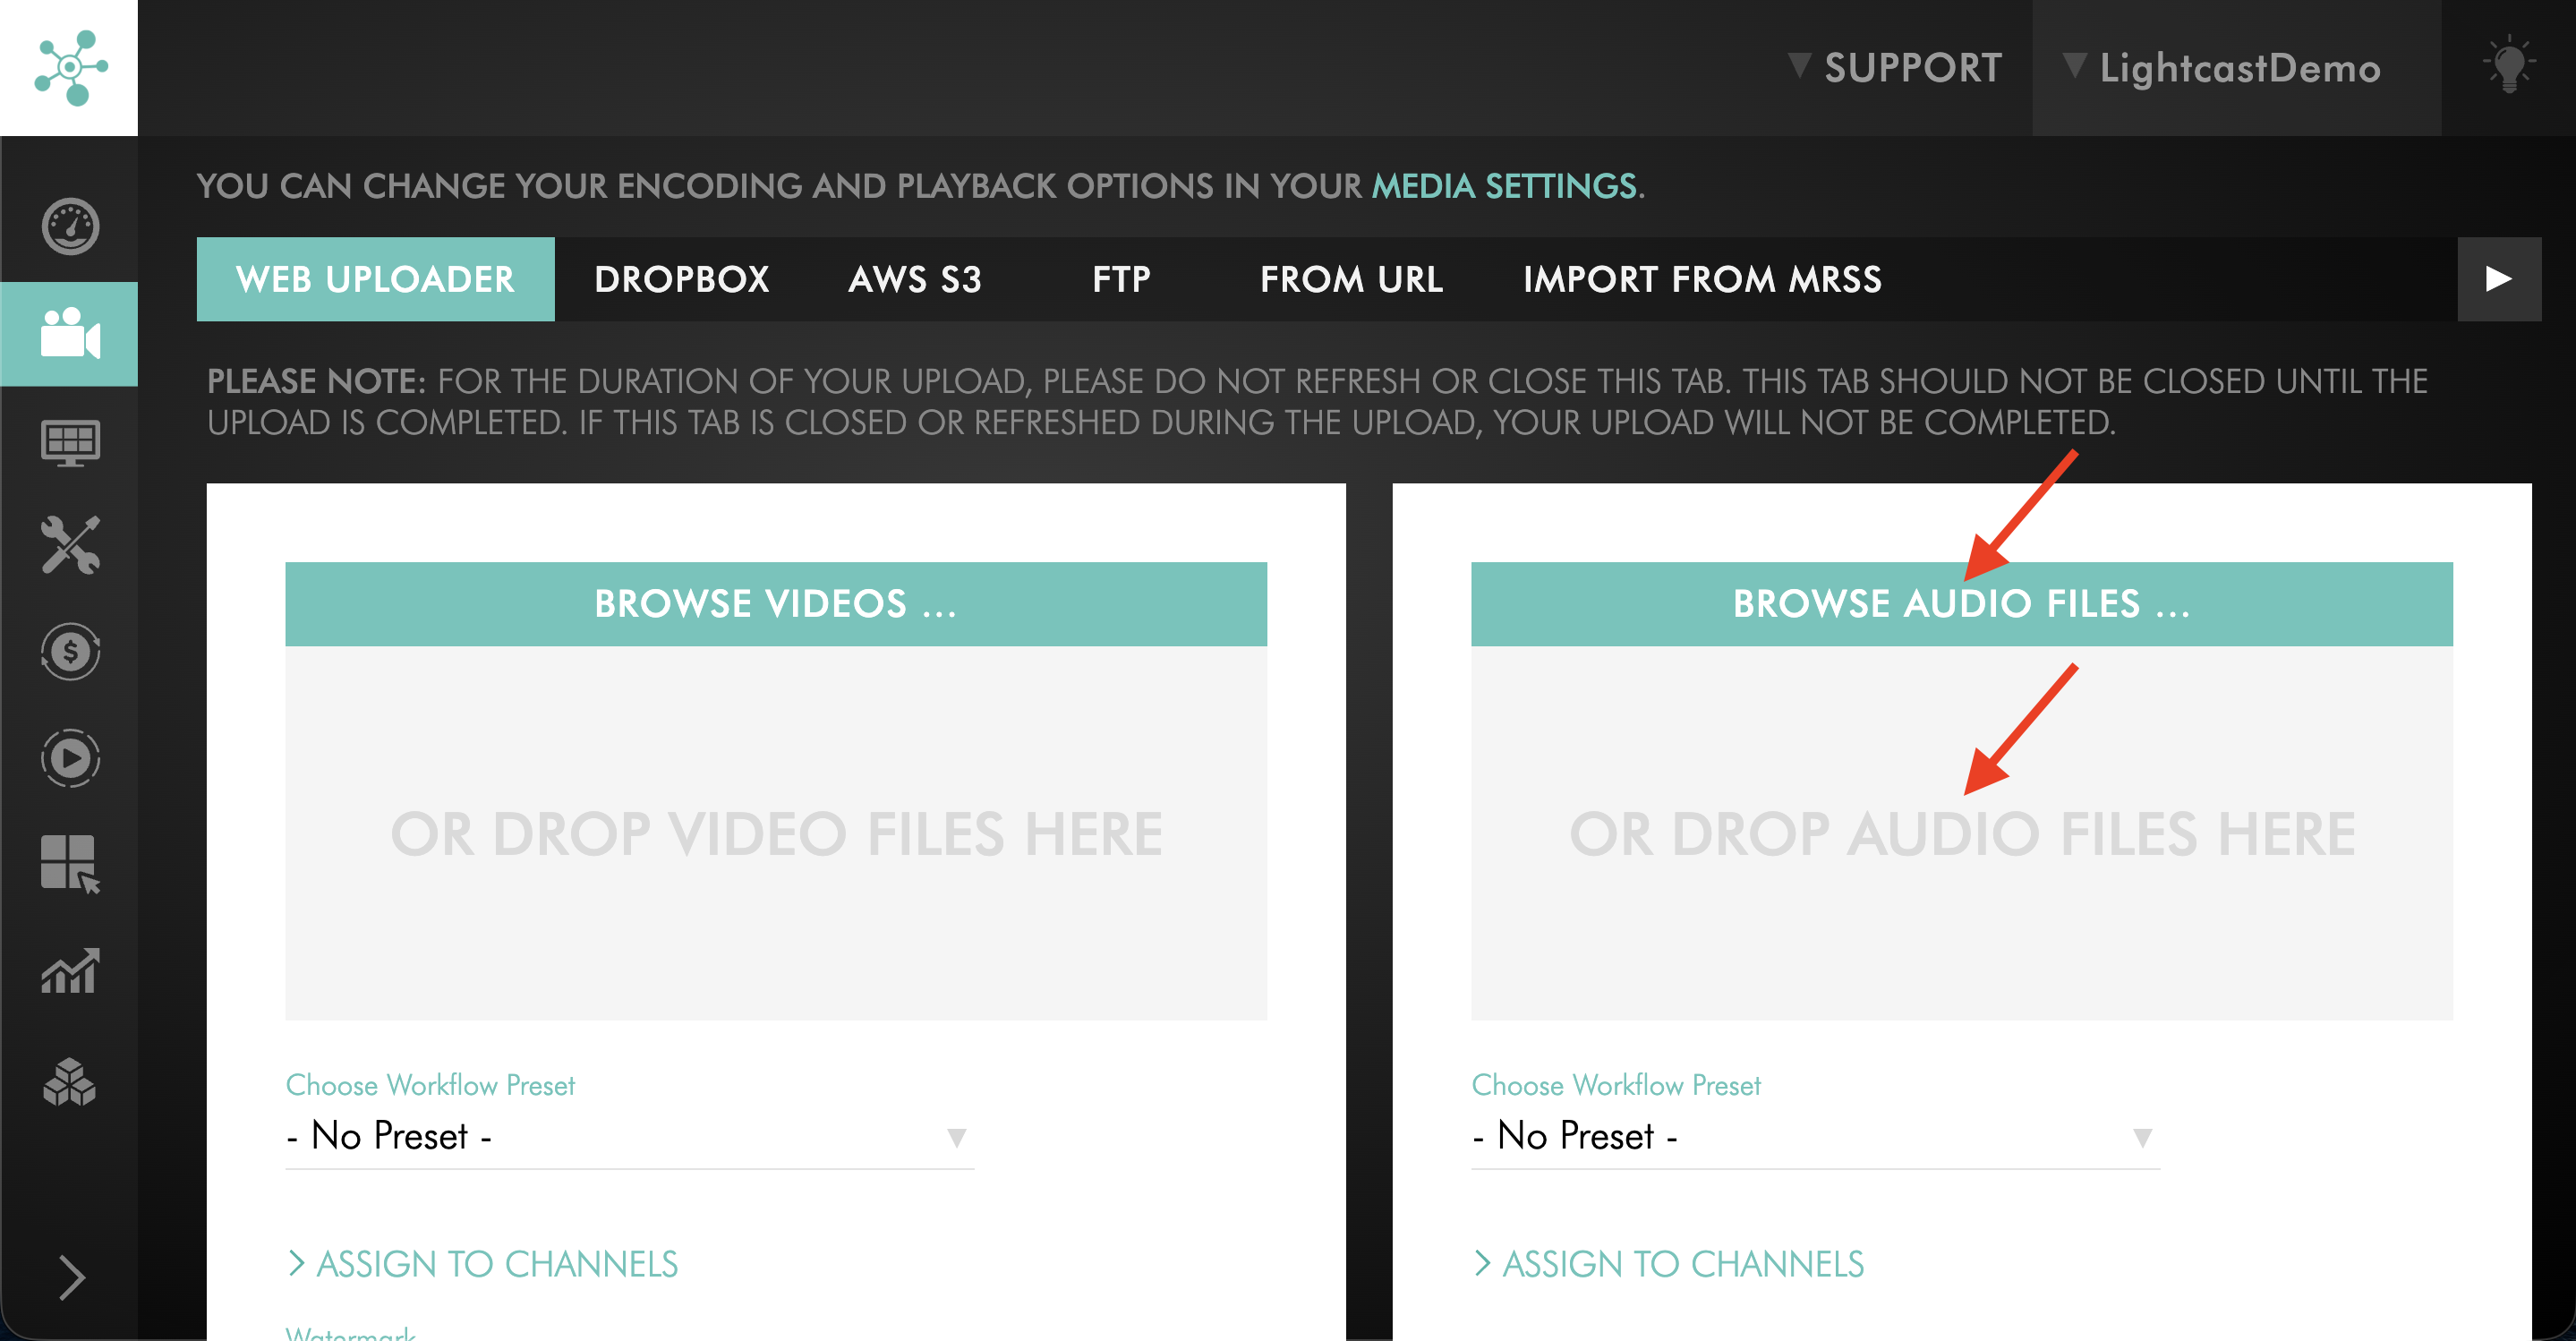
To upload audio files, drag and drop them into the Browse Audio Files area, or click BROWSE AUDIO FILES… to select files from your computer.
Step 4
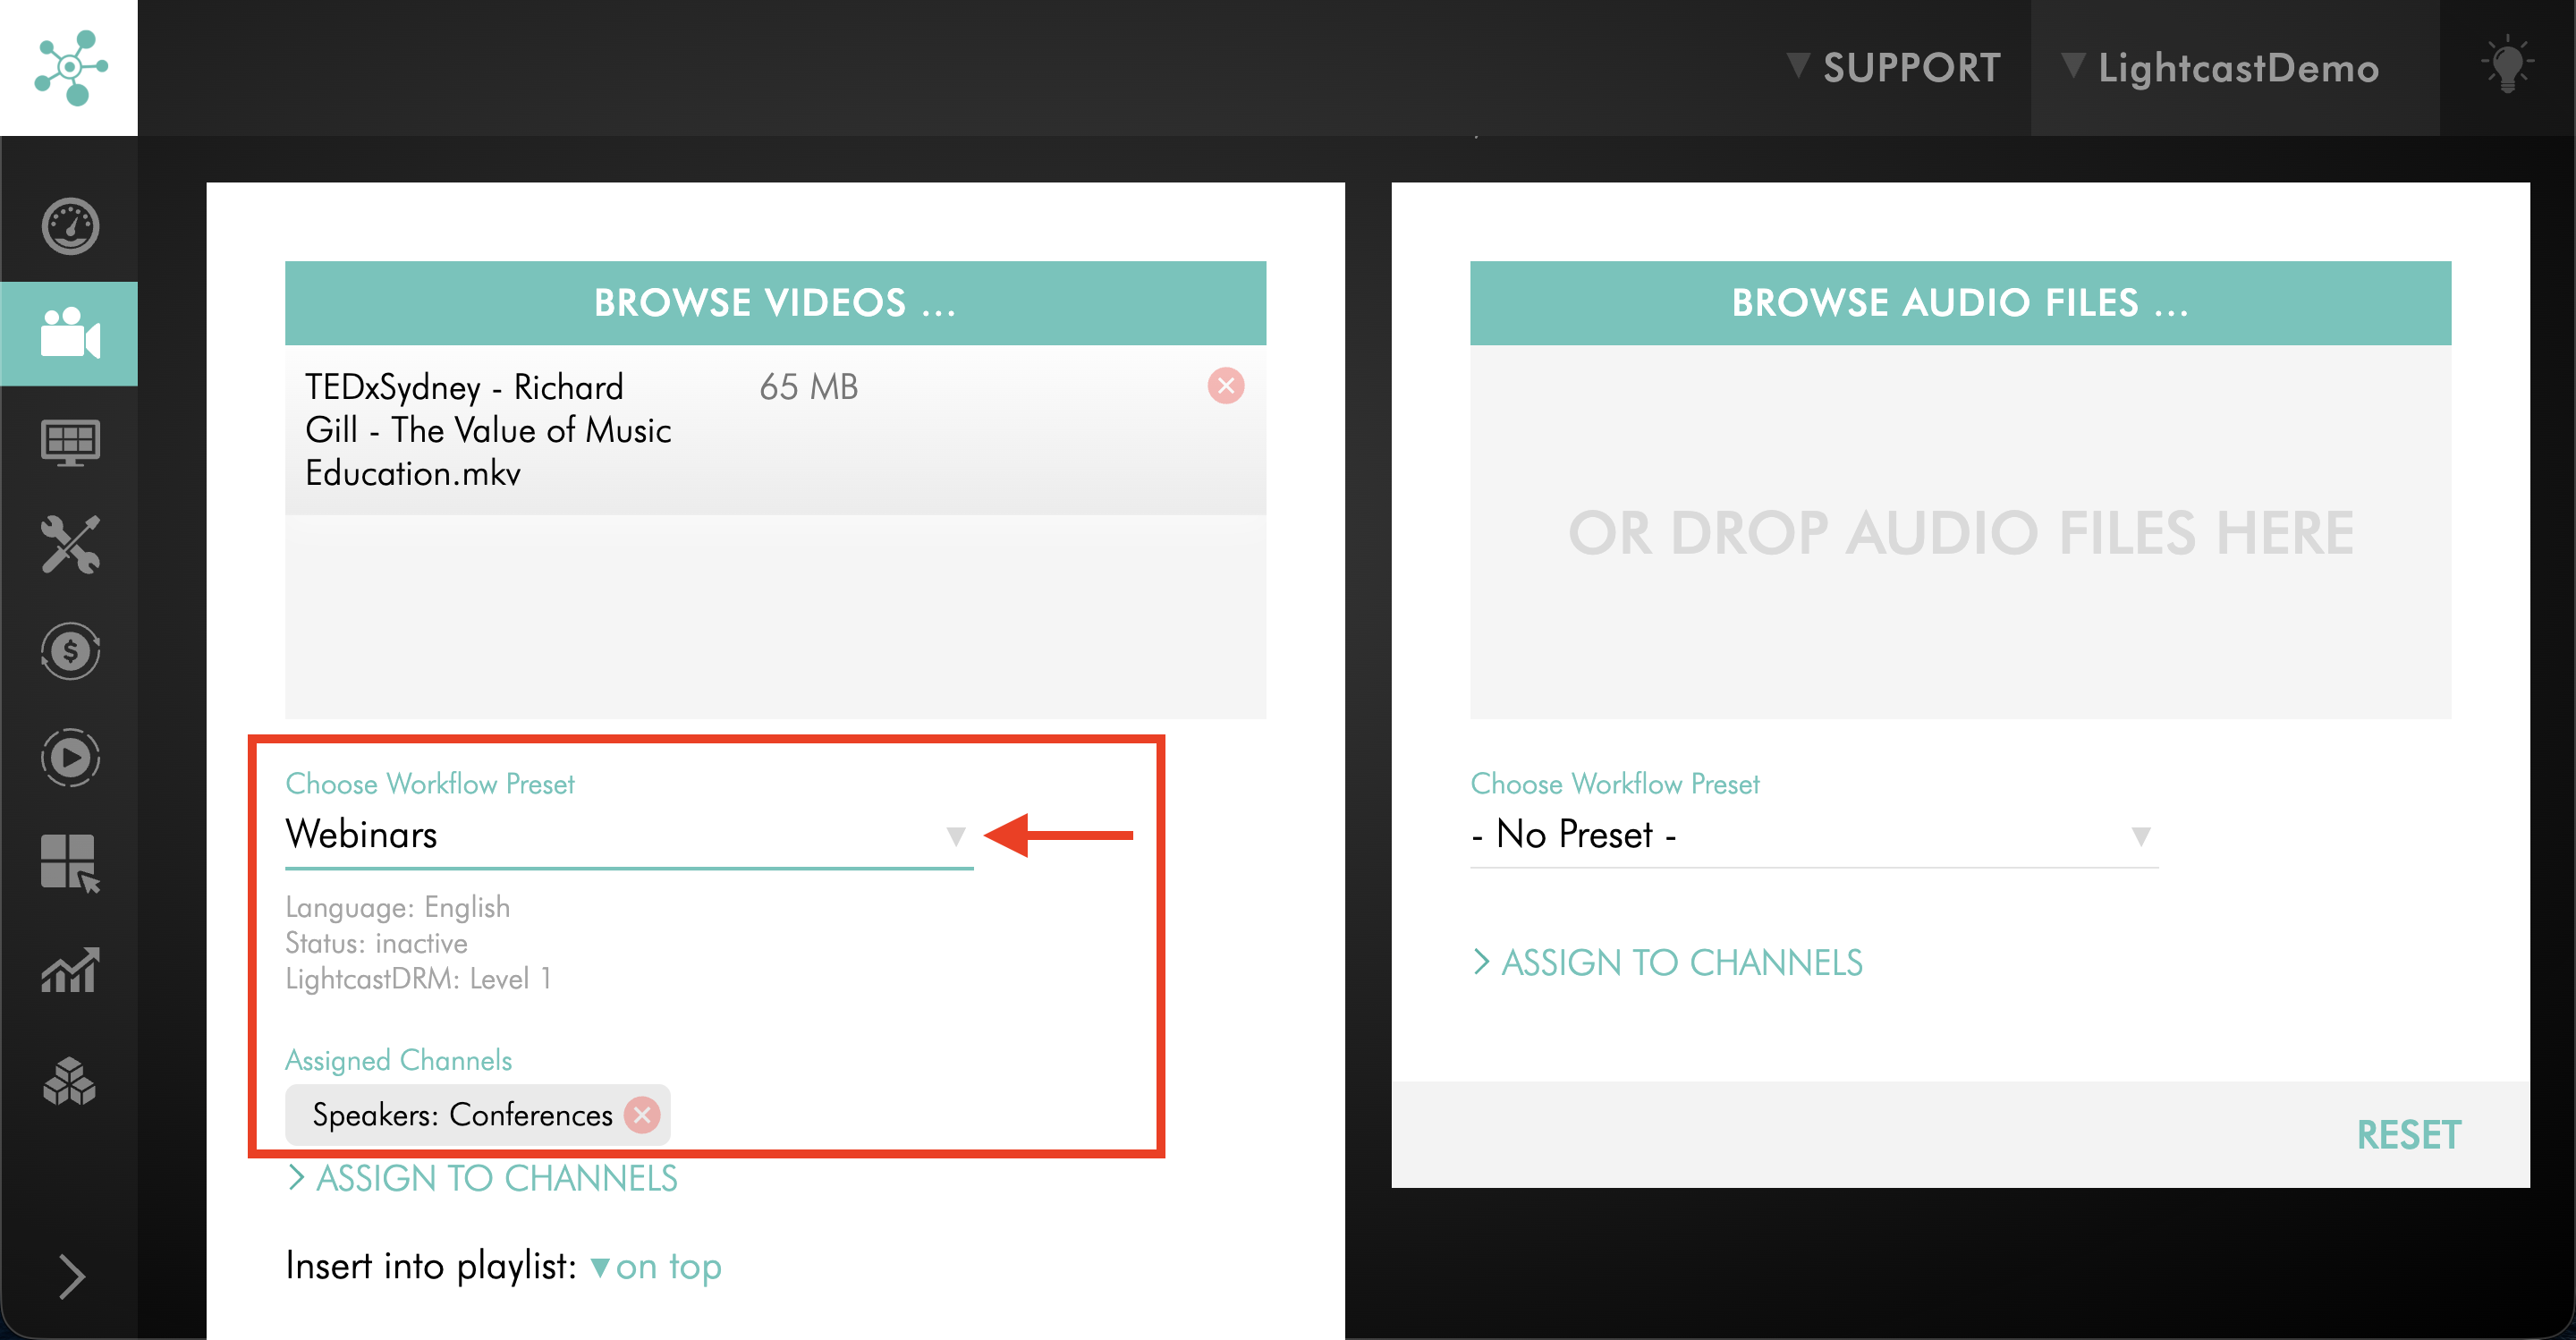
Optional: Select a Workflow Preset.
To learn how to create a Workflow Preset, see: How to create Workflow Presets
Step 5
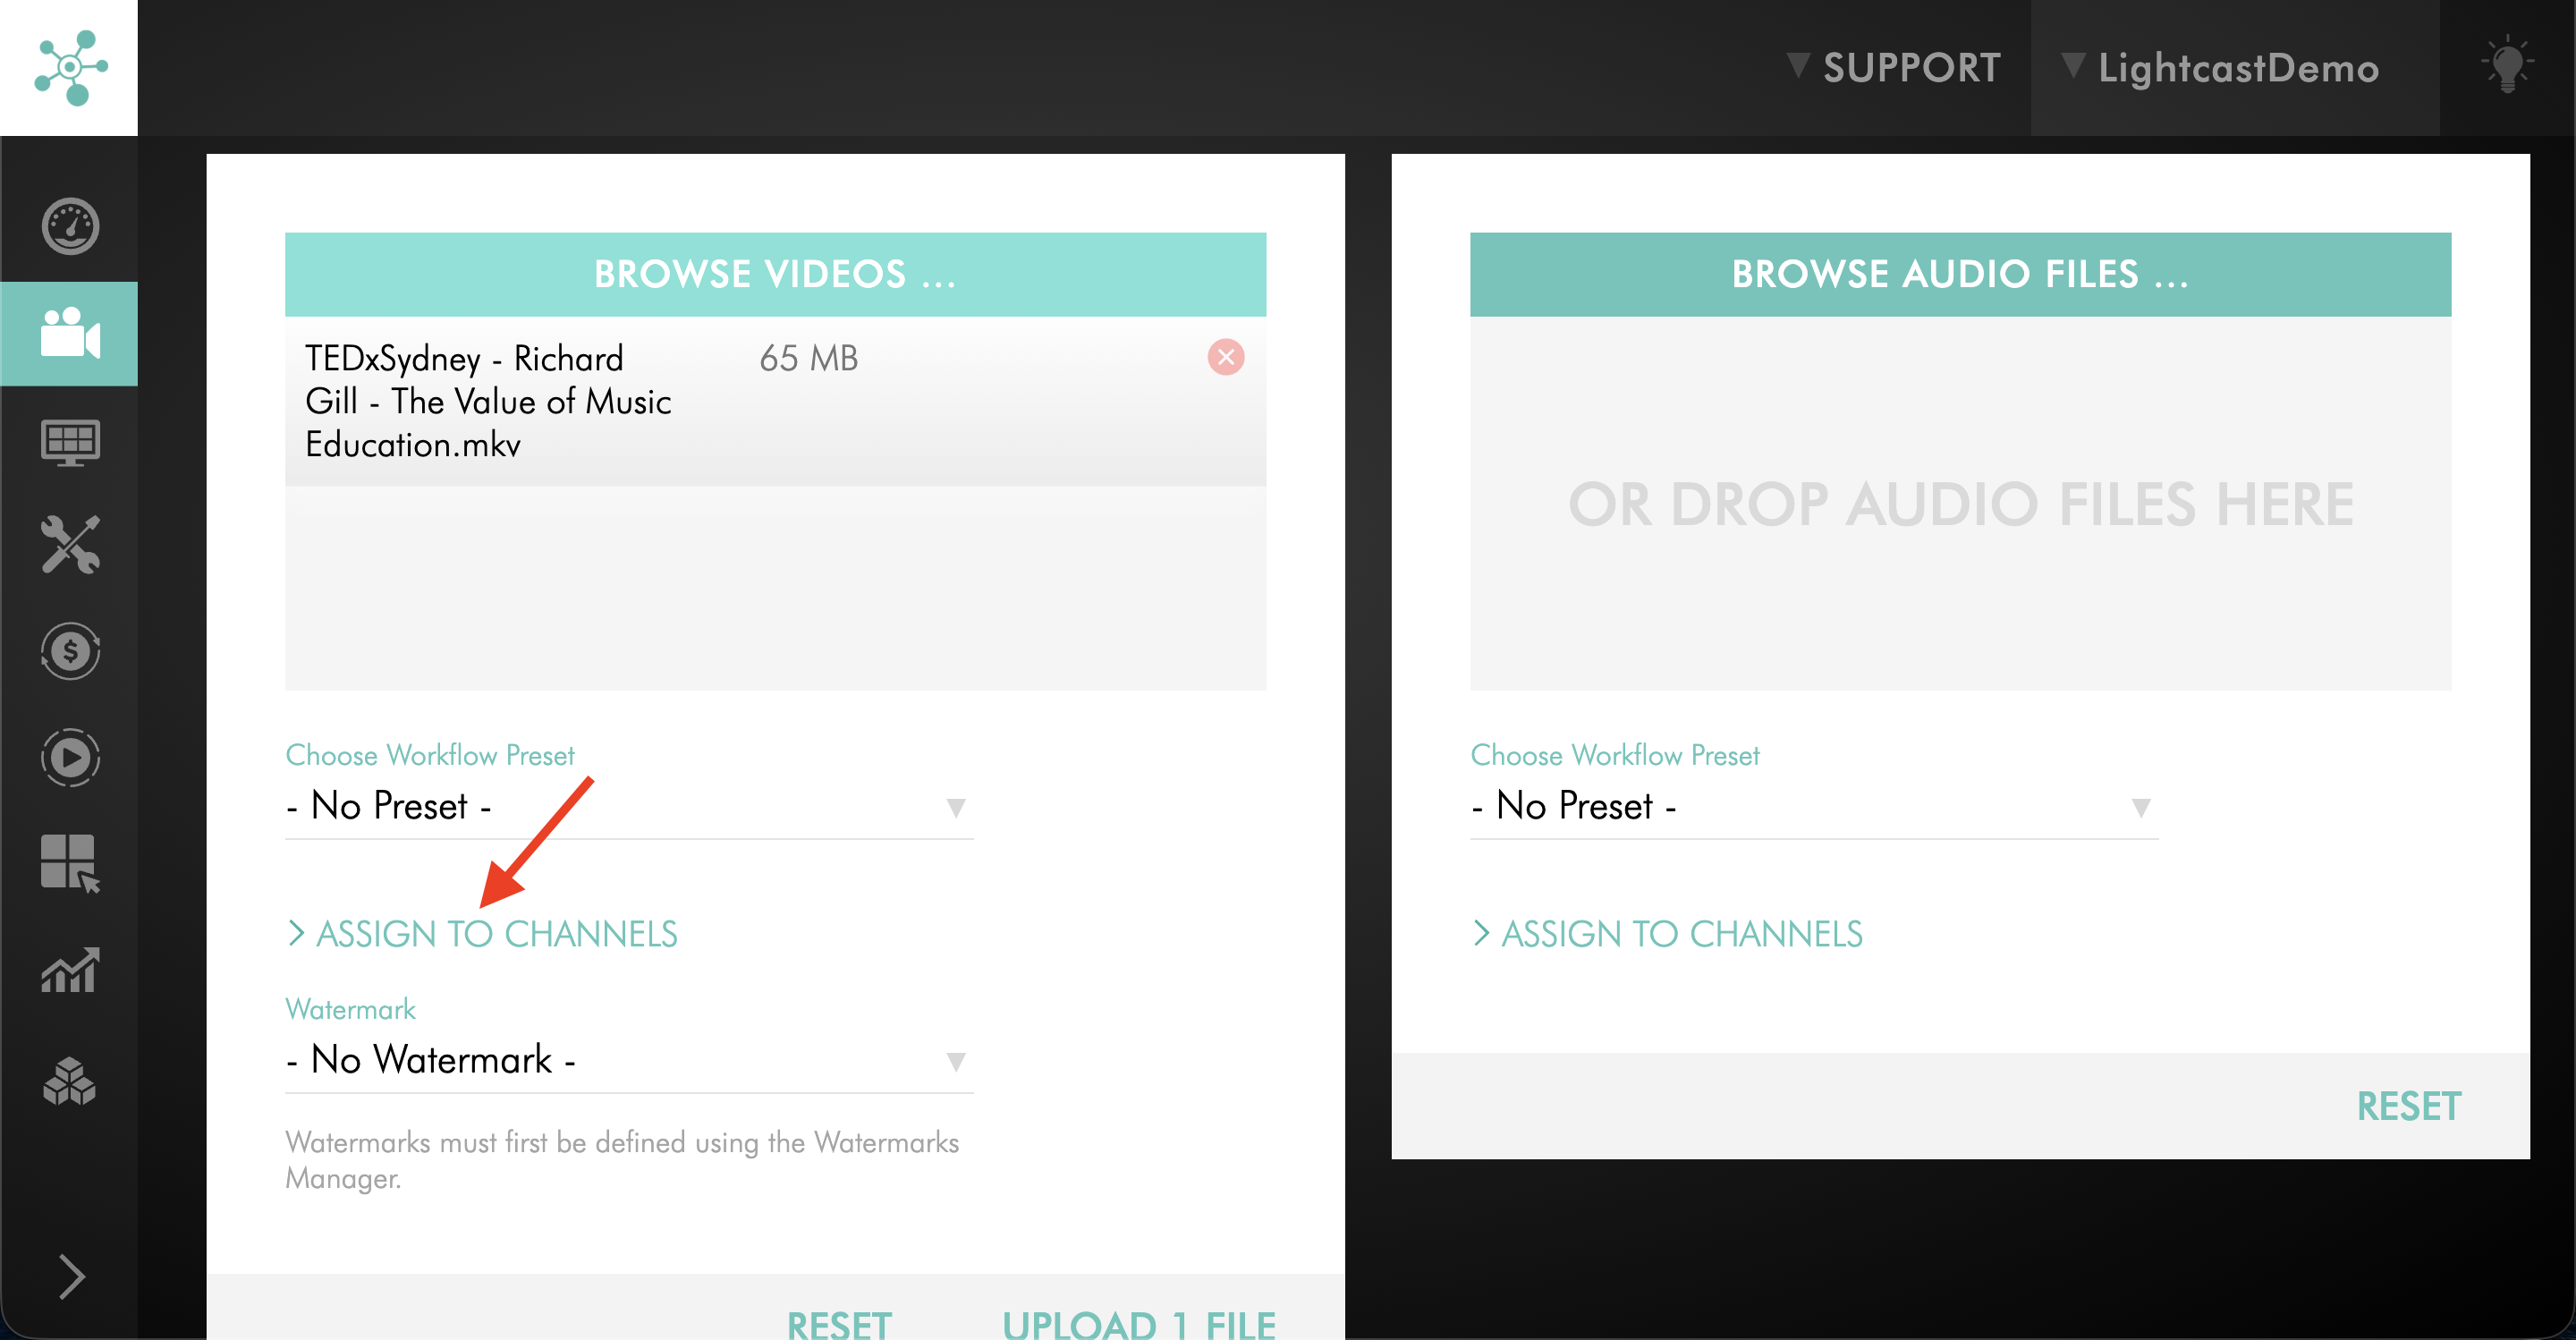
If you are not using a Workflow Preset, click ASSIGN TO CHANNELS to open the Channel assignment window.
Step 6
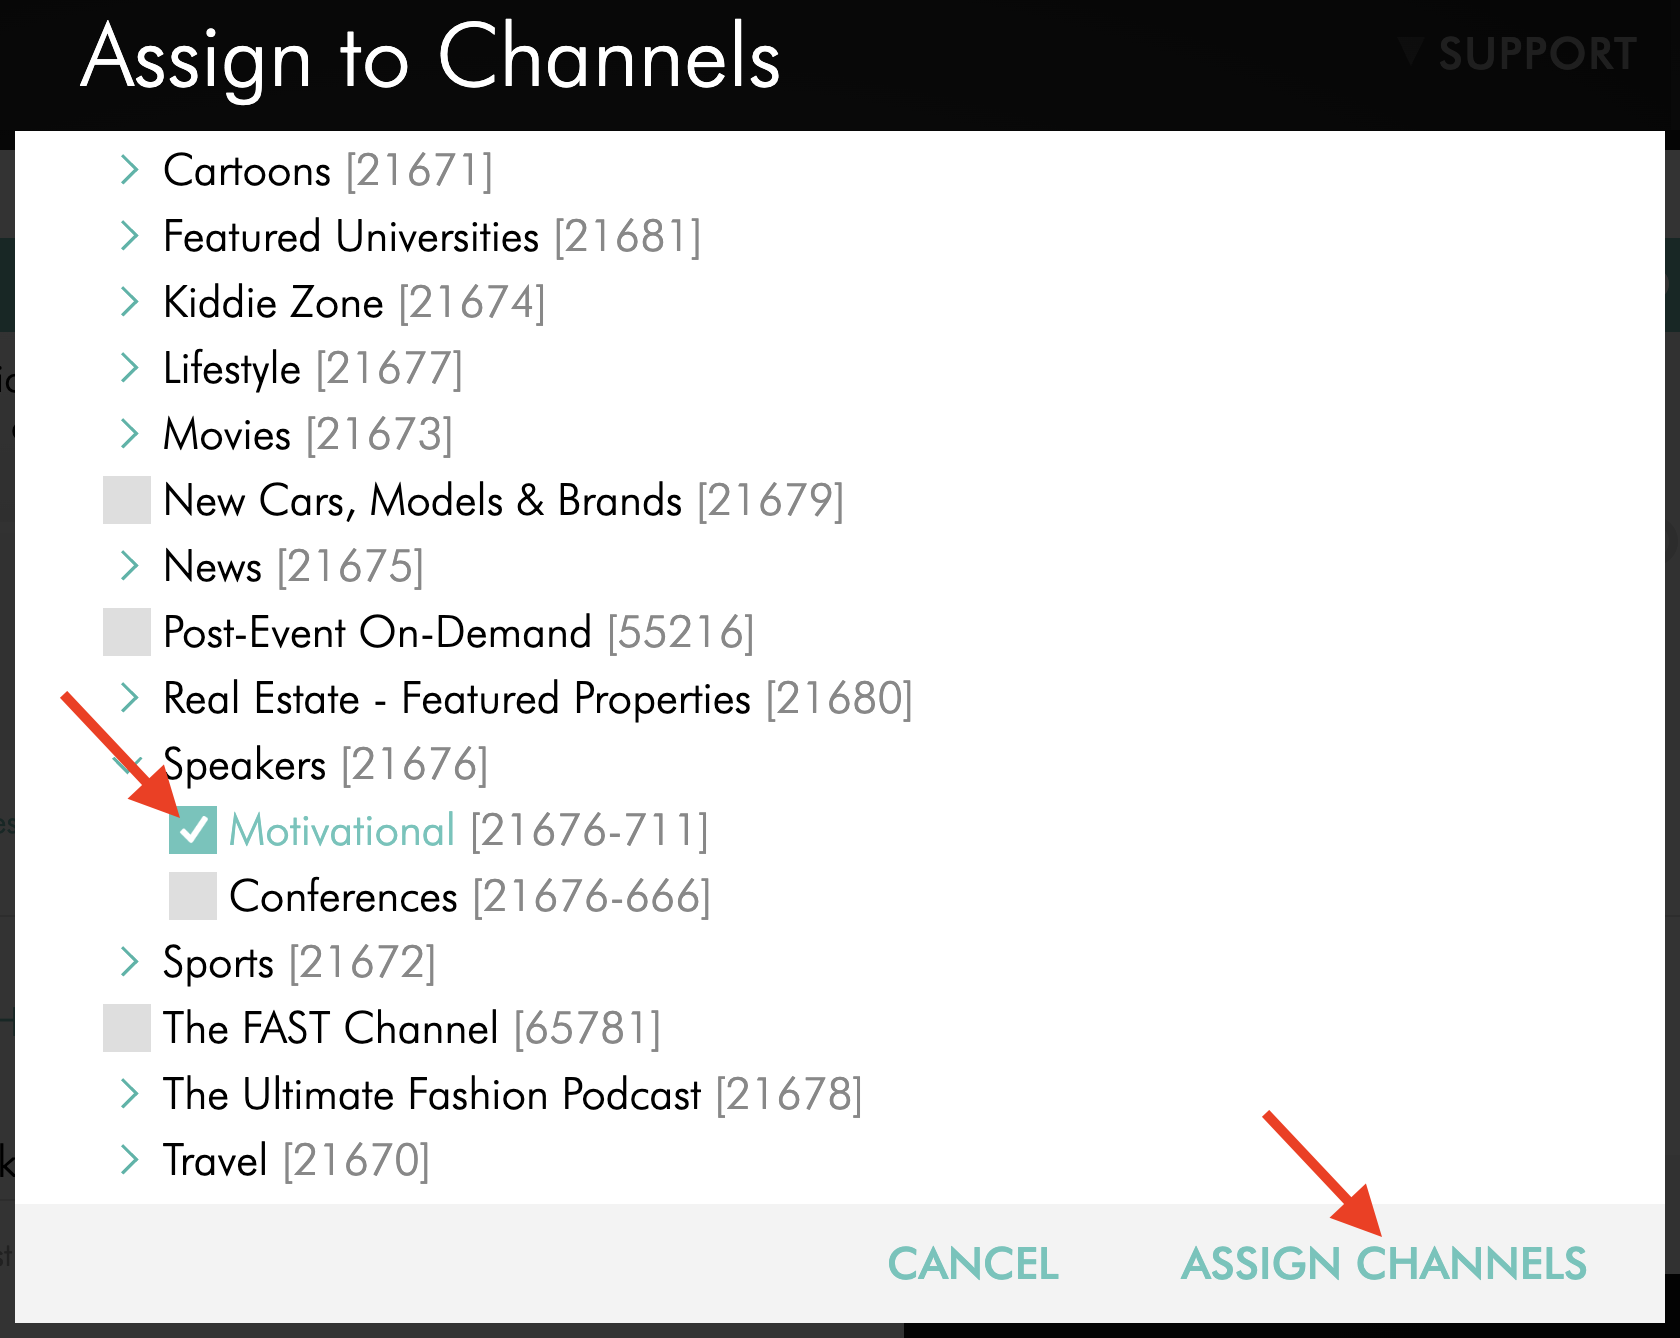
In the Assign to Channels pop-up window, select the checkbox next to the Channel or Sub-Channel you want to use, then click ASSIGN CHANNELS.
Step 7
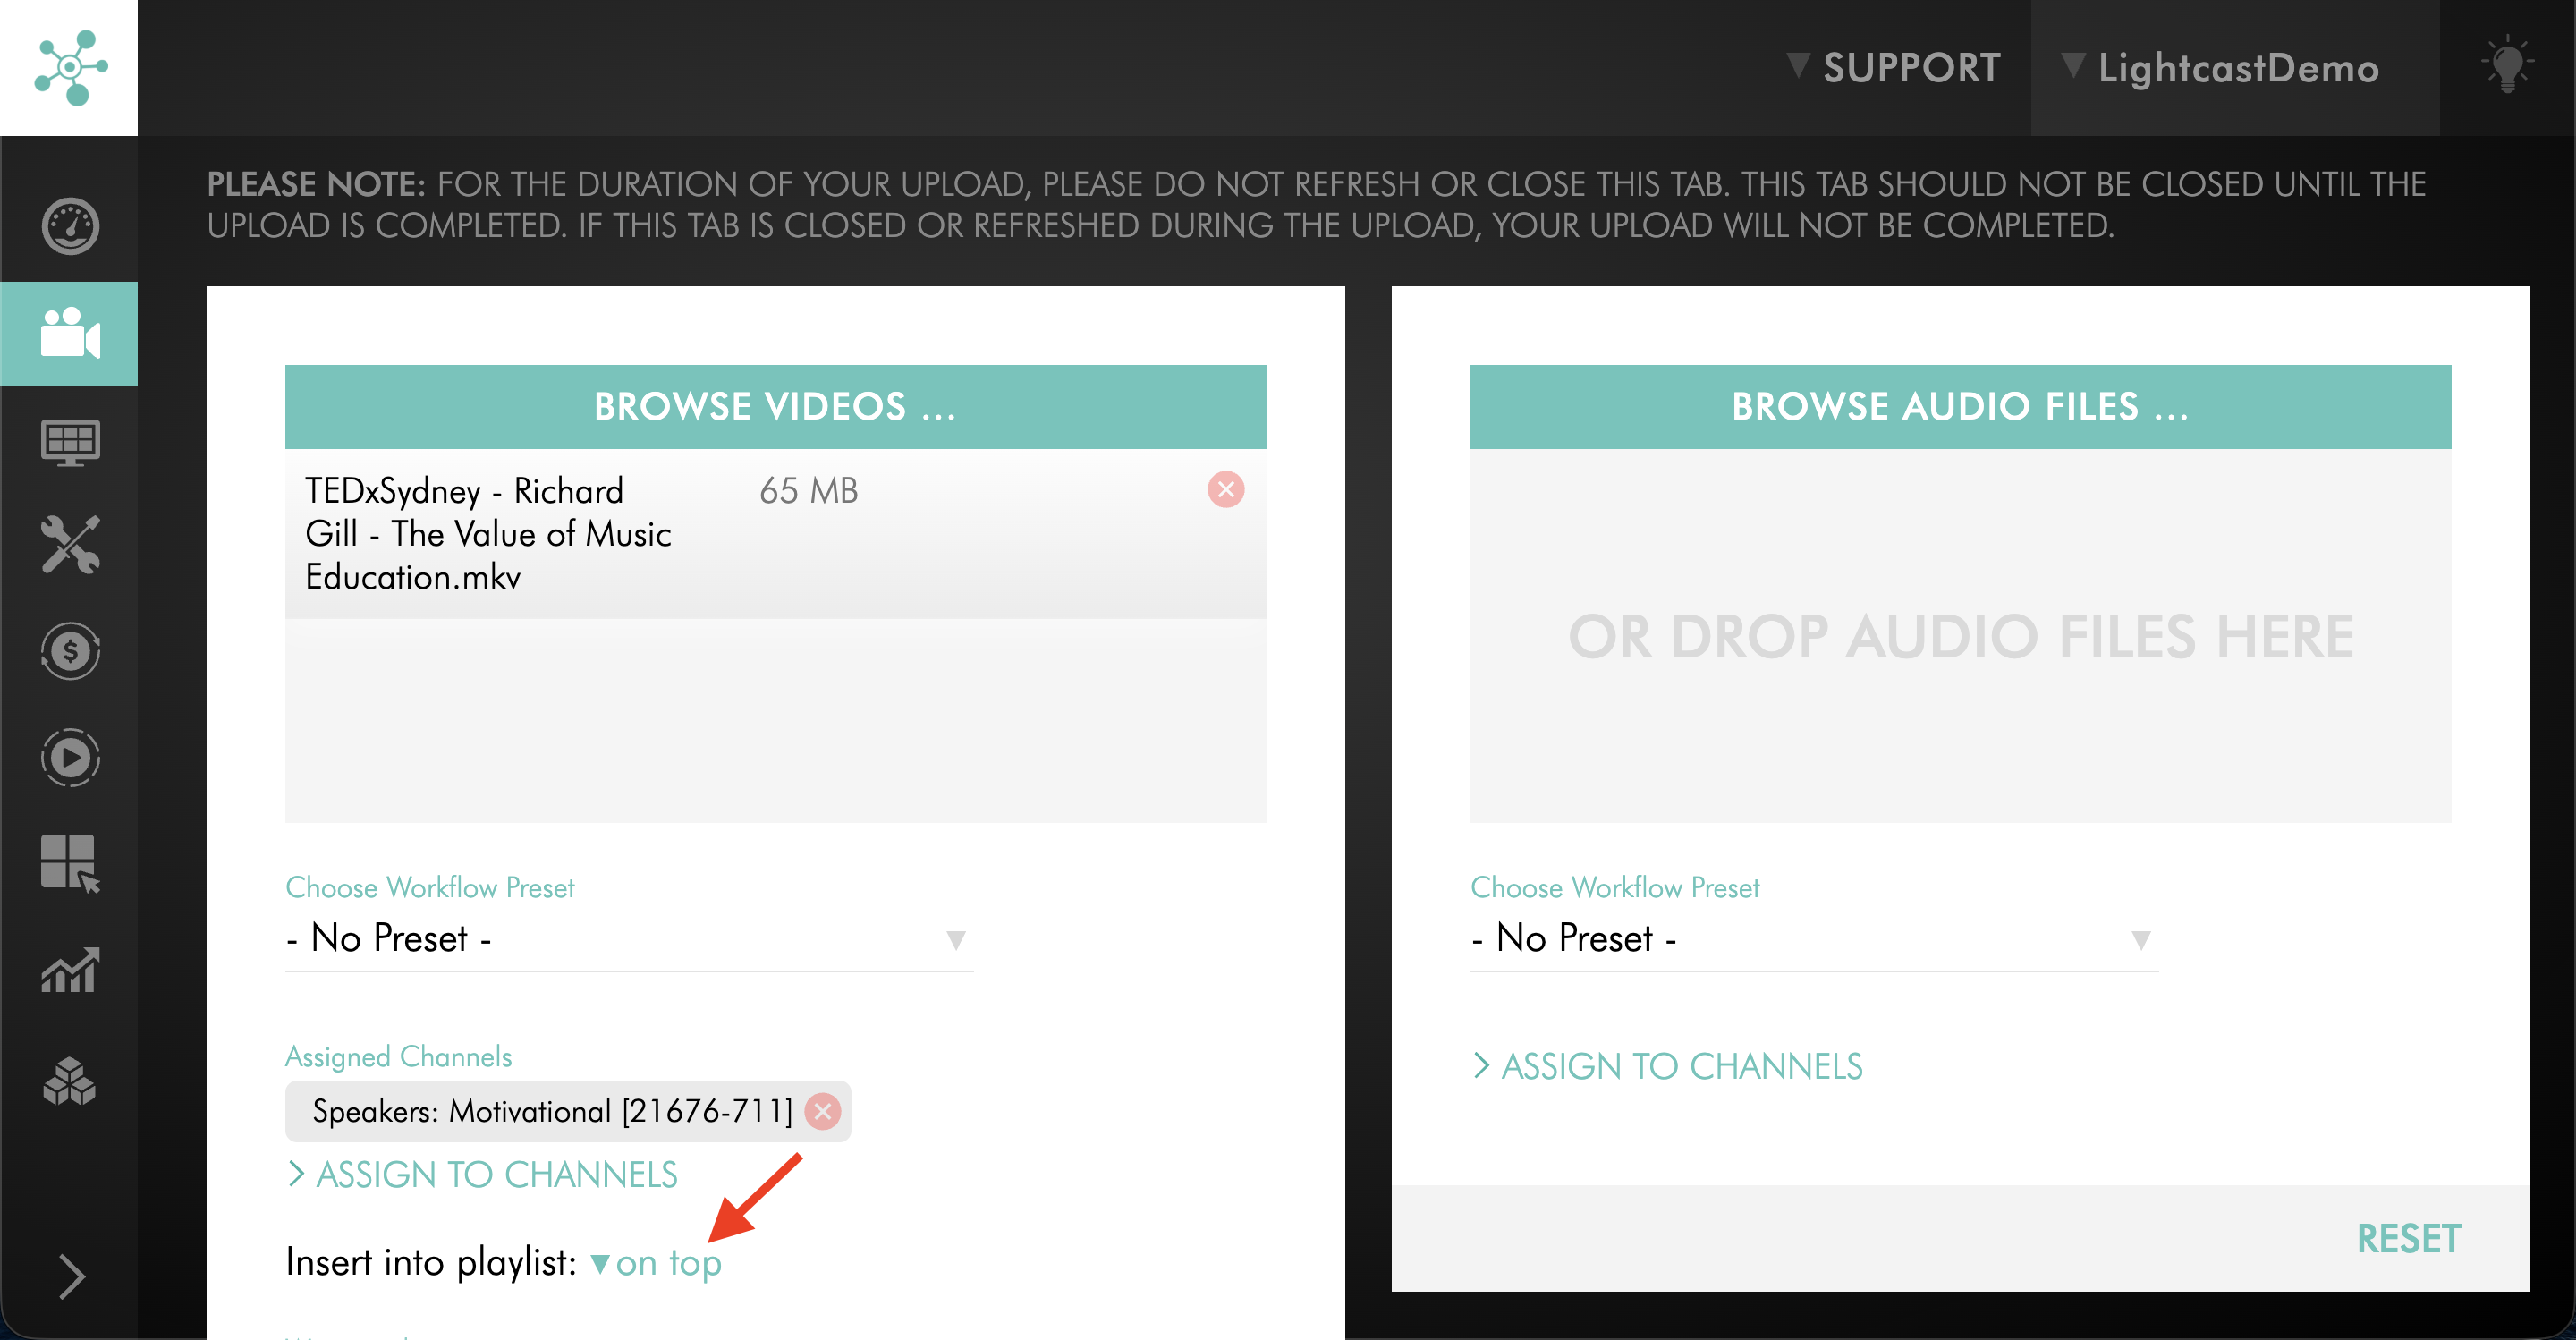
Select the playlist position for the uploaded content:
on top places the content at the beginning of the Channel or Sub-Channel playlist
at the bottom places the content at the end of the Channel or Sub-Channel playlist
Step 8
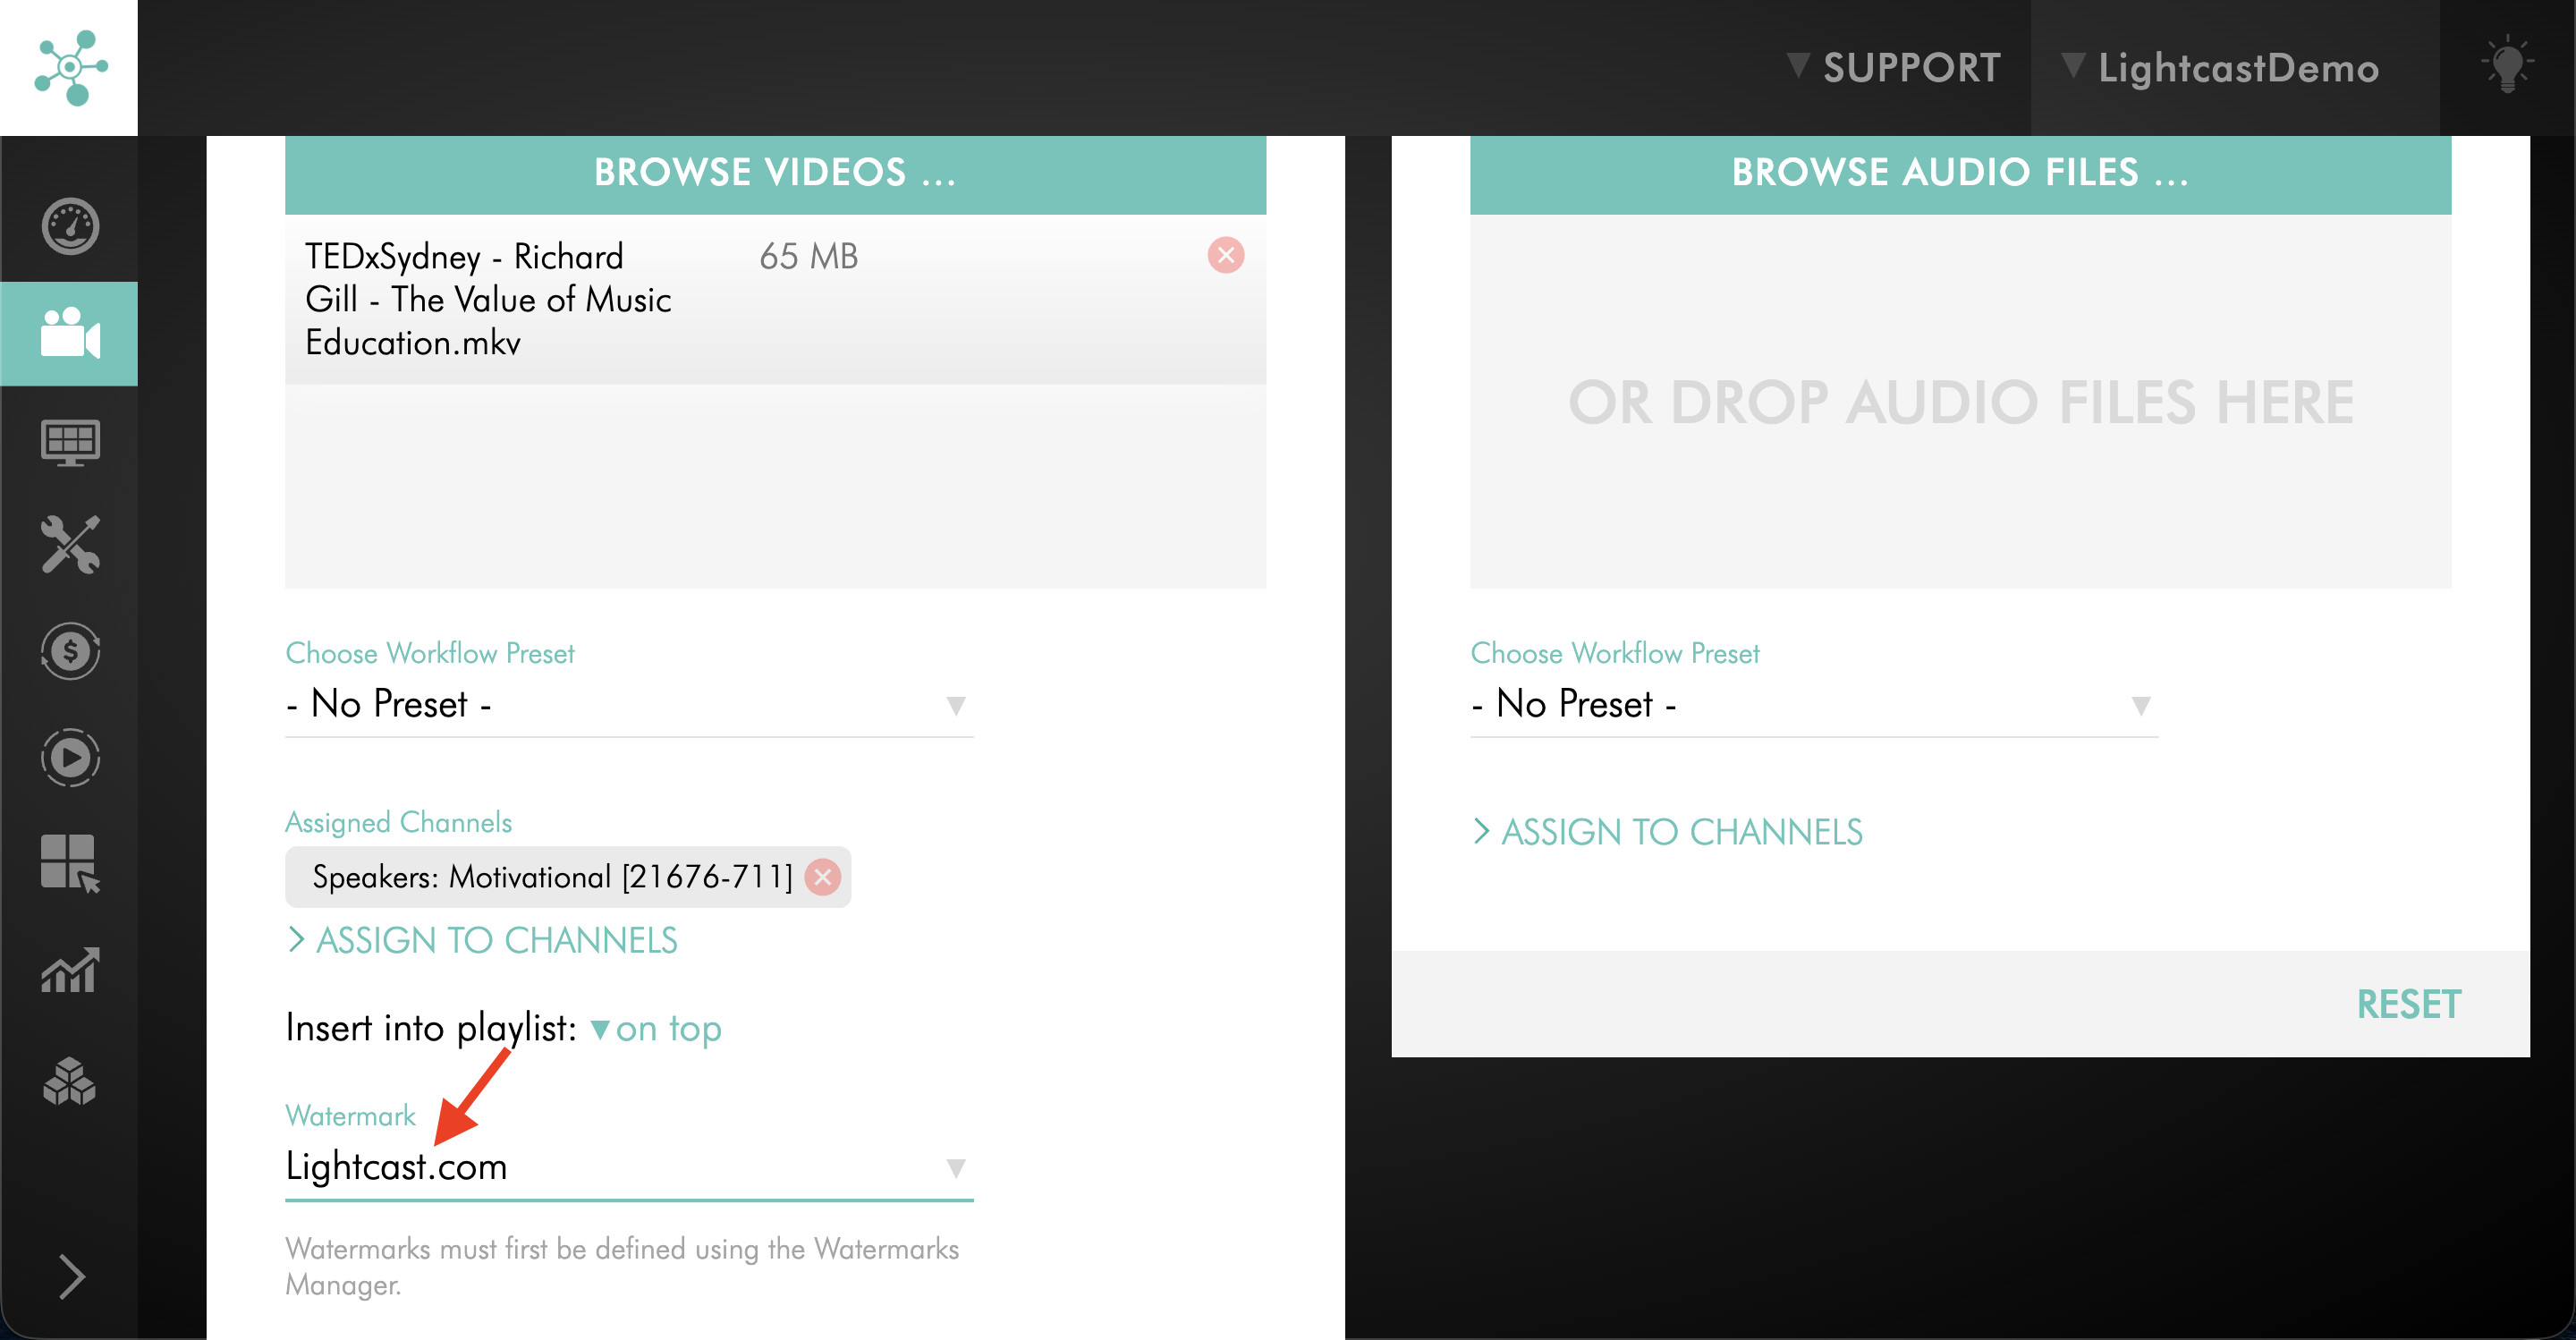
Optional: If you are uploading a video file, select a Watermark to apply it during encoding.
To learn how to create a Watermark, see: How to add a Watermark
Step 9
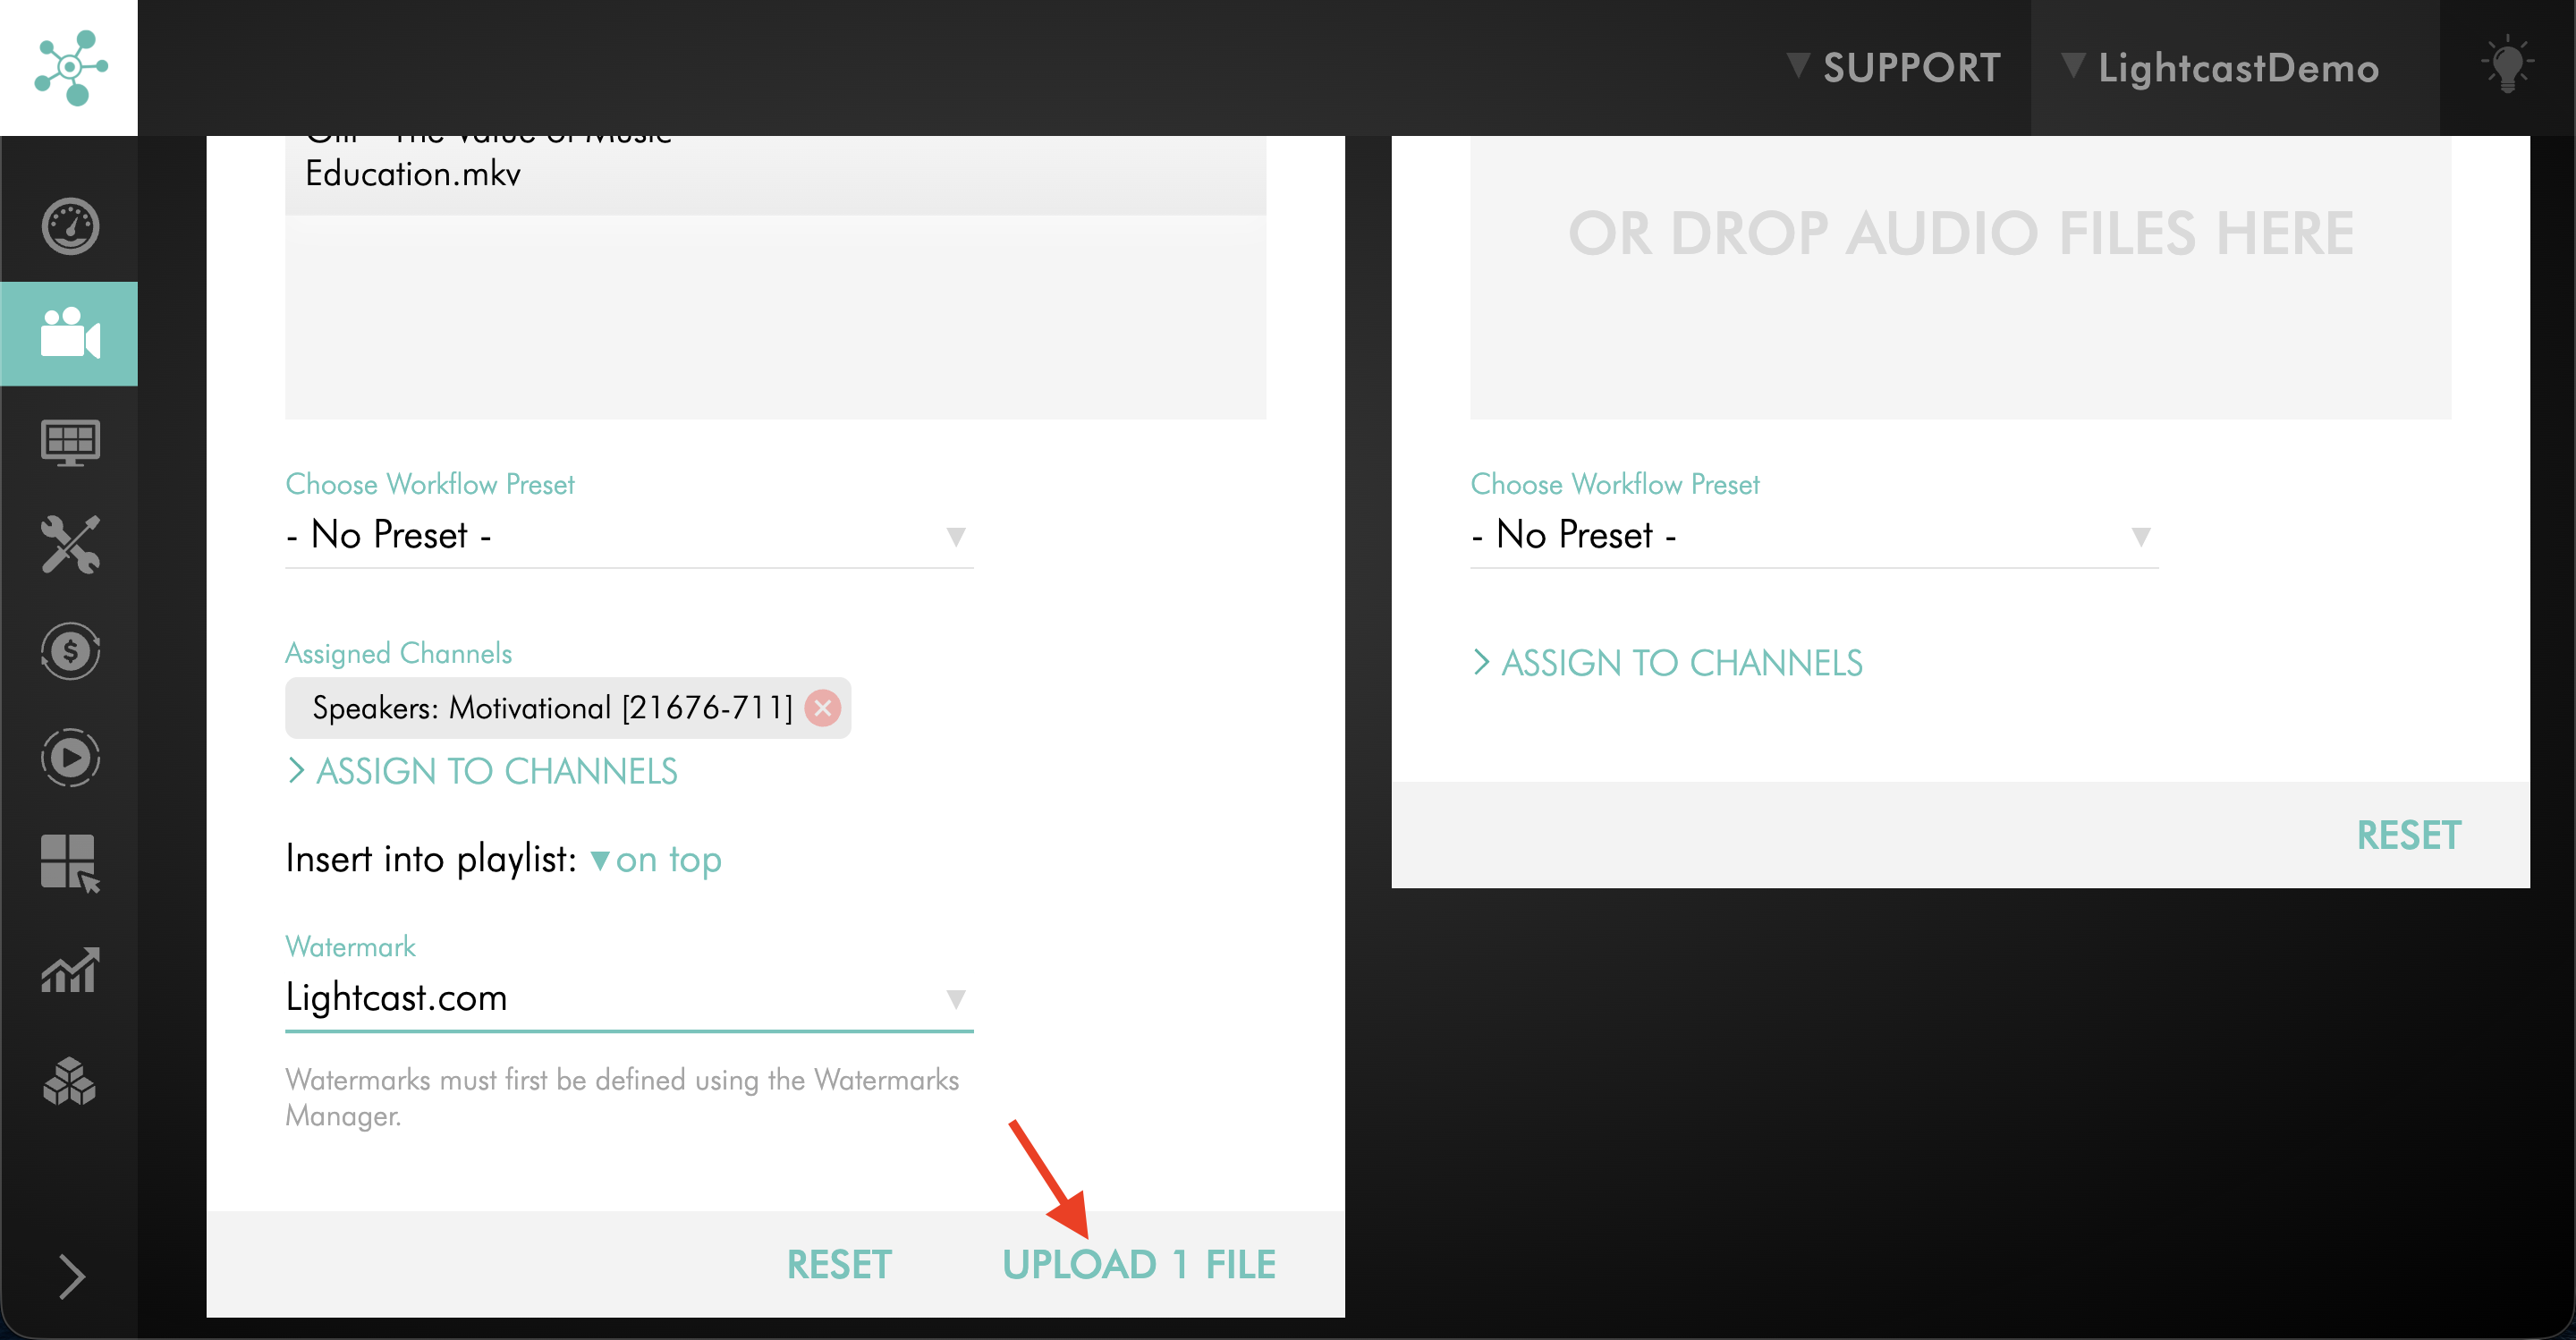
Click UPLOAD to upload the selected files.
Step 10
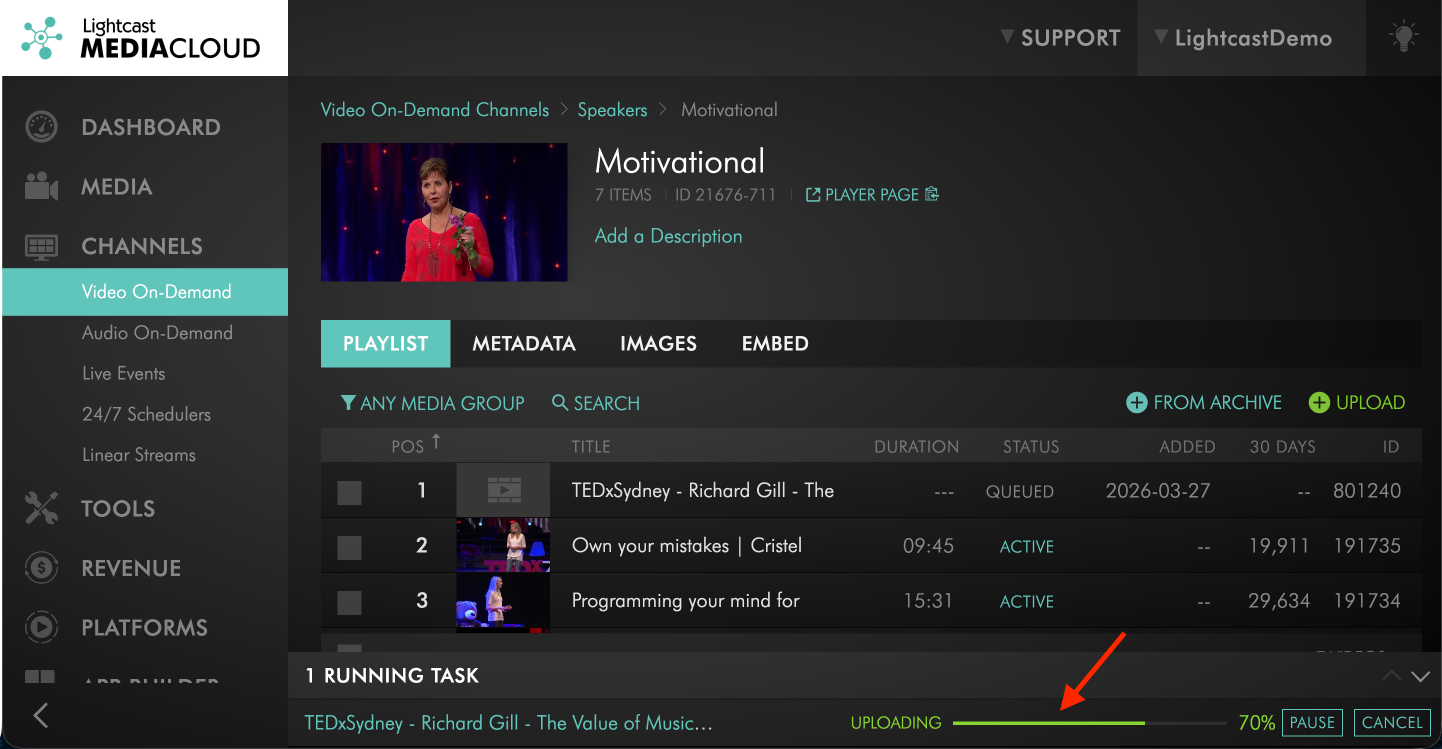
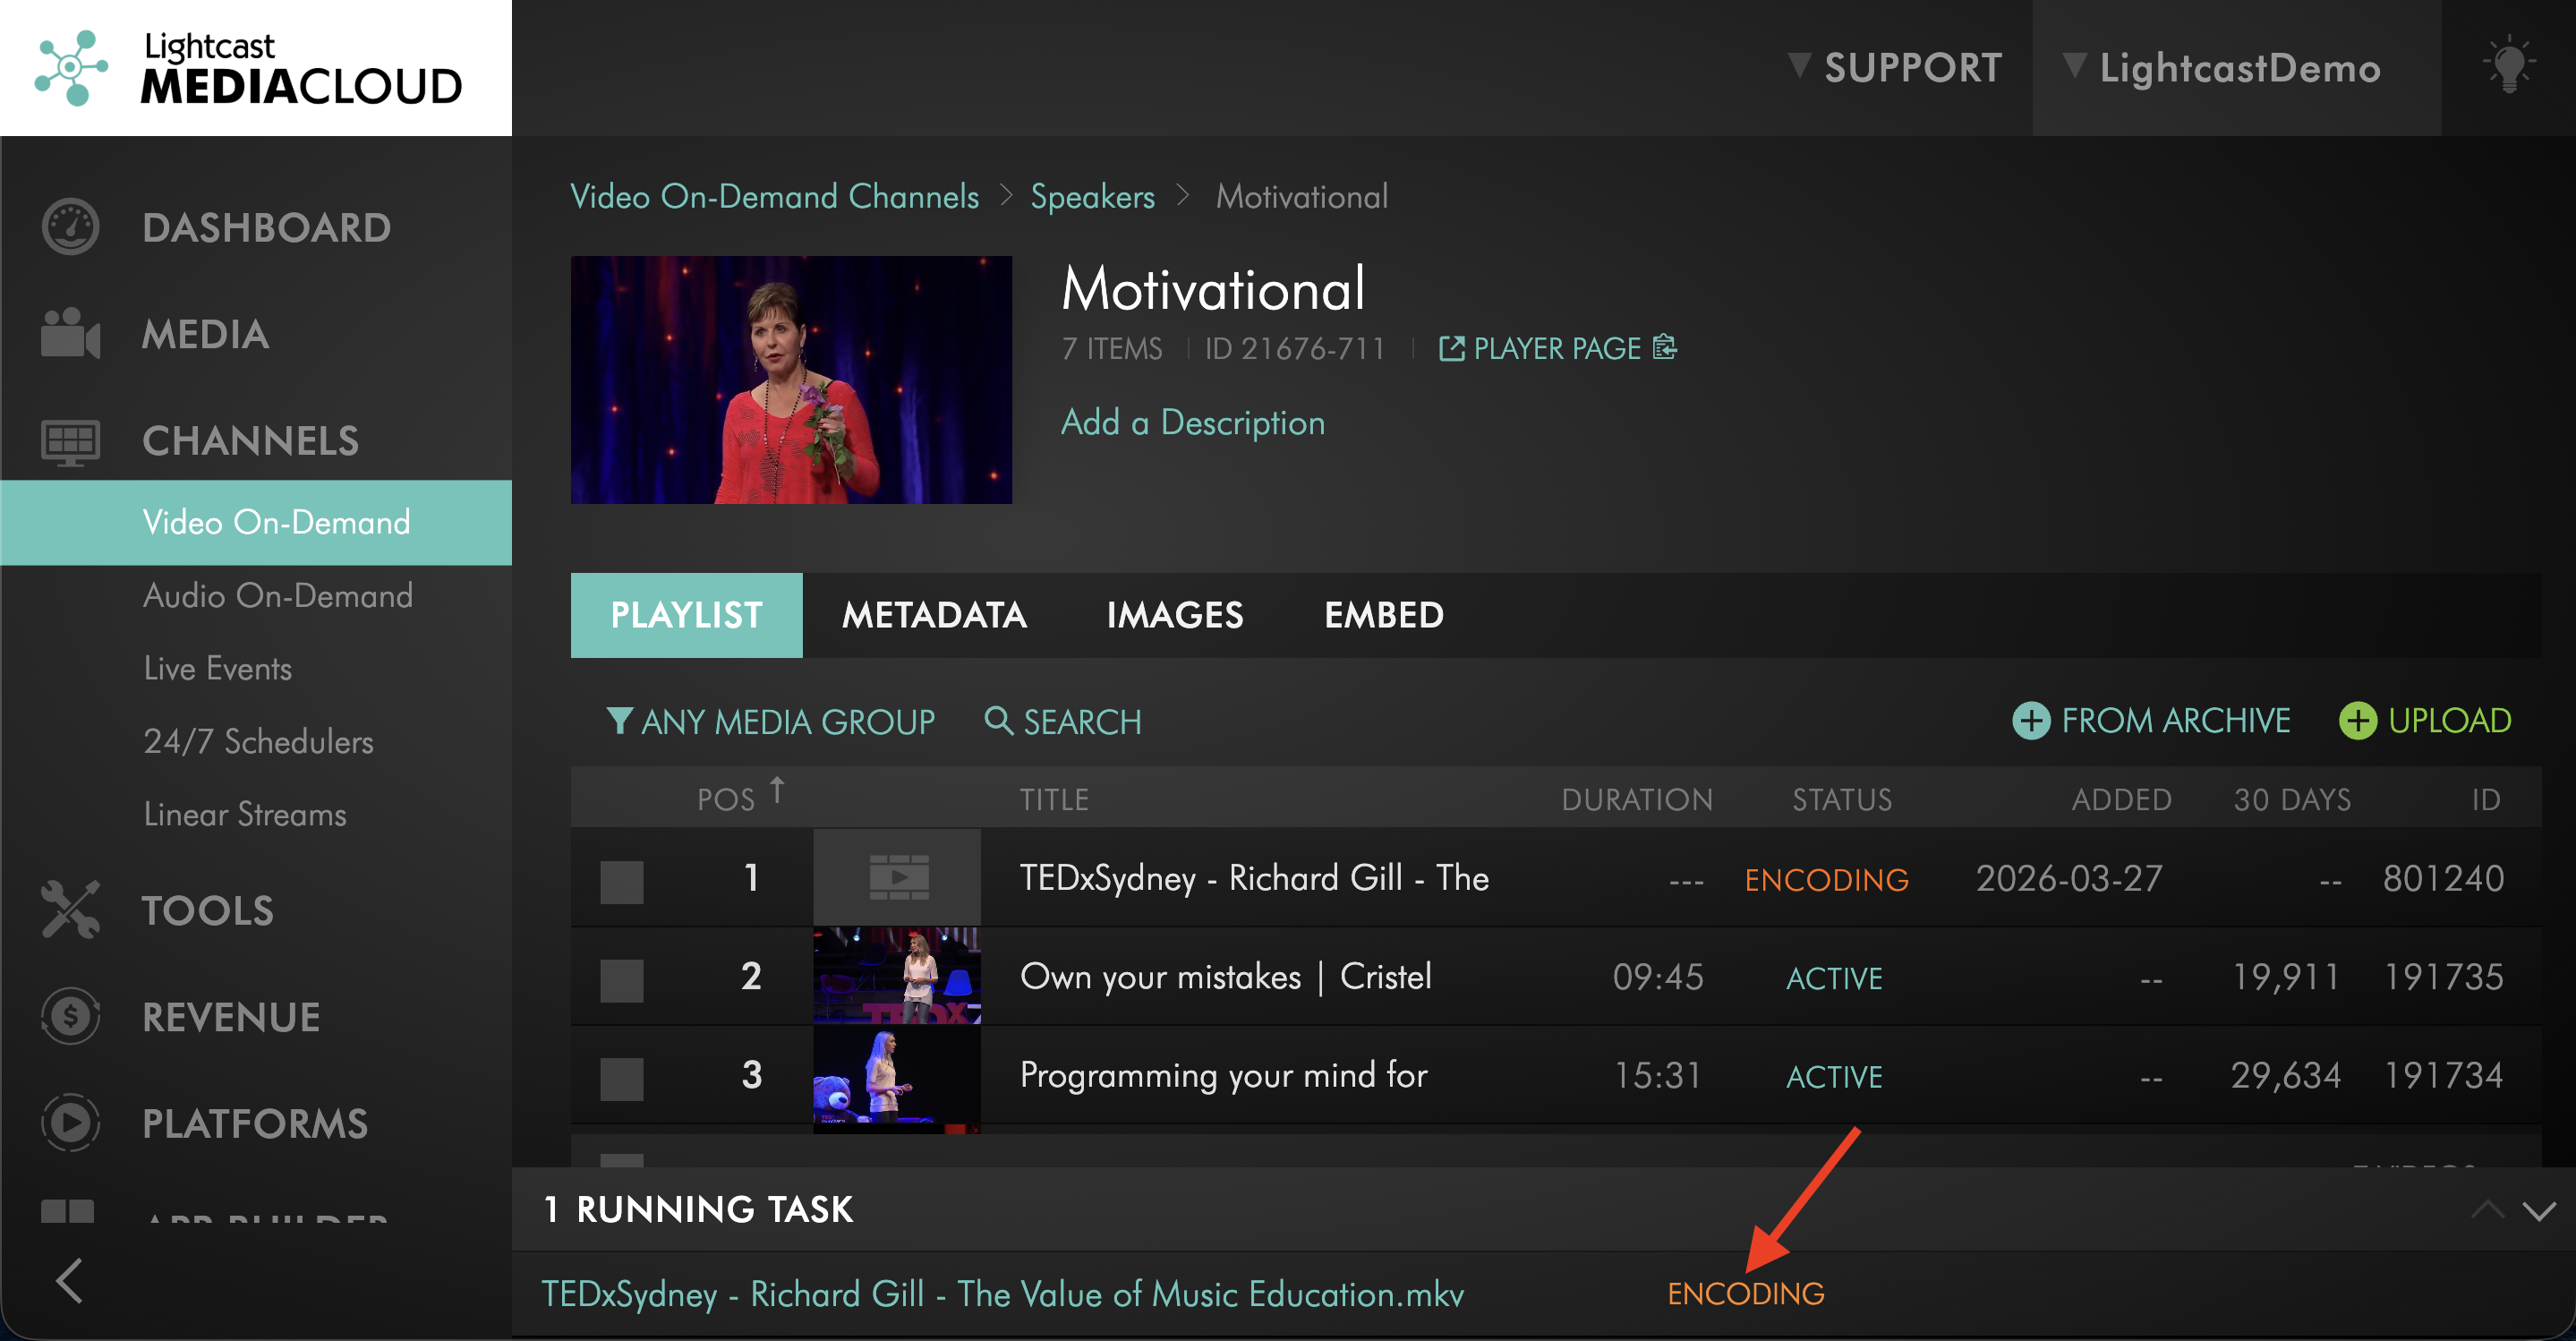
Wait for the upload to finish before leaving or refreshing the page.
Your files should complete the Uploading stage and move into Encoding before you exit the Media Cloud.
FAQs
What is the file size limit for the Web Uploader?
The Web Uploader currently supports files up to 4 GB per file.
How many files can I upload at once?
You can upload up to 50 files at one time using the Web Uploader.
Do I need to install any software?
No. The Web Uploader works directly in your browser.
When should I use a different upload method?
Use a different upload method if your file is larger than 4 GB, if you are uploading a large batch of files, or if your content is already stored somewhere else.
For example:
use the Dropbox Uploader, AWS S3 Uploader, or FTP Uploader if your files are already stored in those locations
use the Direct URL Uploader if your file is already hosted online and you have a direct file URL
use the MRSS Import Tool if you want to automatically import content from an existing media feed
What happens if I leave the page before the upload finishes?
If you leave or refresh the page before the upload has finished, the upload may fail or become interrupted. Wait until the upload has completed and moved into Encoding before exiting the page.
Can my upload be affected by my Storage or Transcoding balance?
Yes. Your ability to complete uploads depends on your account’s available Storage and Transcoding. If your remaining balance is too low, uploads may be limited and you may see an upload warning. Because Storage and Transcoding usage is estimated, balances may also go into the negative in some cases.
Troubleshooting upload issues
Troubleshooting encoding issues