
How to configure OBS for streaming to Lightcast
Overview
This article explains how to configure OBS Studio to stream to a LIVE Channel in the Media Cloud using RTMP or SRT.
It covers connecting OBS to your LIVE Channel, configuring the recommended encoder settings, adding video and audio sources, and starting your stream.
Before you begin
Use this article when you want to stream to a Live Events Channel or Linear Stream Channel in the Media Cloud using OBS Studio.
In this article, LIVE Channel refers to either a Live Events Channel or Linear Stream Channel.
Before you begin, make sure you have:
OBS Studio installed on your computer
An active LIVE Channel in the Media Cloud
Your LIVE Channel stream credentials
A connected camera, capture device, or media source
A stable upload connection
For step-by-step instructions on activating a LIVE Channel, see How to set up and ingest a Live Event stream or How to set up and ingest a 24/7 Linear Stream.
For instructions on finding your Stream Key, CDN Access Point, or SRT Streaming URL, see How to find your LIVE Channel stream credentials.
For general encoder setting recommendations, see Recommended encoder settings for live streaming.
How it works
OBS Studio is a software encoder that captures video and audio from your computer and sends the stream to a LIVE Channel.
OBS can connect to your LIVE Channel in three ways:
Lightcast.com service option — uses RTMP and may be available as a built-in service in OBS.
Manual RTMP Setup — uses the LIVE Channel’s CDN Access Point and Stream Key.
Manual SRT Setup — uses the LIVE Channel’s SRT Streaming URL.
If you want to stream using SRT, use Manual SRT Setup. The Lightcast.com service option uses RTMP.
When OBS sends the stream to the Media Cloud, the LIVE Channel receives the stream and delivers it to your connected platforms, apps, and embedded players.
RTMP is widely supported and works well for most standard streaming workflows. SRT can provide a more resilient connection between your encoder and Lightcast, especially when streaming over networks with packet loss, variable bandwidth, or longer geographic distances.
Using the recommended OBS settings helps provide reliable playback across supported platforms and devices. Incorrect or incompatible encoder settings can result in buffering, playback errors, poor video quality, or a stream that does not play.
Instructions
Prepare OBS and your stream credentials
Step 1
Download and install OBS Studio on your computer.
After installation, open OBS Studio and confirm that your camera, audio device, capture card, or media source is connected and working.
Step 2
Choose how you want to connect OBS to Lightcast.
Use the Lightcast.com service option if it is available in OBS and you want to send an RTMP stream by selecting a Lightcast.com server.
Use Manual RTMP Setup if you want to enter the LIVE Channel’s CDN Access Point and Stream Key manually.
Use Manual SRT Setup if you want to stream using the LIVE Channel’s SRT Streaming URL.
To learn where to find these credentials, see How to find your LIVE Channel stream credentials.
Important: Keep your Stream Key and SRT Streaming URL private. Anyone with access to your streaming credentials may be able to send a stream to your LIVE Channel.
Configure the Lightcast.com service option
Note: The Lightcast.com service option in OBS uses RTMP streaming. To stream with SRT, use Manual SRT Setup instead.
Step 1
Open OBS Studio.
Step 2
Click Settings.
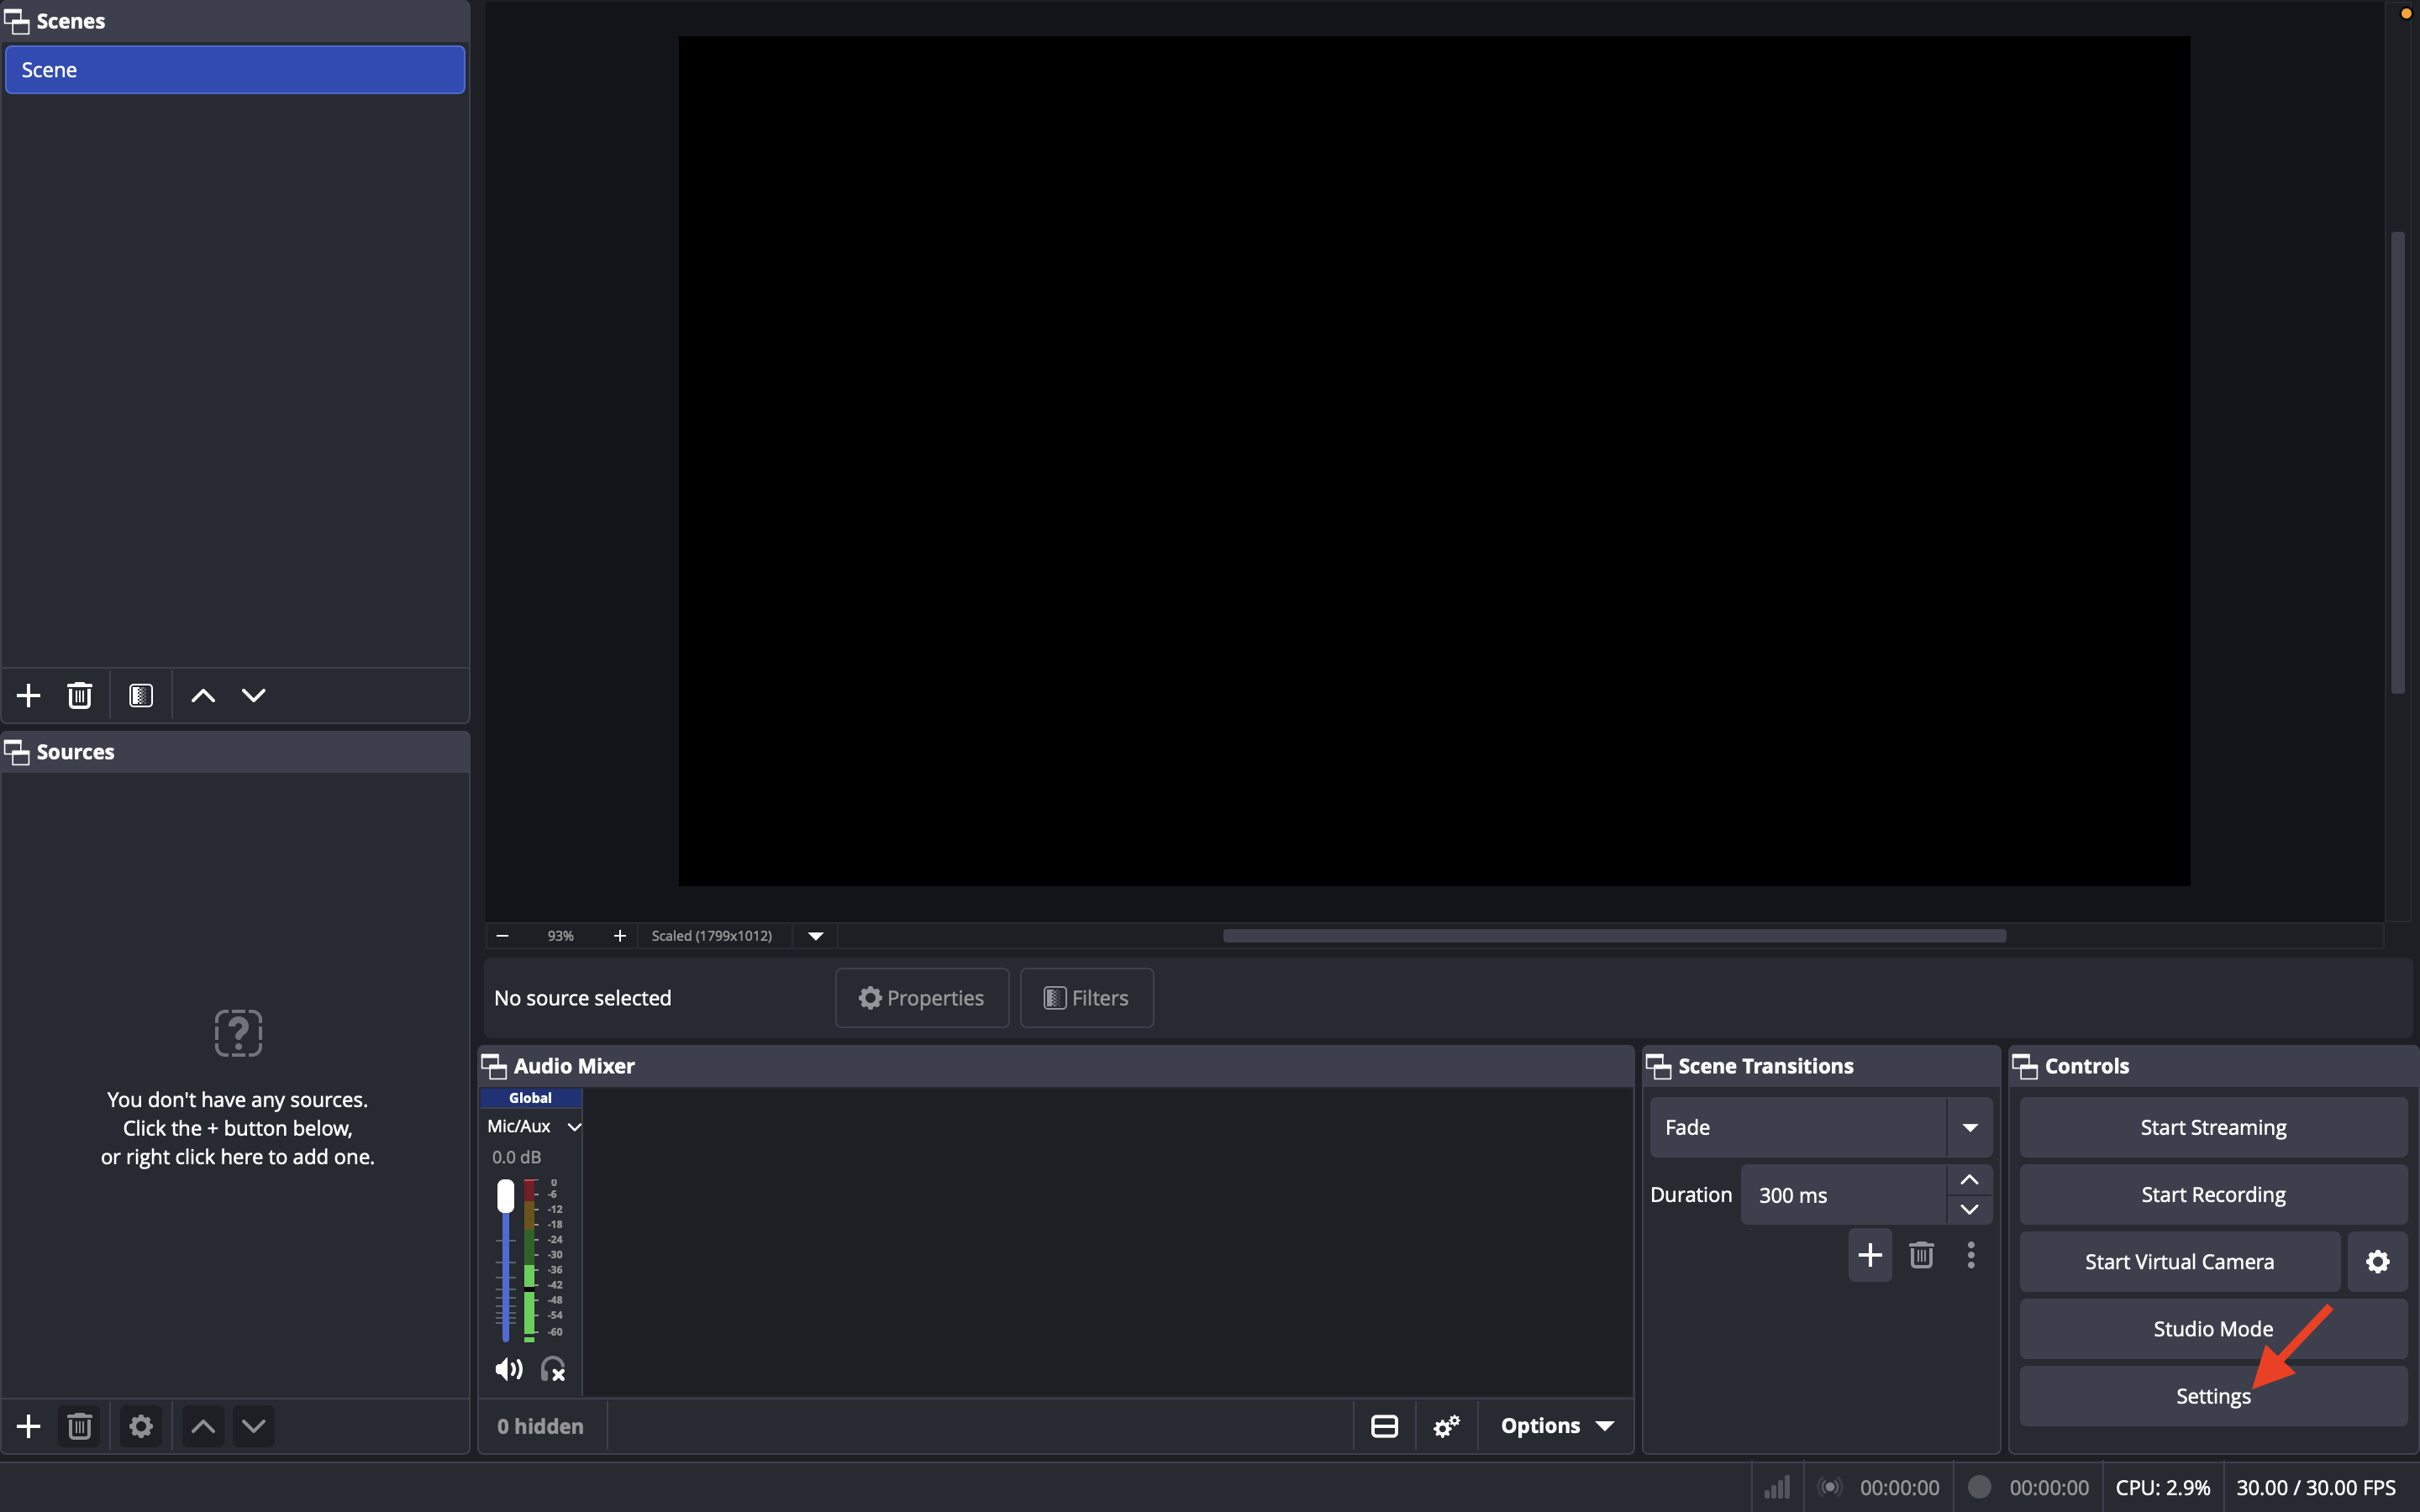
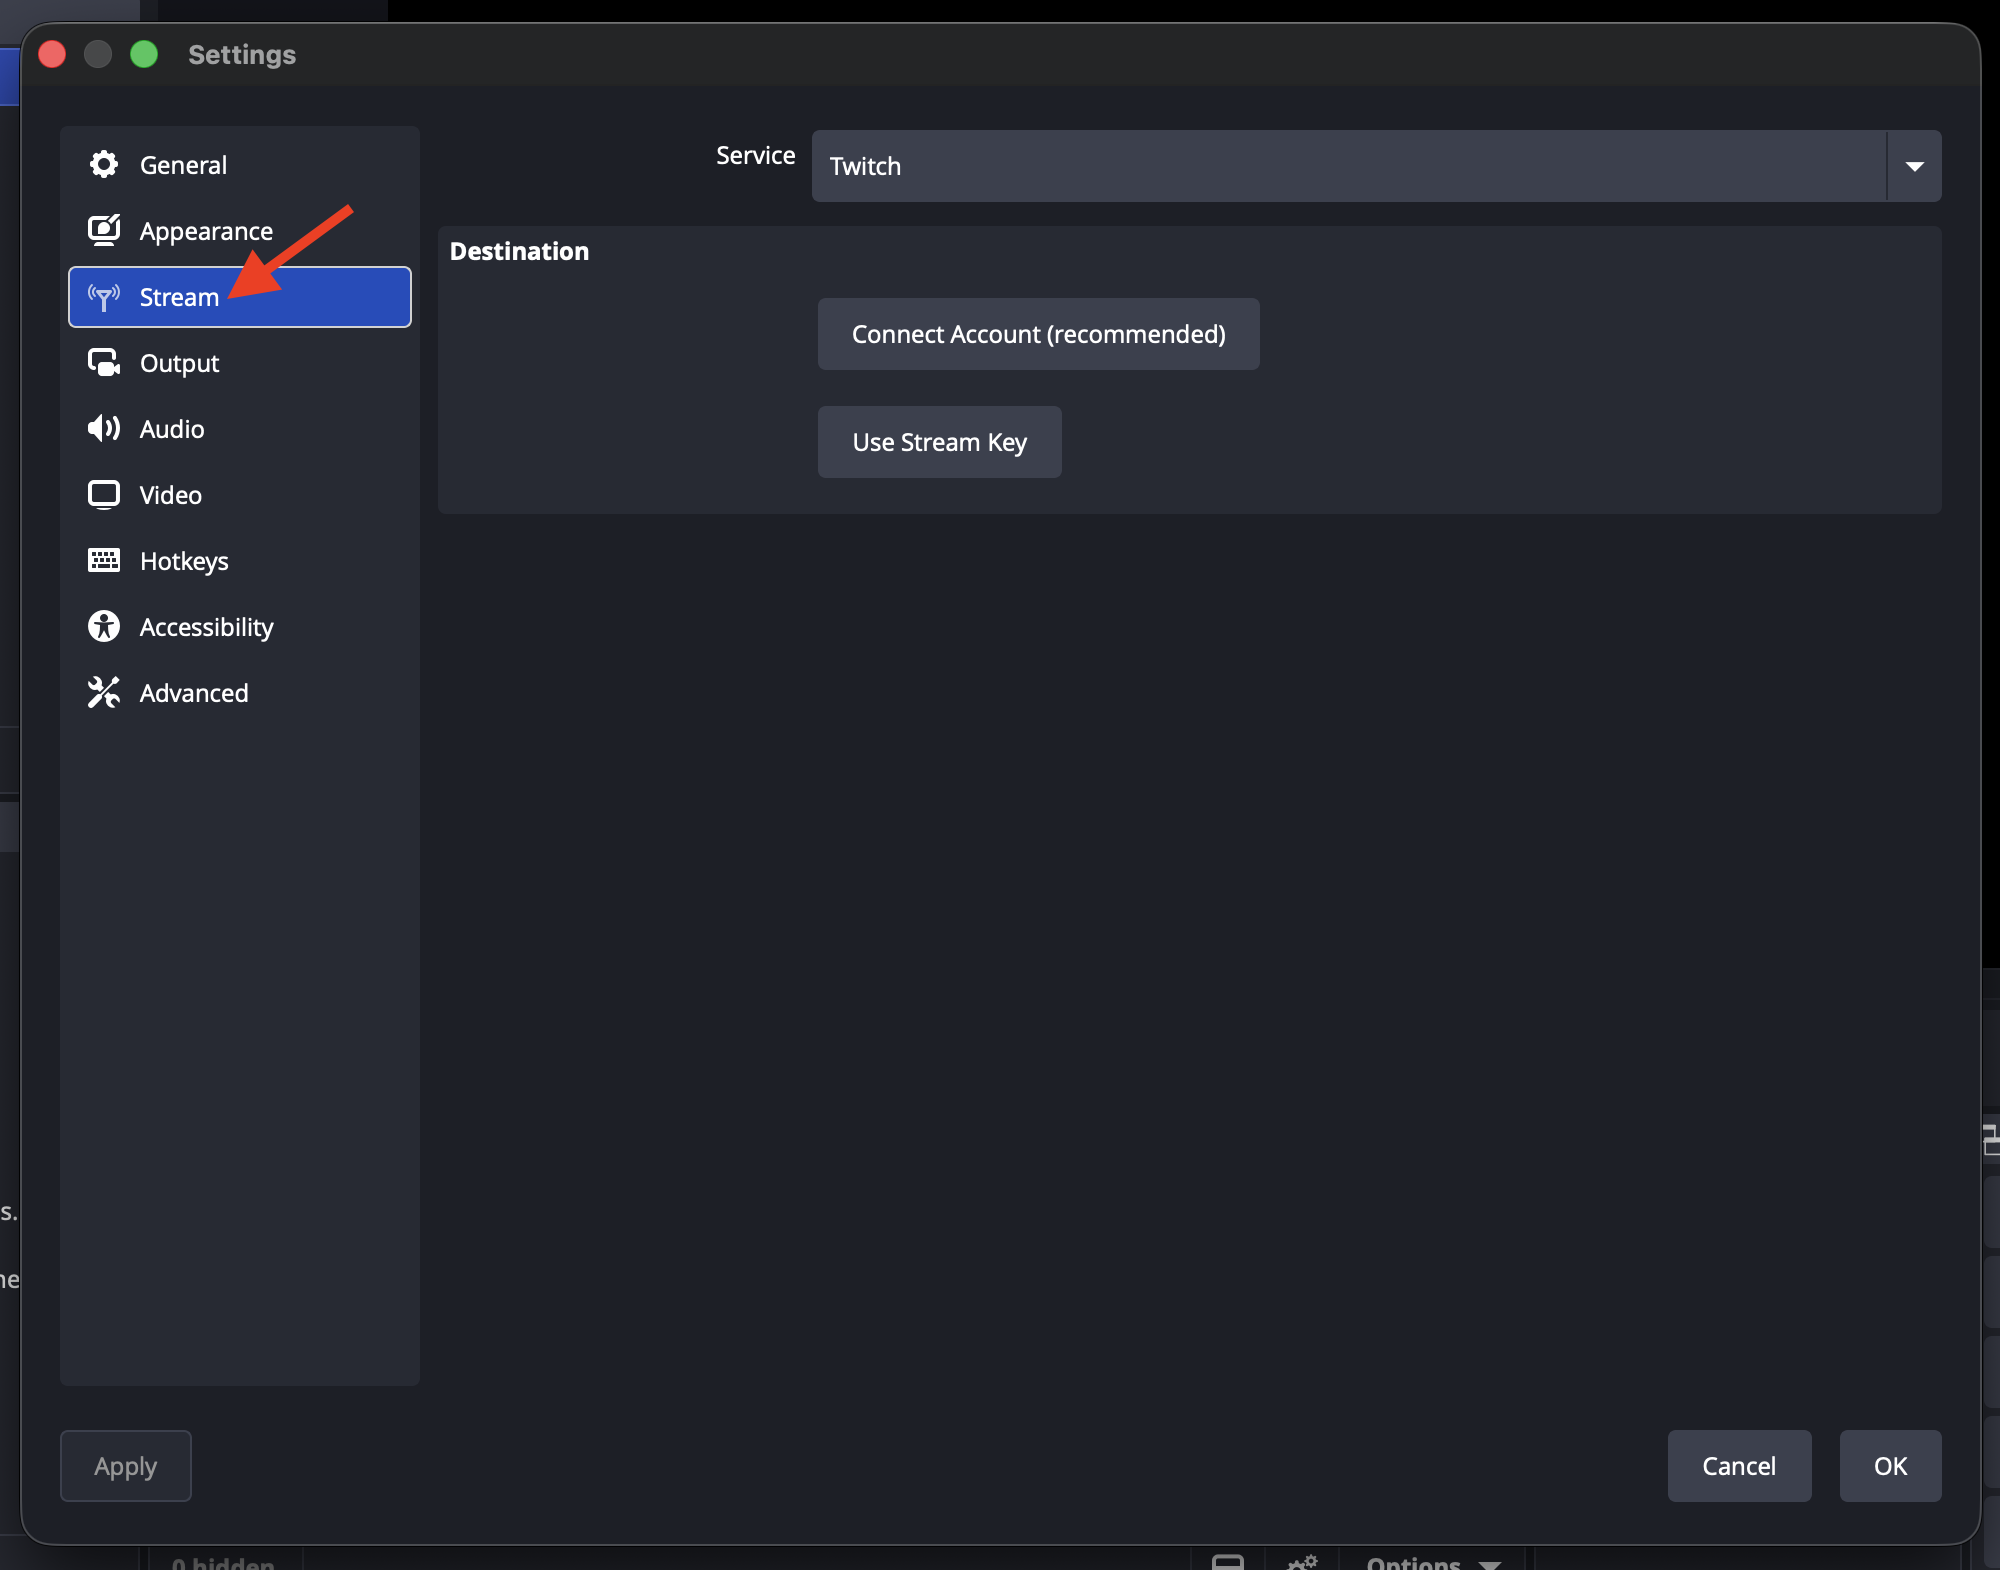
Step 3
Select Stream from the left menu.
Step 4
Open the Service dropdown.
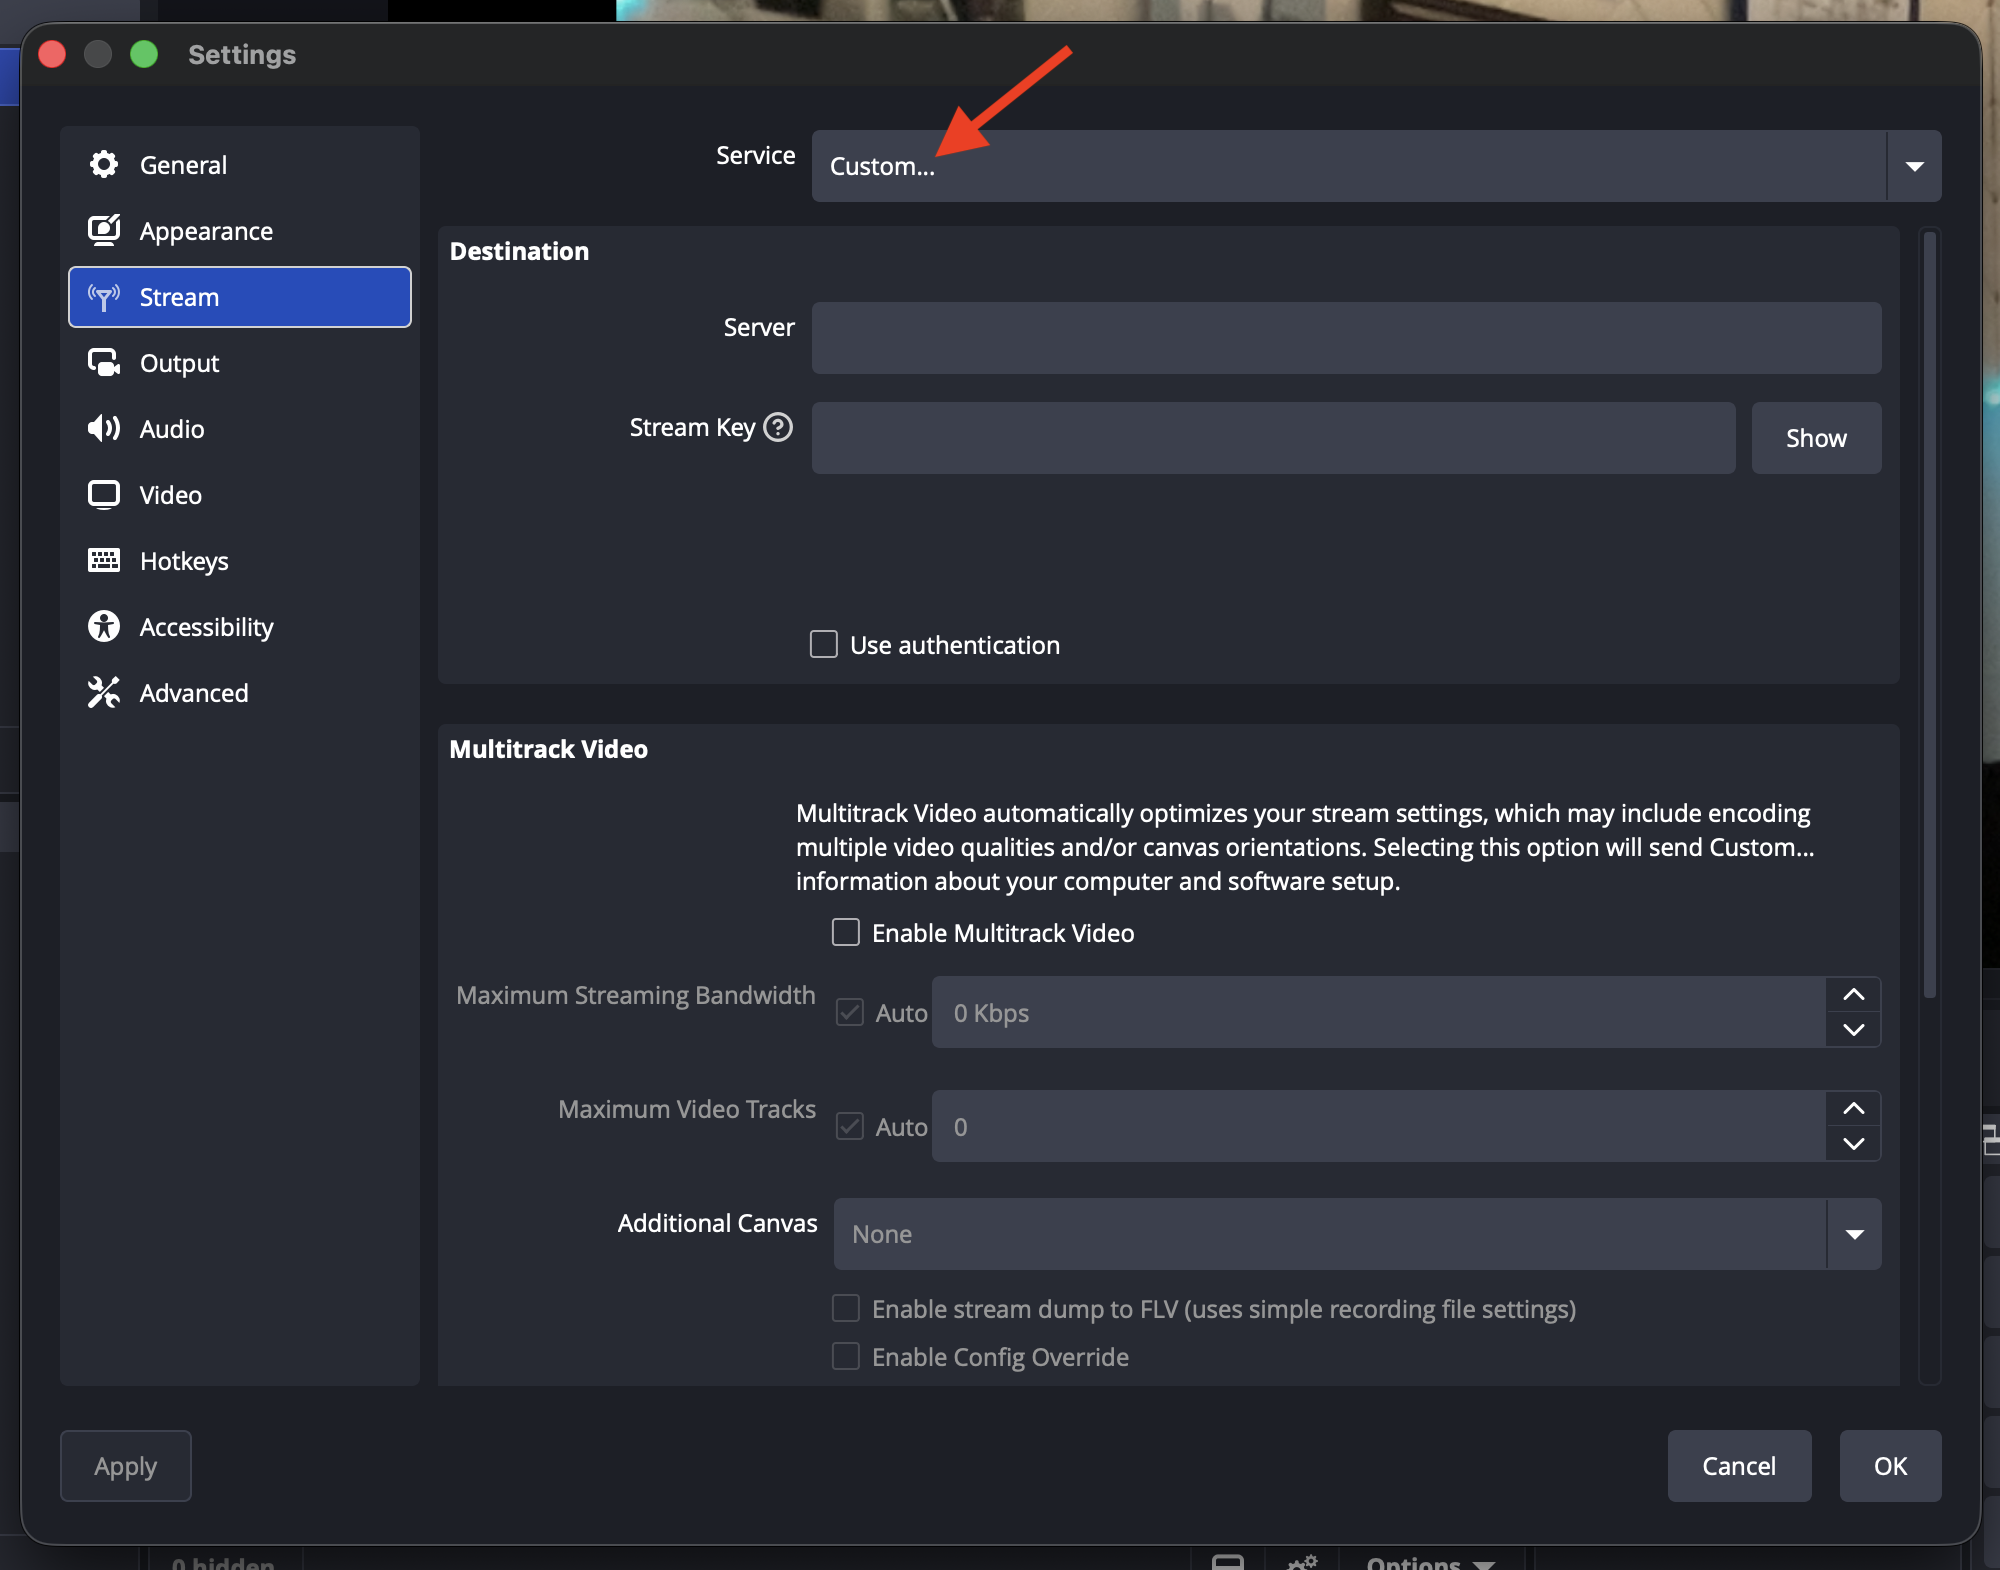
Step 5
If Lightcast.com appears in the dropdown list, select Lightcast.com.
If Lightcast.com does not appear in the dropdown list:
Select Show All…
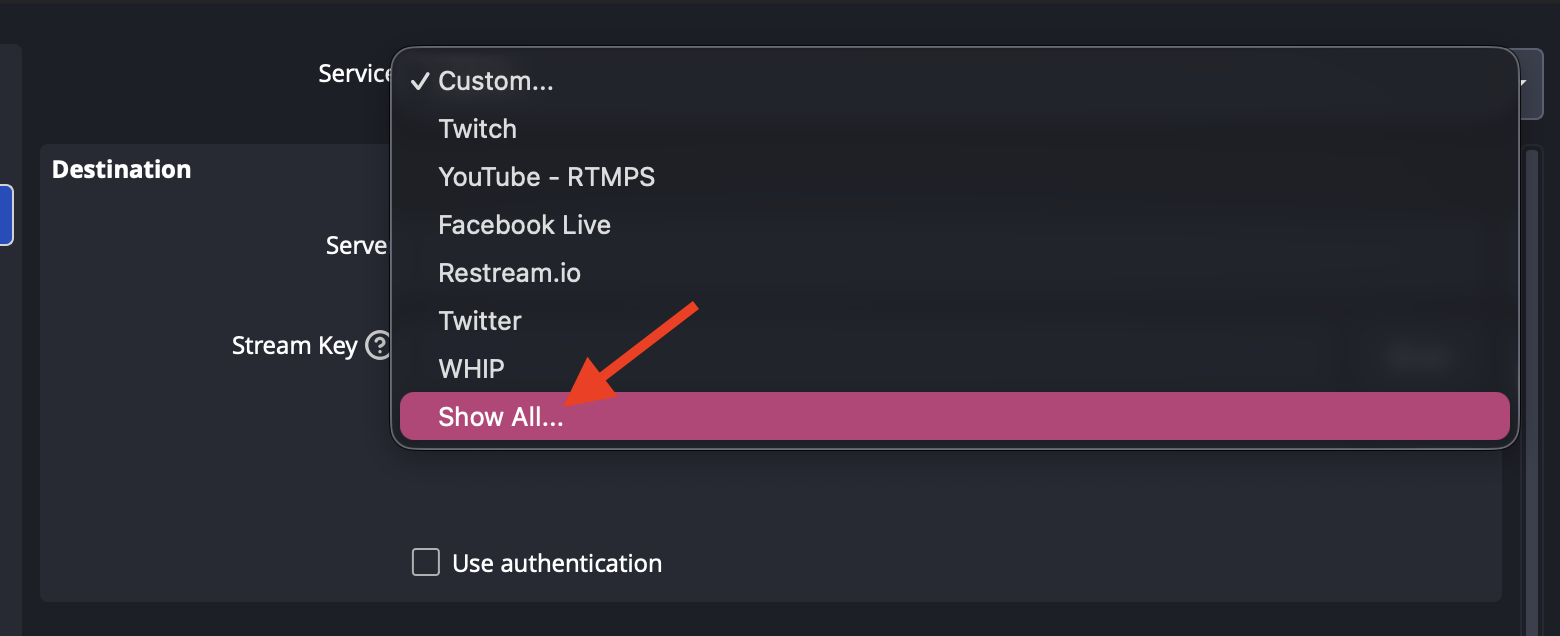
Locate and select Lightcast.com
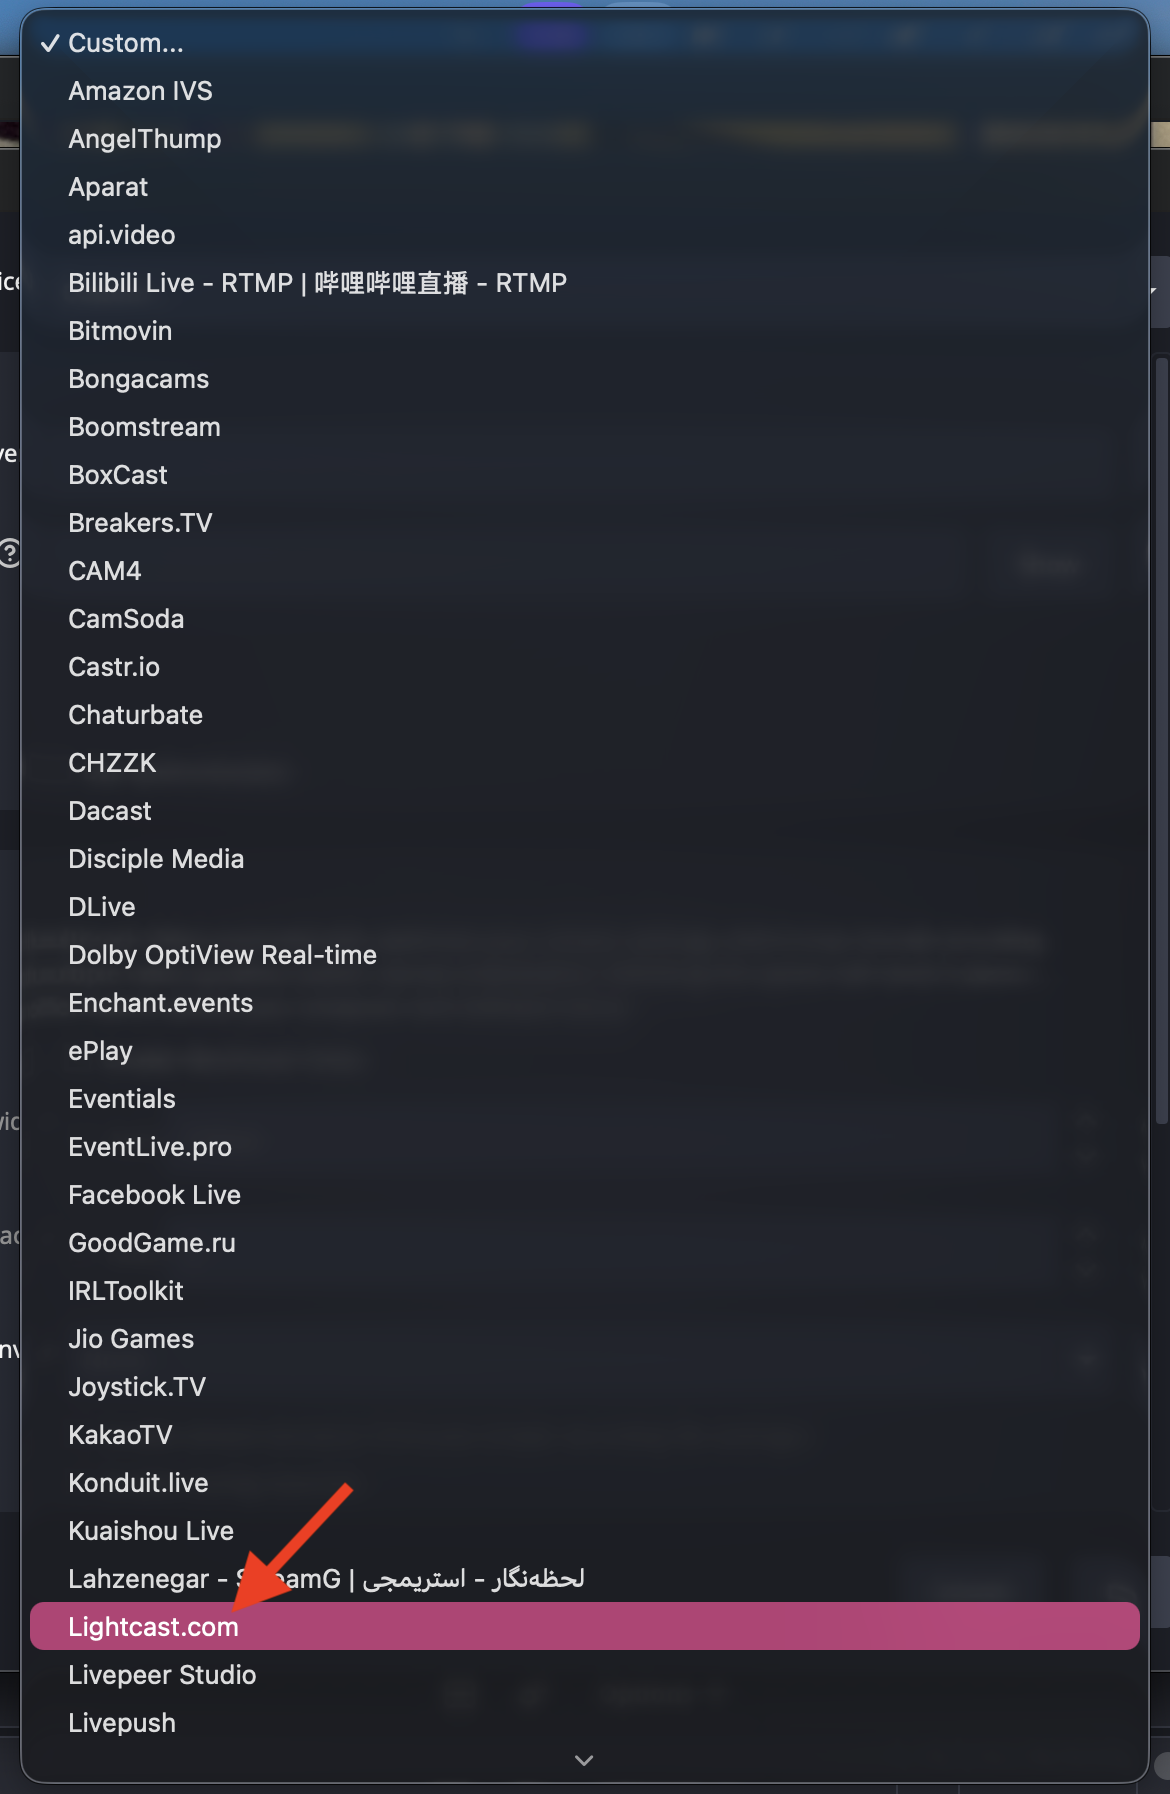
Step 6
Select the server closest to your location.
Selecting a nearby server can help improve stream reliability.
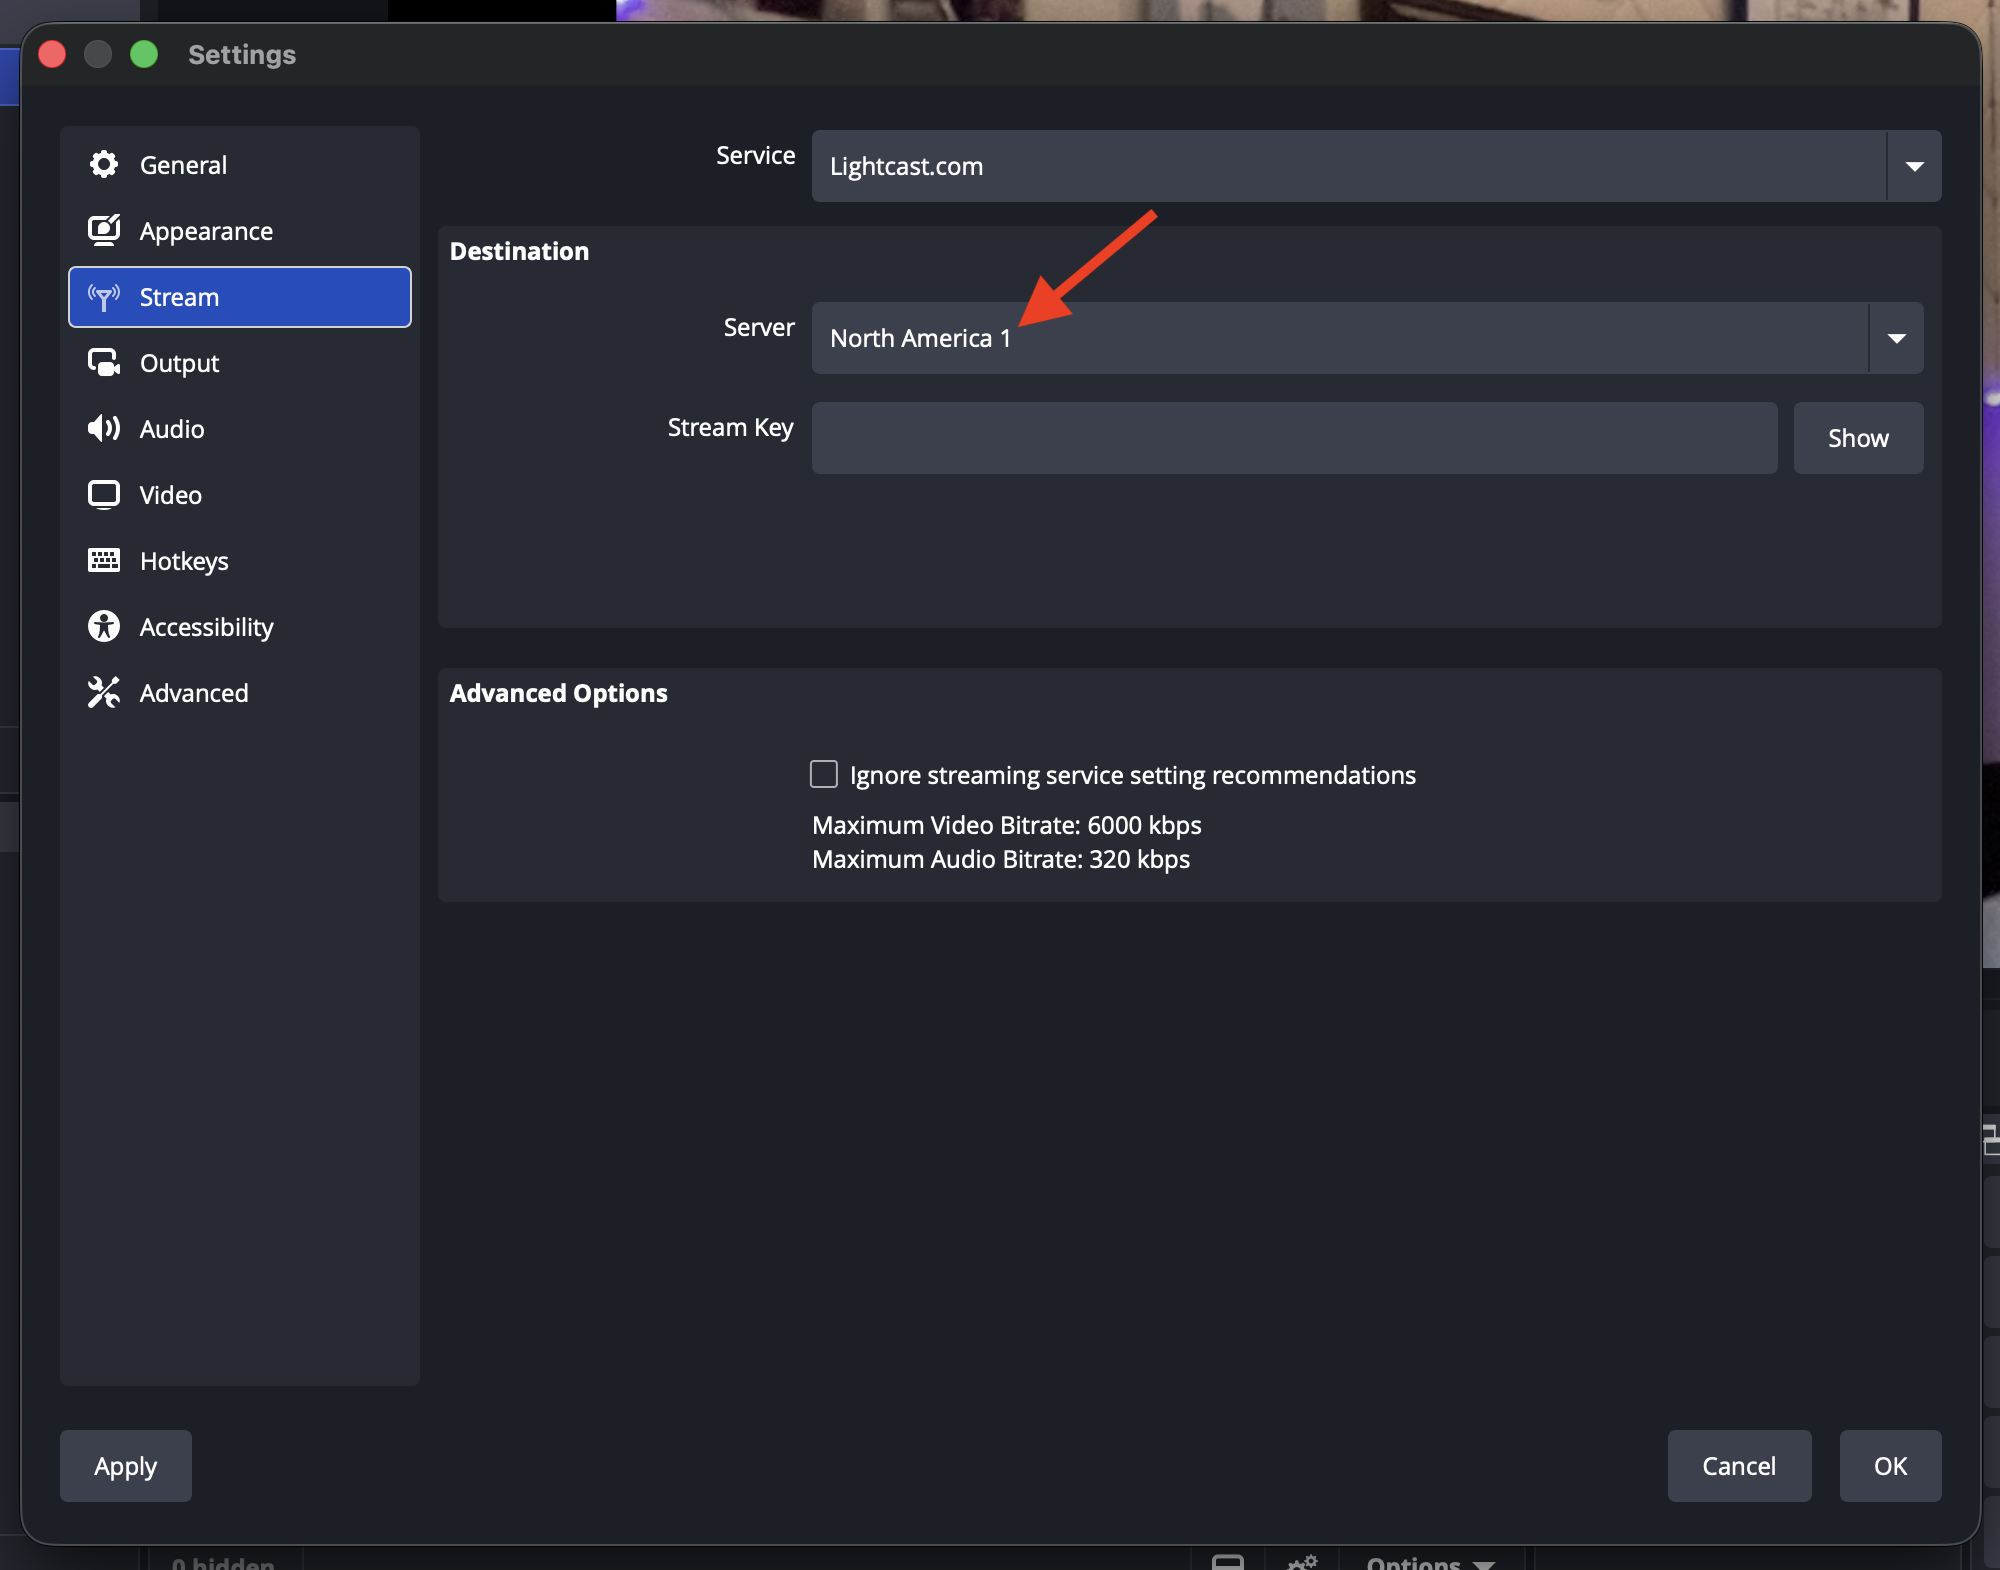
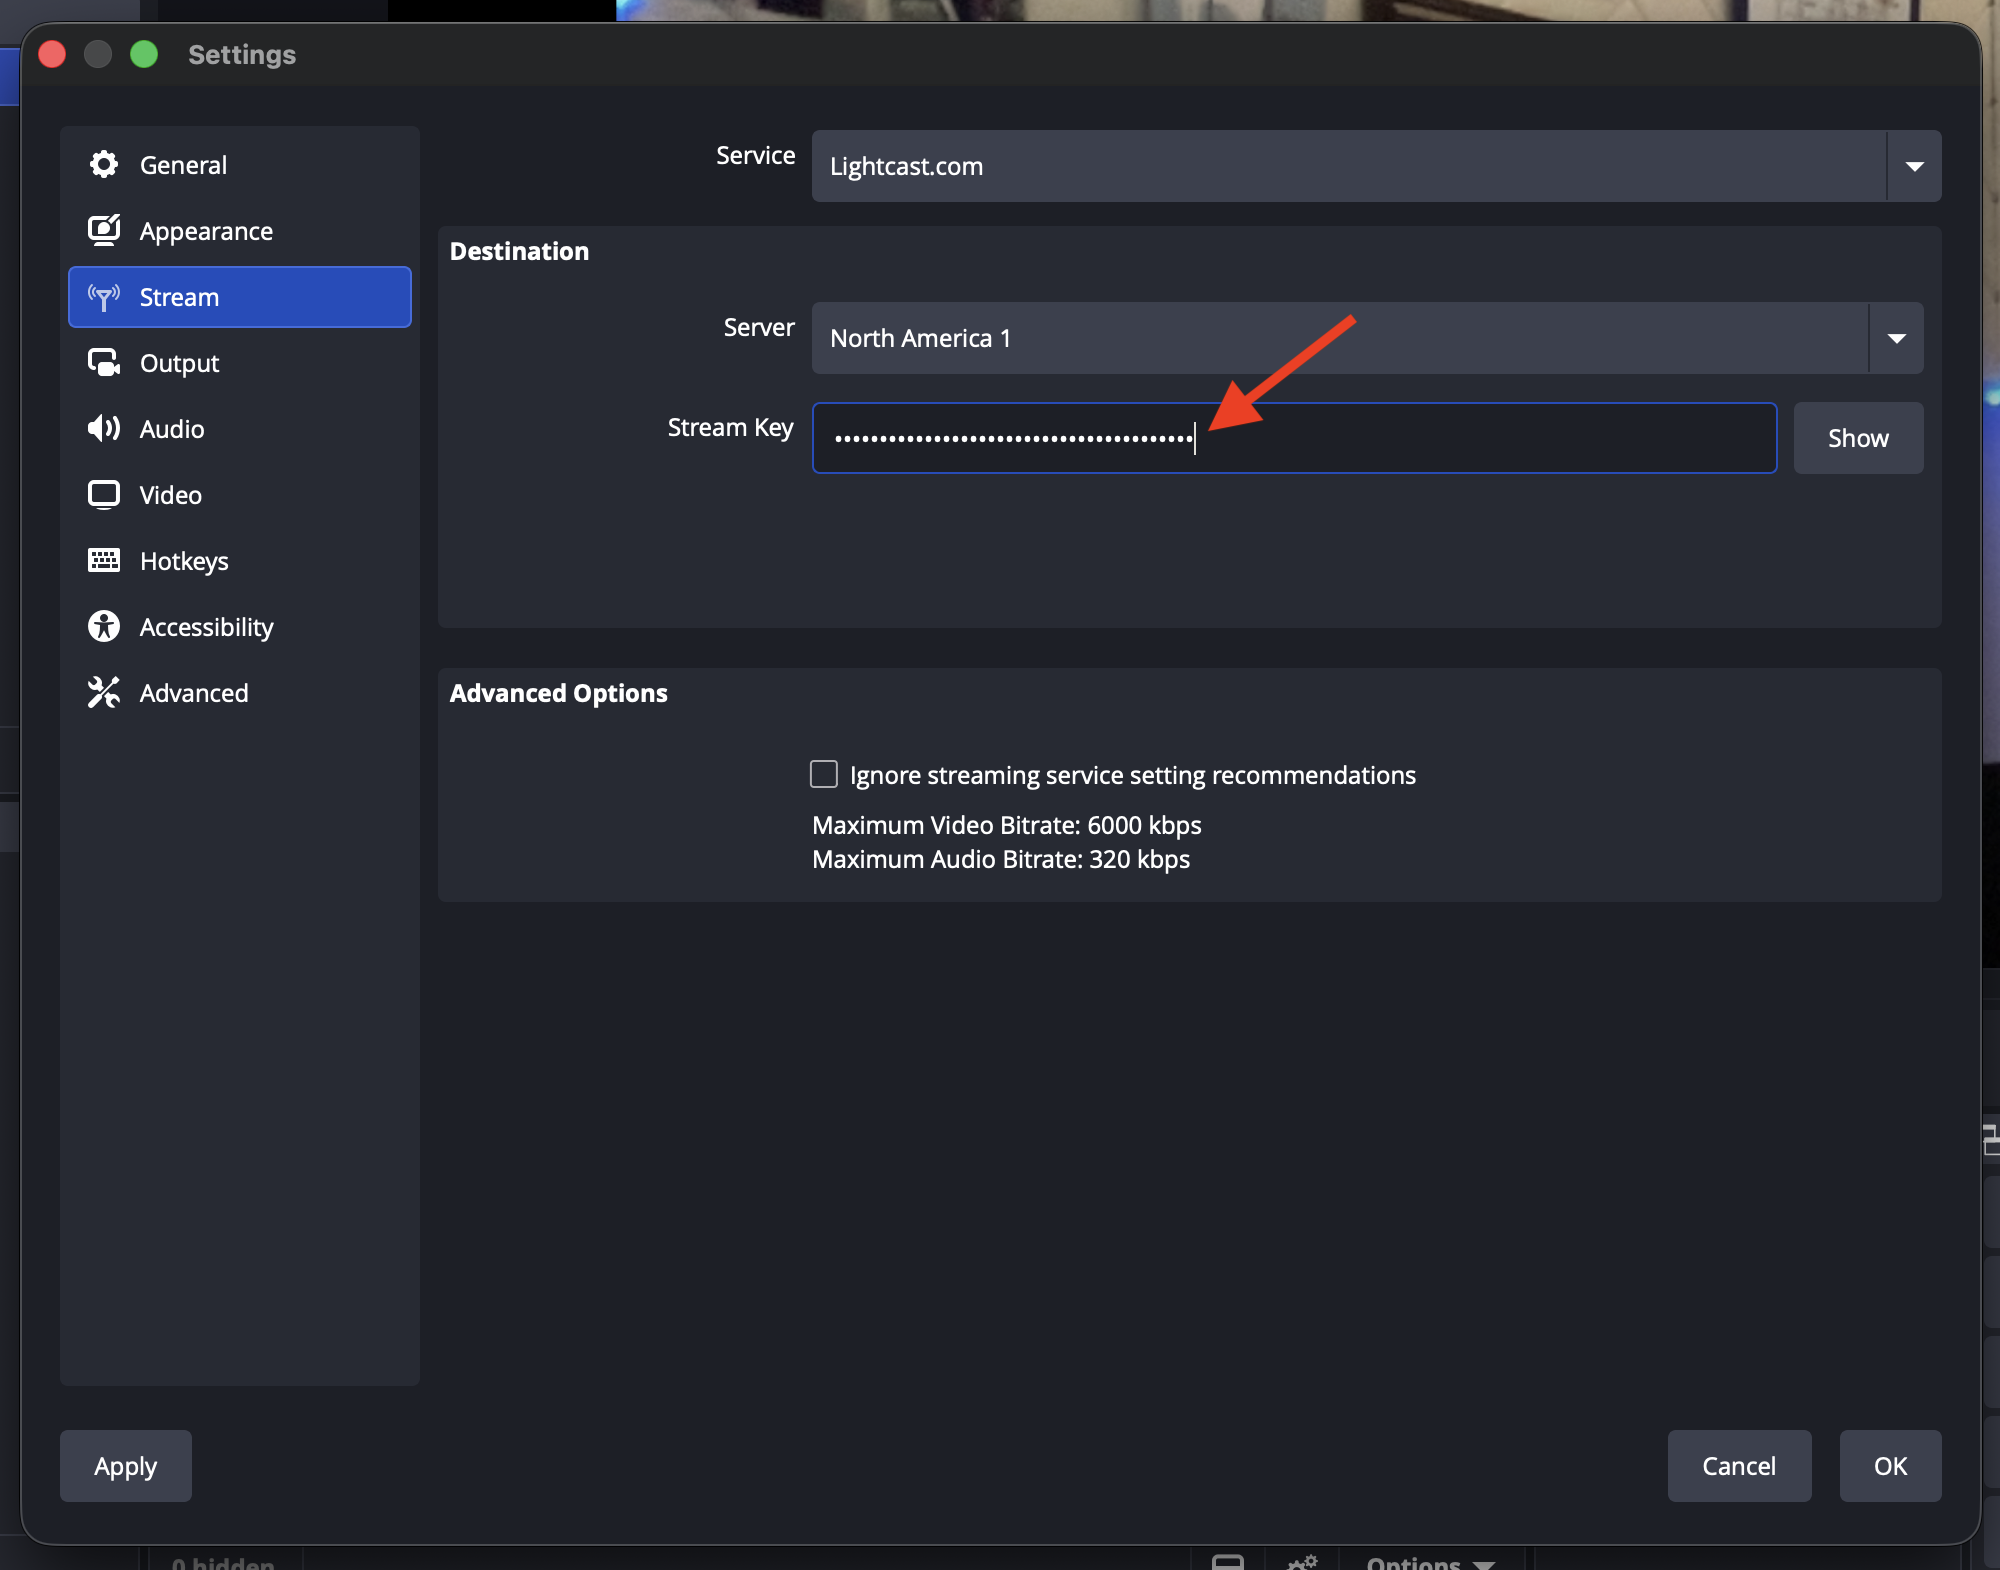
Step 7
Paste your LIVE Channel Stream Key into the Stream Key field.
To learn where to find your Stream Key, see How to find your LIVE Channel stream credentials.
Step 8
Click Apply.
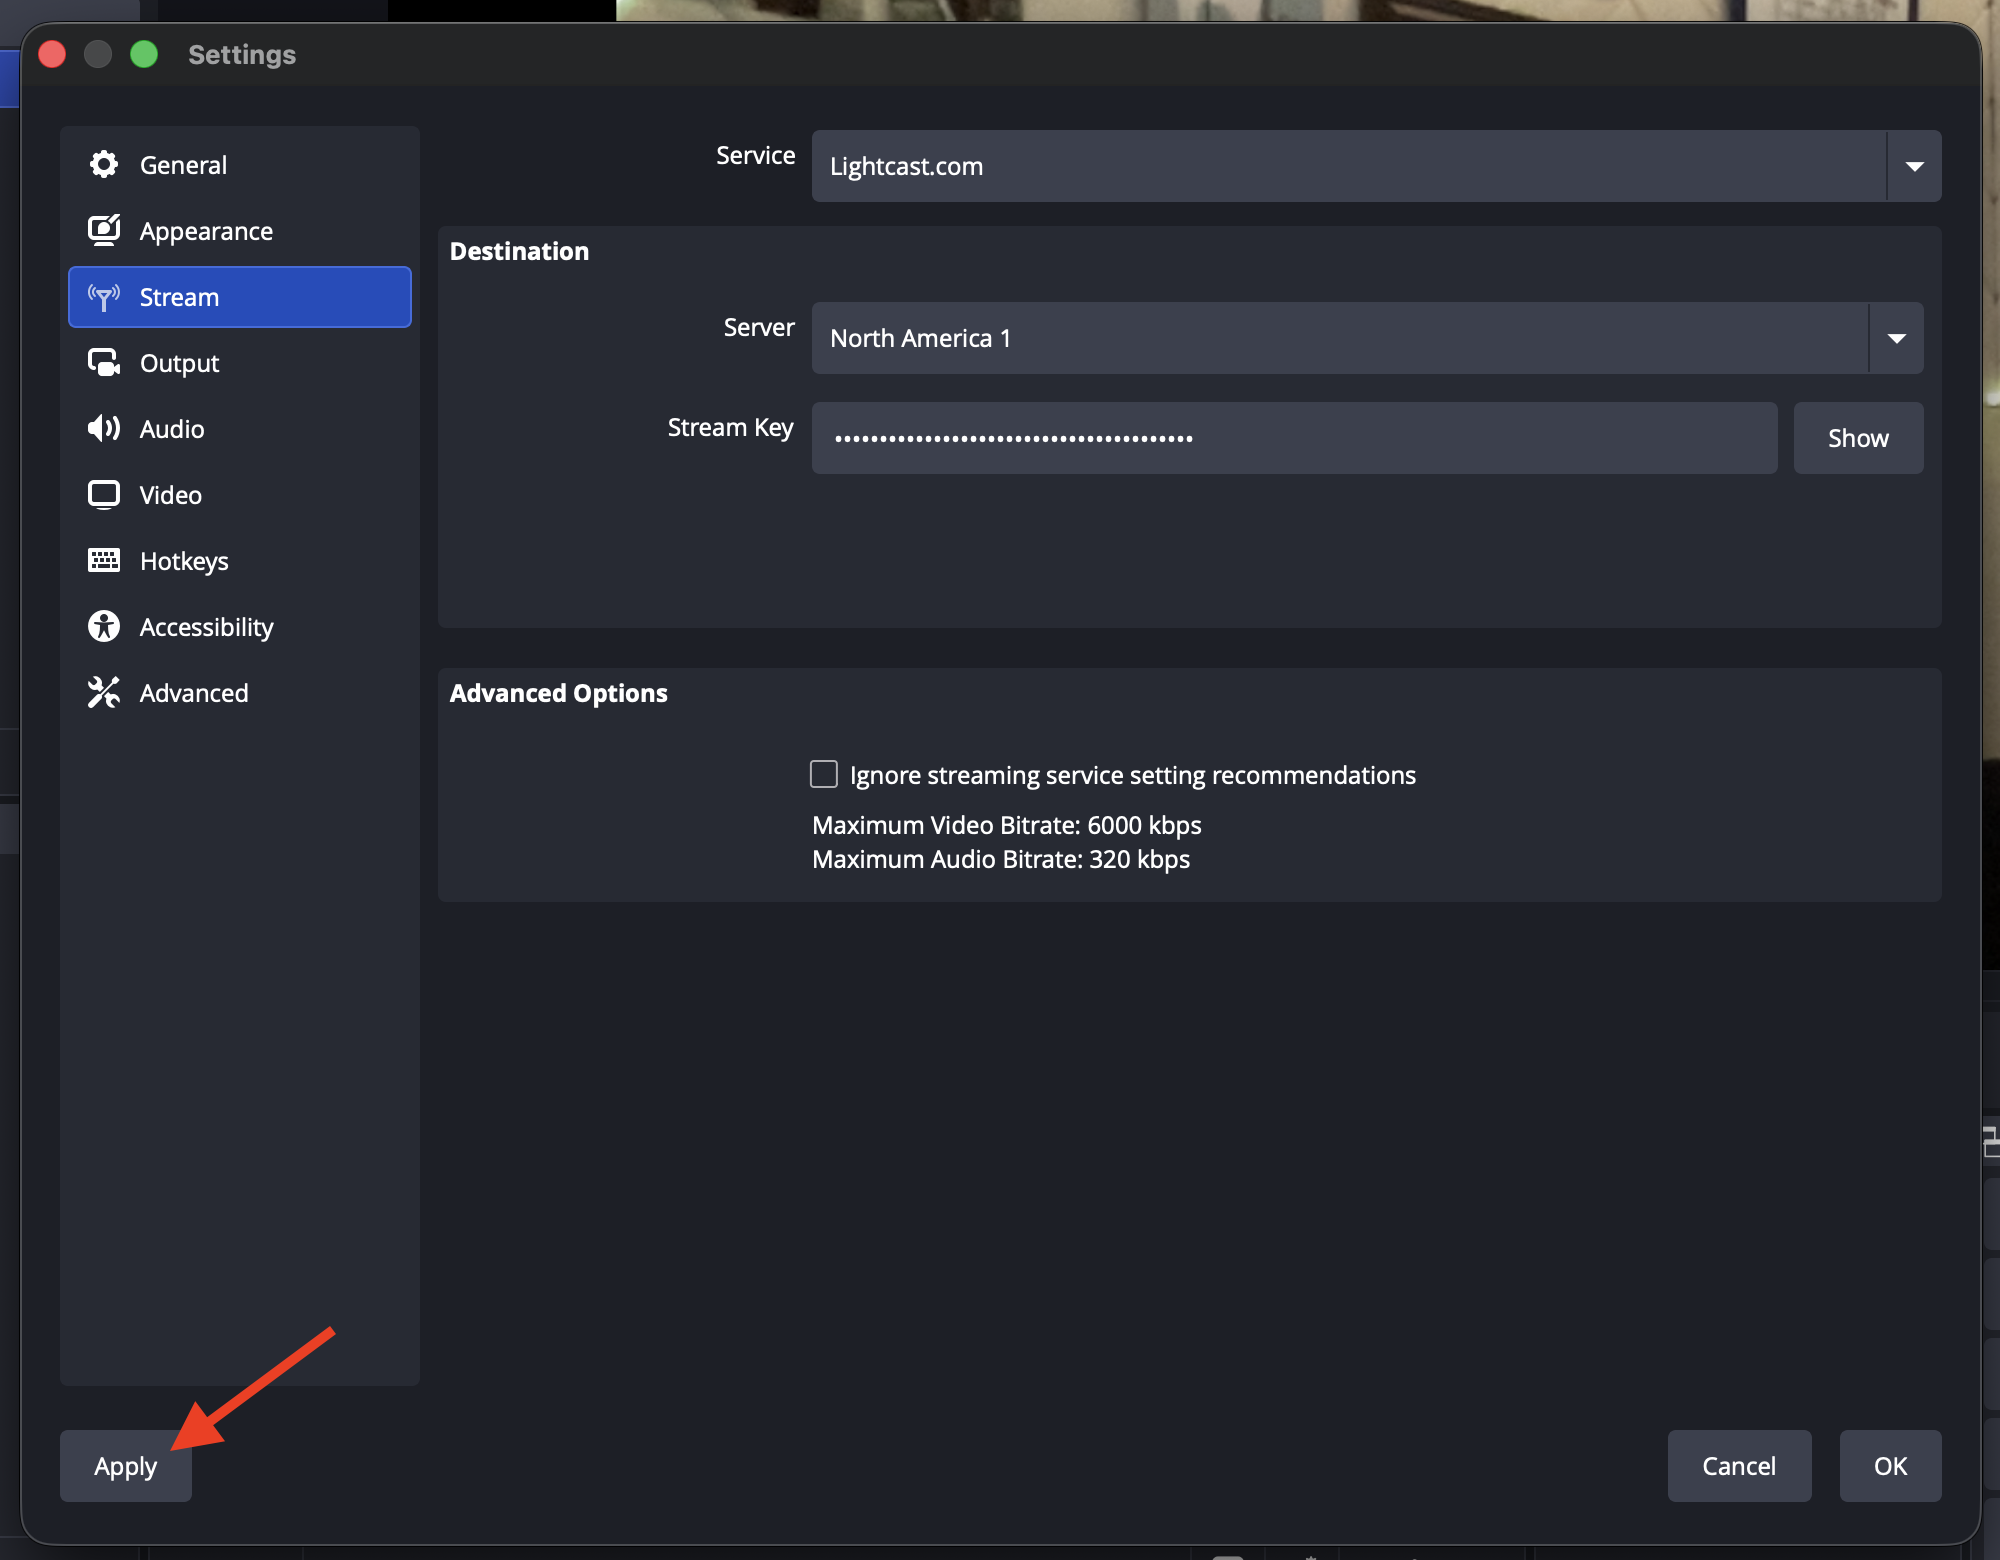
OBS is now configured to send an RTMP stream to your LIVE Channel using the Lightcast.com destination setup.
Configure Manual RTMP Setup
Step 1
Open OBS Studio.
Step 2
Click Settings.
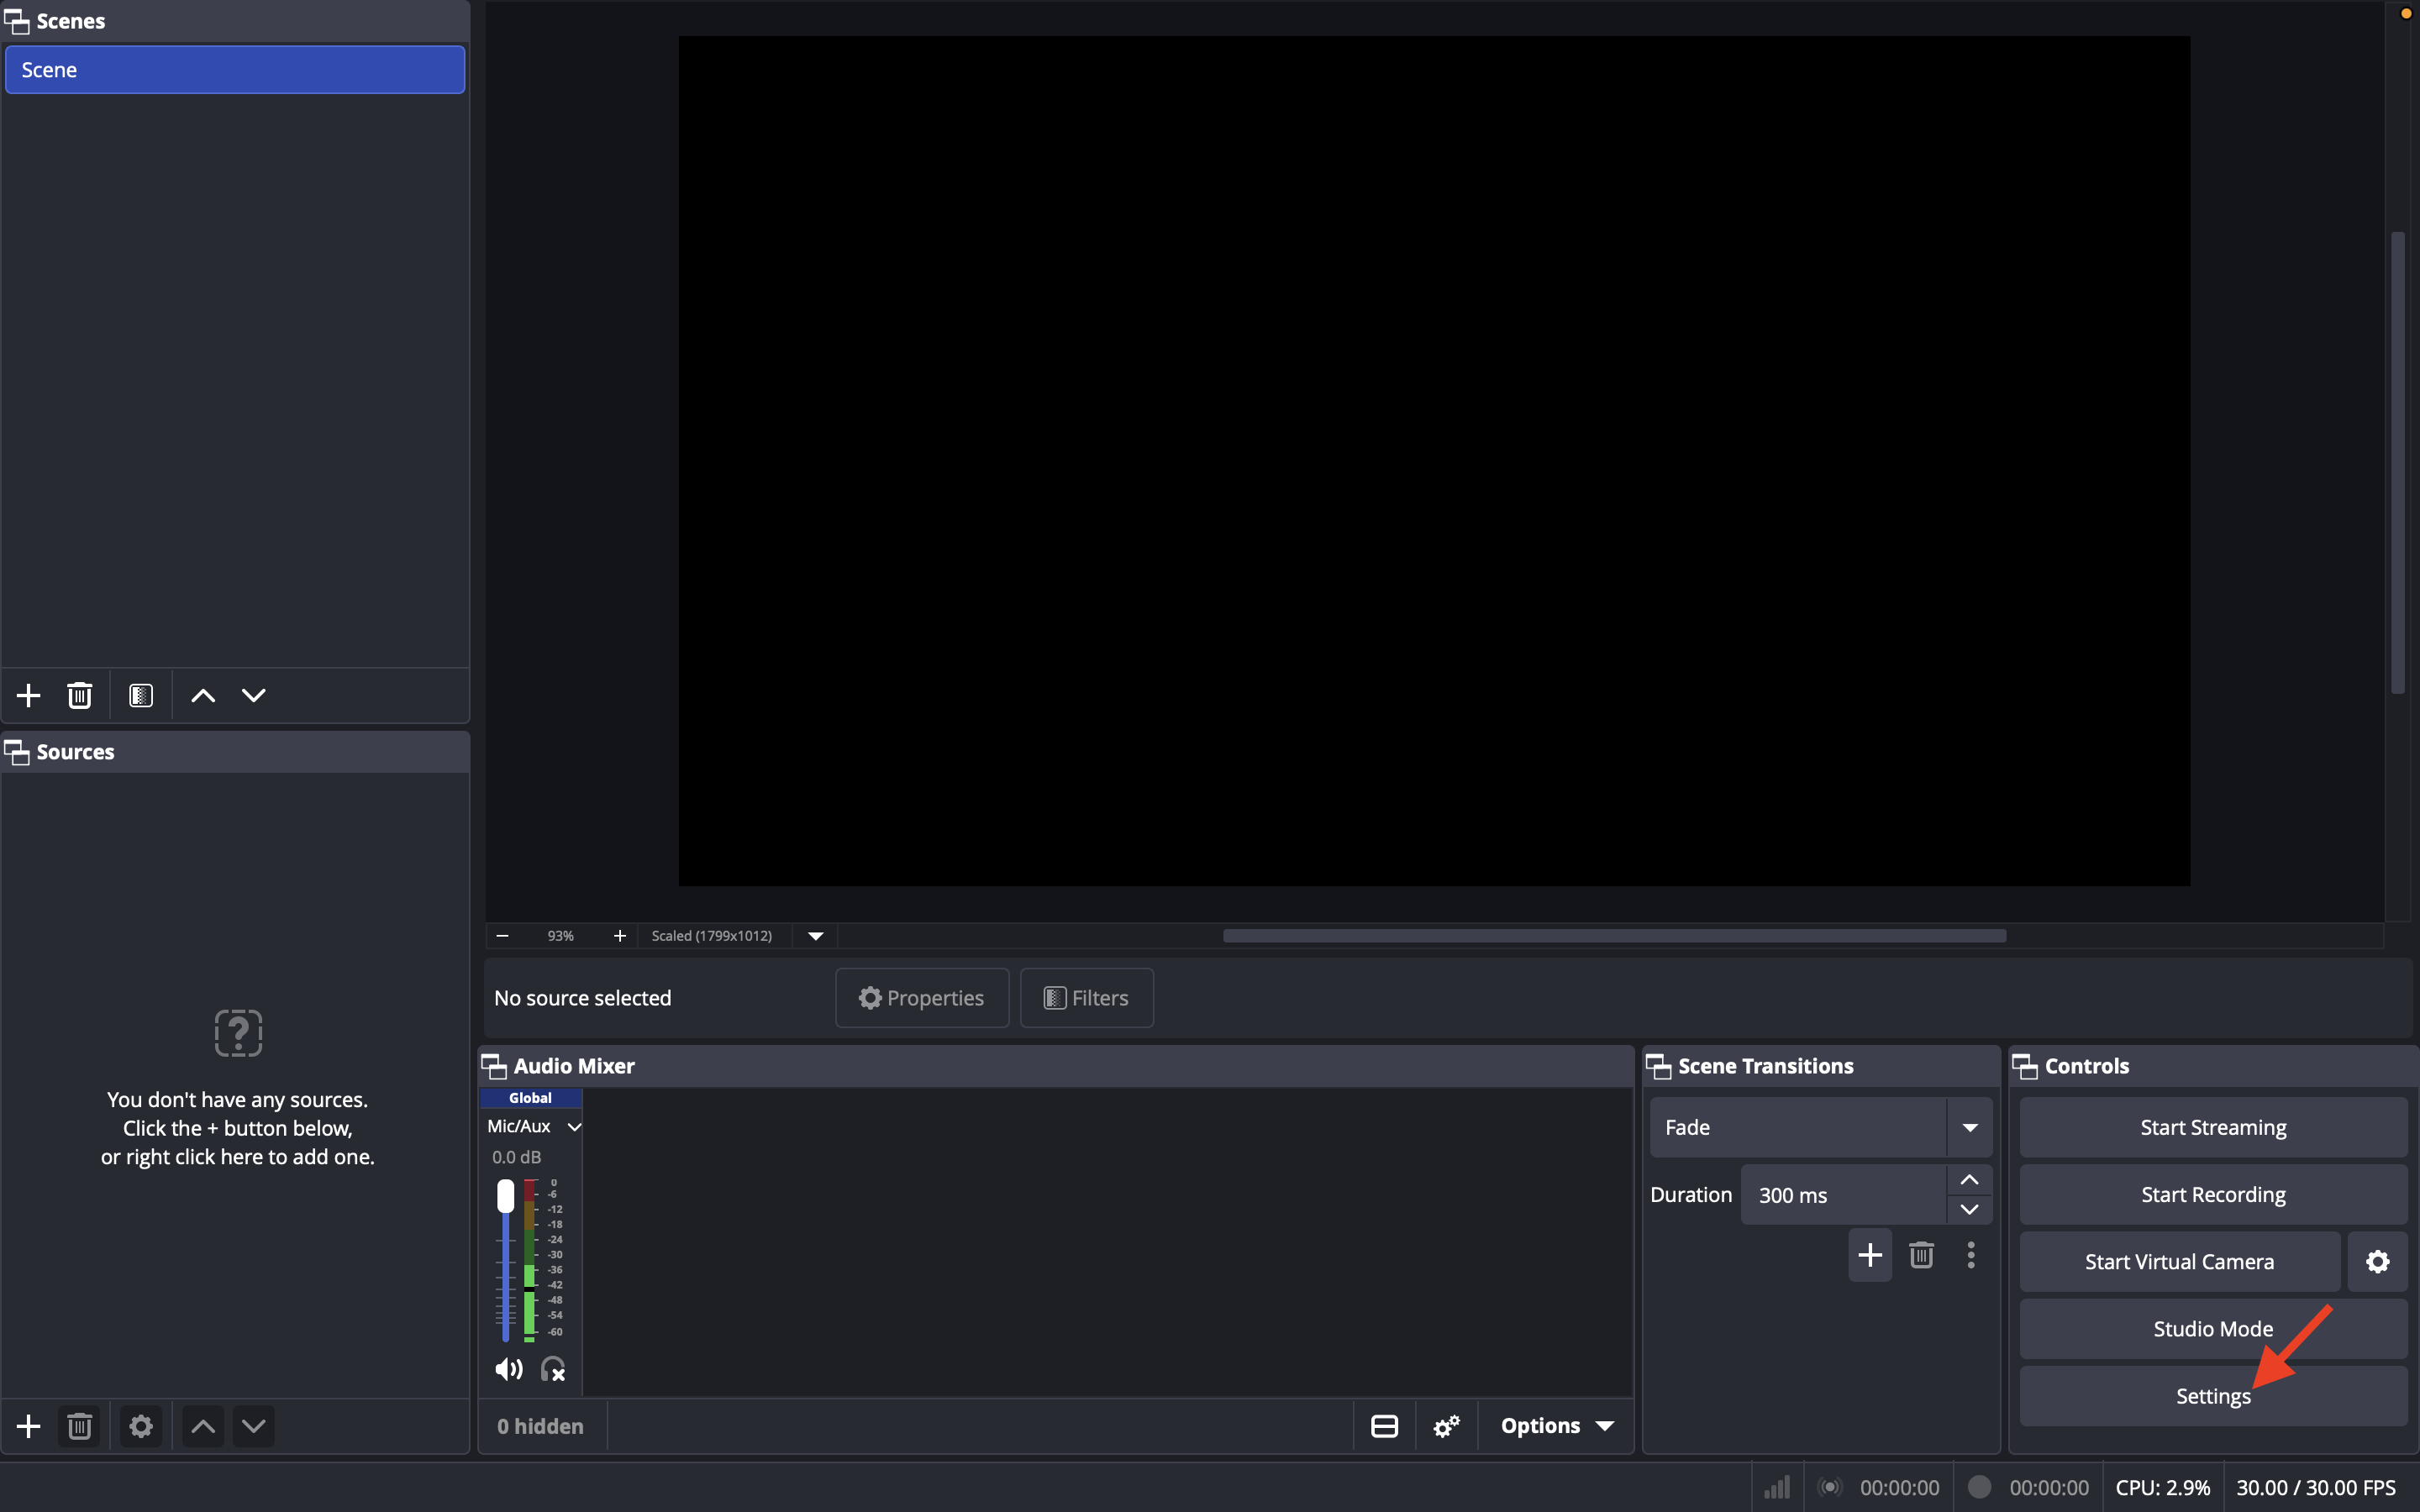
Step 3
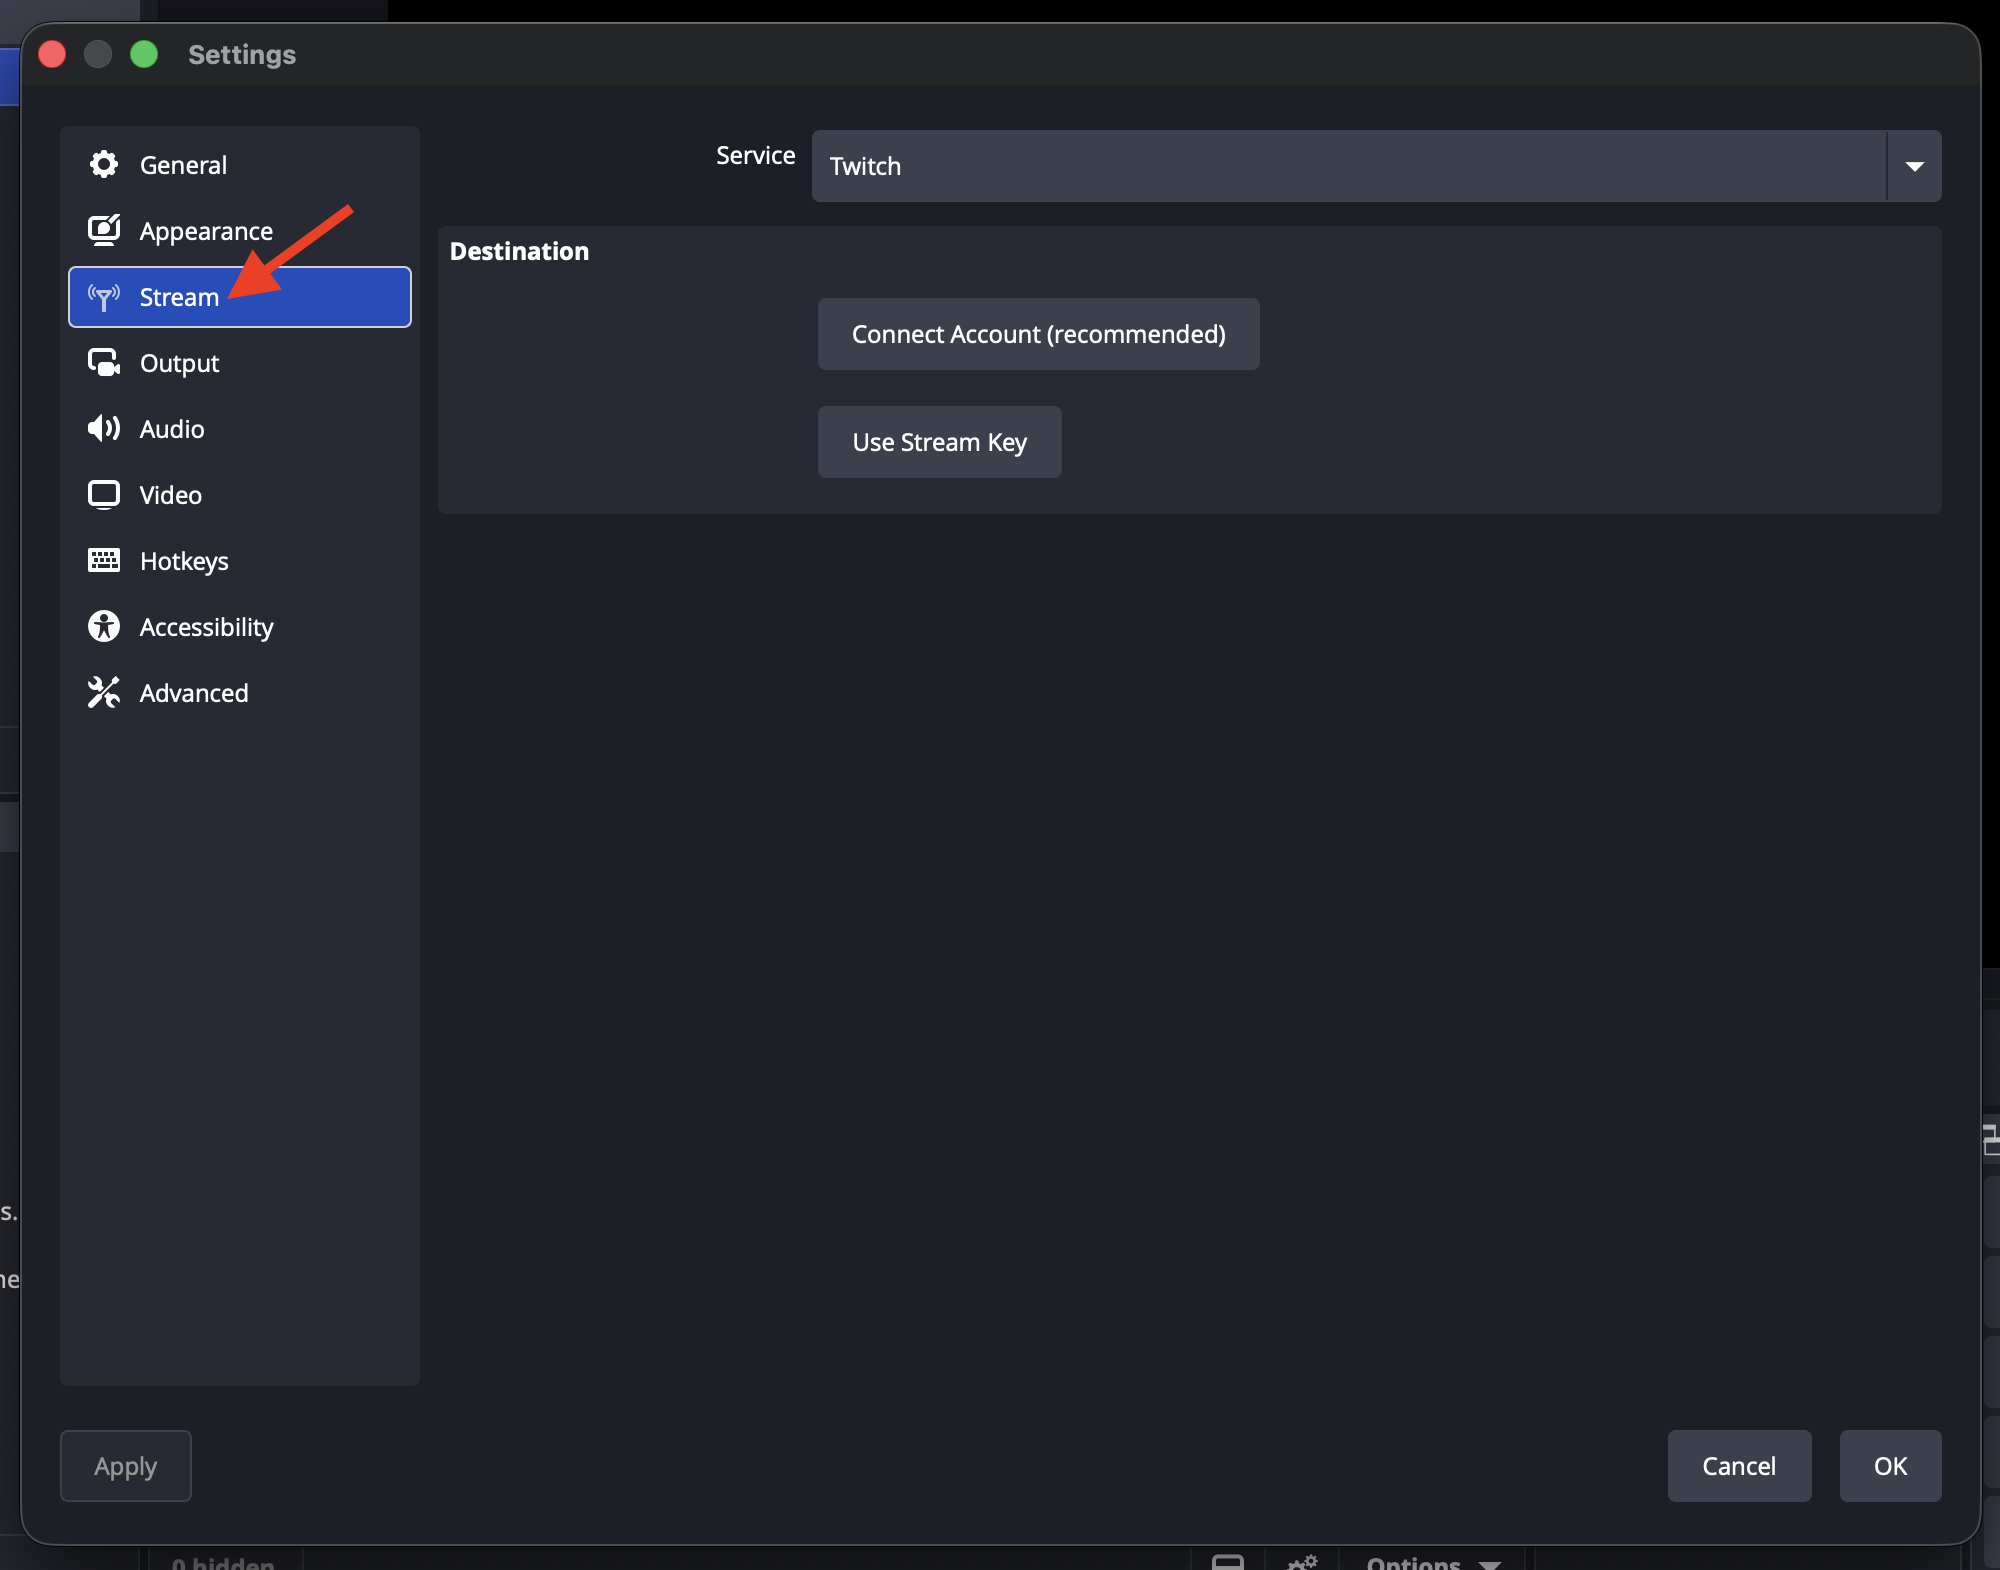
Select Stream from the left menu.
Step 4
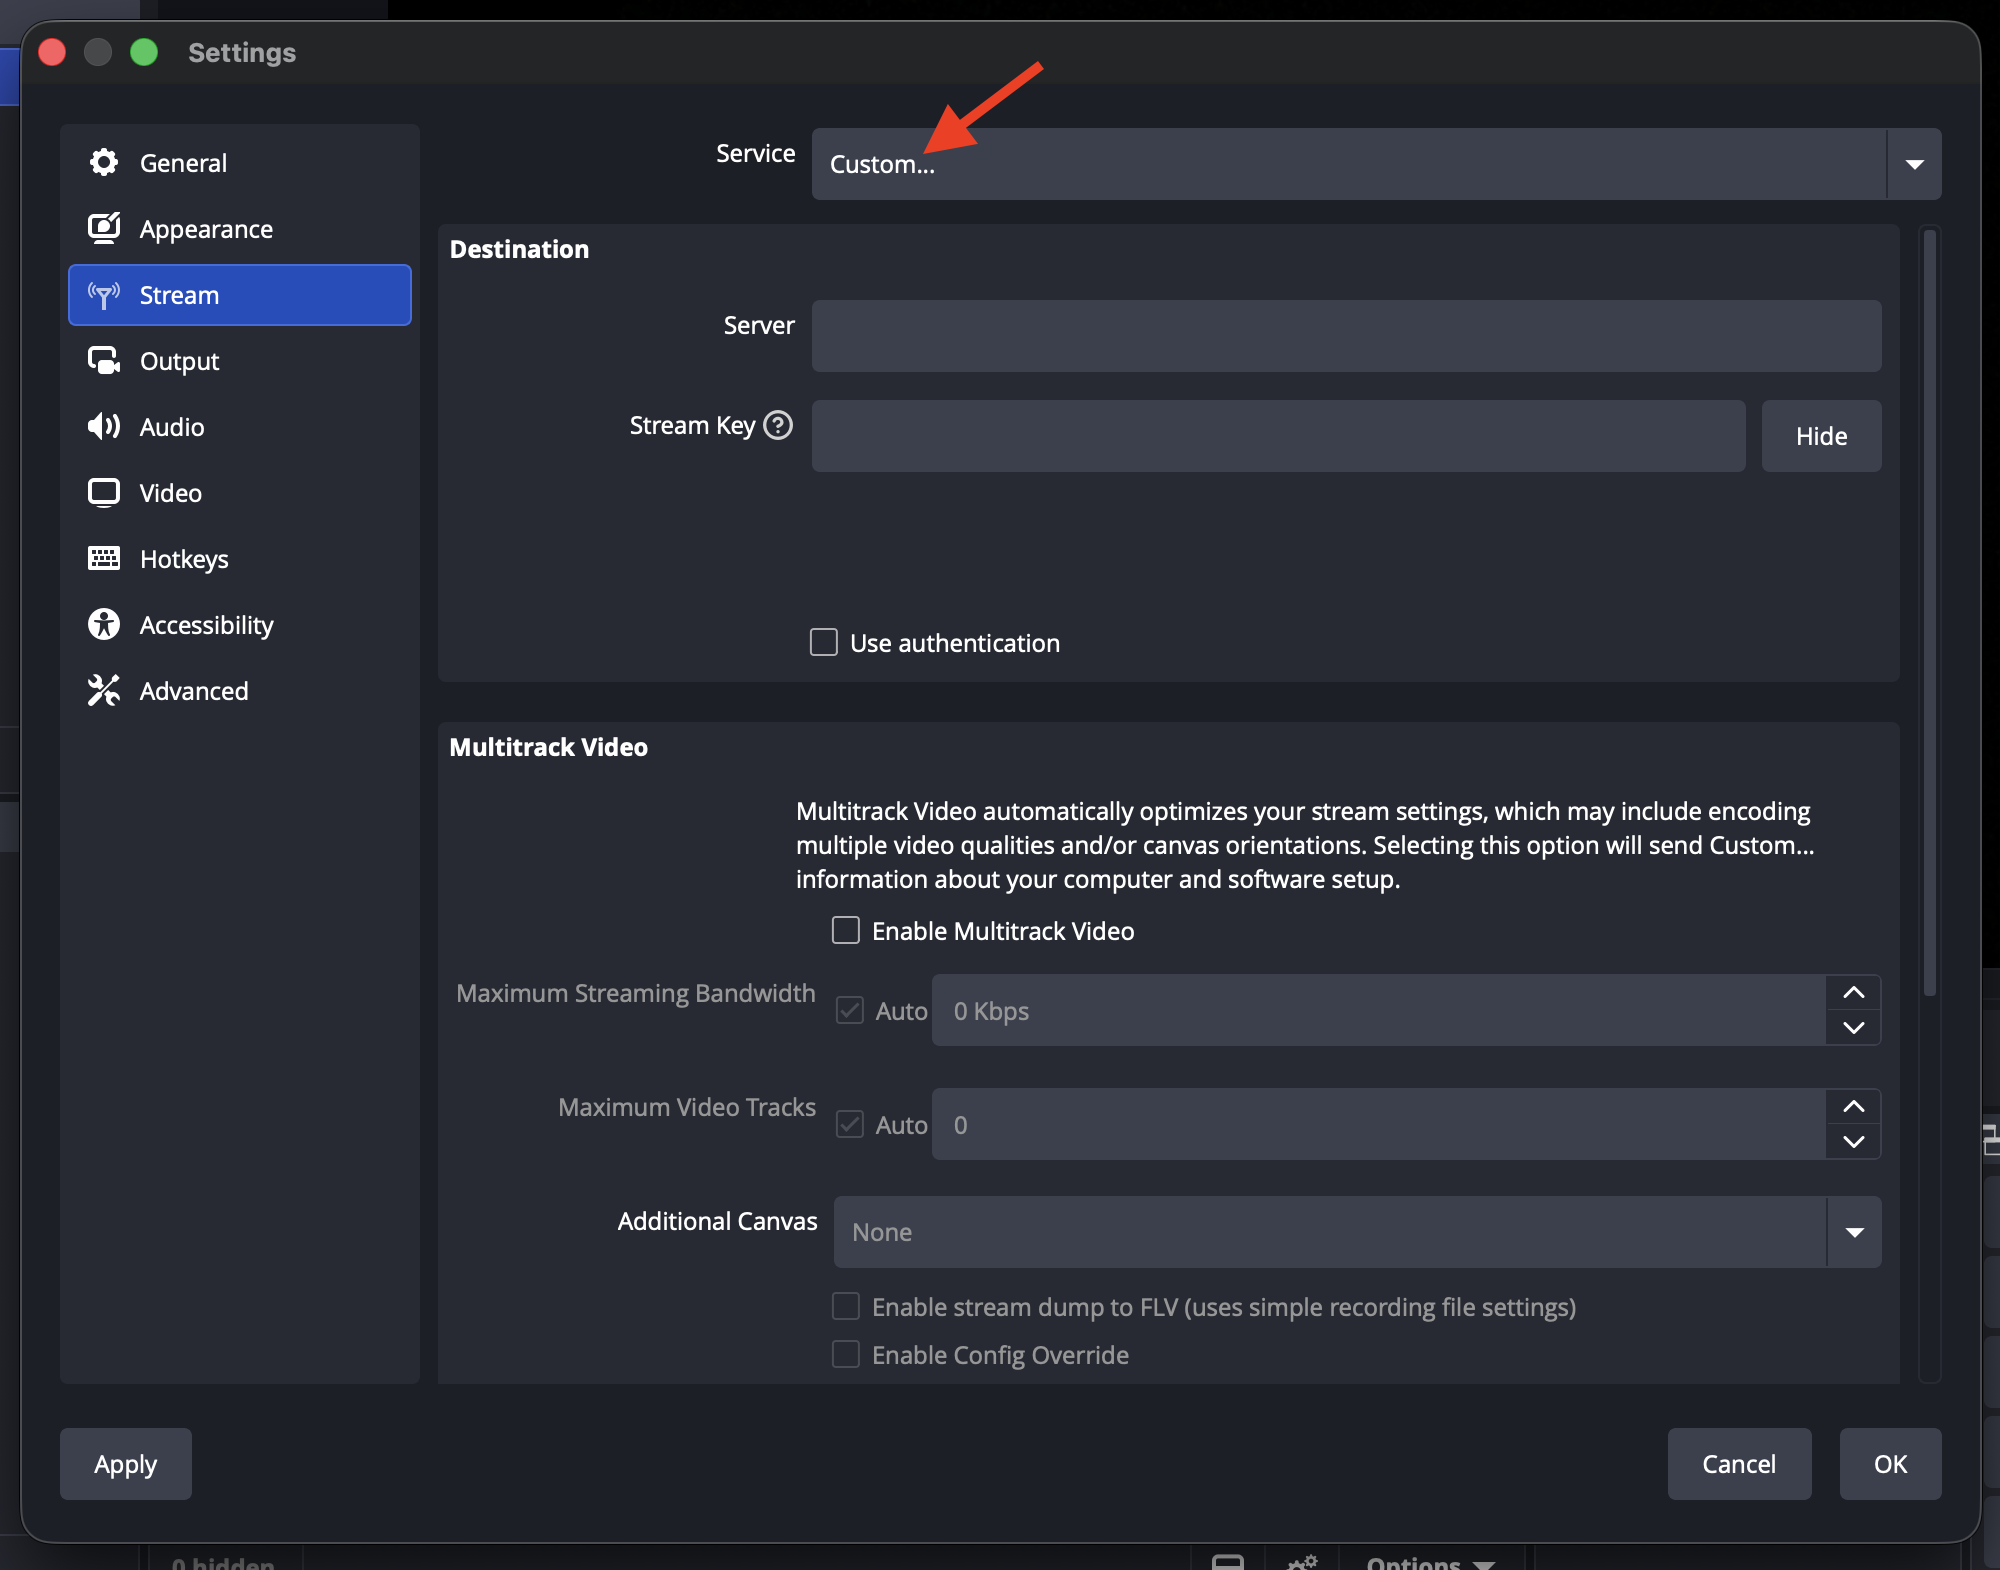
Set Service to Custom.
Step 5
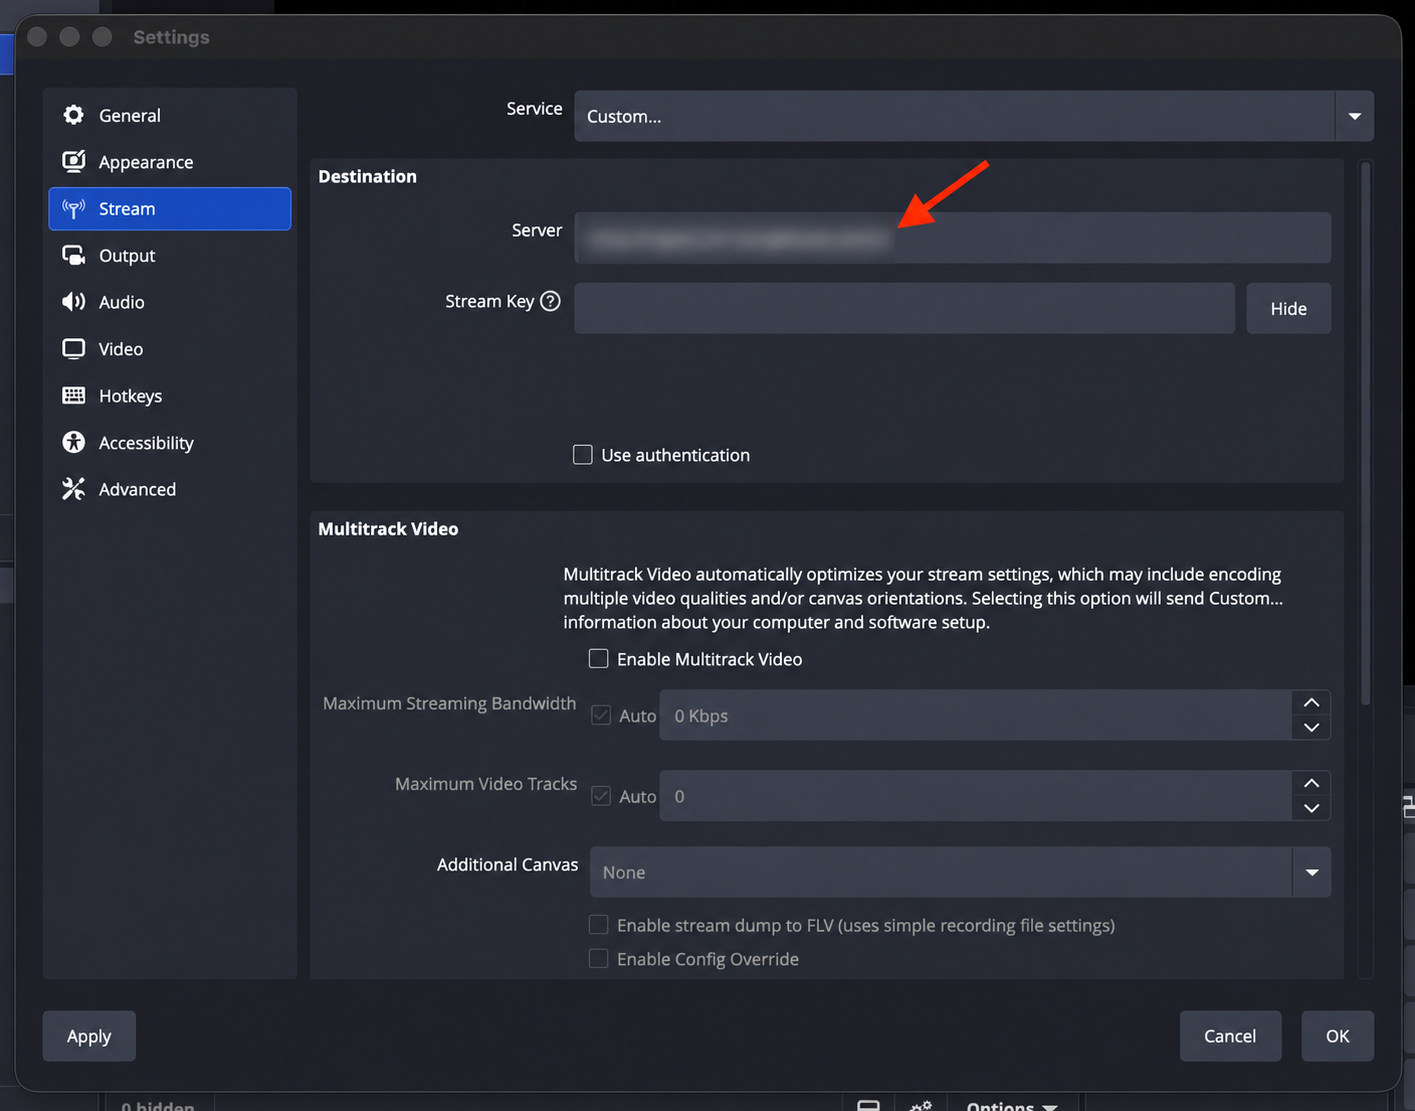
Paste the LIVE Channel's CDN Access Point into the Server field.
Step 6
Paste the LIVE Channel's Stream Key into the Stream Key field.
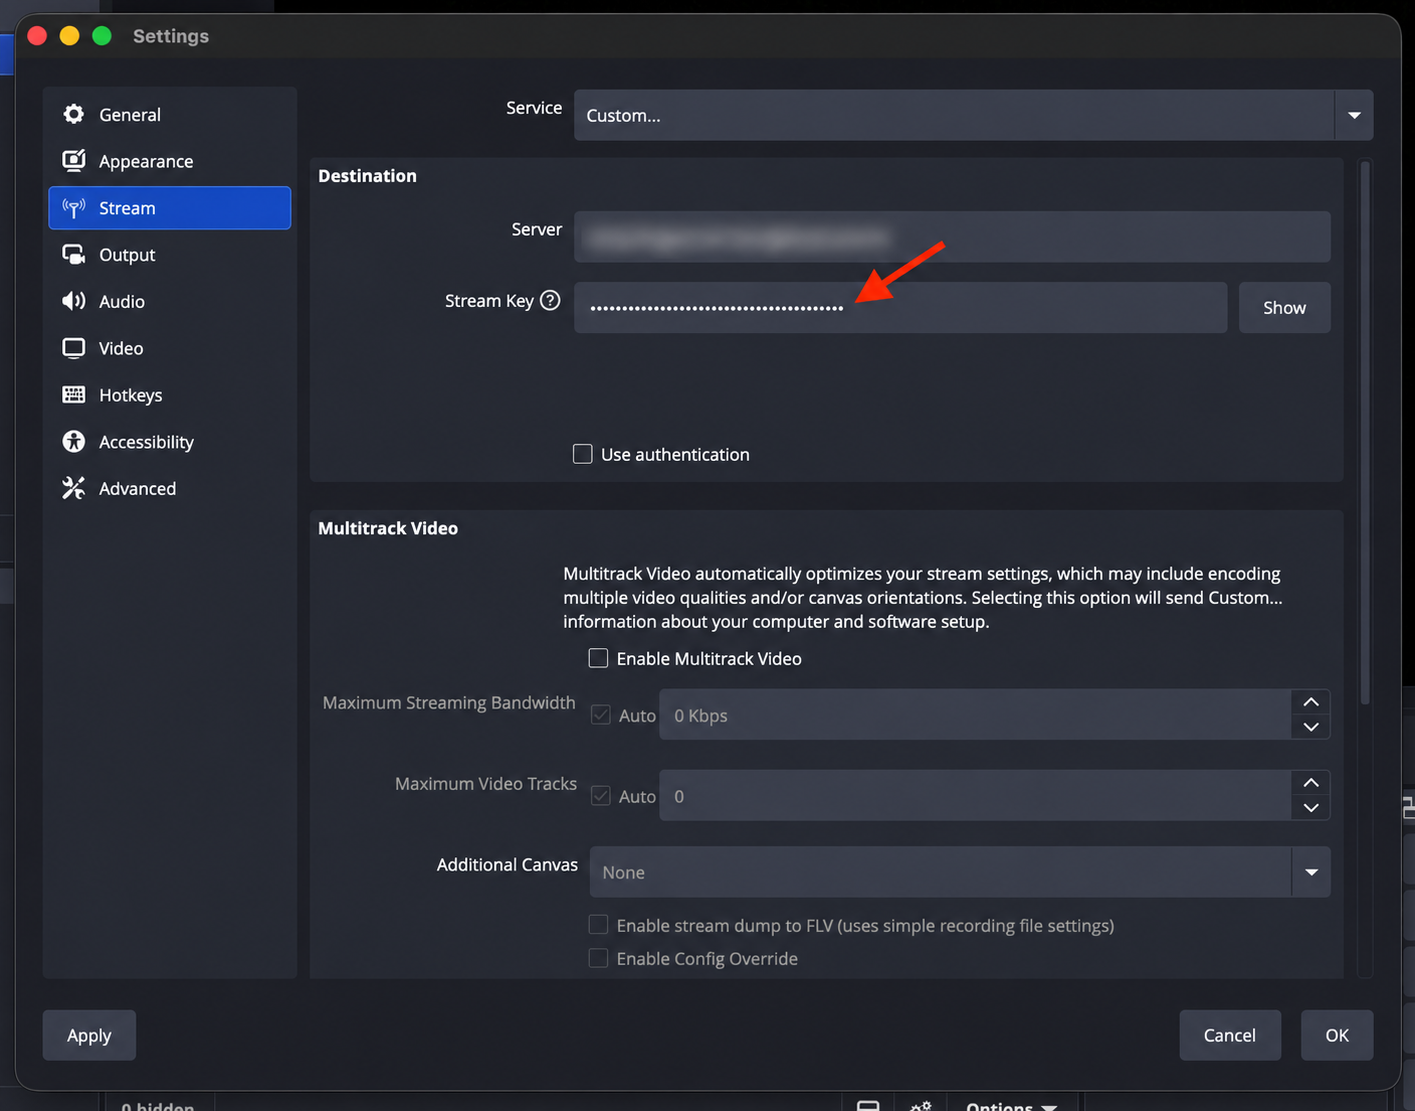
Step 7
Click Apply.
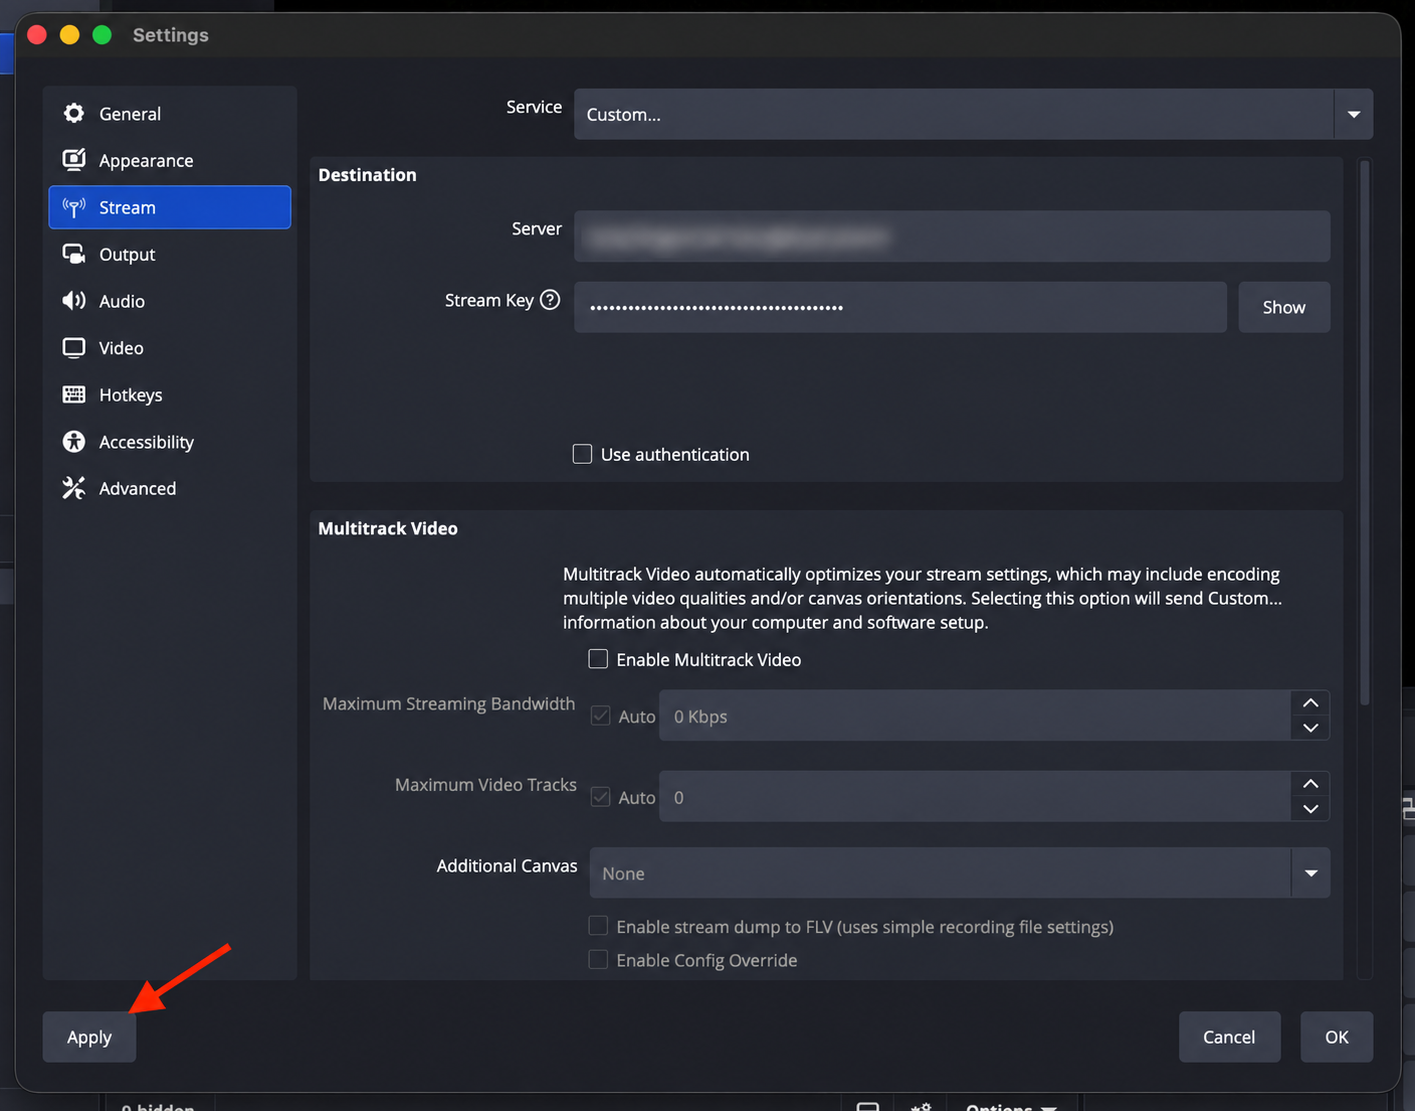
OBS is now configured to send an RTMP stream to your LIVE Channel.
Configure Manual SRT Setup
Step 1
Open OBS Studio.
Step 2
Click Settings.
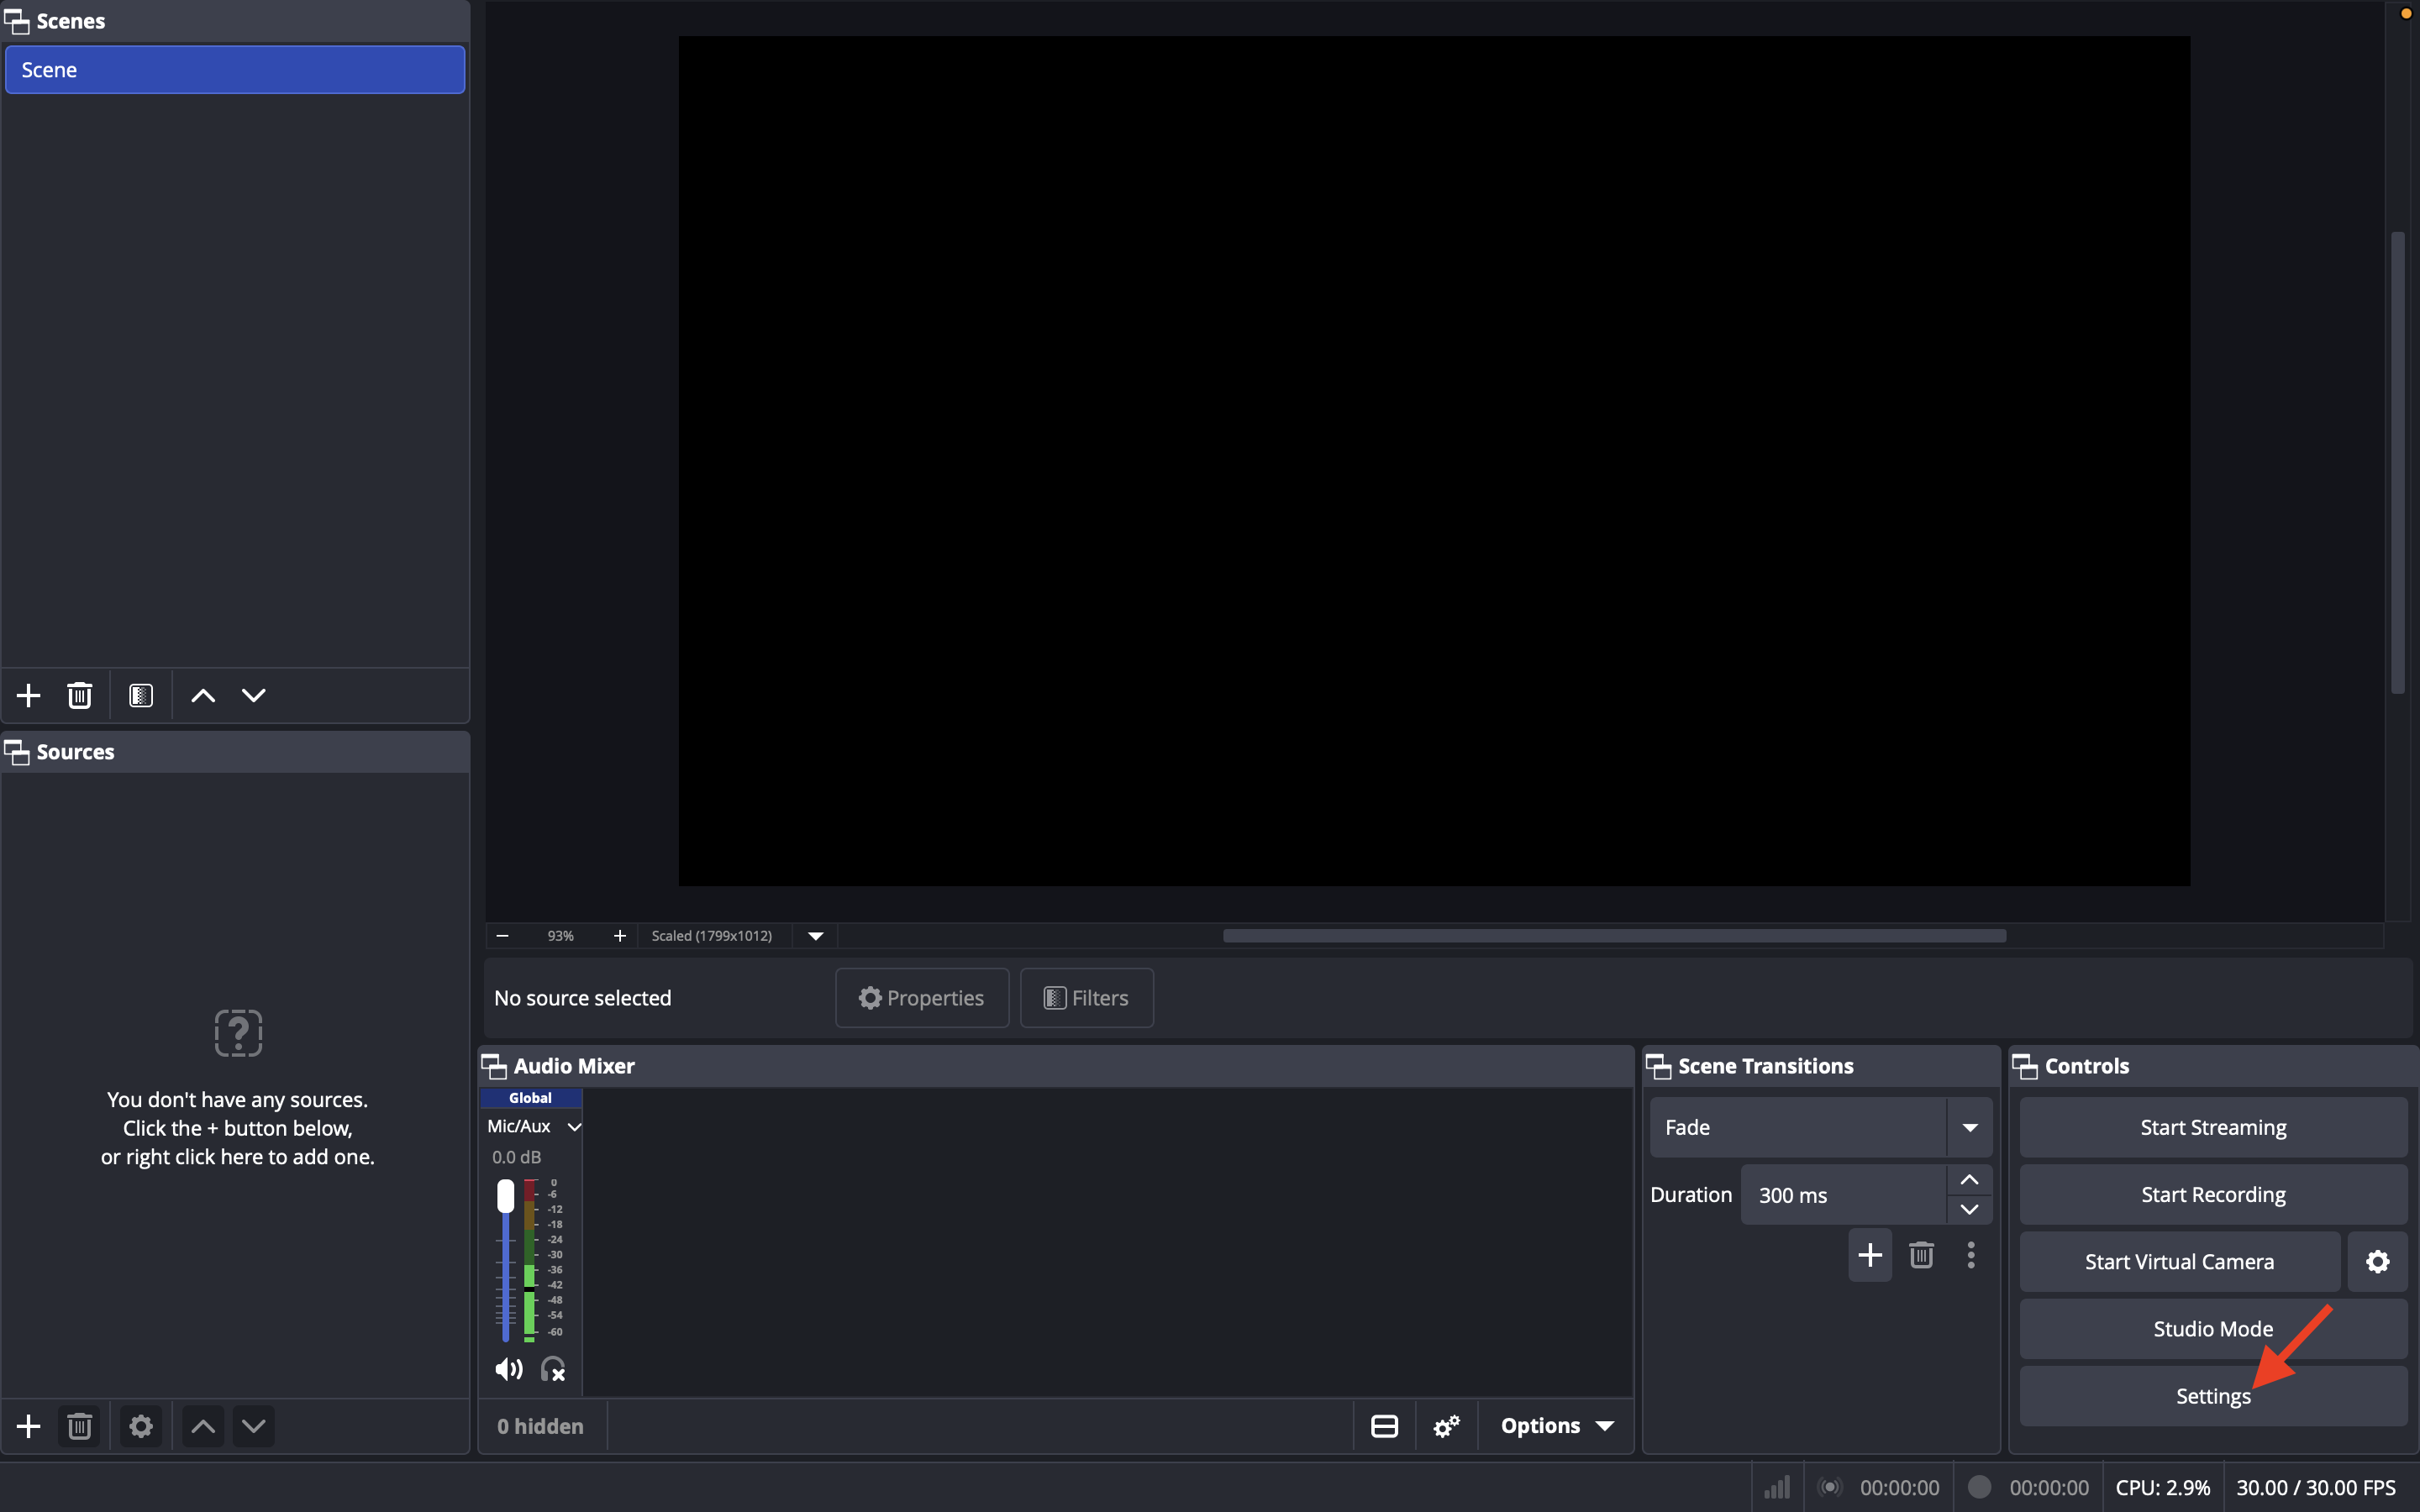
Step 3
Select Stream from the left menu.
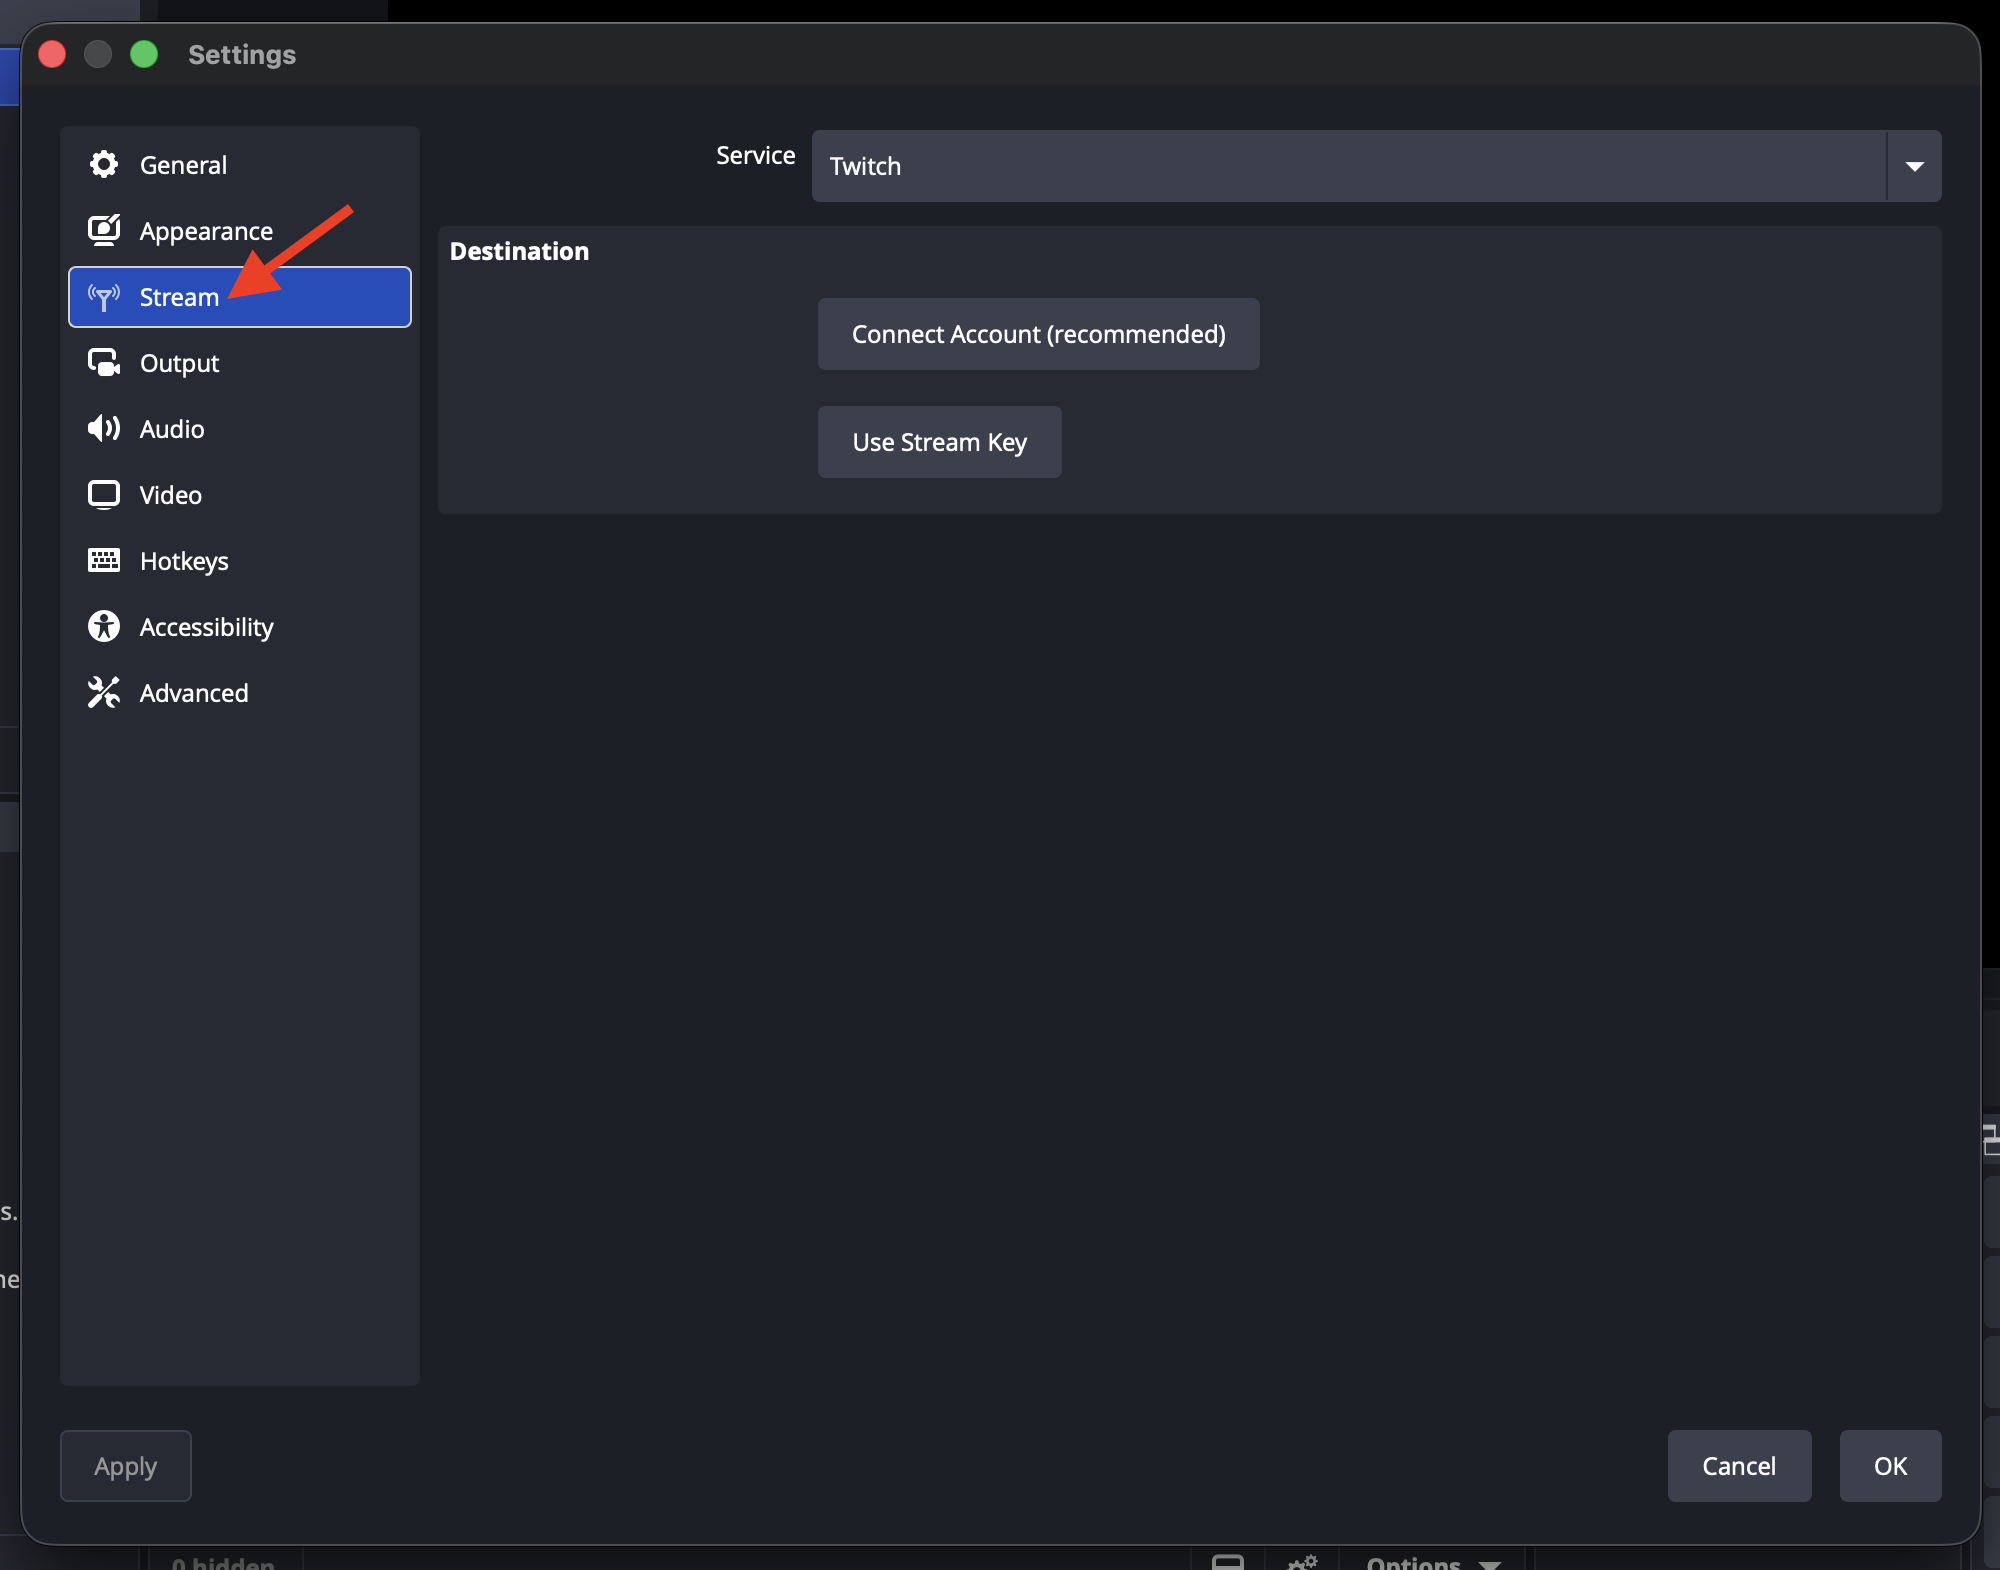
Step 4
Set Service to Custom.
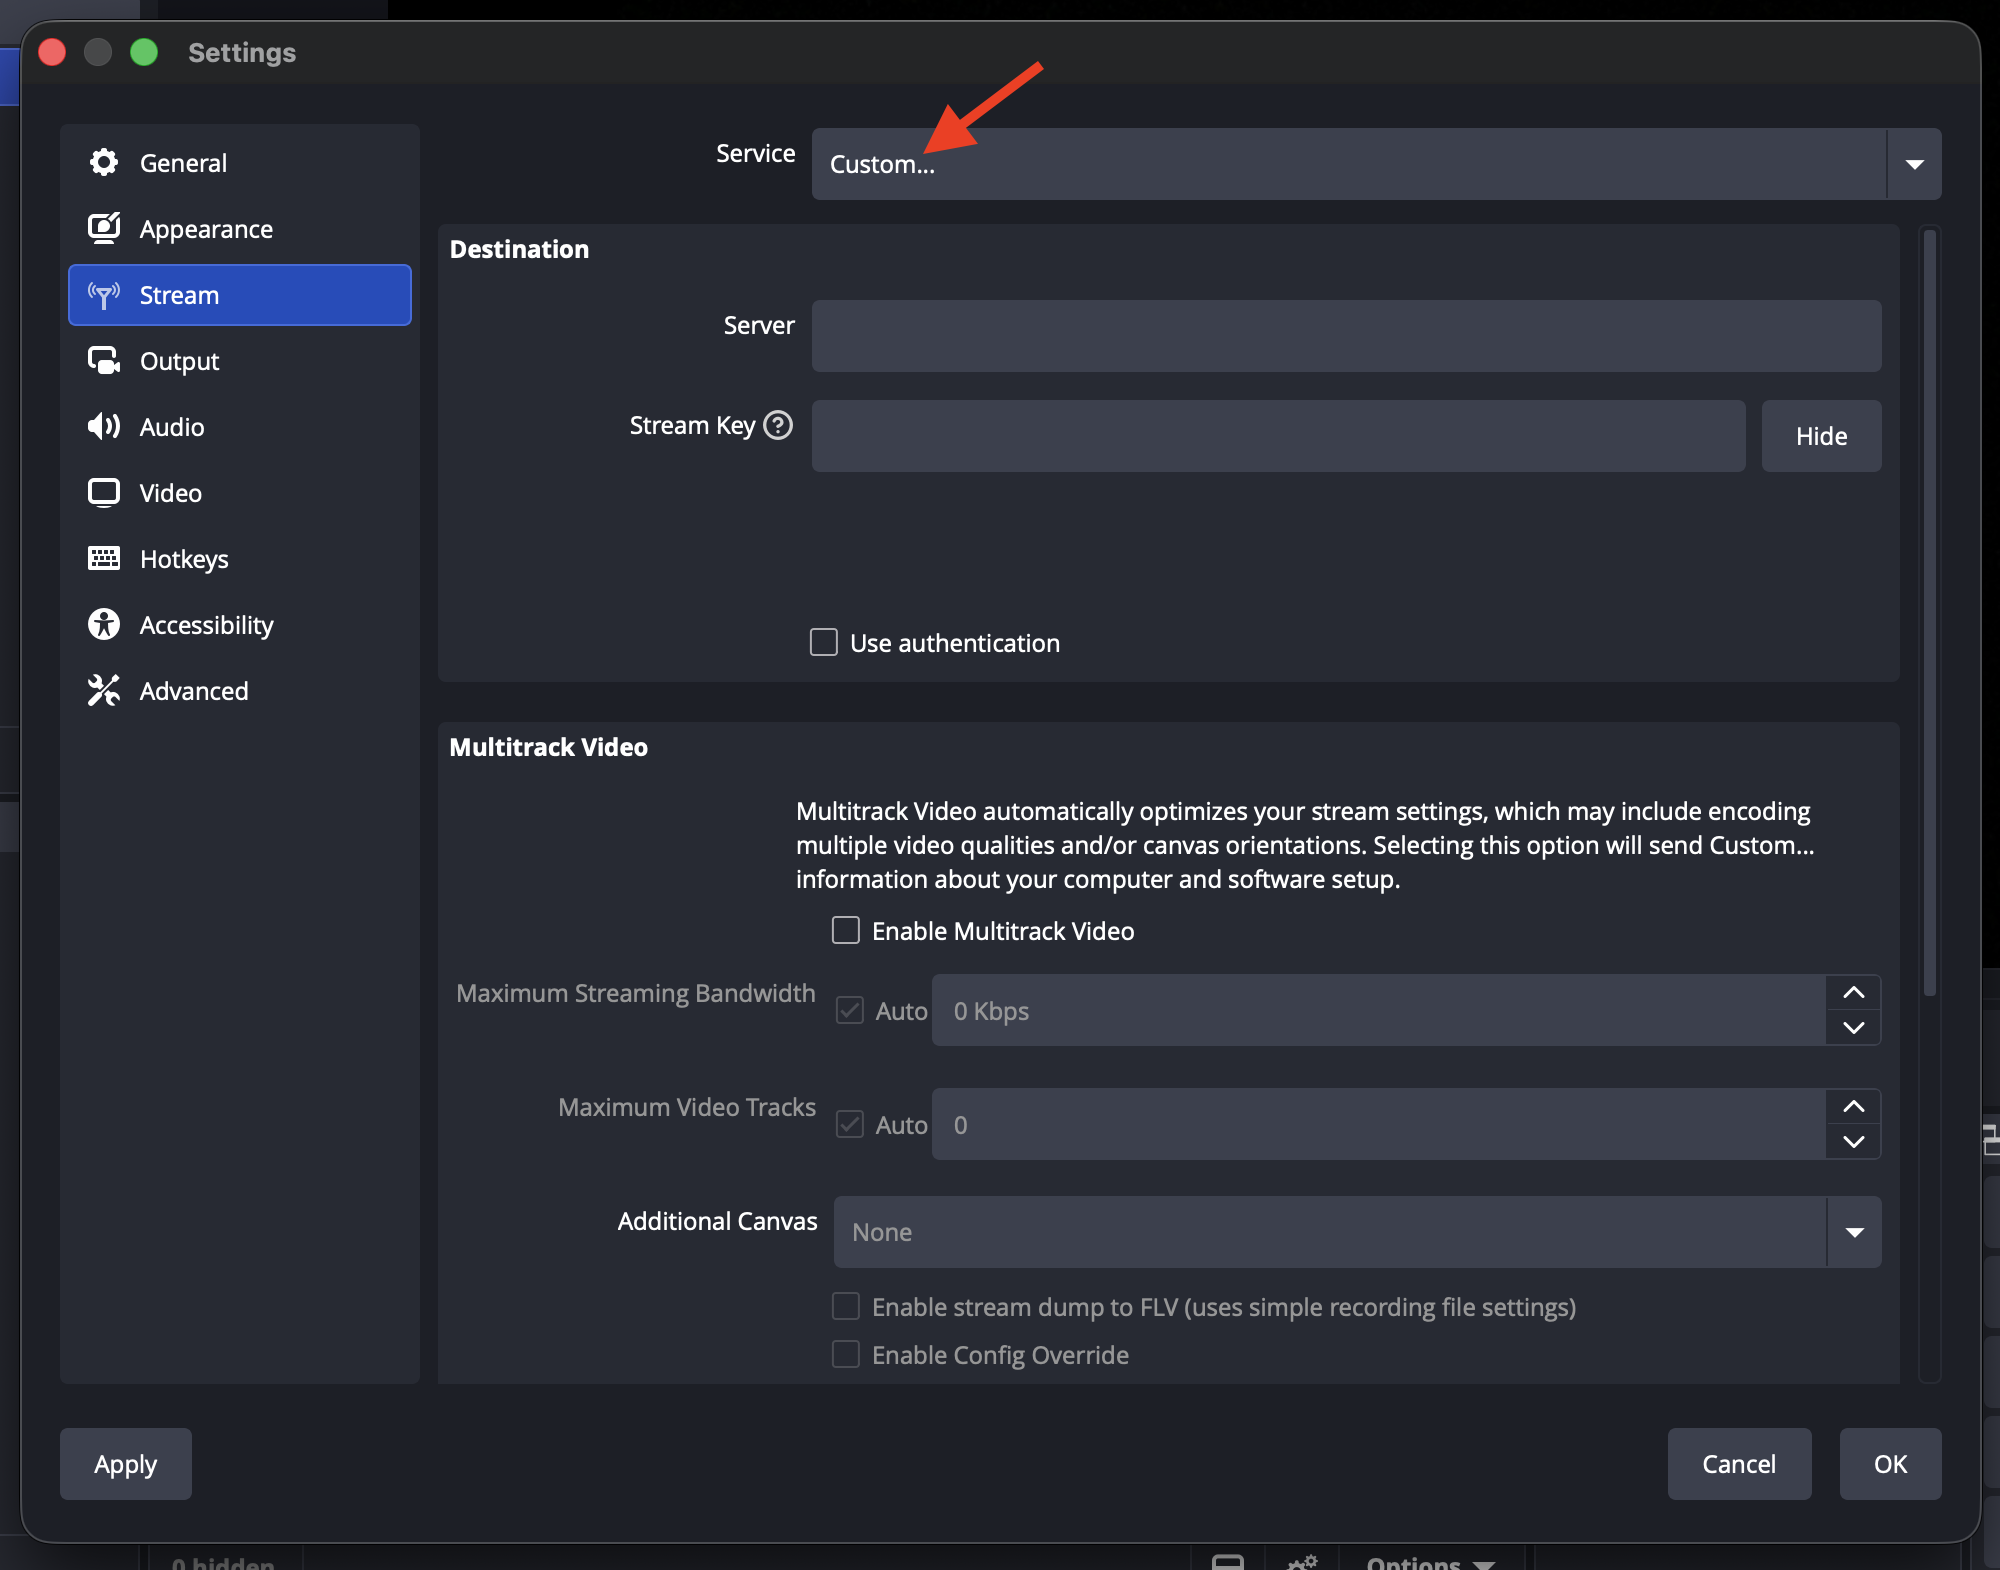
Step 5
Paste the LIVE Channel's SRT Streaming URL into the Server field.
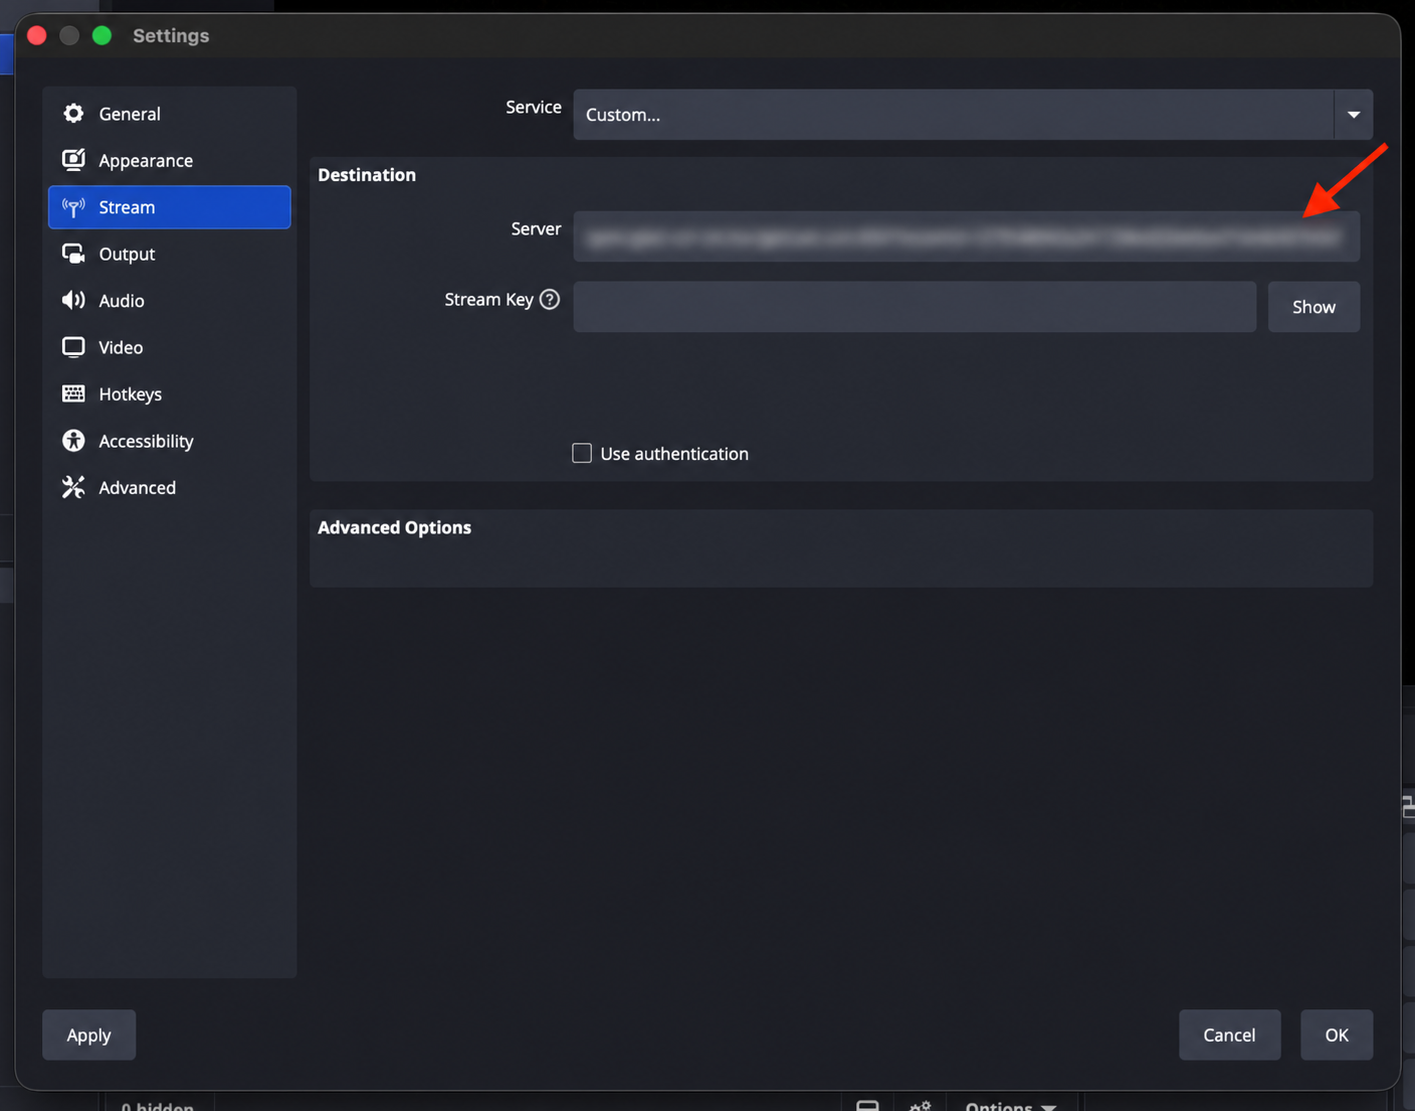
Step 6
Leave the Stream Key field empty.
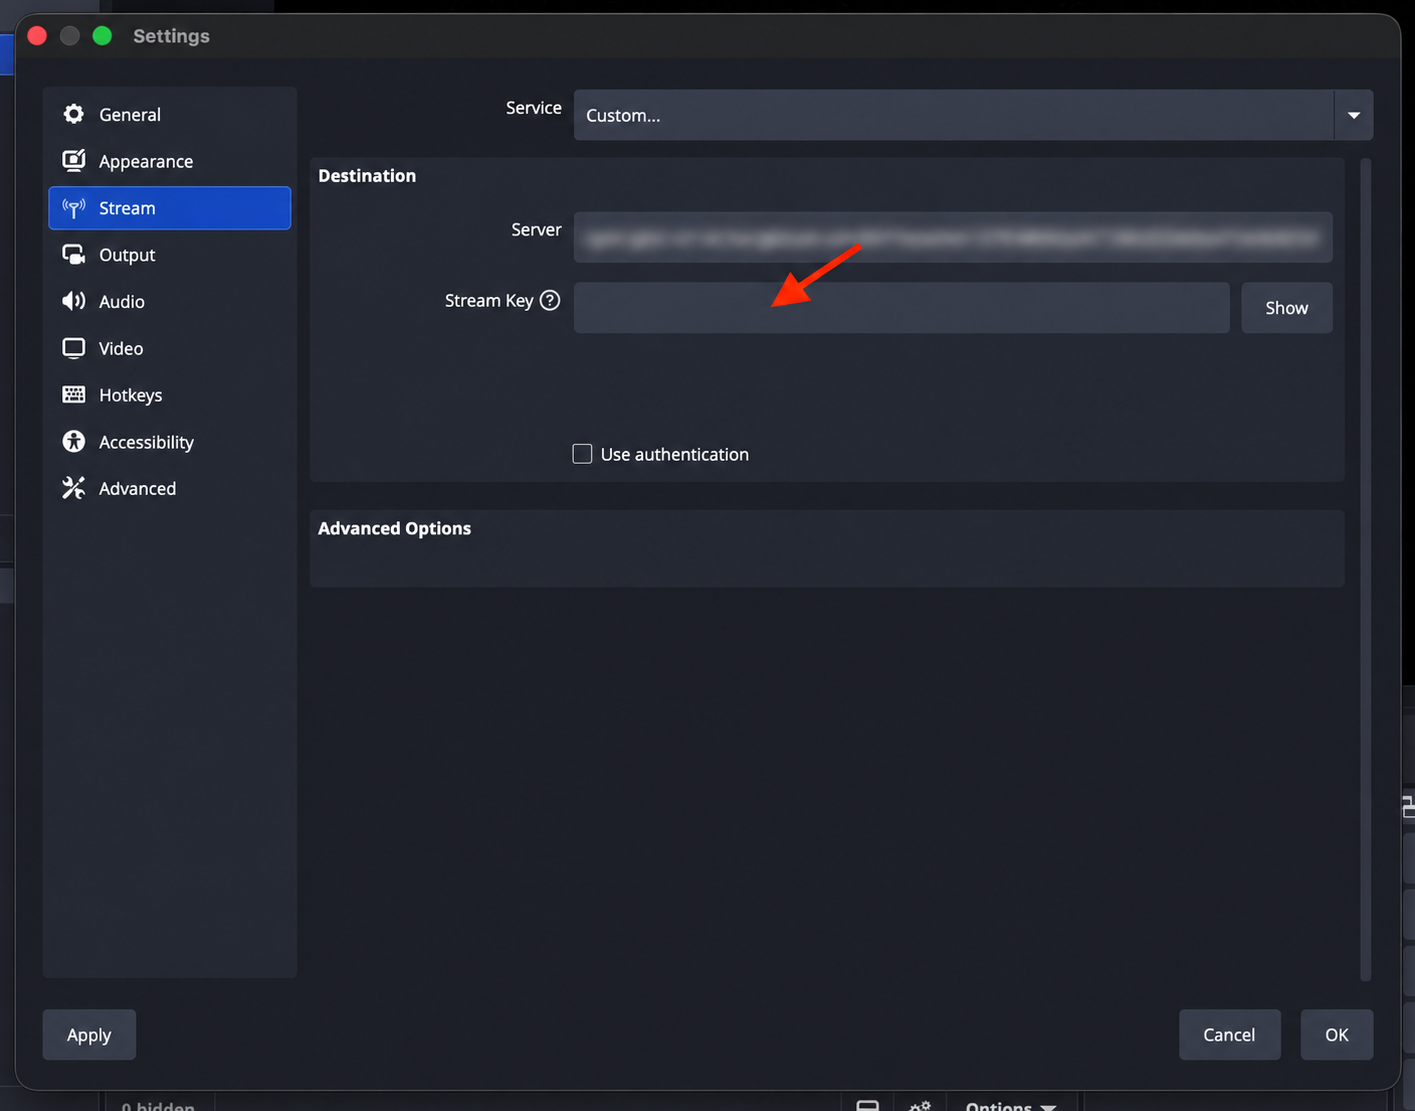
Step 7
Click Apply.
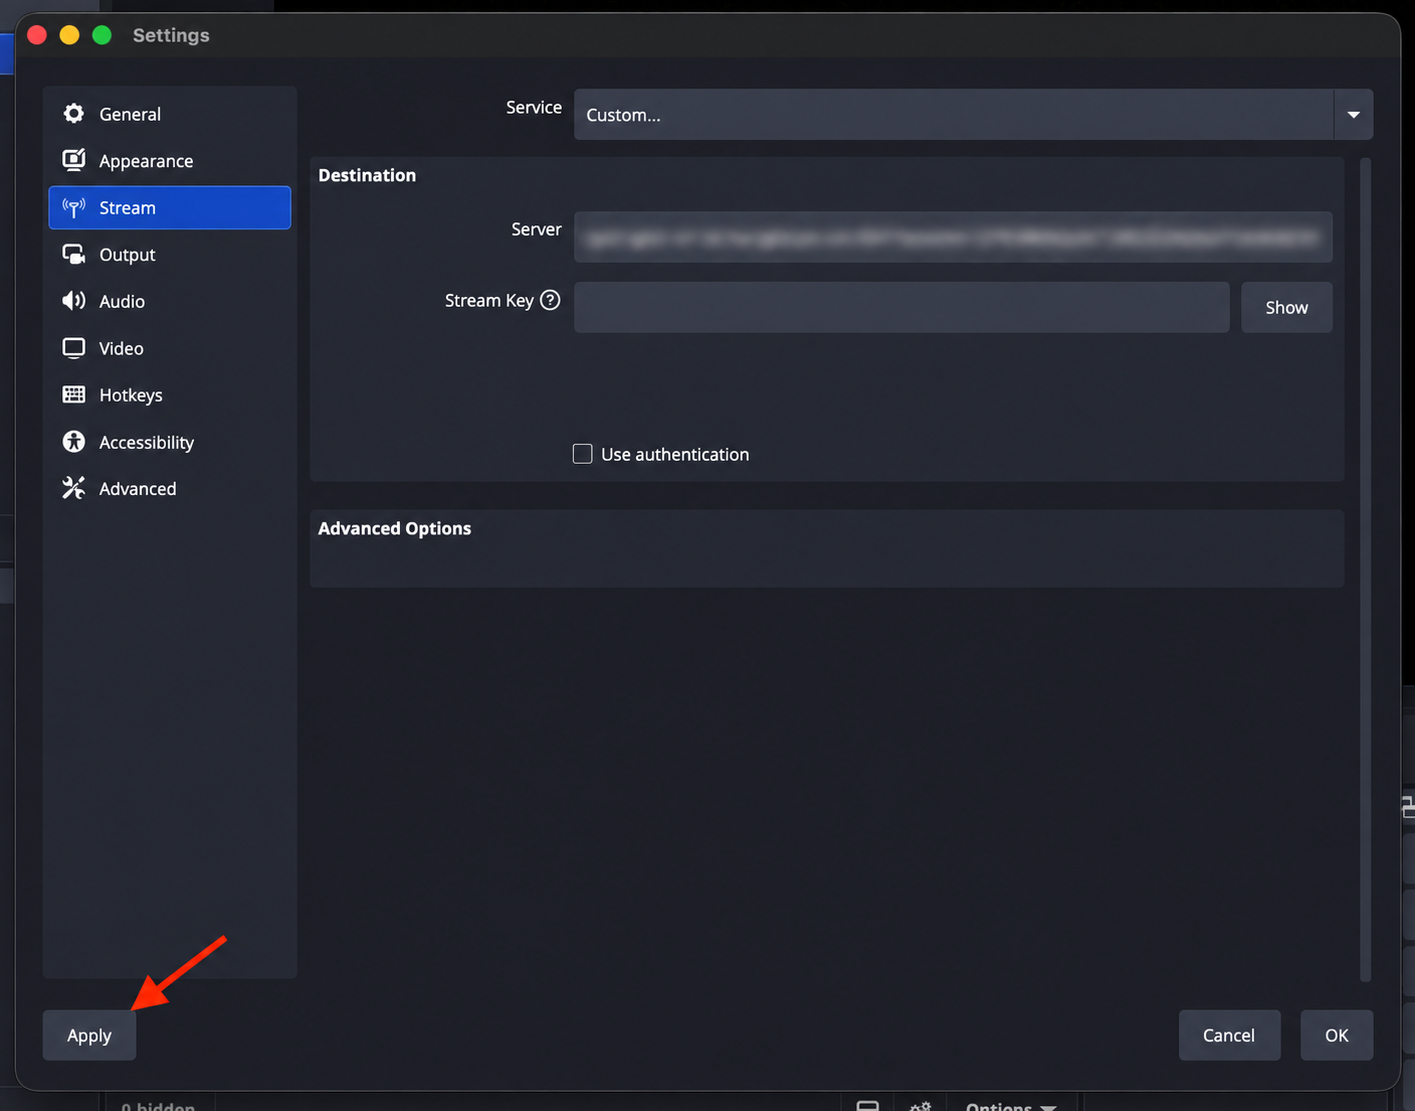
OBS is now configured to send an SRT stream to your LIVE Channel.
Configure output settings
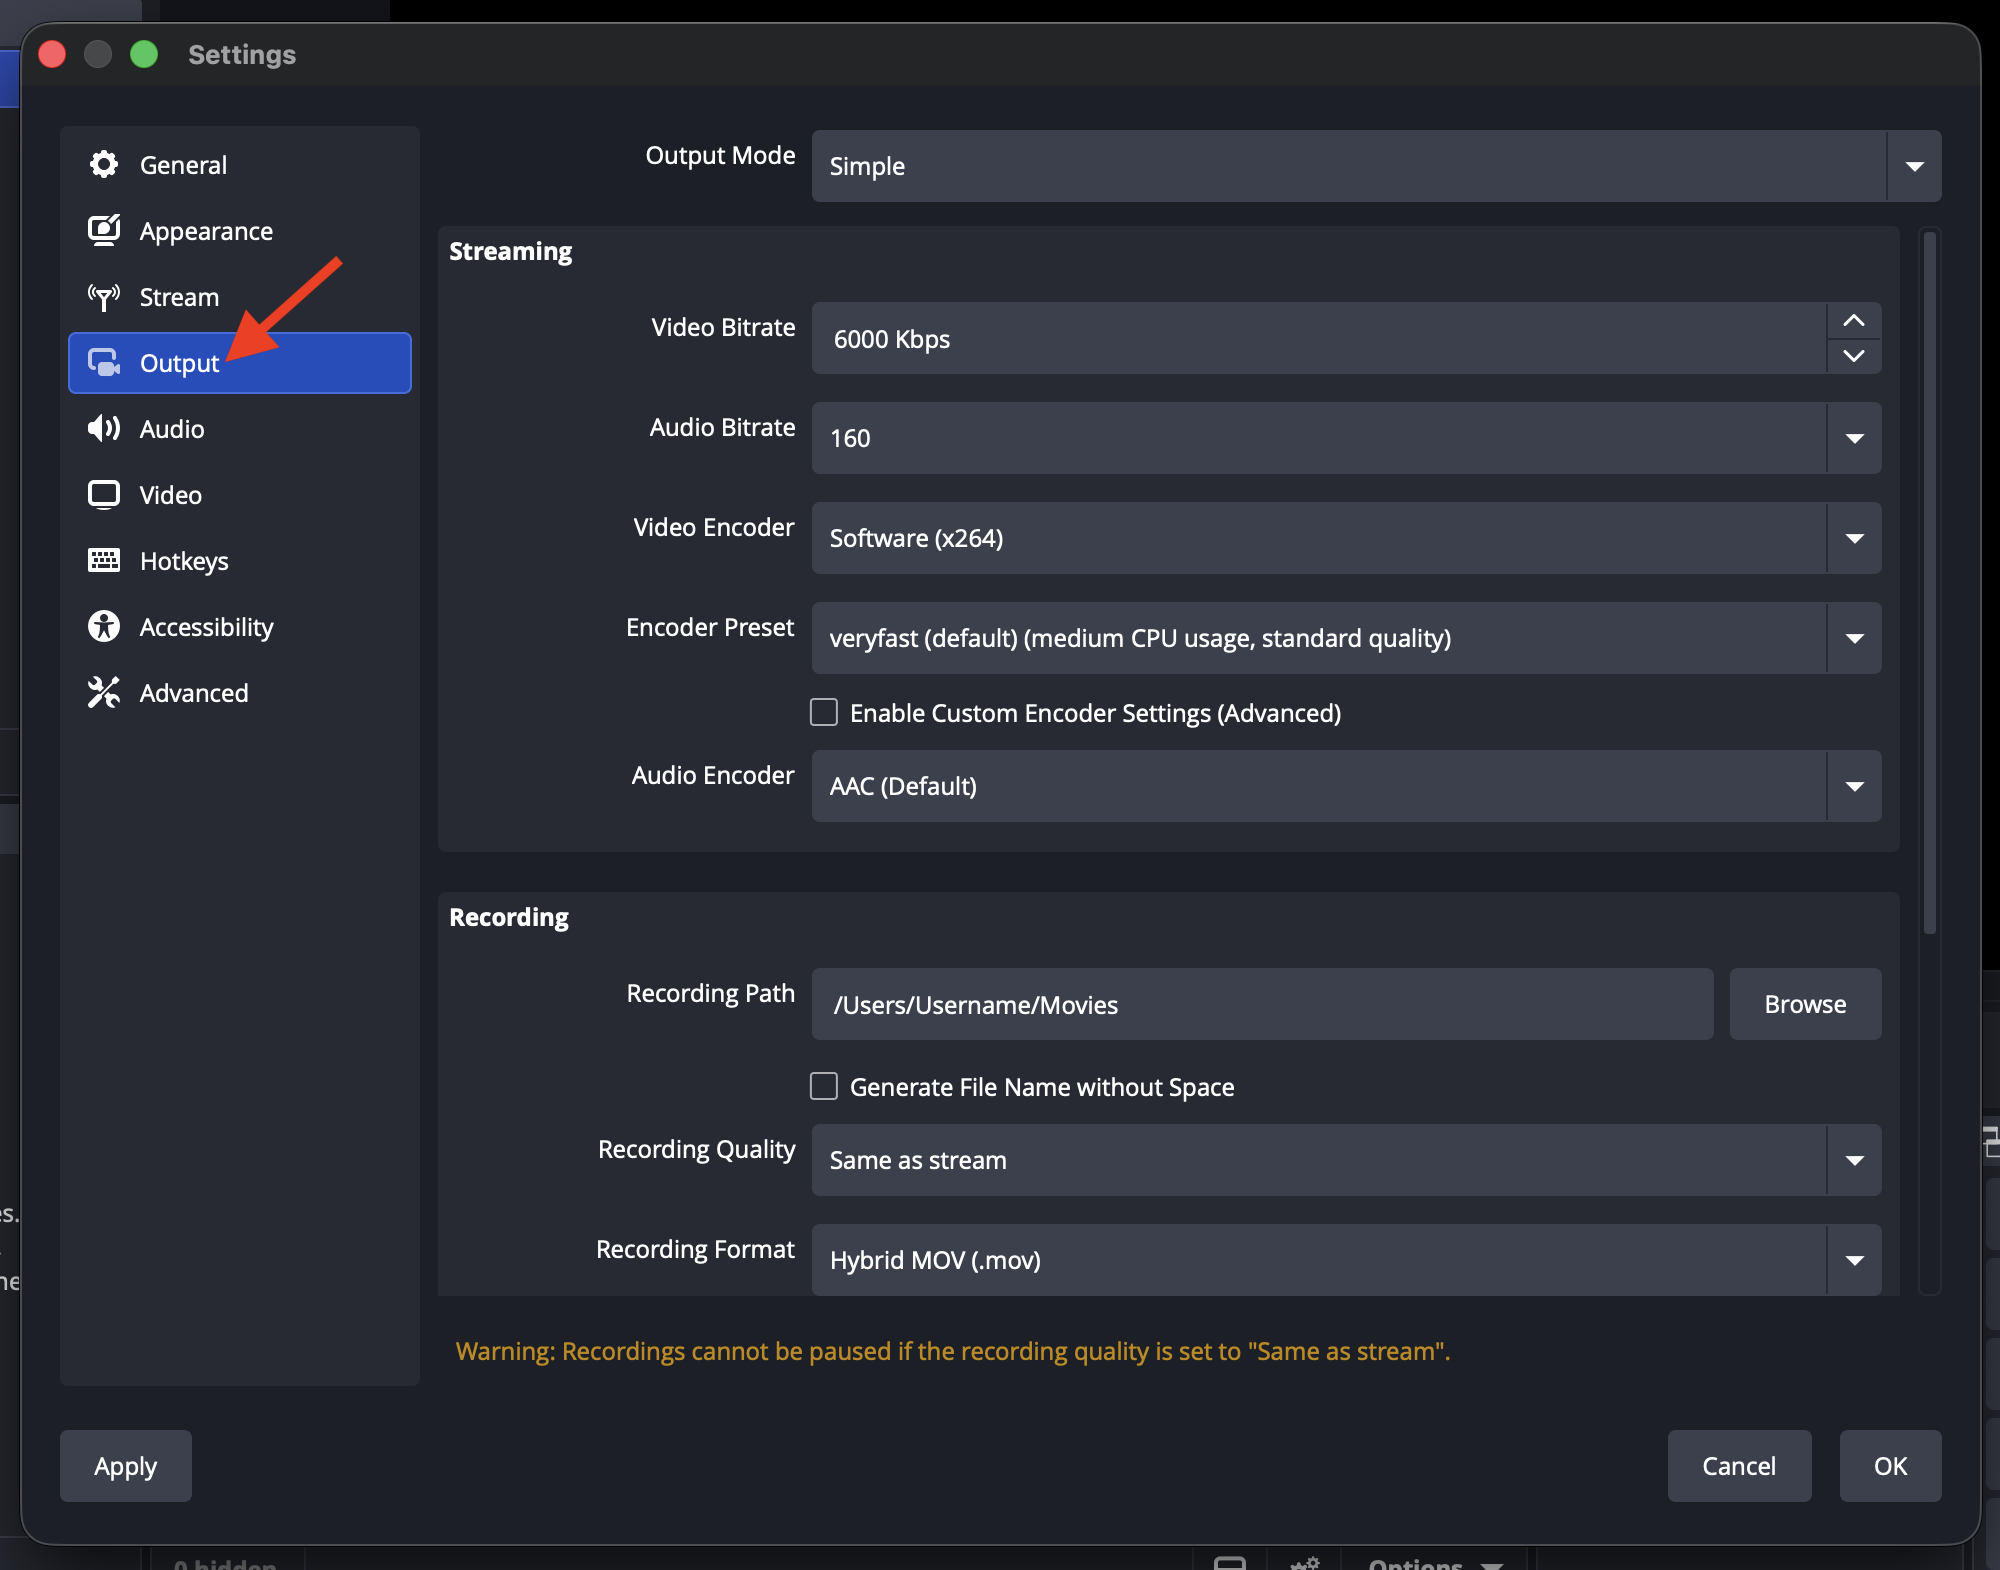
Step 1
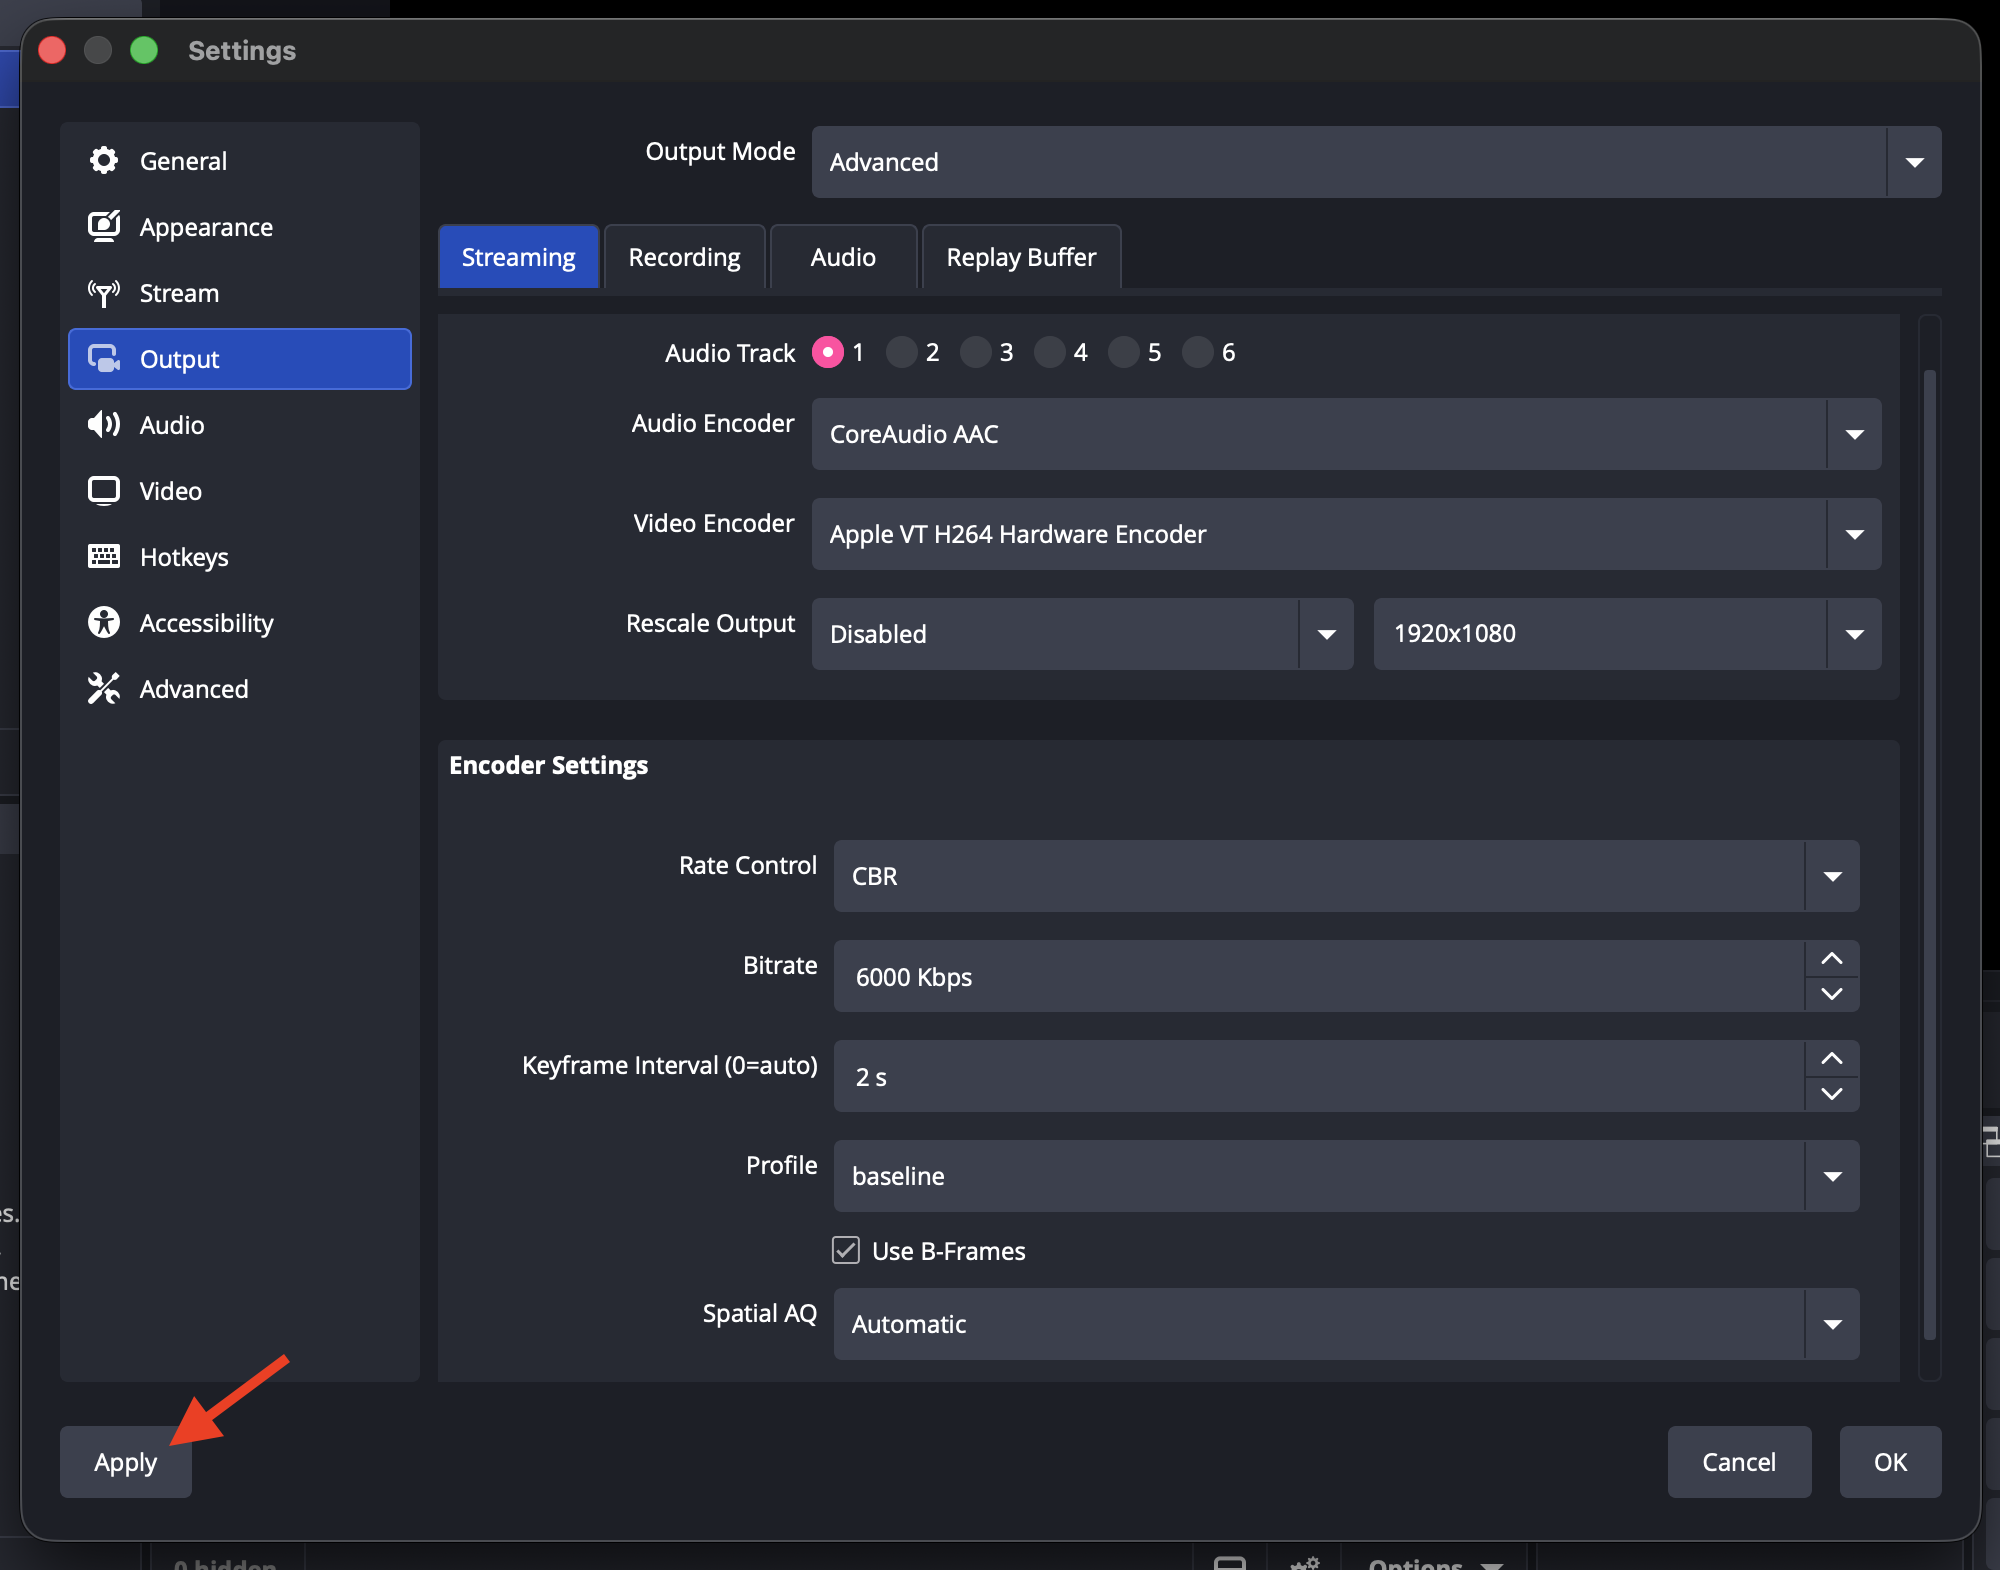
Select Output from the left menu.
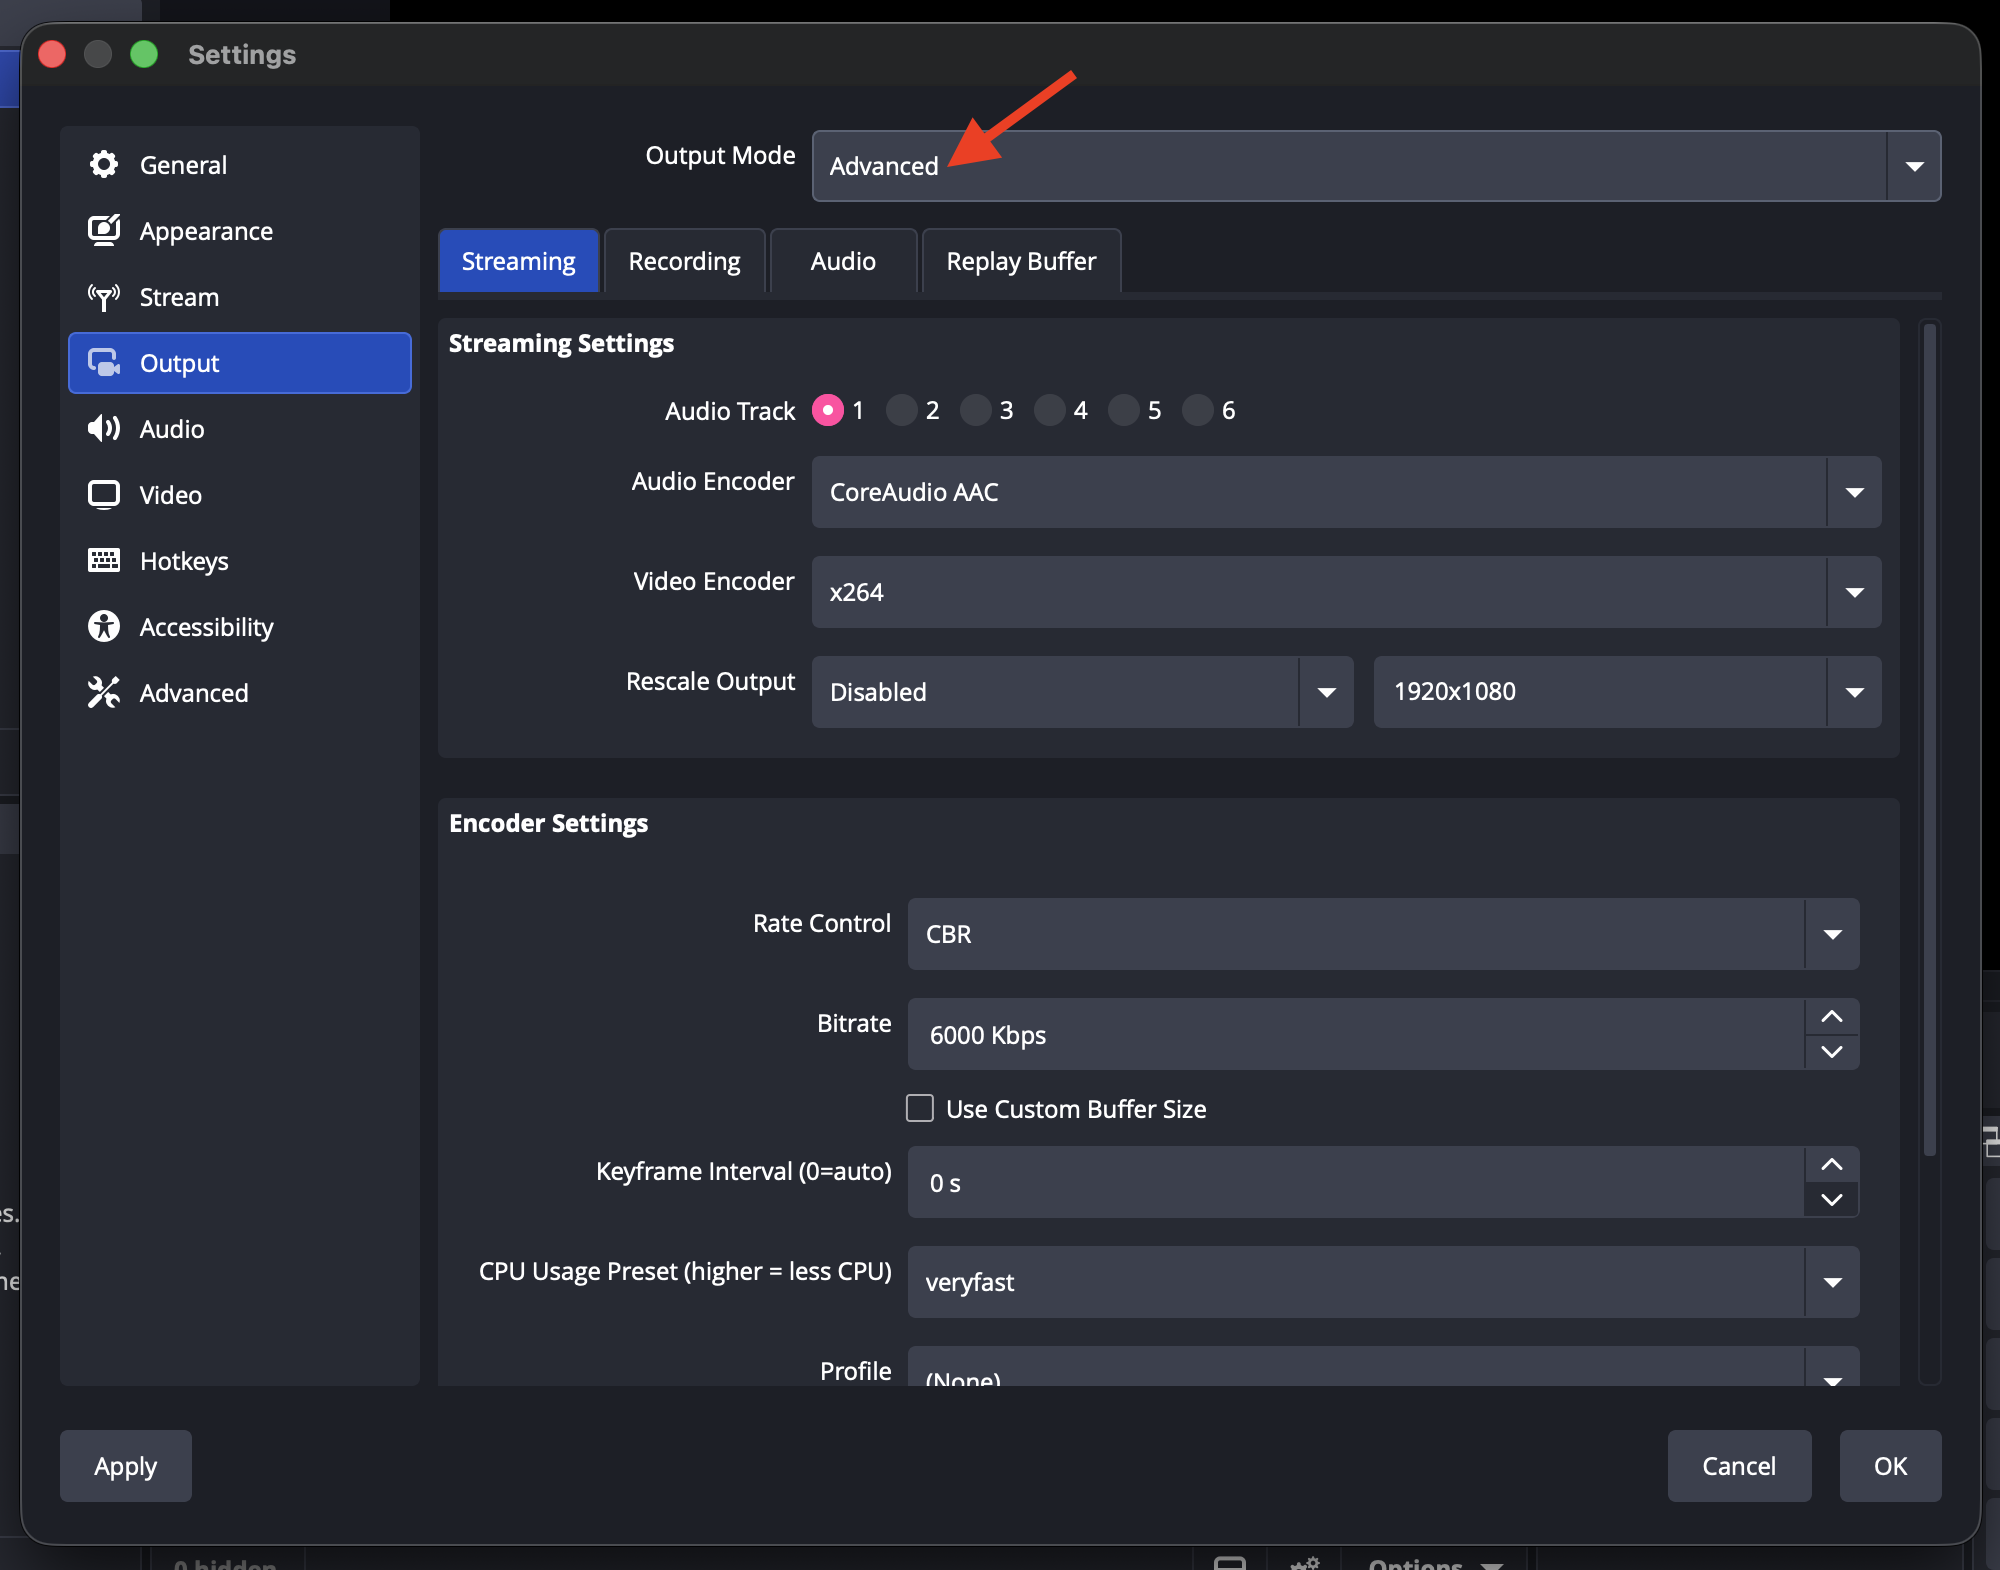
Step 2
Set Output Mode to Advanced.
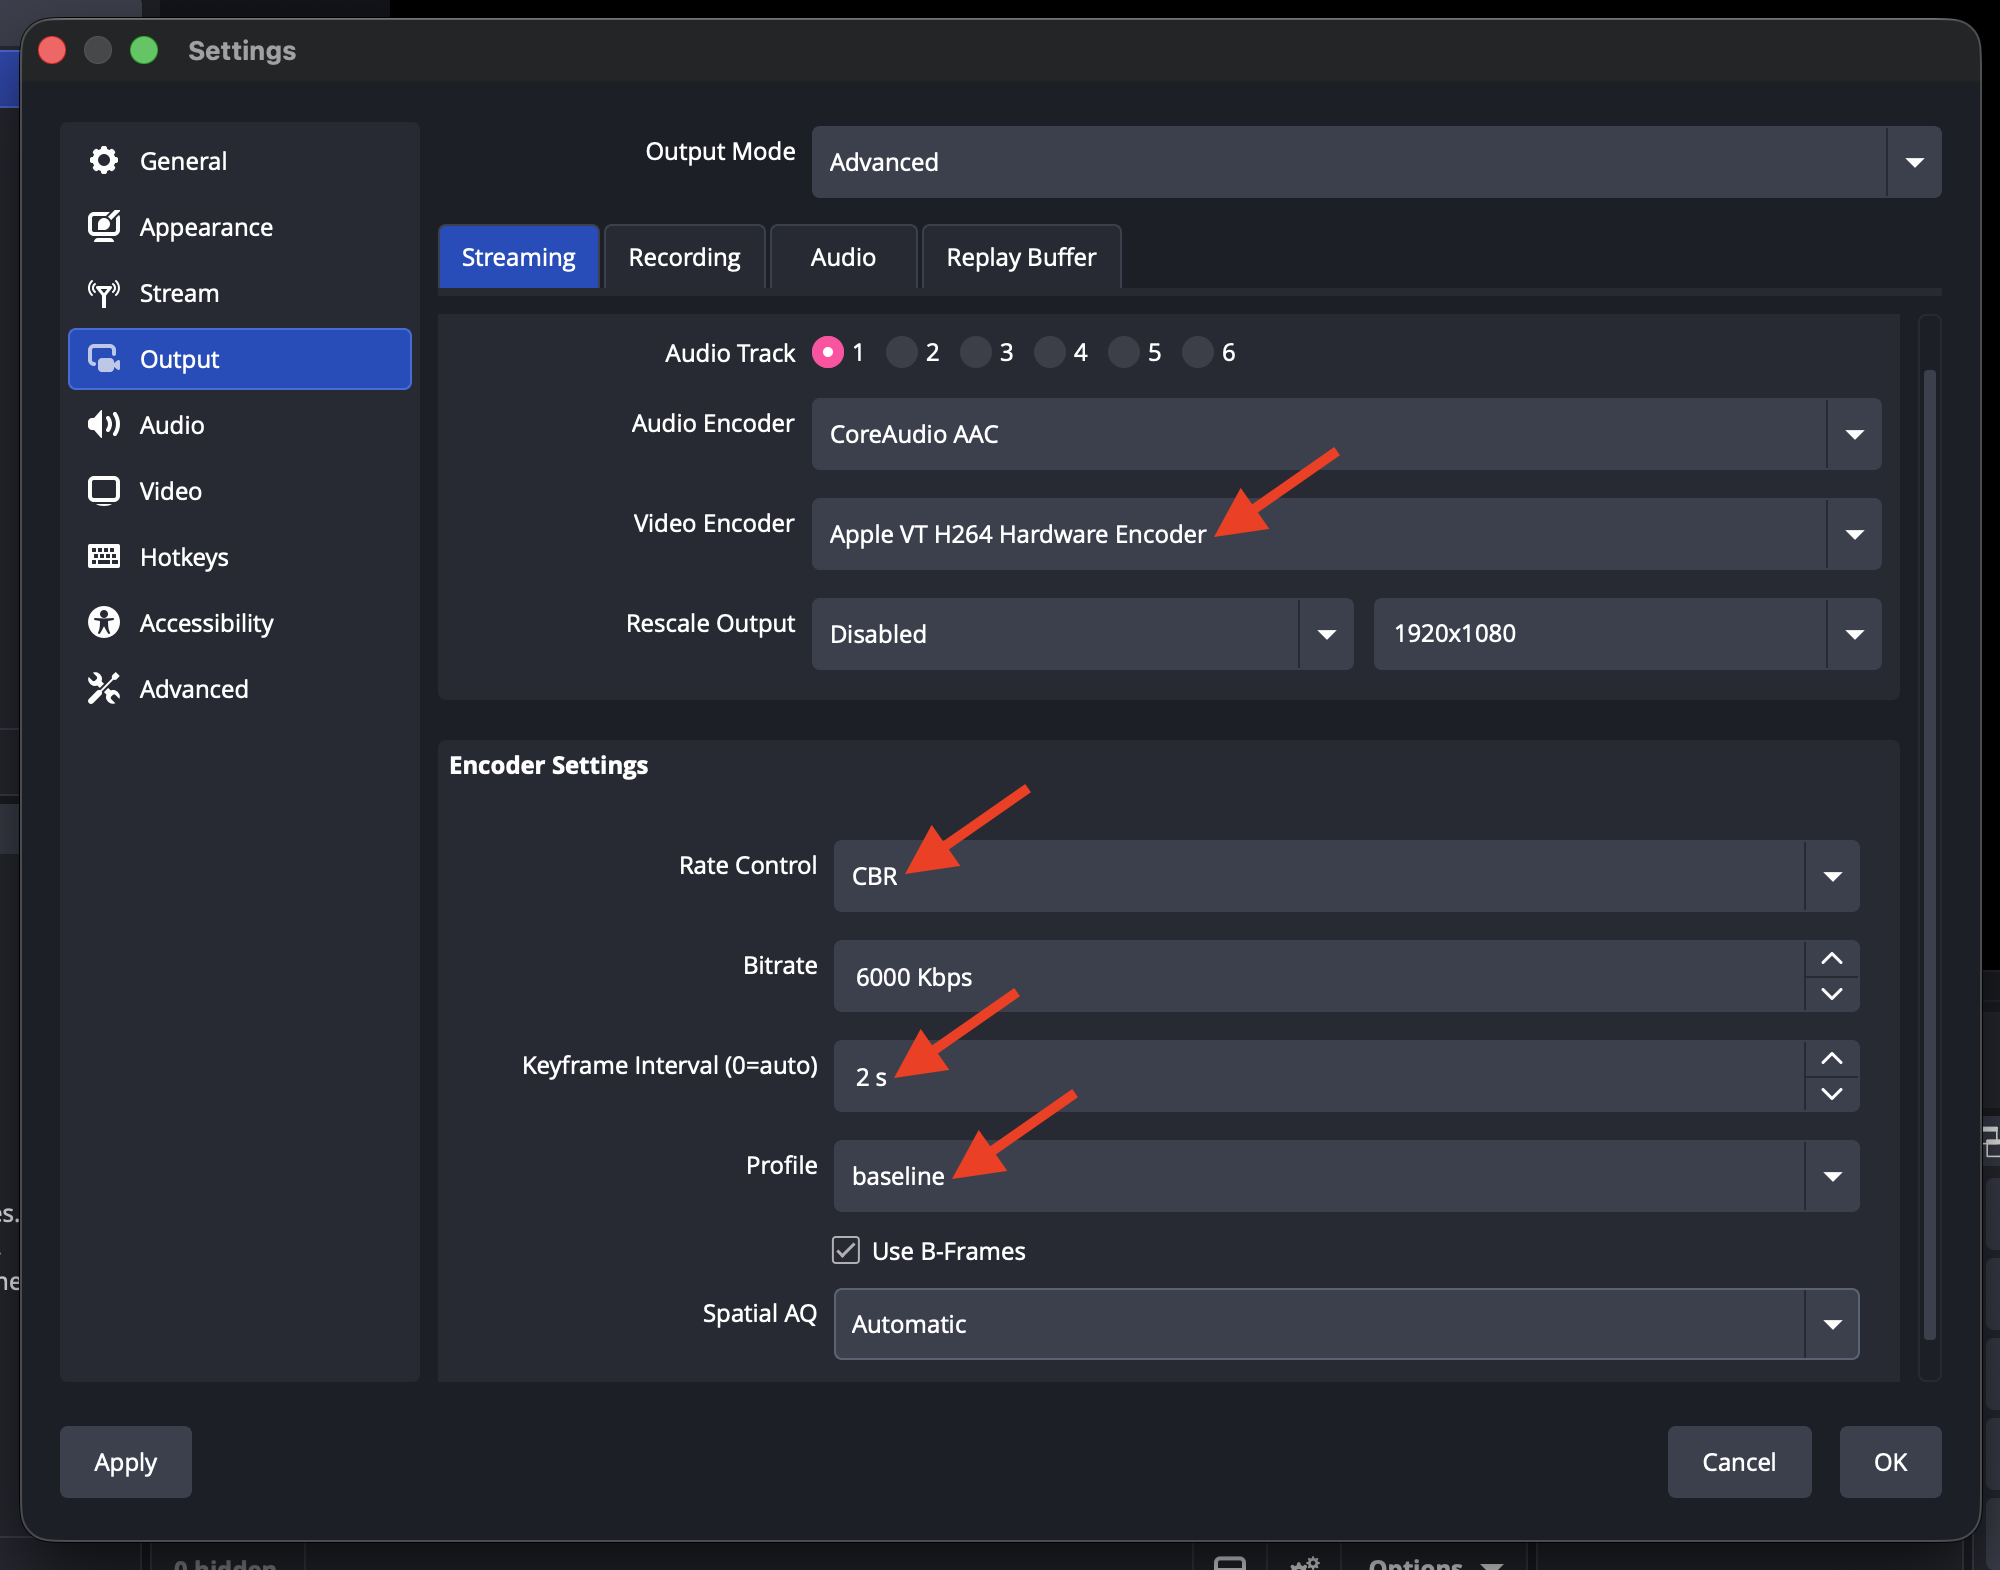
Step 3
Under the Streaming tab, configure the recommended output settings.
Setting | Recommended value |
|---|---|
Encoder | Hardware H.264 encoder, if available |
Rate Control | CBR |
Keyframe Interval | 2 |
Profile | High recommended; Baseline may be used when required for device or encoder compatibility |
The exact H.264 encoder name may vary depending on your computer. OBS may display a hardware encoder from NVIDIA, AMD, Intel, or Apple, depending on your device.
Leave all other settings at the default unless your streaming setup requires a different configuration.
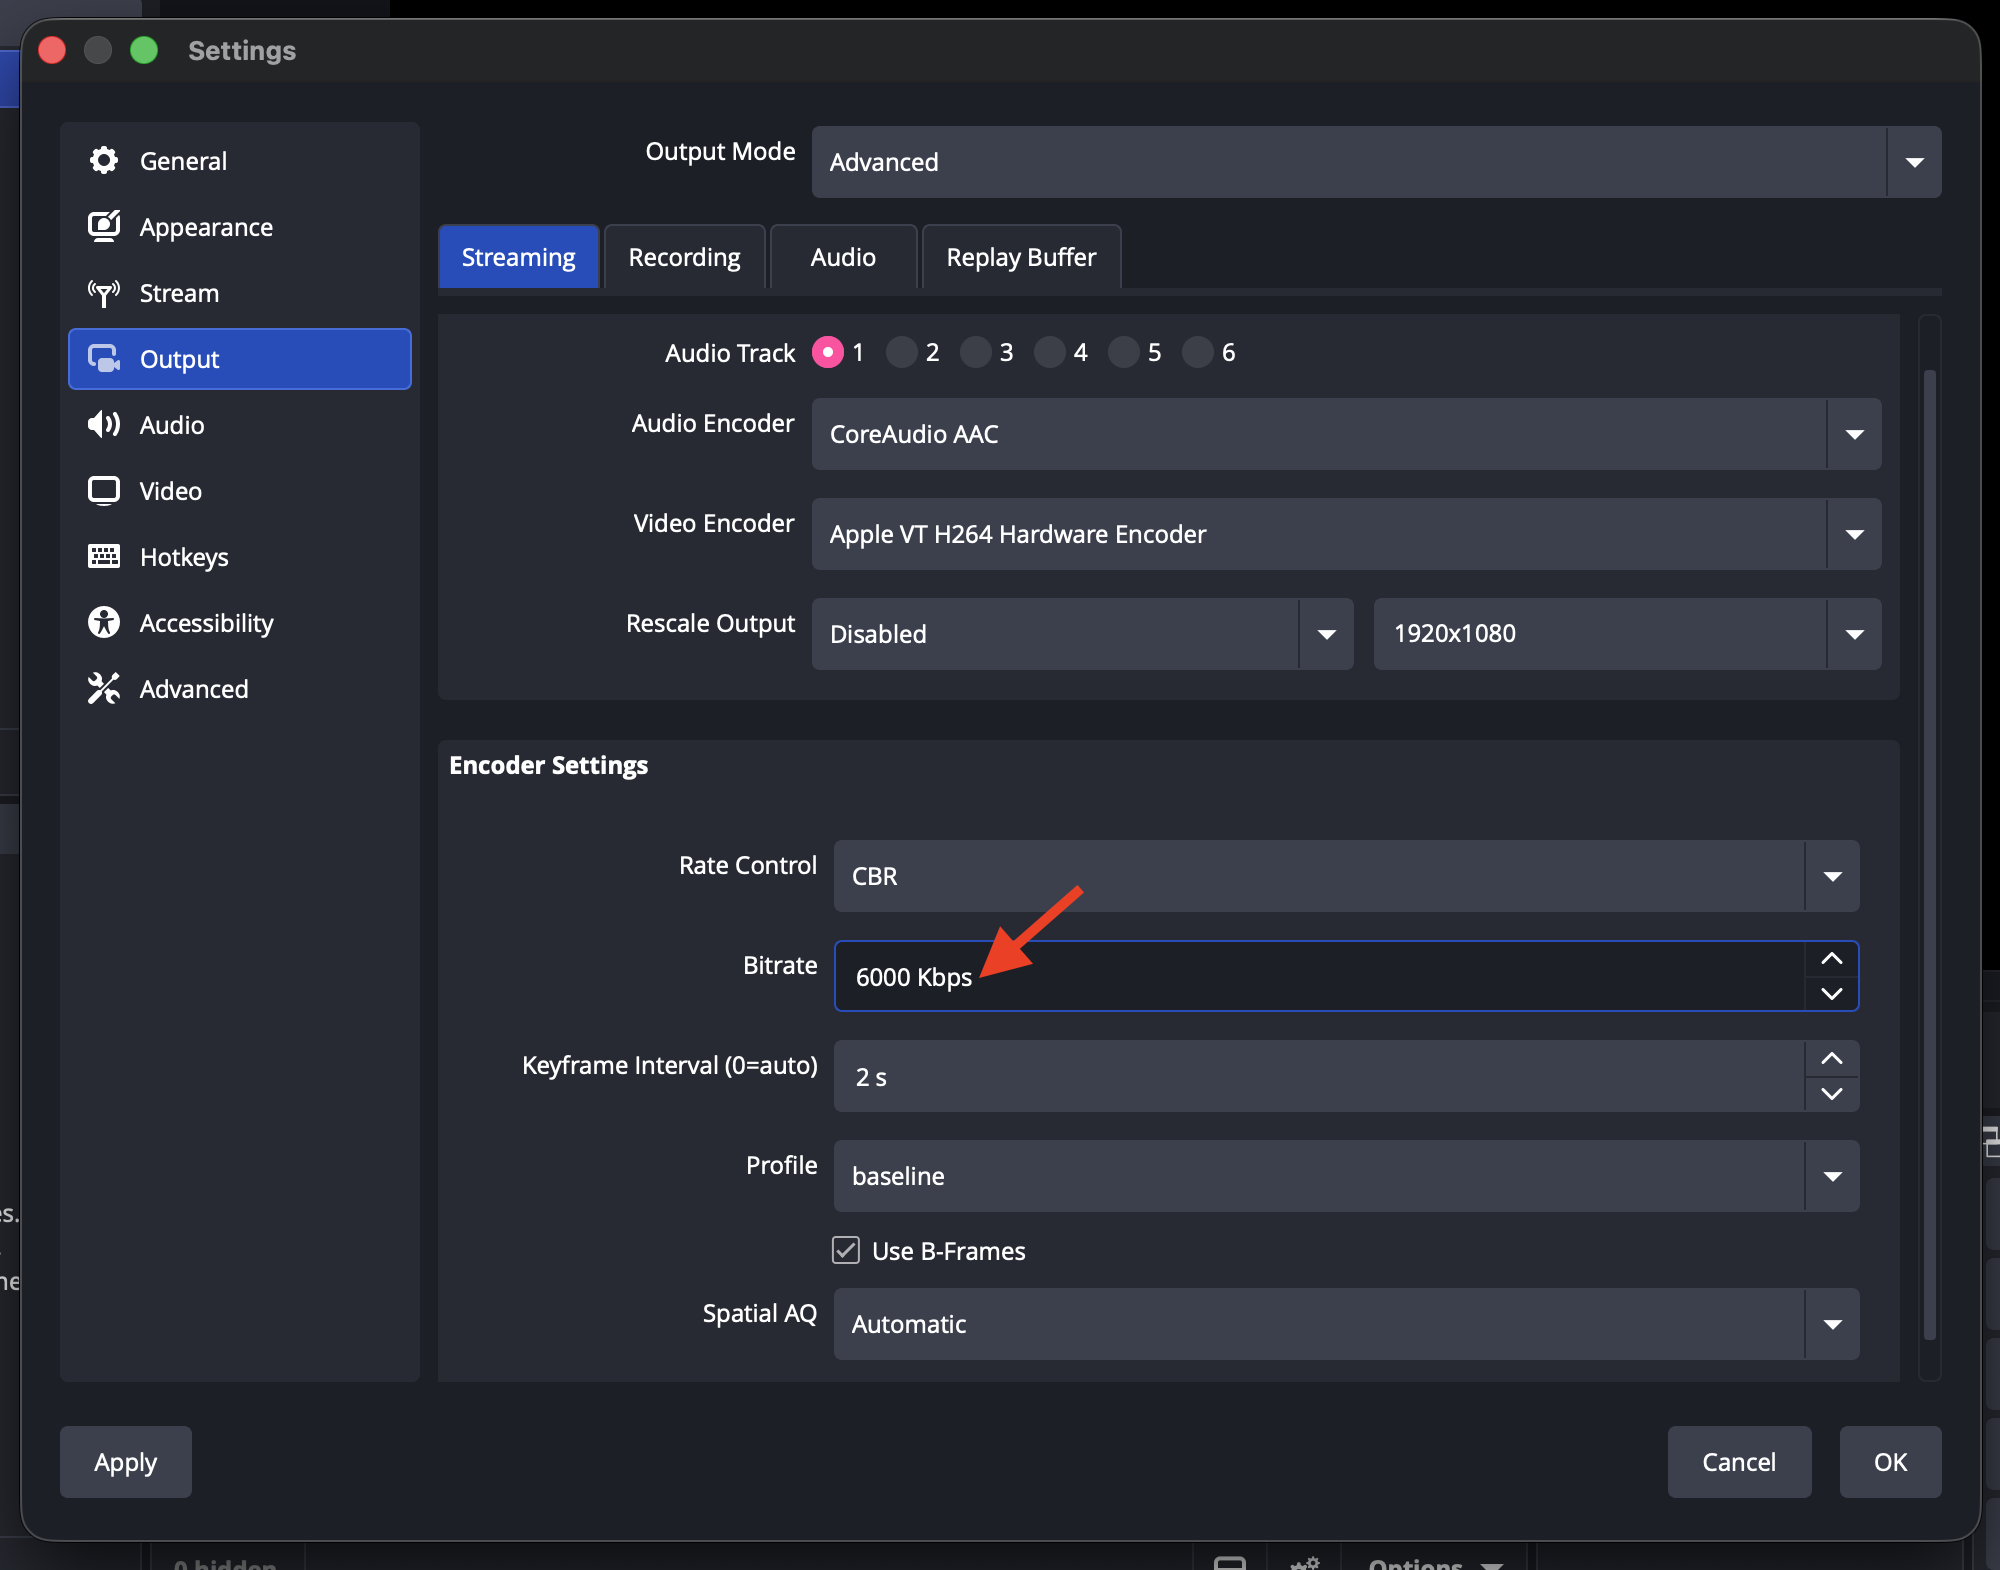
Step 4
Set your streaming bitrate.
Resolution | Recommended bitrate |
|---|---|
720p | 2,000–2,500 kbps |
1080p | 5,000–8,000 kbps |
For best results, your available upload bandwidth should be at least twice the total bitrate of your stream, including video and audio. This provides additional capacity for network fluctuations and helps maintain a stable live stream.
Step 5
Click Apply.
Step 6
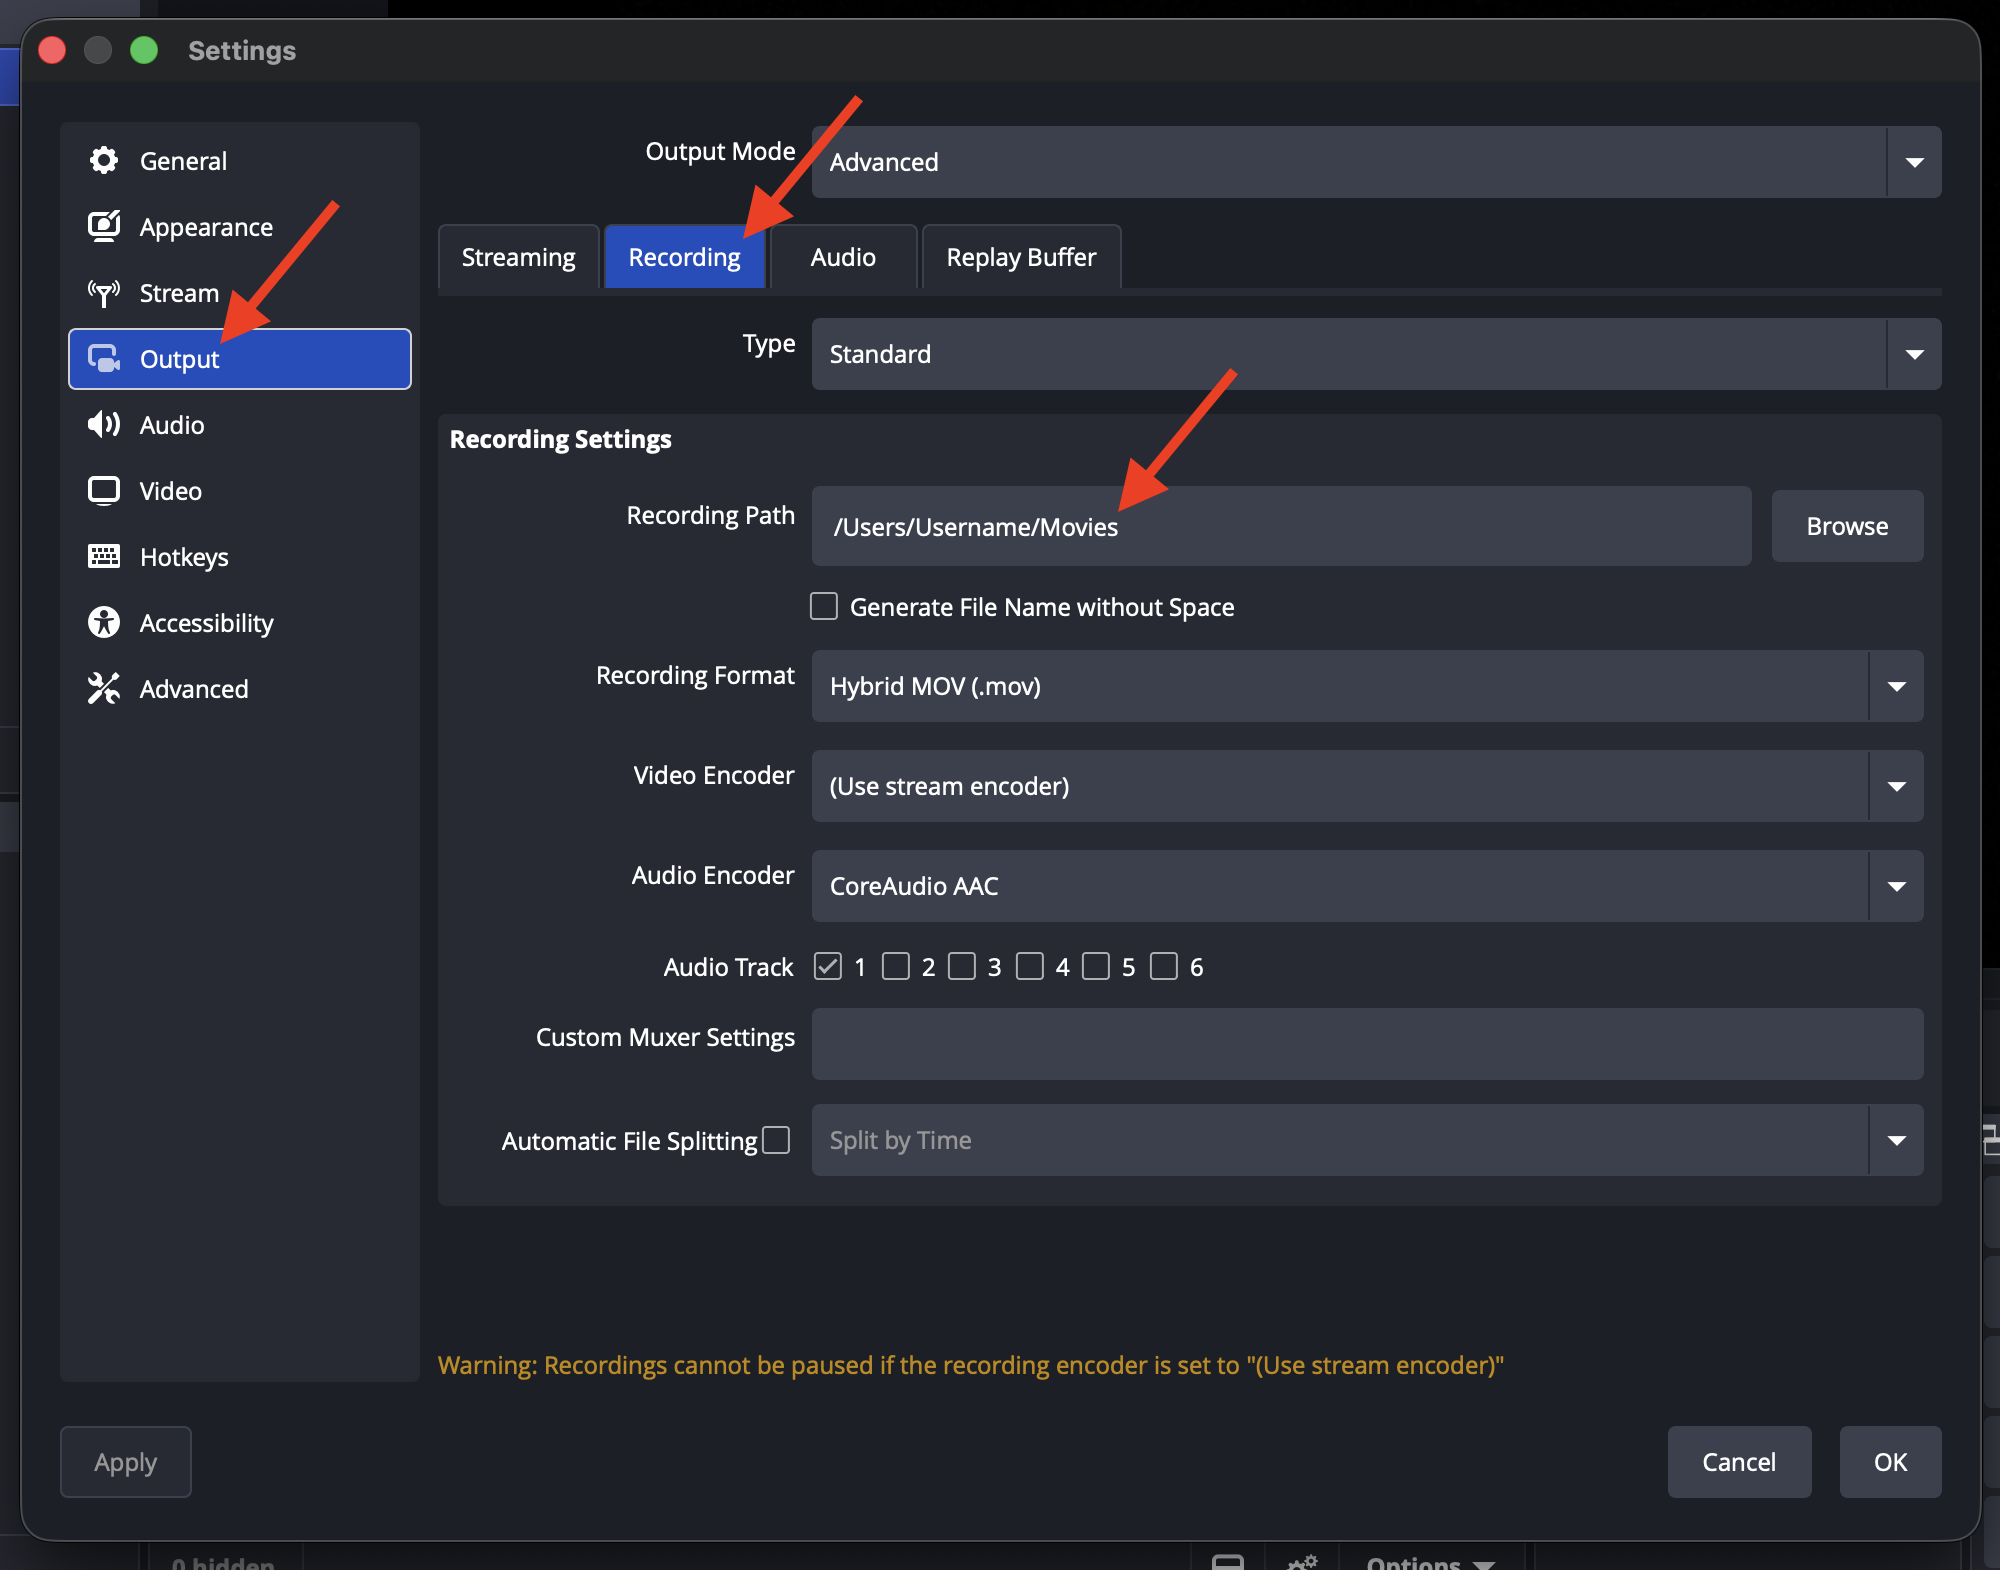
Optional: Configure recording settings if you want OBS to record a local copy of your stream.
In Output, open the Recording tab and choose the folder location where OBS should save the recording.
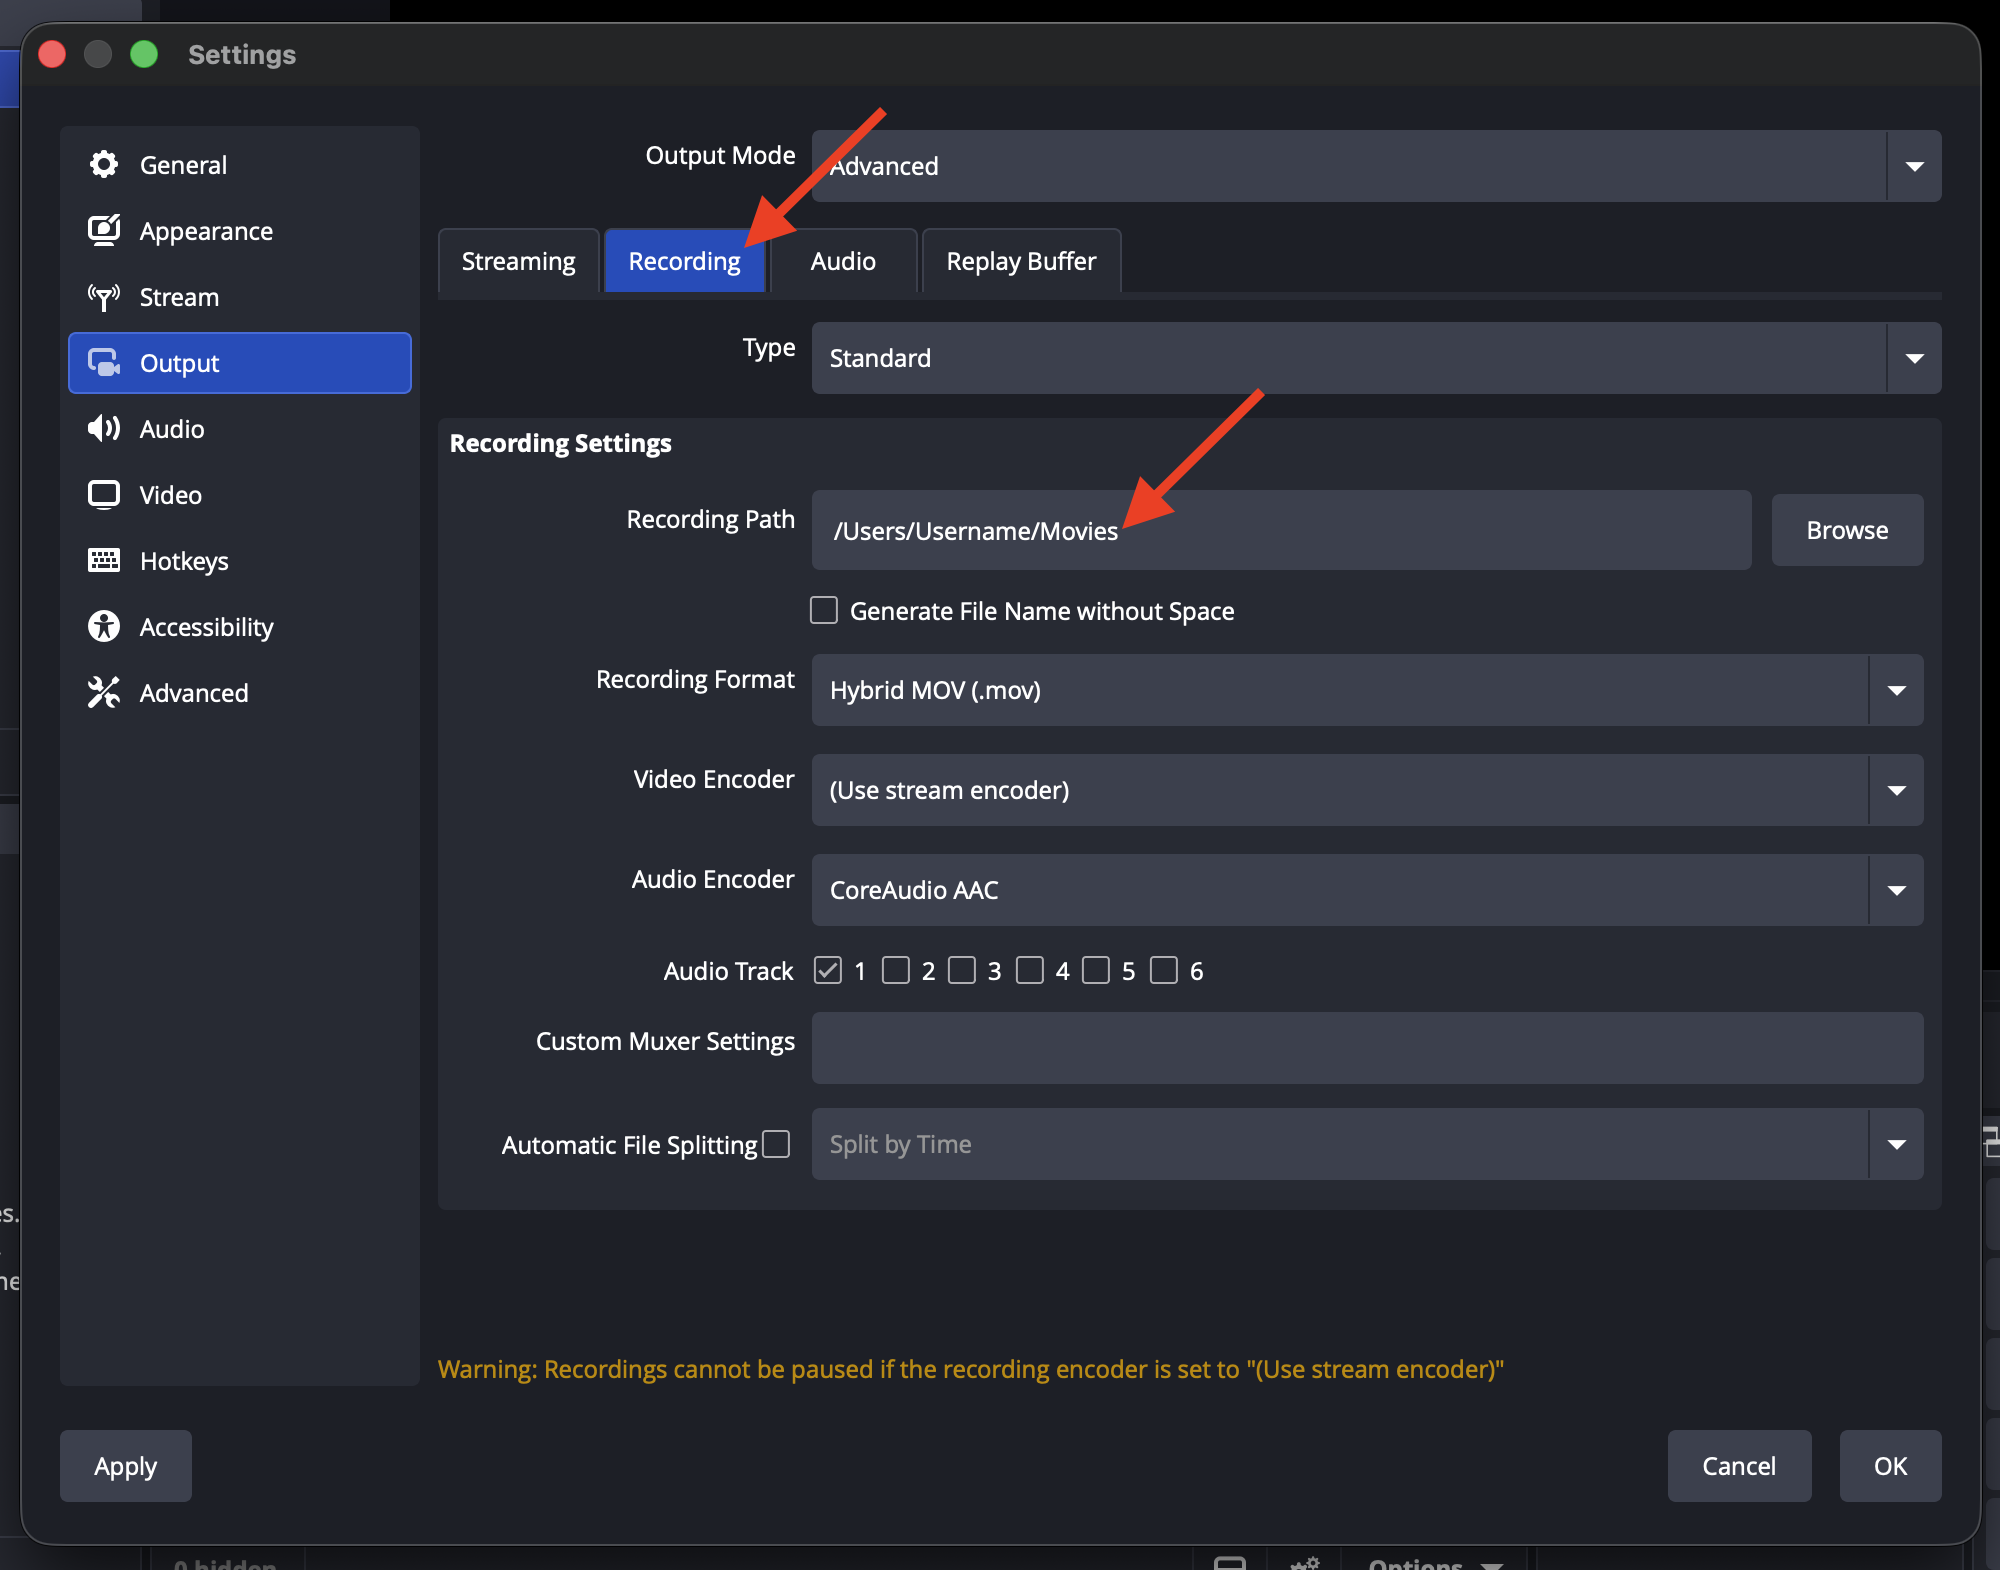
A local recording can be used as a backup file after the broadcast.
Configure audio and video settings
Step 1
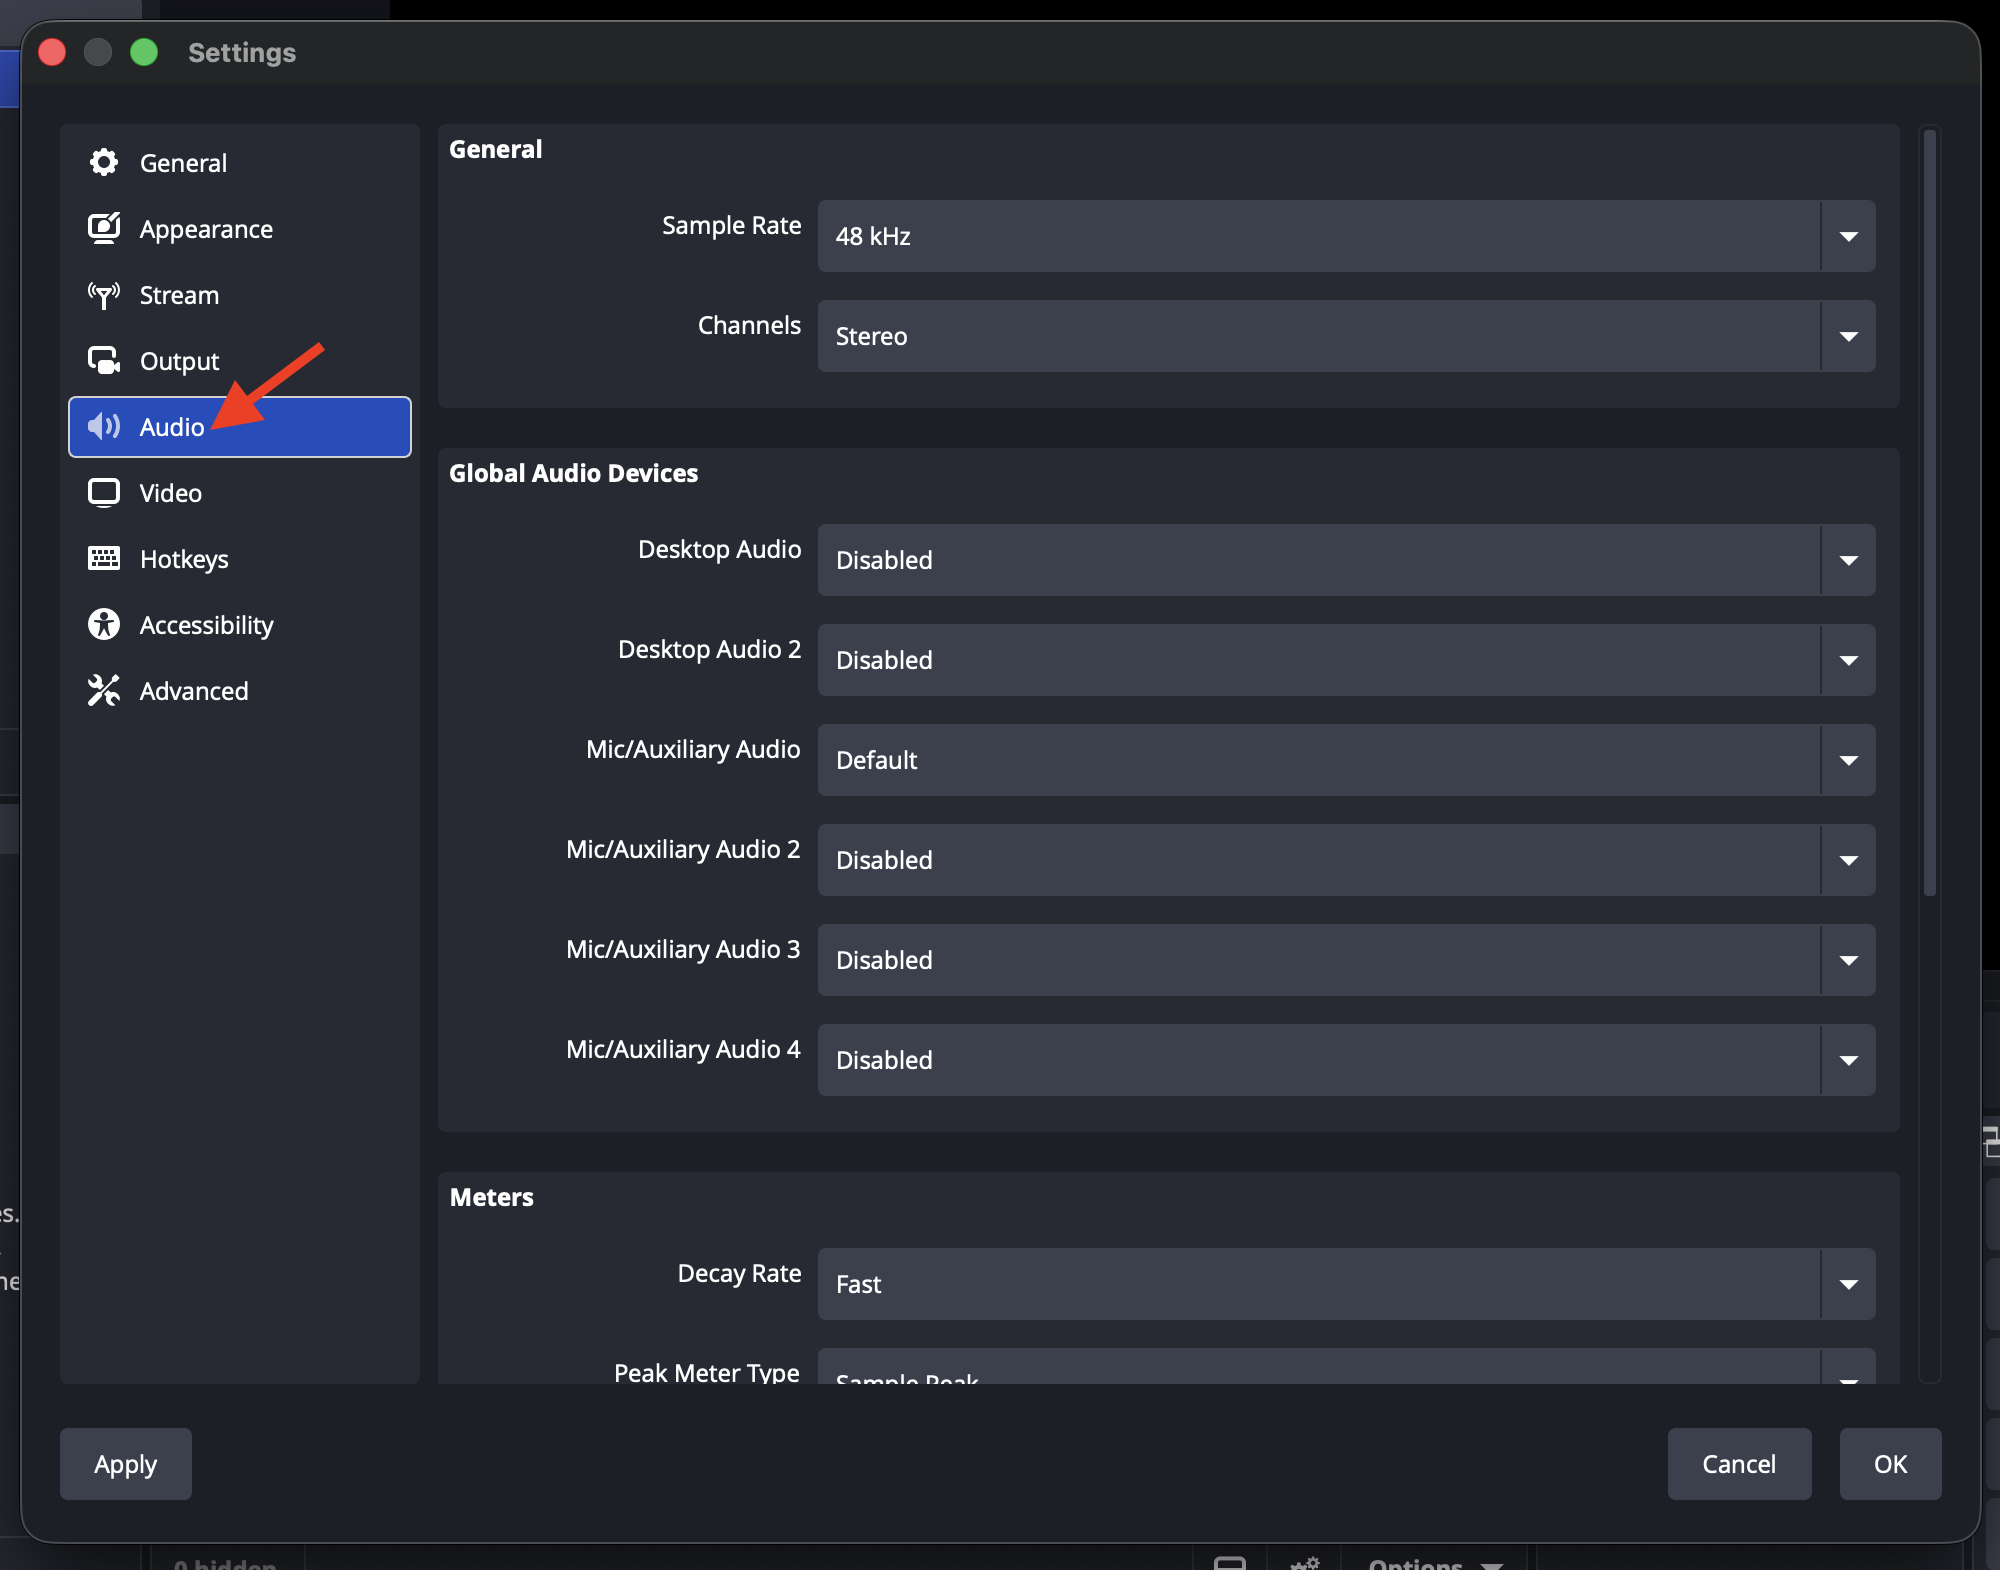
Select Audio from the left menu.
Step 2
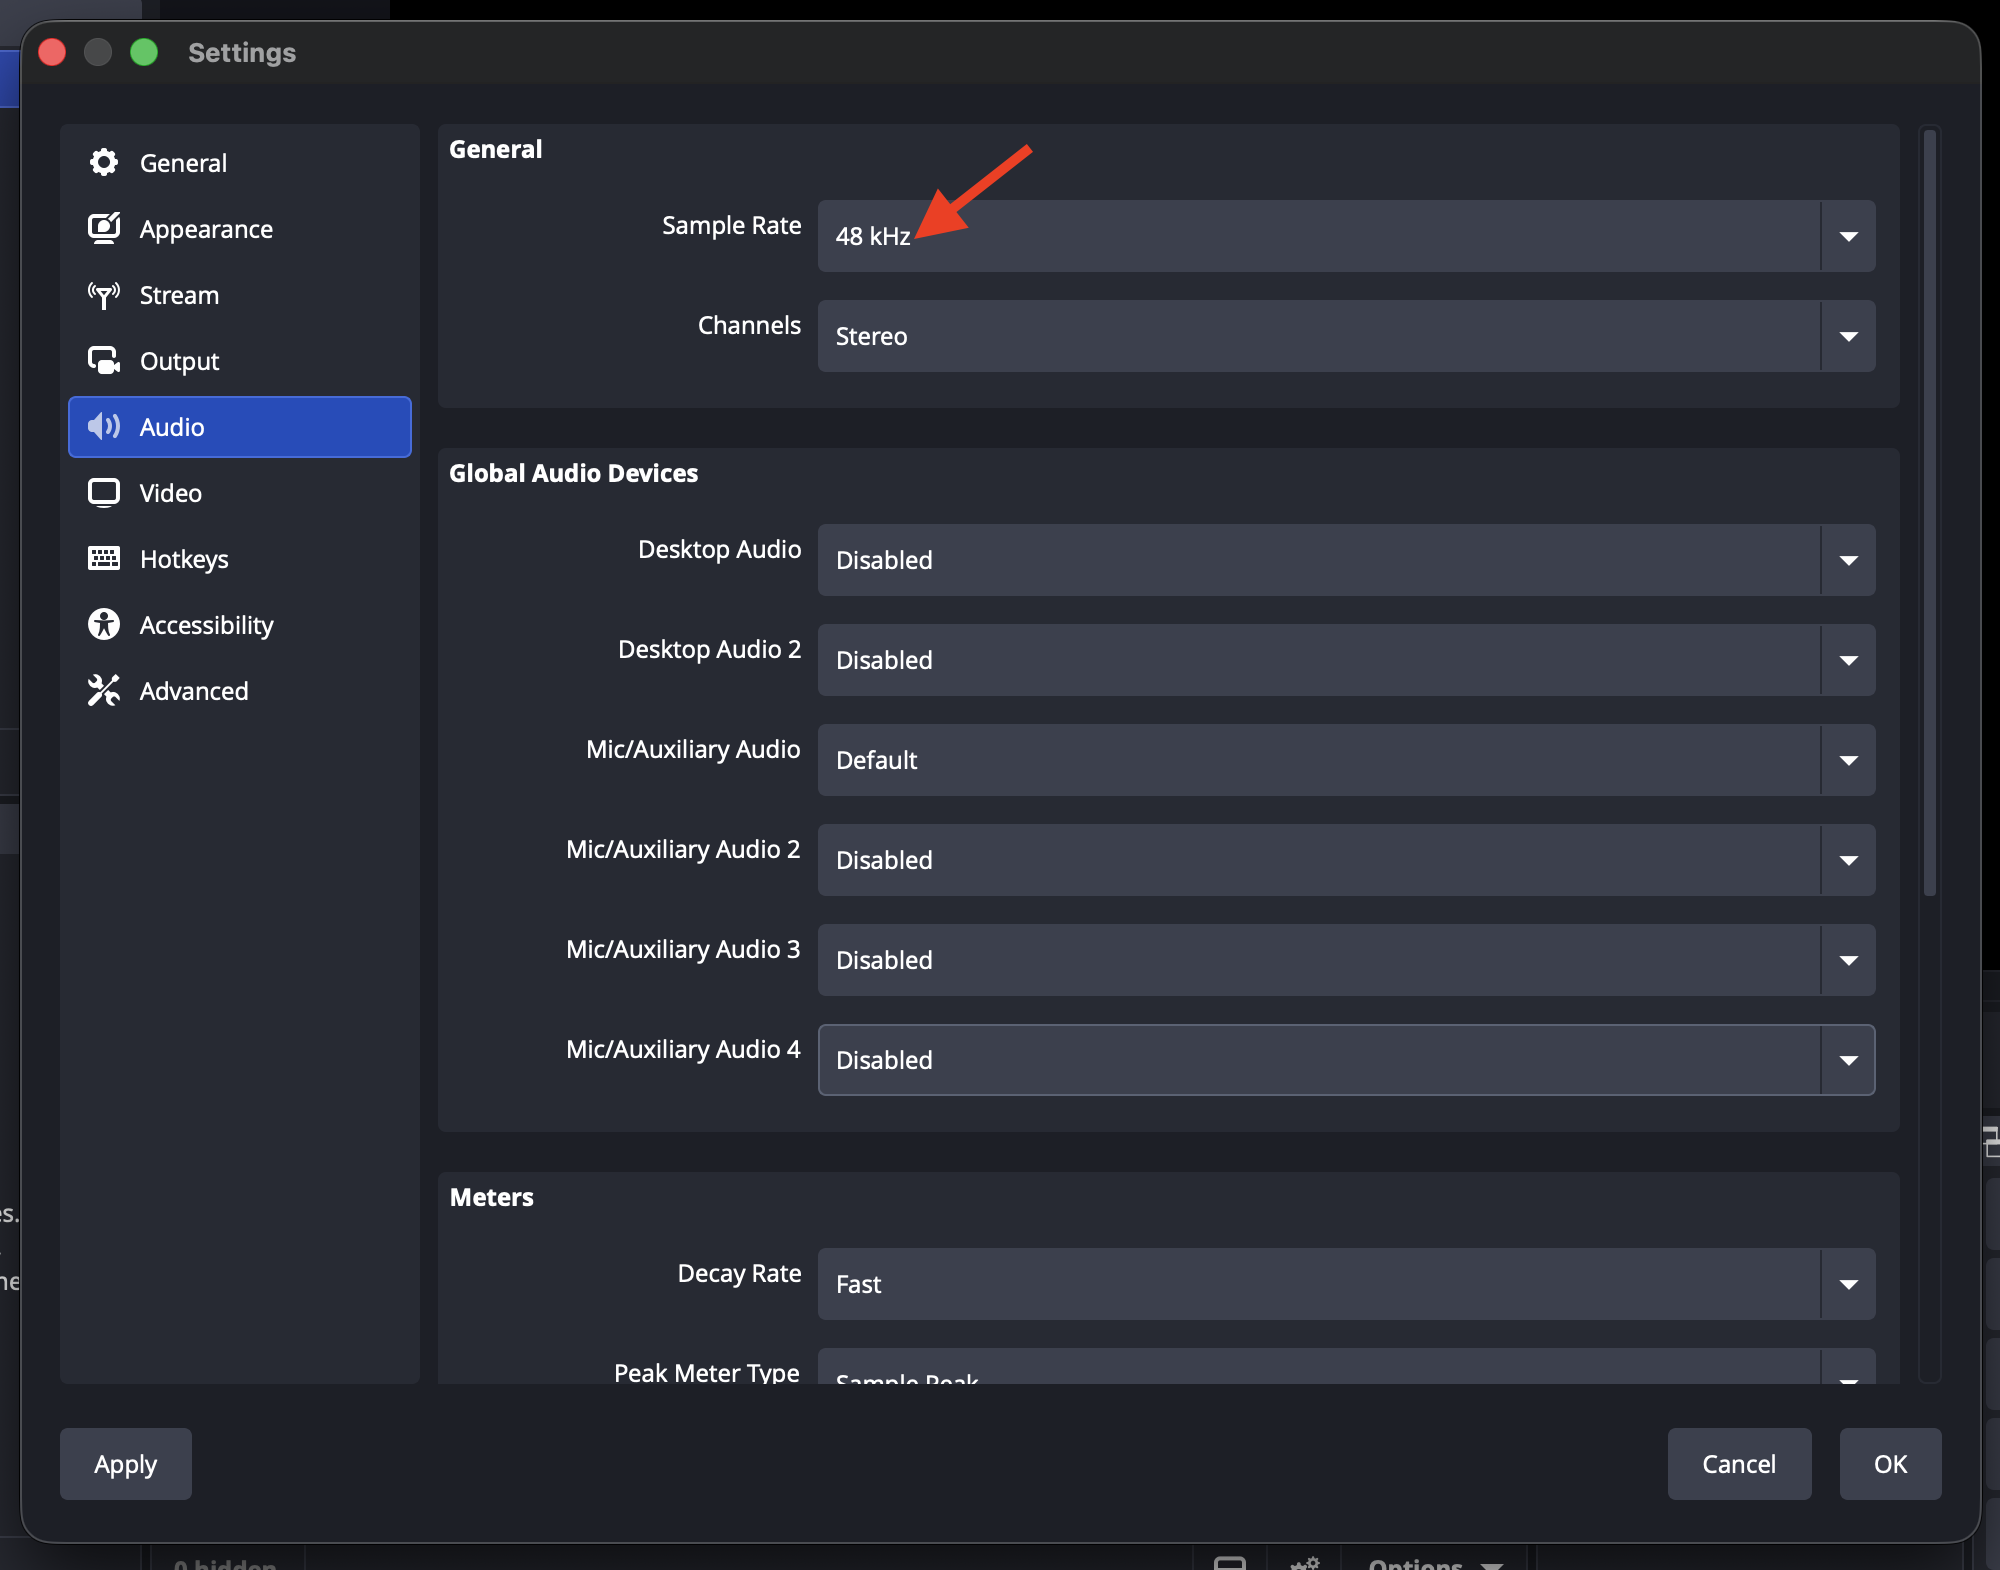
Set the Sample Rate to 44.1 kHz or 48 kHz.
Step 3
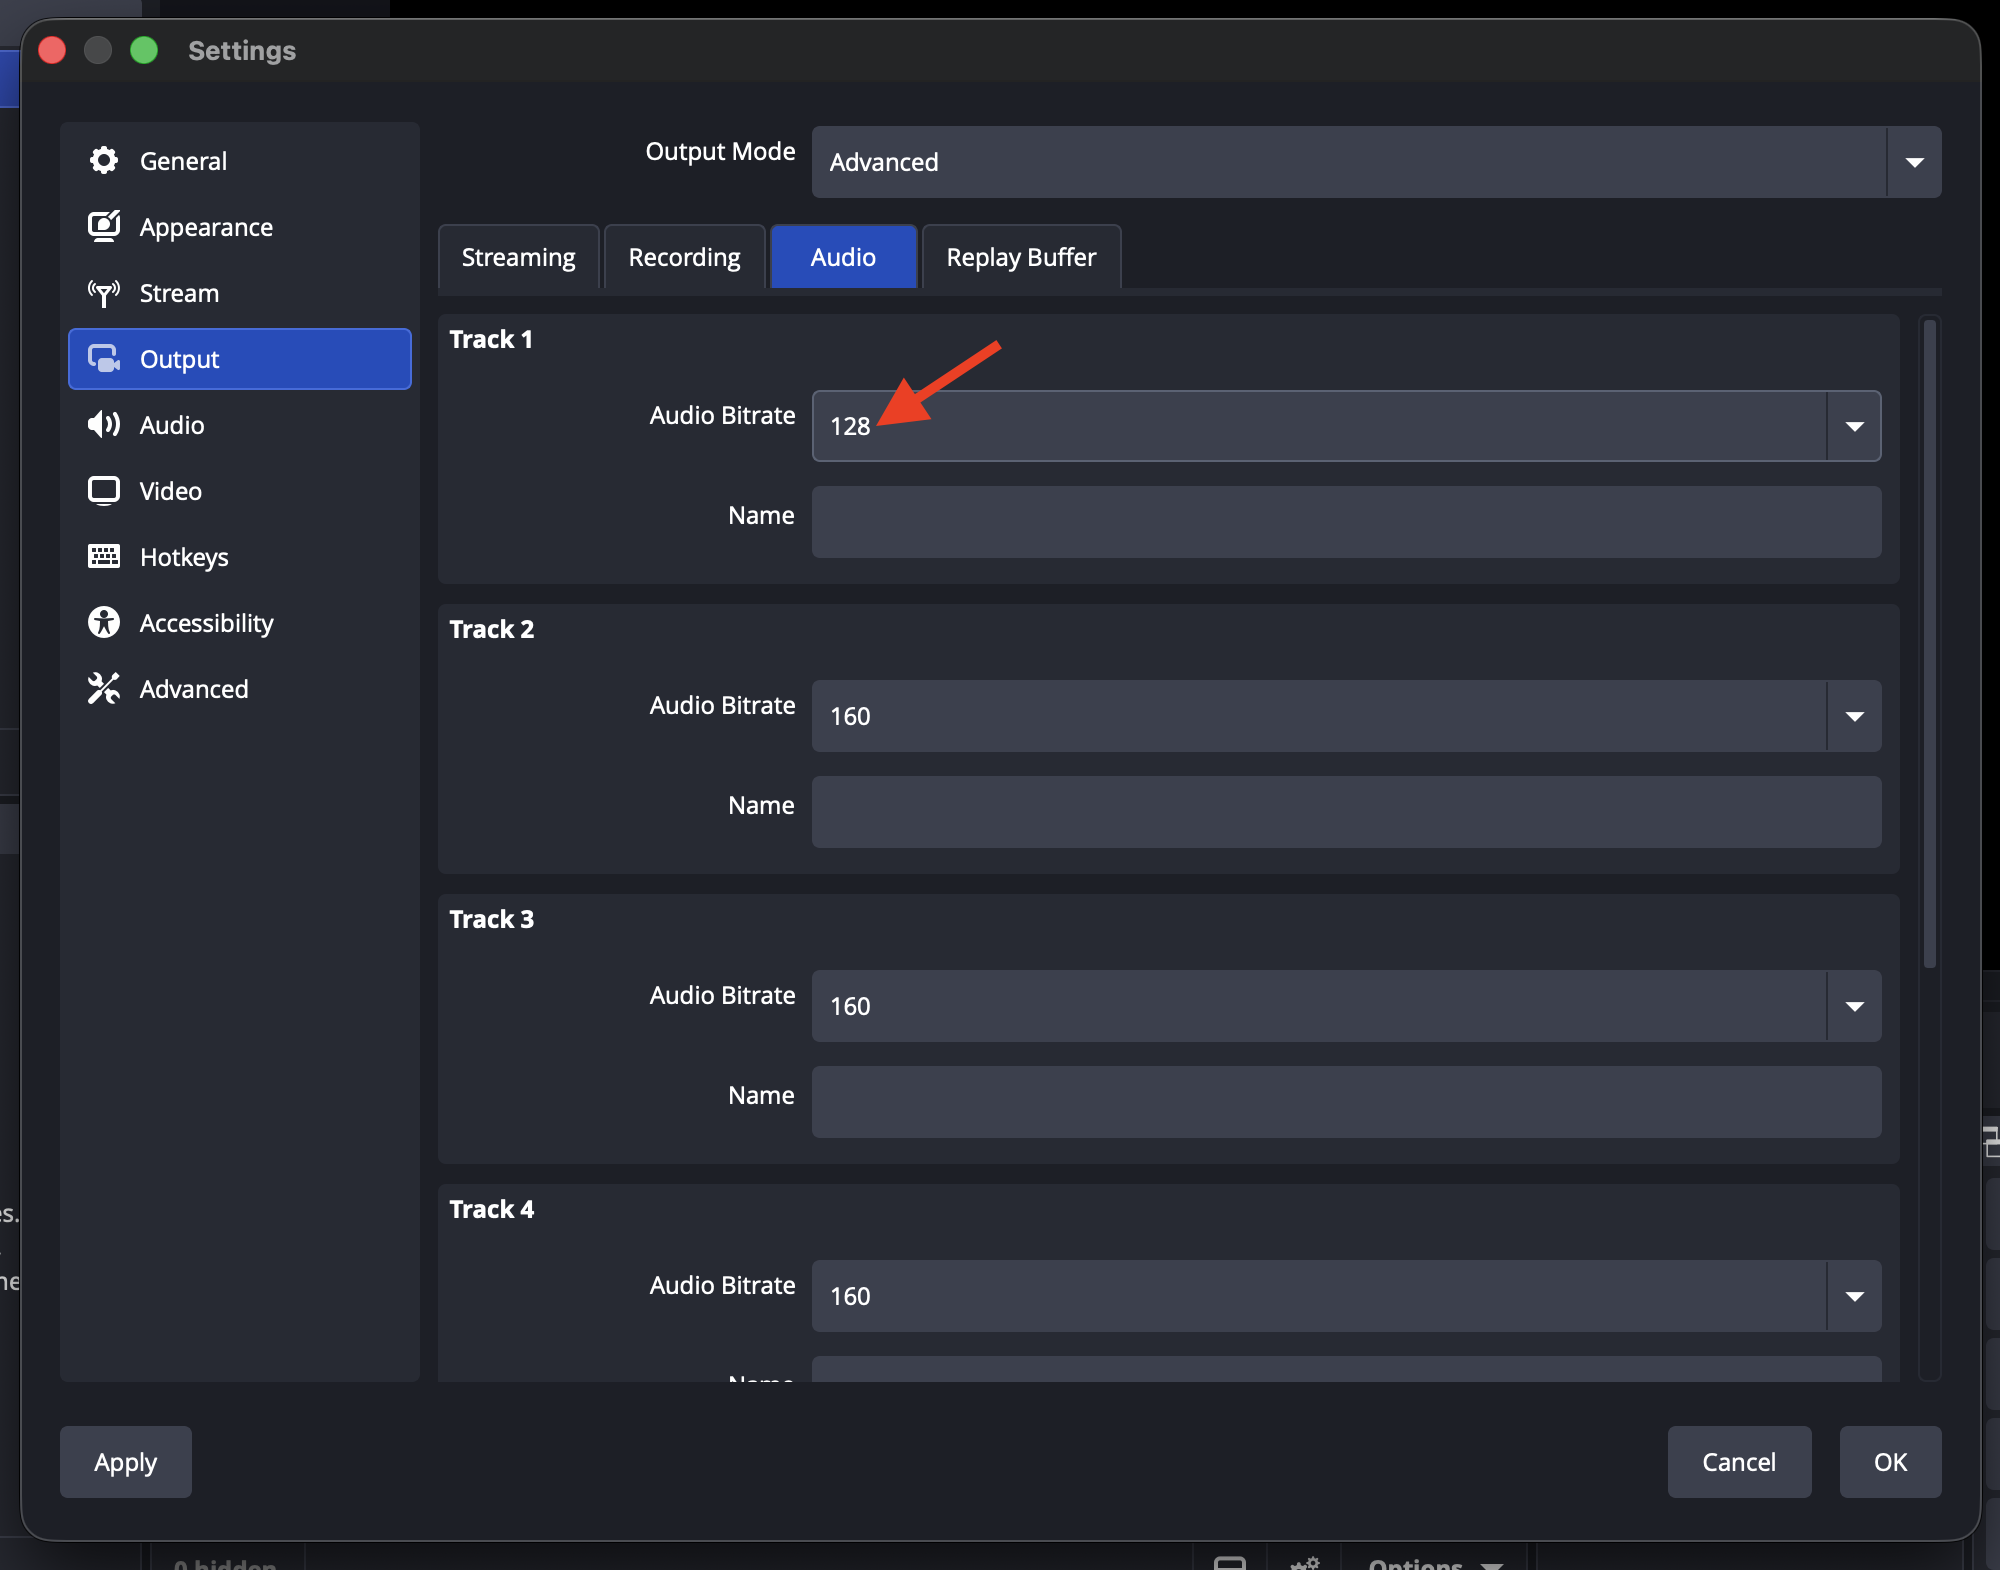
Return to Output → Audio and set the Track 1 audio bitrate to 128 kbps.
Step 4
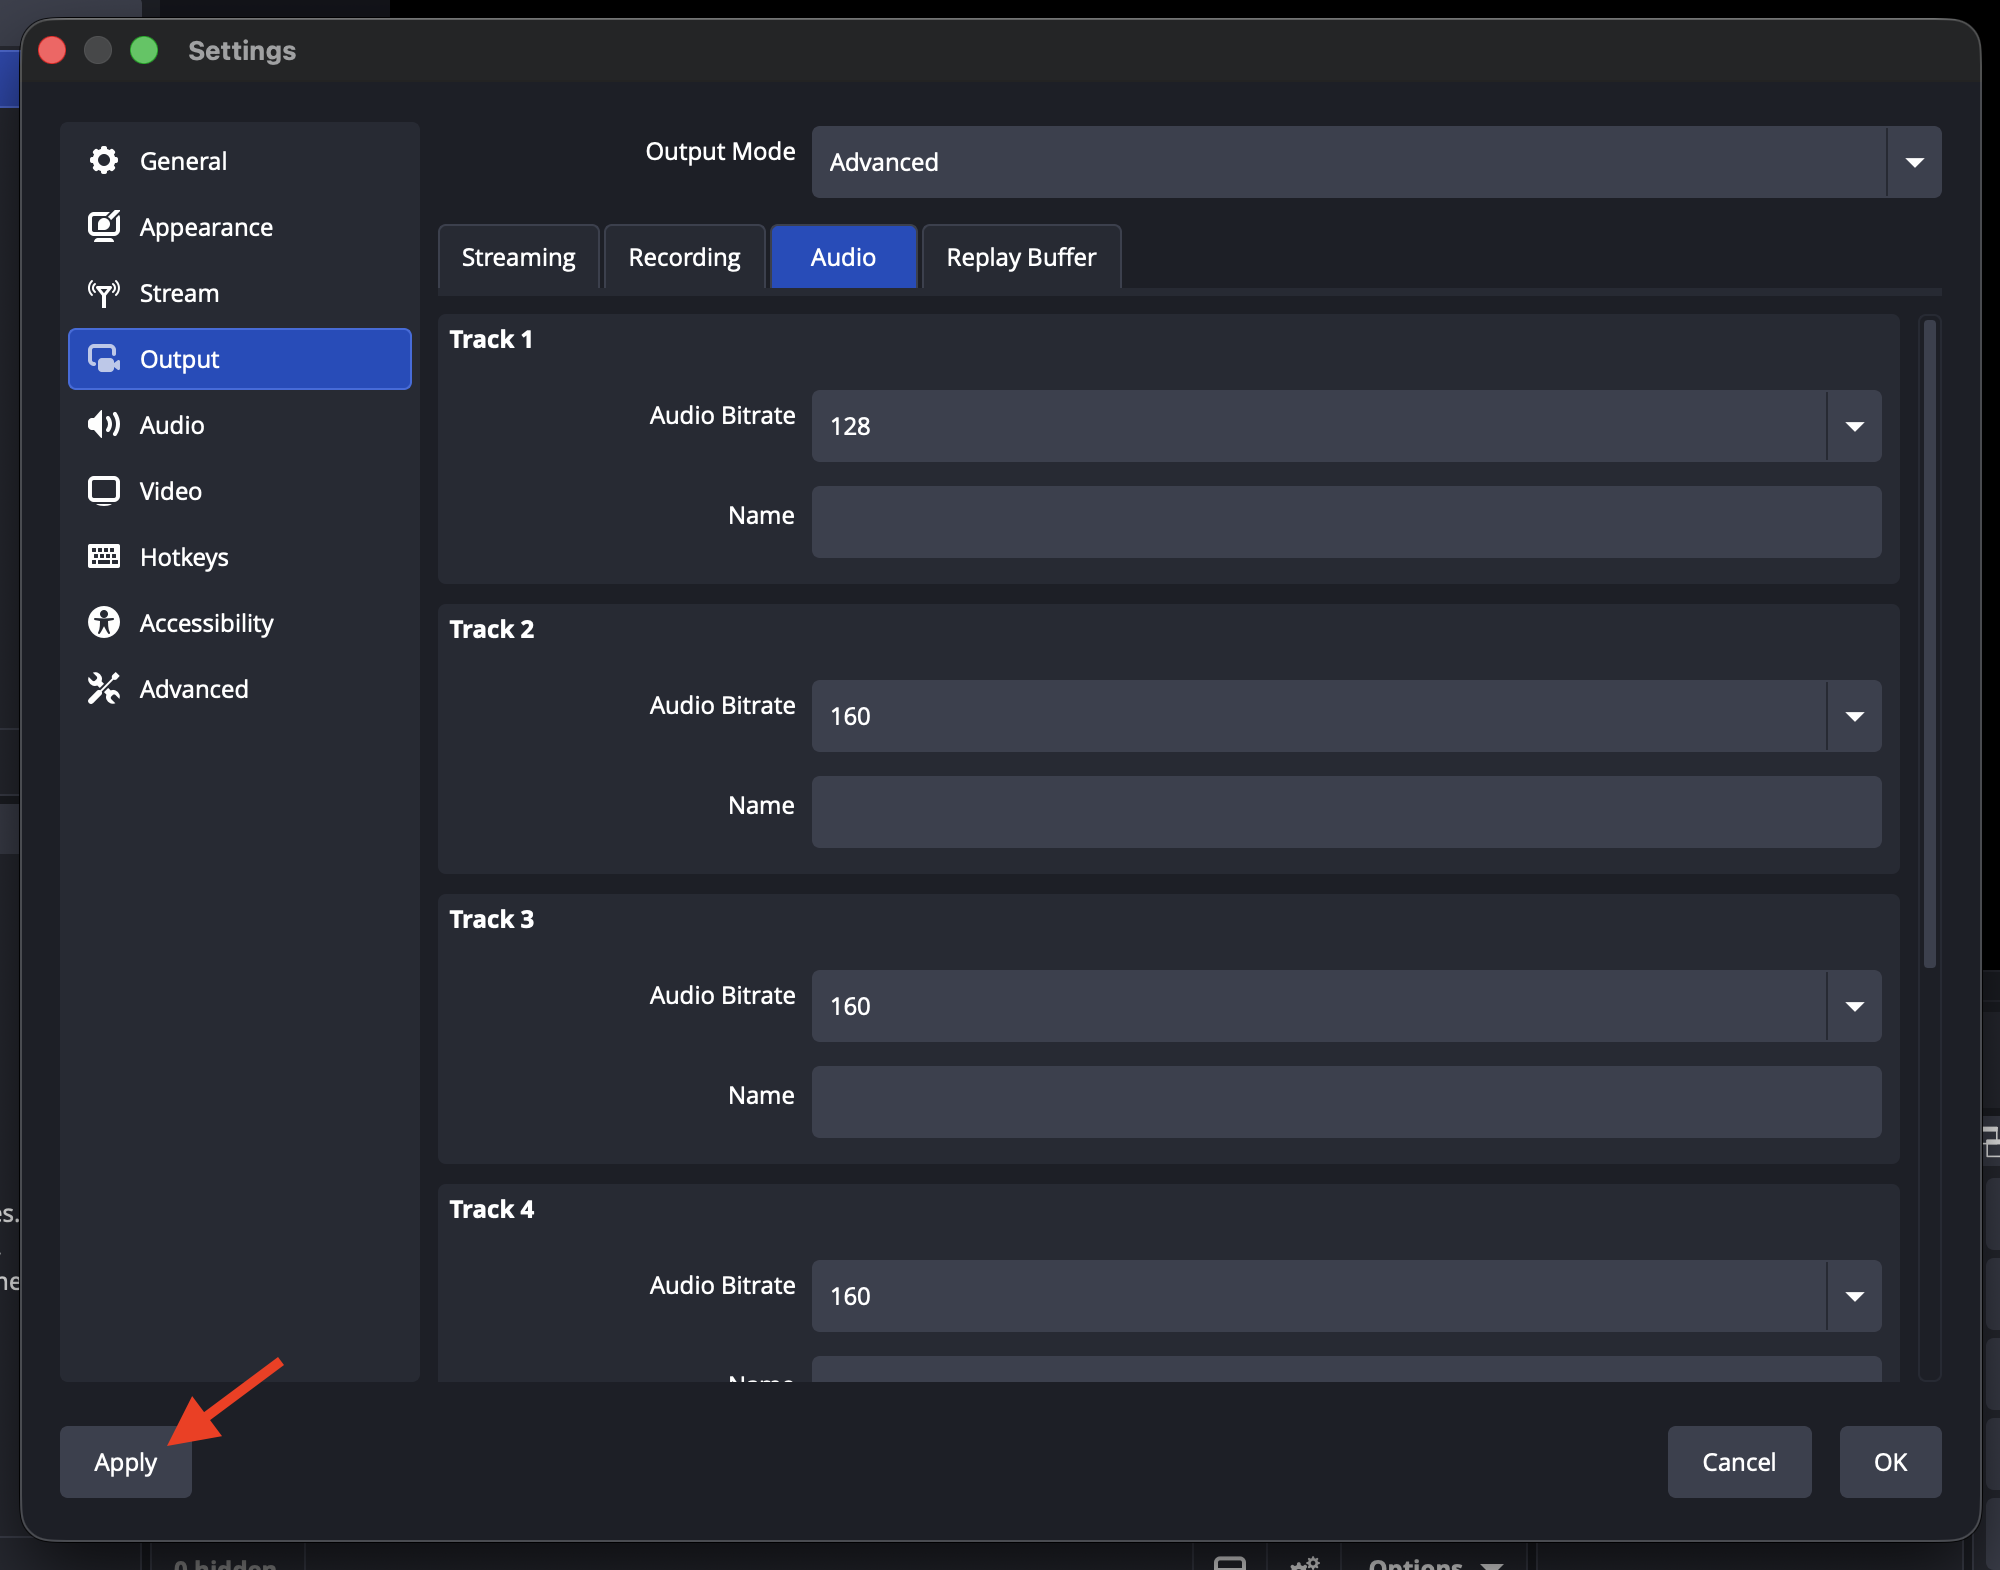
Click Apply.
Step 5
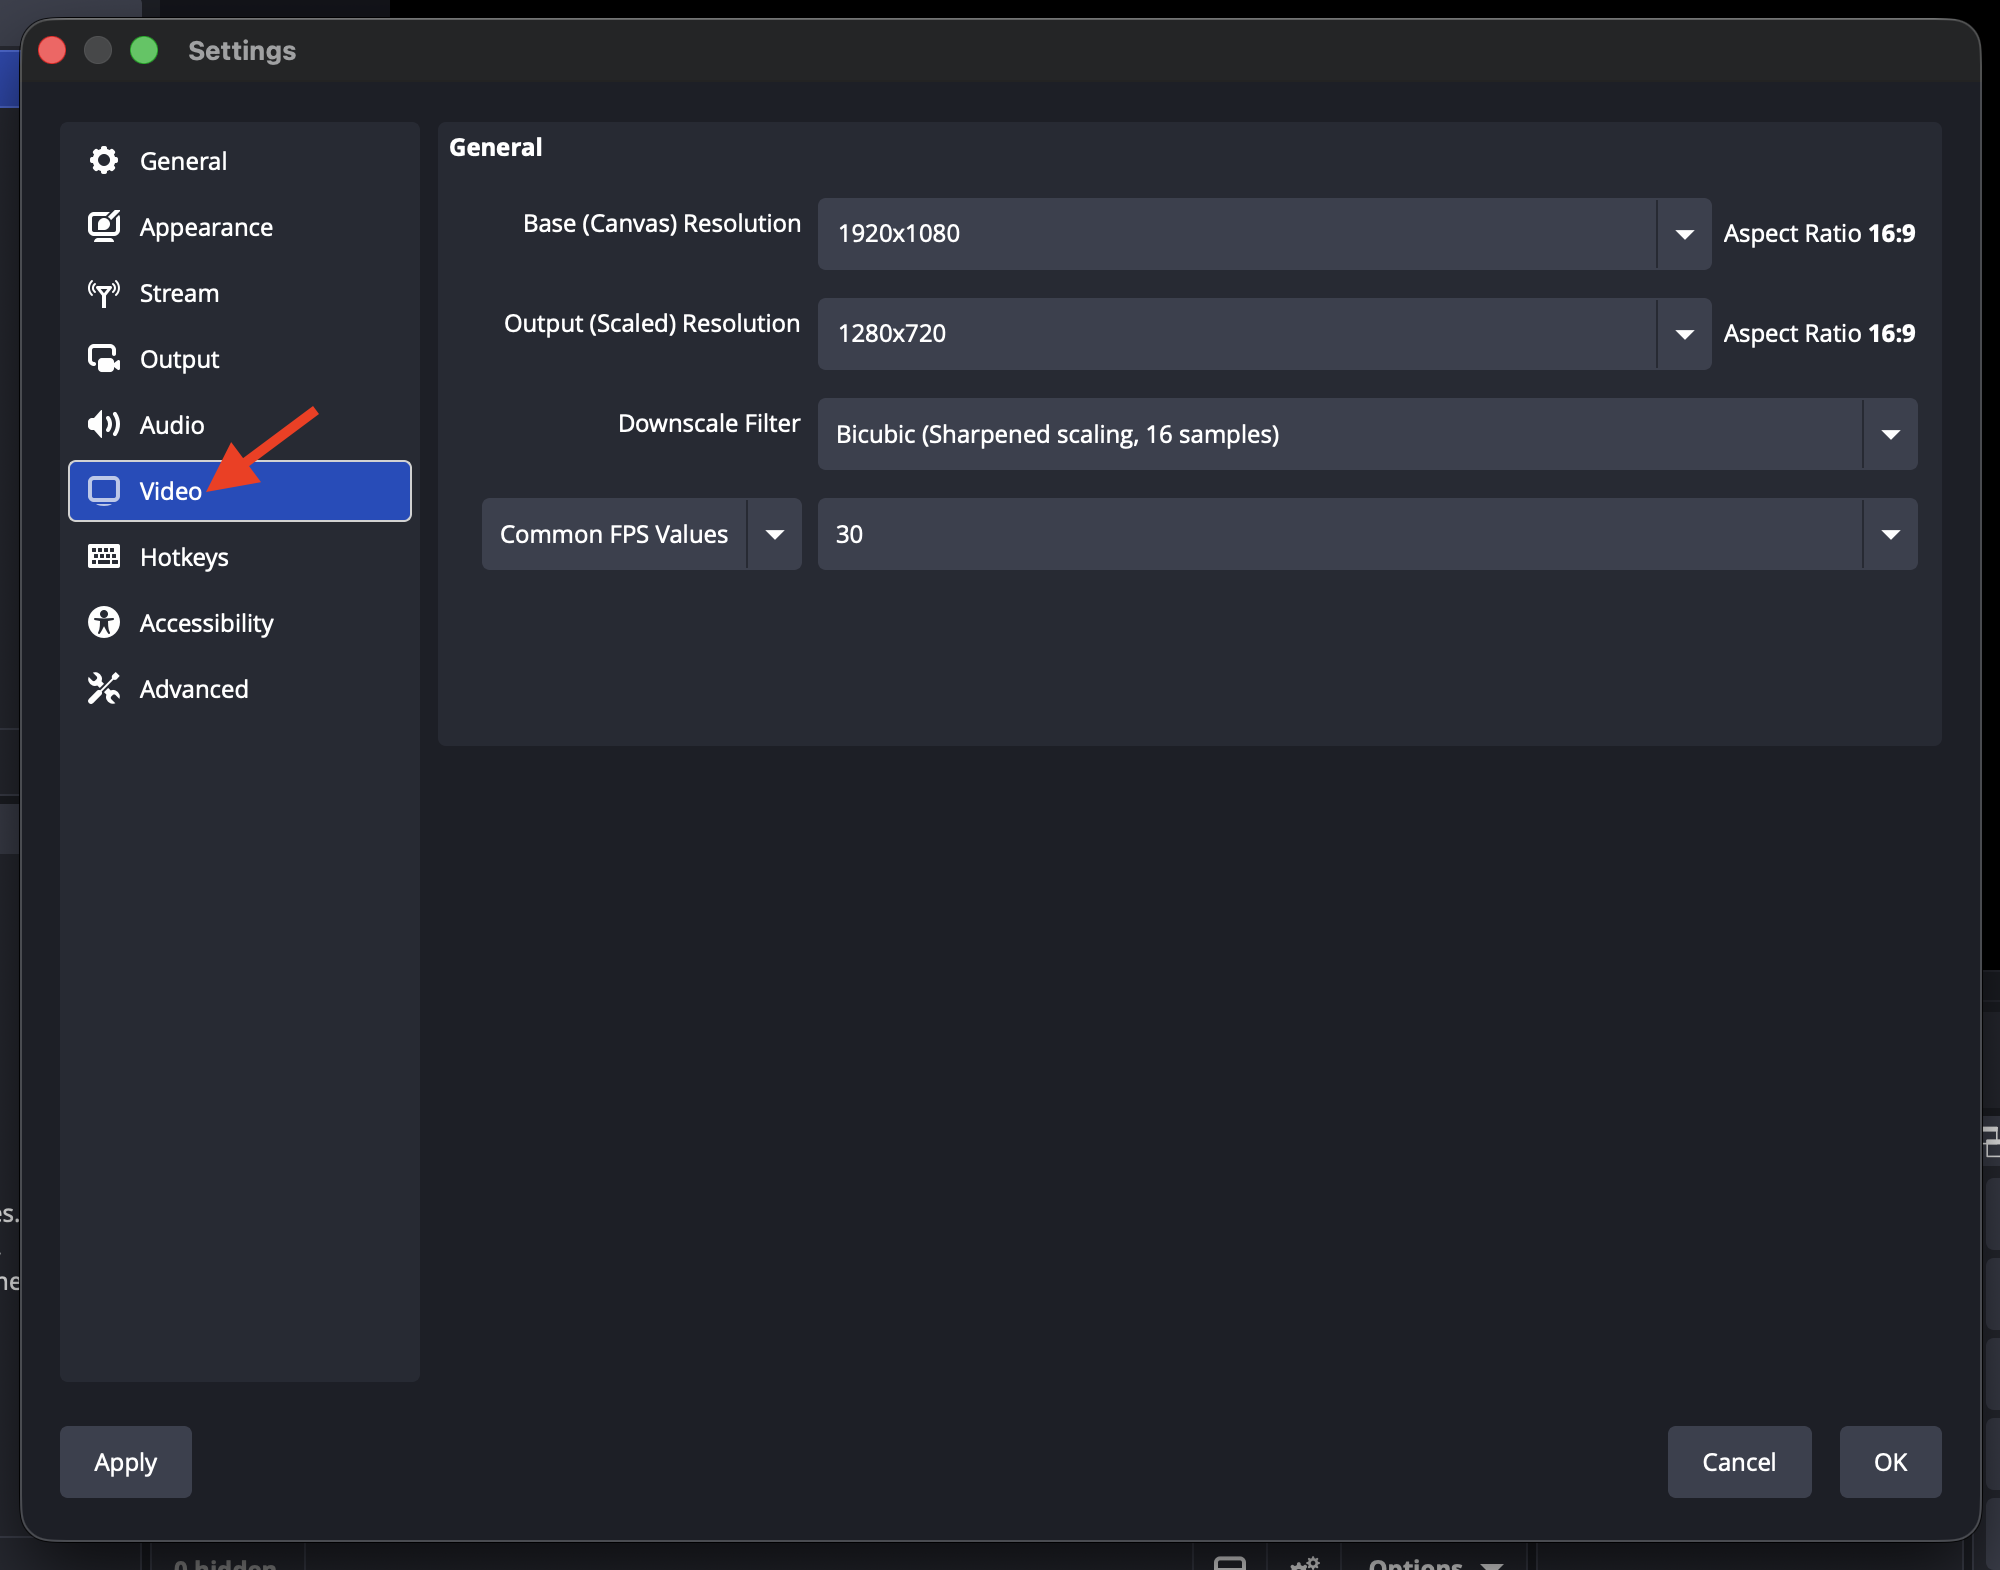
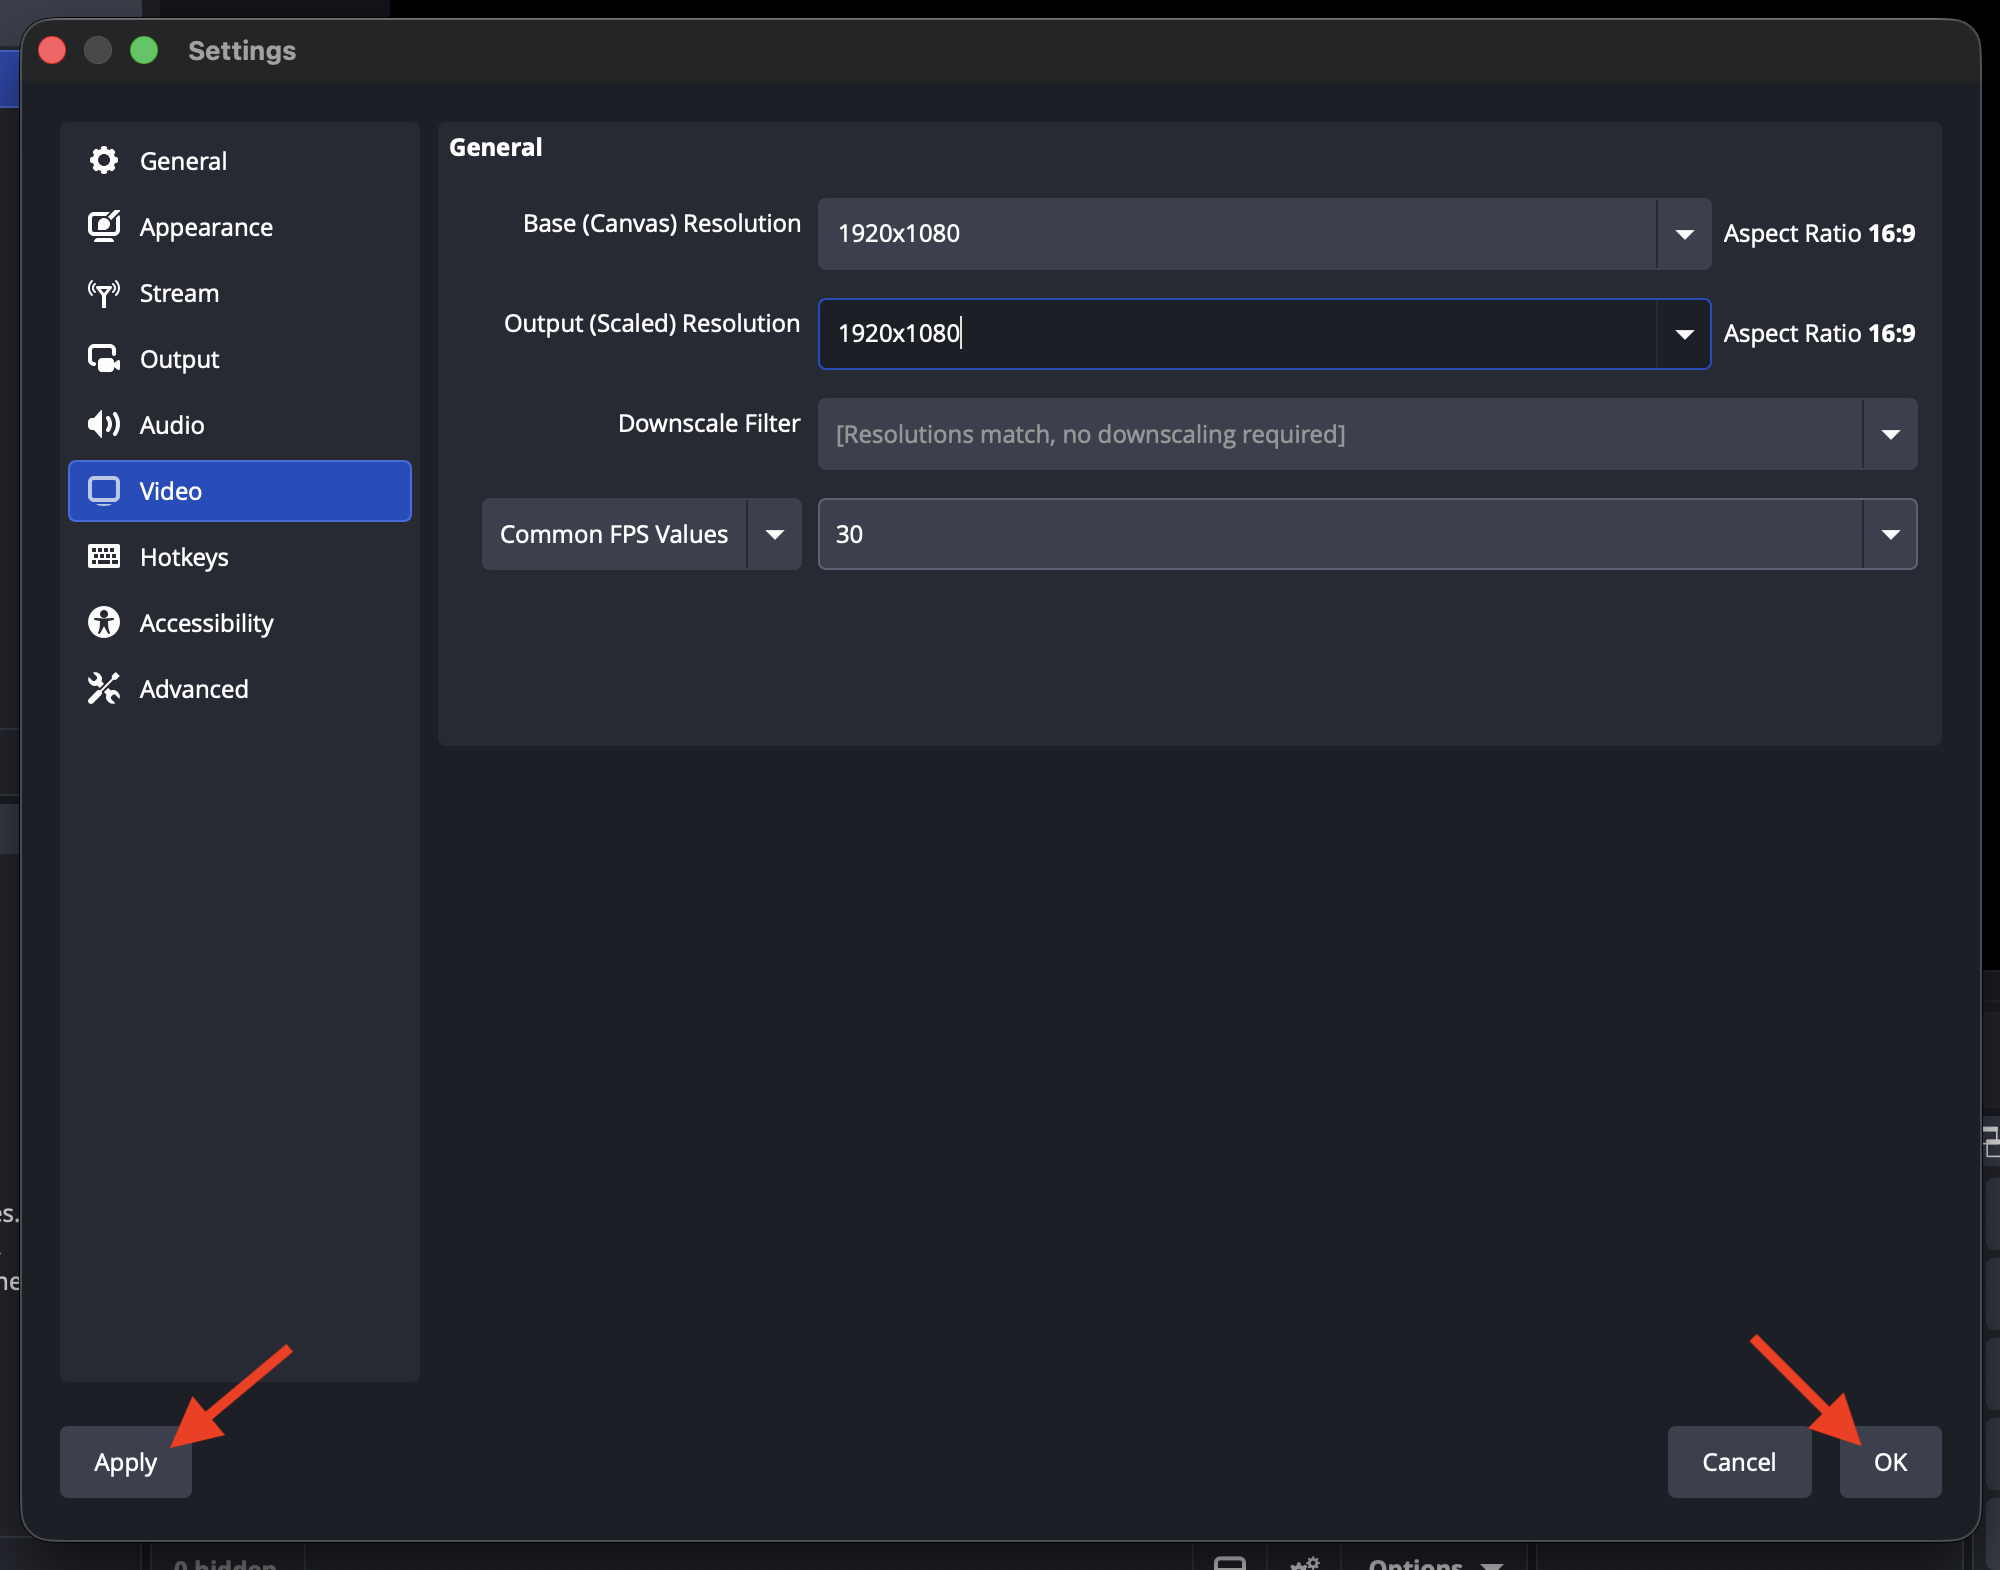
Select Video from the left menu.
Step 6
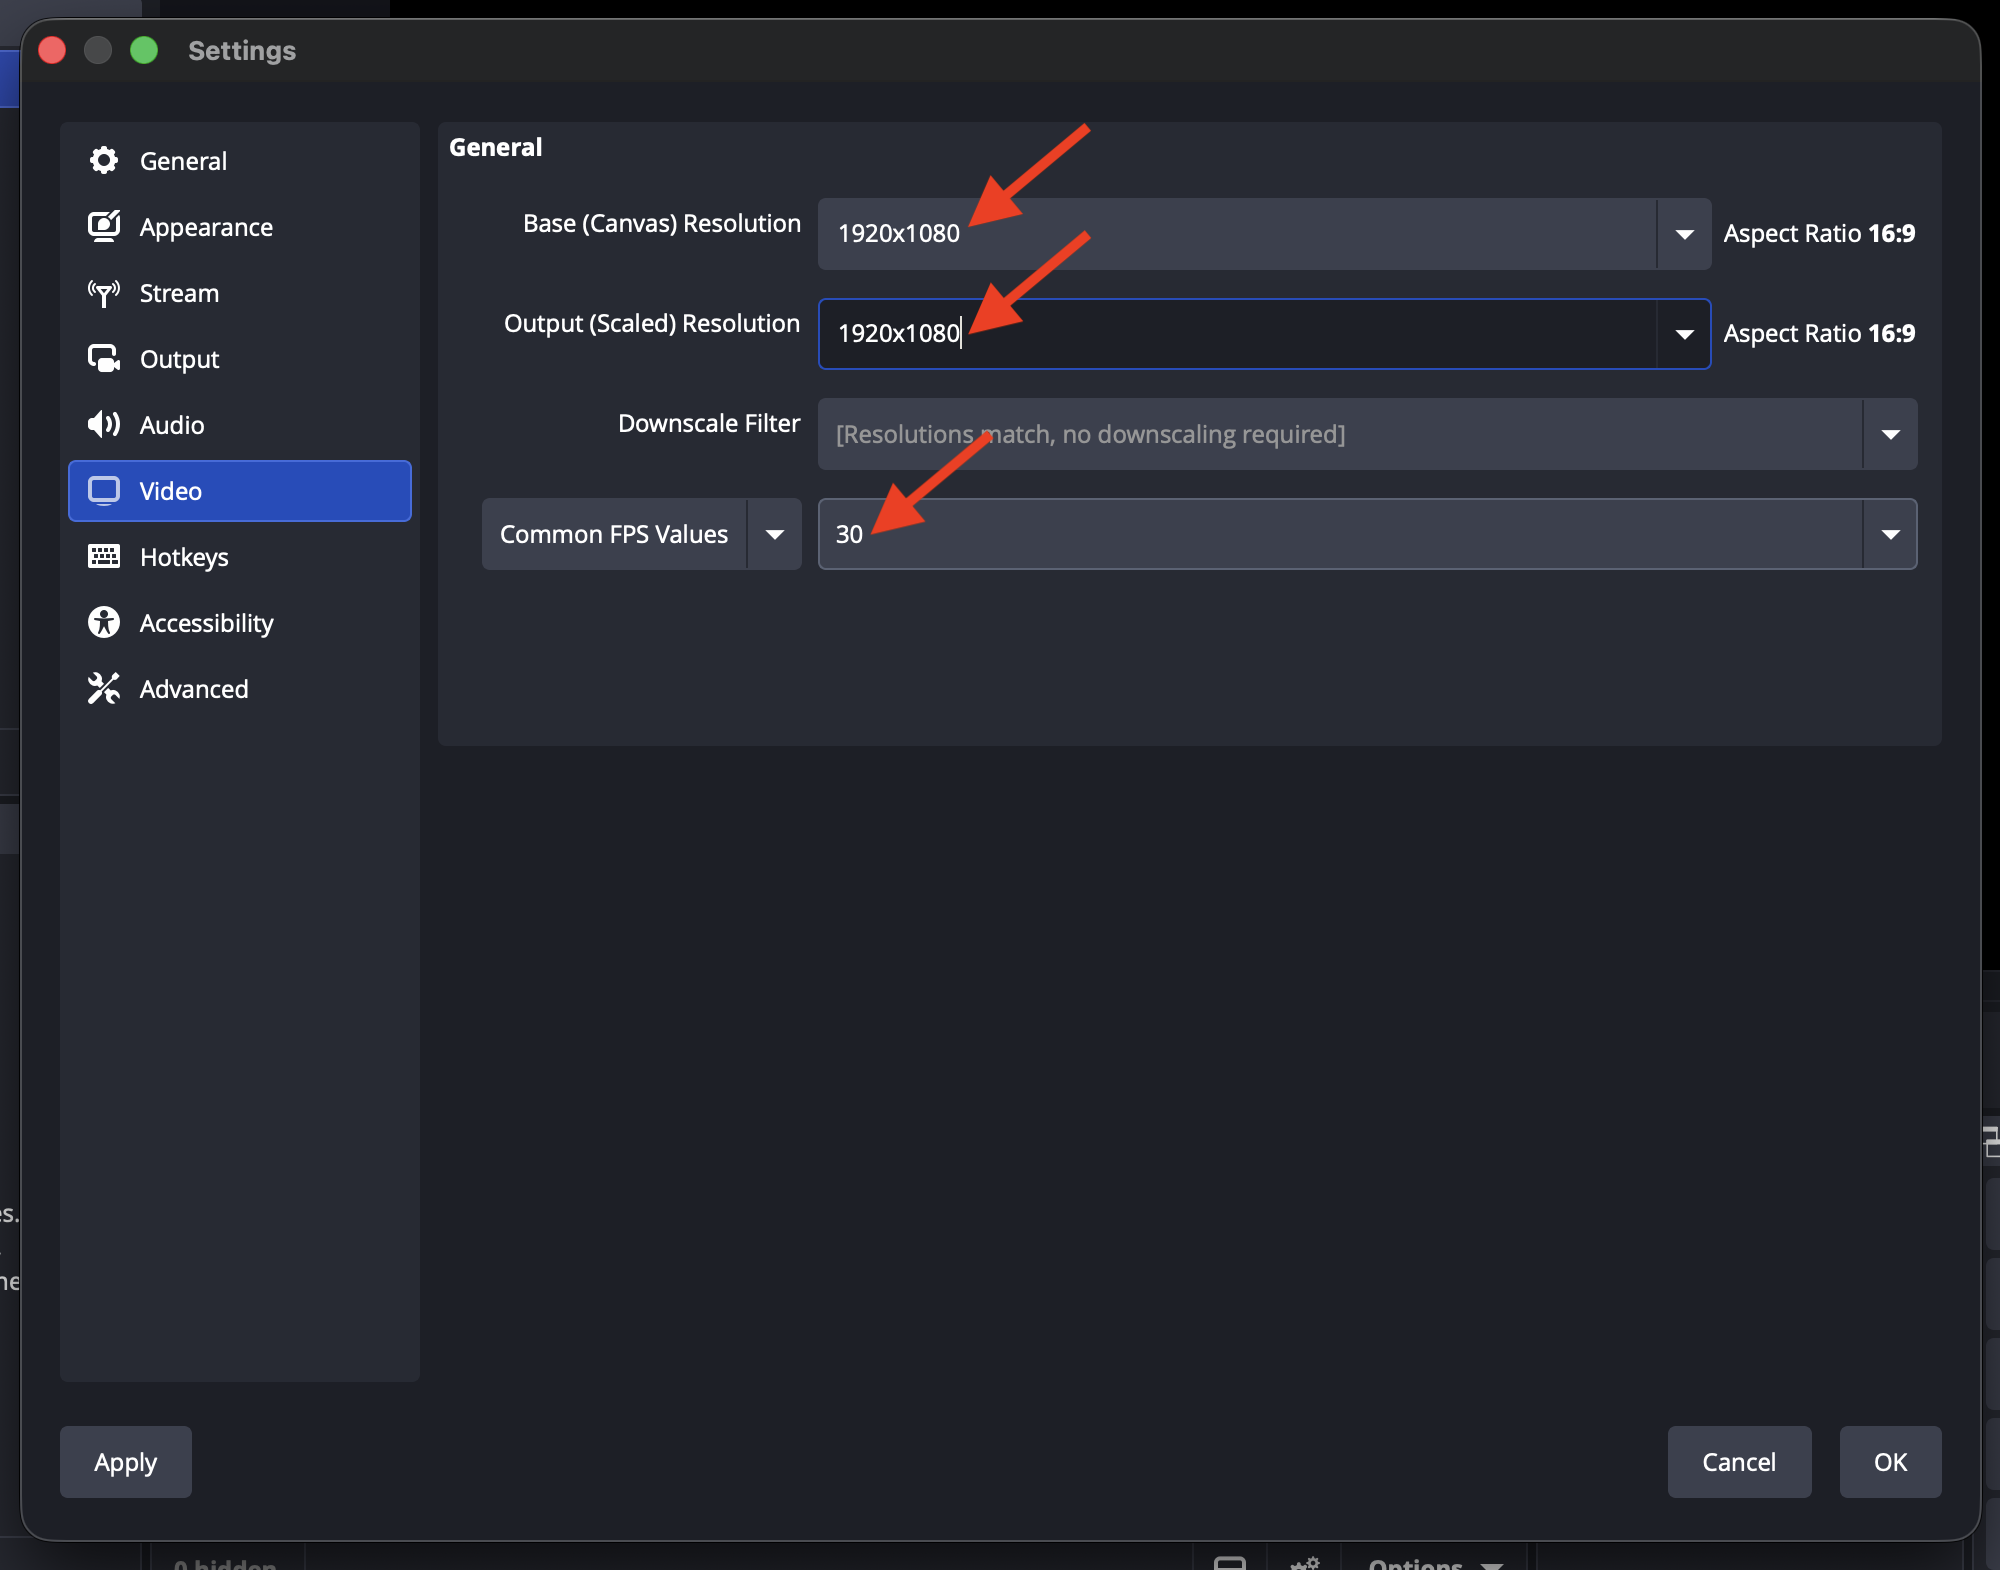
Configure the video settings.
Setting | Recommended value |
|---|---|
Base (Canvas) Resolution | Match your camera or source resolution |
Output (Scaled) Resolution | 1280×720 for 720p or 1920×1080 for 1080p |
Common FPS Values | 30 |
For most live streaming workflows, 30 FPS is recommended unless your setup has been specifically configured and tested for a higher frame rate.
Step 7
Click Apply, then click OK.
Add your video or audio source
Step 1
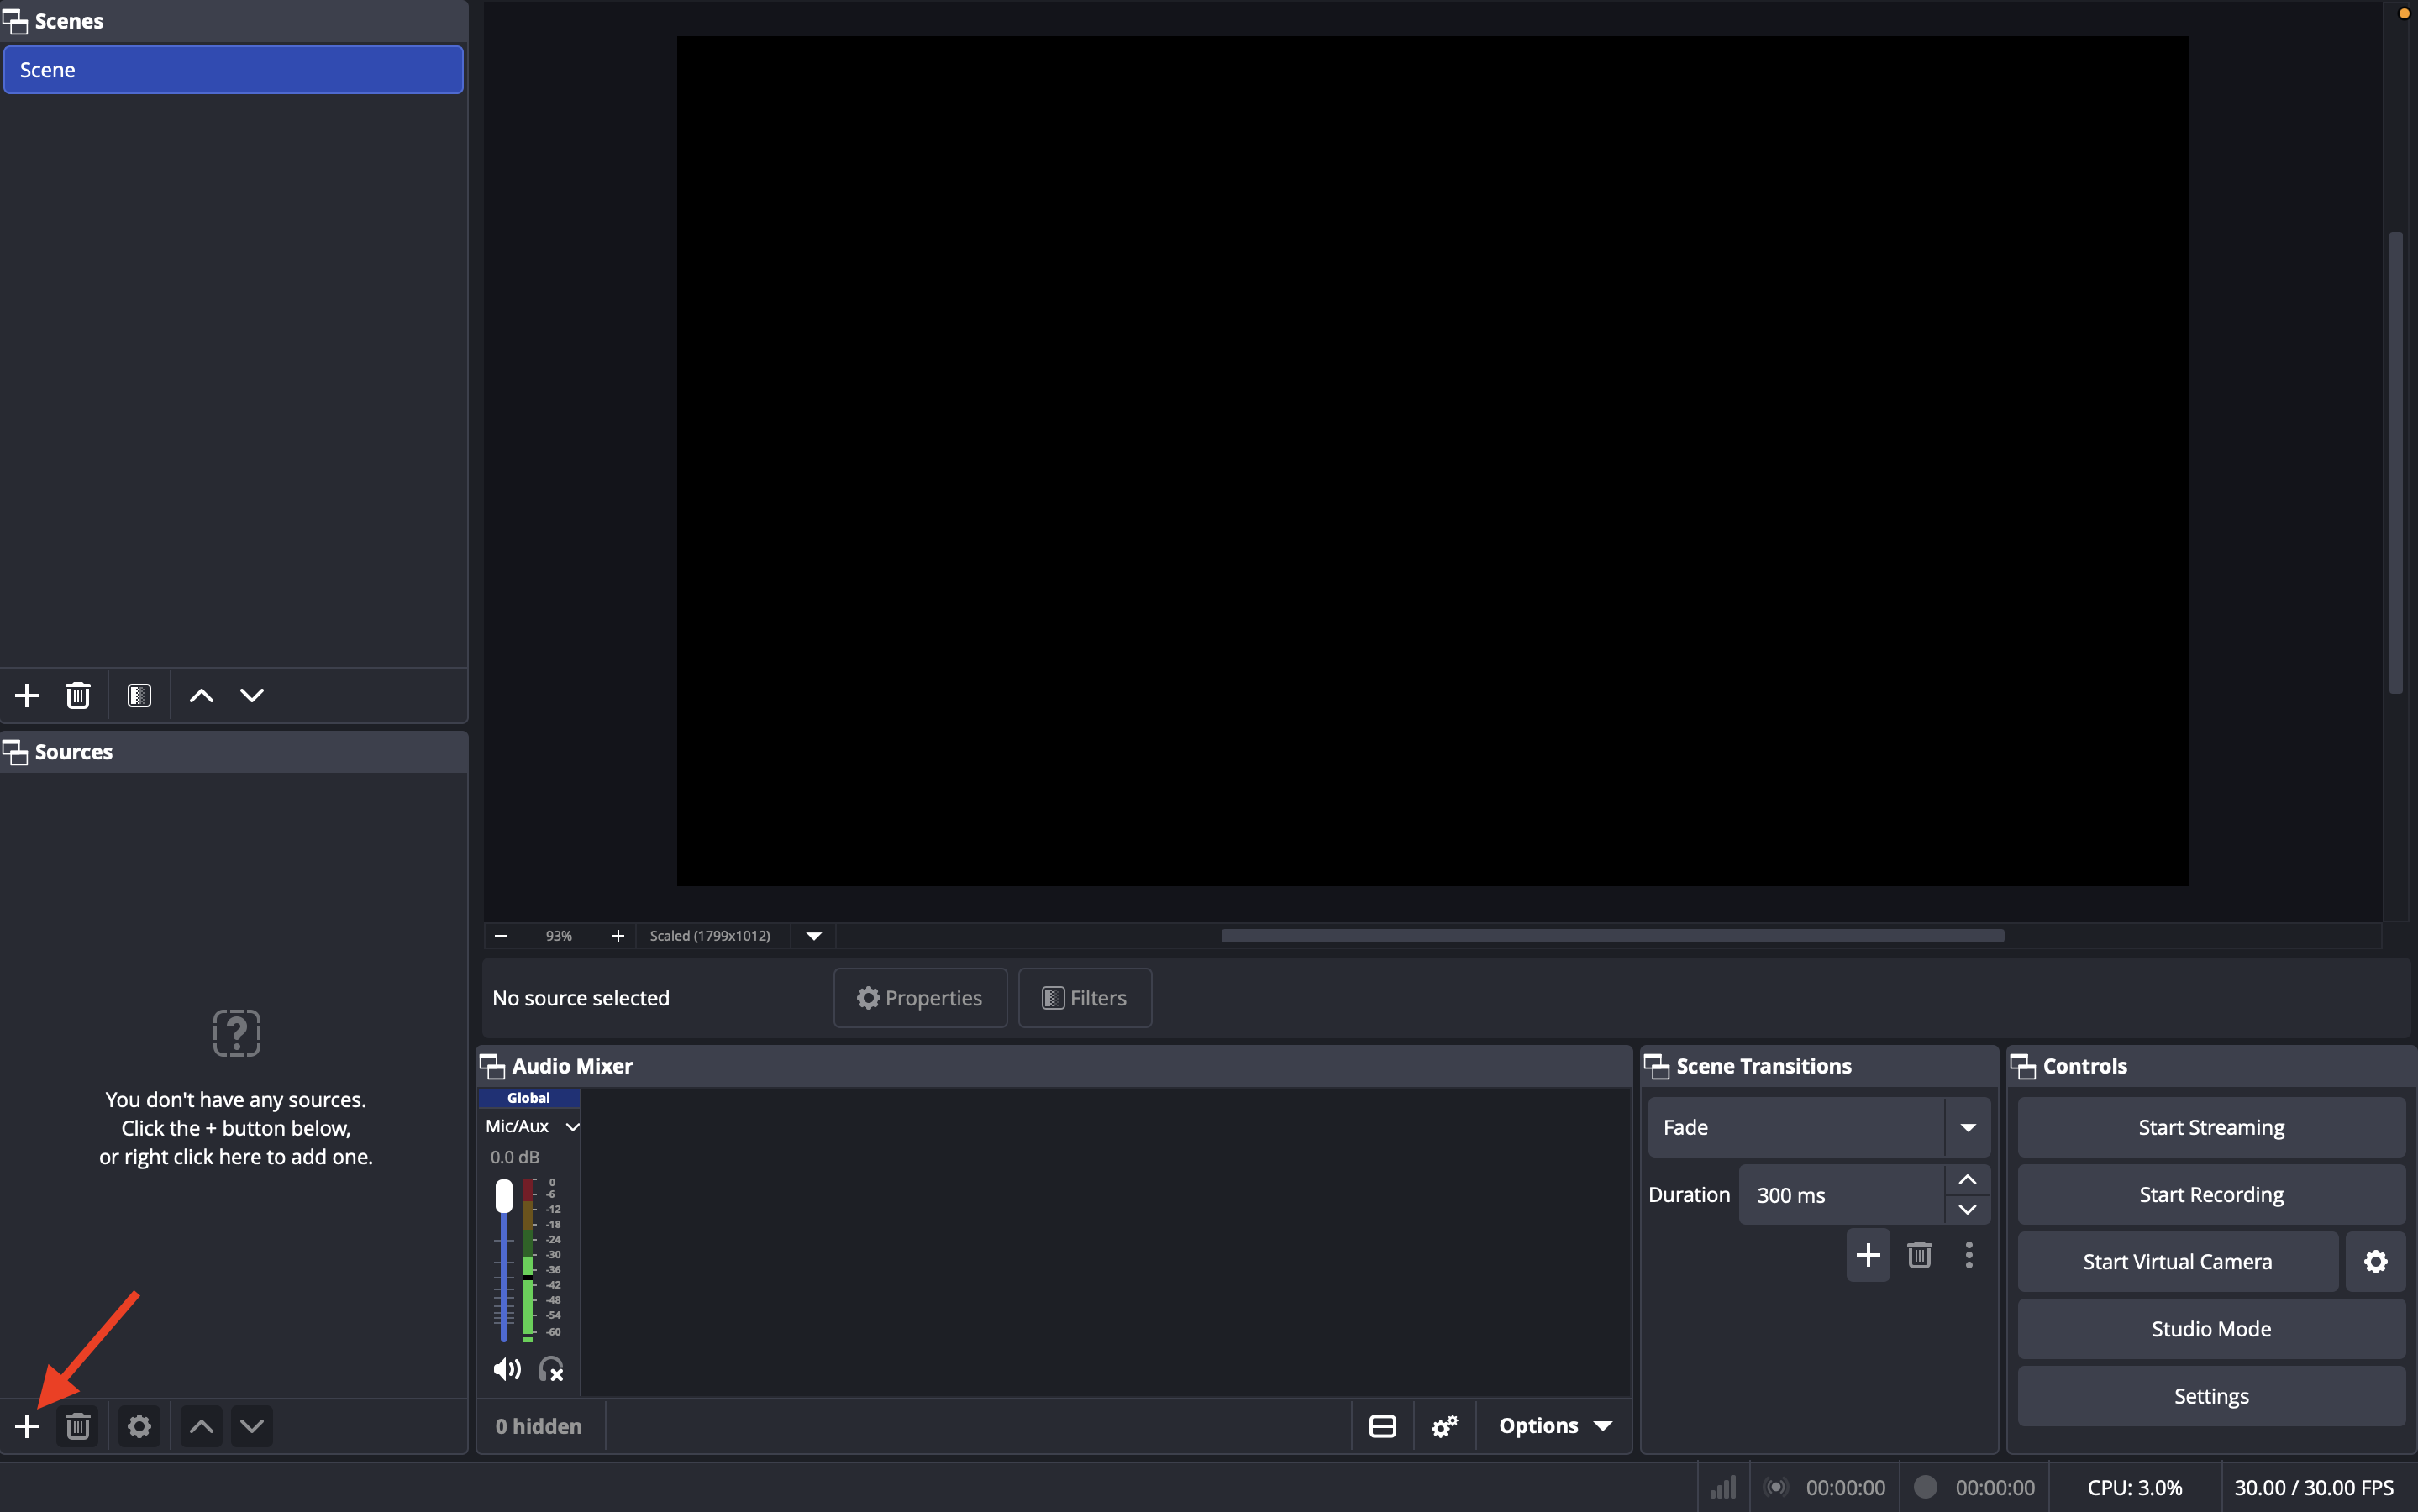
Add your video or audio source.
In the main OBS window, go to the Sources panel and click the + icon.
Step 2
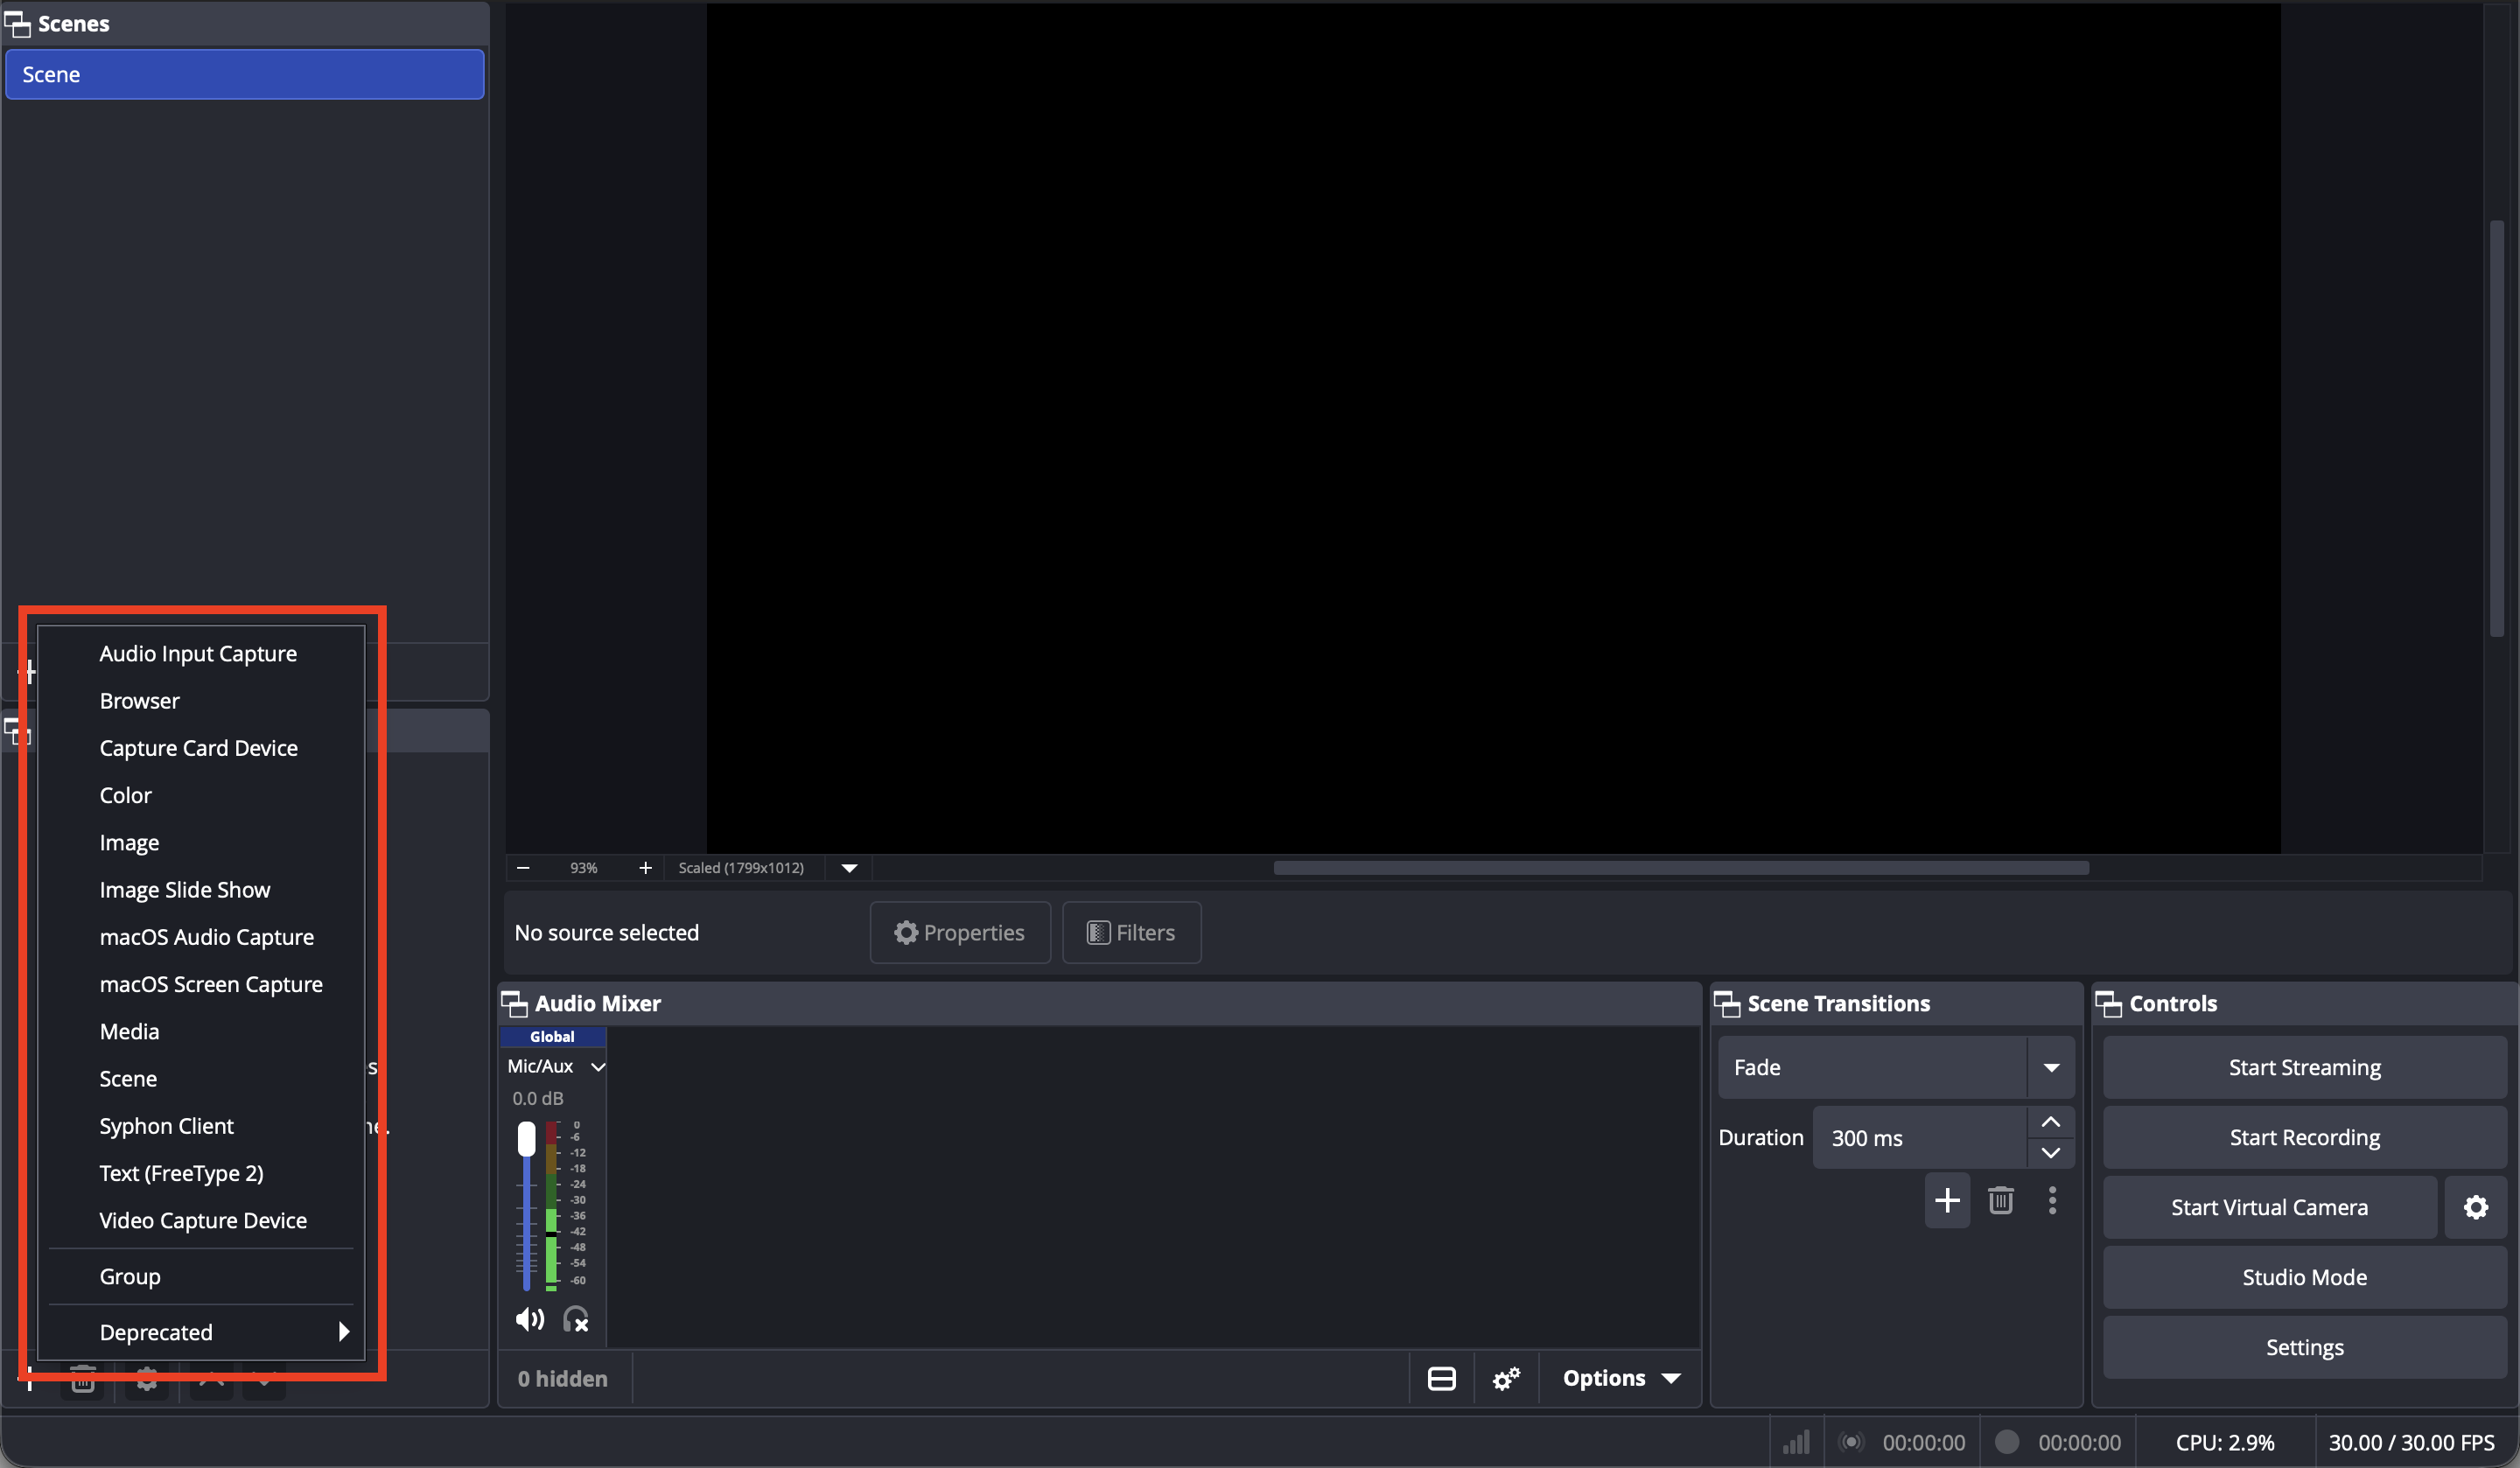
Select the source type you want to use.
For example, select Video Capture Device to use a camera or capture card.
Step 3
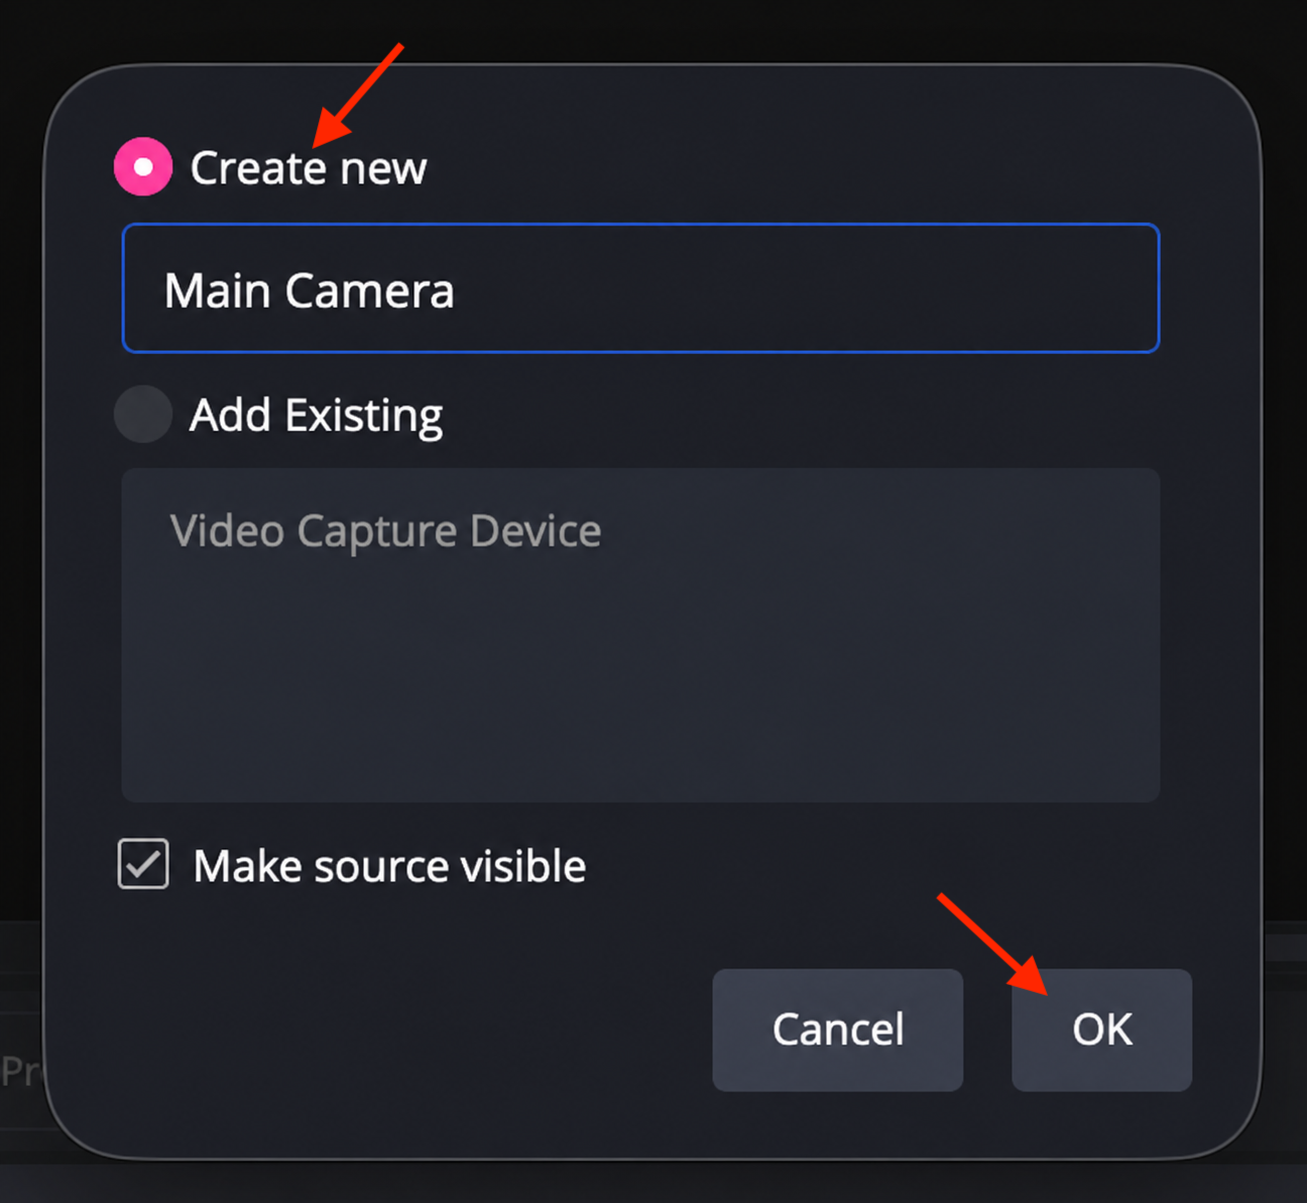
Choose whether to use an existing source or create a new source.
If your device is already available, select Add Existing, choose the device, and click OK.
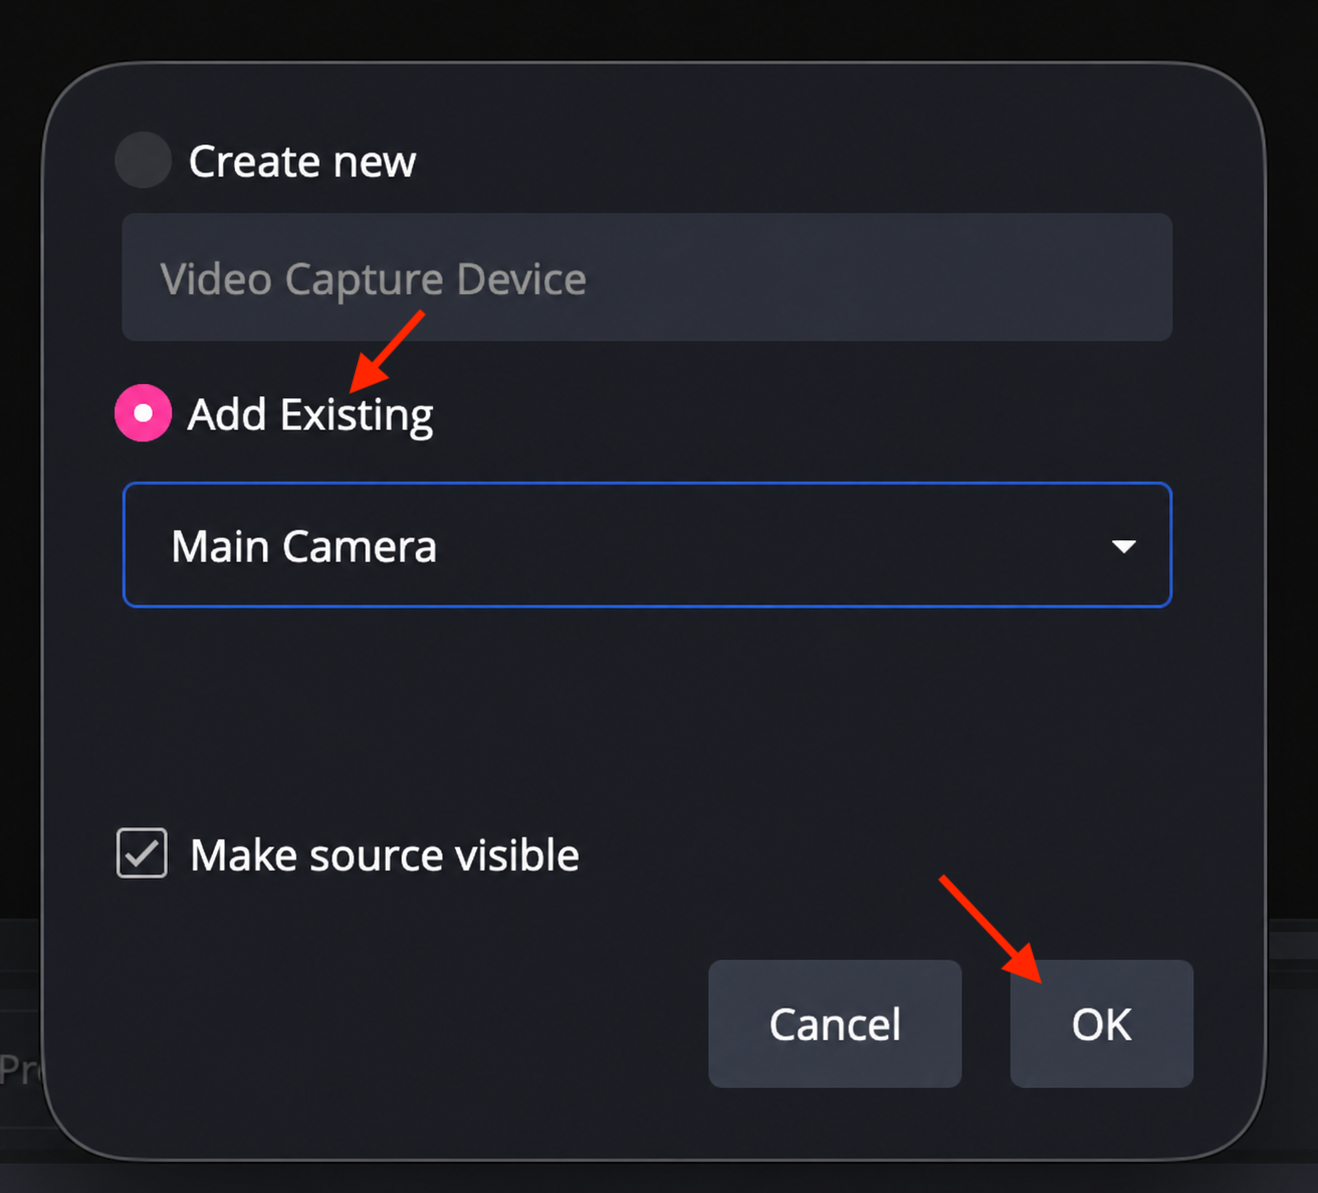
If your device is not already available, select Create New, enter a name for the source, and click OK.
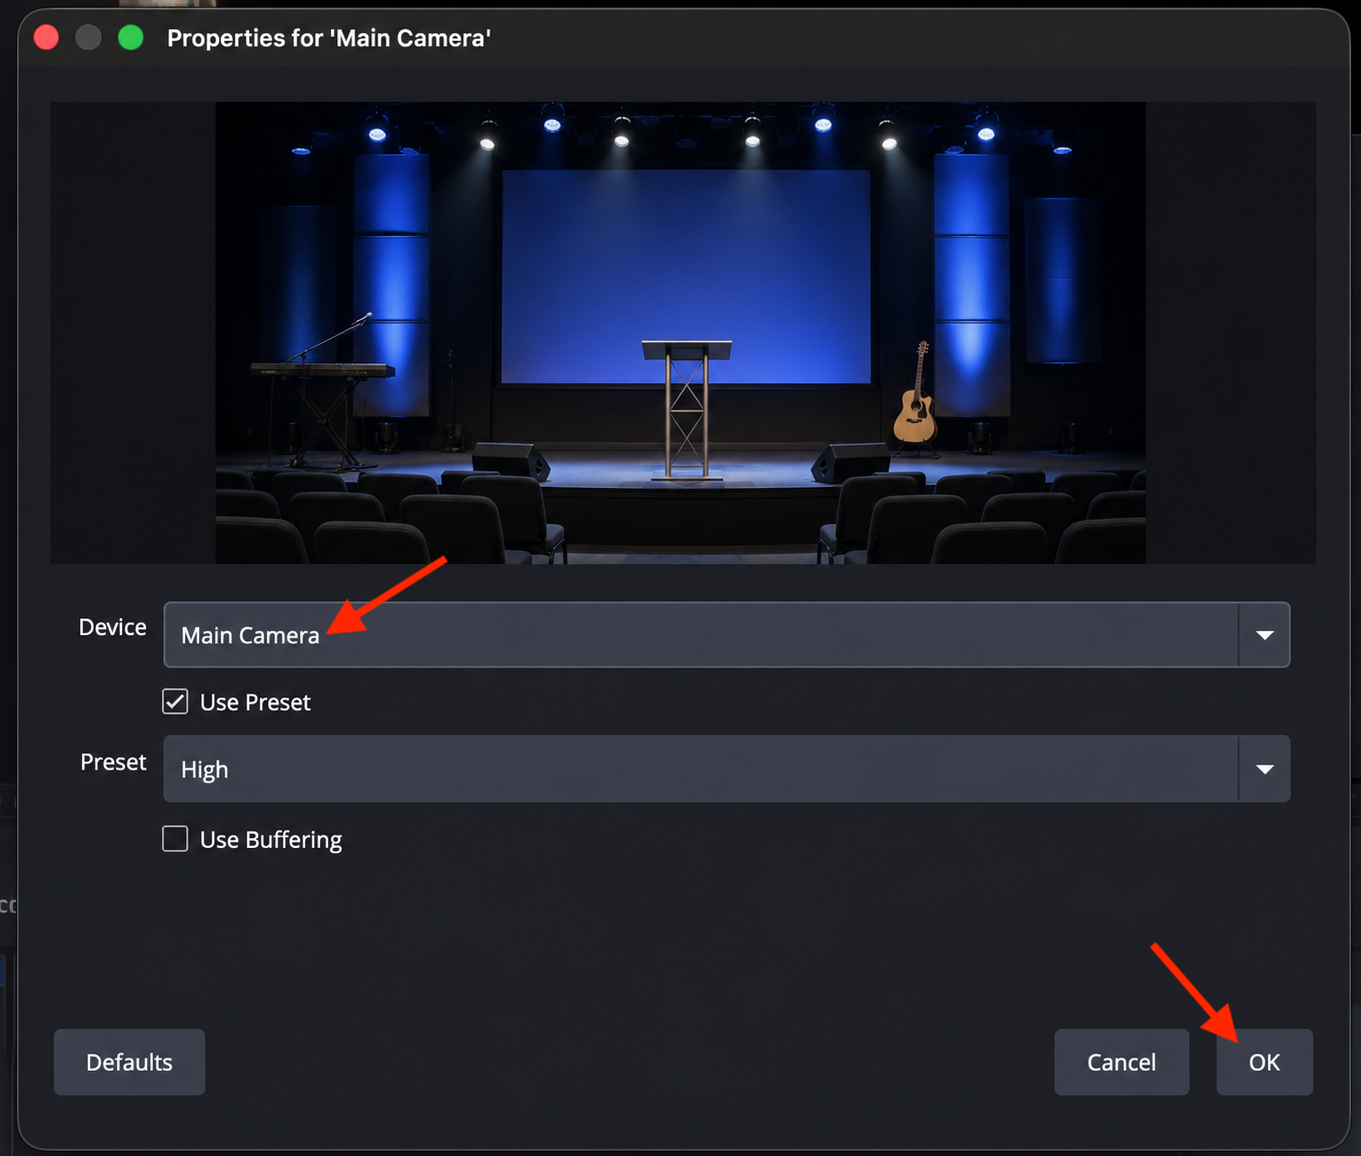
Step 4
In the device settings window, select the camera, capture card, or source you want to use, then click OK.
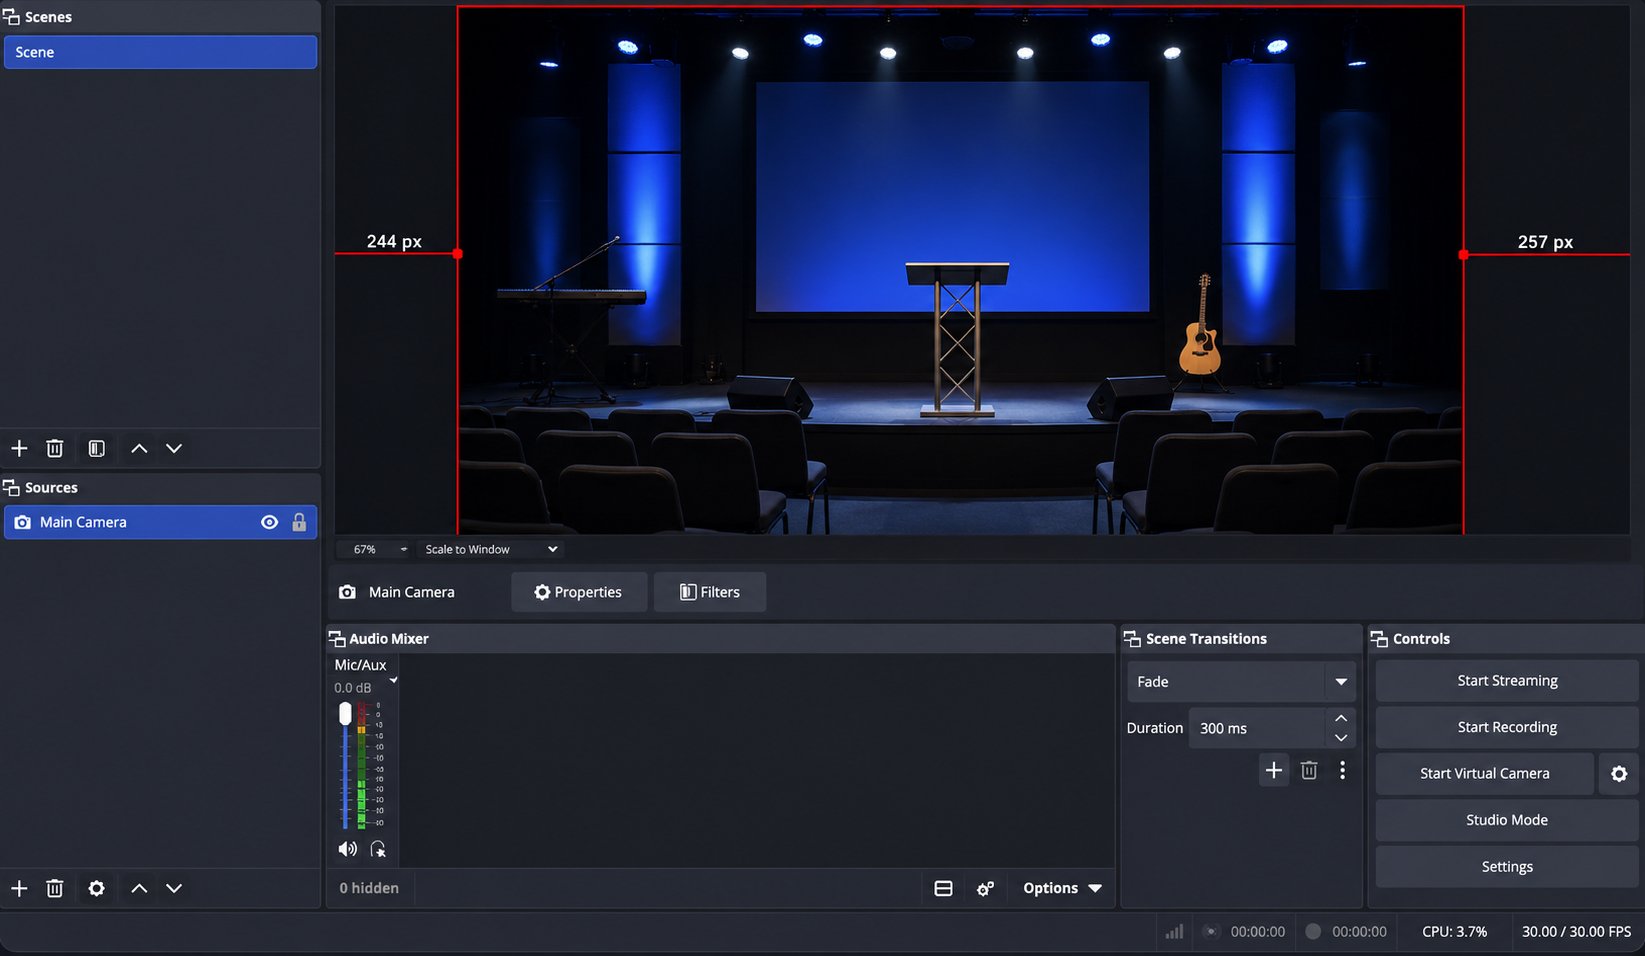
Step 5
Your preview window should now display the selected video source.
Save, record, and start streaming
Step 1
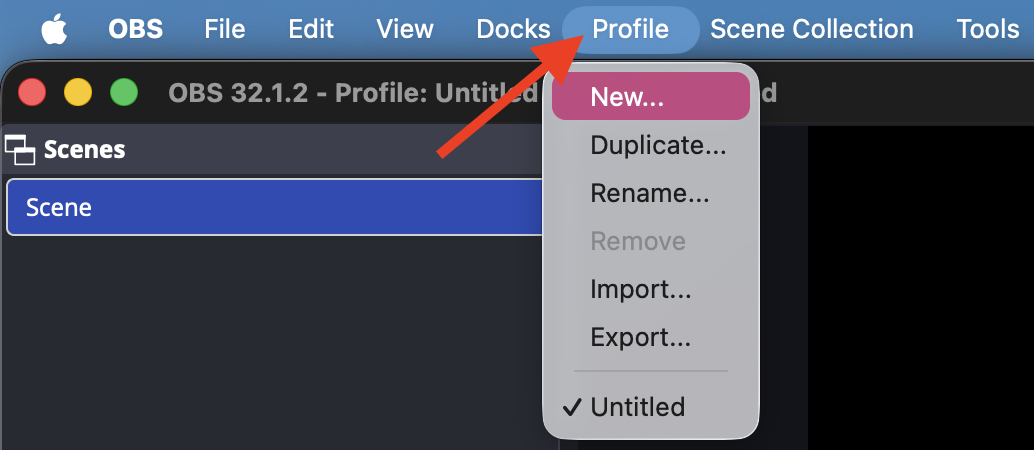
Optional: Save your OBS profile settings.
Go to Profile and click New. Enter a profile name and click OK.
Saving a profile can help you reuse the same OBS settings for future streams.
Step 2
Optional: Confirm local recording settings if you want OBS to record a local copy of your stream.
A local recording can be used as a backup file after the broadcast.
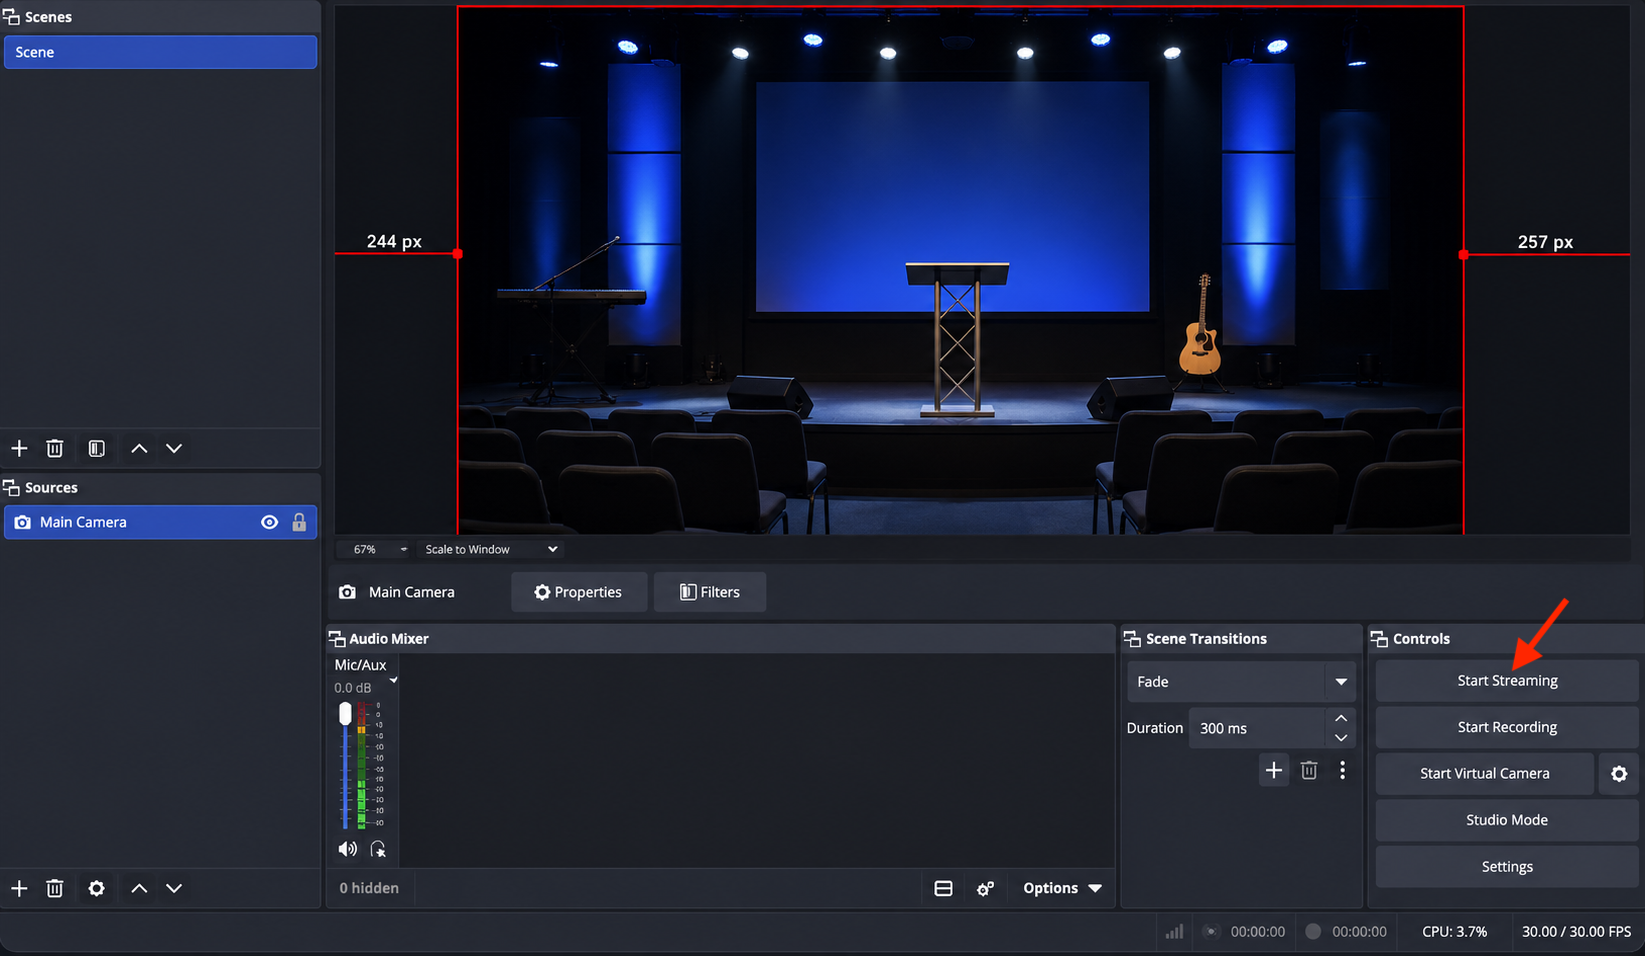
Step 3
Click Start Streaming in OBS when you are ready to begin streaming.
Confirm the stream is being received in the Media Cloud
Step 1
Return to the Media Cloud.
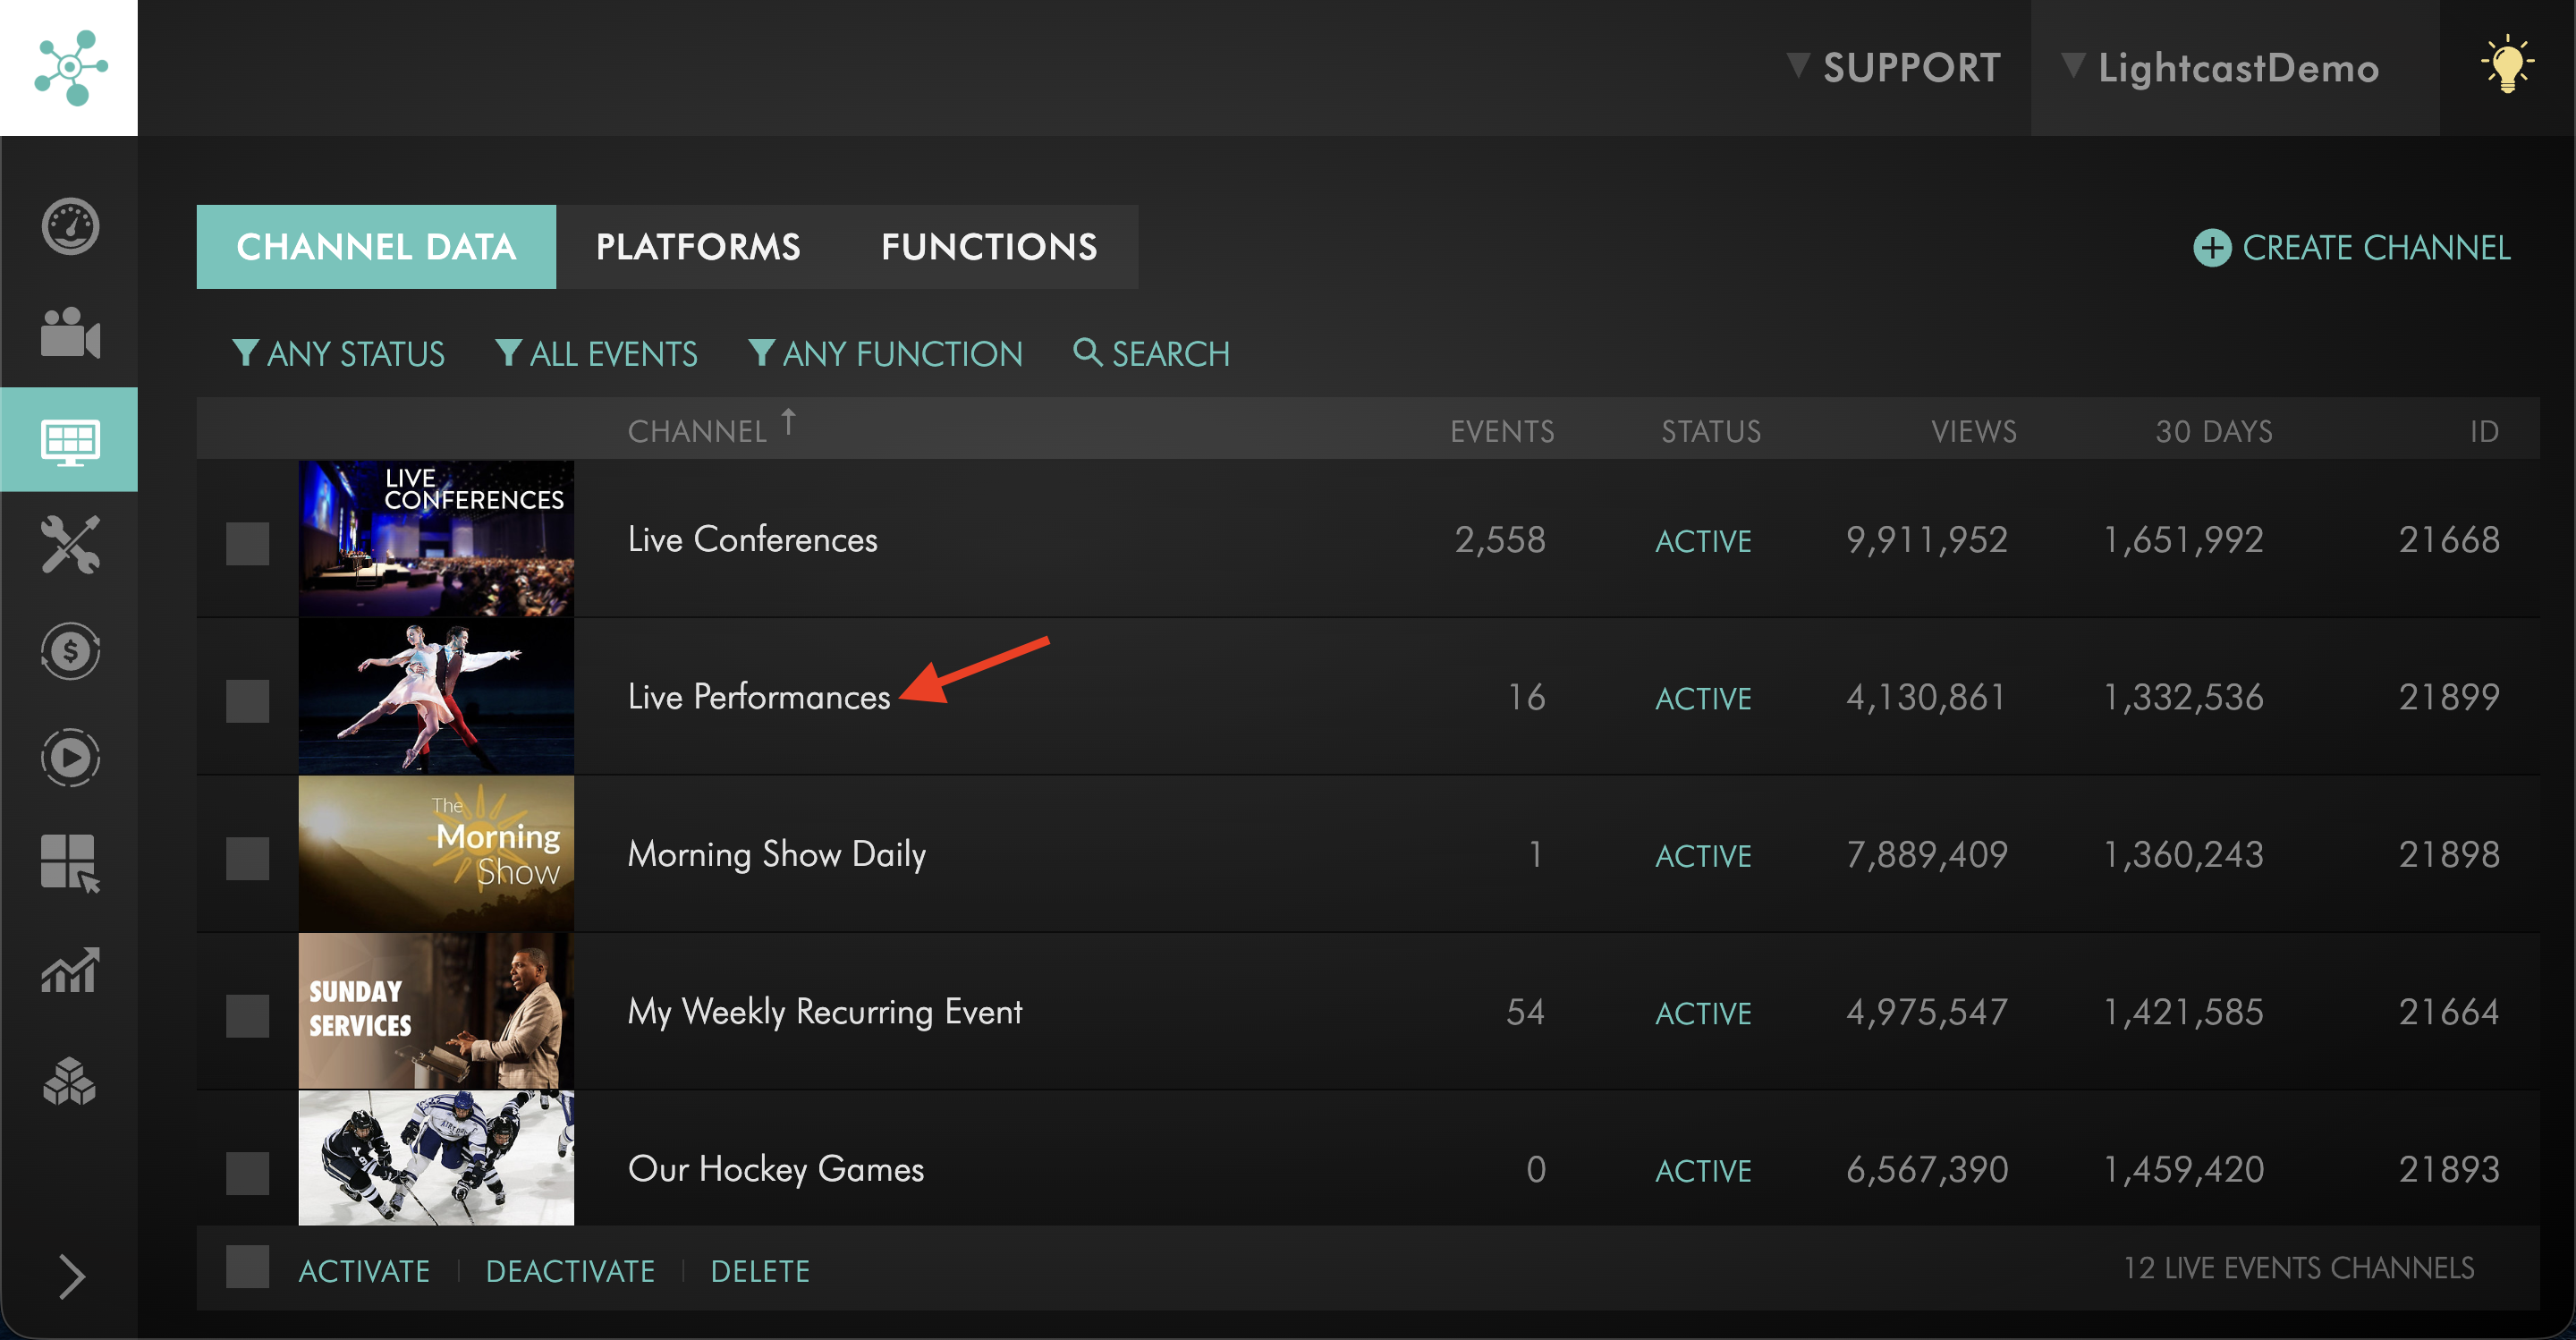
Step 2
Open the LIVE Channel where you are sending the stream.
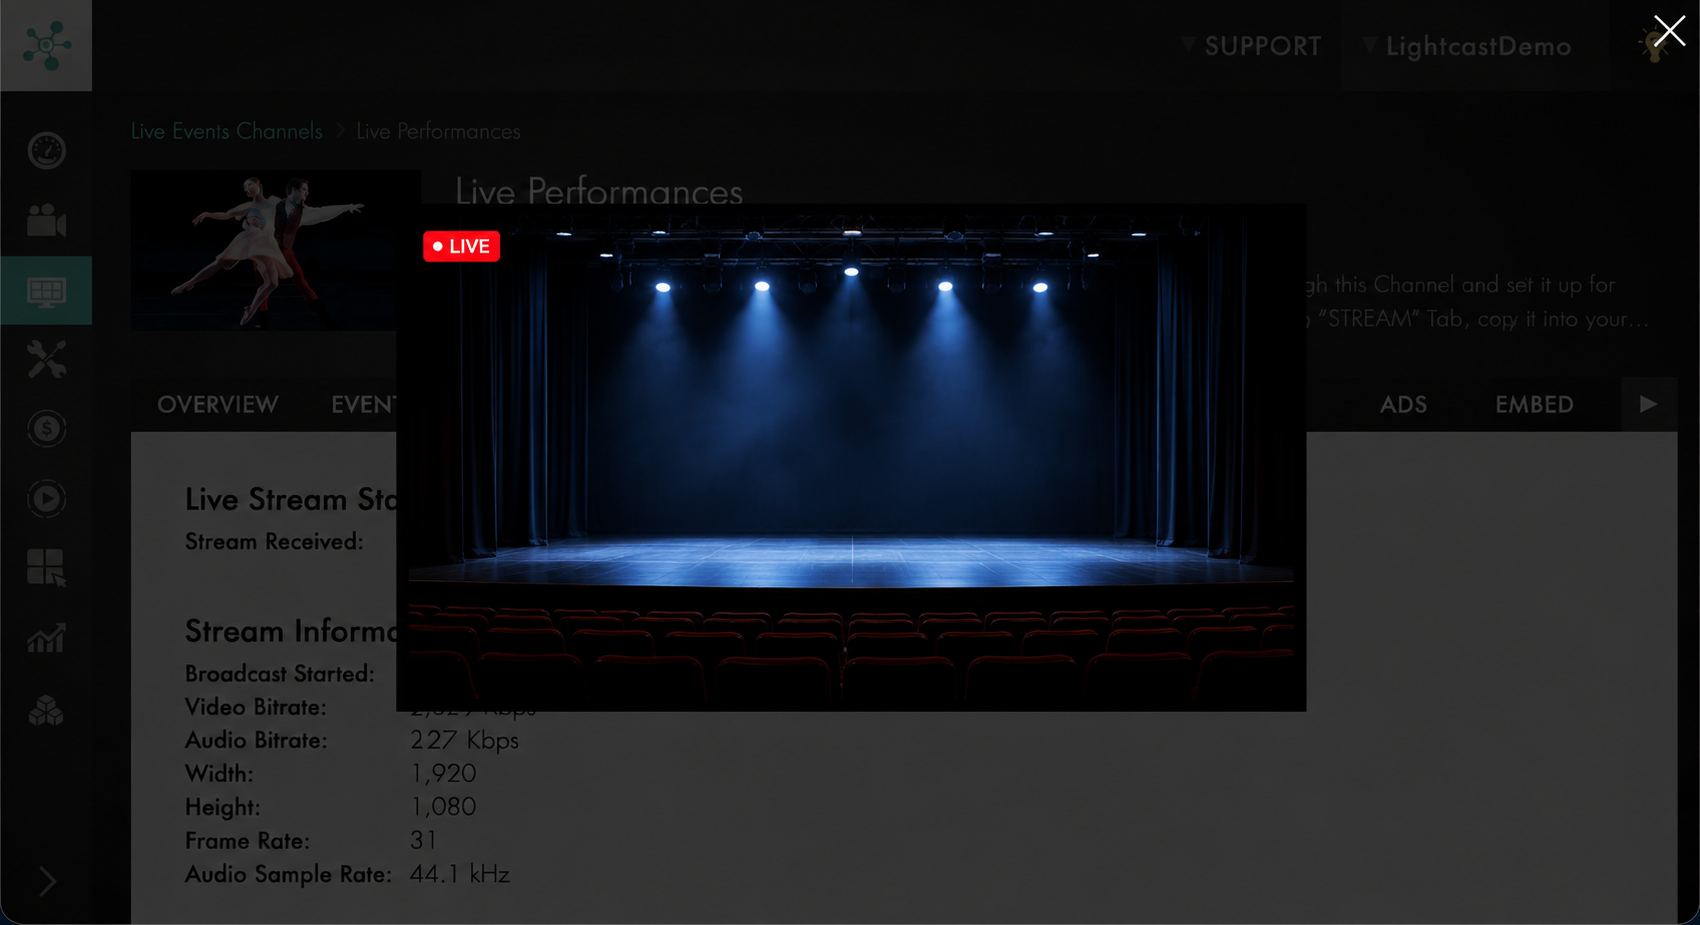
Step 3
Confirm that the incoming stream is detected and playing as expected.
Allow a short amount of time for the stream to appear after you begin broadcasting.
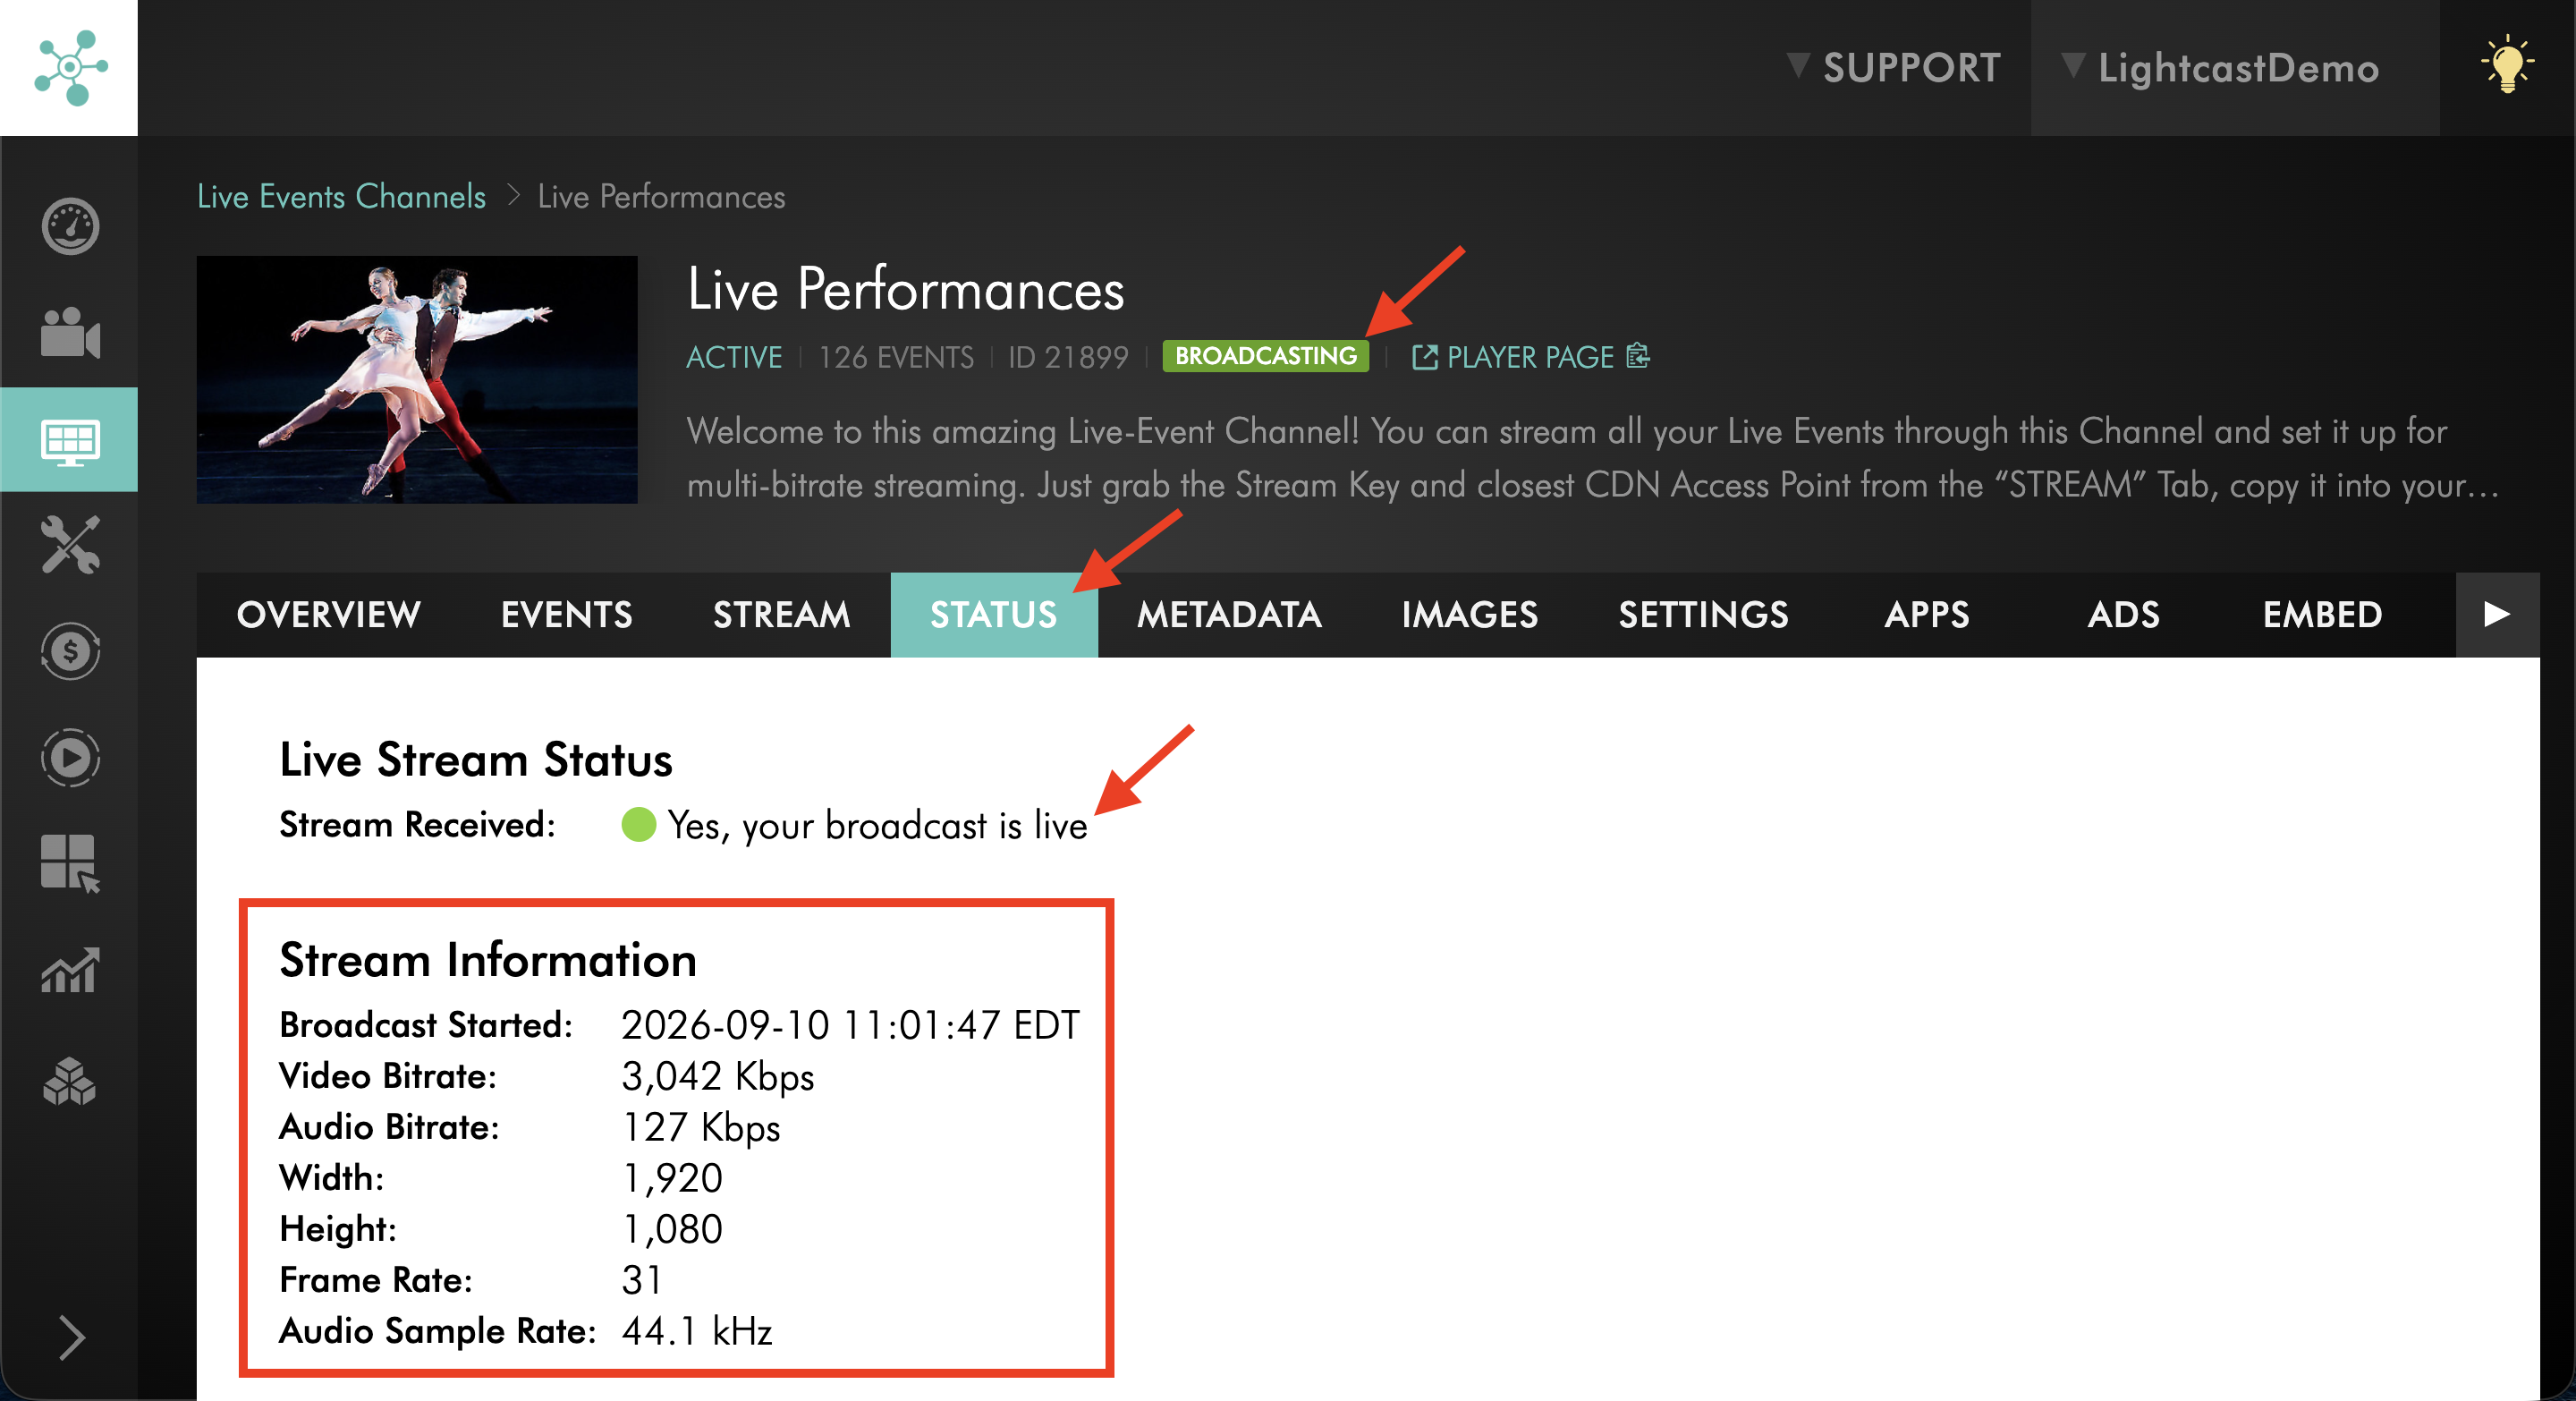
Step 4
Verify that both video and audio are playing correctly before beginning your broadcast.
Stop the stream
Step 1
When your broadcast is finished, return to OBS.
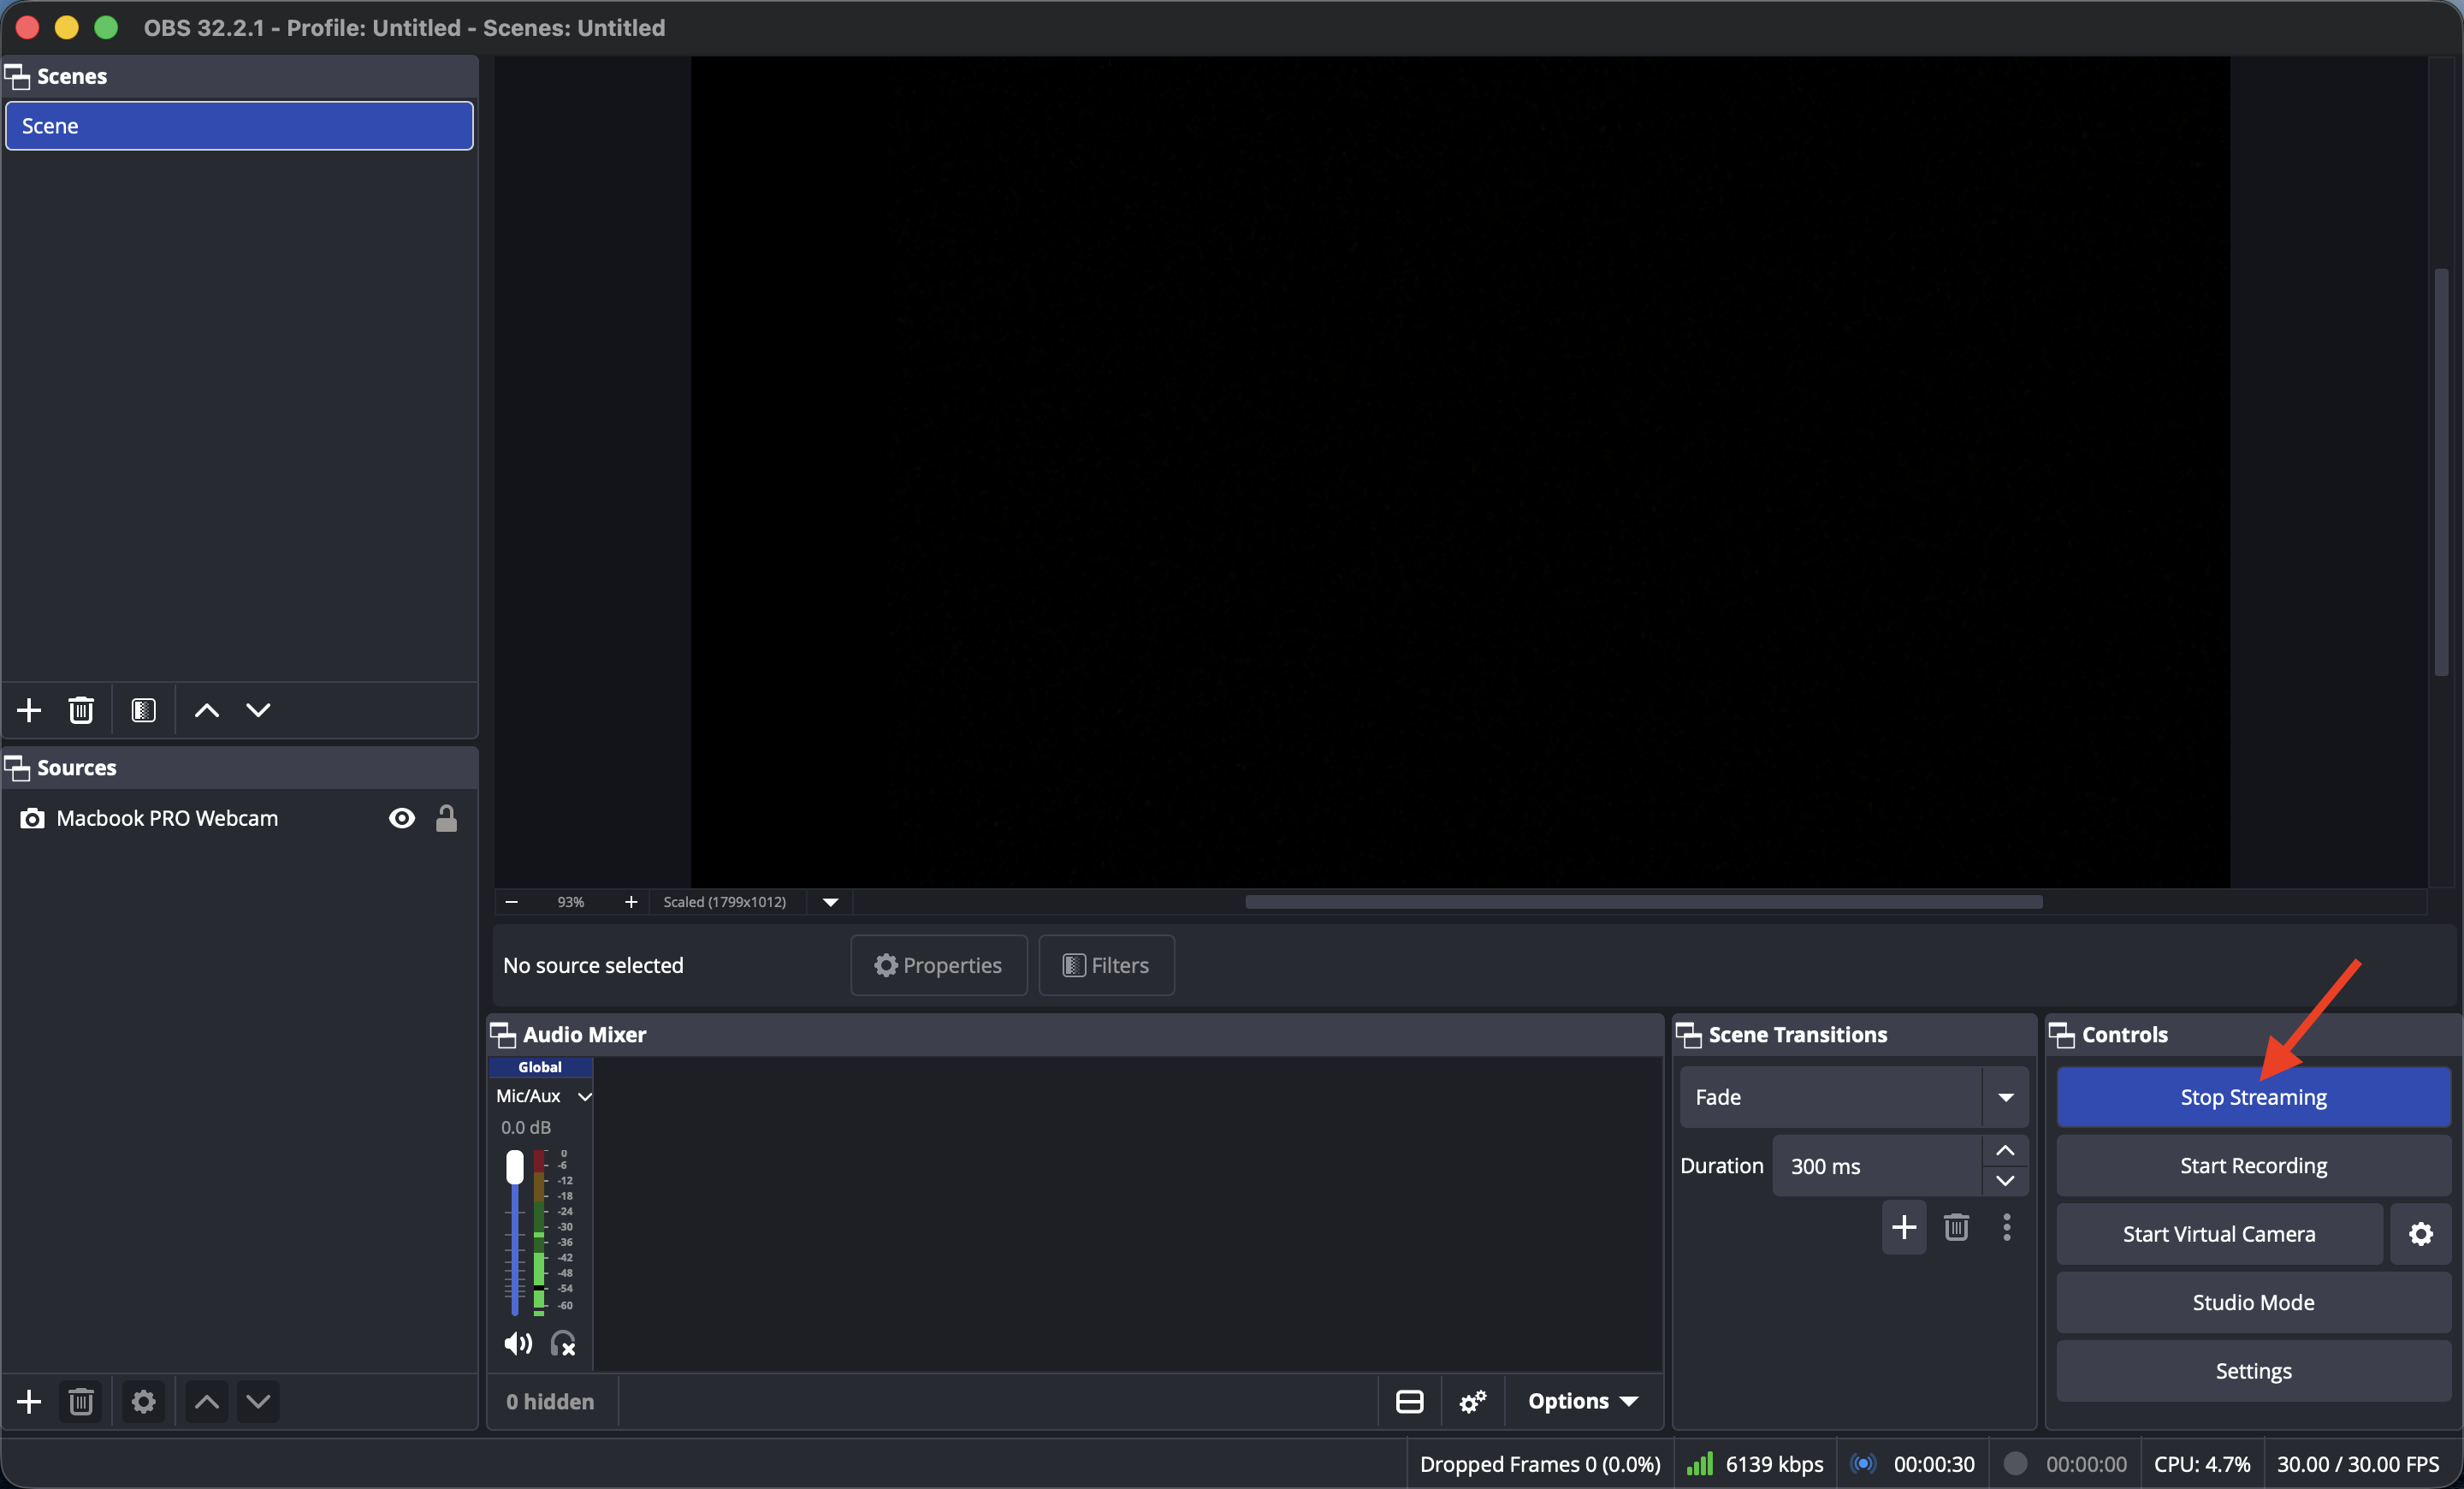
Step 2
Click Stop Streaming.
Step 3
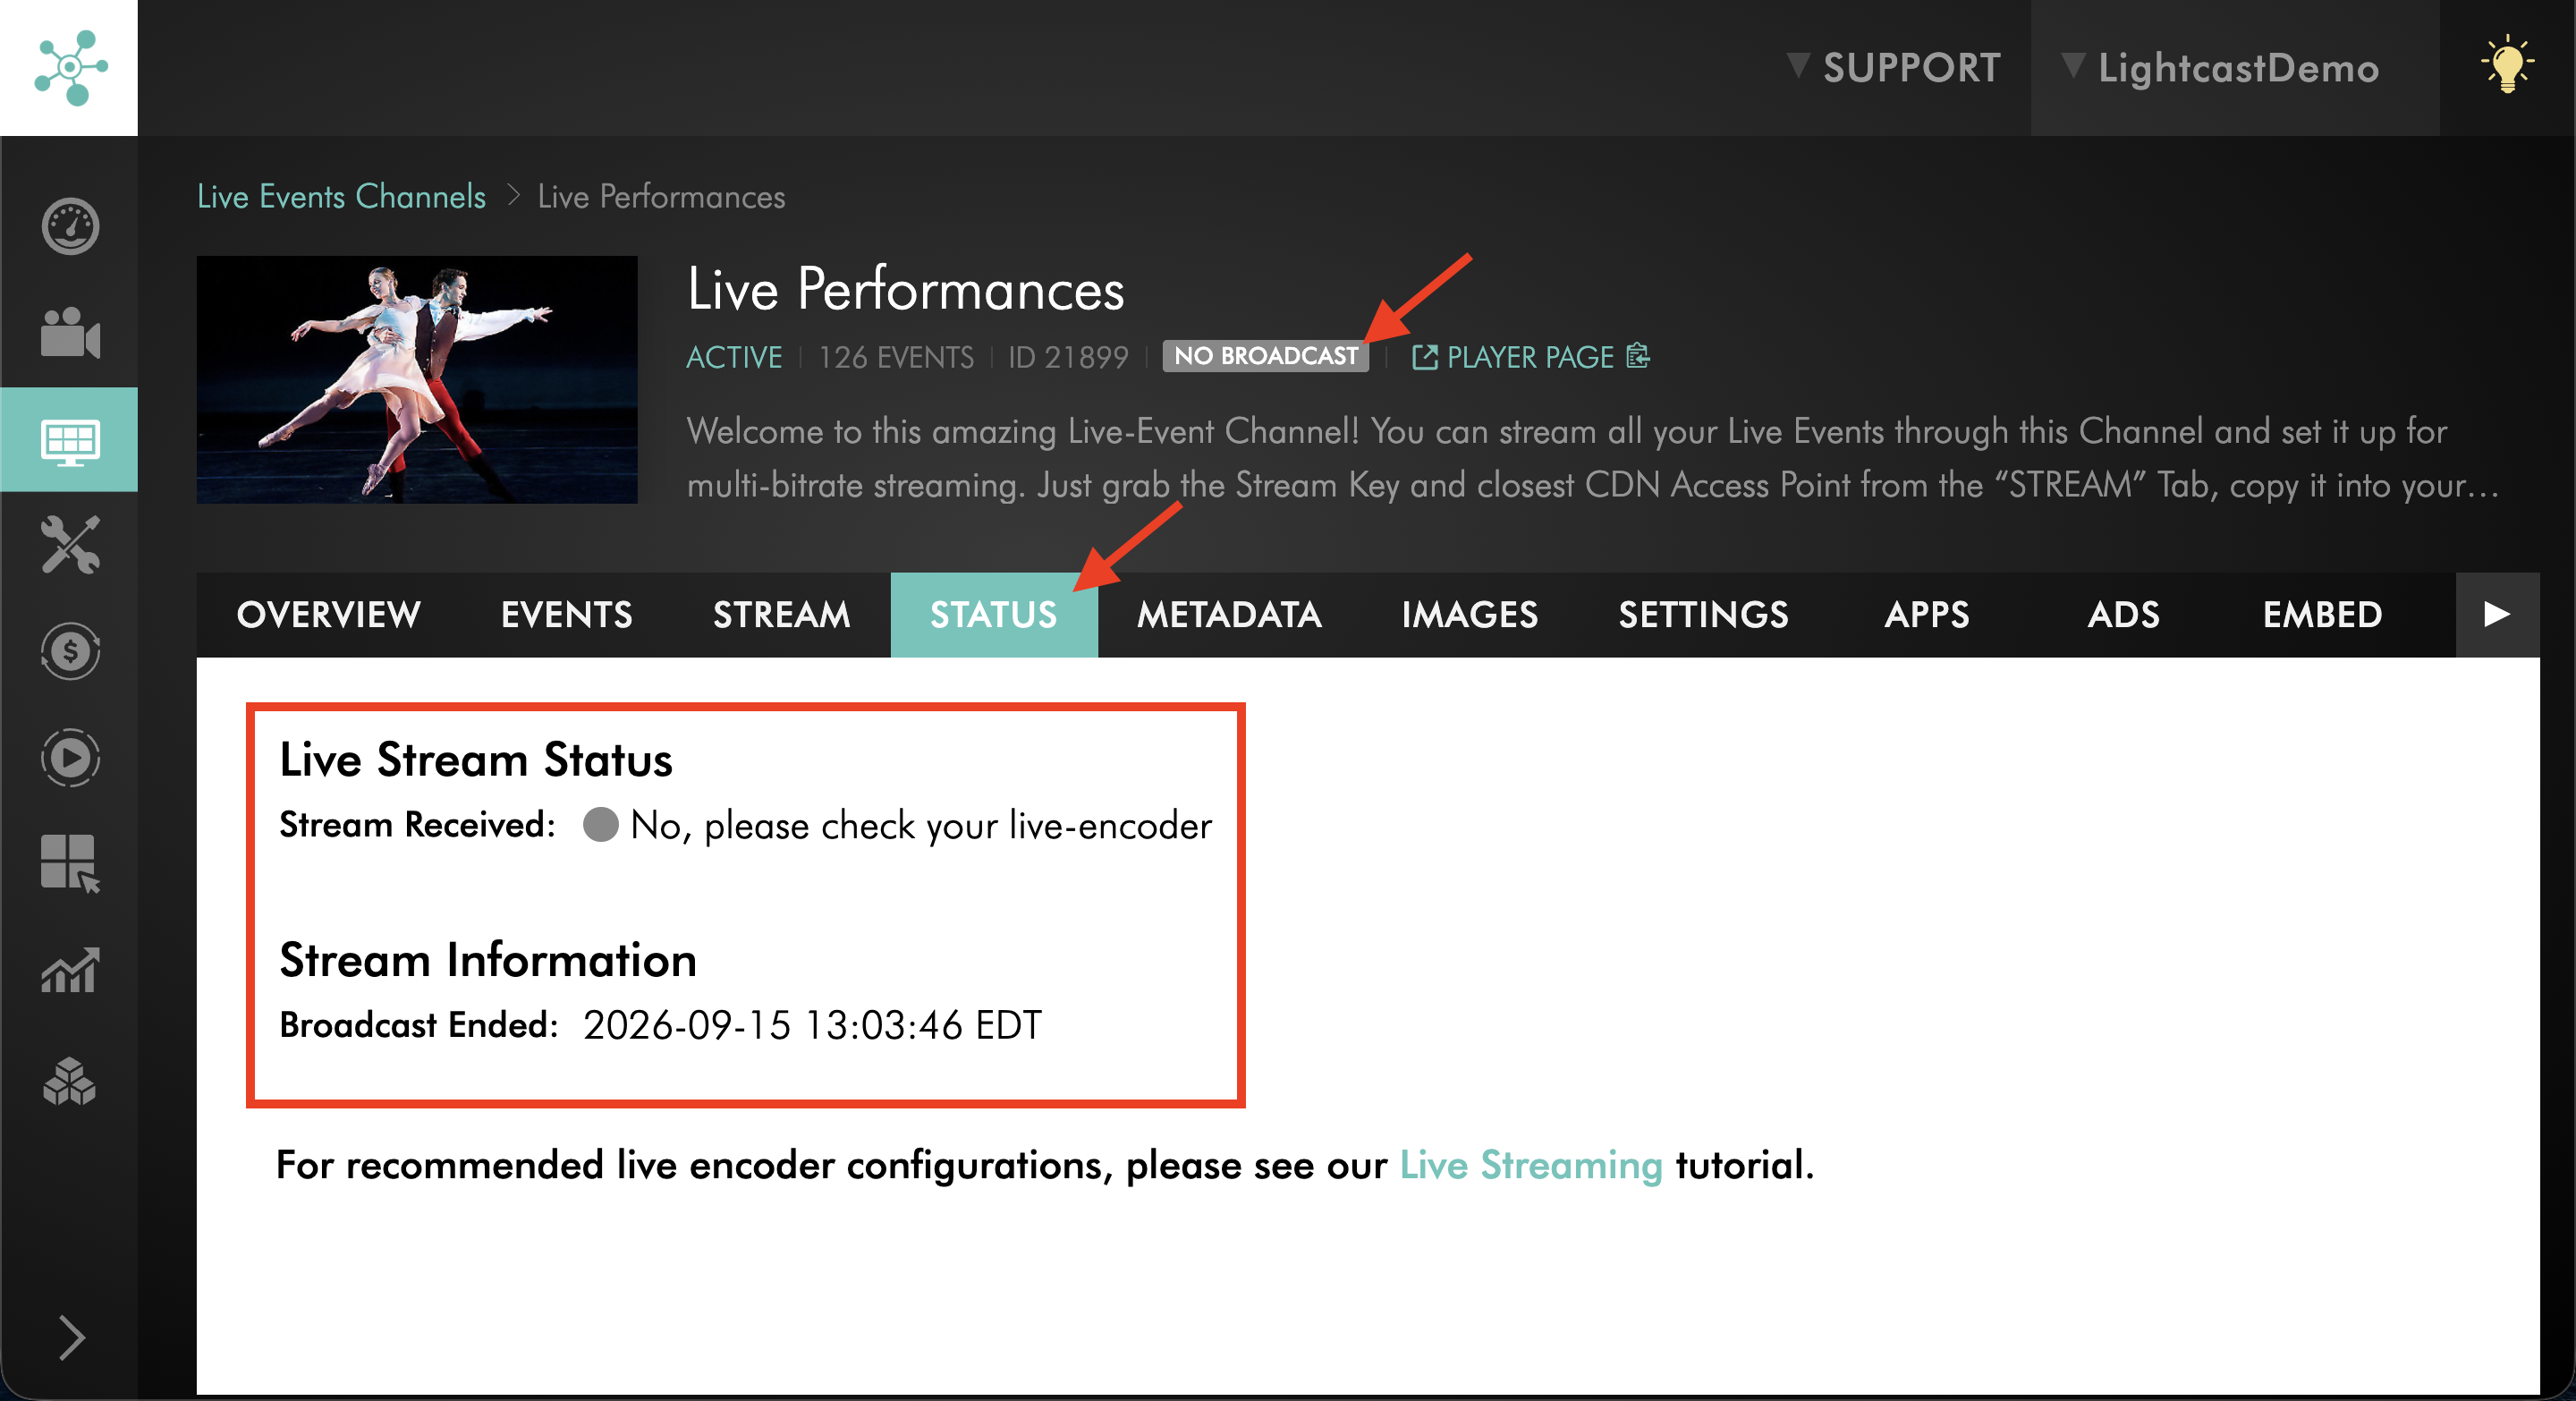
Return to the Media Cloud and confirm that the LIVE Channel is no longer receiving the active stream.
Troubleshooting
The stream is not detected in the Media Cloud
Verify that OBS is actively streaming and that the stream is being sent to the correct LIVE Channel.
If you are using Manual RTMP Setup, confirm that the CDN Access Point and Stream Key were copied correctly.
If you are using Manual SRT Setup, confirm that the complete SRT Streaming URL was copied correctly.
Video appears, but there is no audio
Confirm that an audio source is selected in OBS.
Also confirm that your audio settings use AAC audio, a supported audio bitrate, and a supported audio sample rate.
The stream buffers or disconnects
Check your available upload bandwidth and reduce the bitrate if necessary.
For best results, your available upload bandwidth should be at least twice the total bitrate of your stream, including video and audio.
Use a wired connection whenever possible and avoid large uploads, downloads, backups, or other bandwidth-heavy activity during the broadcast.
SRT does not connect
Confirm that the complete SRT Streaming URL was copied correctly from the Media Cloud.
Make sure OBS is set to Custom and that the SRT Streaming URL is pasted into the Server field.
Leave the Stream Key field empty when using SRT.
Lightcast.com does not appear as a service option
If Lightcast.com does not appear as a service option, use Manual RTMP Setup instead.
You can still send an RTMP stream to your LIVE Channel by entering the CDN Access Point and Stream Key manually.
For additional troubleshooting guidance, see Recommended encoder settings for live streaming and Troubleshooting encoder connection and buffering issues.
FAQs
What is the difference between the Lightcast.com service option and Manual RTMP Setup?
The Lightcast.com destination setup uses OBS’s built-in Lightcast.com service option. It allows you to select a Lightcast.com server from the Server dropdown and enter your LIVE Channel Stream Key.
Manual RTMP Setup uses the Custom service option and requires you to paste both the CDN Access Point and the Stream Key from the Media Cloud.
Both options use RTMP streaming.
Can I use the Lightcast.com service option for SRT streaming?
No. The Lightcast.com service option in OBS uses RTMP streaming.
To stream with SRT, use Manual SRT Setup and paste the SRT Streaming URL into the Server field.
What is the difference between RTMP and SRT?
RTMP is widely supported and works well for most standard streaming setups.
SRT can provide a more resilient connection between your encoder and Lightcast, especially when streaming over networks with packet loss, variable bandwidth, or longer geographic distances.
Where can I find my Stream Key, CDN Access Point, or SRT Streaming URL?
Your LIVE Channel stream credentials are located in the LIVE Channel’s STREAM tab.
For step-by-step instructions, see How to find your LIVE Channel stream credentials.
What bitrate should be used in OBS?
Use a bitrate that matches your resolution, encoder capacity, and available upload speed.
Resolution | Recommended bitrate |
|---|---|
720p | 2,000–2,500 kbps |
1080p | 5,000–8,000 kbps |
For best results, your available upload bandwidth should be at least twice the total bitrate of your stream, including video and audio.
Why is the LIVE Channel not showing video after OBS starts streaming?
Common causes include an incorrect Stream Key, incorrect CDN Access Point, incorrect SRT Streaming URL, OBS not actively streaming, or a bitrate that exceeds the available upload speed.
Verify your stream settings in OBS and confirm that the stream is being sent to the correct LIVE Channel.
Should OBS be set to High or Baseline profile?
High is recommended for most live streaming workflows.
Baseline may be used when required for device compatibility, encoder compatibility, or a specific streaming setup.
Can OBS record the live stream while streaming?
Yes. OBS can record a local copy of your stream while it is broadcasting. Configure recording settings in the Output → Recording tab before starting the stream.
A local recording can be helpful as a backup file after the live event.