
How to trim a LIVE-to-VOD recording
Overview
This article explains how to trim a LIVE-to-VOD recording in the Media Cloud before sending it to encoding.
Trimming allows you to remove extra content from the beginning or end of a live recording before it is processed and published as a VOD asset.
When to trim a LIVE-to-VOD recording
Use the LIVE-to-VOD trimming tool when you want to clean up a live recording before publishing it as on-demand video.
This may be helpful when:
You started streaming before the Live Event began and want to remove the extra footage
You continued streaming after the Live Event ended and want to remove the extra footage
You want the VOD asset to begin and end at specific points
LIVE-to-VOD recordings must be available in Live Recordings before they can be trimmed. For more information, see How to manage LIVE-to-VOD recordings.
How it works
LIVE-to-VOD recordings can be trimmed before they are sent to encoding.
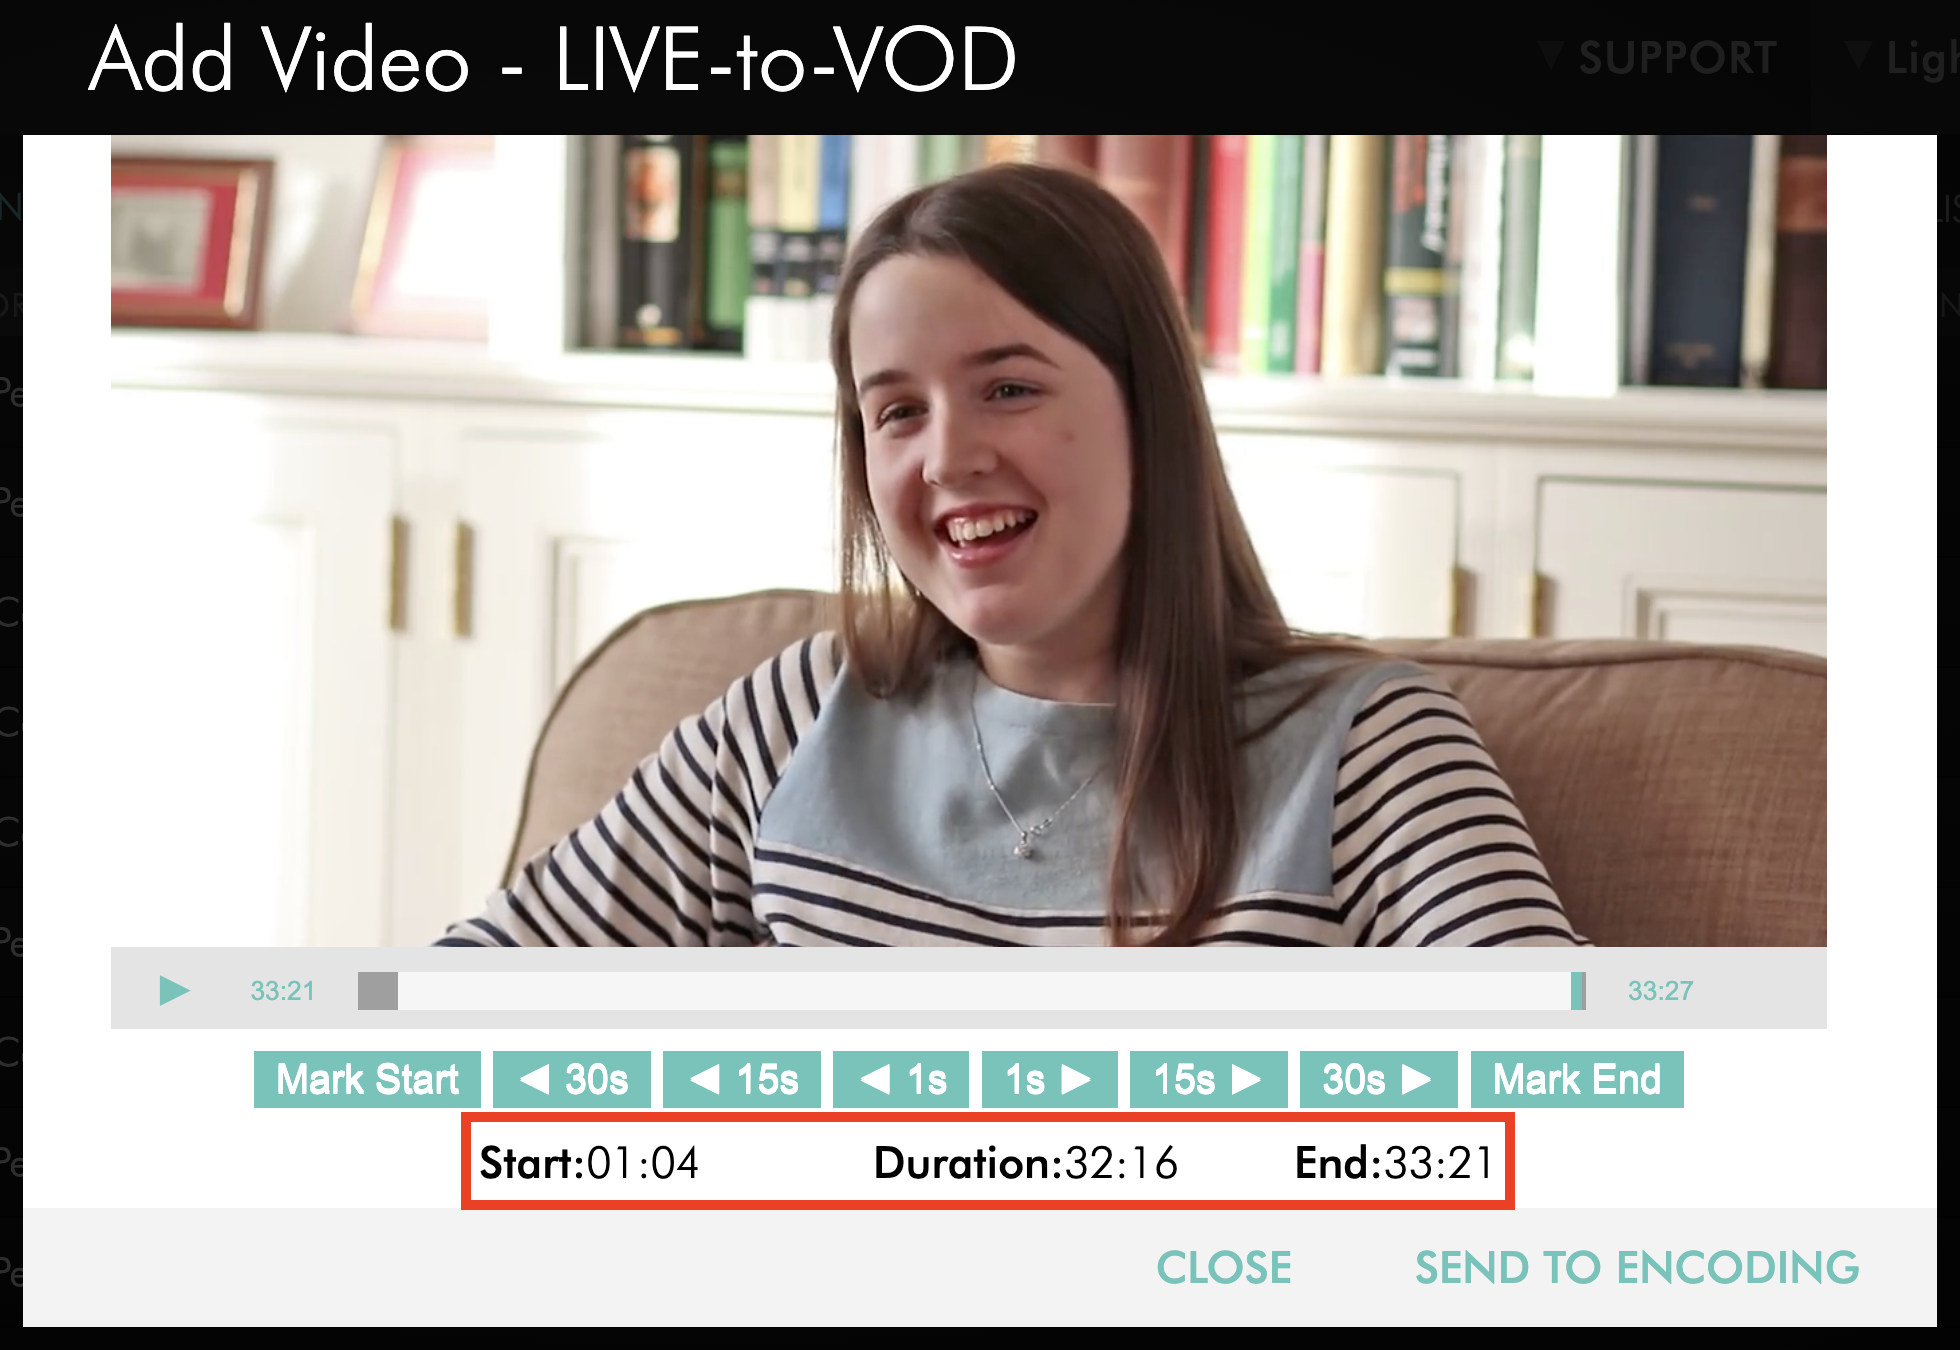
When you select Manual Trim, the Media Cloud displays a video preview and trim controls. You can move through the recording, set the start and end points, and review the selected duration.
Only the portion between the selected start and end points will be sent to encoding. The original LIVE-to-VOD recording remains unchanged in Live Recordings.
Important: The trimming tool allows you to adjust the beginning and end of a recording. It cannot be used to remove sections from the middle of the recording.
When you are finished trimming, select SEND TO ENCODING. This starts the transcoding process, which prepares the selected portion of the recording for multi-platform VOD playback.
LIVE-to-VOD recordings are automatically removed from Live Recordings after 30 days. Trim and send any recordings you want to keep to encoding before then.
Instructions
Step 1
Log in to your Media Cloud account.
Step 2
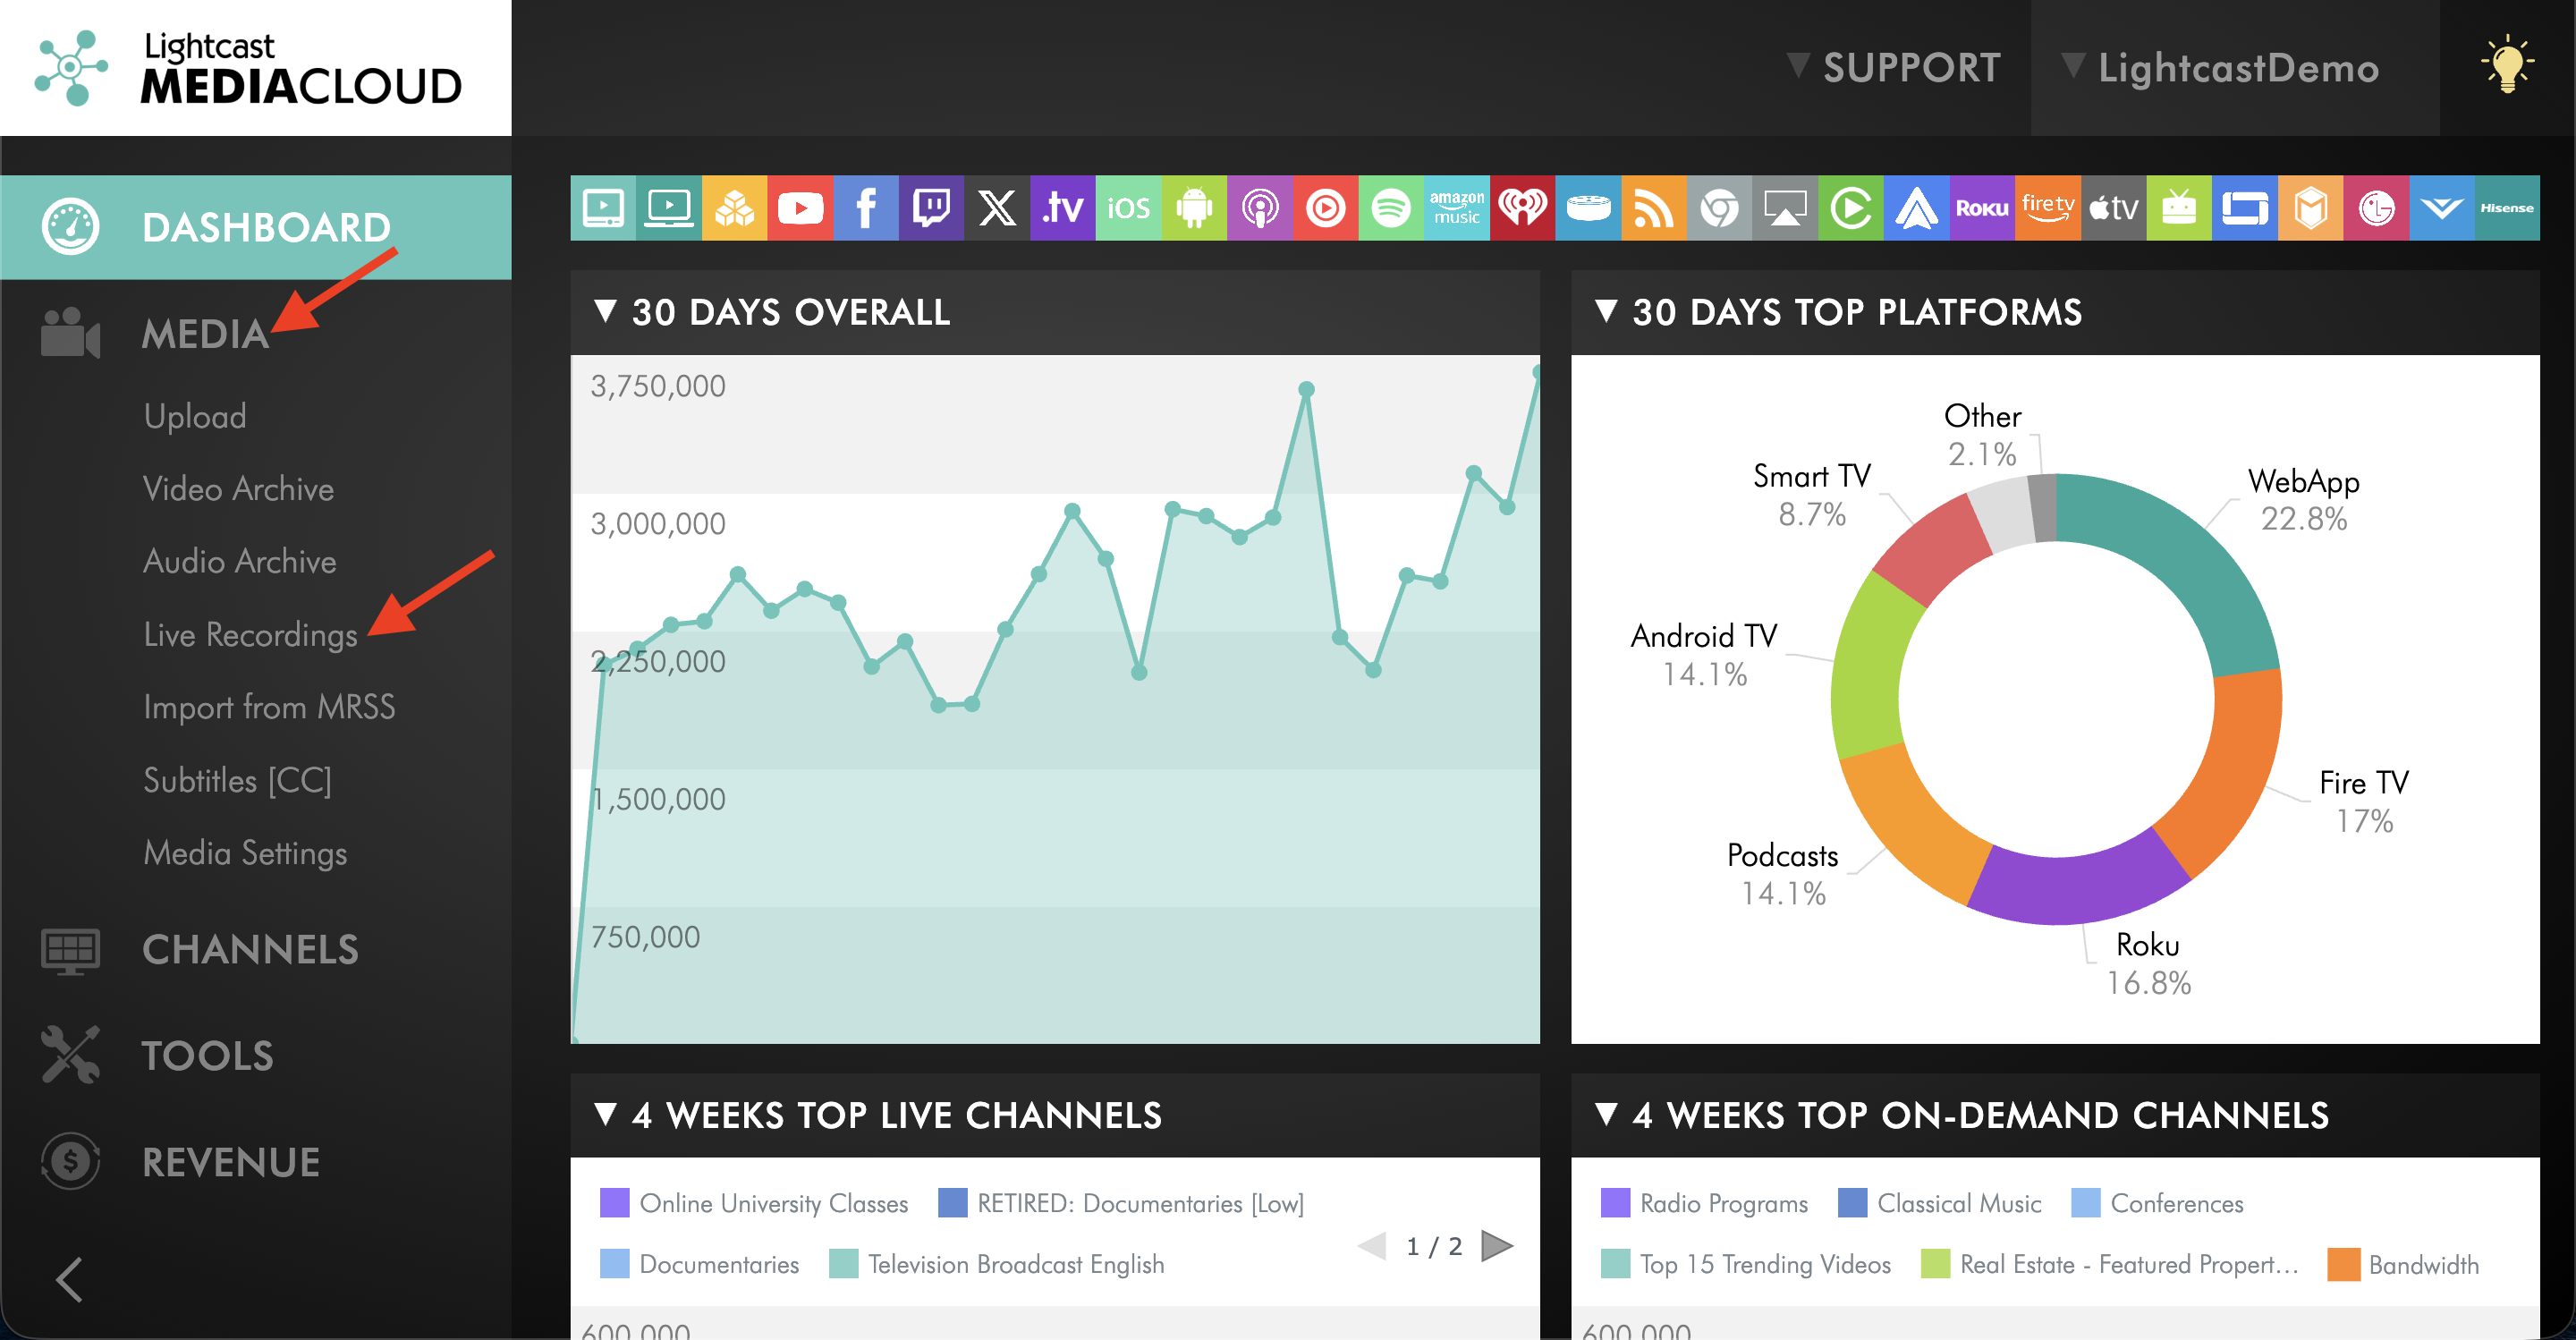
Go to MEDIA, then select Live Recordings.
Step 3
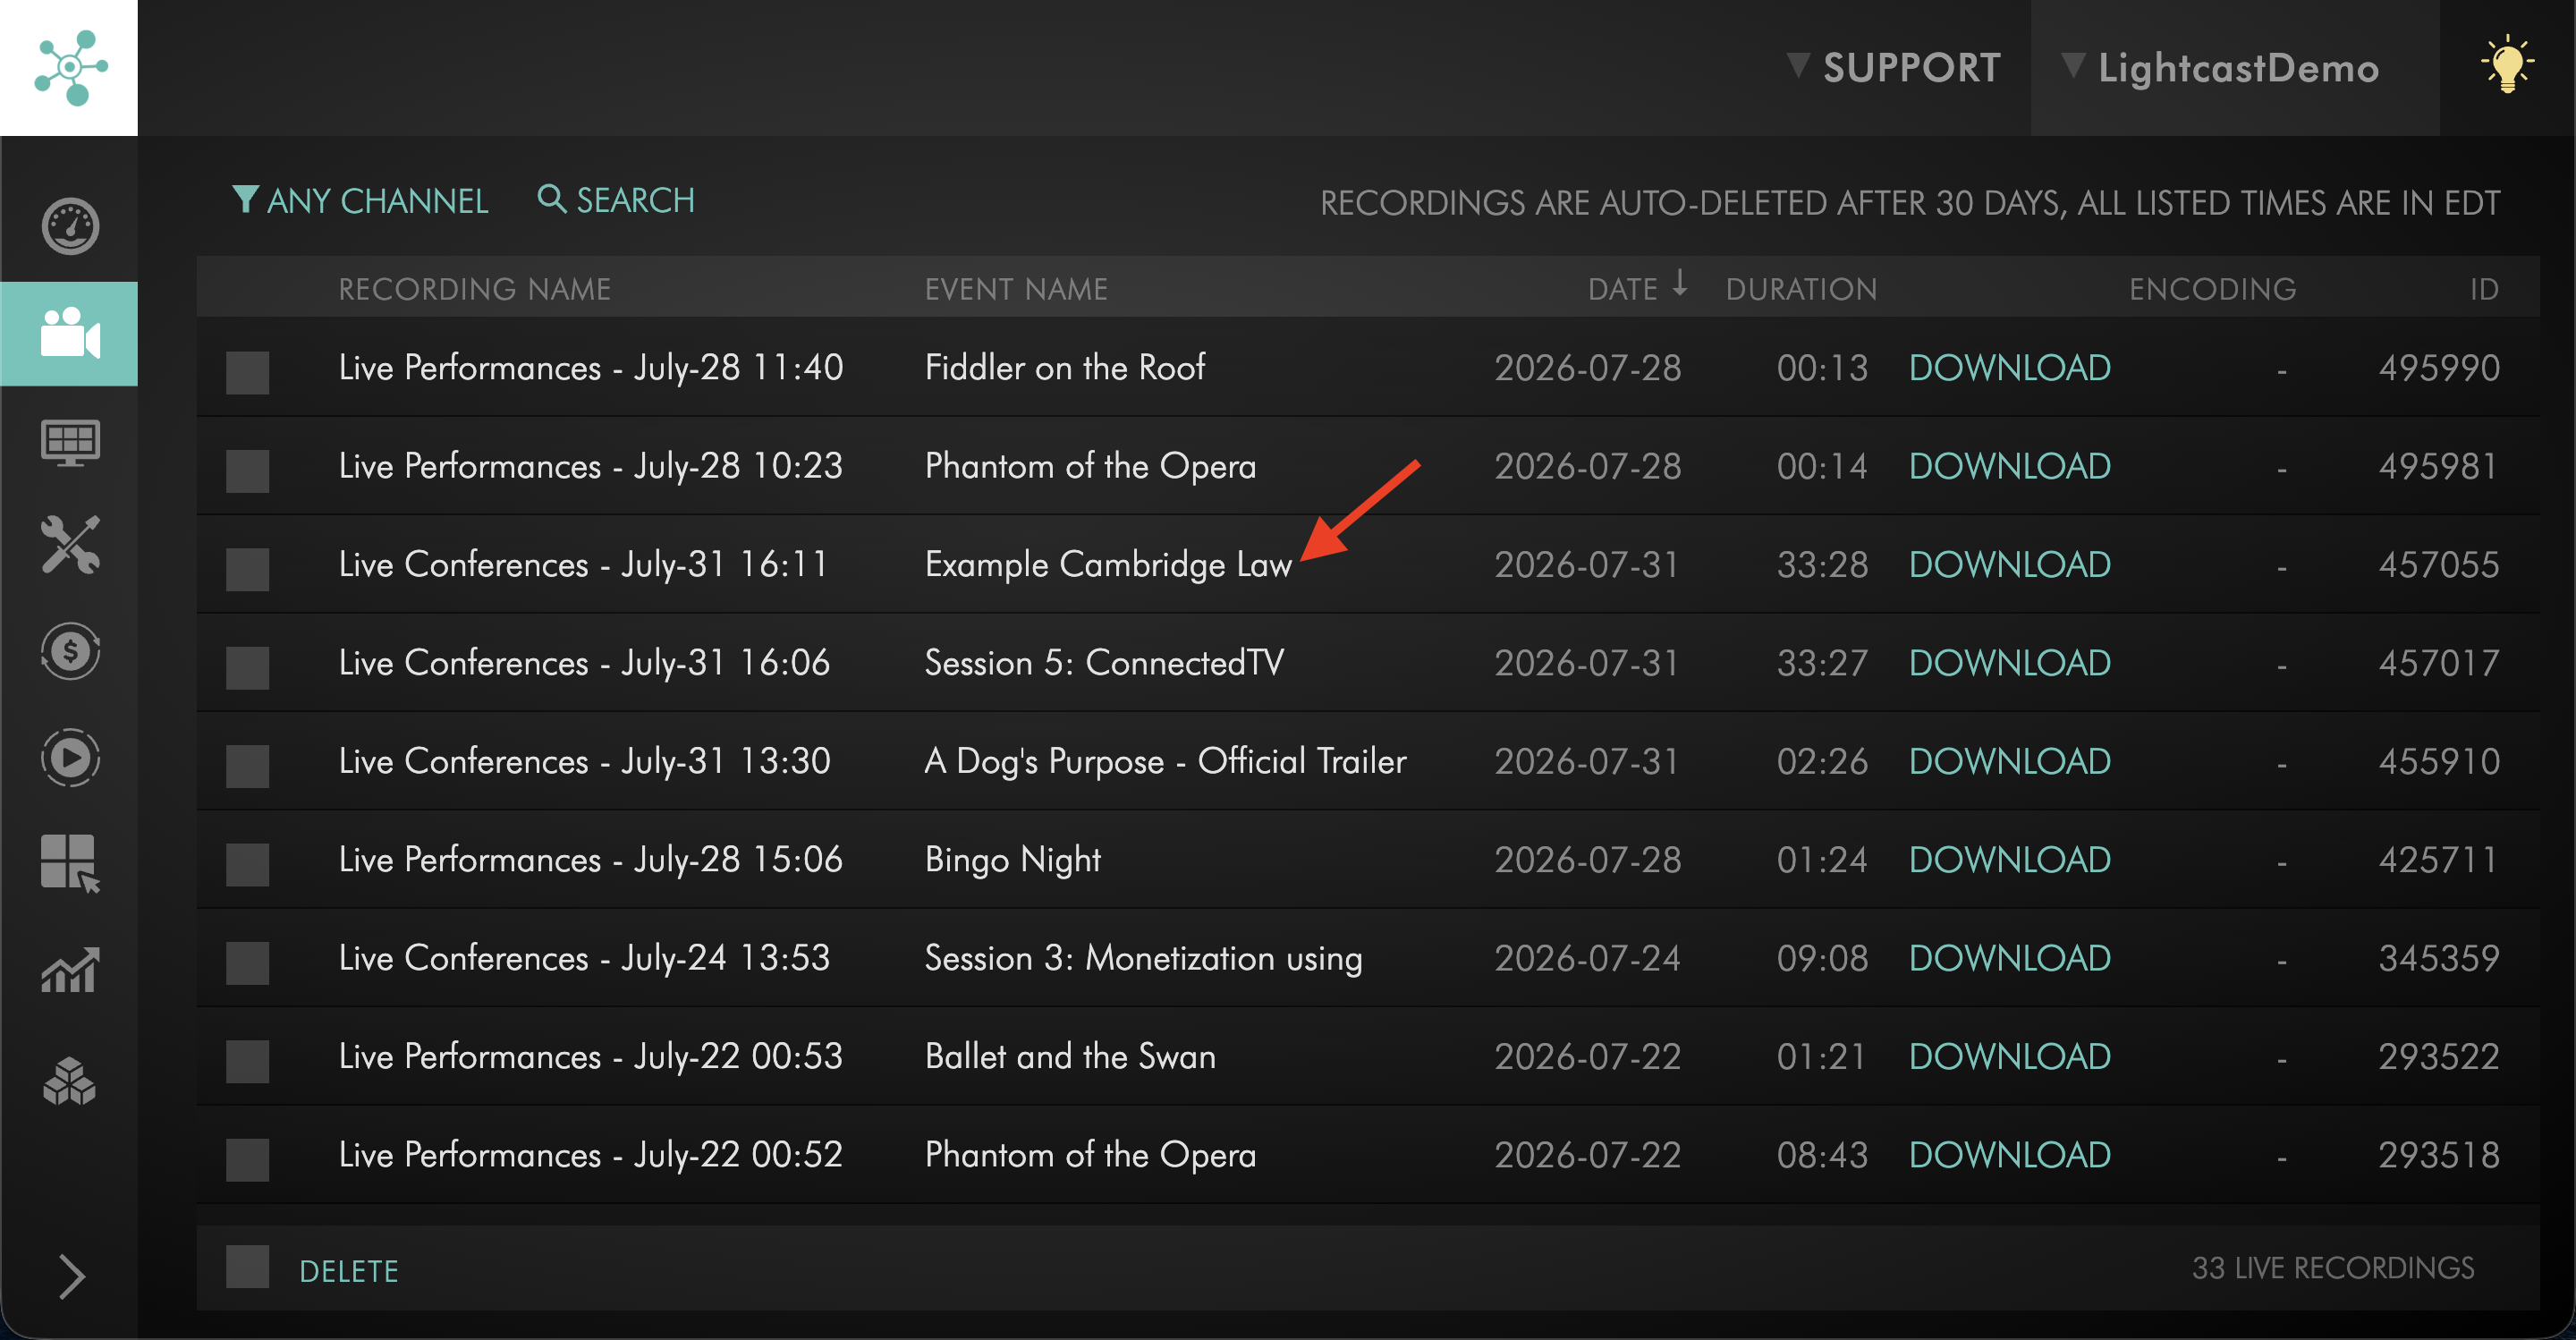
Select the LIVE-to-VOD recording you want to trim.
Step 4
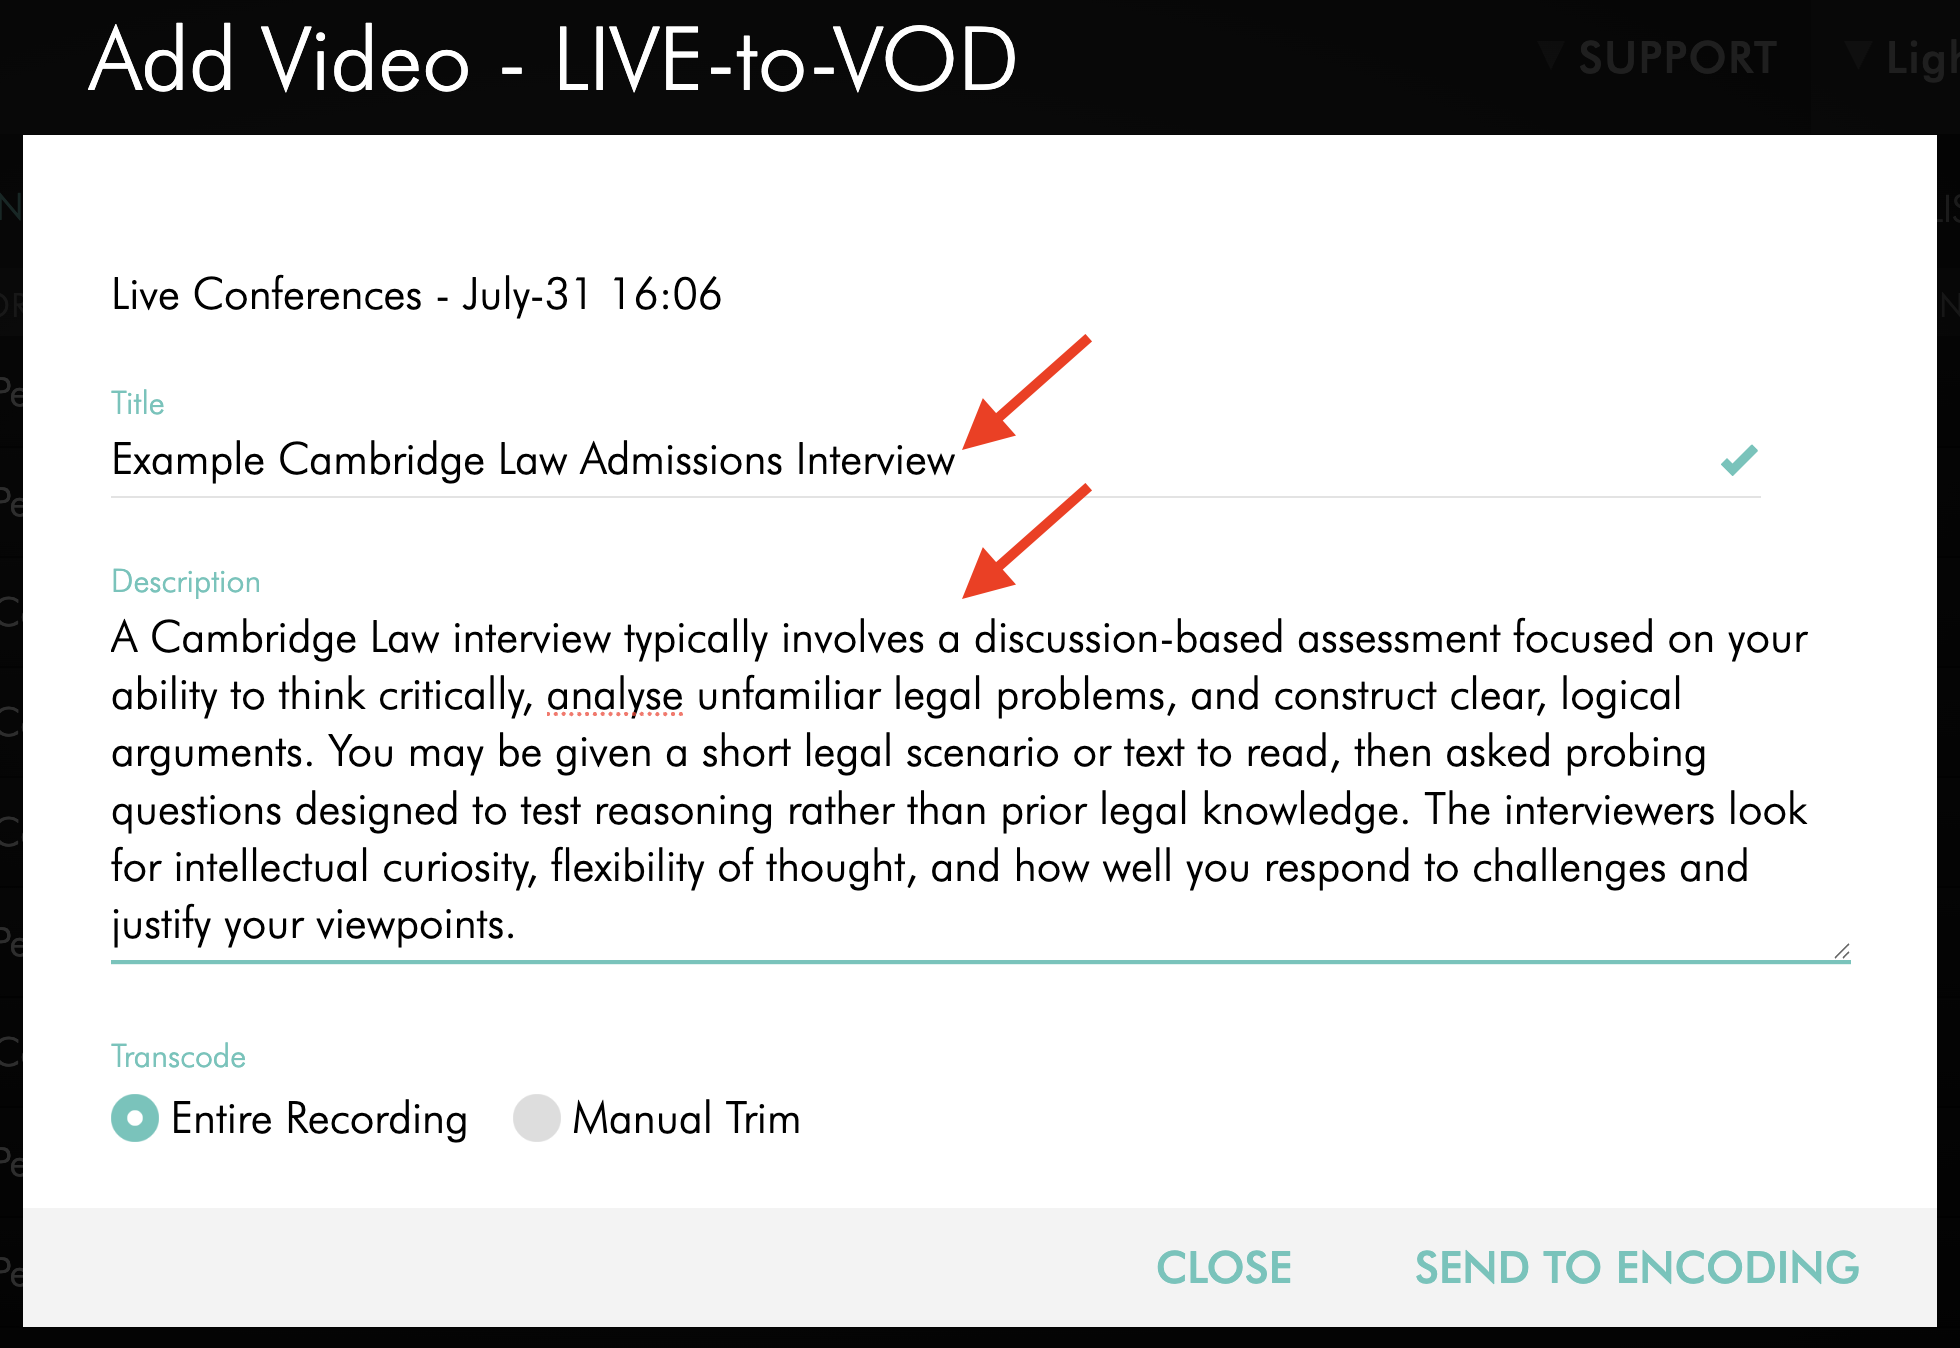
Enter or review the recording metadata, such as the title and description.
Step 5
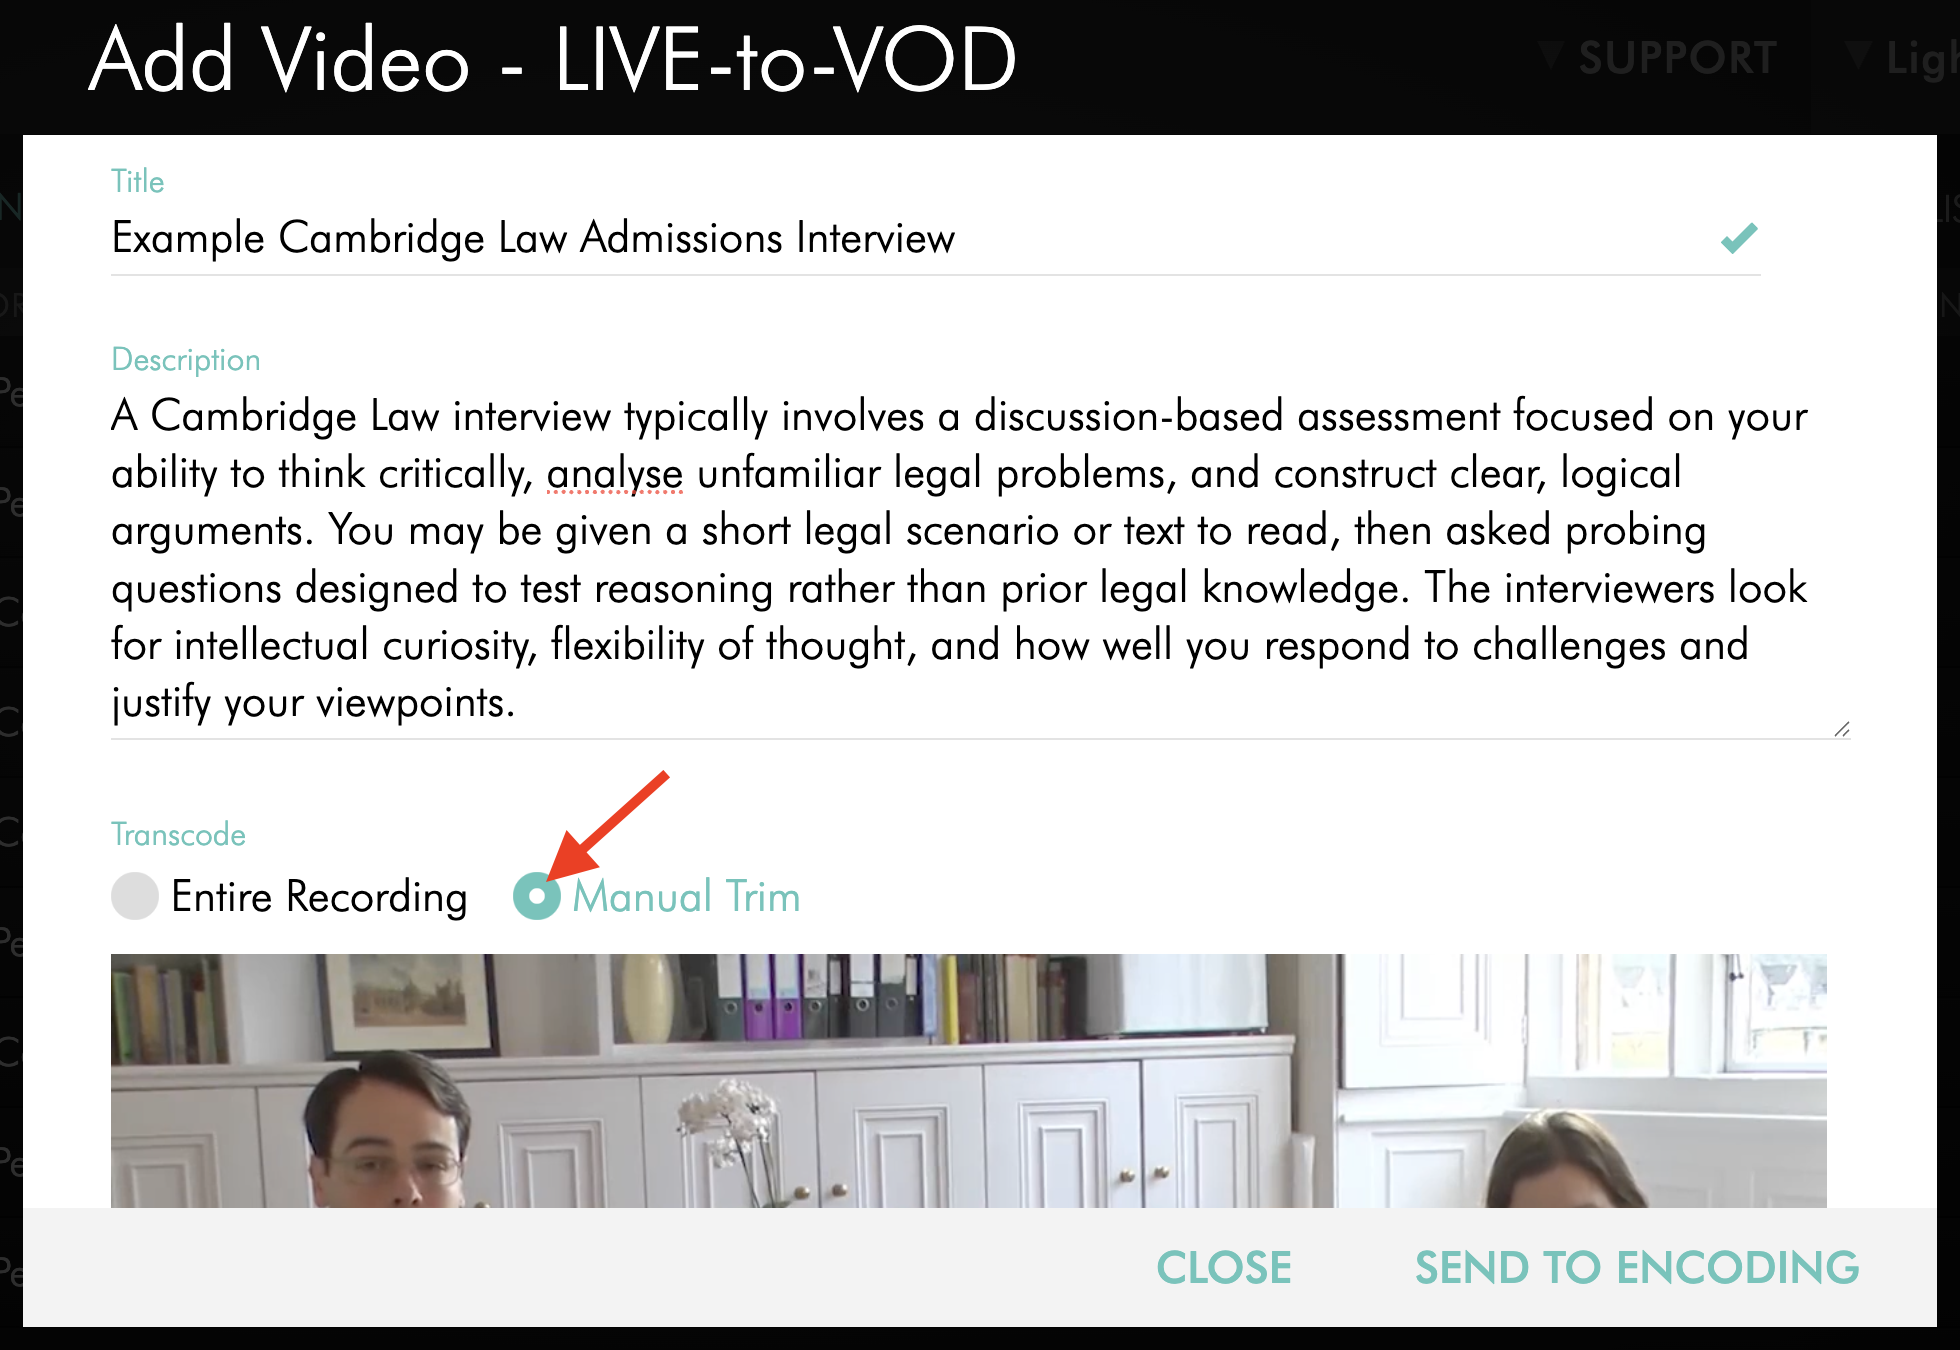
Under Transcode, select Manual Trim.
The video preview and trim controls will appear.
Step 6
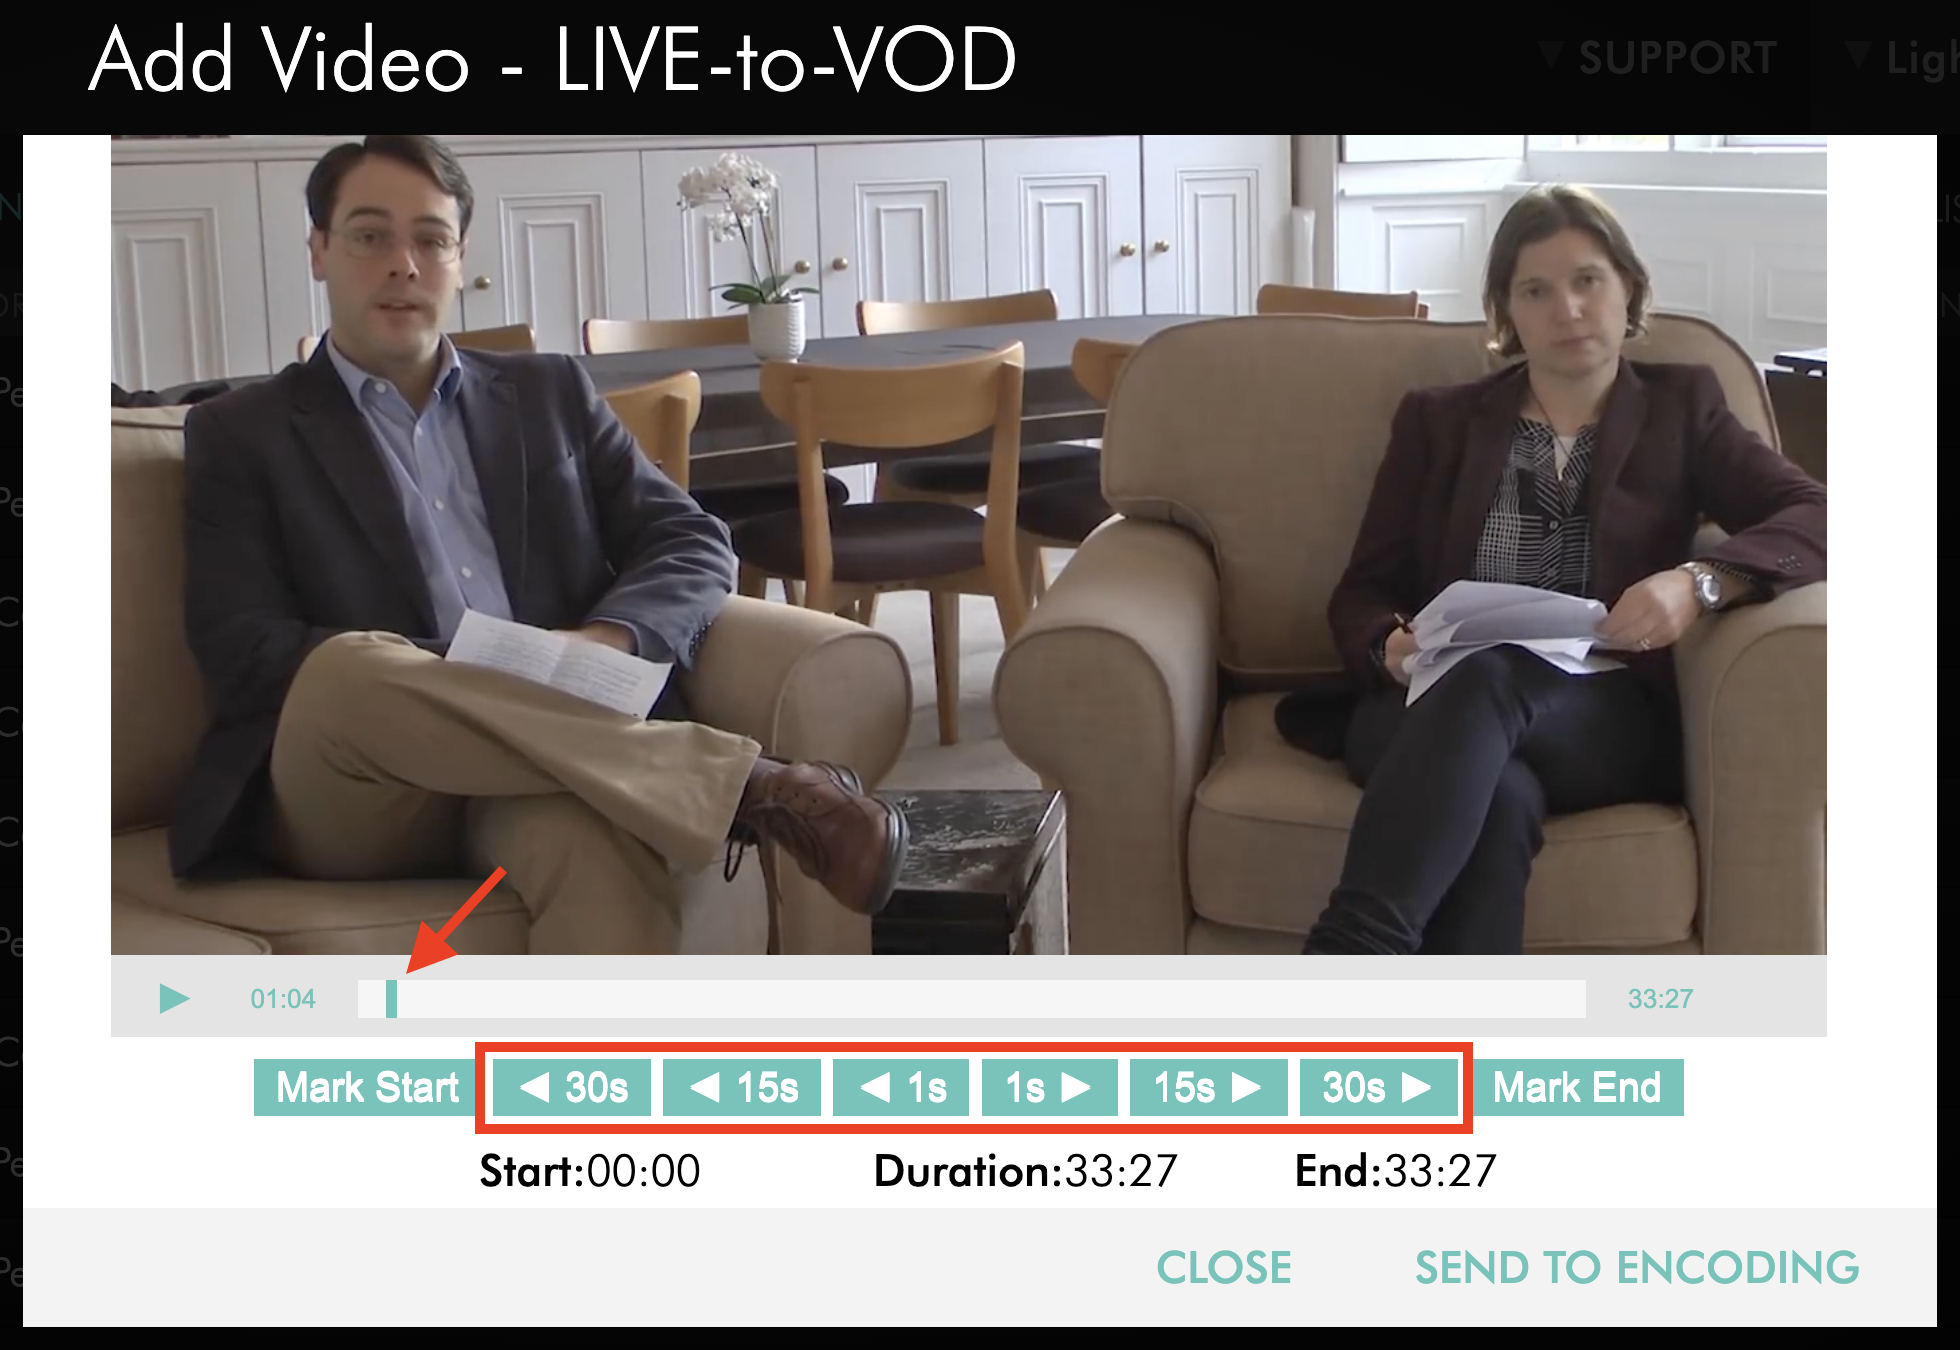
Use the video player controls to find where you want the finished VOD asset to begin.
You can use the playback bar or the available time controls to move through the recording.
Step 7
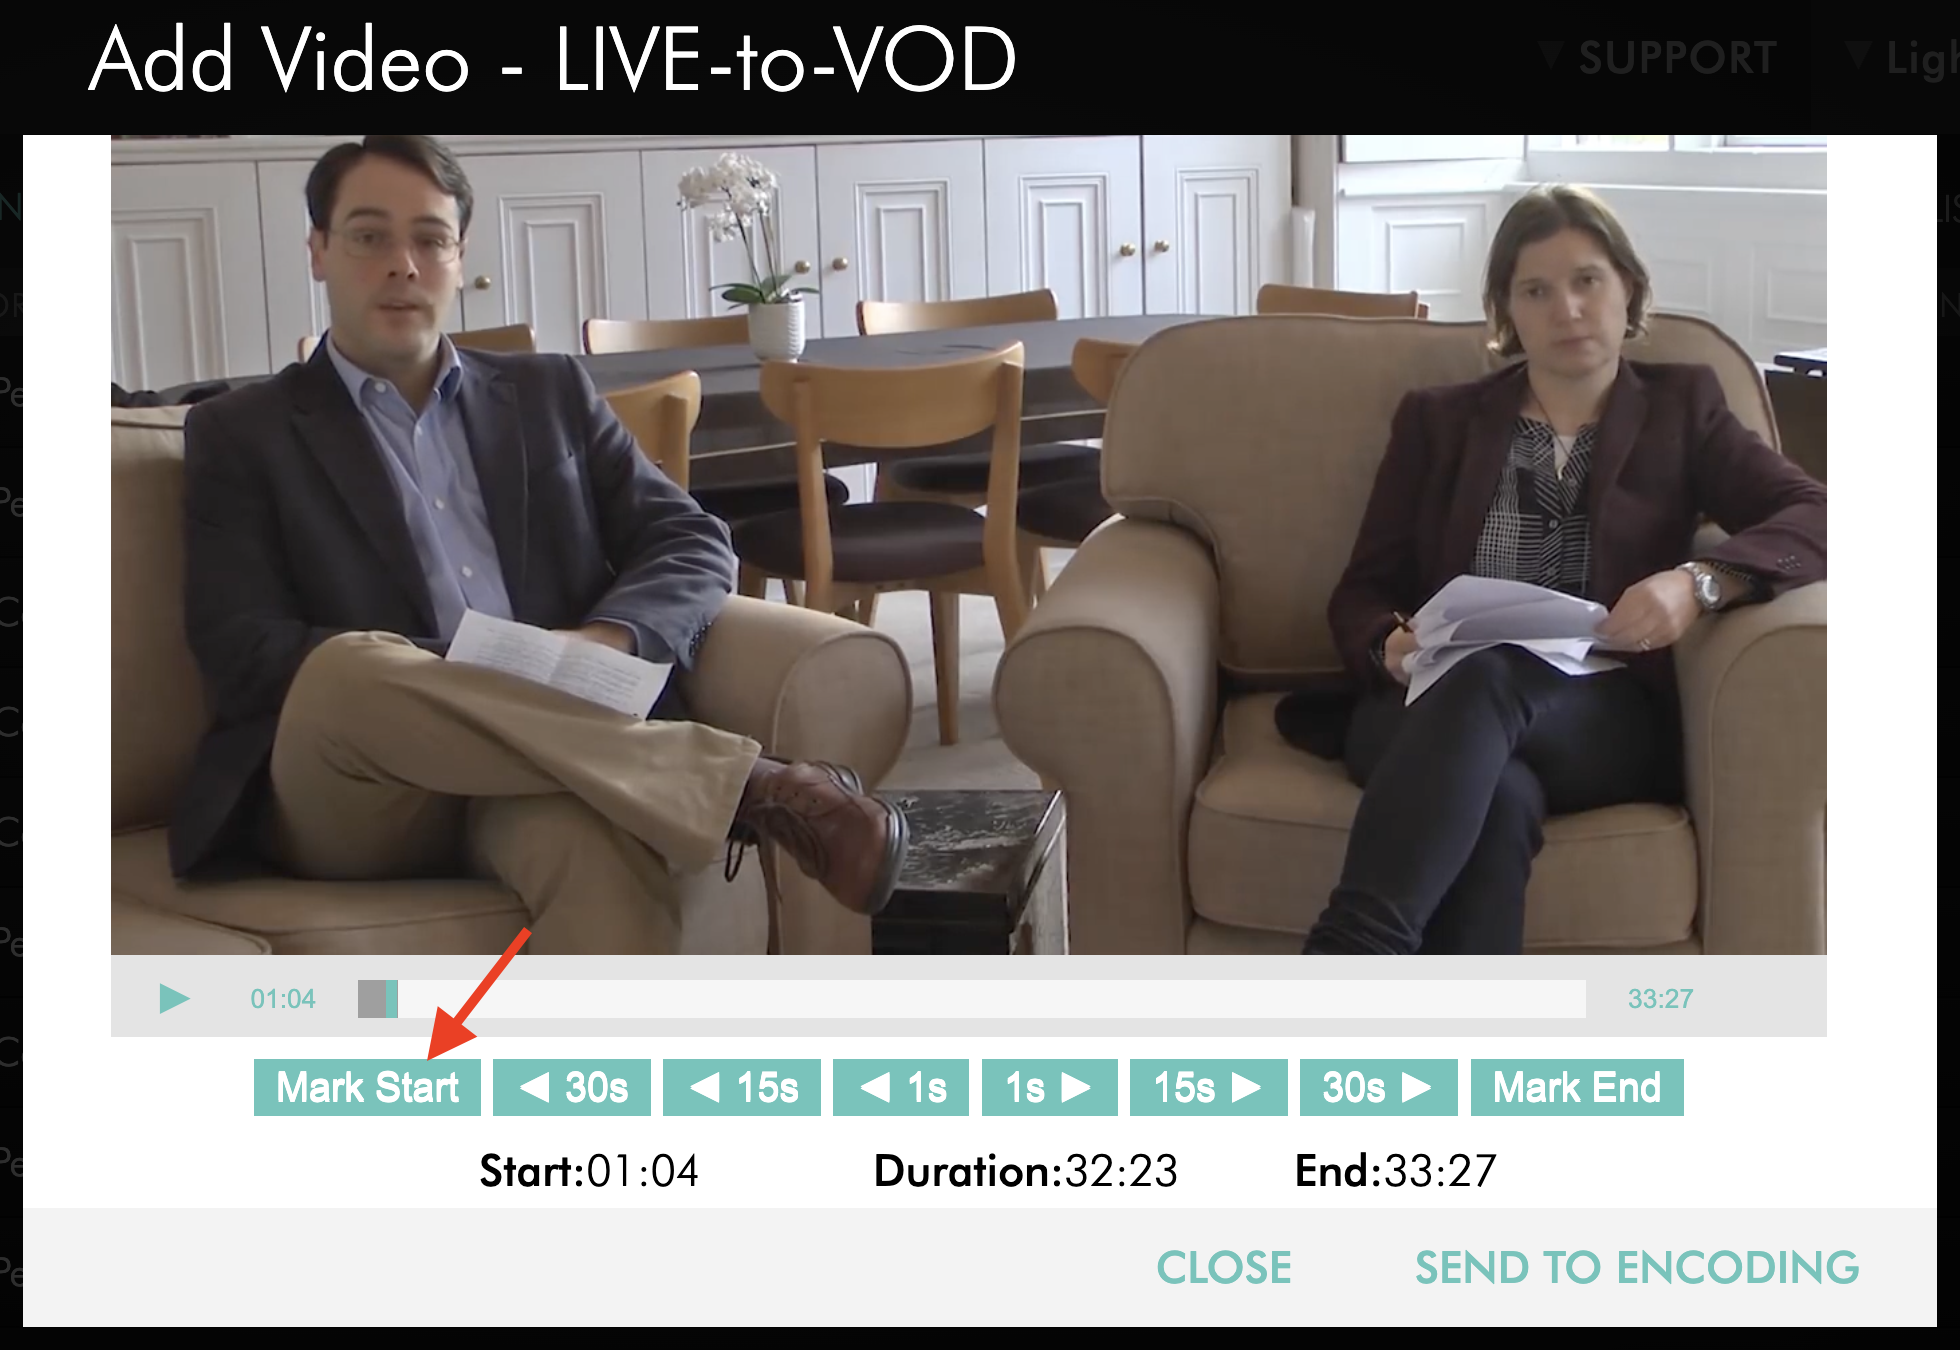
Click Mark Start.
This sets the beginning of the trimmed recording.
Step 8
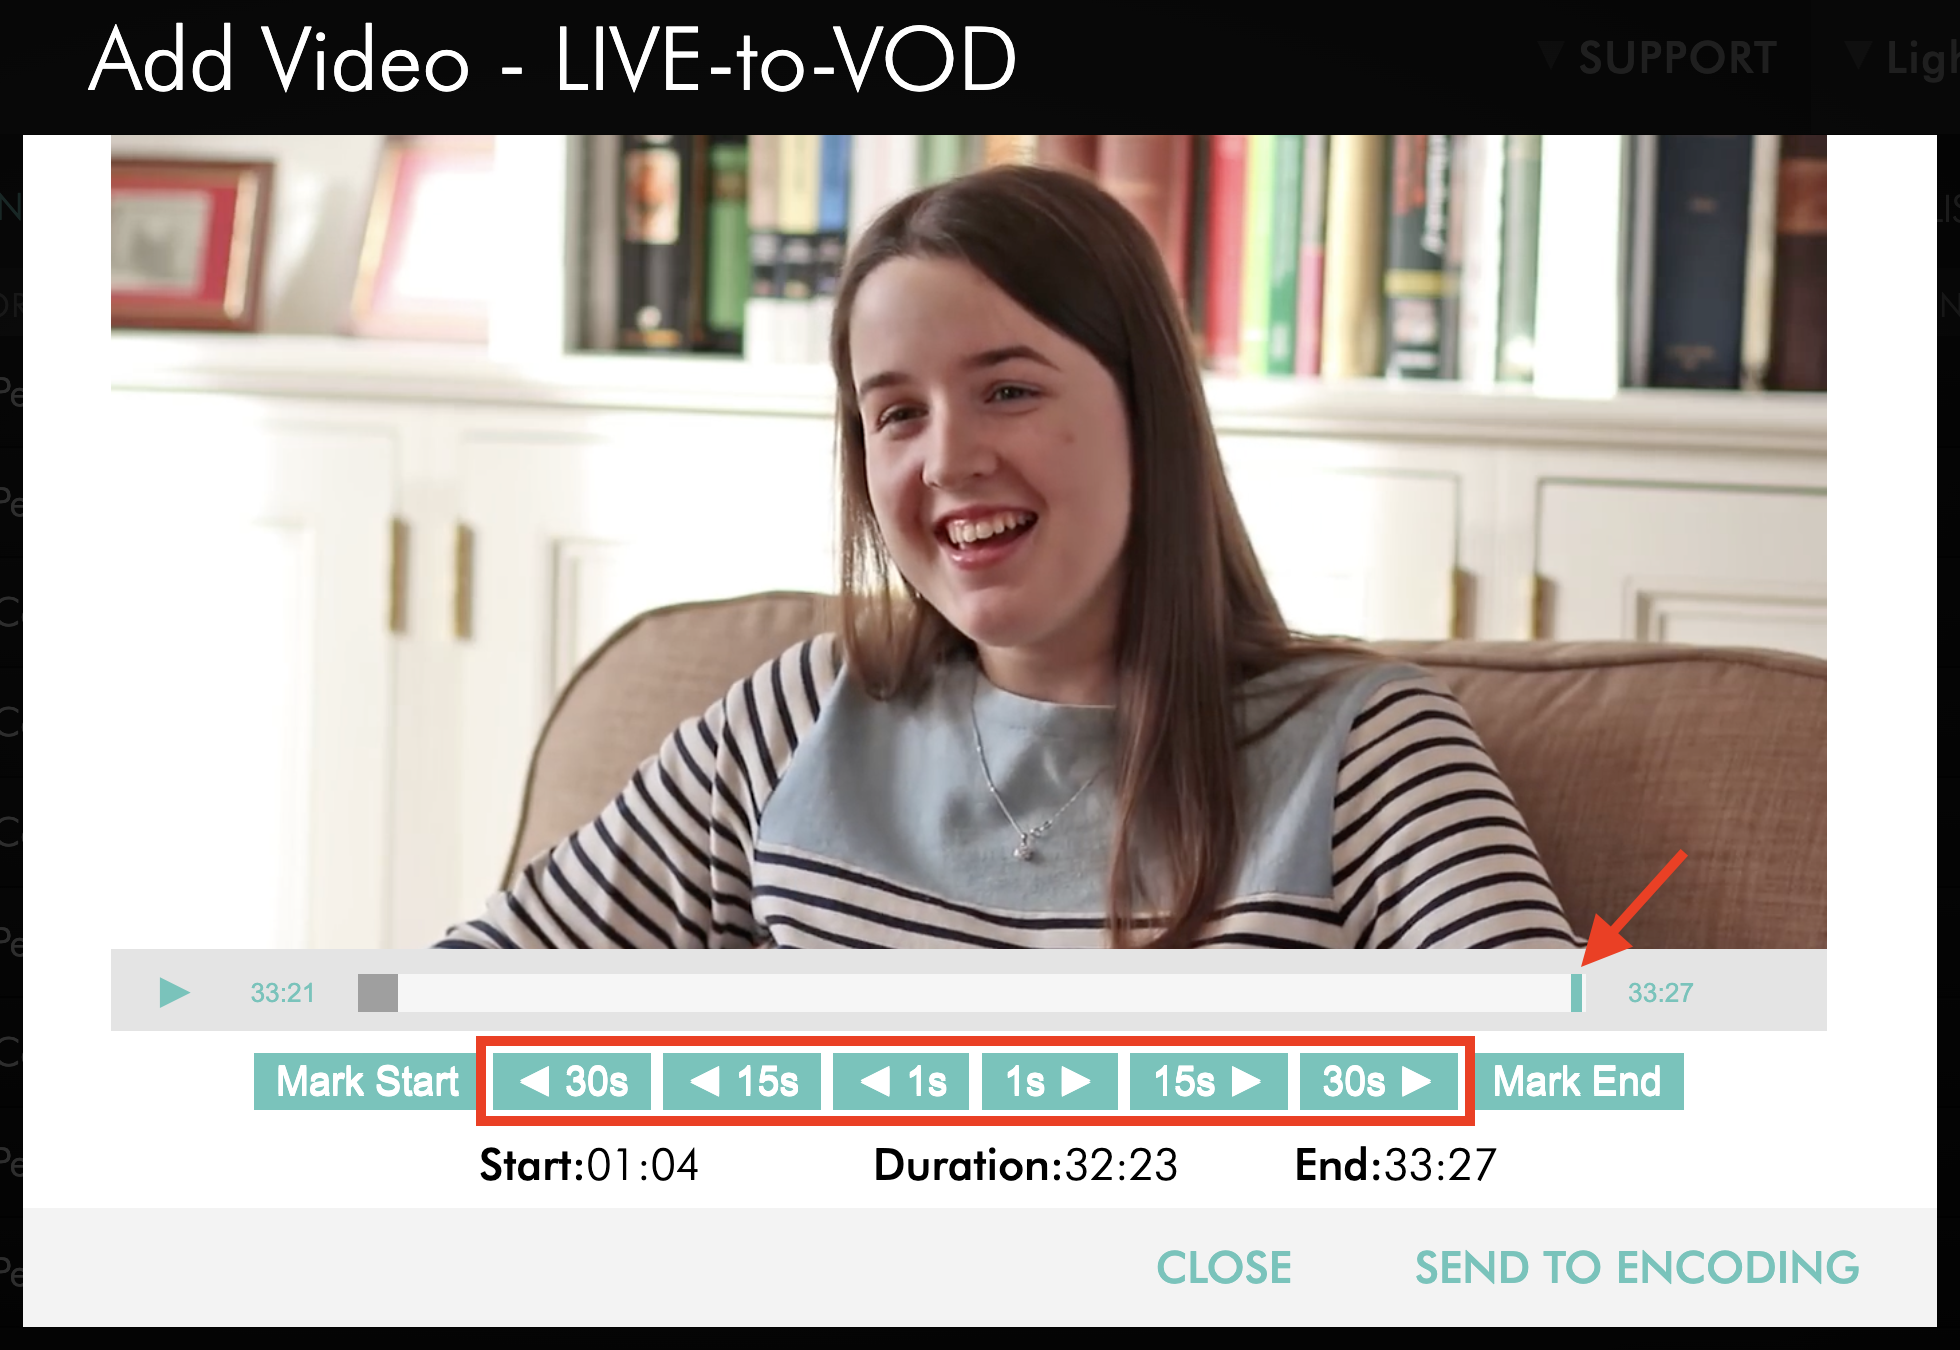
Use the video player controls to find where you want the finished VOD asset to end.
Step 9
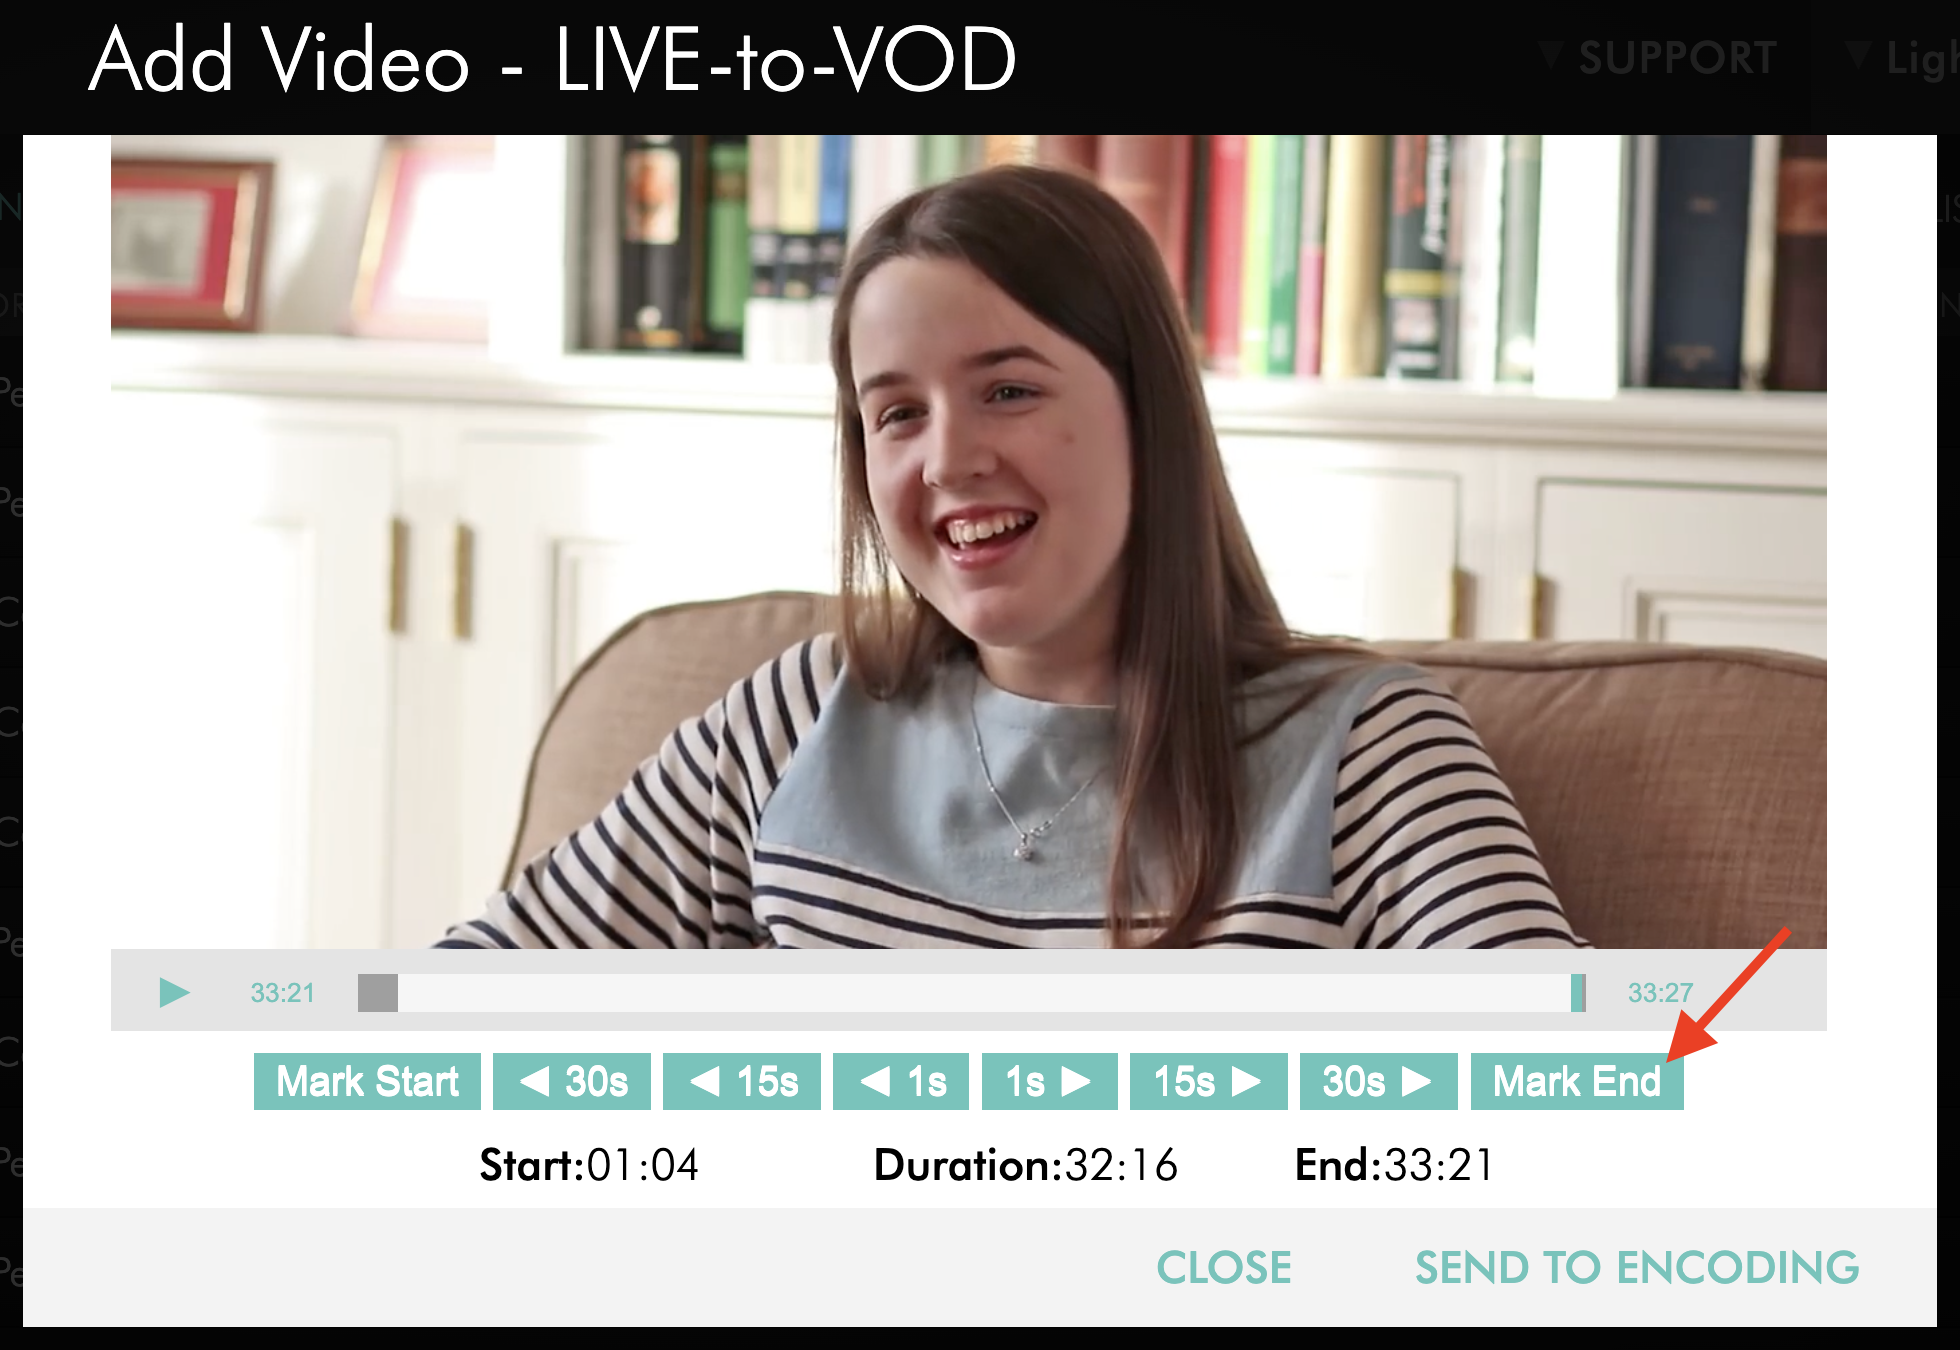
Click Mark End.
This sets the end of the trimmed recording.
Step 10
Review the Start, Duration, and End values to confirm that the selected portion of the recording is correct.
Step 11
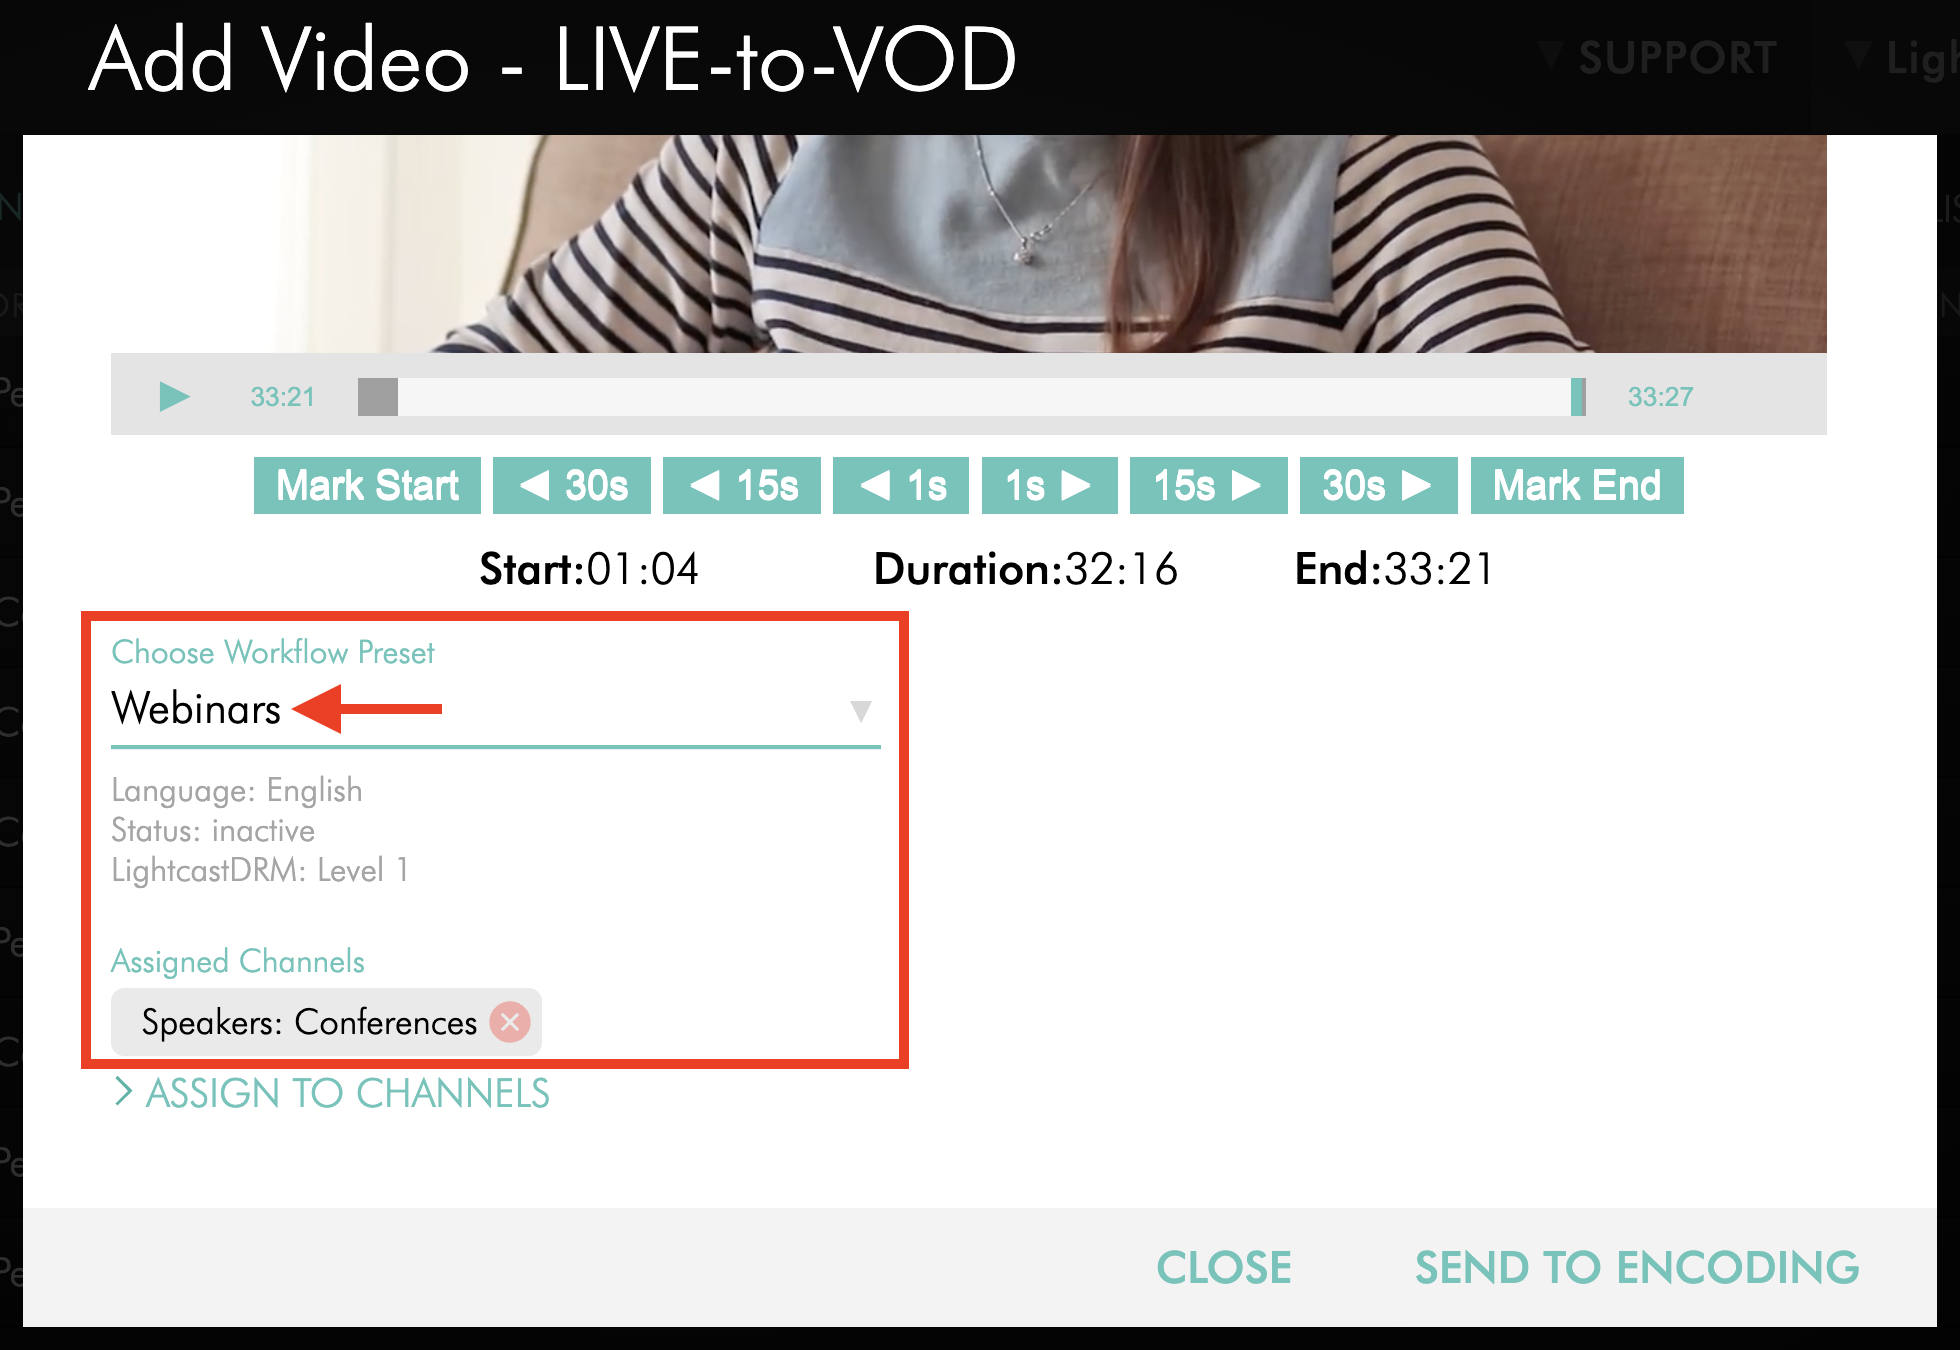
Optional: Select a Workflow Preset if you want to apply saved publishing settings to the recording before it is sent to encoding.
Workflow Presets must be created before they can be selected. To learn how to create a Workflow Preset, see How to create and manage Workflow Presets.
Step 12
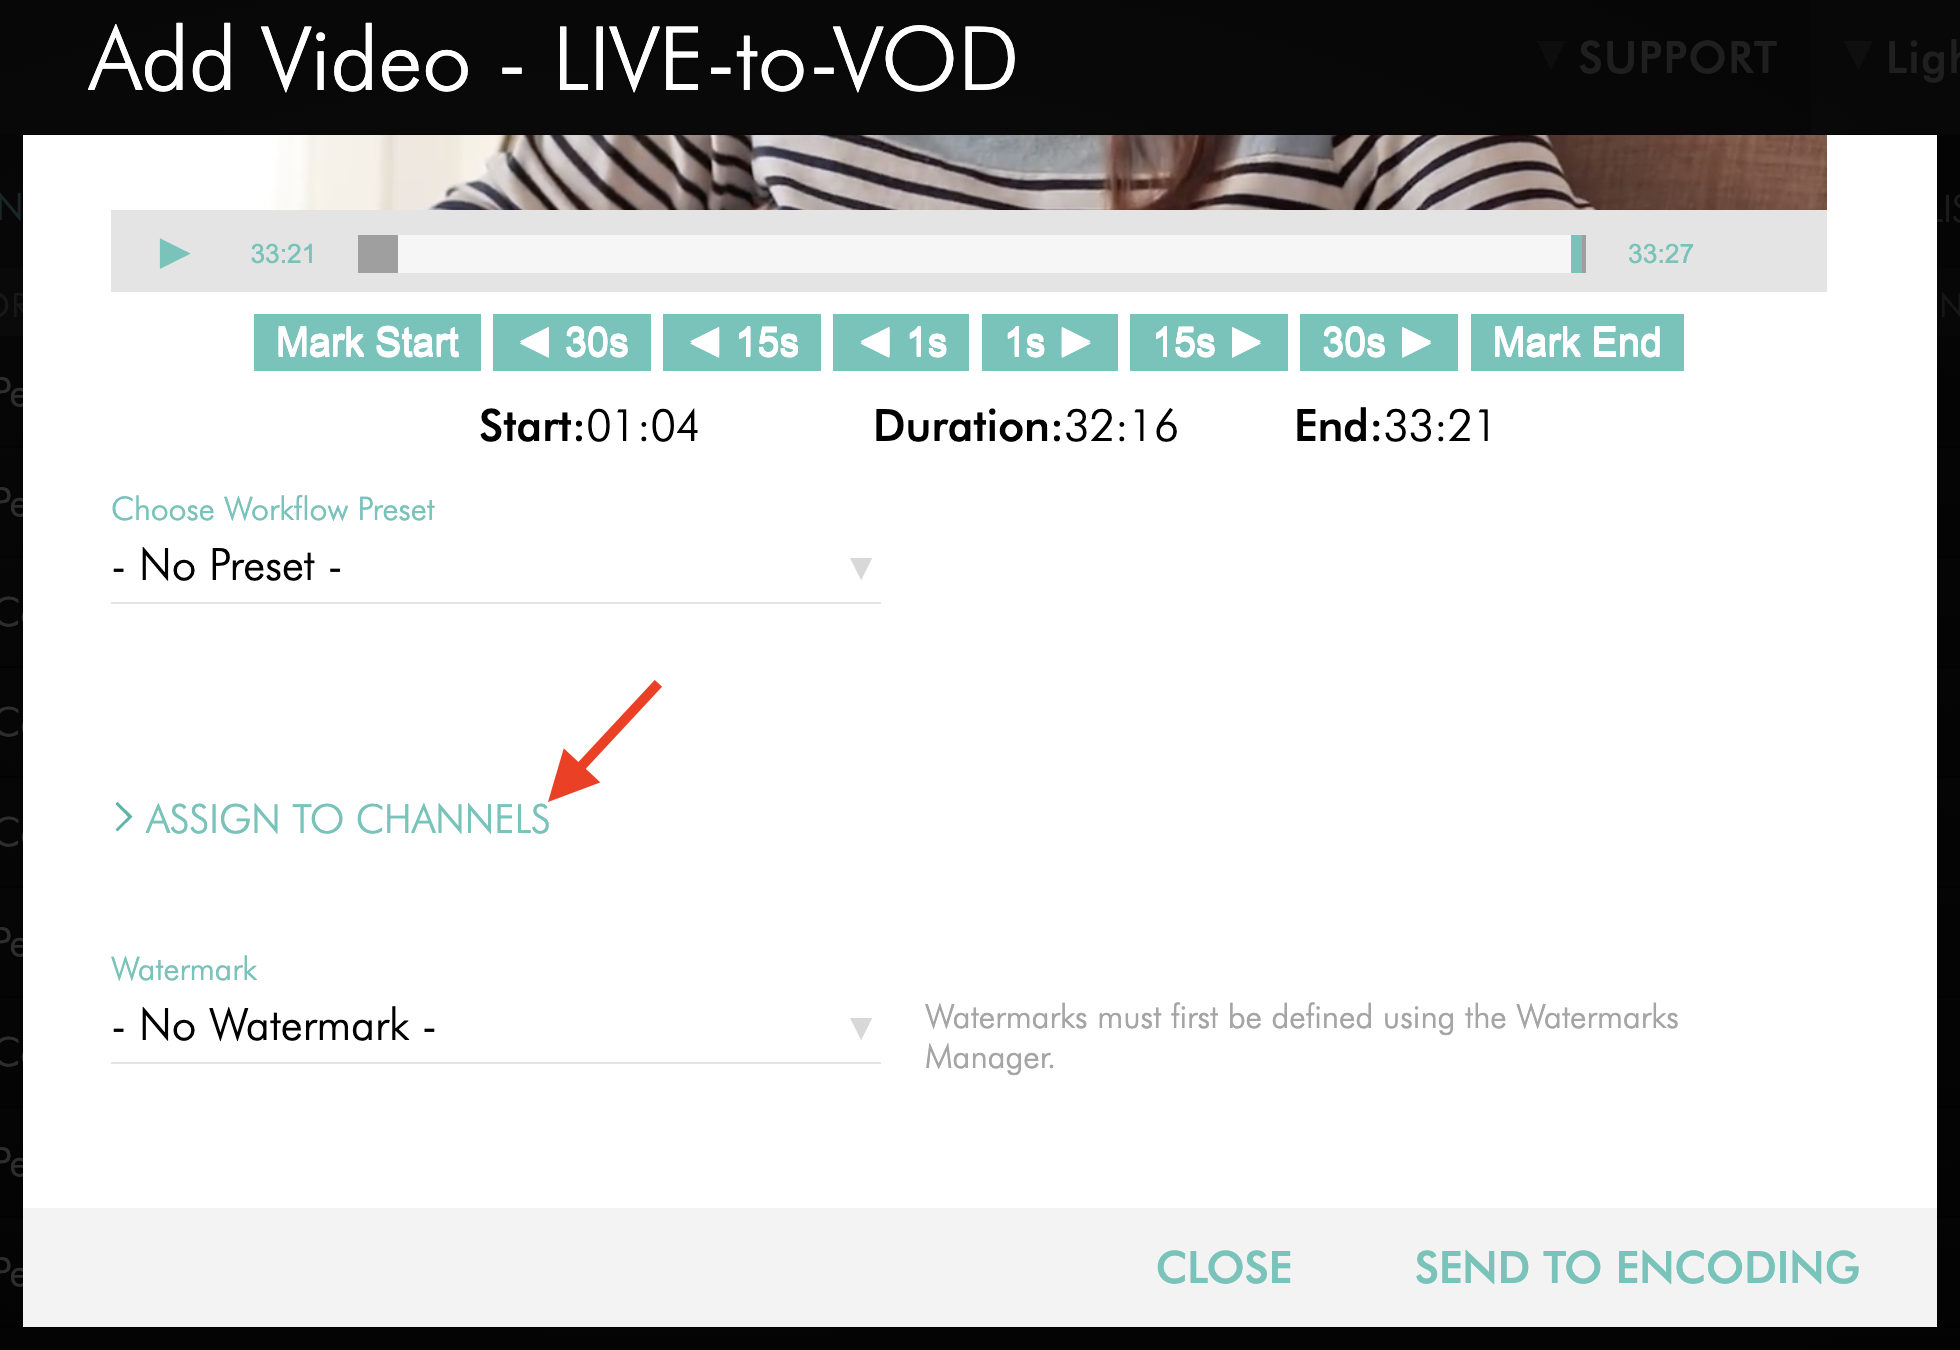
If you are not using a Workflow Preset, click ASSIGN TO CHANNELS.
Step 13
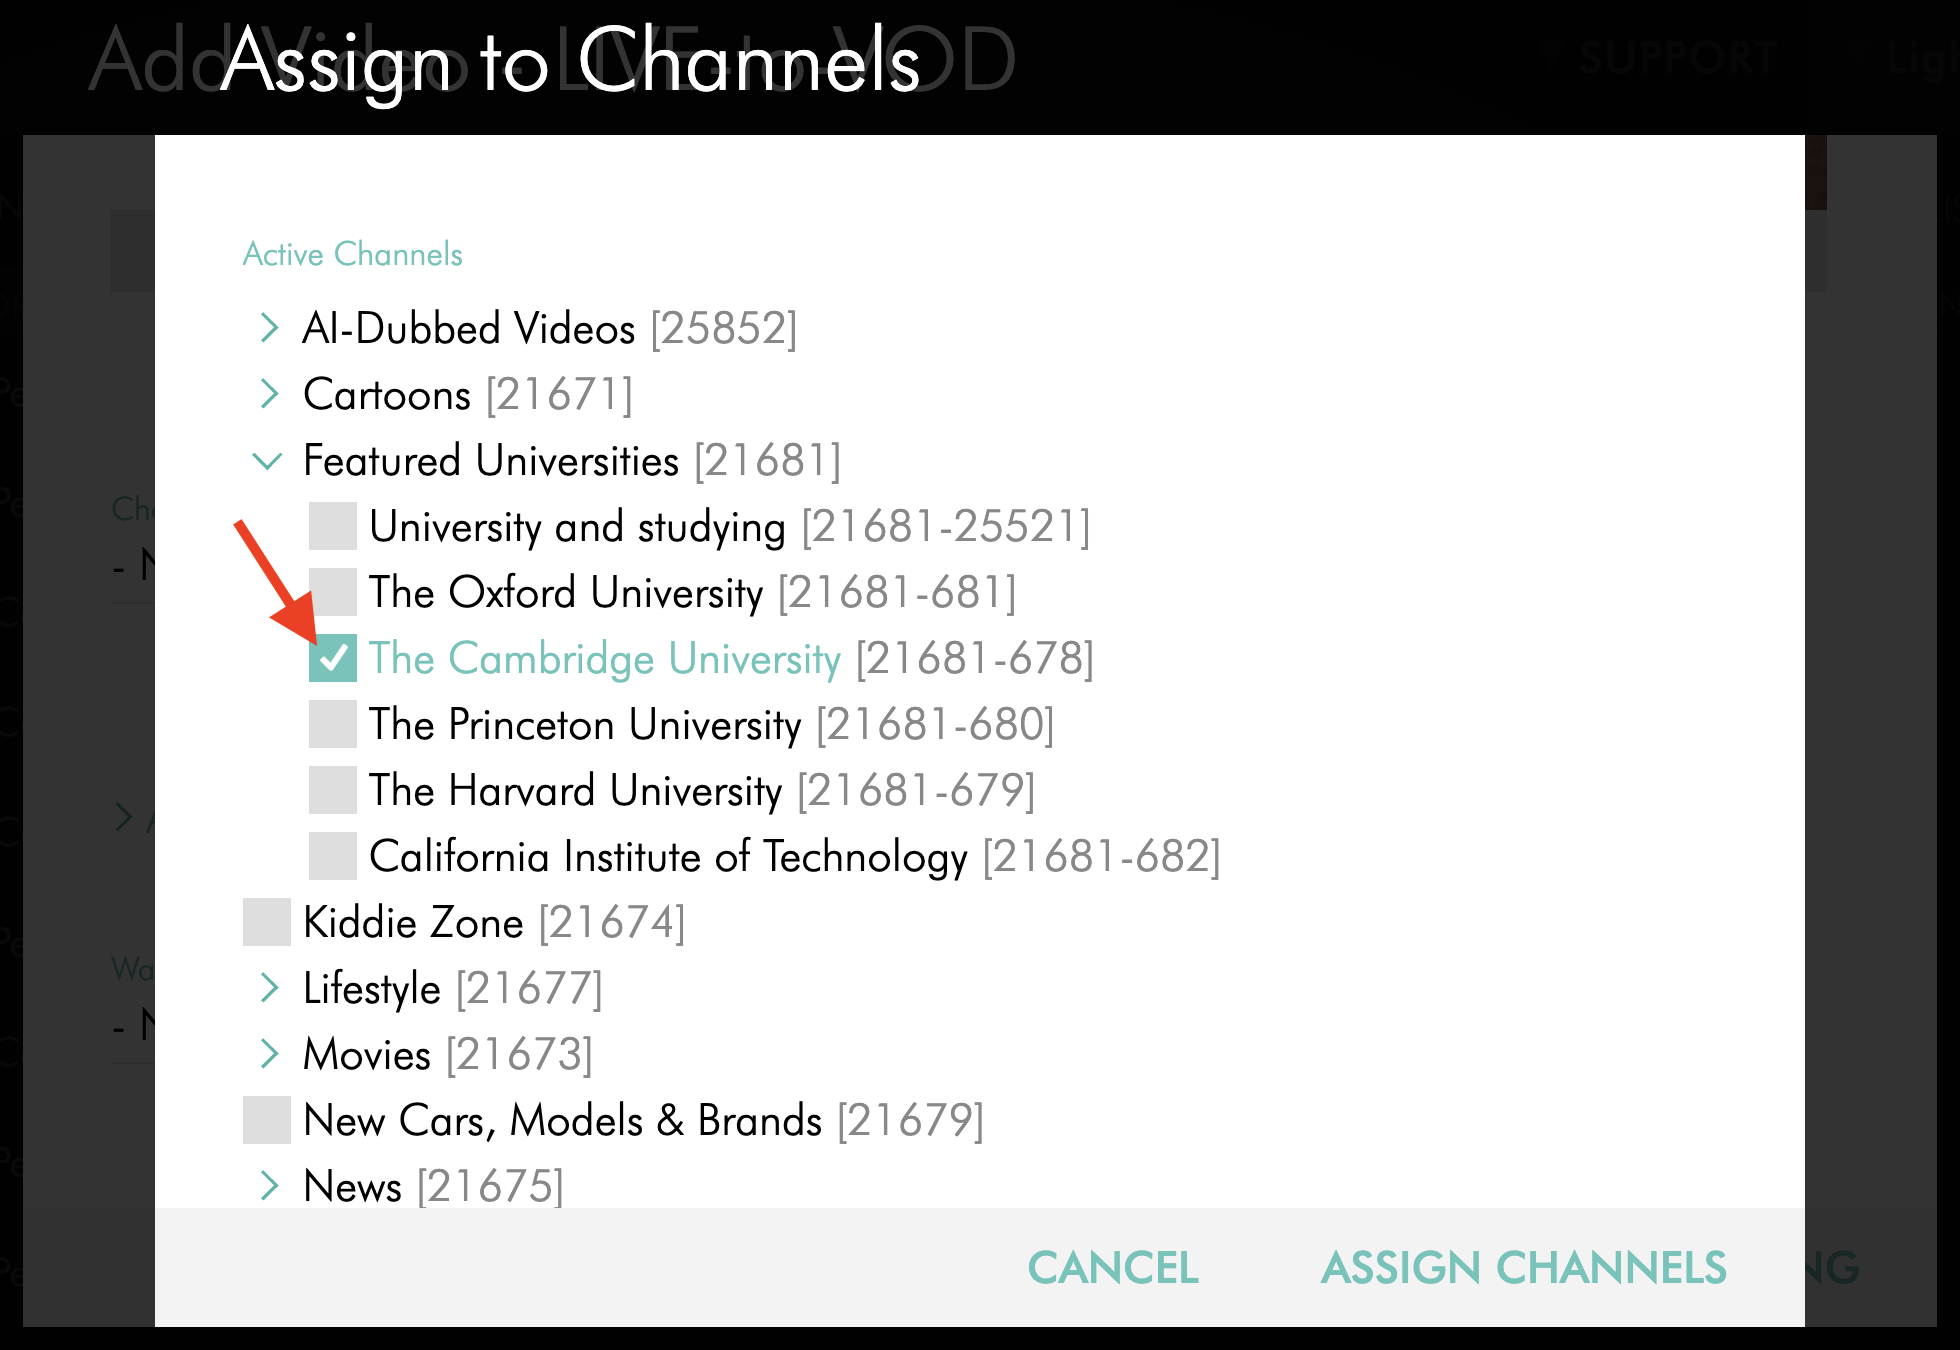
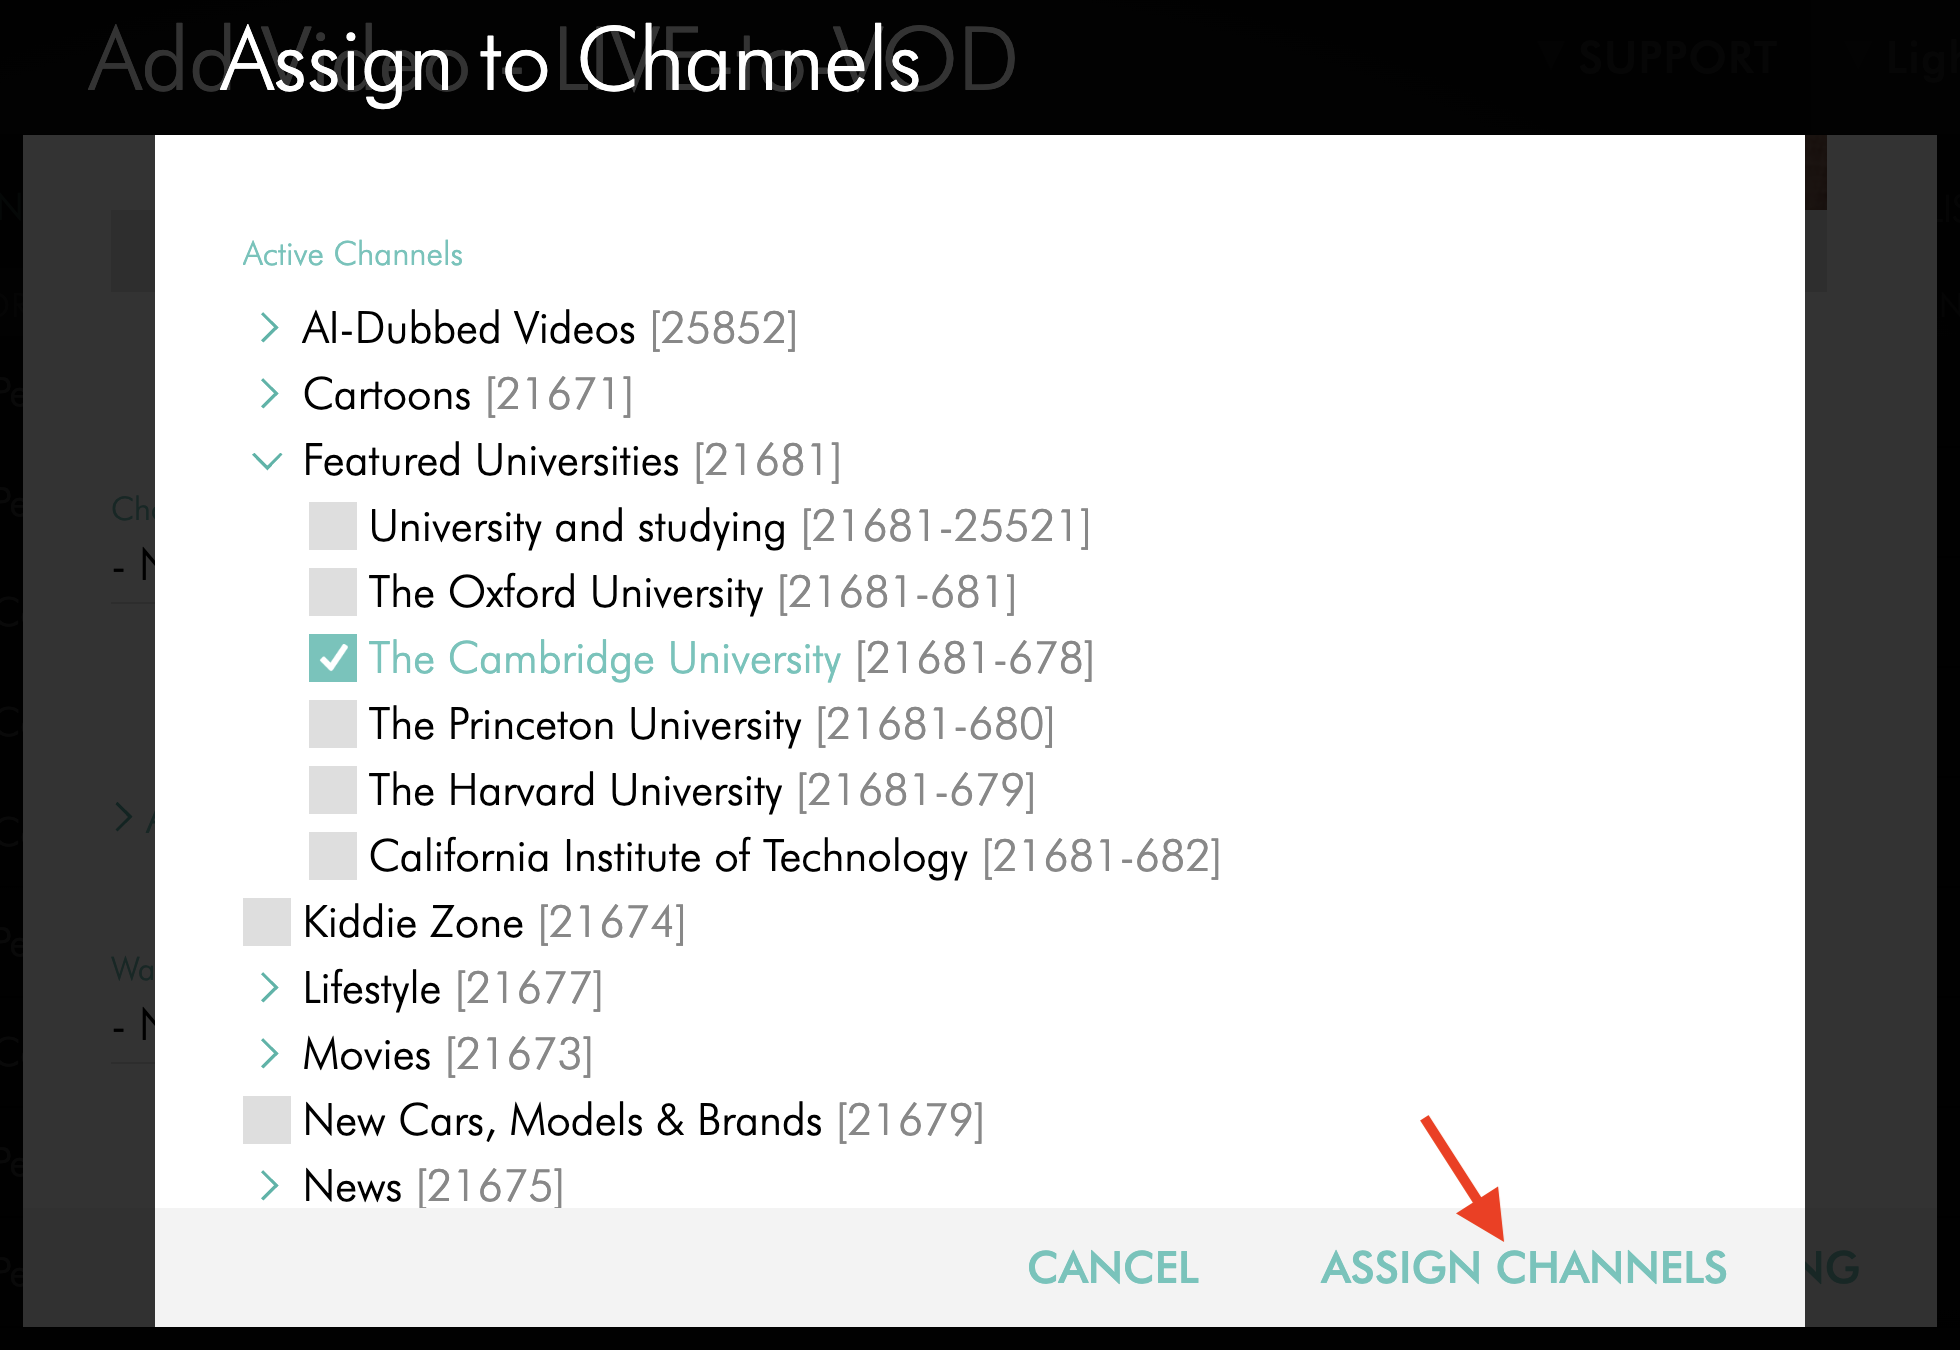
In the Assign to Channels pop-up window, select the Channel or Sub-Channel where the finished VOD asset should be assigned.
Step 14
Click ASSIGN CHANNELS.
Step 15
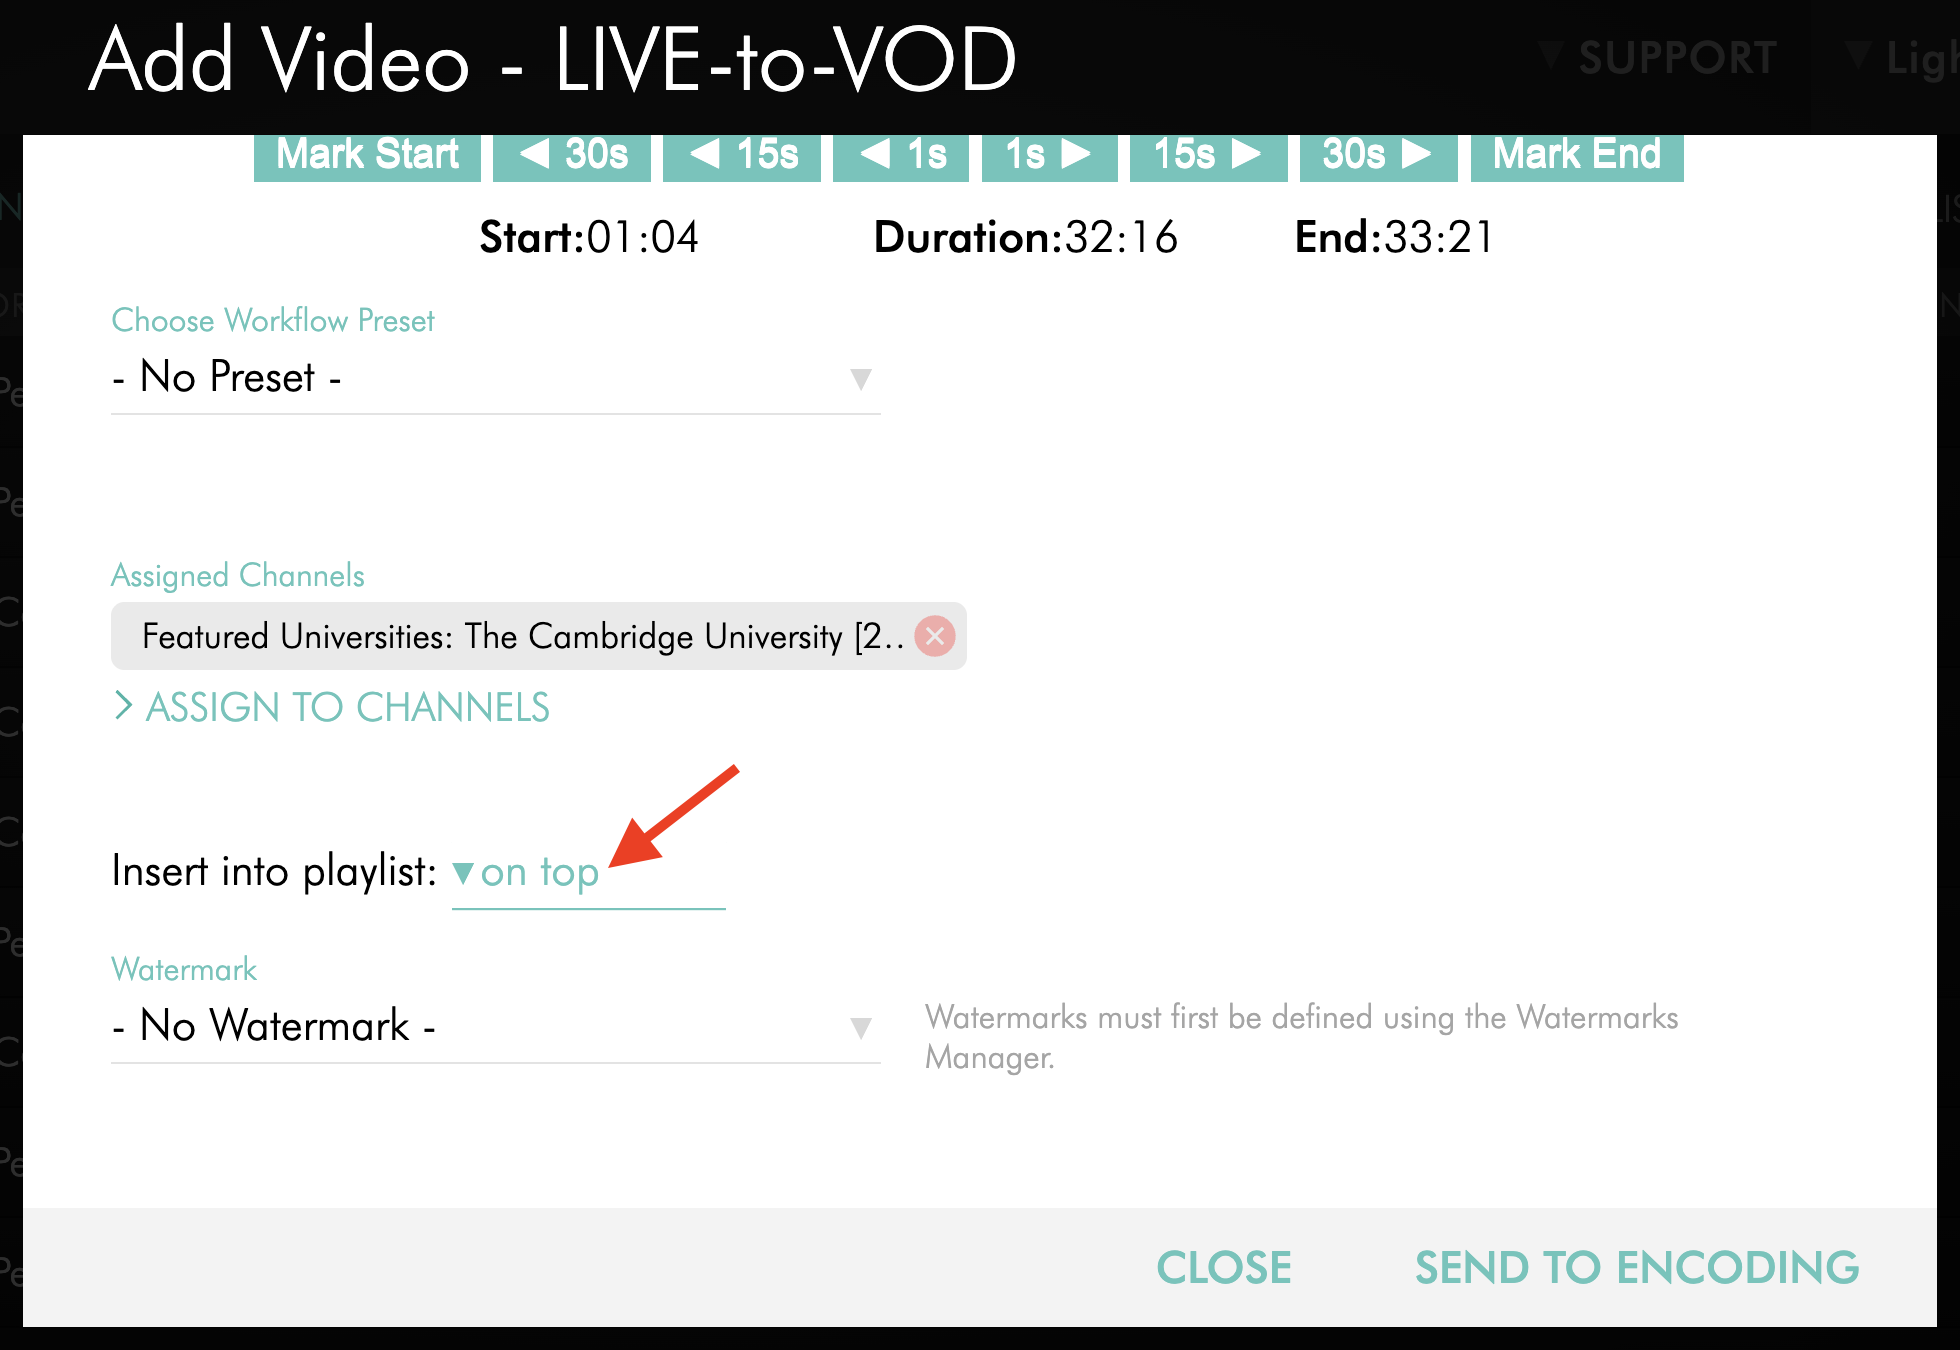
Select the playlist position for the uploaded content:
on top places the content at the beginning of the Channel or Sub-Channel playlist
at the bottom places the content at the end of the Channel or Sub-Channel playlist
Step 16
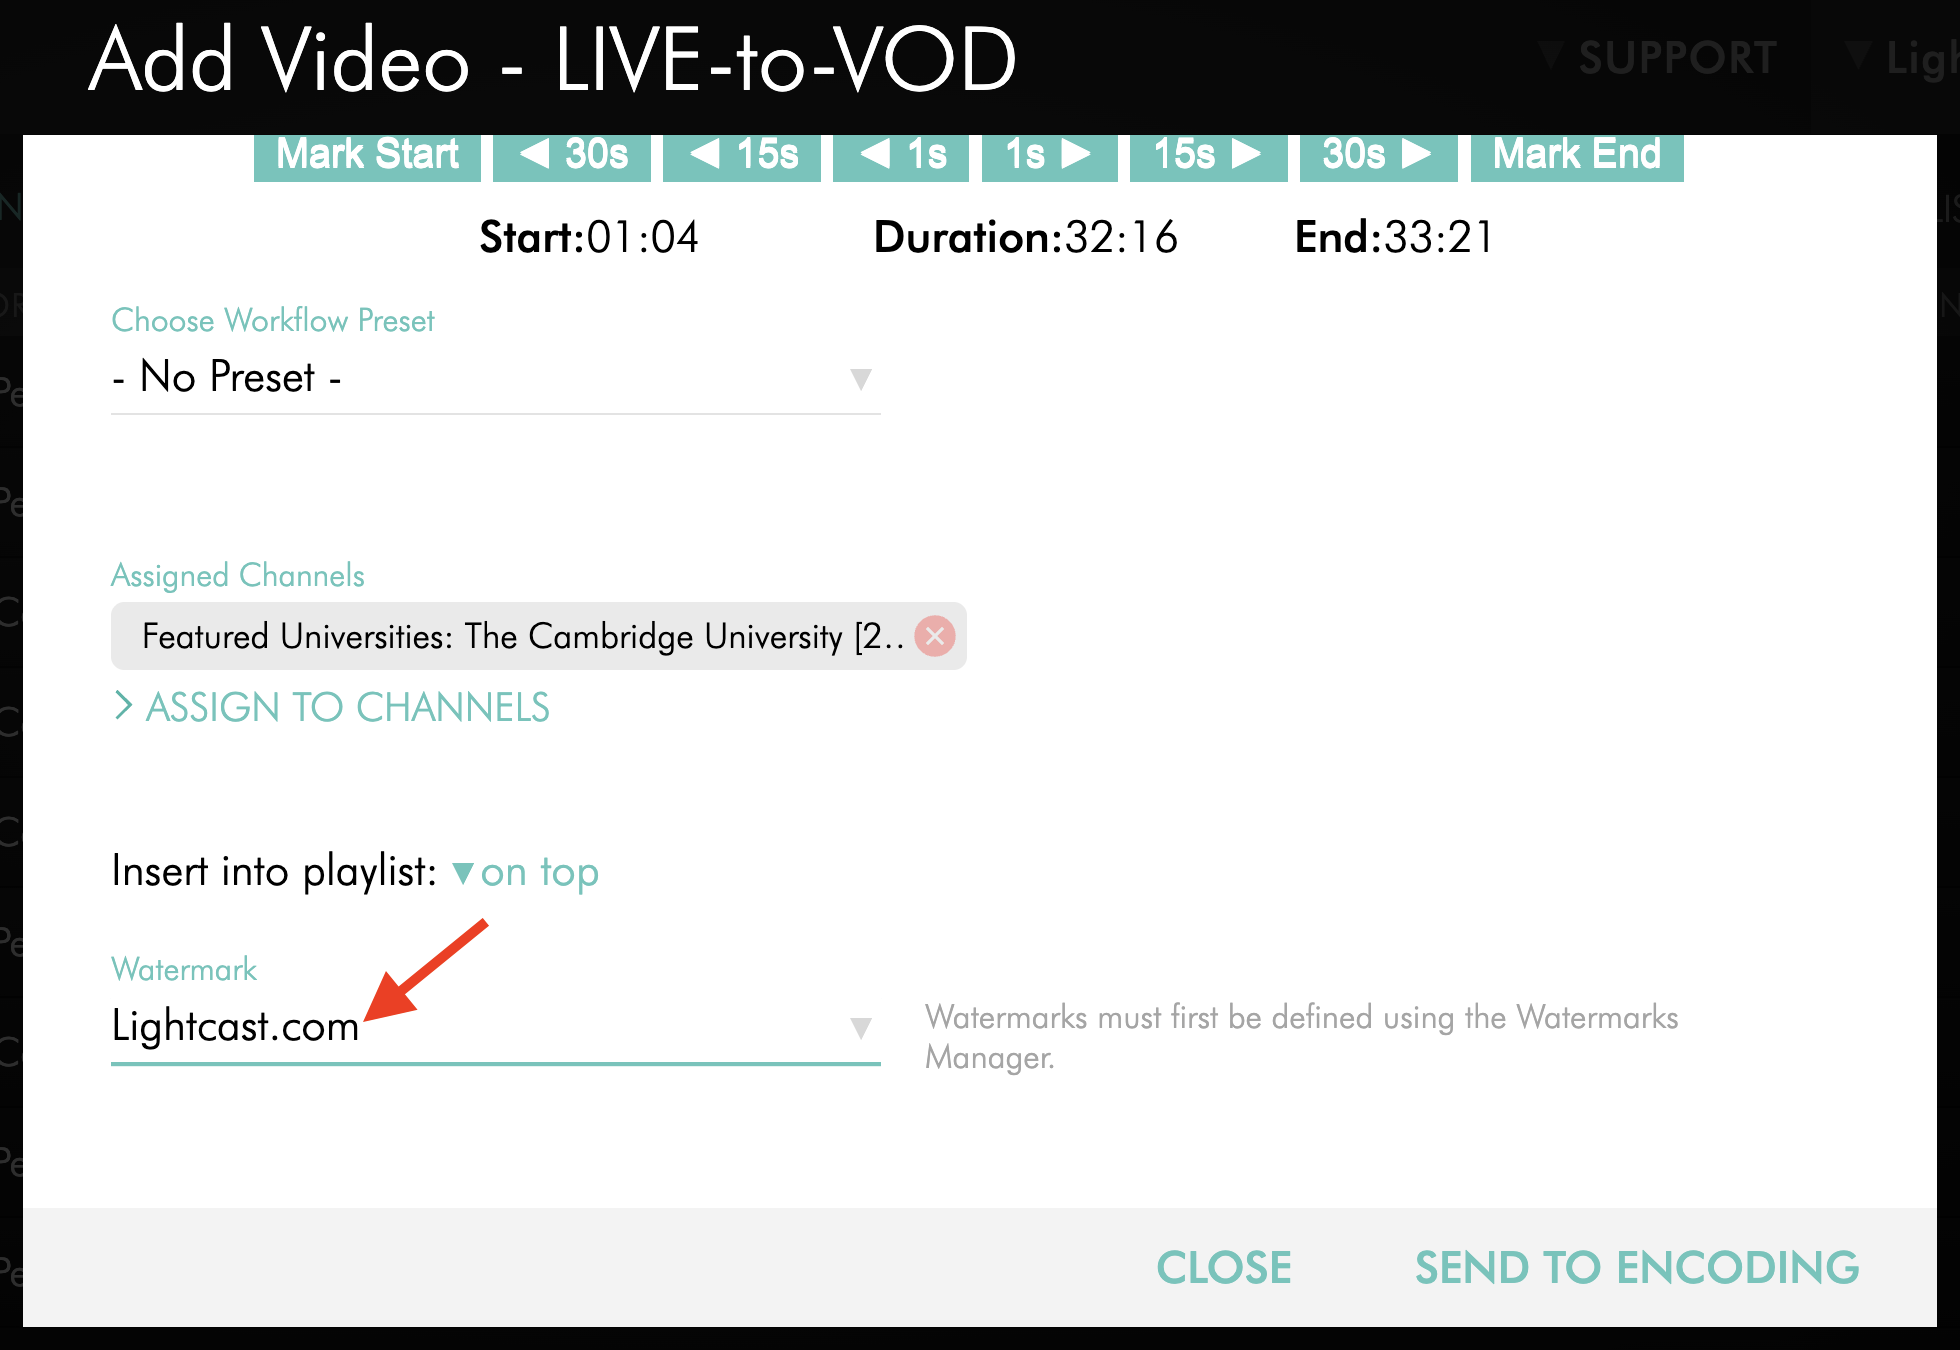
Optional: Select a Watermark if you want it to be applied to the finished VOD asset during encoding.
Watermarks must be created in the Watermarks Manager before they can be selected. To learn how to create a Watermark, see How to add a Watermark to your on-demand video uploads.
Step 17
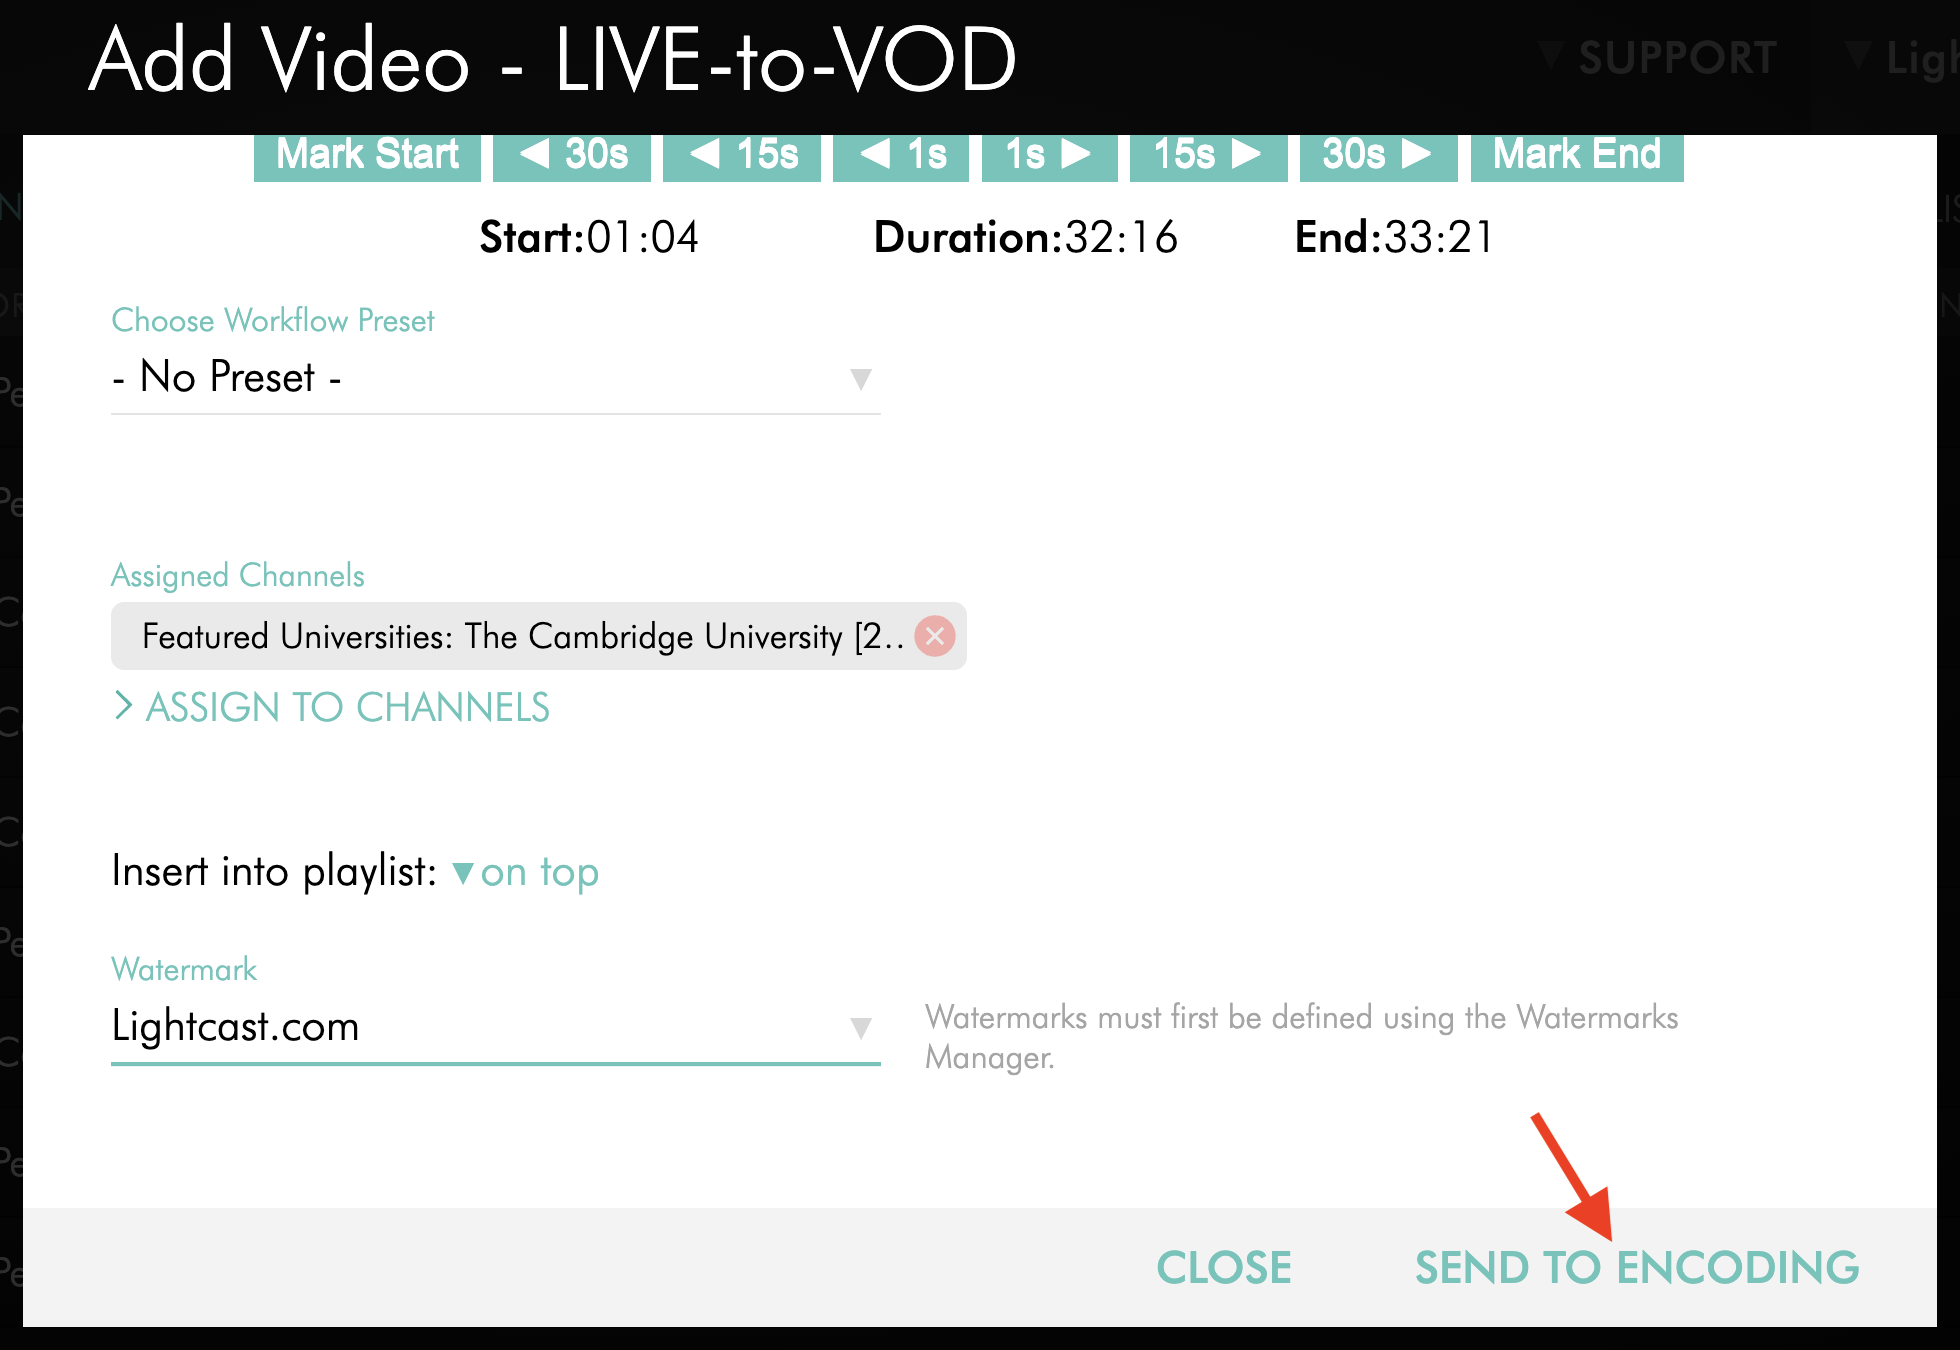
Click SEND TO ENCODING.
The selected portion of the recording will be sent to encoding so it can be processed as a VOD asset.
FAQs
Can I trim the beginning and end of a LIVE-to-VOD recording?
Yes. Use Manual Trim to mark where the finished VOD asset should begin and end before sending the recording to encoding.
Can I remove a section from the middle of a LIVE-to-VOD recording?
No. The LIVE-to-VOD trimming tool allows you to adjust the beginning and end of the recording. It cannot be used to remove sections from the middle of the recording.
If you need advanced editing, such as removing a section from the middle of the recording, download the recording and edit it with separate video editing software before uploading the edited file as a new VOD asset.
Does trimming change the original LIVE-to-VOD recording?
No. Trimming determines which portion of the recording is sent to encoding. The original LIVE-to-VOD recording remains unchanged in Live Recordings.
Do I need to trim a LIVE-to-VOD recording before sending it to encoding?
No. If you want to process the full recording, select Entire Recording instead of Manual Trim.
What happens after I click SEND TO ENCODING?
The selected portion of the recording is sent to encoding.
Sending the recording to encoding starts the transcoding process, which prepares the selected portion of the recording for multi-platform VOD playback.
Can I use a Workflow Preset after trimming a LIVE-to-VOD recording?
Yes. You can select a Workflow Preset before clicking SEND TO ENCODING.
Workflow Presets can help apply saved publishing settings before the recording is processed.
Can I apply a Watermark to a trimmed LIVE-to-VOD recording?
Yes. You can select a Watermark before clicking SEND TO ENCODING.
The Watermark will be applied to the finished VOD asset during encoding.
How long are LIVE-to-VOD recordings available for trimming?
LIVE-to-VOD recordings are automatically removed from Live Recordings after 30 days.
Trim and send any recordings you want to keep to encoding within 30 days.
Pricing
LIVE-to-VOD recording is available on POWER packages and up.
If you don't have access to this feature, you can upgrade to one of our latest plans or contact your account manager.