
How to create Workflow Presets
Overview
Workflow Presets help you save time by storing repeated upload and publishing settings for video and audio content in the Media Cloud. Instead of selecting the same settings each time you upload, you can create a preset once and reuse it during supported upload workflows.
When to use Workflow Presets
Workflow Presets are useful when you regularly upload similar content and want to apply the same publishing settings each time. They can help speed up recurring, scheduled, and bulk upload workflows while keeping your settings more consistent.
In many cases, it is best to create separate presets for different workflows rather than trying to make one preset cover every use case. For example, you may want different presets for recurring video uploads to a specific Channel, audio uploads for a podcast or archive, content that should start in a draft status, or content that needs a specific Watermark or embedding setting.
Before creating a Workflow Preset, make sure any Channels, Sub-Channels, Watermarks, or Media Groups you want to use already exist in your Media Cloud account. Some options, such as Lightcast DRM, Watermarks, and Media Groups, may depend on your service package.
How it works
Workflow Presets are designed to automate repeated parts of your upload workflow. A preset stores selected upload and publishing settings so they can be applied automatically when you upload media.
Workflow Presets can automate these settings for your uploads:
Channel and Sub-Channel assignment
Media Group assignment
DRM selection
Initial publishing status
Watermark settings
Language selection
Workflow Presets are applied during the upload process before the media item is sent to encoding. This means the preset must be selected inside the upload tool. It is not something you apply after the upload has already been submitted.
Workflow Presets can be used for both video and audio workflows.
Instructions
Before you create a Workflow Preset
Before creating a Workflow Preset, decide whether the preset will be used for video uploads or audio uploads.
Make sure any Channels, Sub-Channels, Watermarks, or Media Groups you want to use already exist in your Media Cloud account. Some options, such as Lightcast DRM, Watermarks, and Media Groups, may depend on your service package.
To learn how to set up a Channel, see: How to set up your AOD, VOD, and LIVE Channels
To learn how to add Sub-Channels, see: How to create and organize Sub-Channels
To learn how to create a Watermark, see: How to add a Watermark
To learn how to create Media Groups, see: How to create a Media Group
To learn more about Lightcast DRM, see: Lightcast DRM explained
After you create a Workflow Preset, you can select it during supported upload workflows before the media is sent to encoding.
How to create a Video Workflow Preset
Step 1
Log in to your Media Cloud account.
Step 2
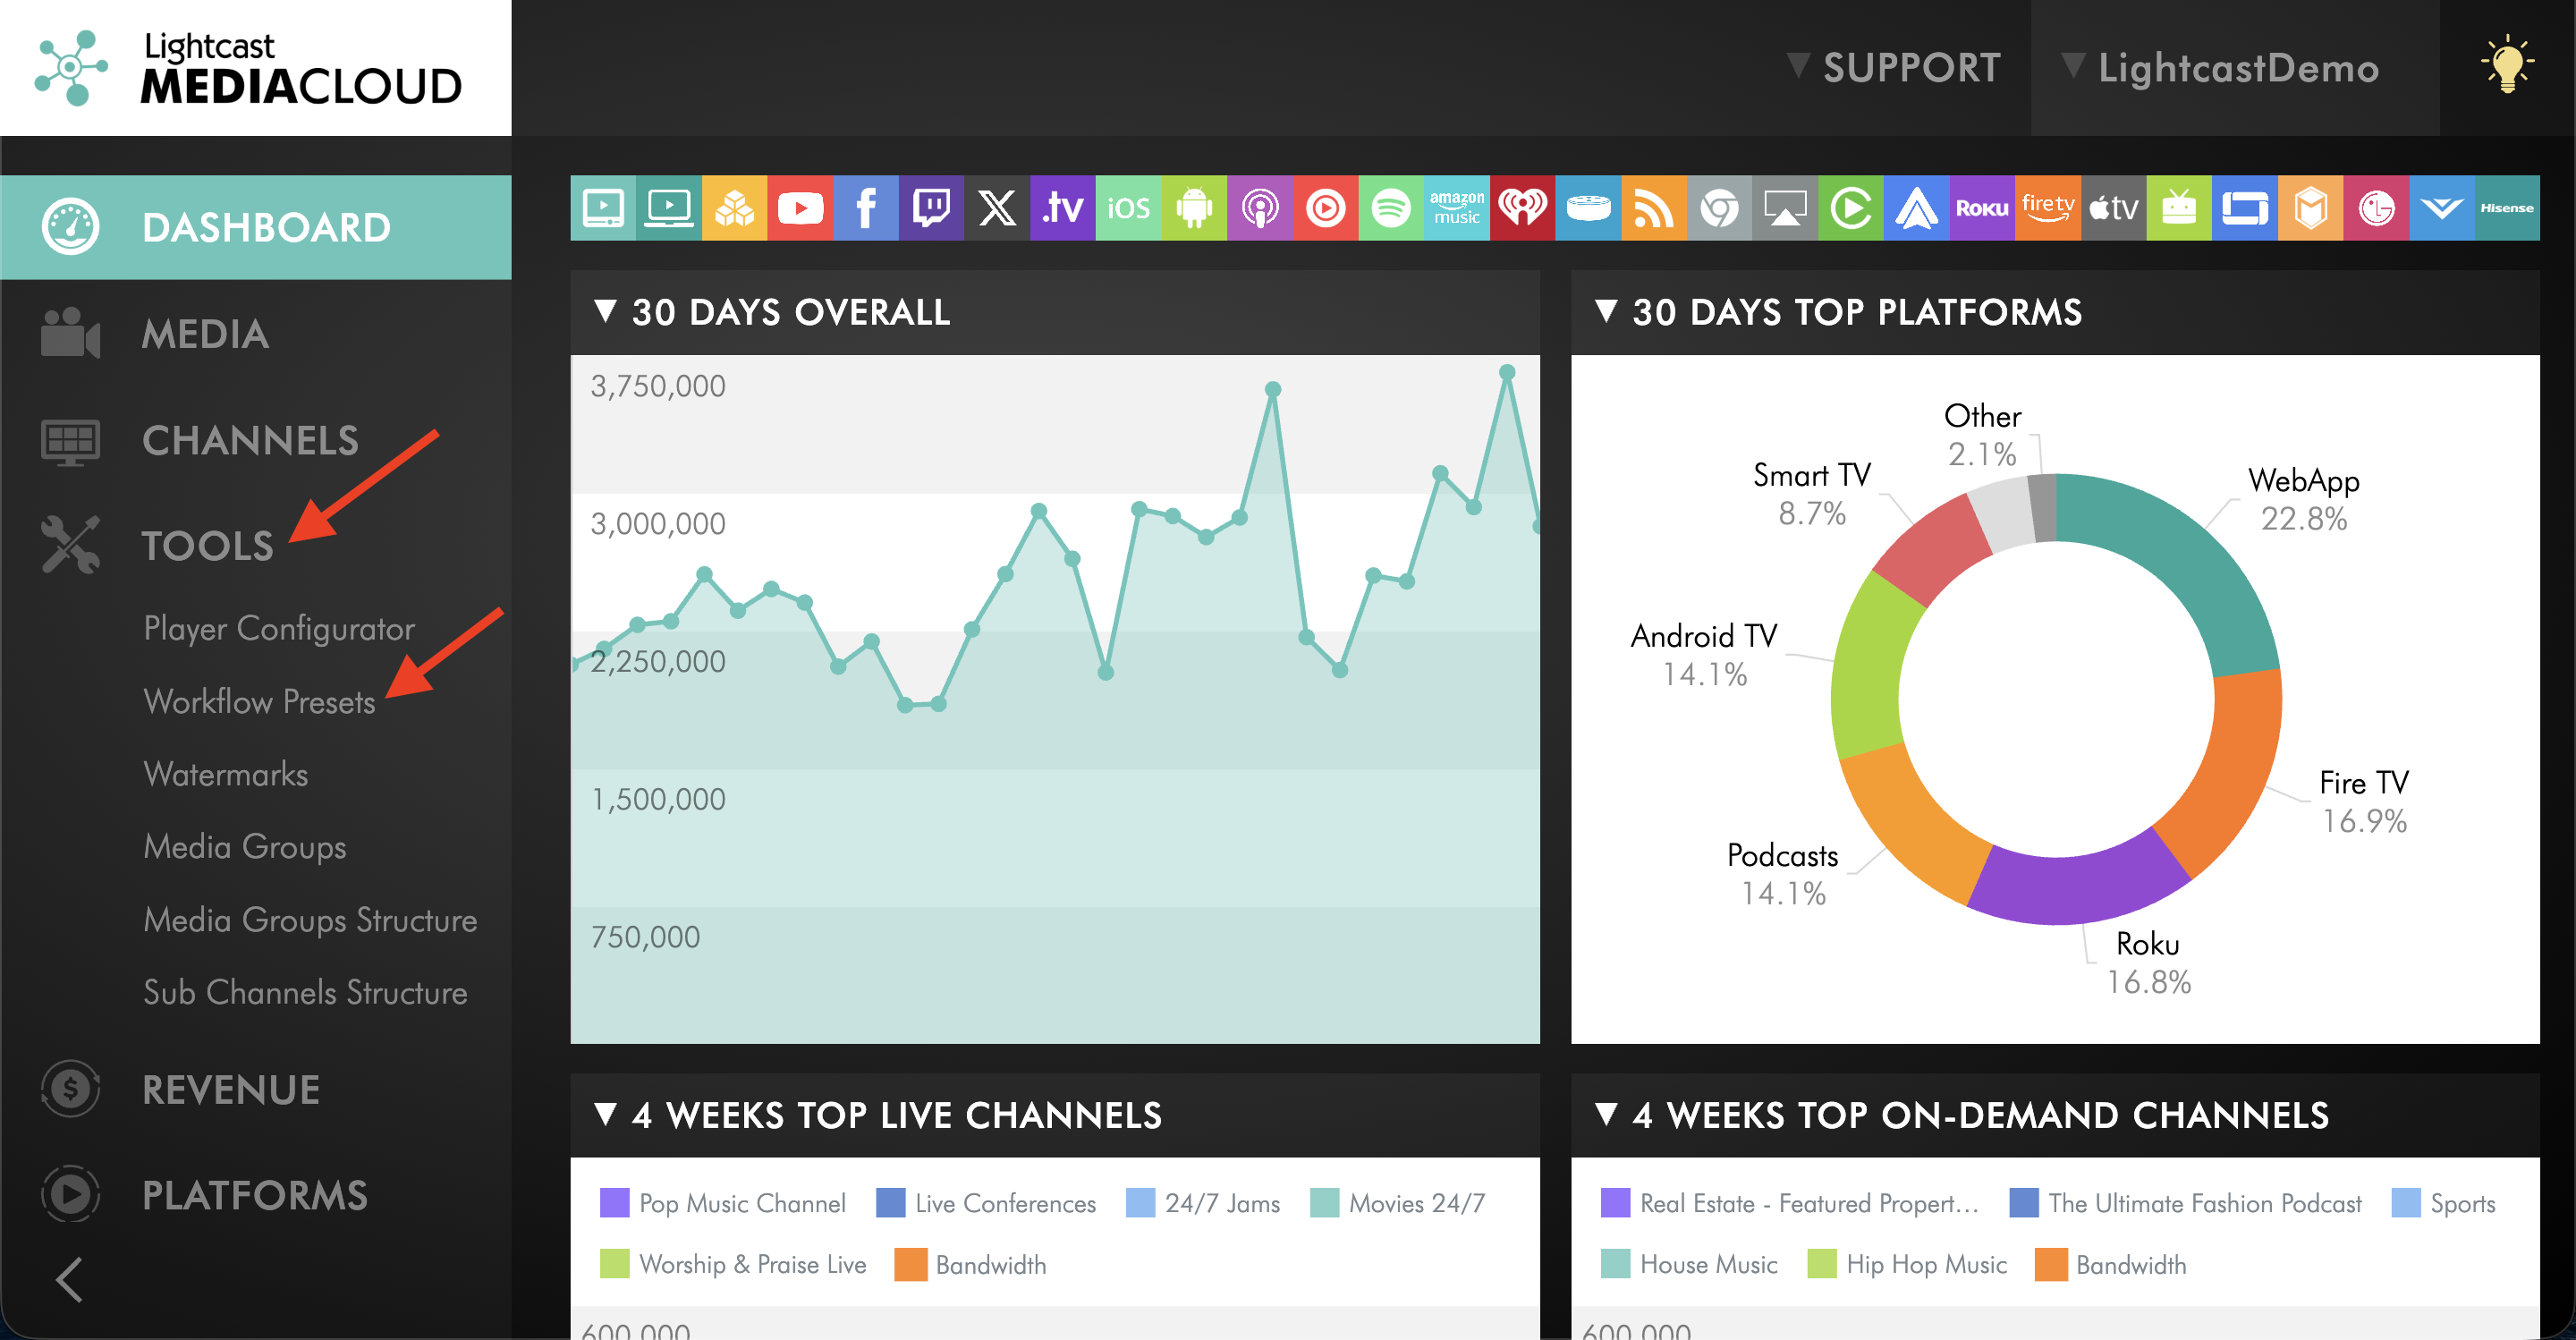
Go to TOOLS and click Workflow Presets.
Step 3
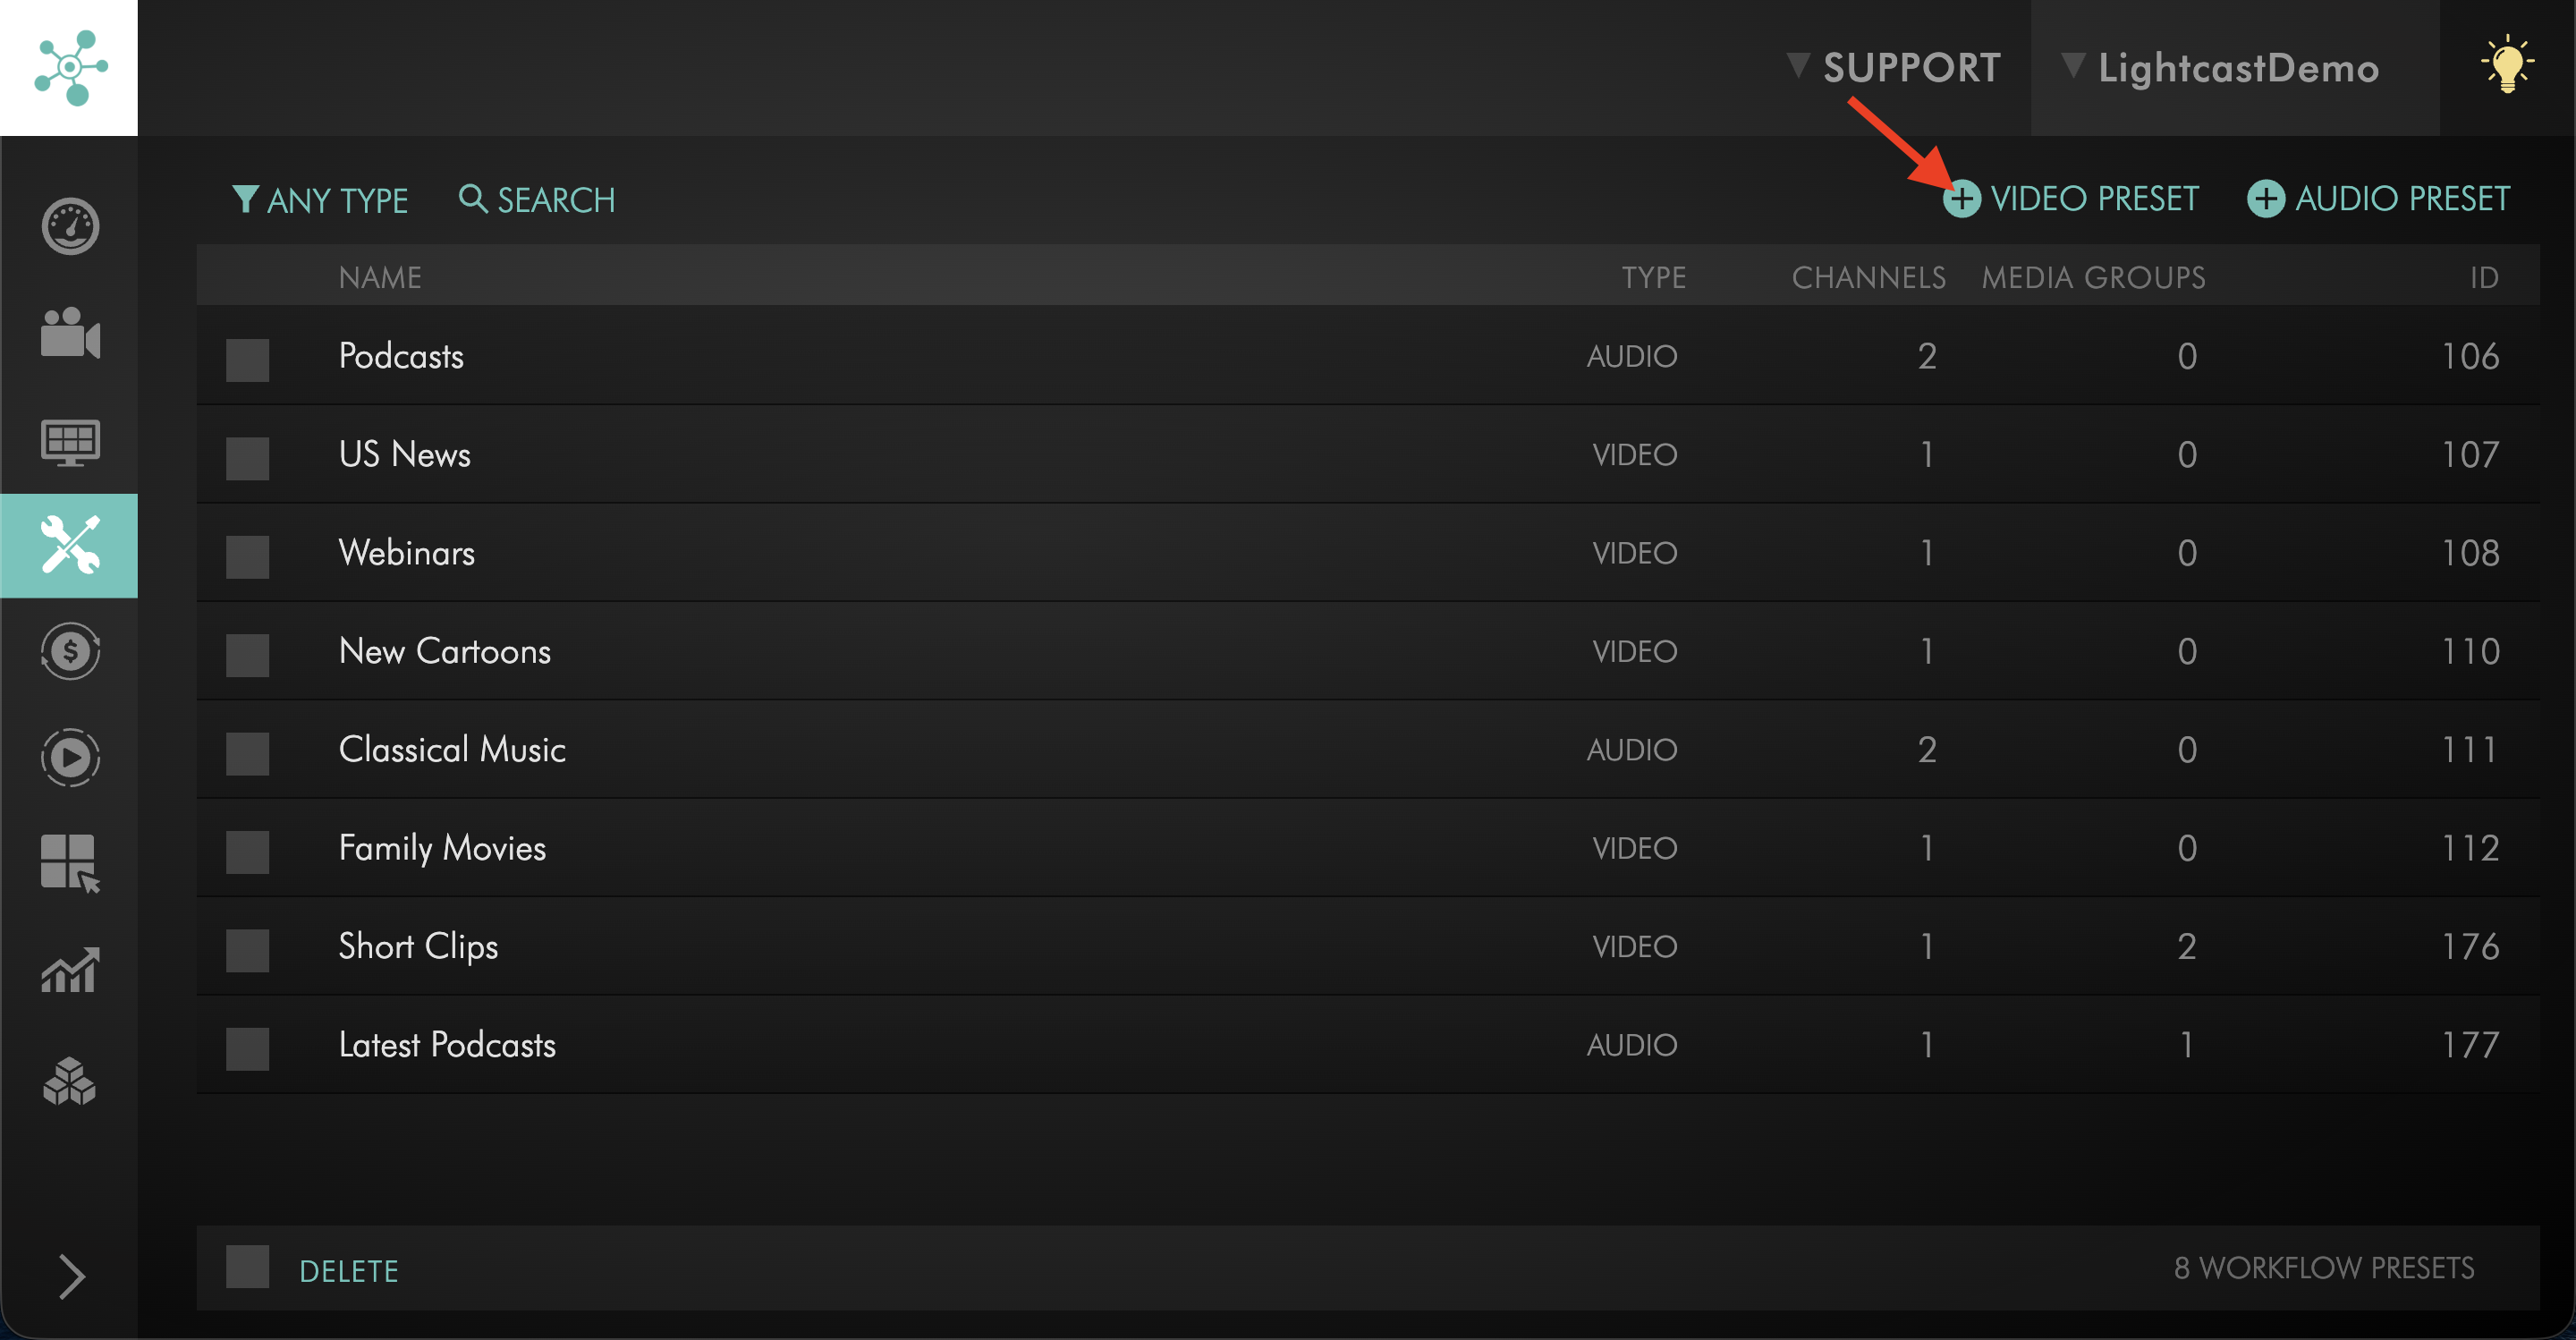
Click + VIDEO PRESET.
Step 4
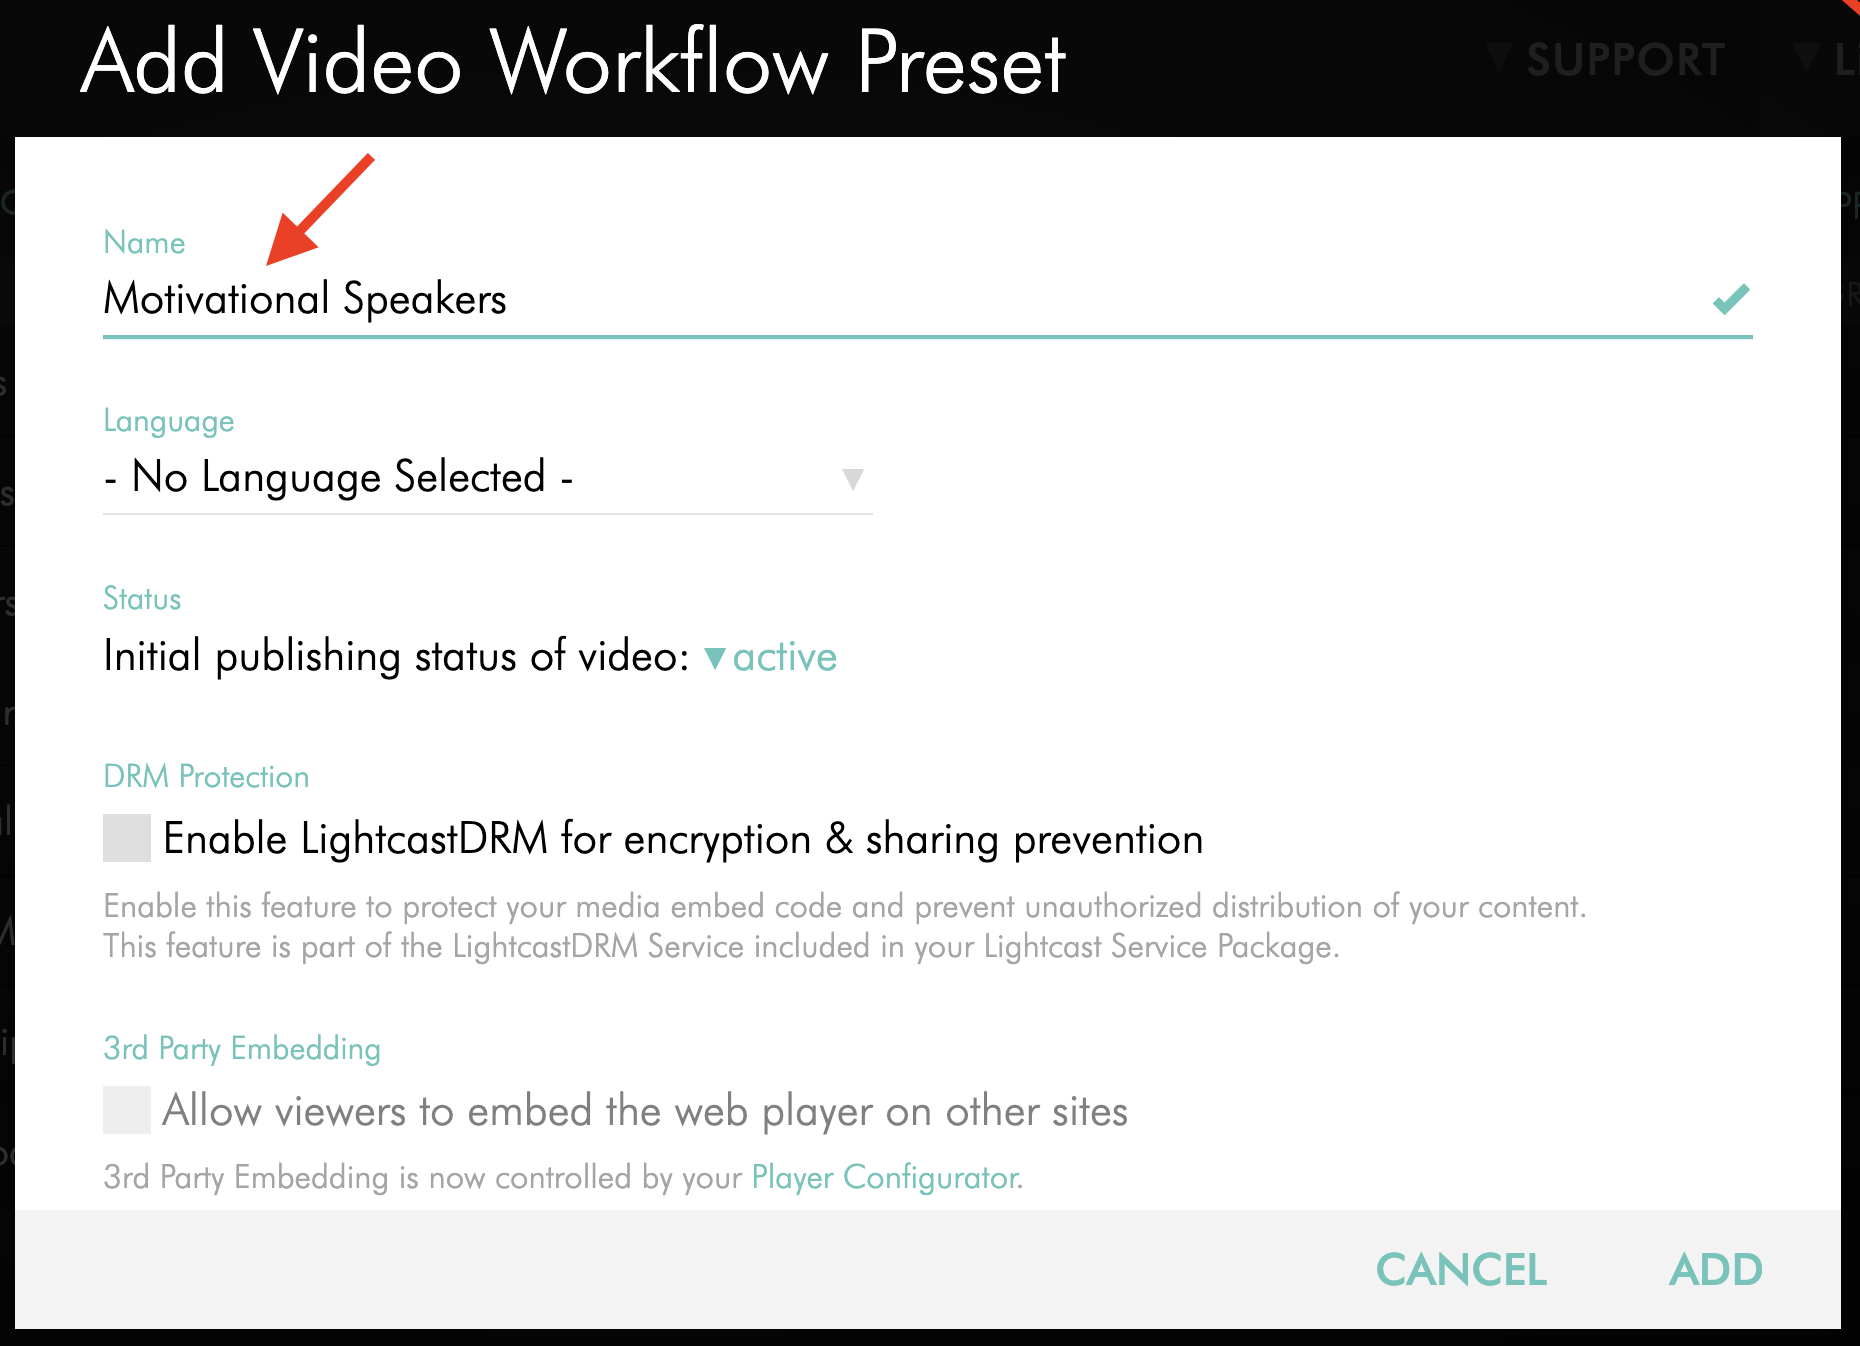
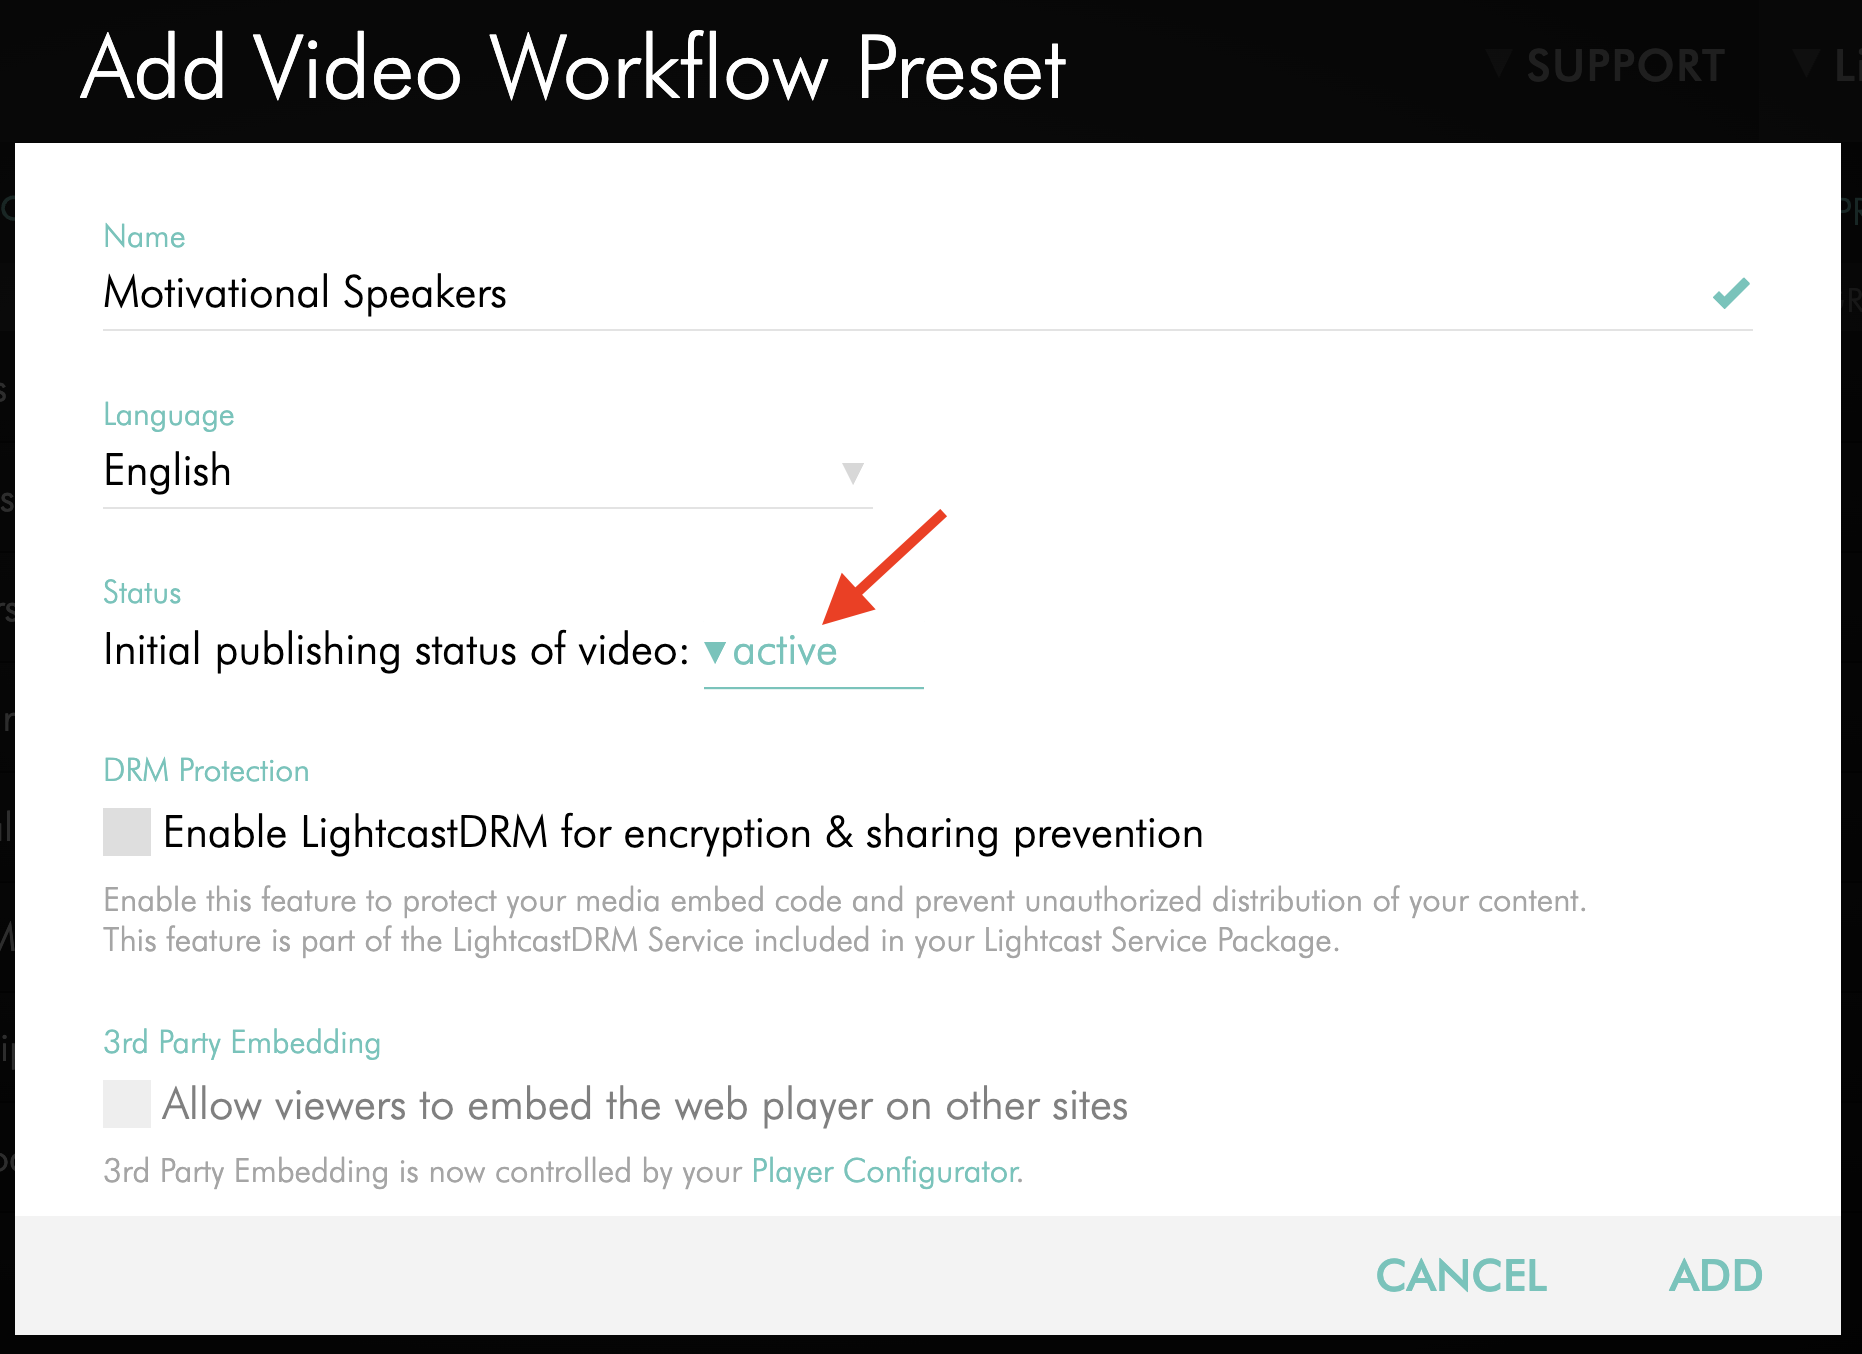
Enter a clear name for the preset.
Use a clear name so your team can quickly recognize when to use it. For example, you might name a preset based on the content type, destination, or publishing workflow.
Step 5
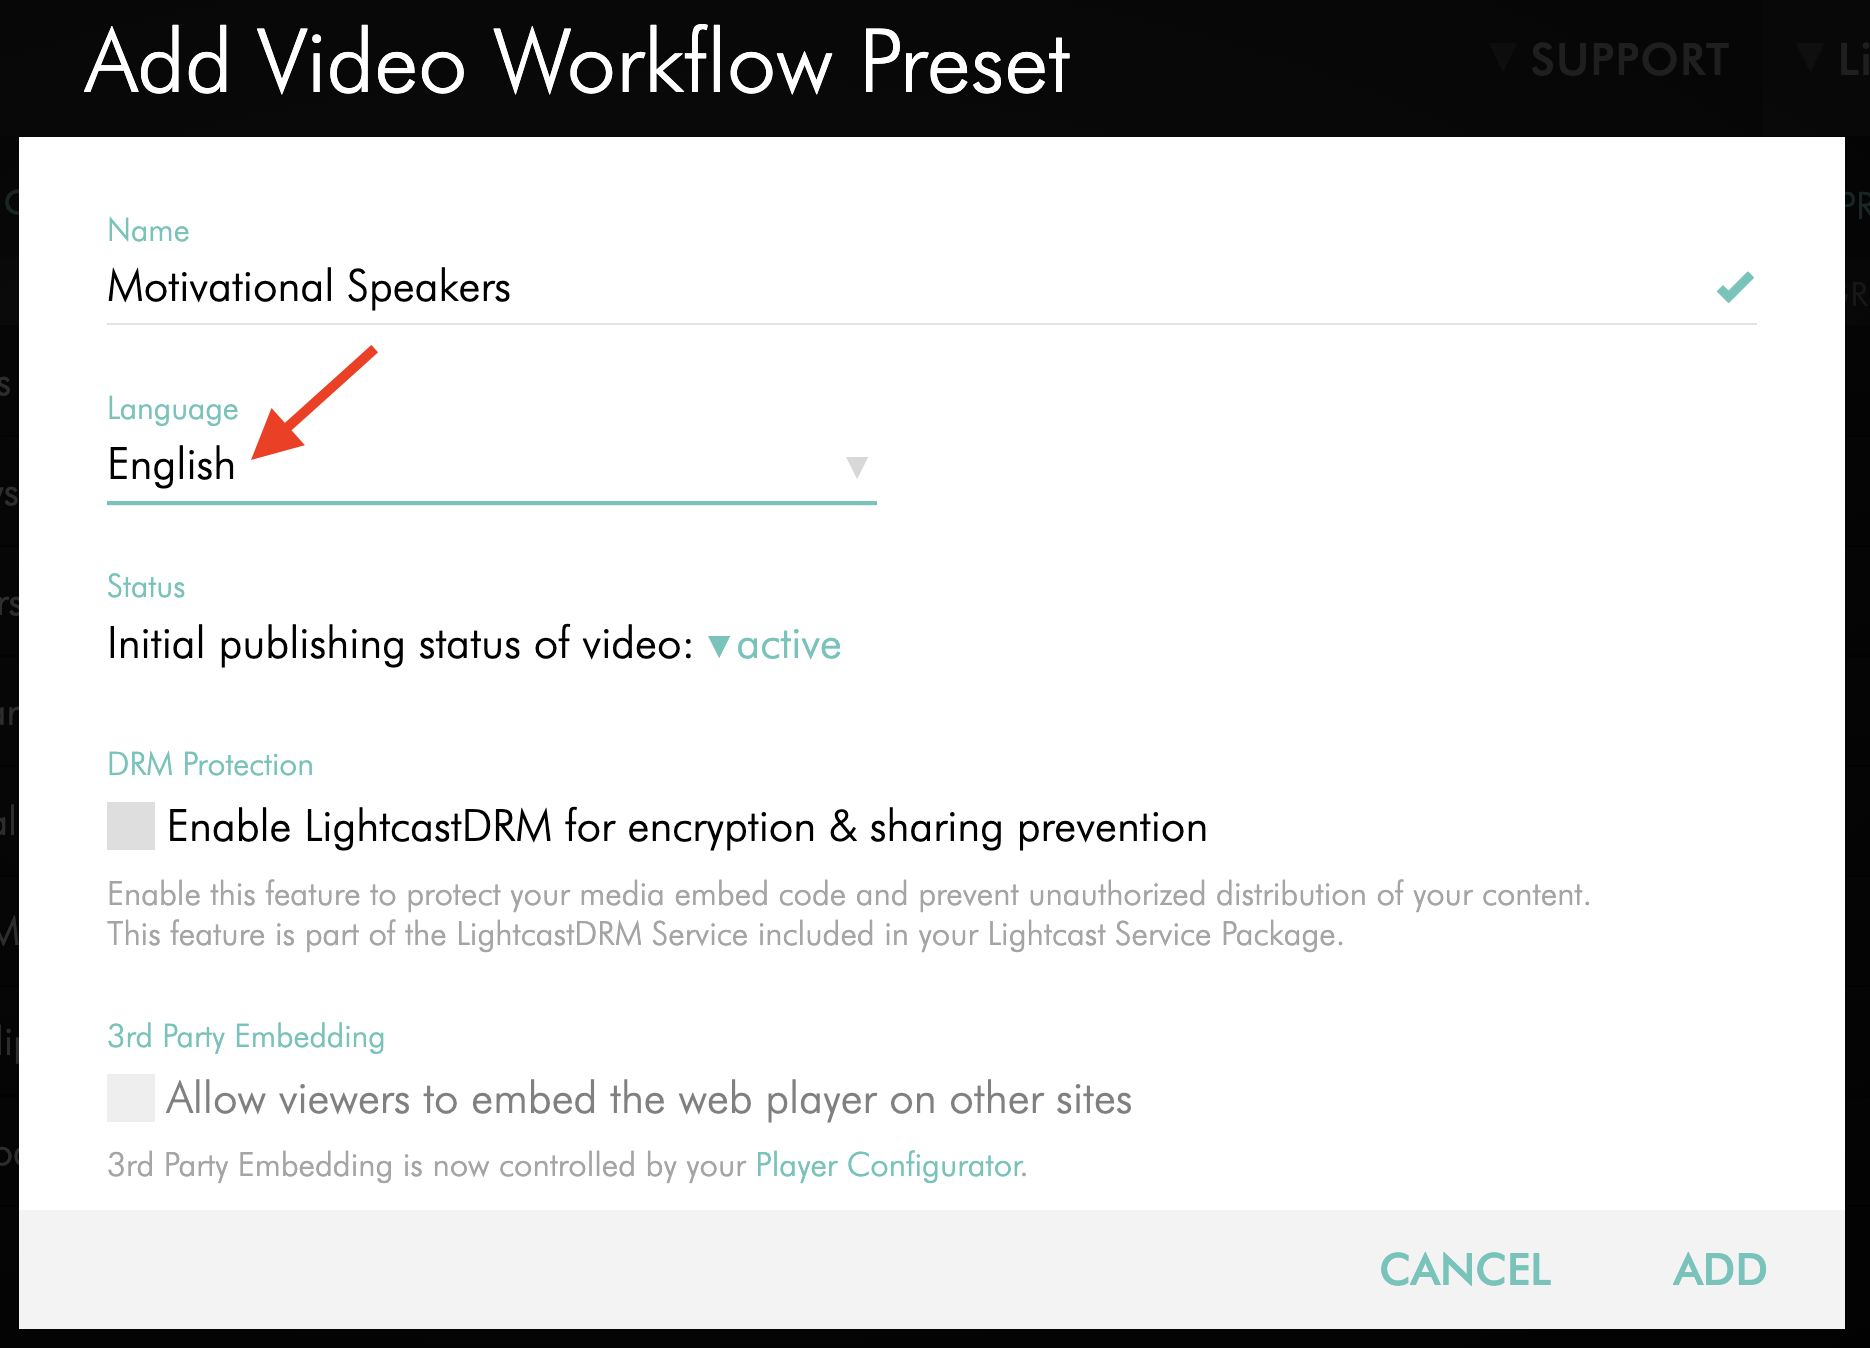
Select the language setting for the media uploads that will use this preset.
Step 6
Select the preferred publishing status for the media items.
Step 7
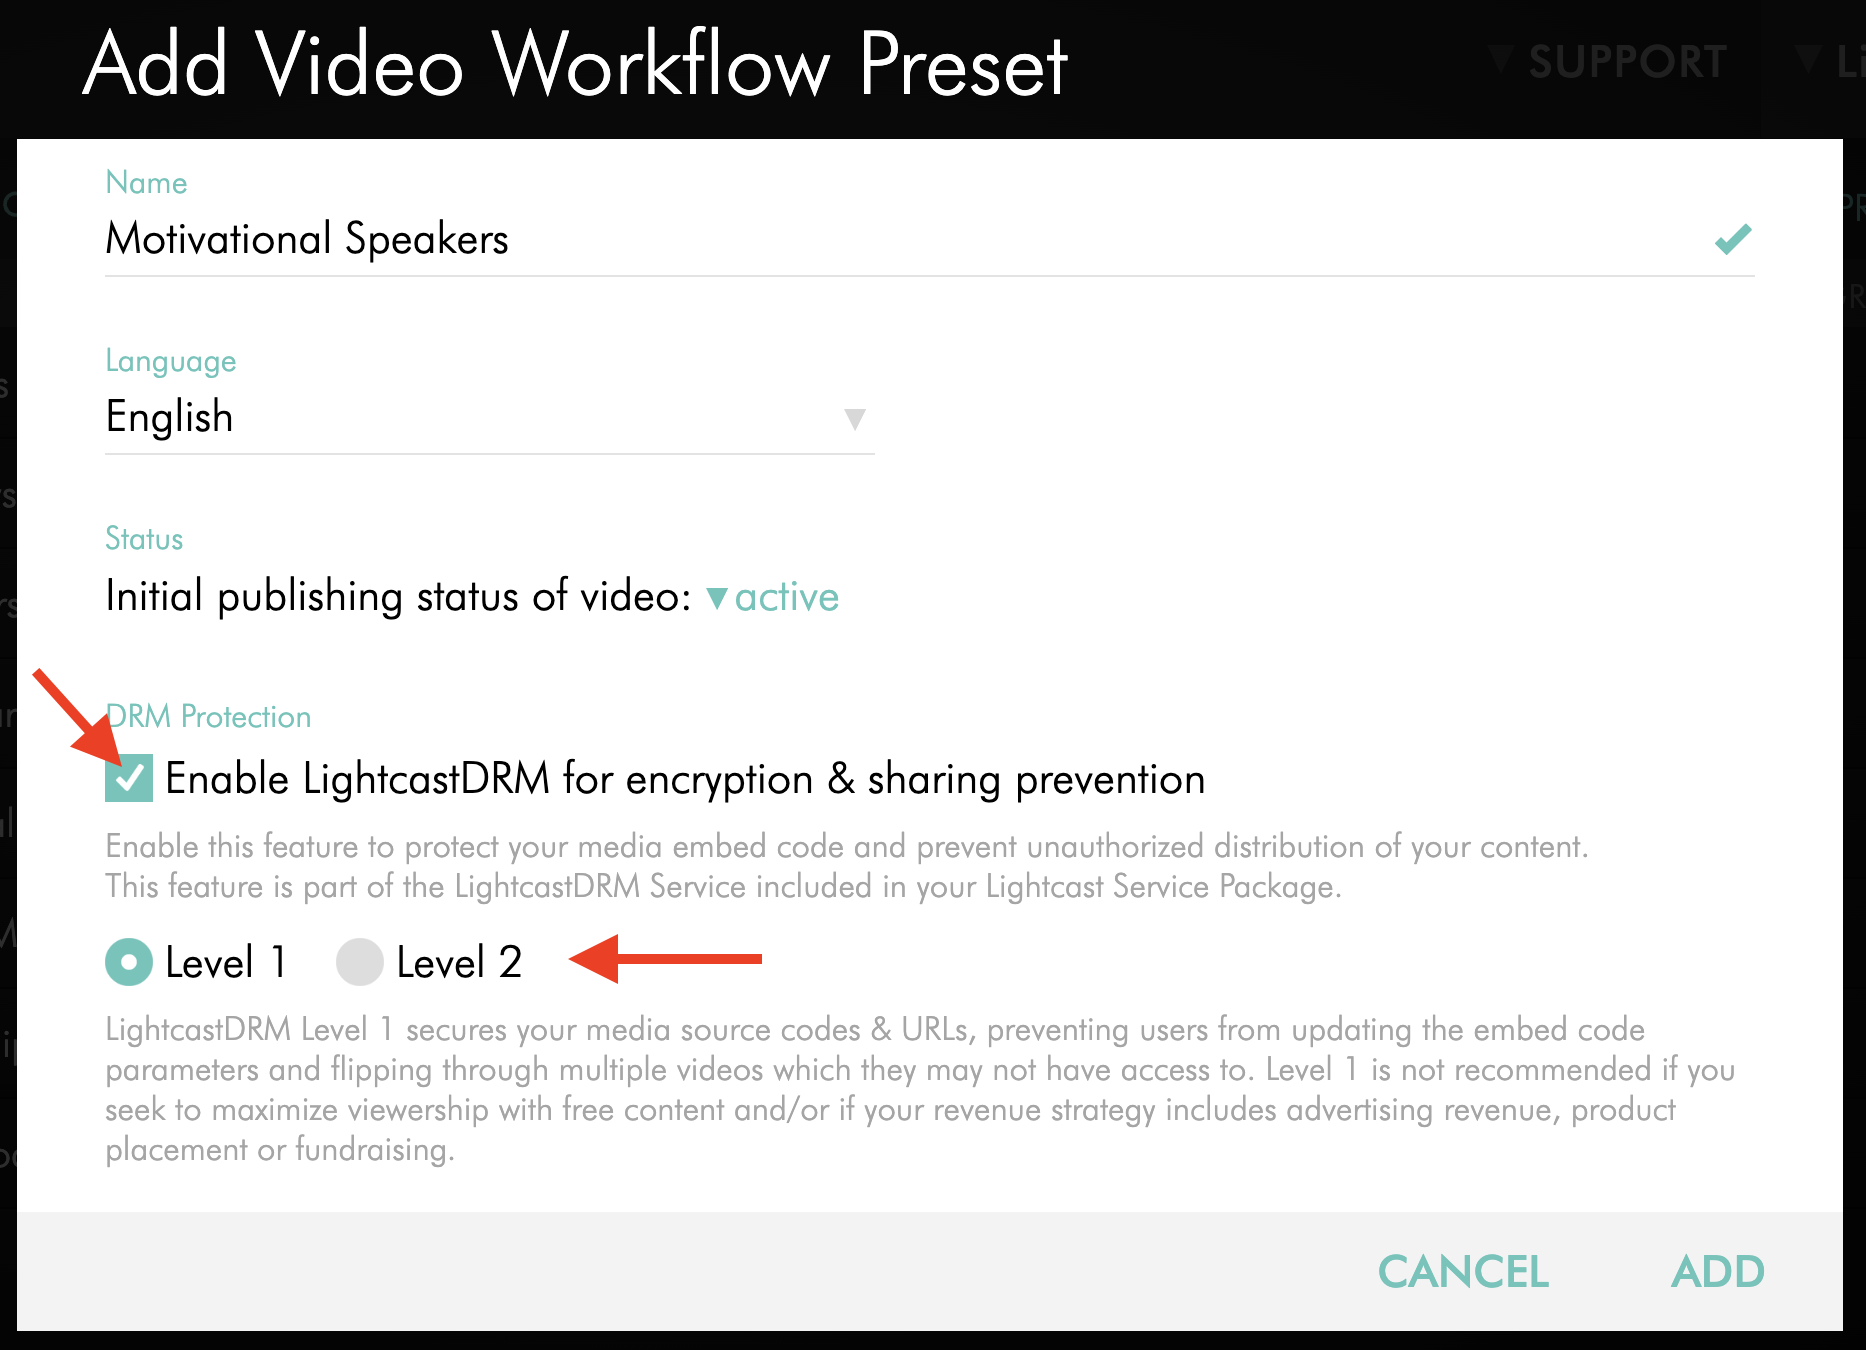
Optional: If your service package includes Lightcast DRM, enable DRM Protection and select Level 1 or Level 2.
To learn more about Lightcast DRM, see: Lightcast DRM explained
Step 8
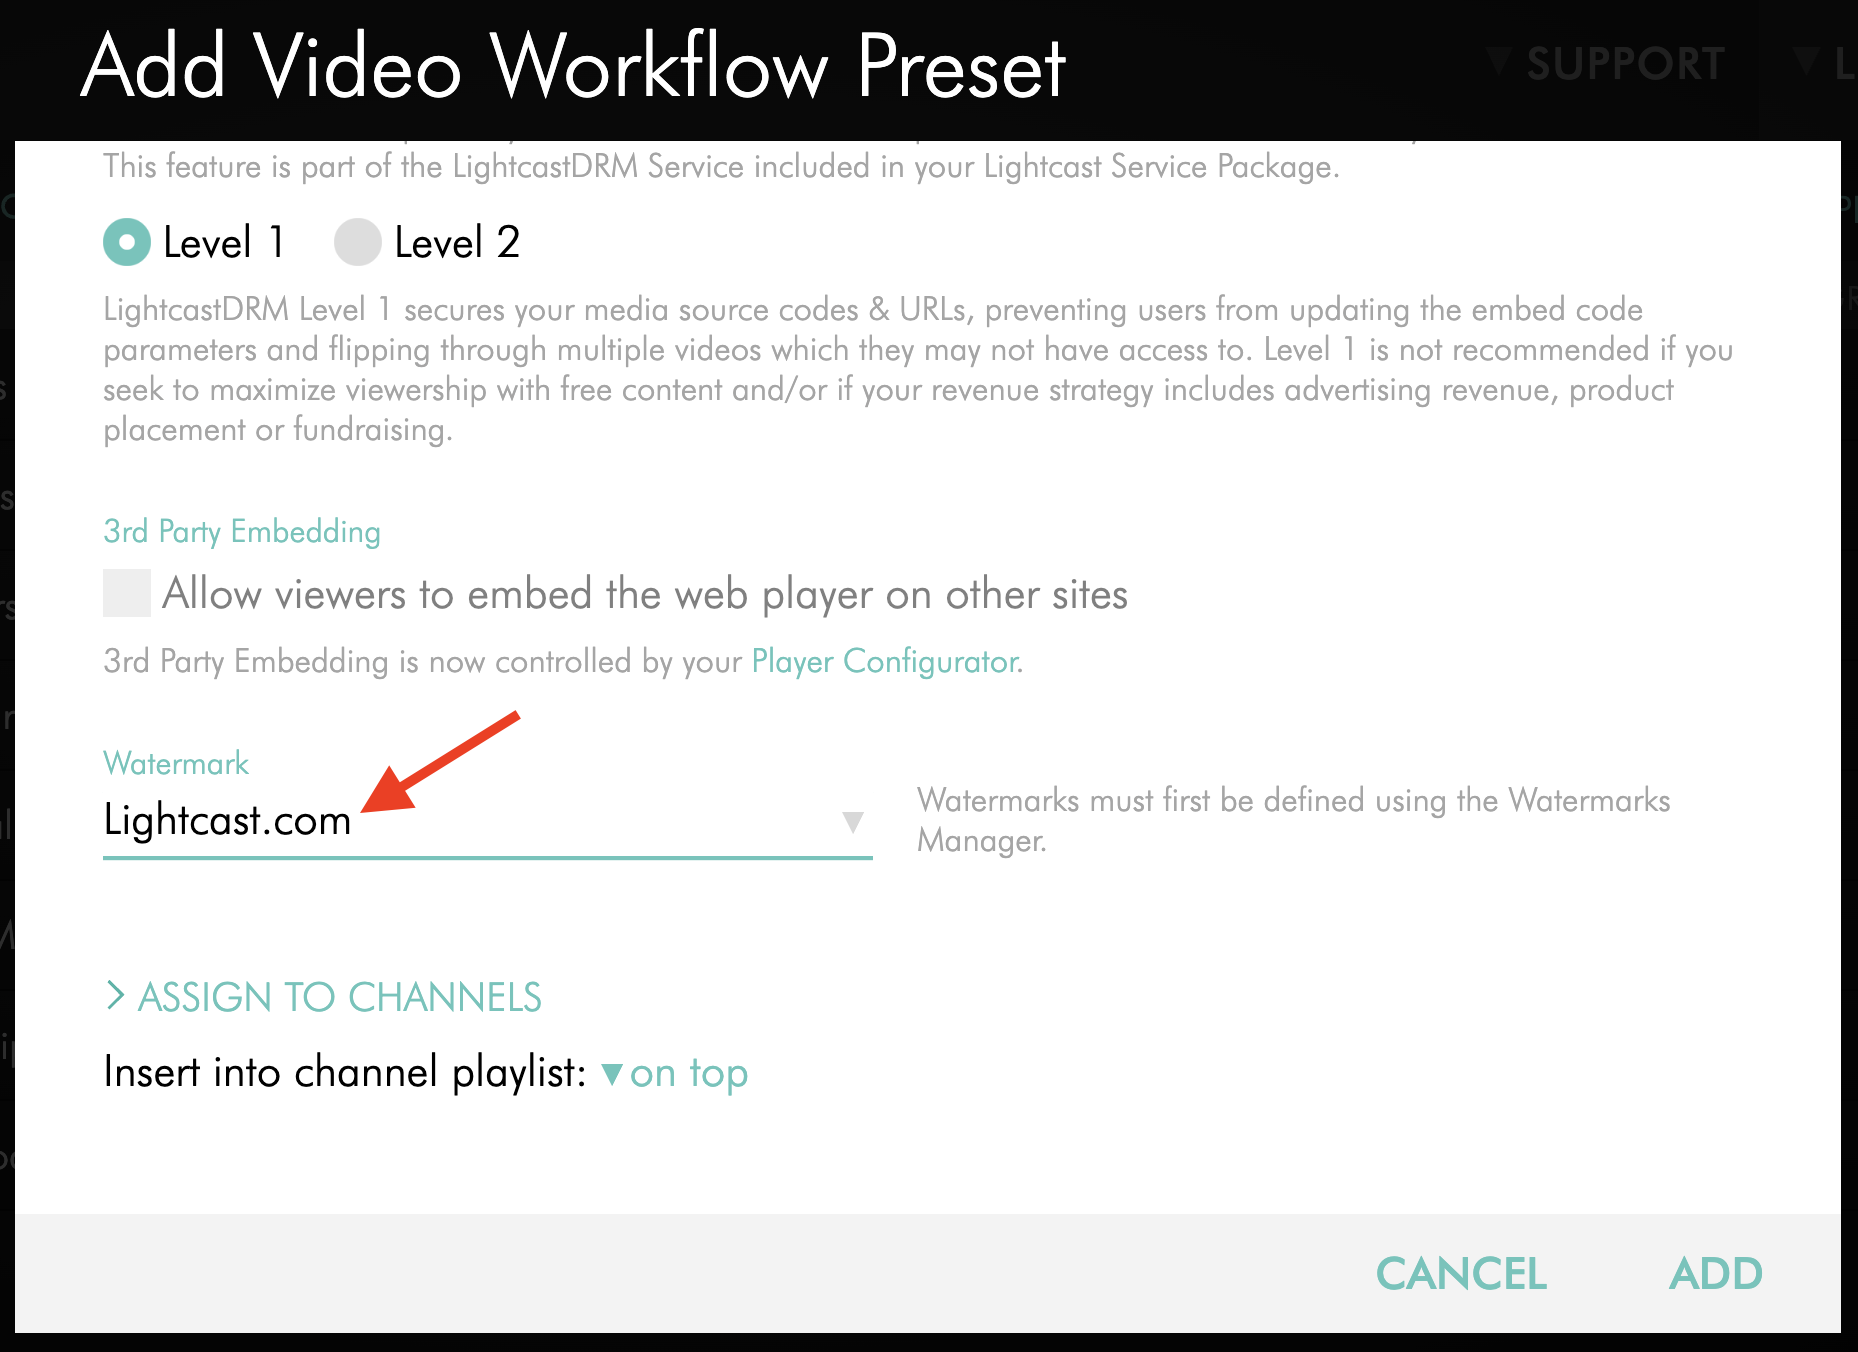
Optional: If your service package includes Watermarks for video uploads, select the Watermark you want to apply to uploads that use this preset.
To learn how to create a Watermark, see: How to add a Watermark
Step 9
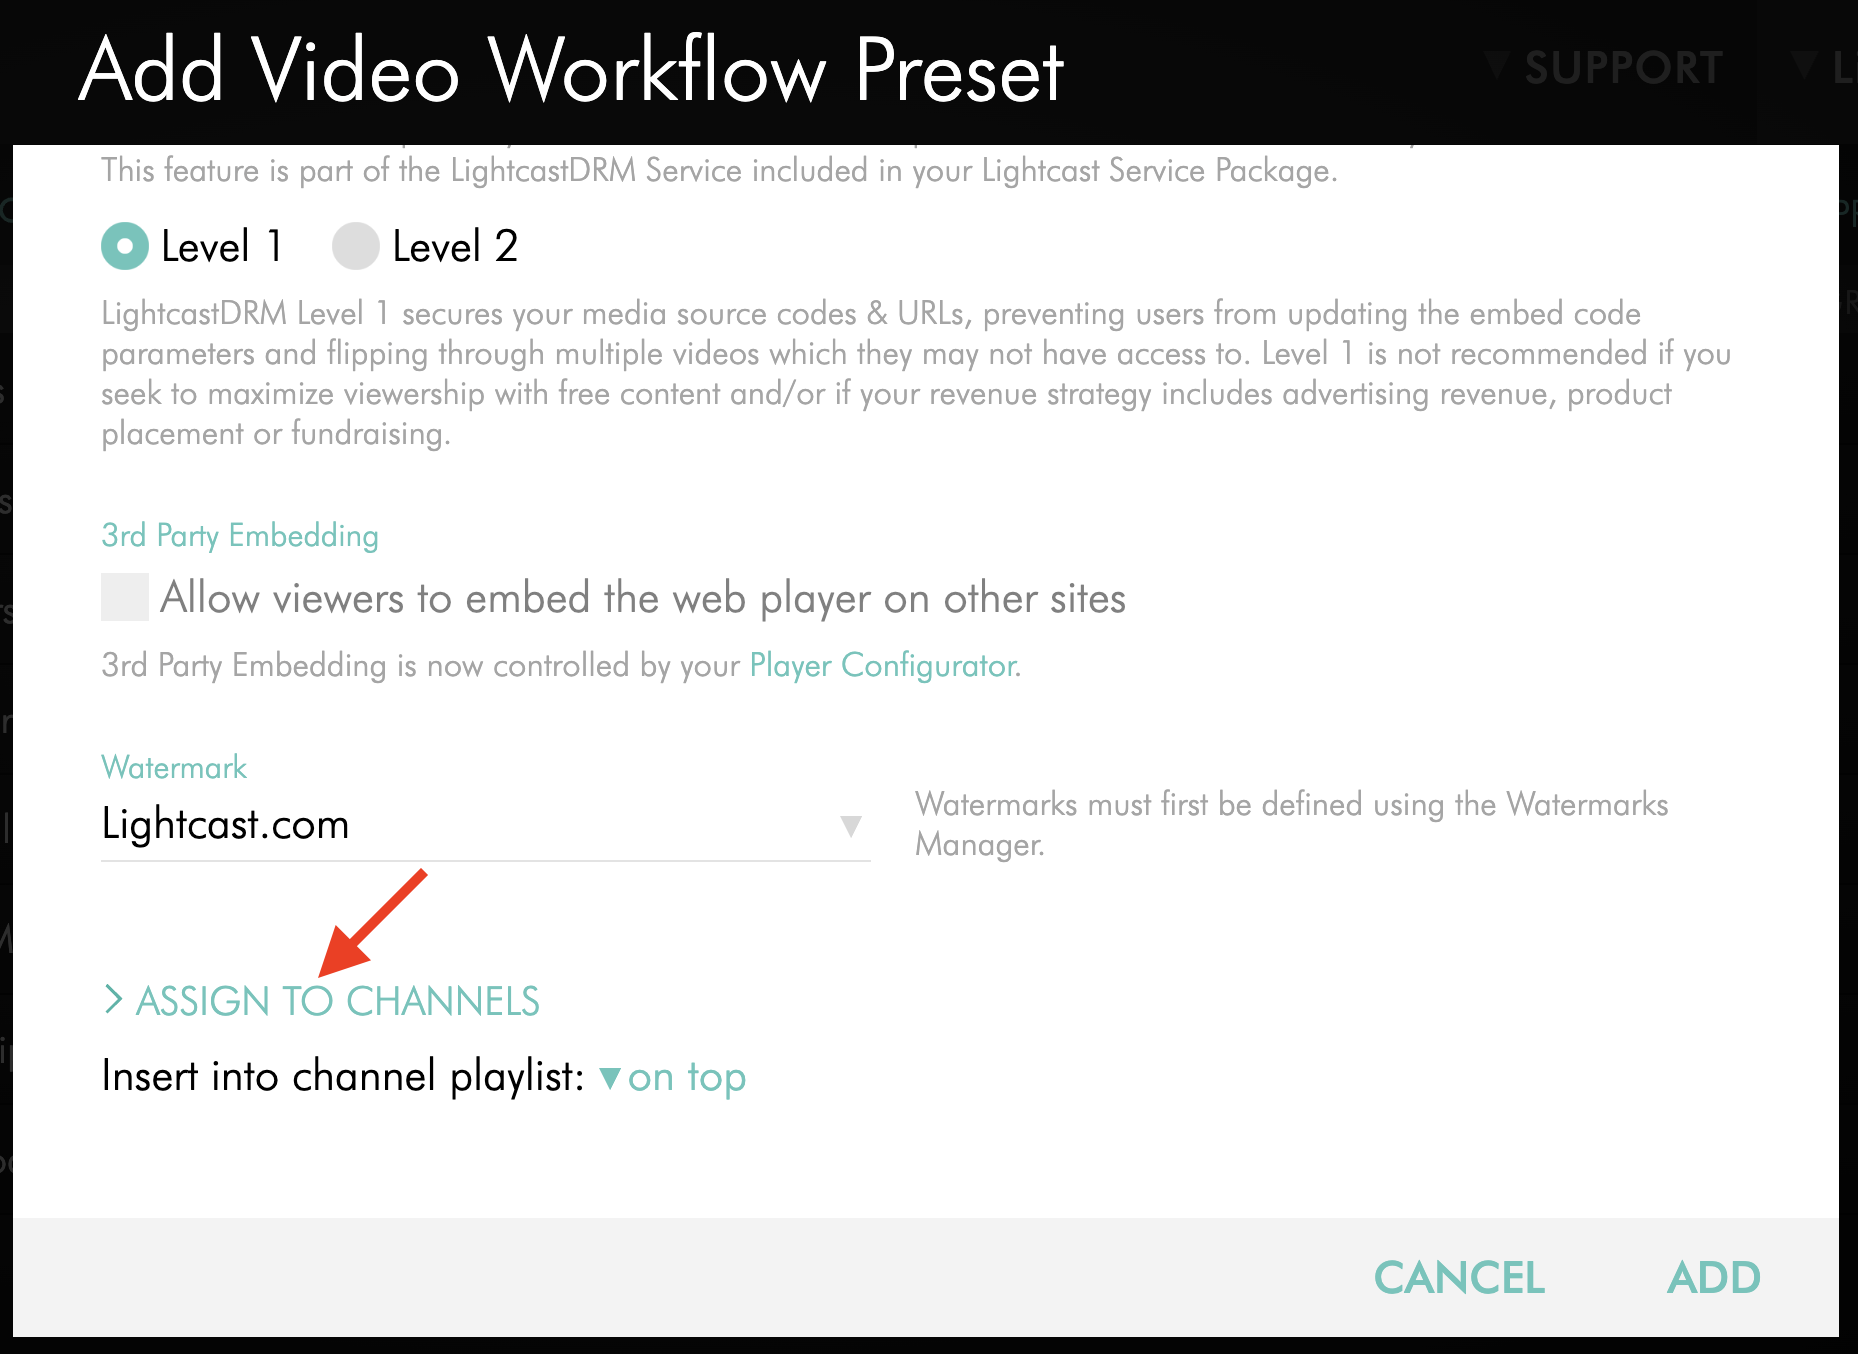
Click ASSIGN TO CHANNELS to open the Channel assignment pop-up window.
Step 10
In the Channel assignment pop-up window, select the Channel or Sub-Channel the media items should be assigned to when using this preset, then click ASSIGN CHANNELS.
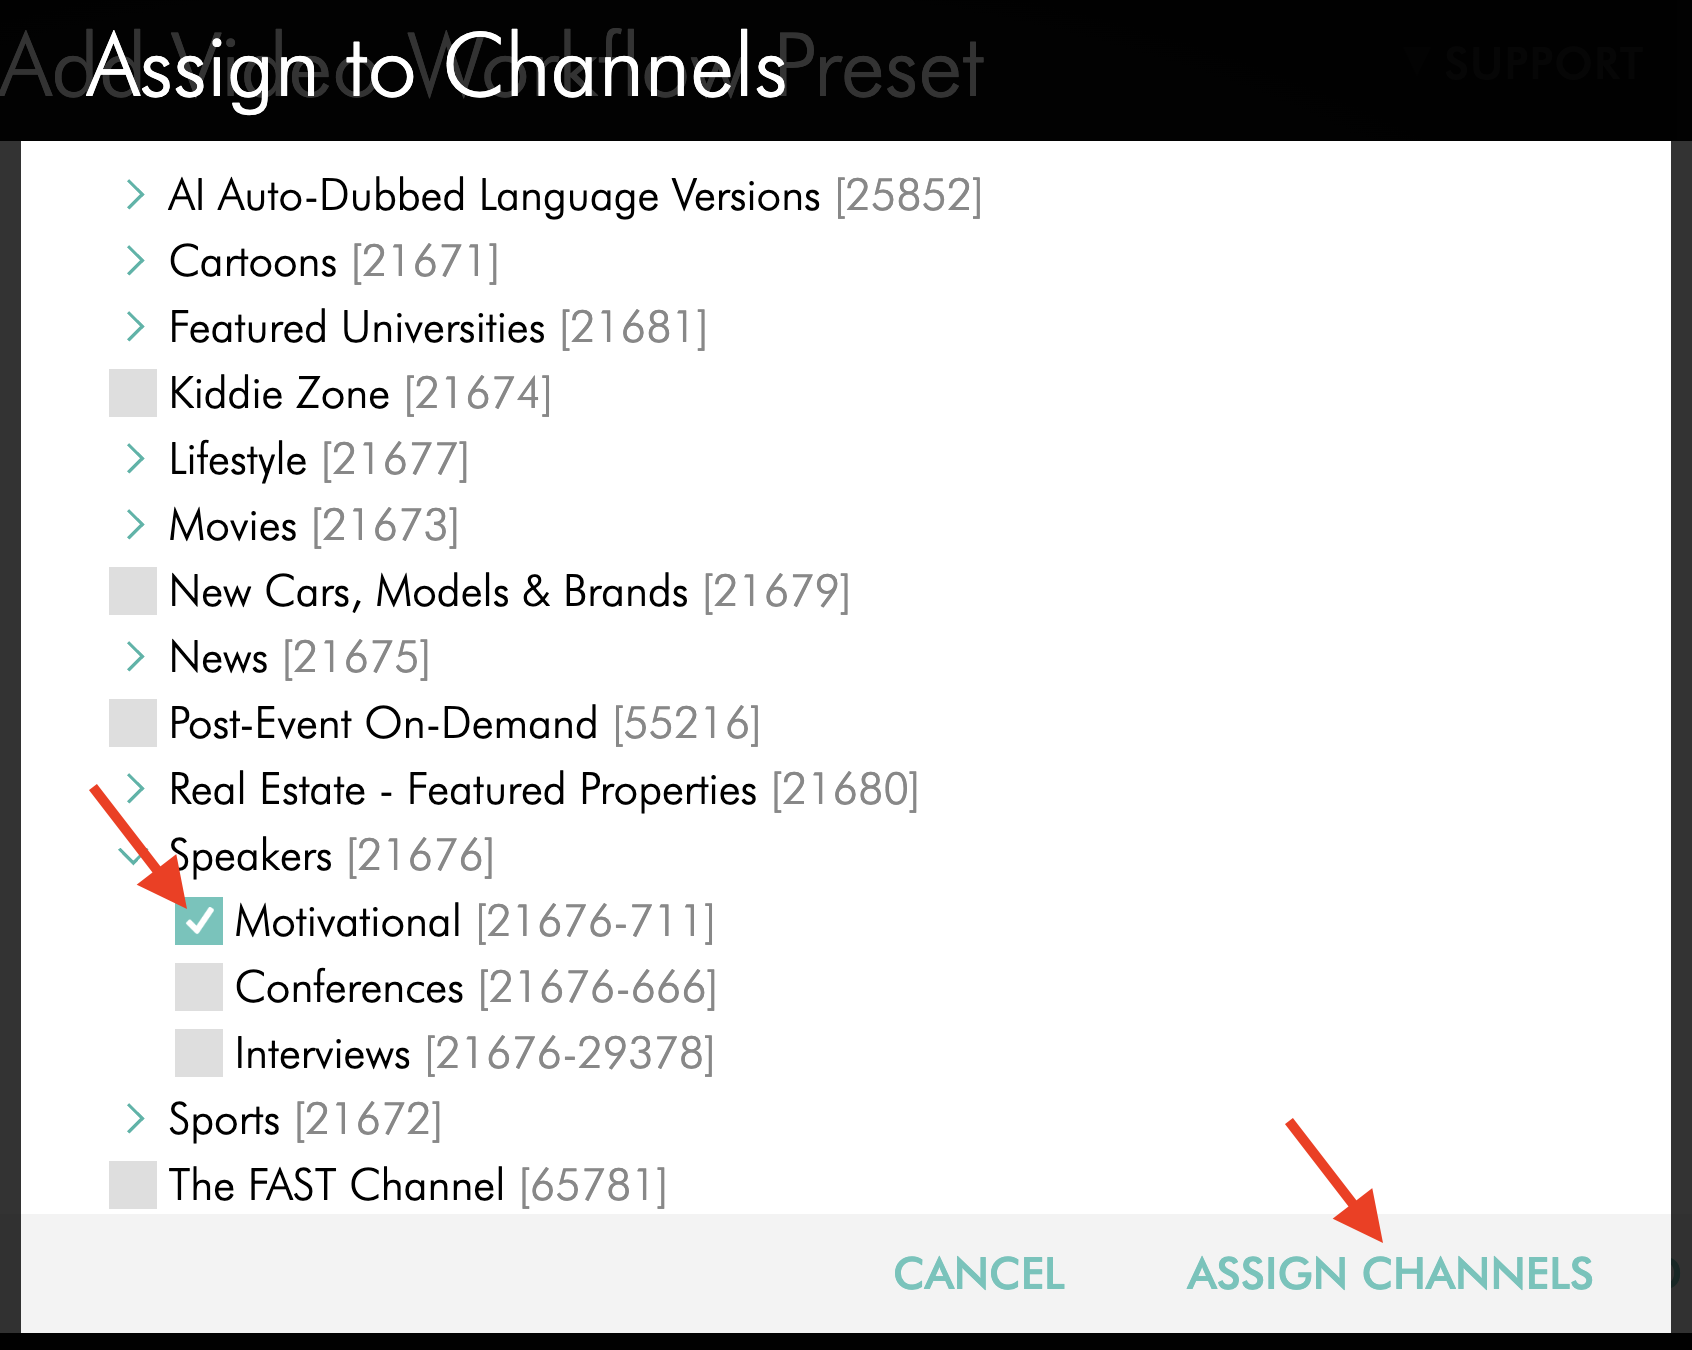
Step 11
Select the playlist position for the uploaded content:
on top places the content at the beginning of the Channel or Sub-Channel playlist
at the bottom places the content at the end of the Channel or Sub-Channel playlist
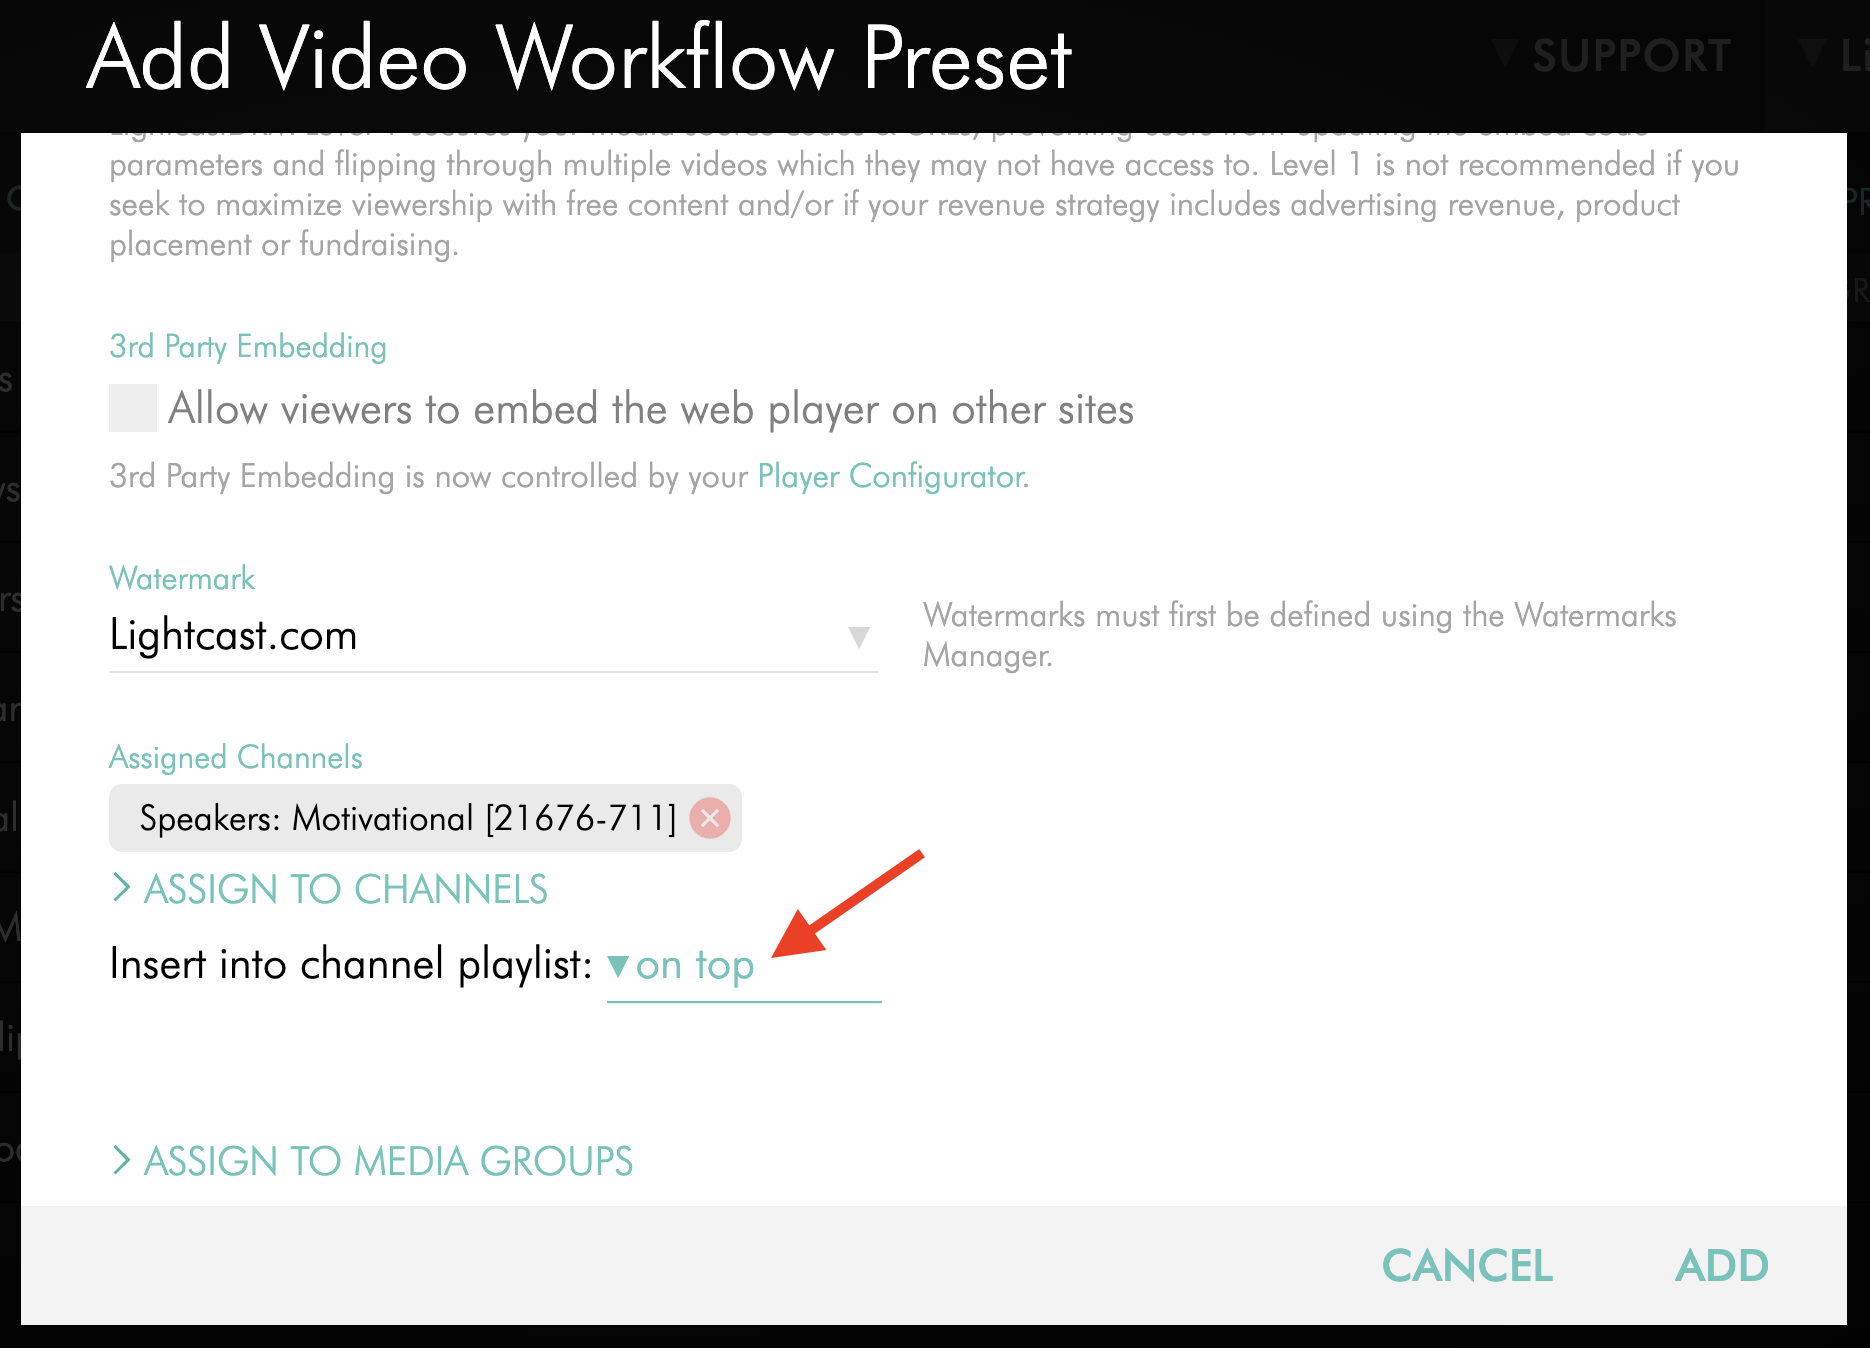
Step 12
Optional: If your service package includes Media Groups, click ASSIGN TO MEDIA GROUPS and select the Media Group you want to use for the video uploads in this preset.
To learn how to create a Media Group, see: How to create a Media Group
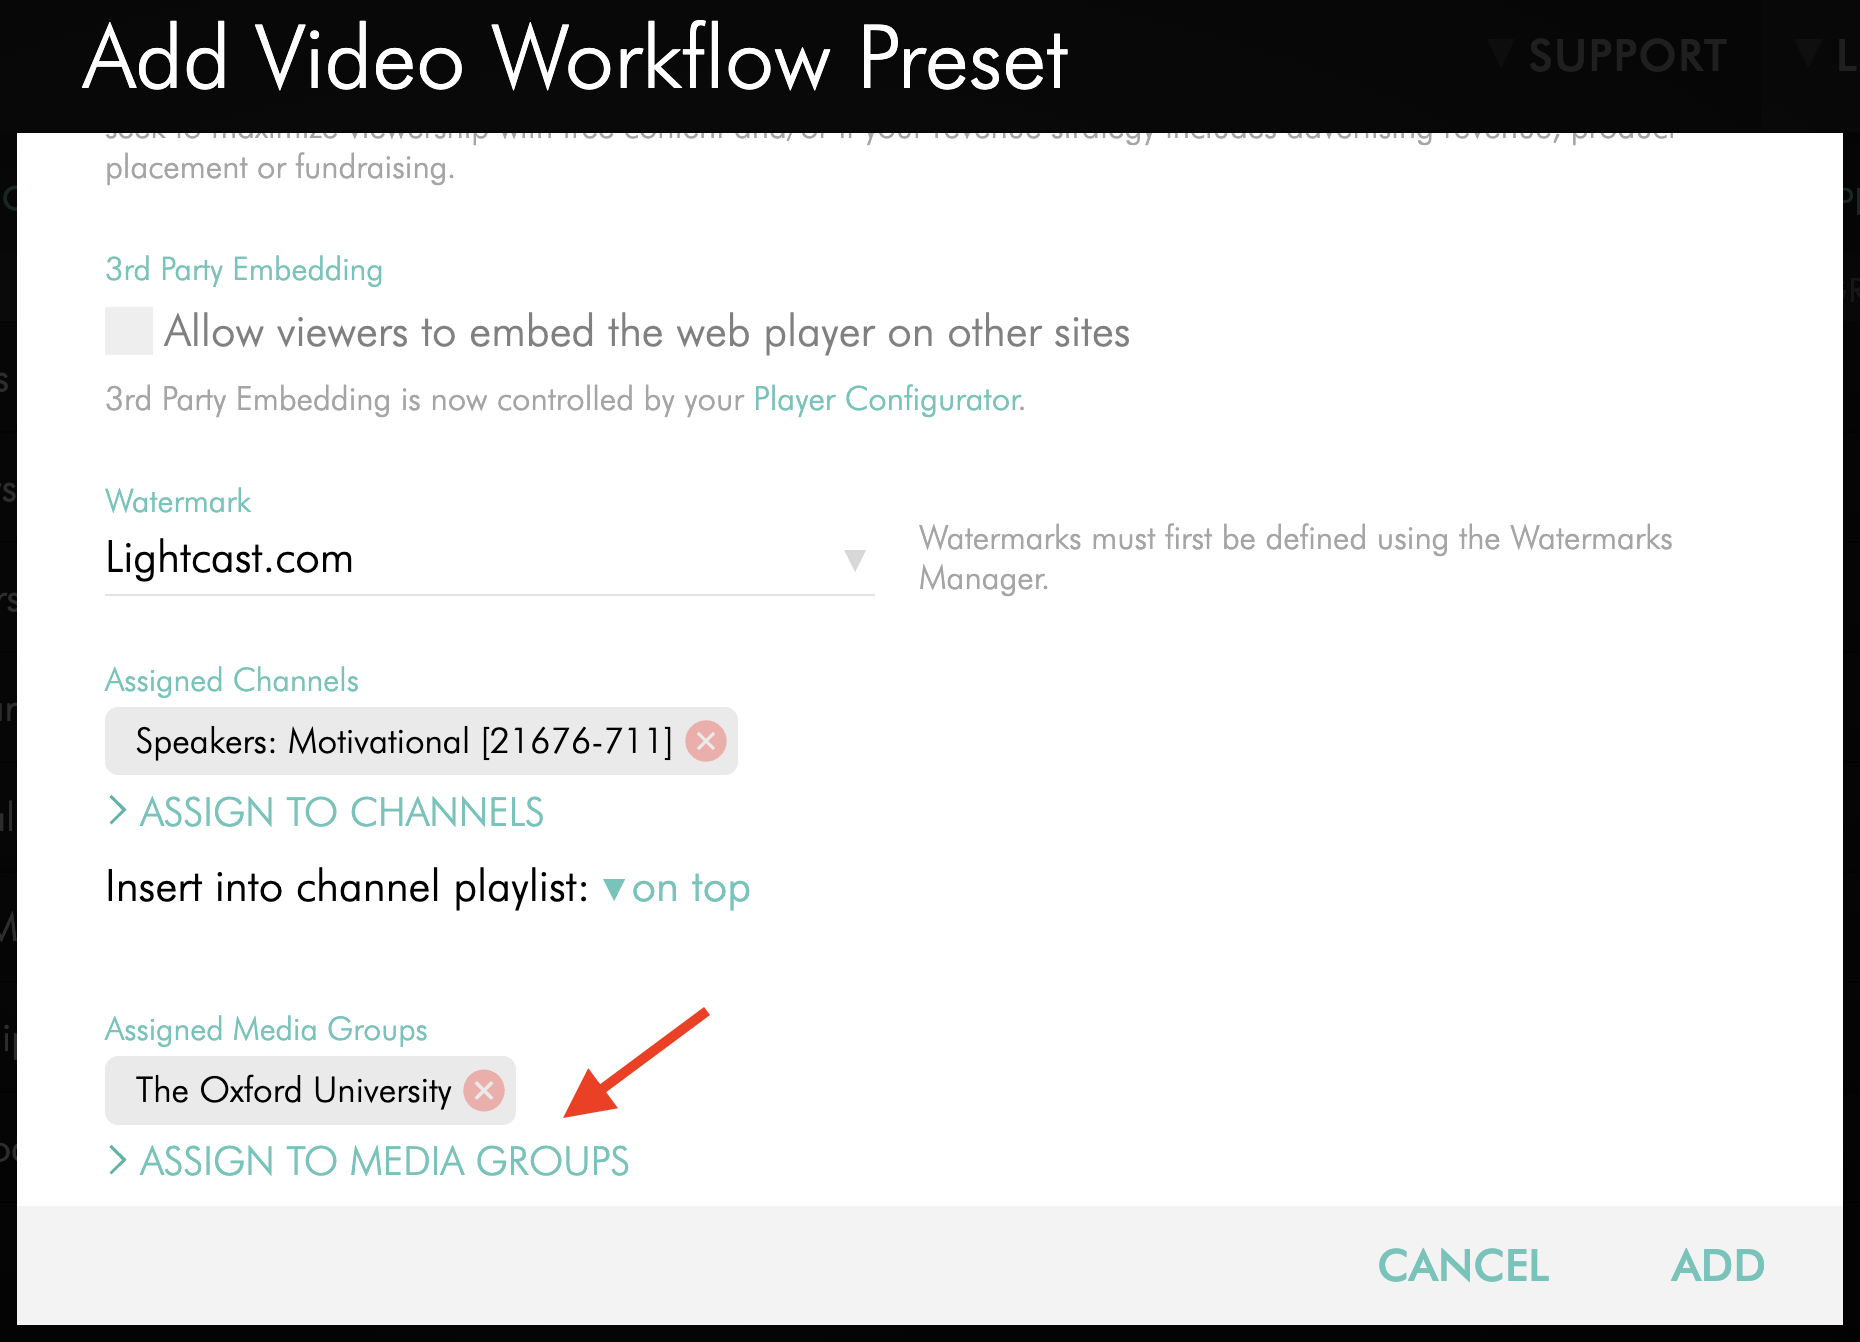
Step 13
Click ADD to save the Workflow Preset.
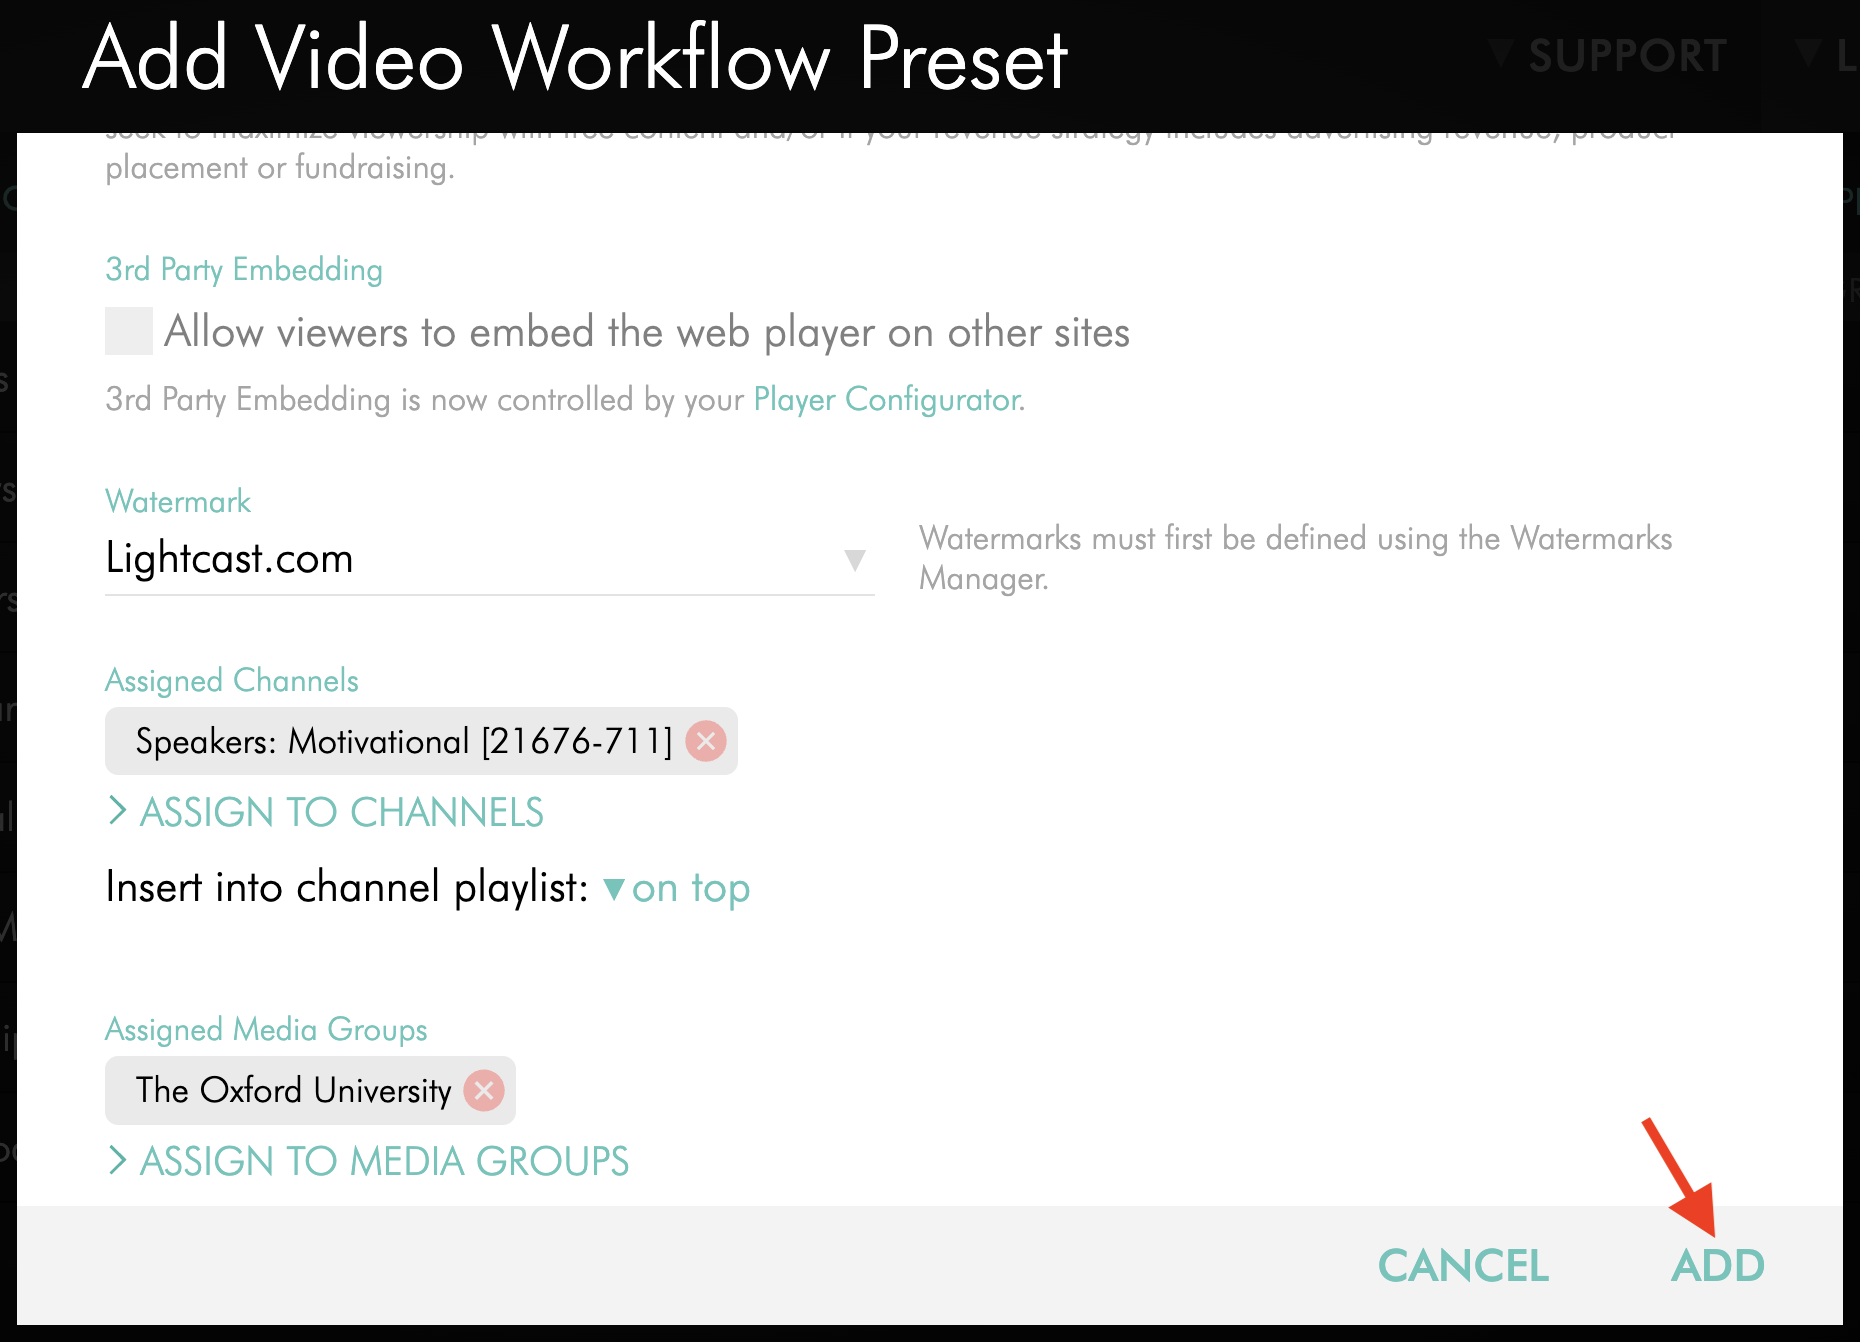
The Workflow Preset will appear in your Workflow Presets list and will be available to select during supported uploads.
To learn how to edit or update an existing preset, see: How to manage Workflow Presets
To learn how to use a Workflow Preset during upload, see the uploader guides in the Additional related resources section below.
How to create an Audio Workflow Preset
Audio Workflow Presets include many of the same setup options as Video Workflow Presets, but some options, such as Watermarks, may only apply to video workflows.
Step 1
Log in to your Media Cloud account.
Step 2
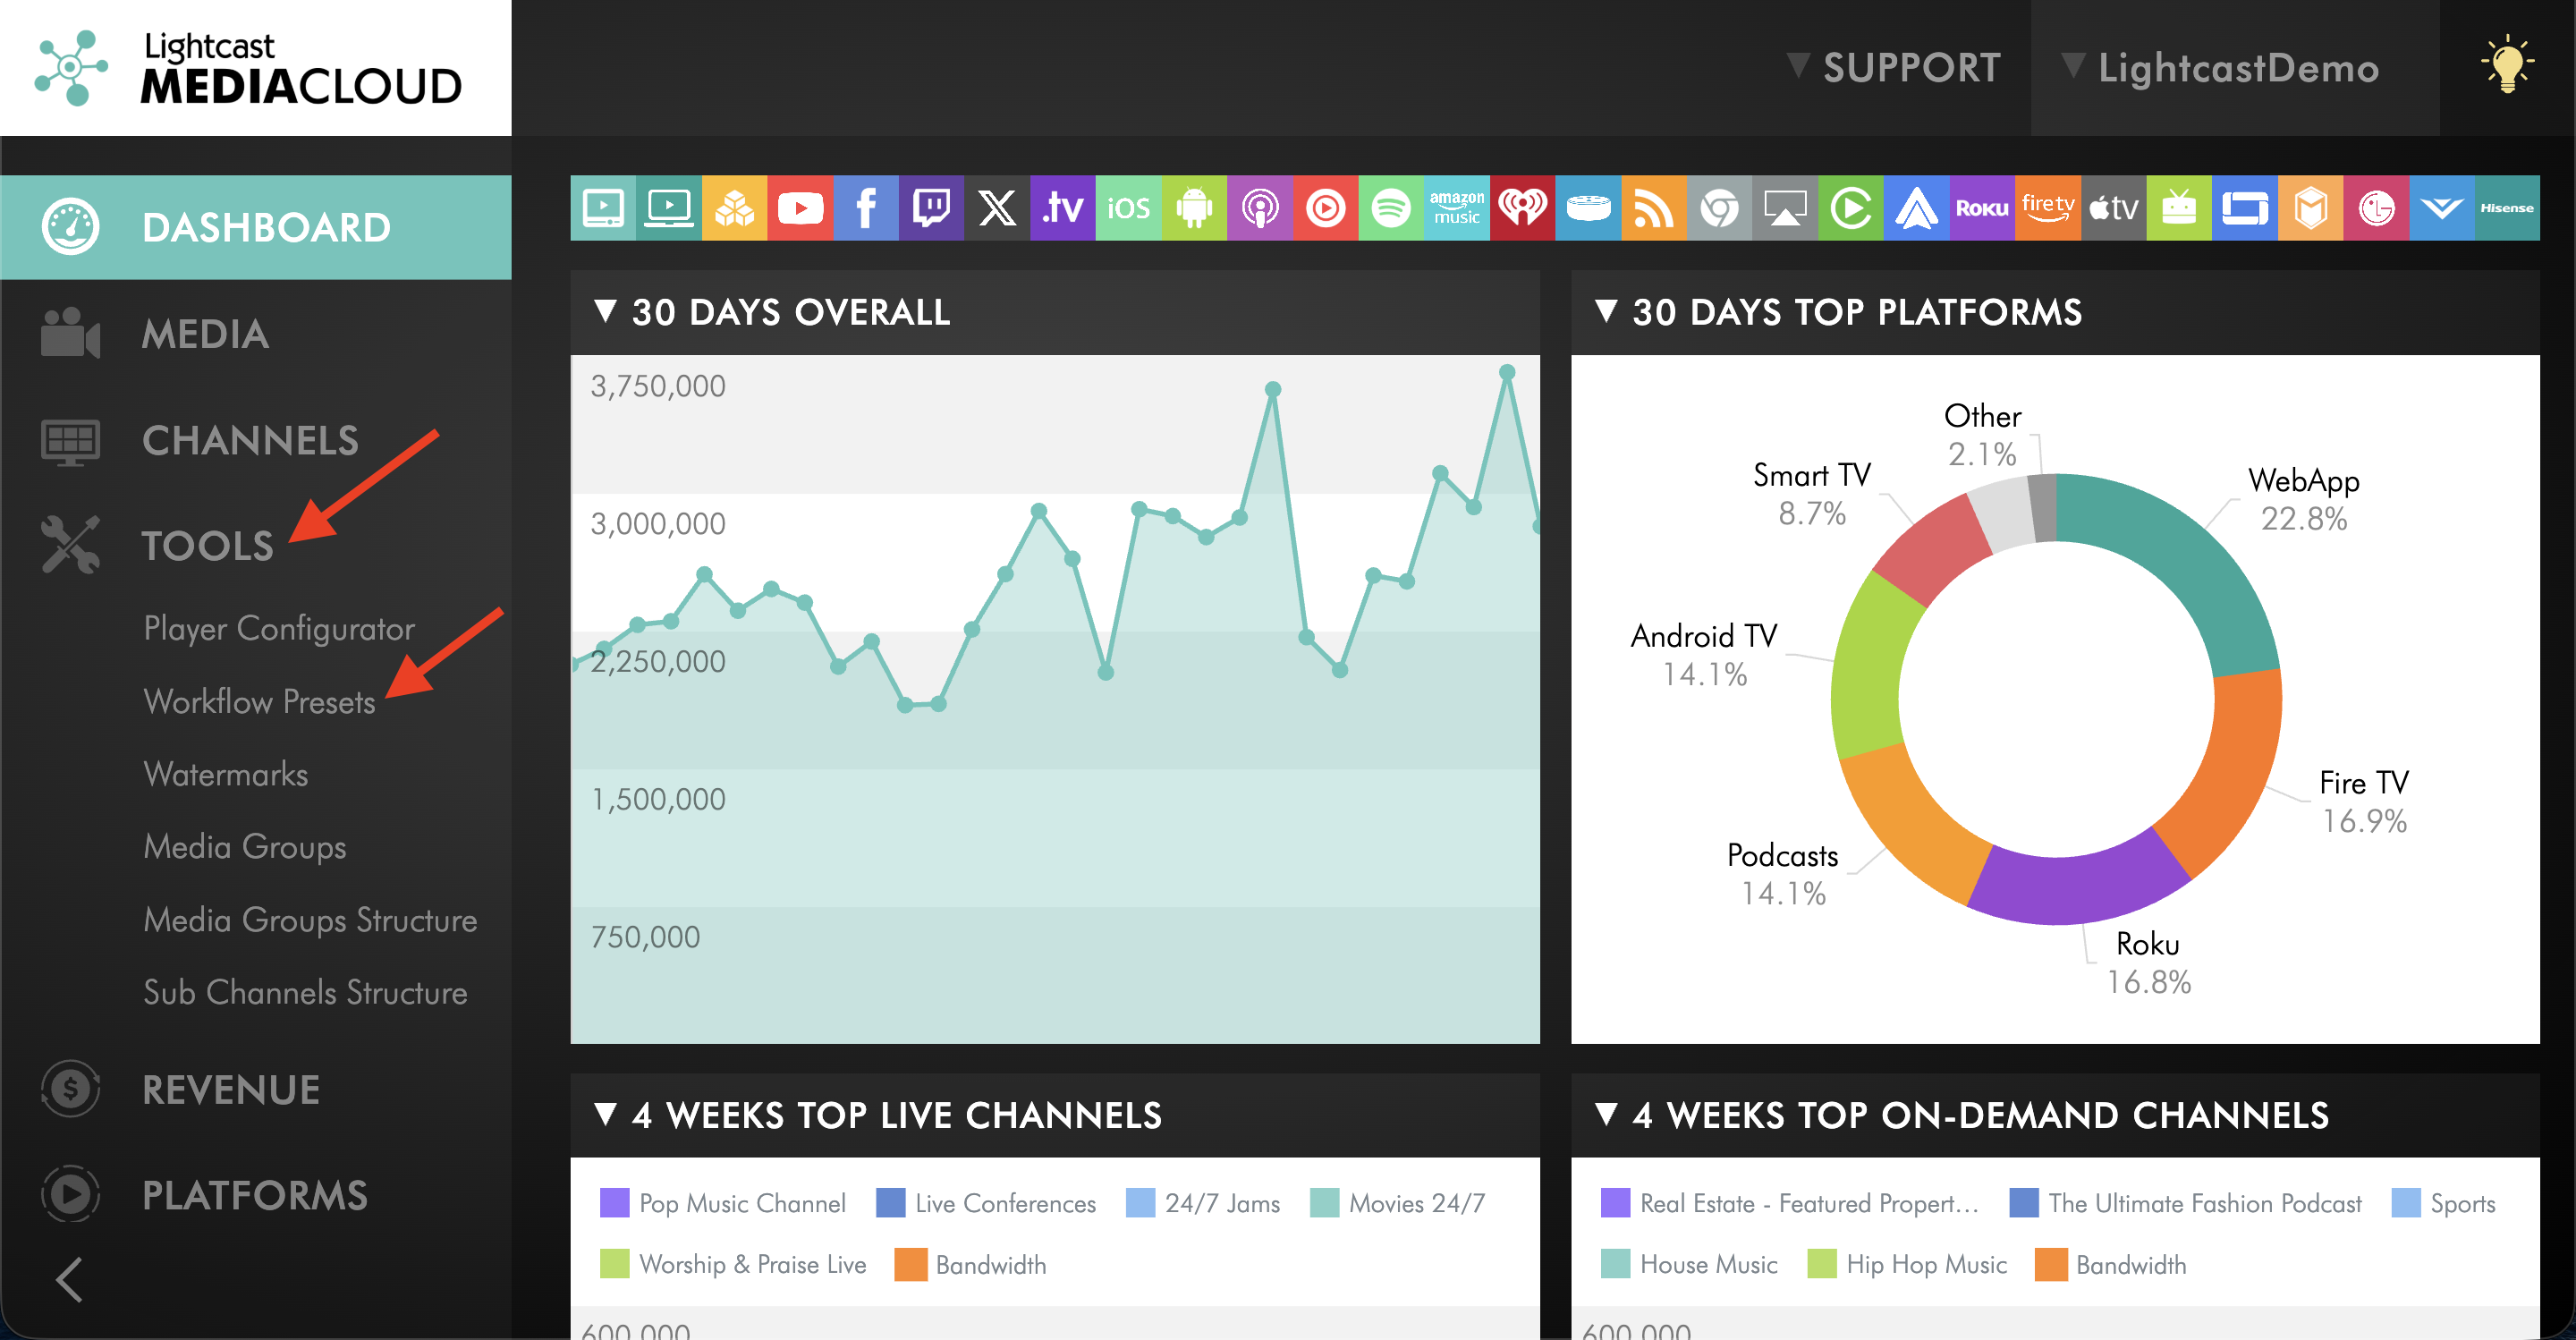
Go to TOOLS and click Workflow Presets.
Step 3
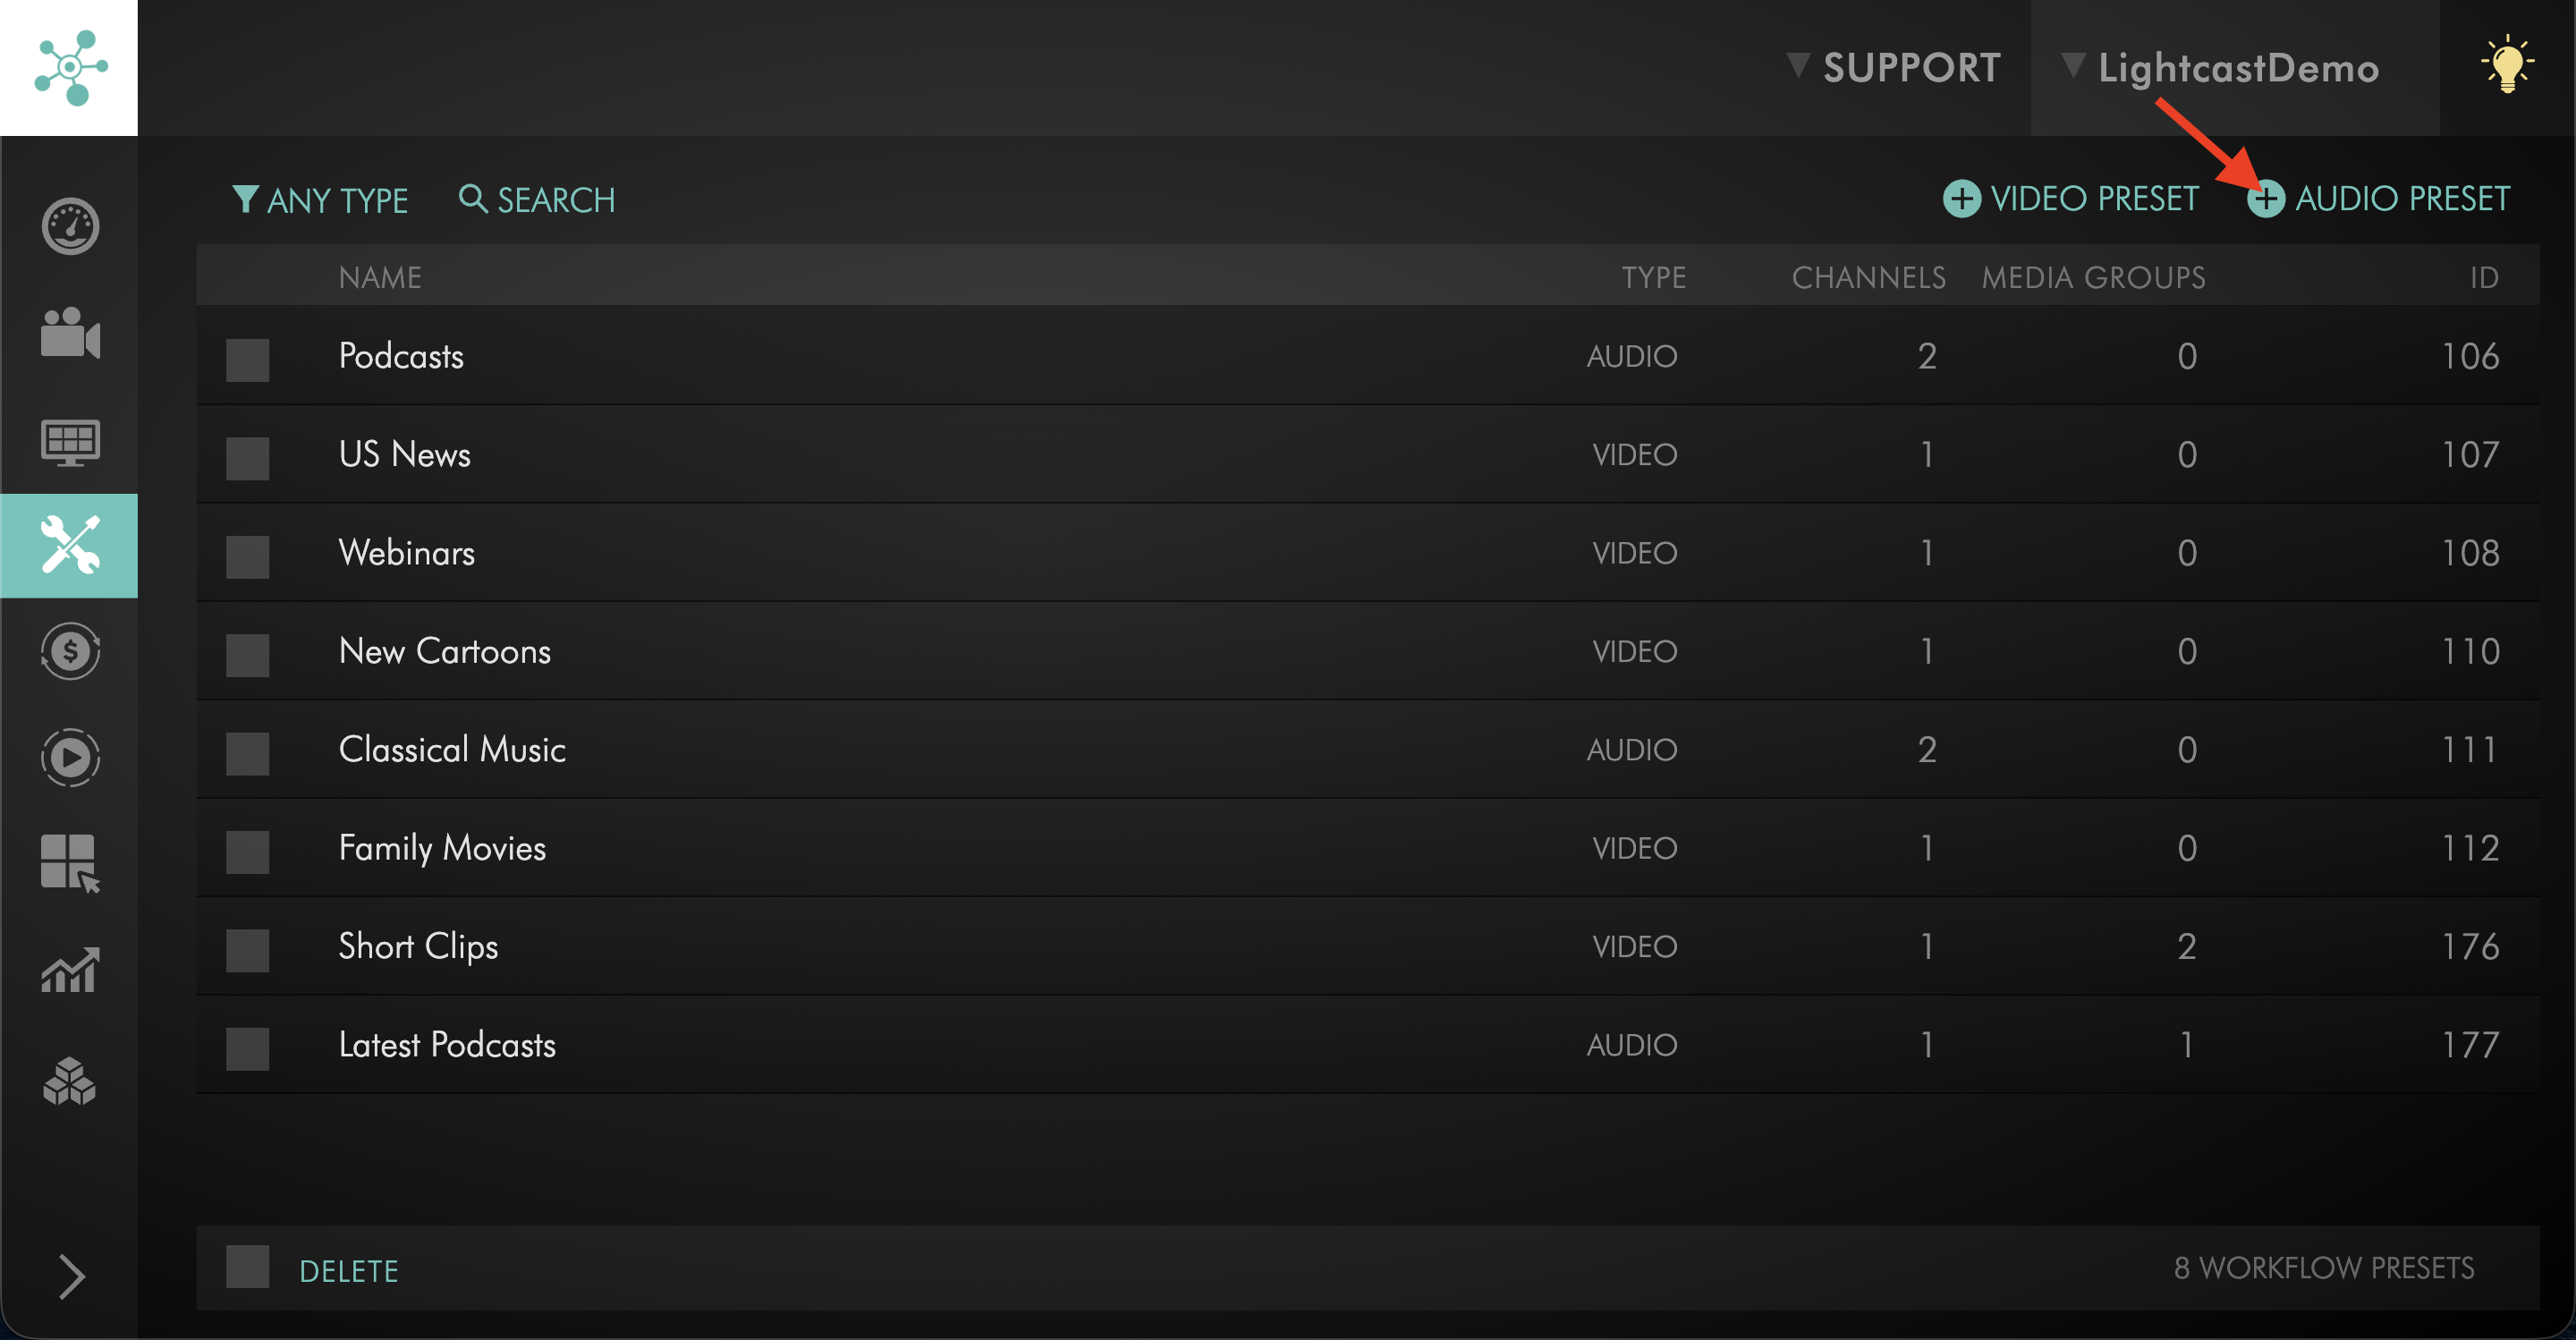
Click + AUDIO PRESET.
Step 4
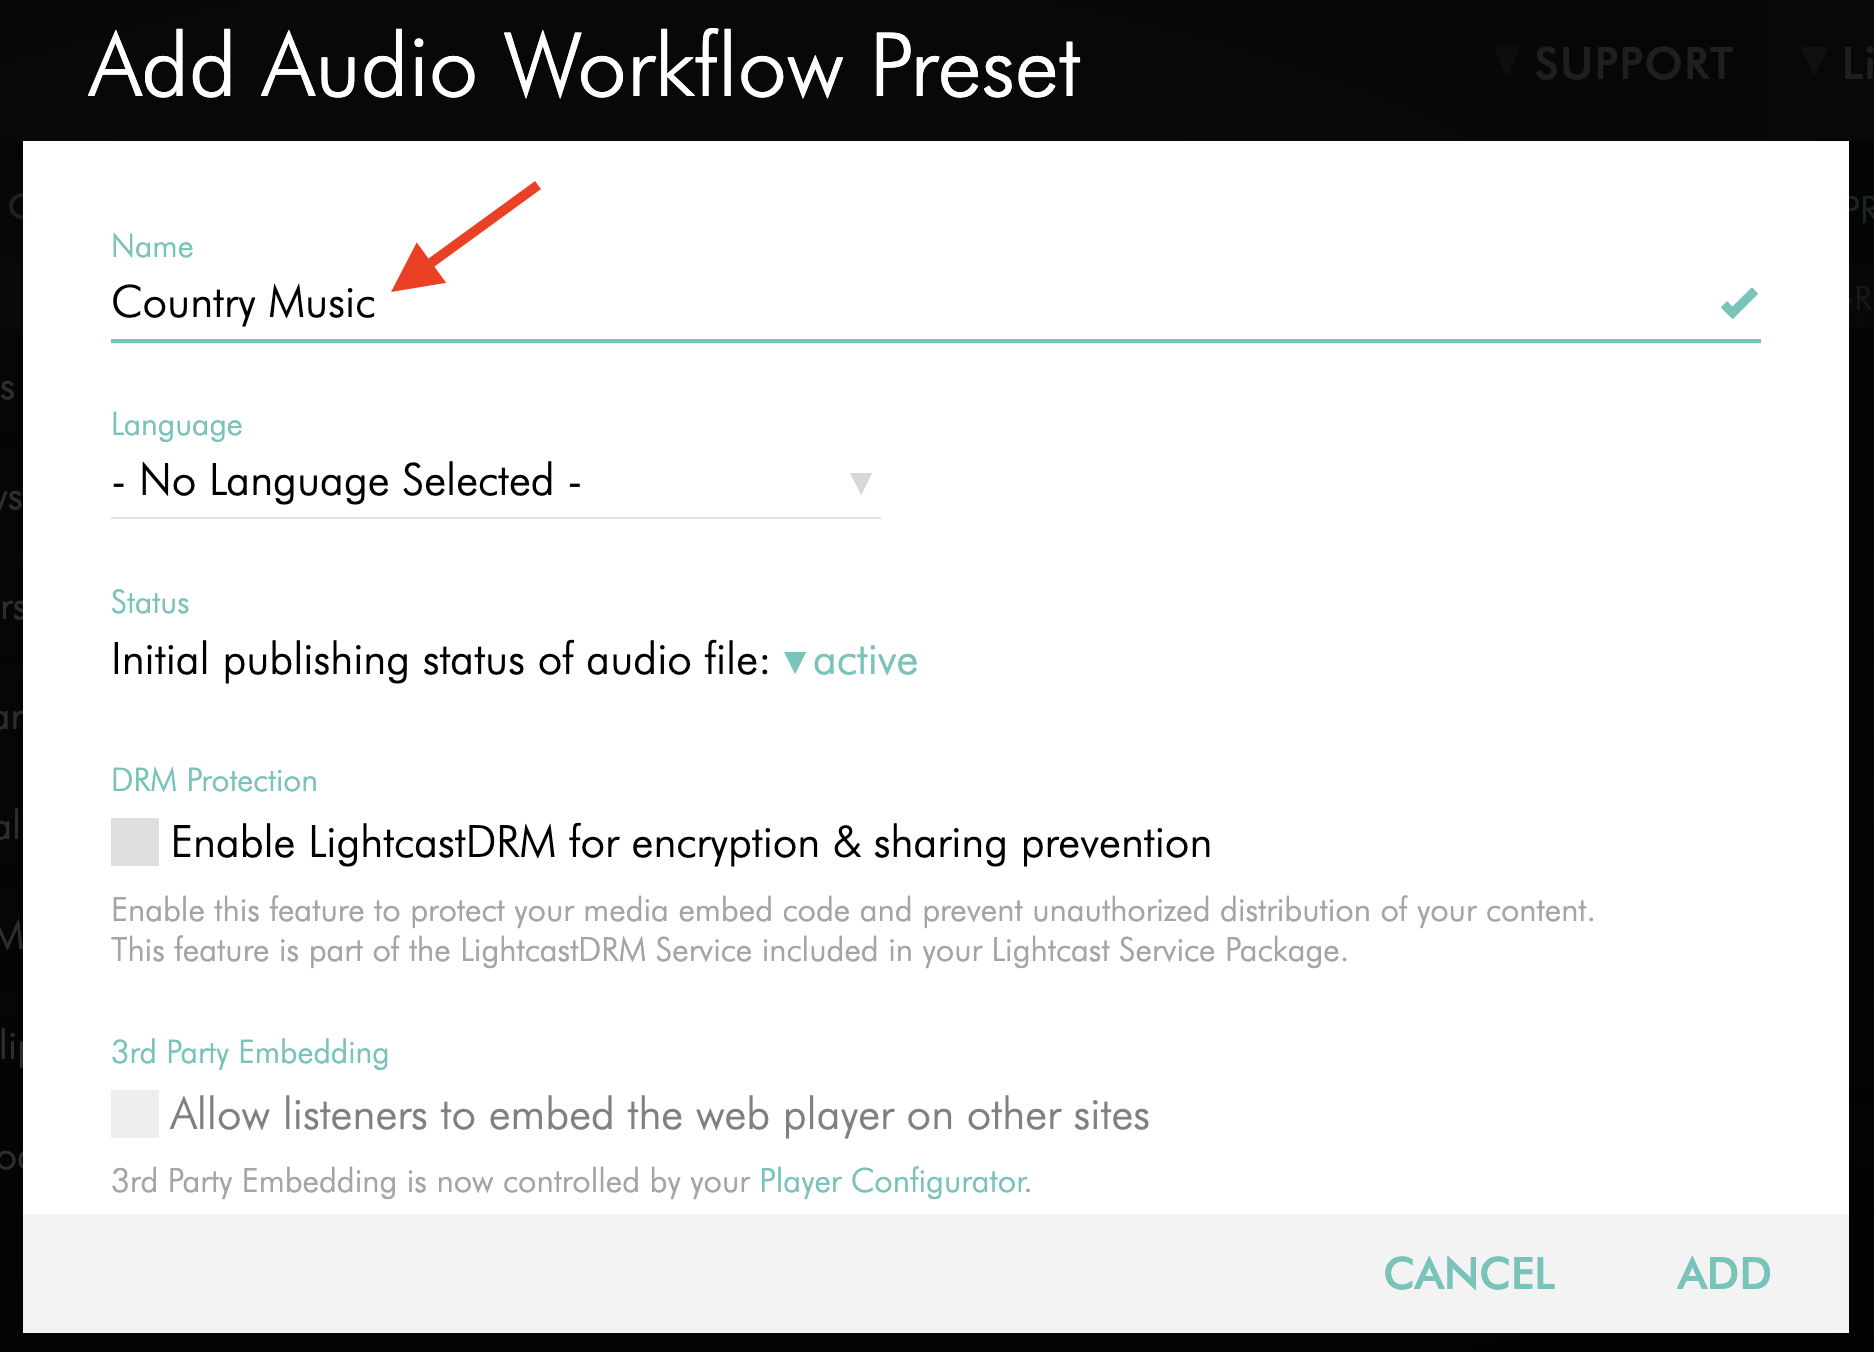
Enter a clear name for the preset.
Use a clear name so your team can quickly recognize when to use it. For example, you might name a preset based on the content type, destination, or publishing workflow.
Step 5
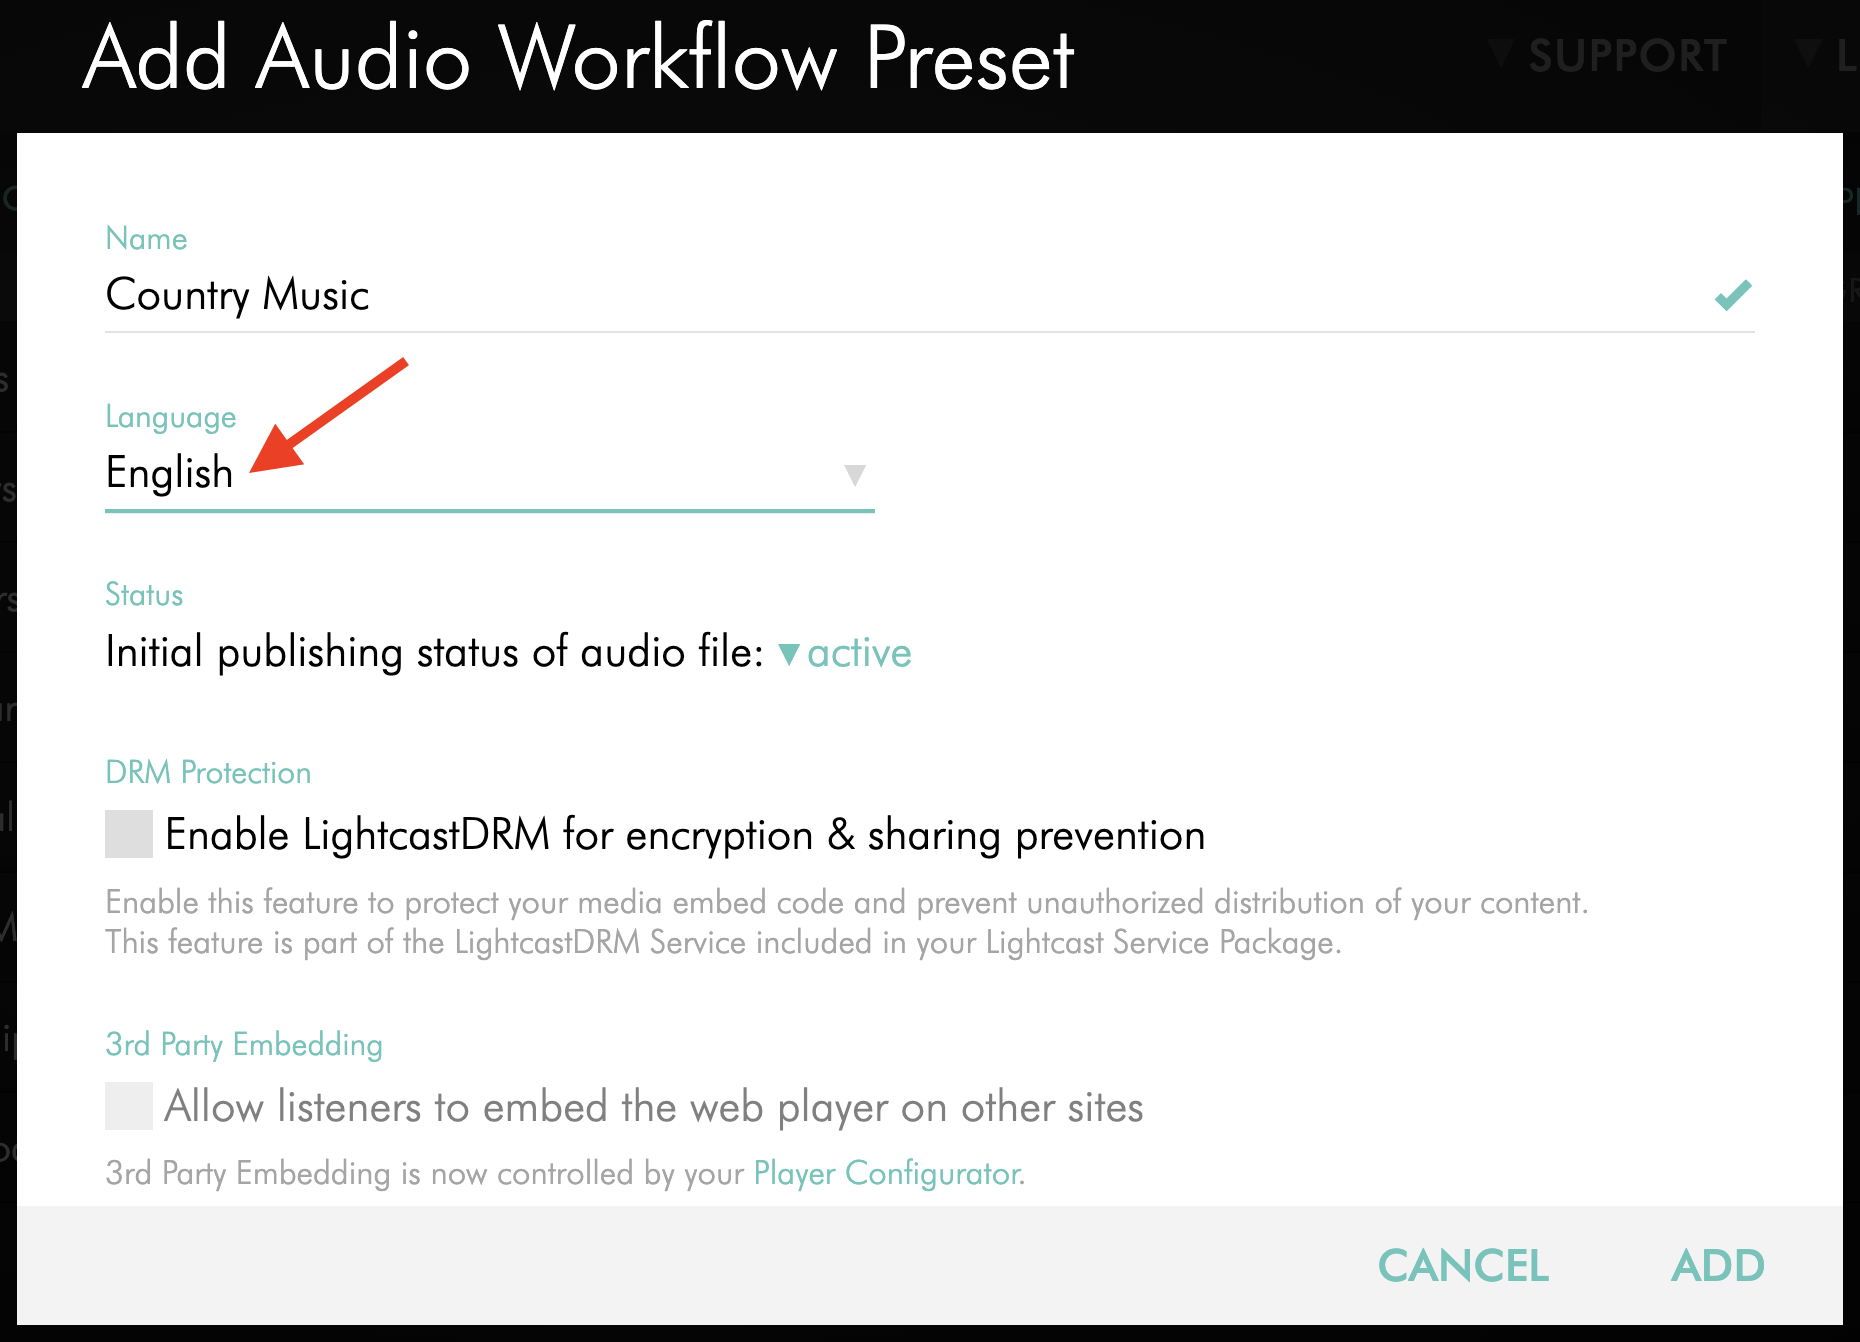
Select the language setting for the media uploads that will use this preset.
Step 6
Select the preferred publishing status for the media items.
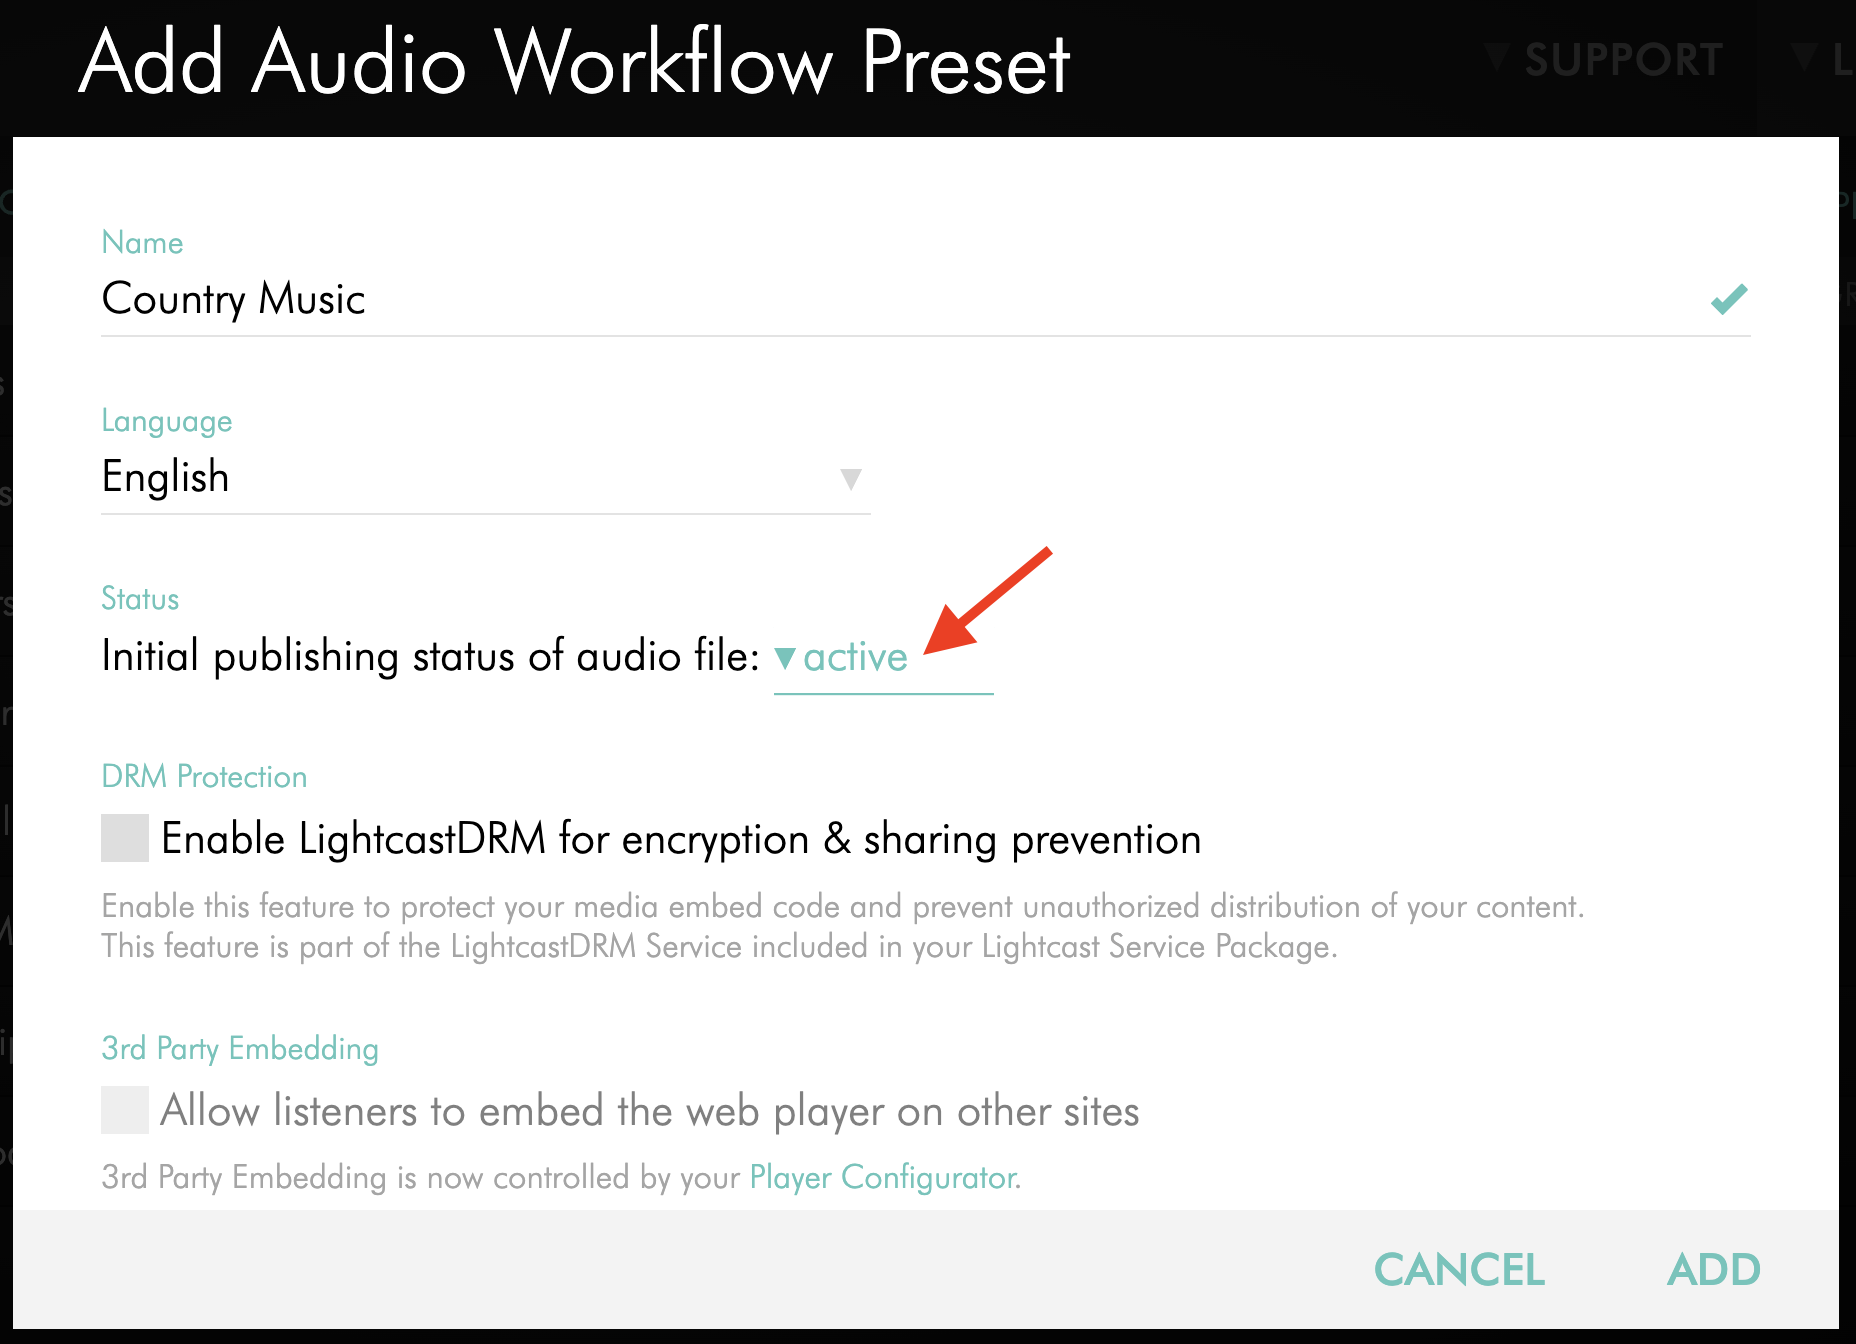
Step 7
Optional: If your service package includes Lightcast DRM, enable DRM Protection and select Level 1 or Level 2.
To learn more about Lightcast DRM, see: Lightcast DRM explained
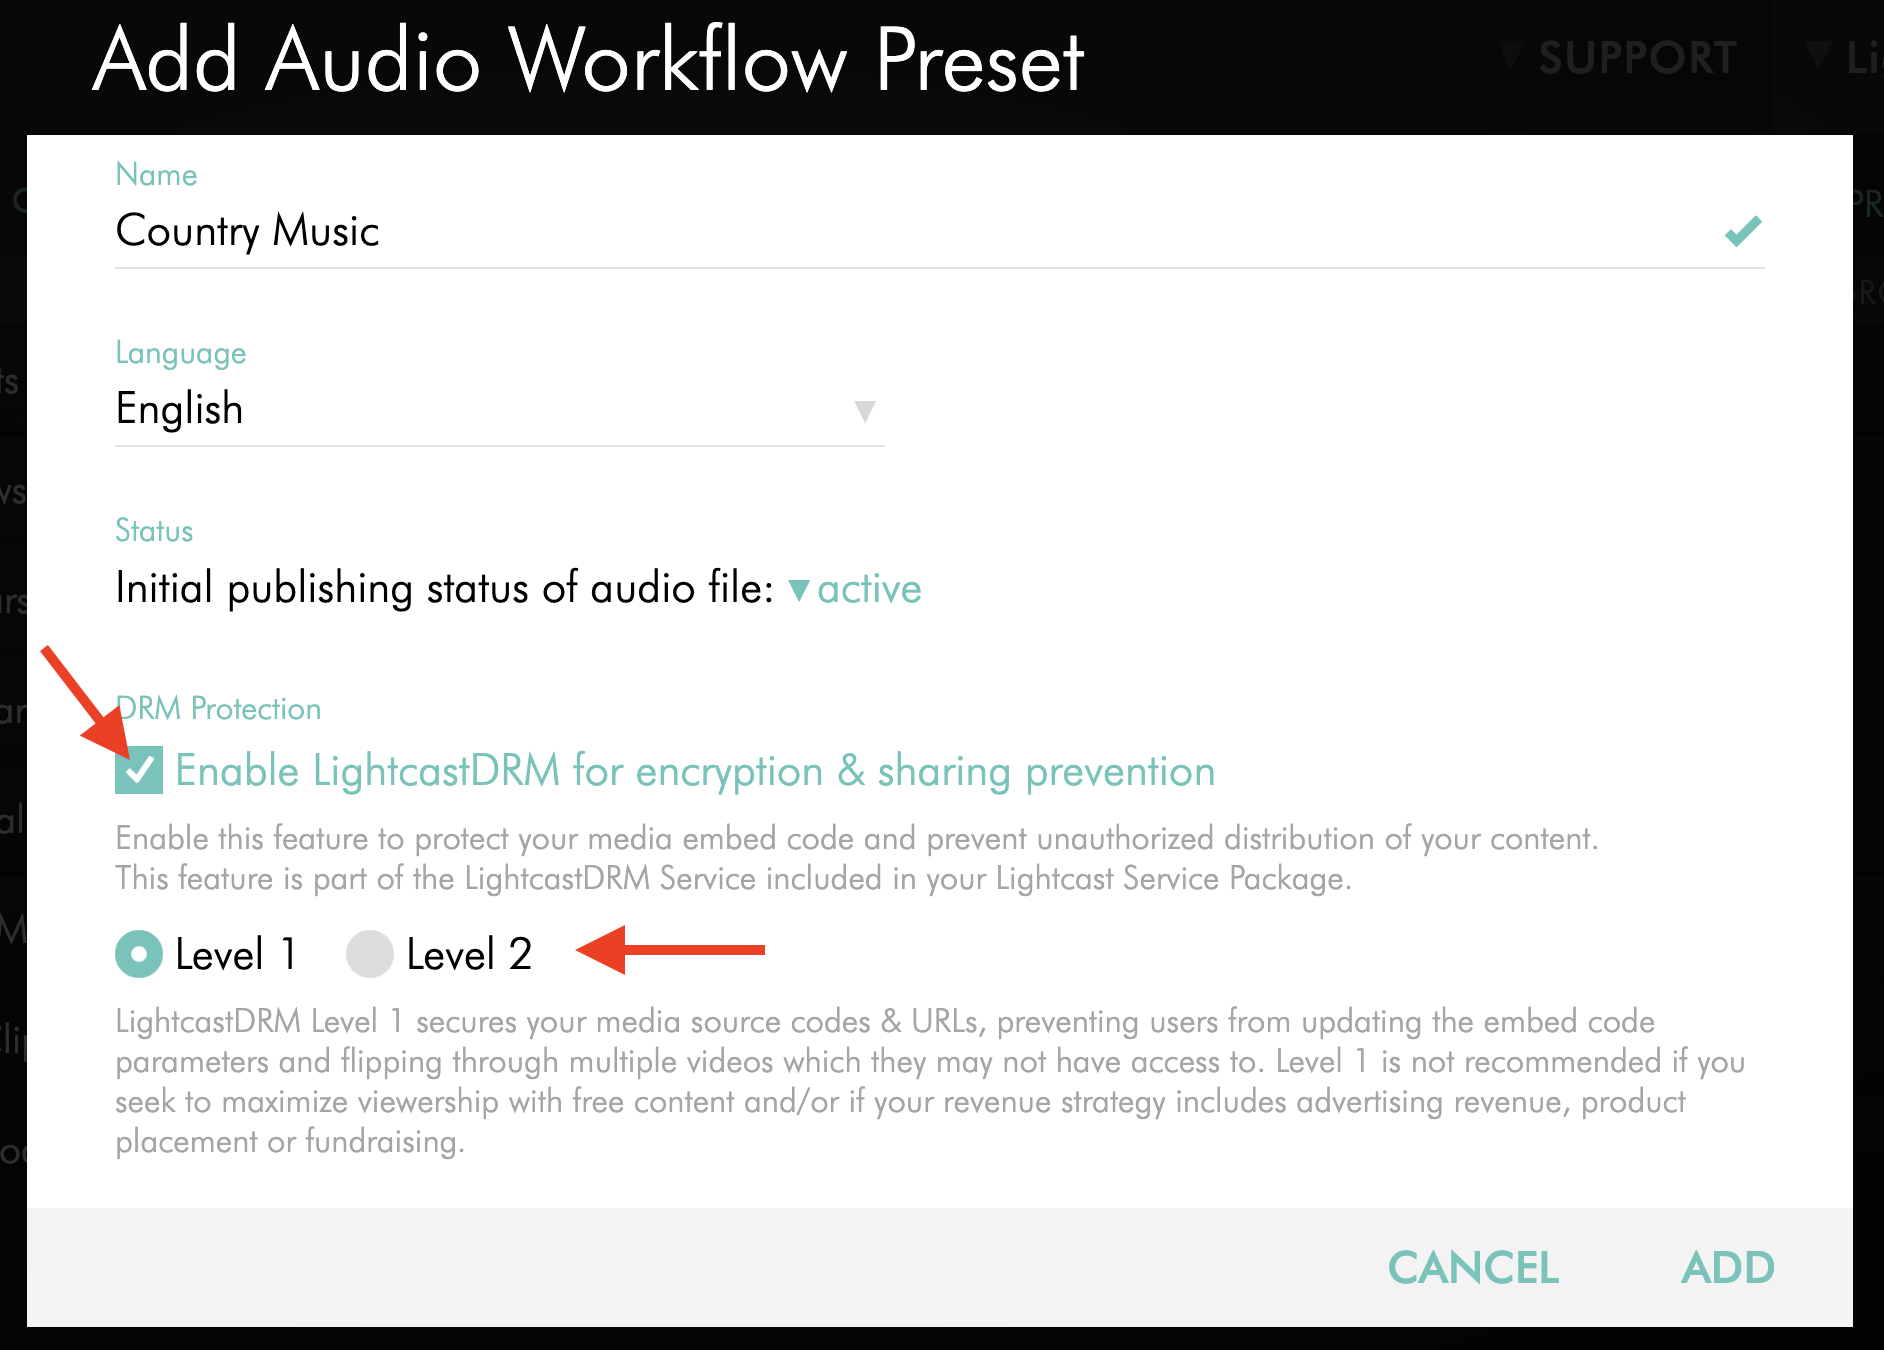
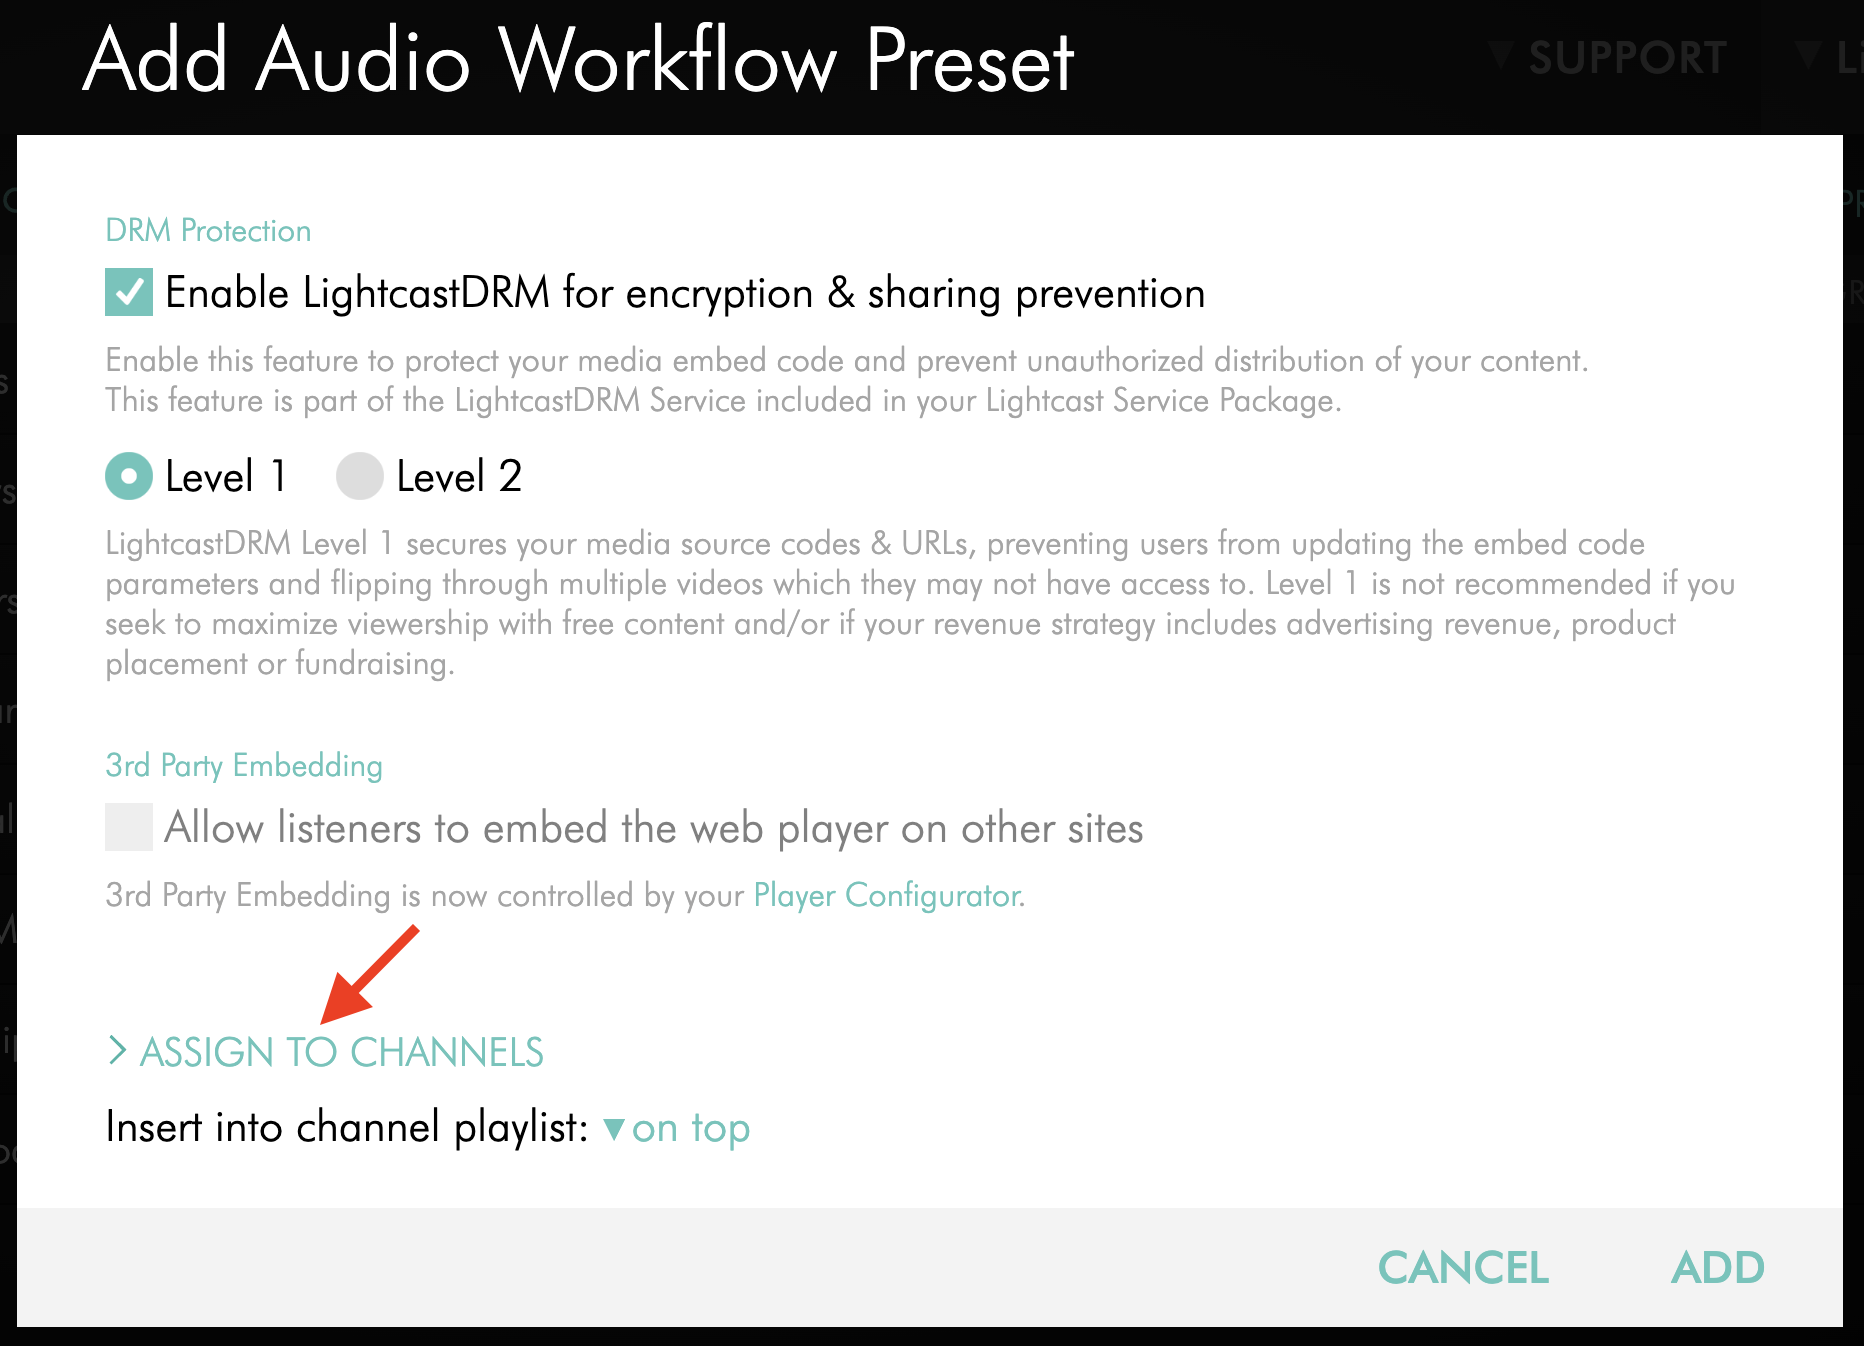
Step 8
Click ASSIGN TO CHANNELS to open the Channel assignment pop-up window.
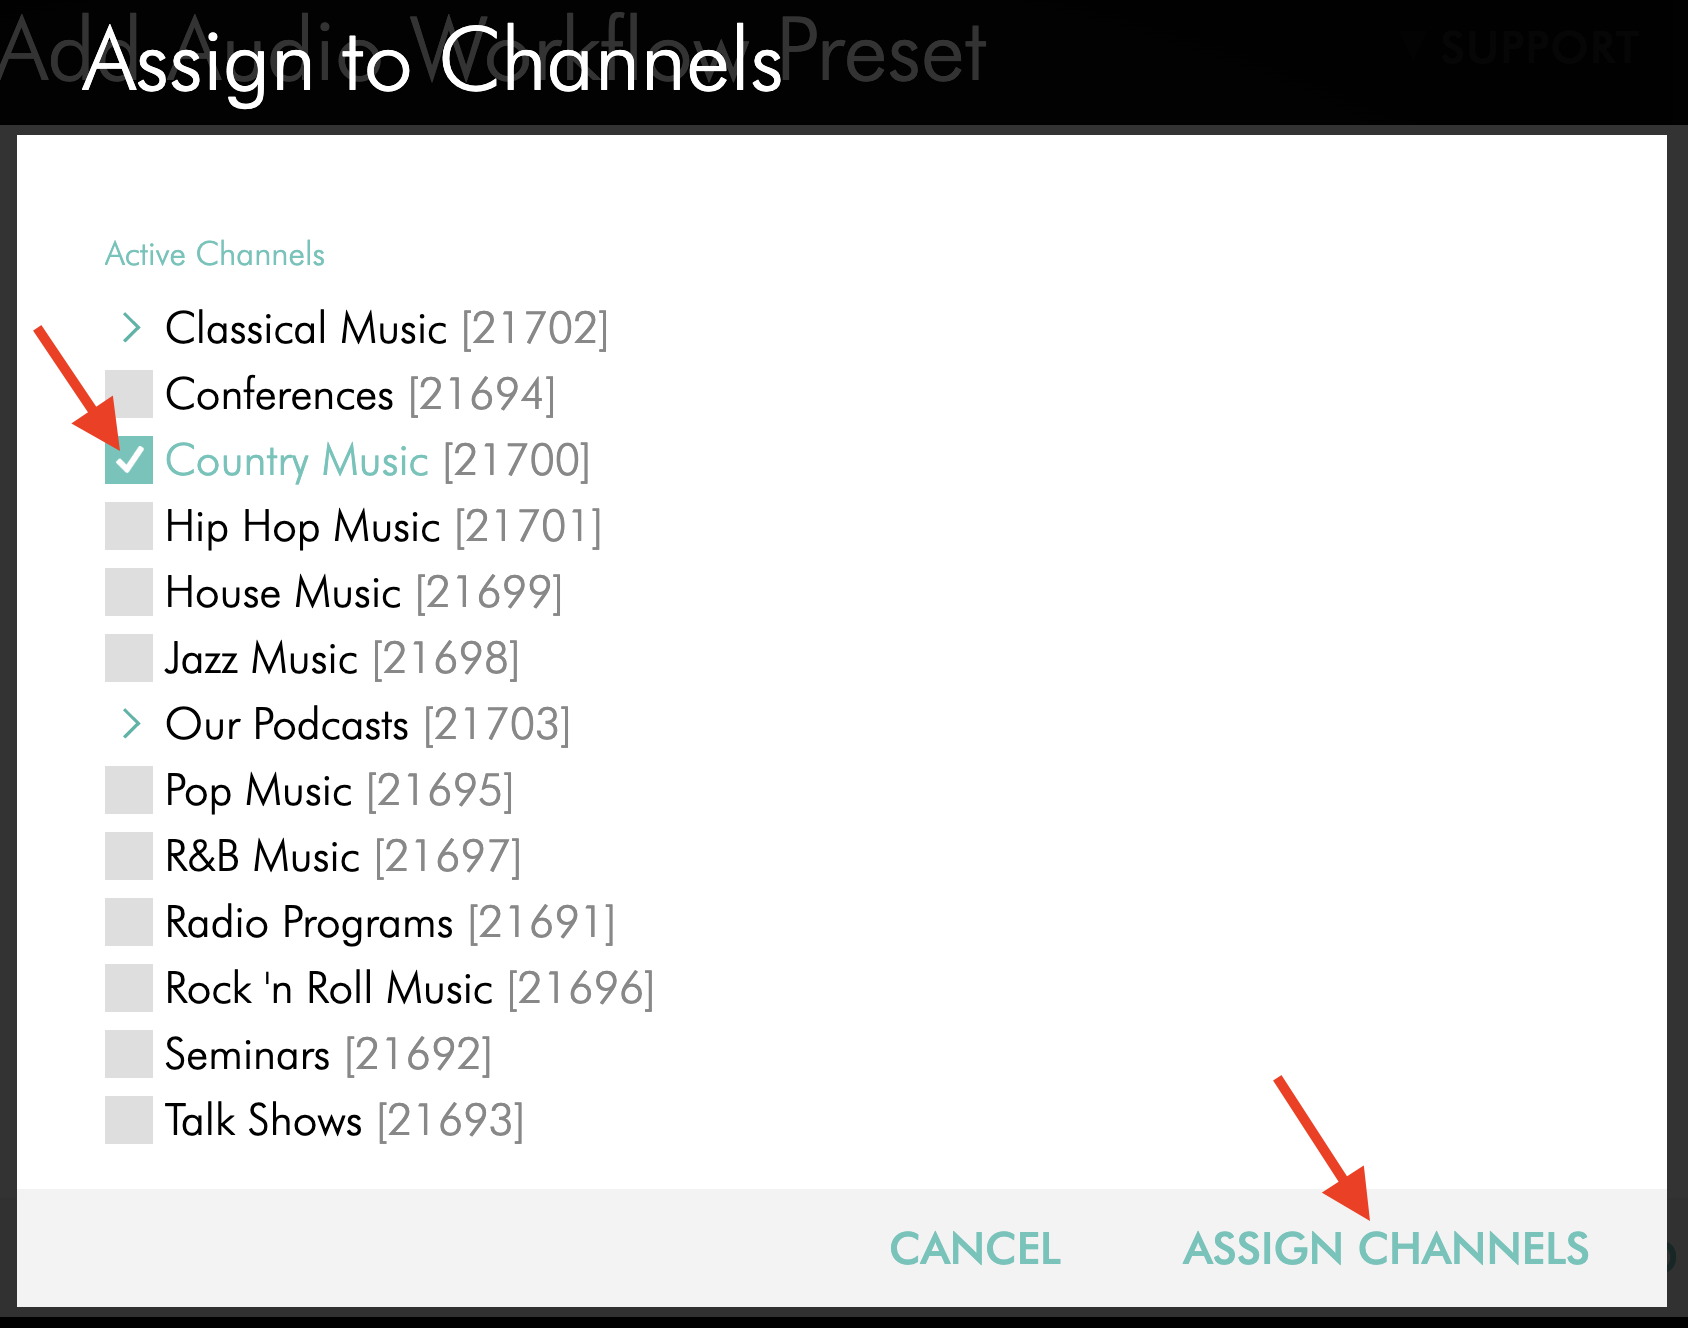
Step 9
In the Channel assignment pop-up window, select the Channel or Sub-Channel the media items should be assigned to when using this preset, then click ASSIGN CHANNELS.
Step 10
Select the playlist position for the uploaded content:
on top places the content at the beginning of the Channel or Sub-Channel playlist
at the bottom places the content at the end of the Channel or Sub-Channel playlist
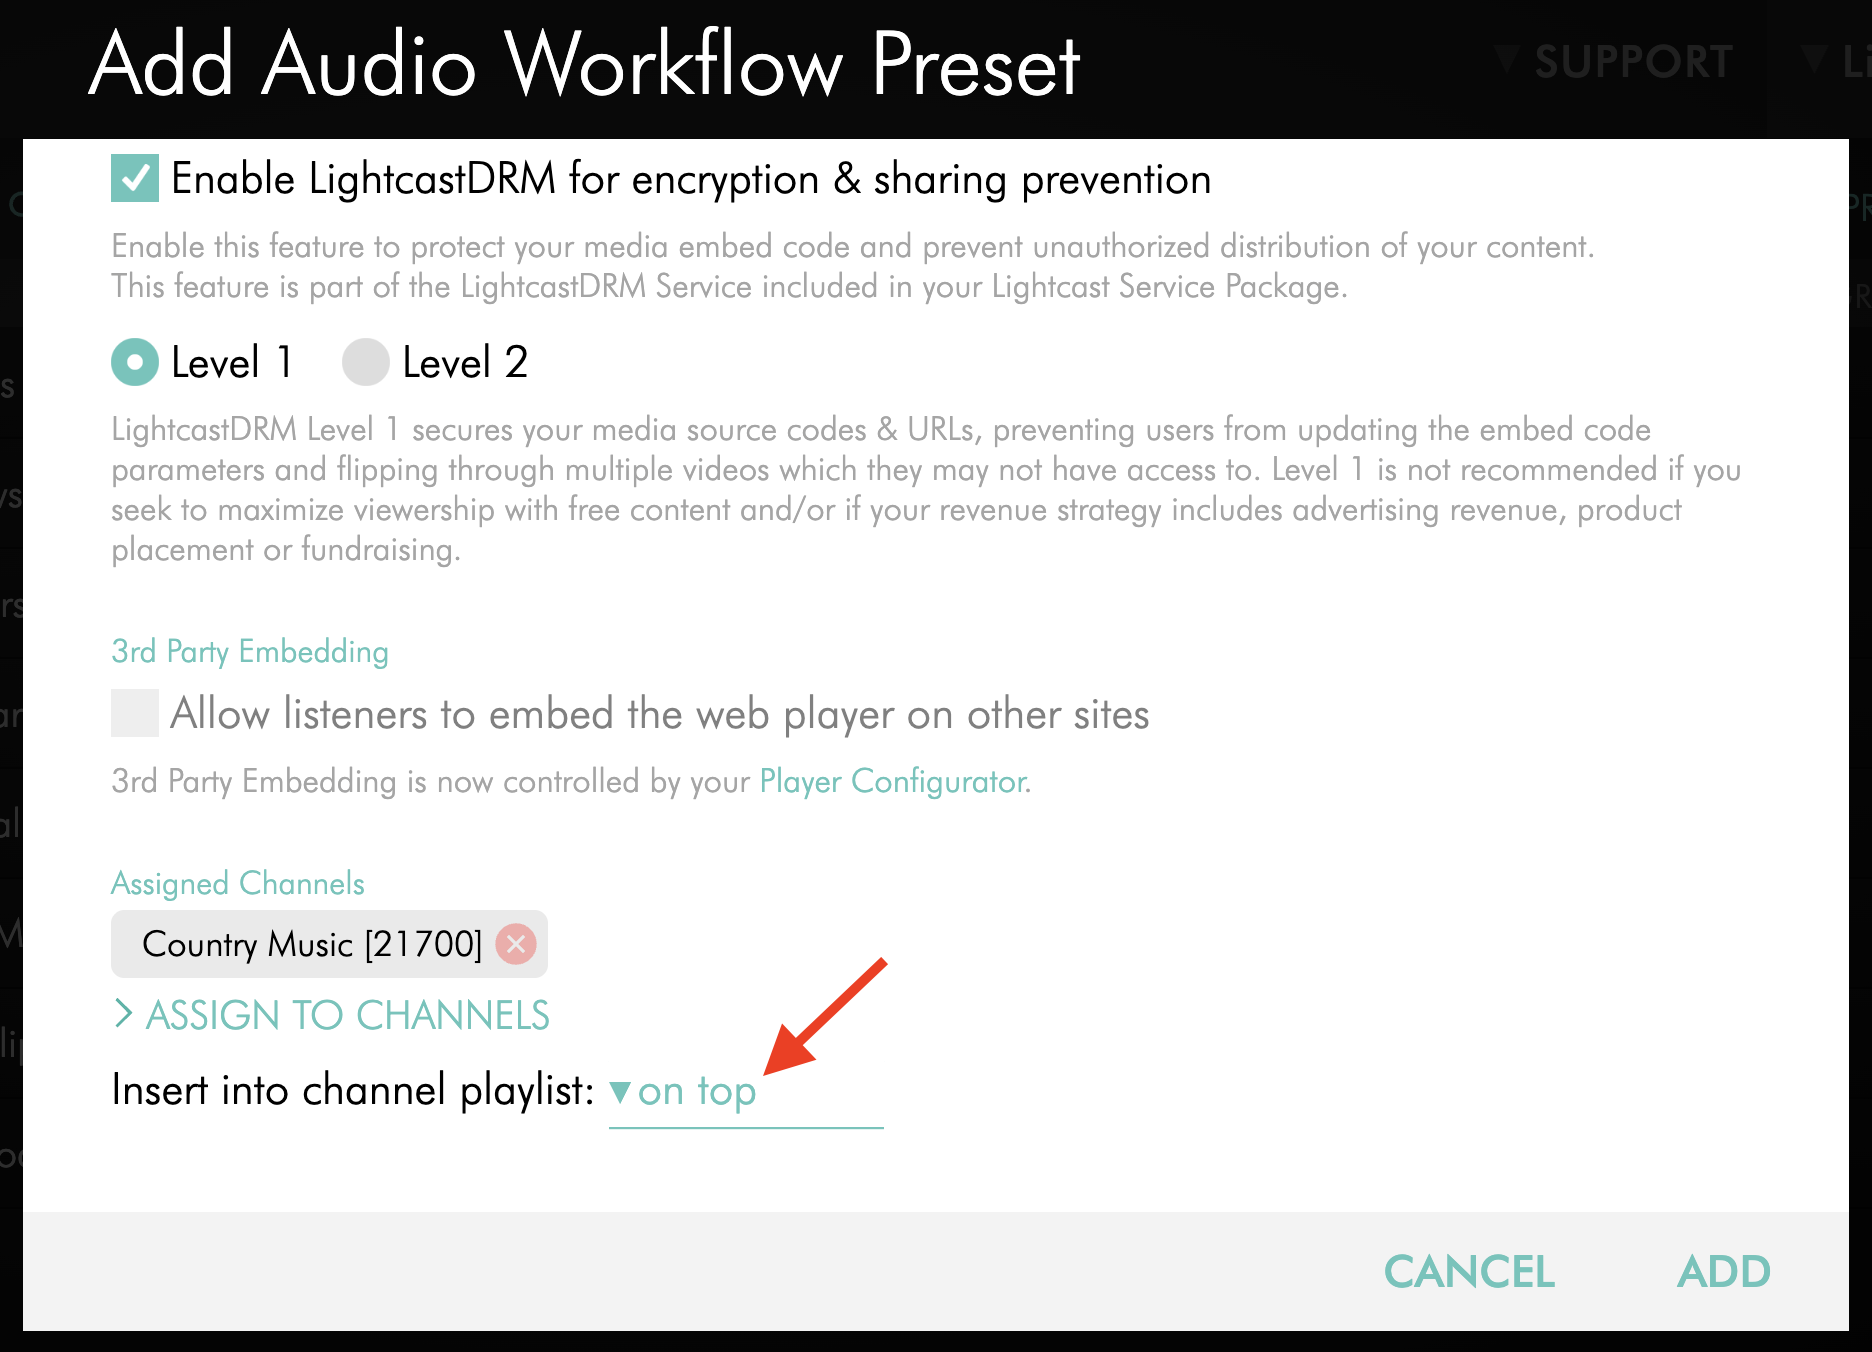
Step 11
Optional: If your service package includes Media Groups, click ASSIGN TO MEDIA GROUPS and select the Media Group you want to use for the audio uploads in this preset.
To learn how to create a Media Group, see: How to create a Media Group
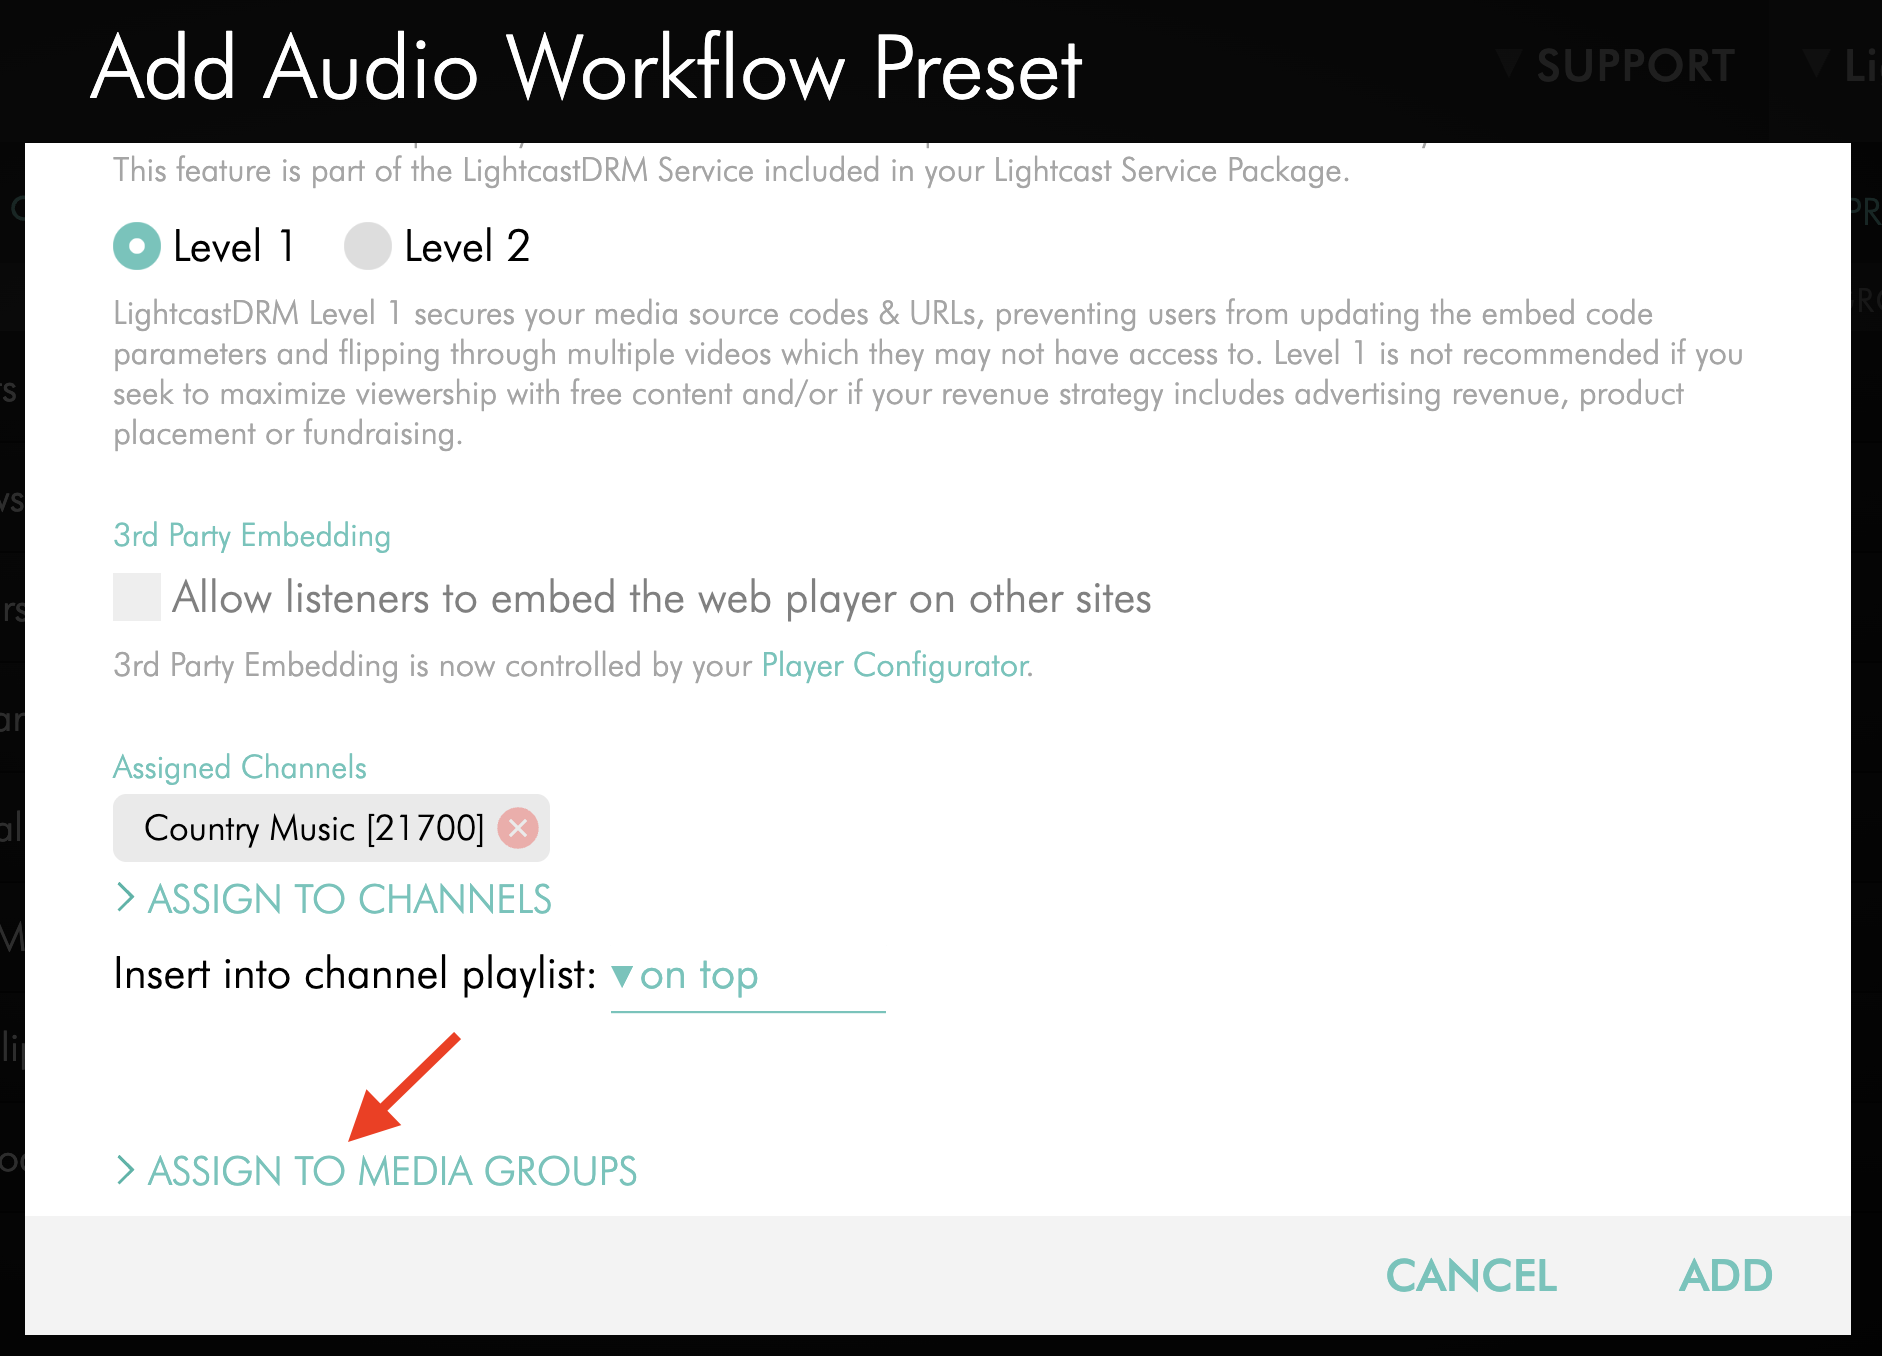
Step 12
Click ADD to save the Workflow Preset.
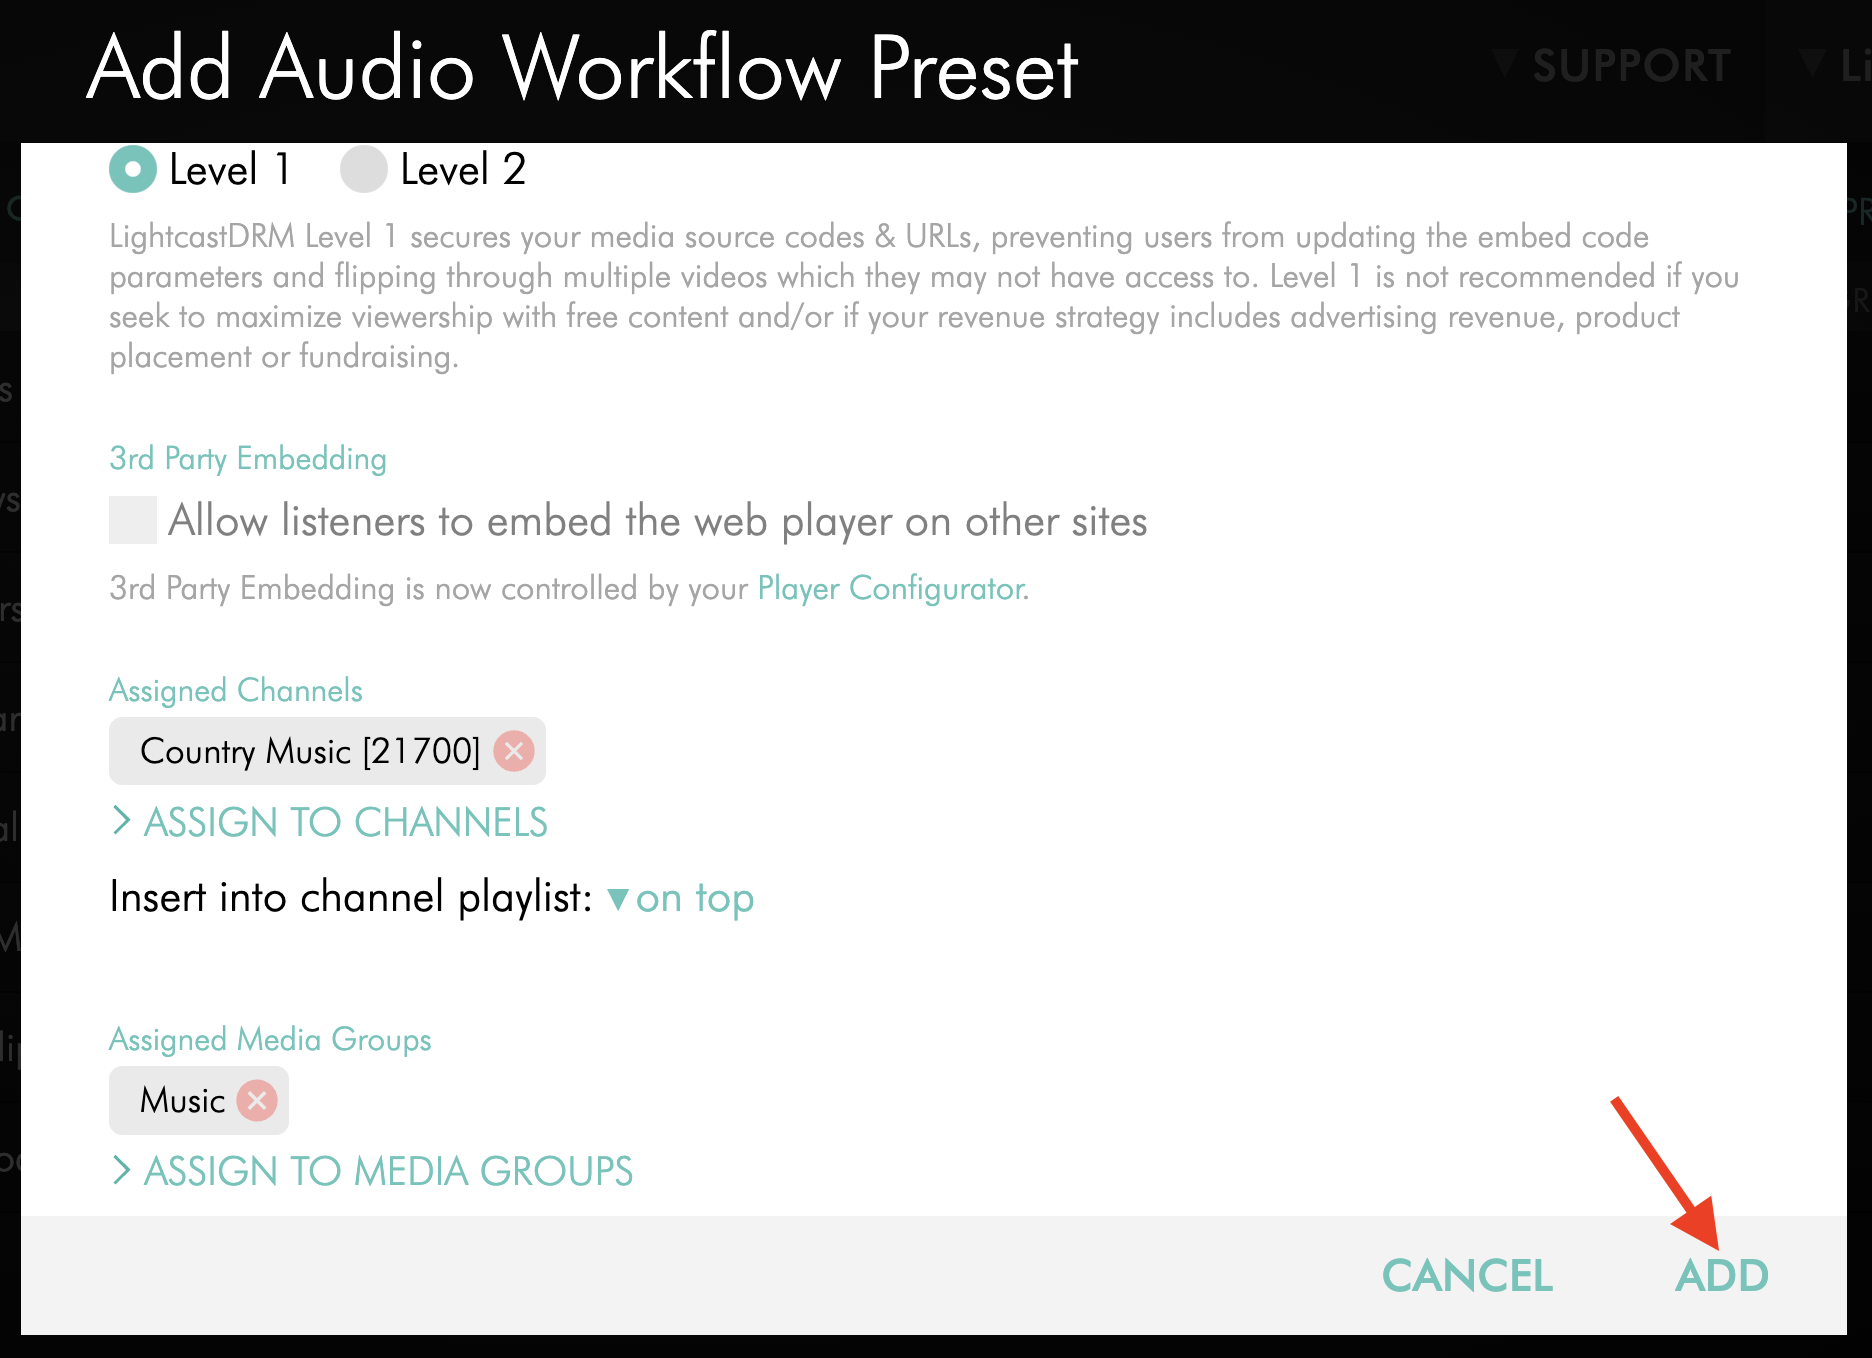
The Workflow Preset will appear in your Workflow Presets list and will be available to select during supported uploads.
To learn how to edit or update an existing preset, see: How to manage Workflow Presets
To learn how to use a Workflow Preset during upload, see the uploader guides in the Additional related resources section below.
FAQs
Can Workflow Presets be used for both video and audio uploads?
Yes. Workflow Presets can be used for both video and audio workflows.
Can I apply a Workflow Preset after upload?
No. Workflow Presets must be selected during the upload process before the media is sent to encoding. They cannot be applied after upload.
What settings can a Workflow Preset automate?
A Workflow Preset can automate Channel and Sub-Channel assignment, Media Group assignment, DRM selection, initial publishing status, Watermark settings, and language selection.
Should I create separate Workflow Presets for different workflows?
Yes, in many cases that is the best approach. Separate presets help keep your upload process organized and reduce the chance of applying the wrong settings to a media item.
Pricing
Workflow Presets is available on POWER packages and up.
If you do not have access to this feature, you can upgrade to one of our latest plans or contact your account manager.
Video tutorial: Workflow Presets
https://support.lightcast.com/908888-Workflow-Presets
Related resources to add:
articles about Channels and Sub Channels