
How to create and organize Sub-Channels in the Media Cloud
Overview
This article explains how to organize your content using Channels and Sub-Channels in the Lightcast Media Cloud. It is helpful if you are building a larger audio or video library, want to improve navigation for viewers, or need to decide whether content should be grouped into a new Channel or a Sub-Channel.
In general, use a Channel for a main library and use Sub-Channels to divide that library into smaller sections. This can make your content easier to manage in the Media Cloud and easier for viewers to browse in your publishing properties.
How it works
Channels are the main containers for your on-demand content in the Lightcast Media Cloud. AOD Channels are used for audio libraries, and VOD Channels are used for video libraries. If you want to separate major content types, audiences, brands, or destinations, it usually makes sense to create separate Channels.
Sub-Channels are created inside an existing AOD or VOD Channel. They add a second level of organization within that parent Channel. This is useful when your content belongs in one main library but still needs to be divided into smaller groups, such as by topic, series, speaker, year, or event type.
As a best practice, create a new Channel when the content should live in its own main library. Create a Sub-Channel when the content belongs inside an existing library but needs another layer of organization.
For the best viewer experience, the highest recommended number of media items in a single playlist is 30. If a Channel contains more than 30 items, consider organizing that content into Sub-Channels or spreading it across multiple Channels.
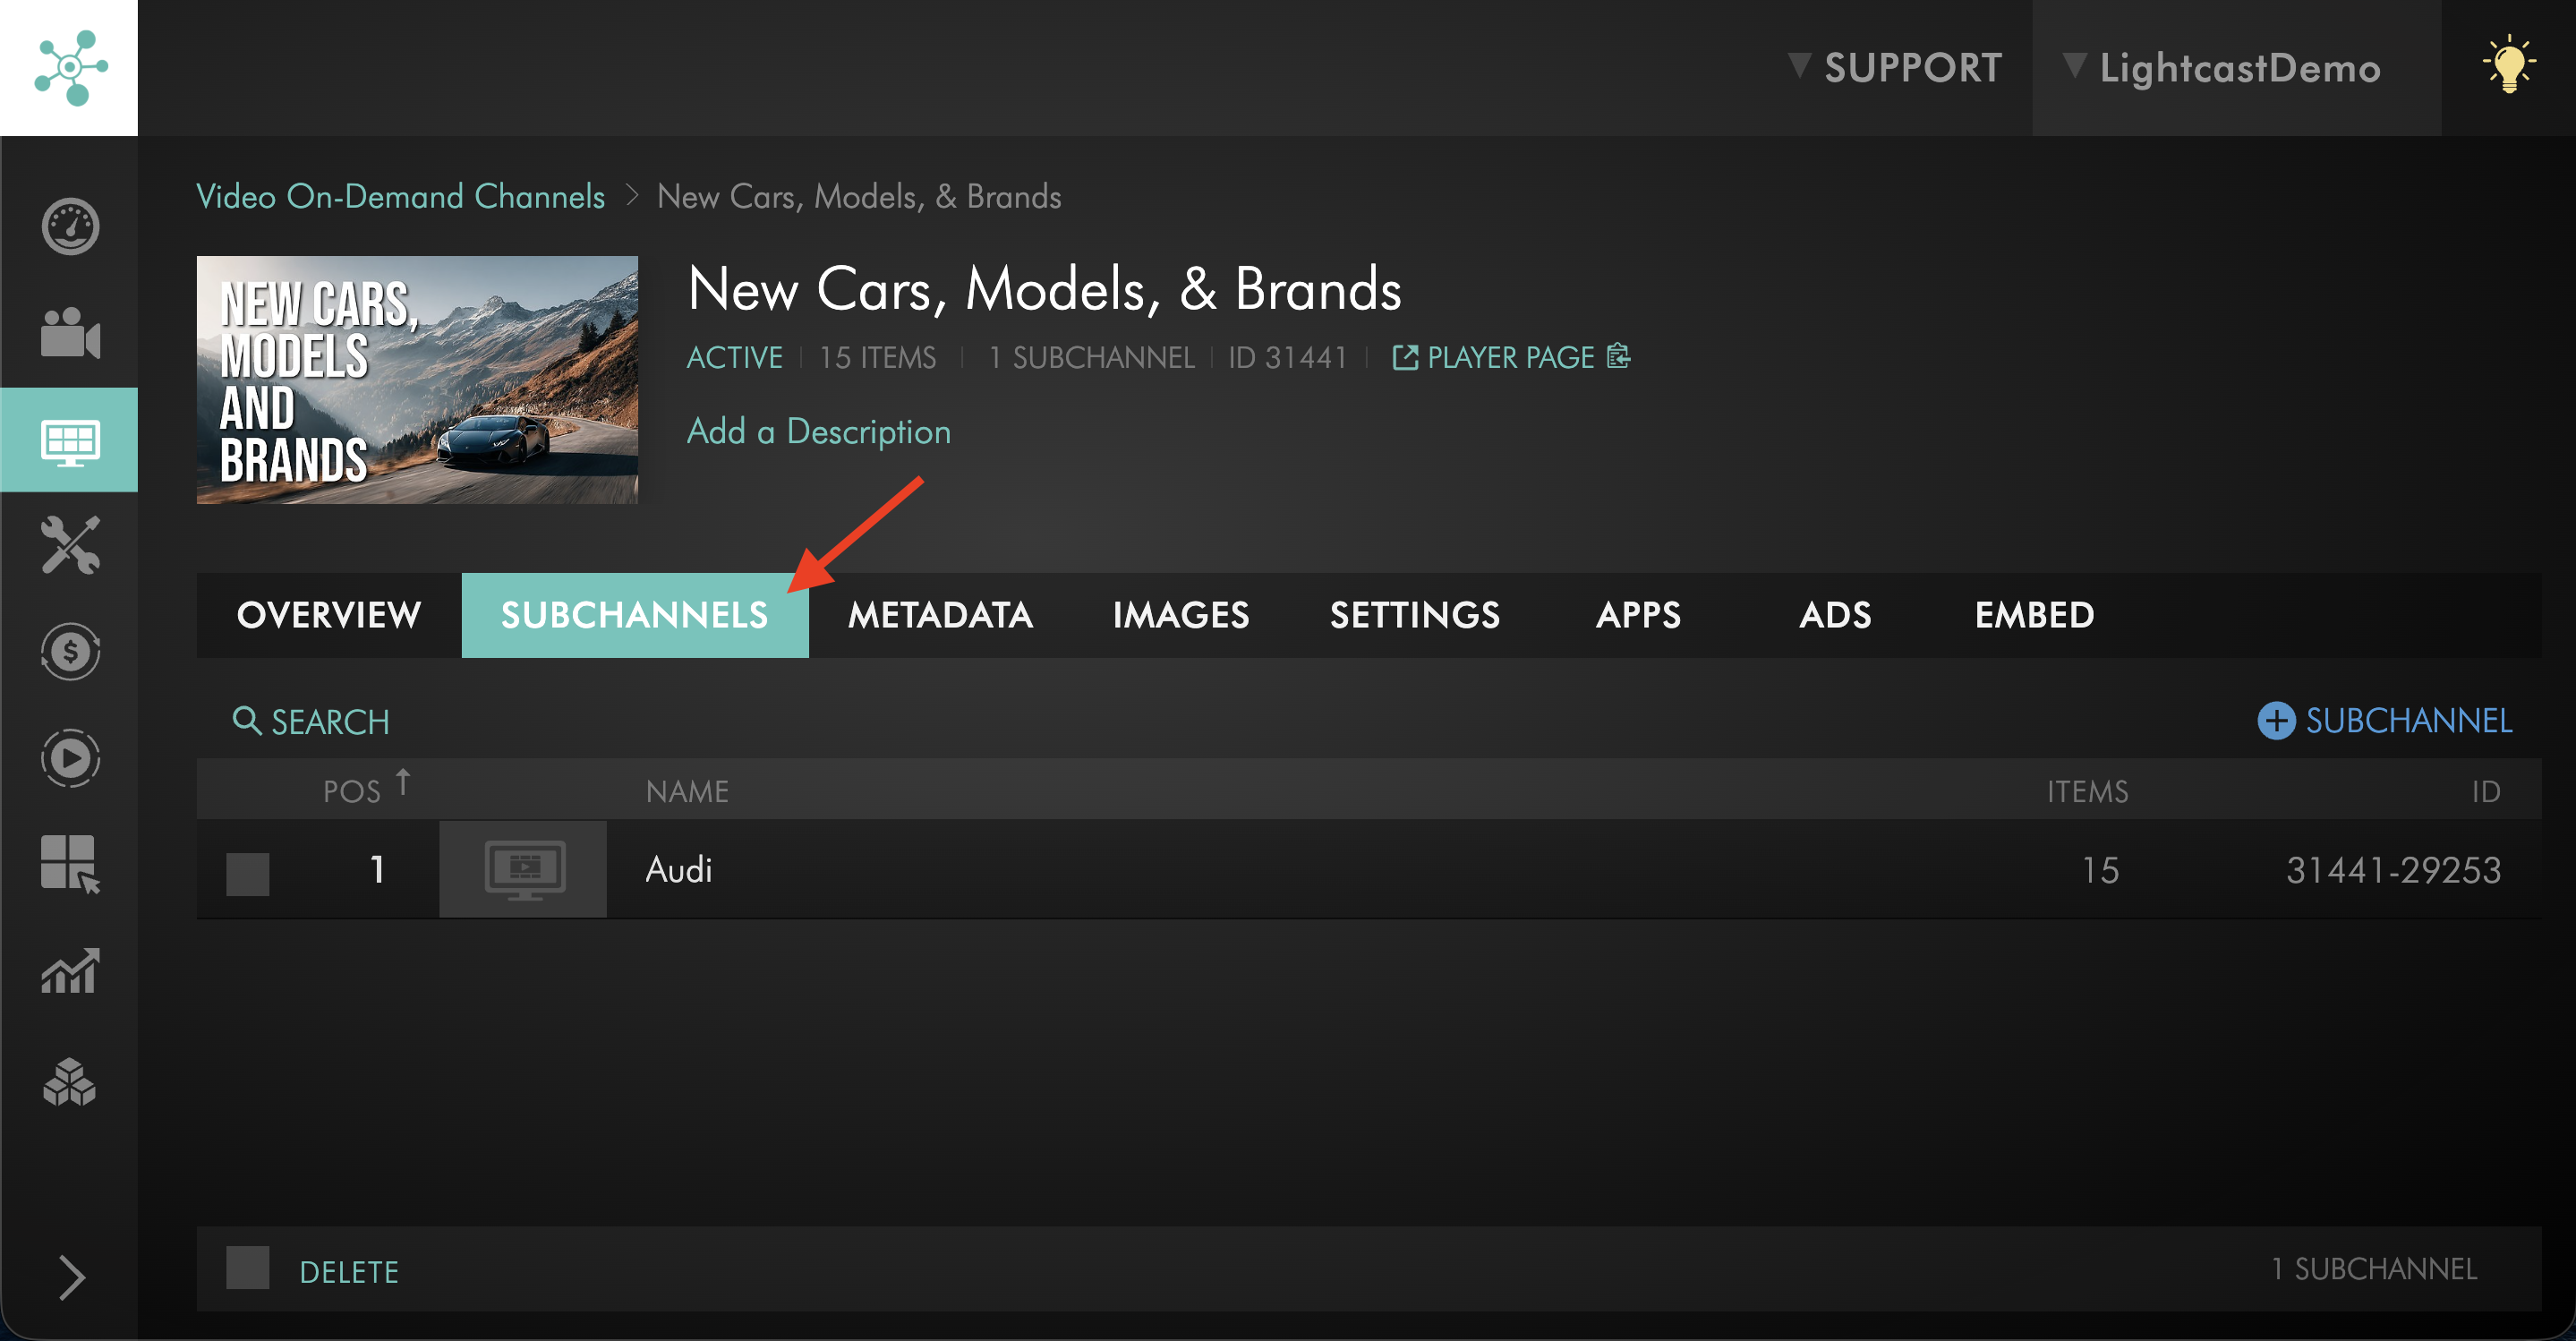
It is also important to understand what happens when you create the first Sub-Channel inside a Channel. All media currently assigned to that parent Channel will automatically be moved into that first Sub-Channel. After that, you can remove media from that Sub-Channel and reassign it as needed.
If Sub-Channels are integrated into your apps, they can also create a clearer browsing experience across publishing platforms such as Roku, Fire TV, and Android TV. It is recommended to create Sub-Channel thumbnails if your apps display them.
How do I decide whether to create a new Channel or a Sub-Channel?
Create a new Channel when:
you want a separate main library
the content should have its own player, structure, or destination
the content does not belong under an existing Channel
Create a Sub-Channel when:
the content belongs inside an existing AOD or VOD Channel
you want to divide one larger library into smaller sections
you want viewers to browse content by category, topic, series, speaker, year, or another grouping
Instructions
How do I create a Sub-Channel?
Step 1
Log in to your Lightcast Media Cloud account.
Step 2
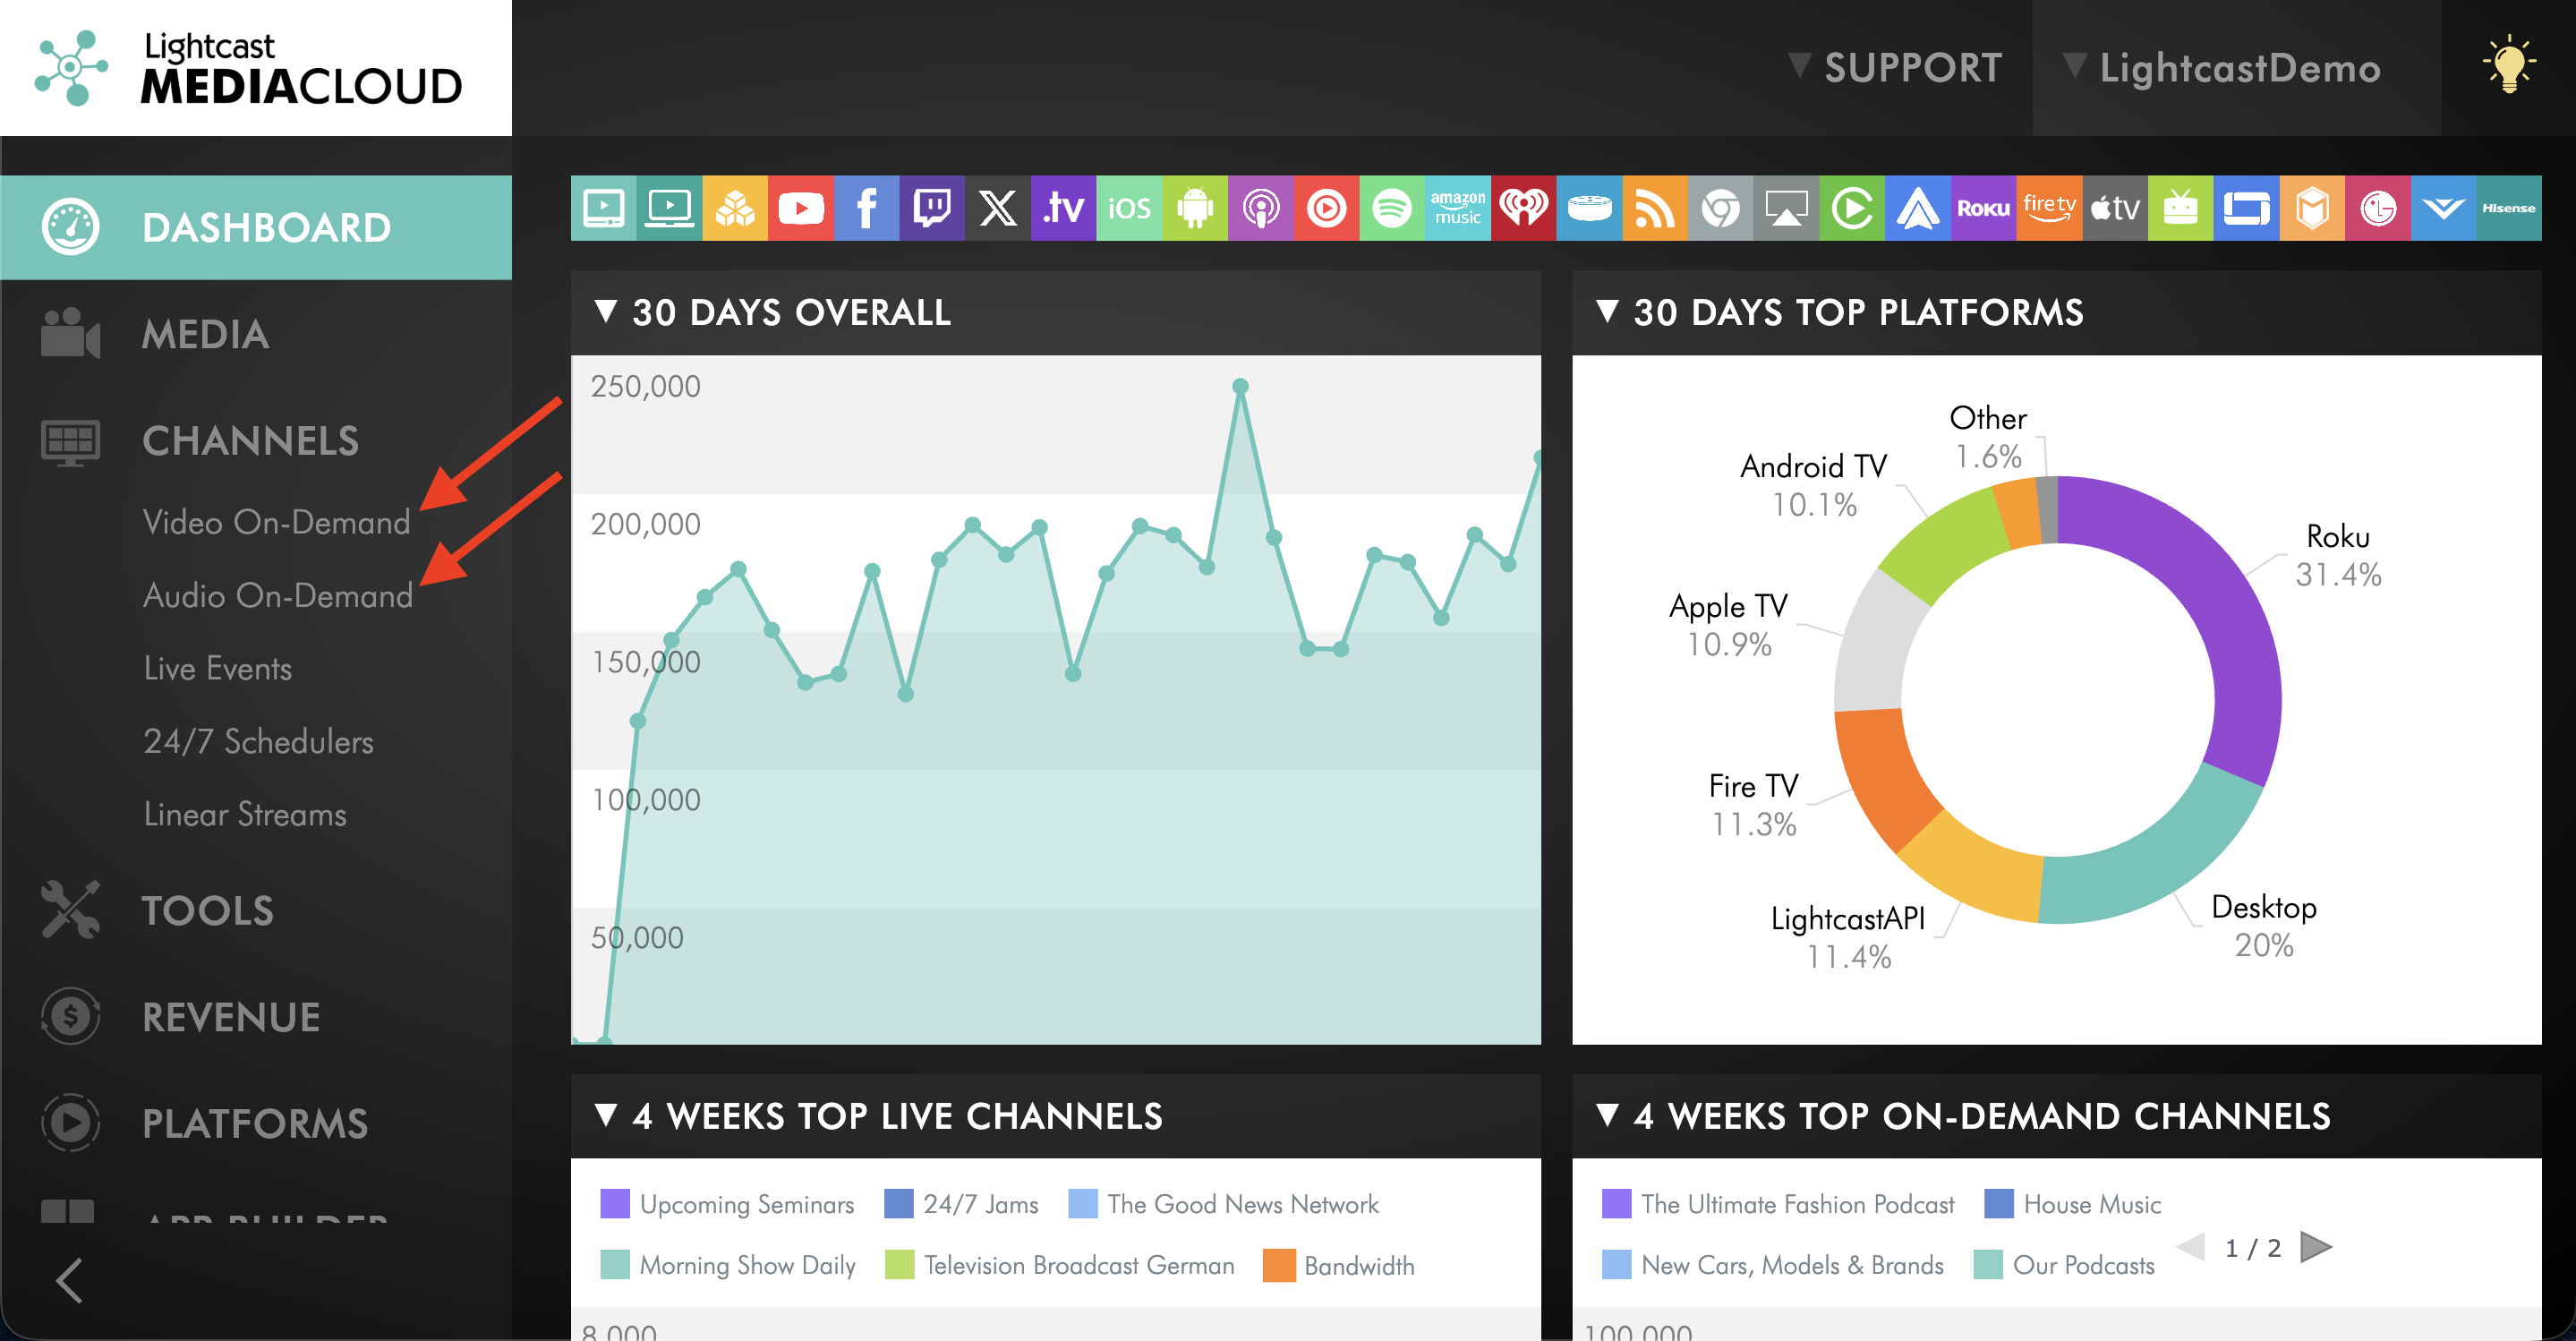
In the left-hand menu under CHANNELS, click Video On-Demand or Audio On-Demand, depending on the Channel you want to organize.
Step 3
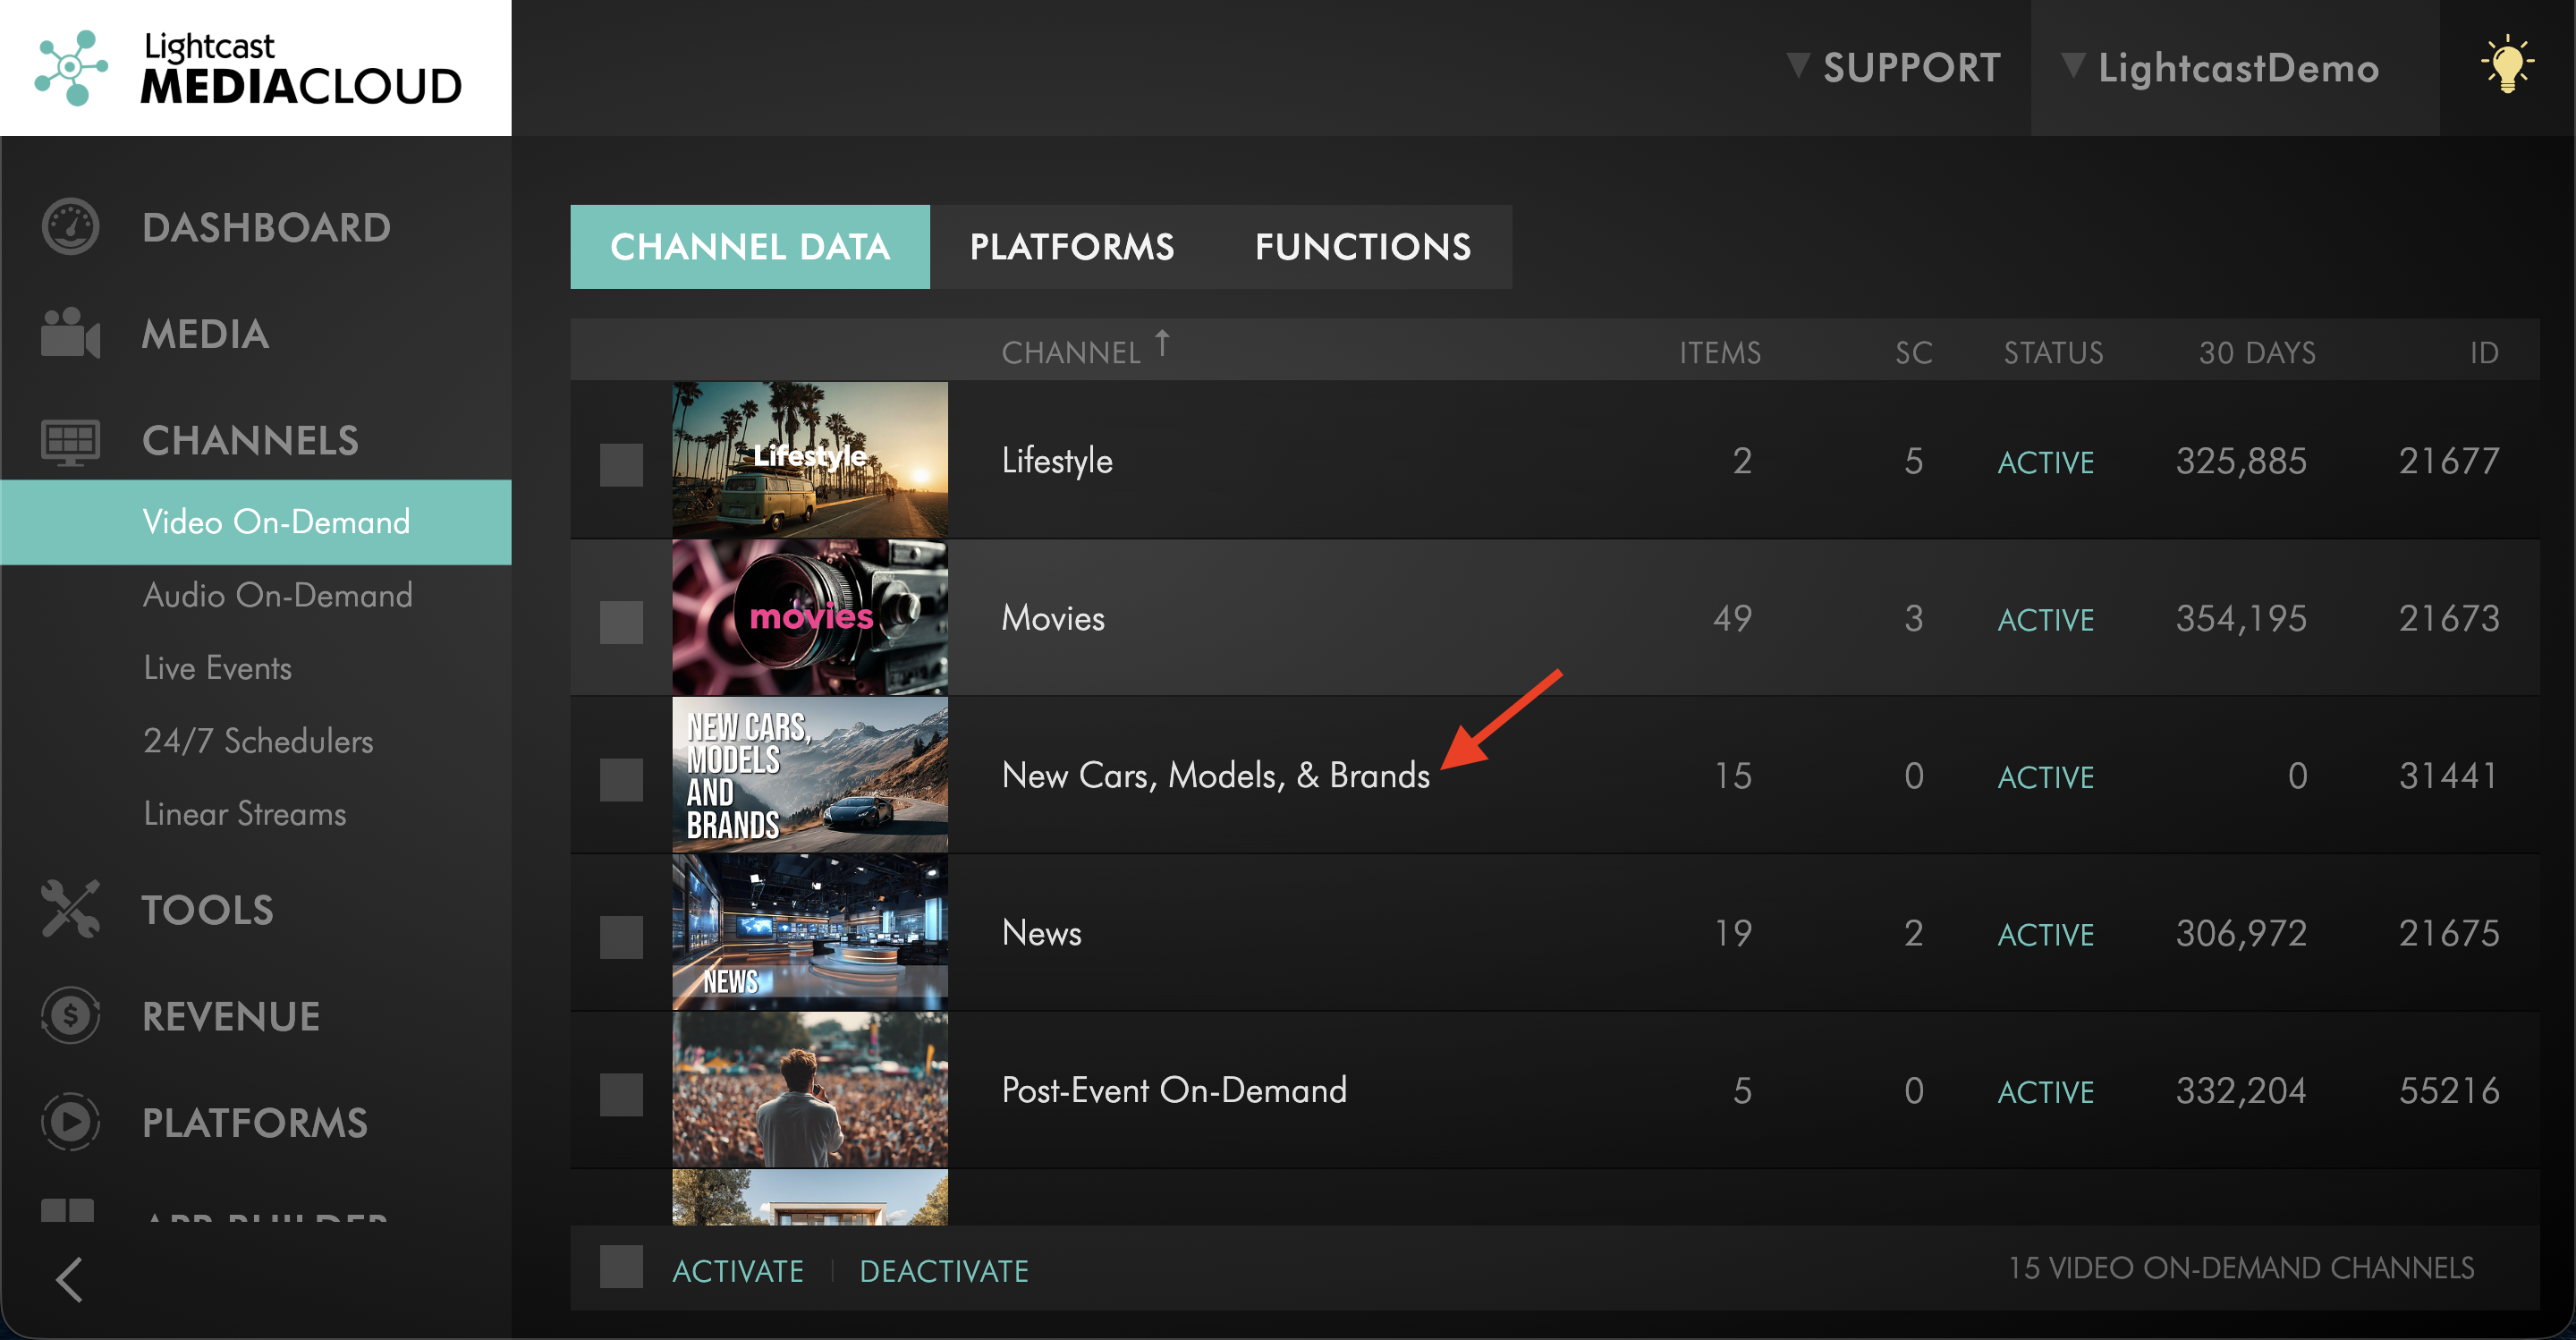
Select the Channel where you want to create the Sub-Channel.
Step 4
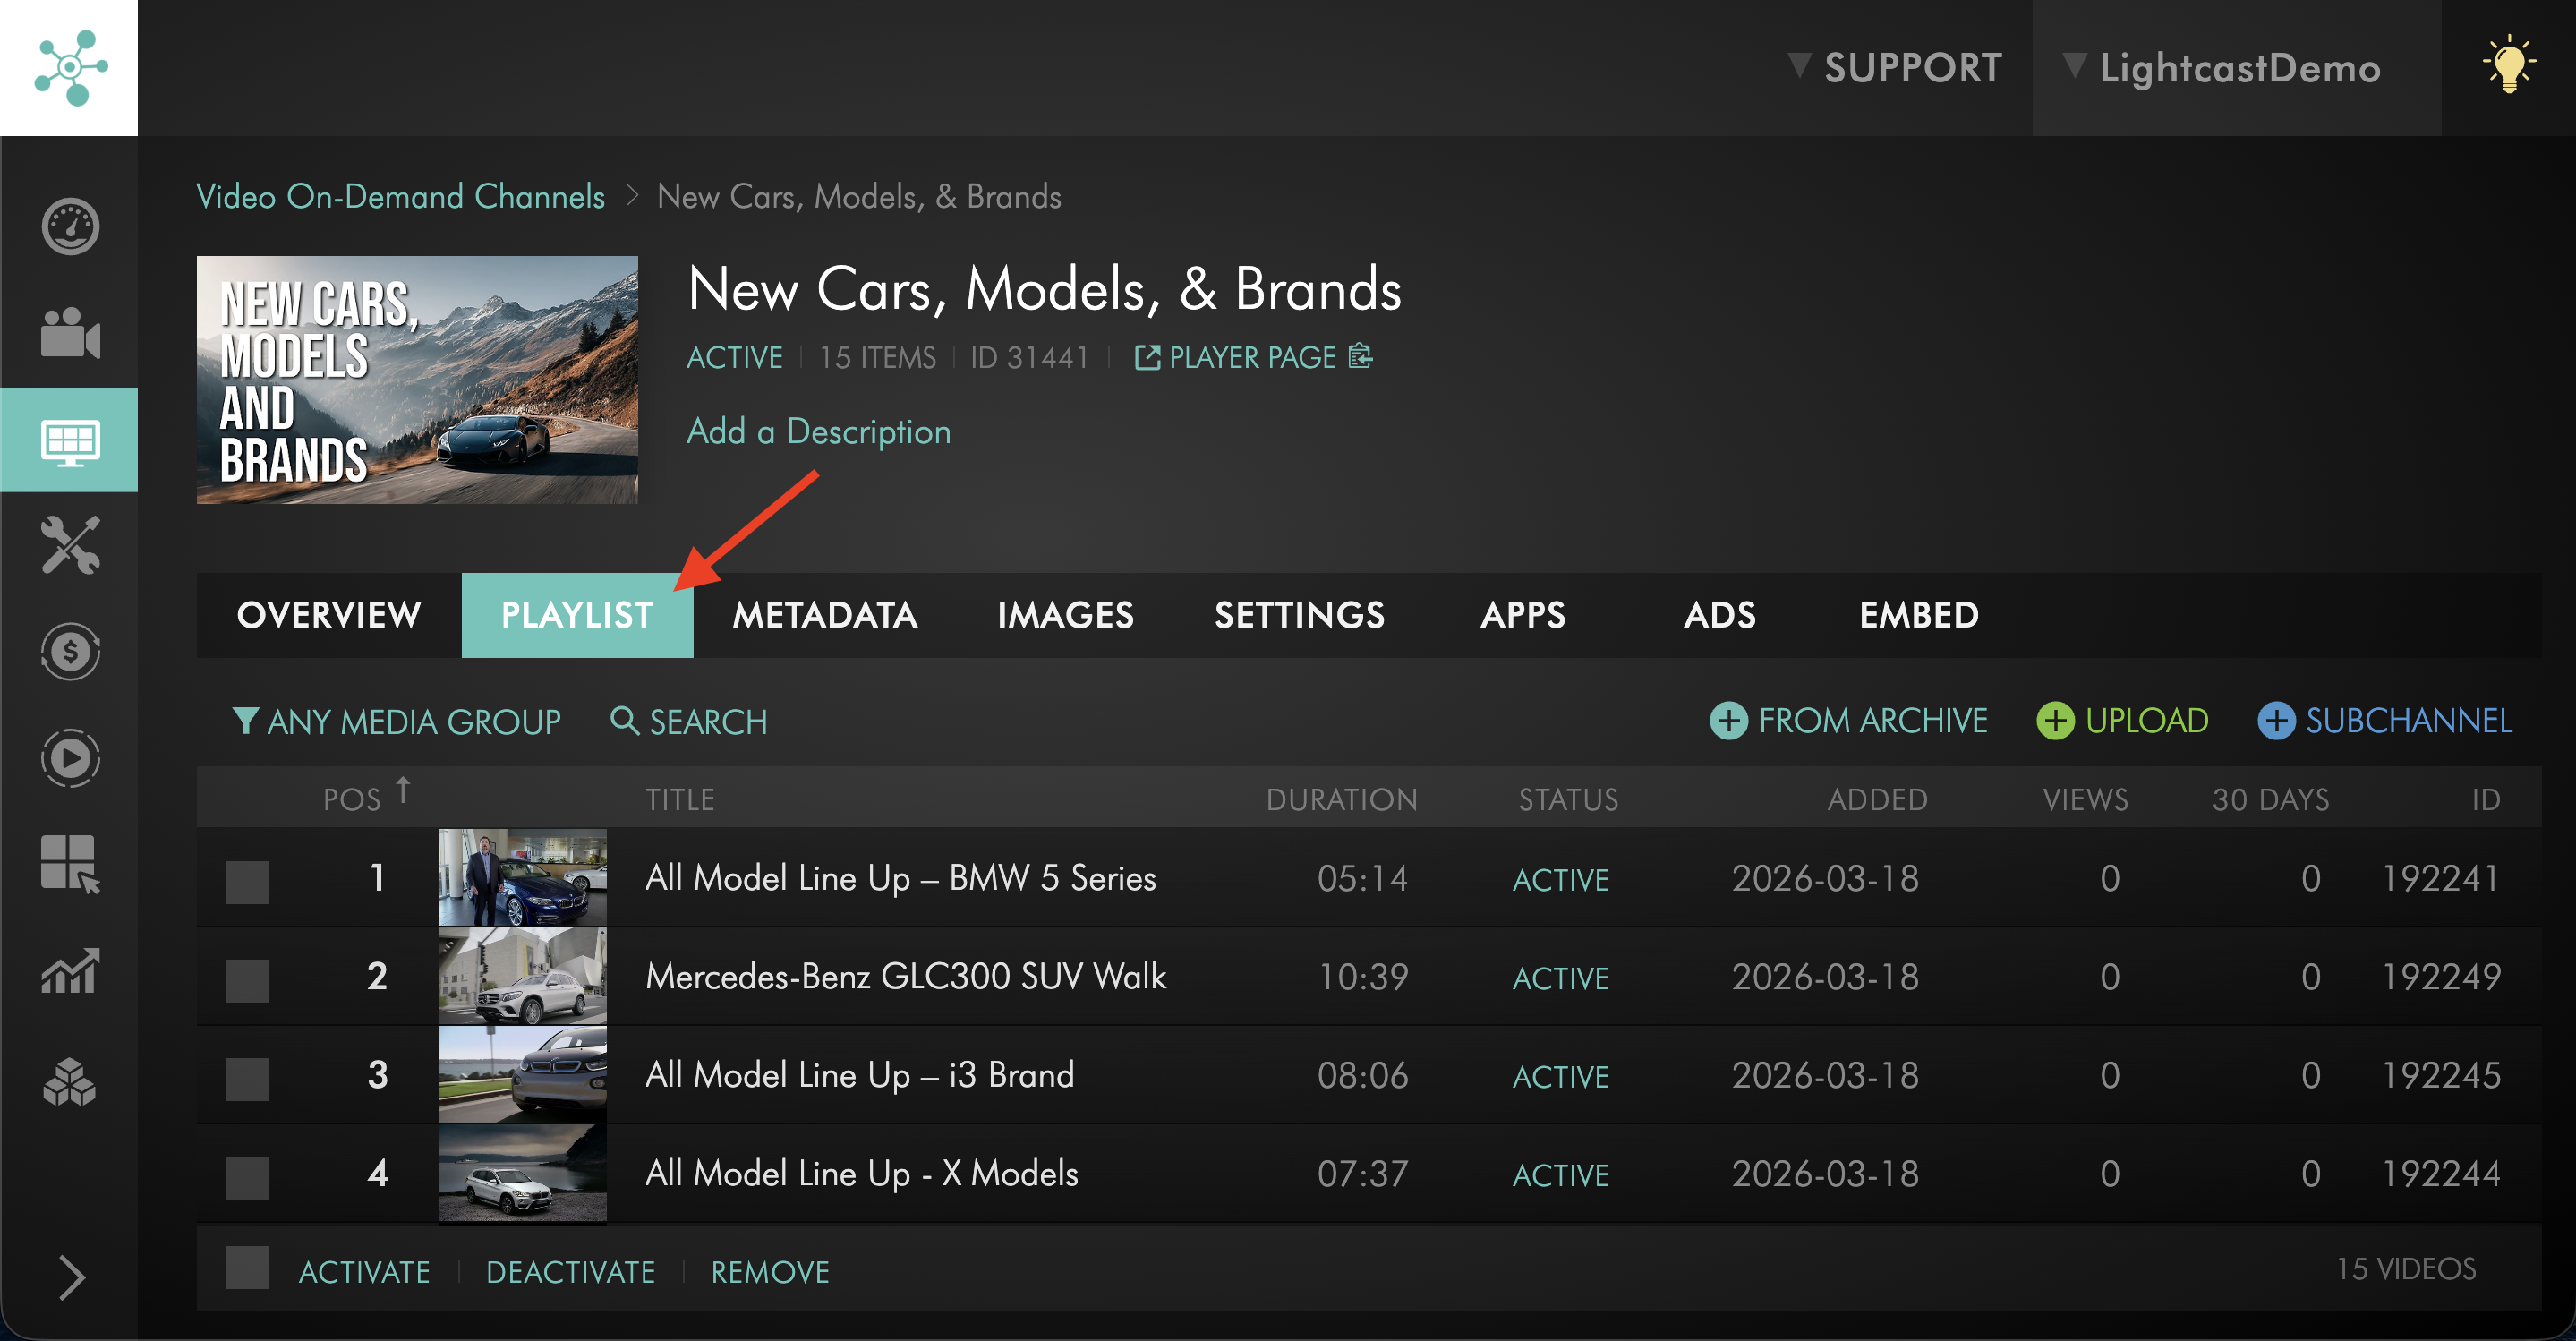
Open the PLAYLIST tab.
Step 5
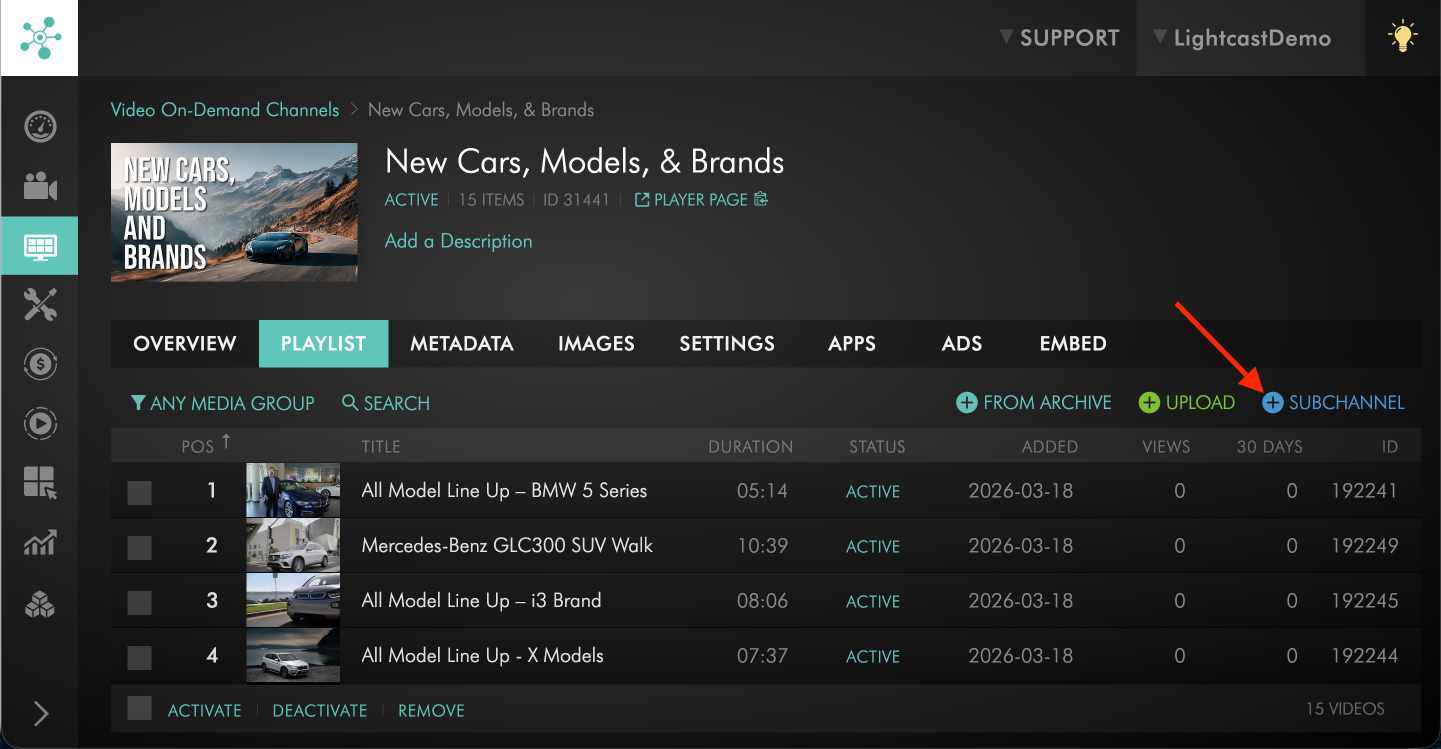
Click + SUBCHANNEL in the upper-right corner.
Step 6
Create your first Sub-Channel.
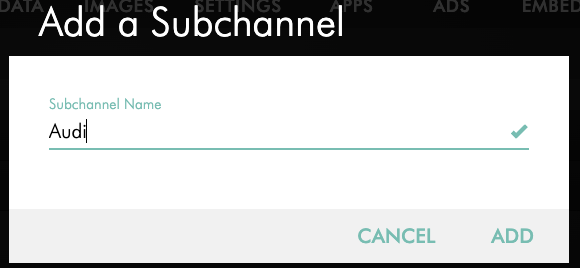
Keep in mind that when you create the first Sub-Channel, all media currently assigned to that parent Channel will automatically be moved into that first Sub-Channel.
How do I remove media from the first Sub-Channel?
Step 1
Open the Sub-Channel.
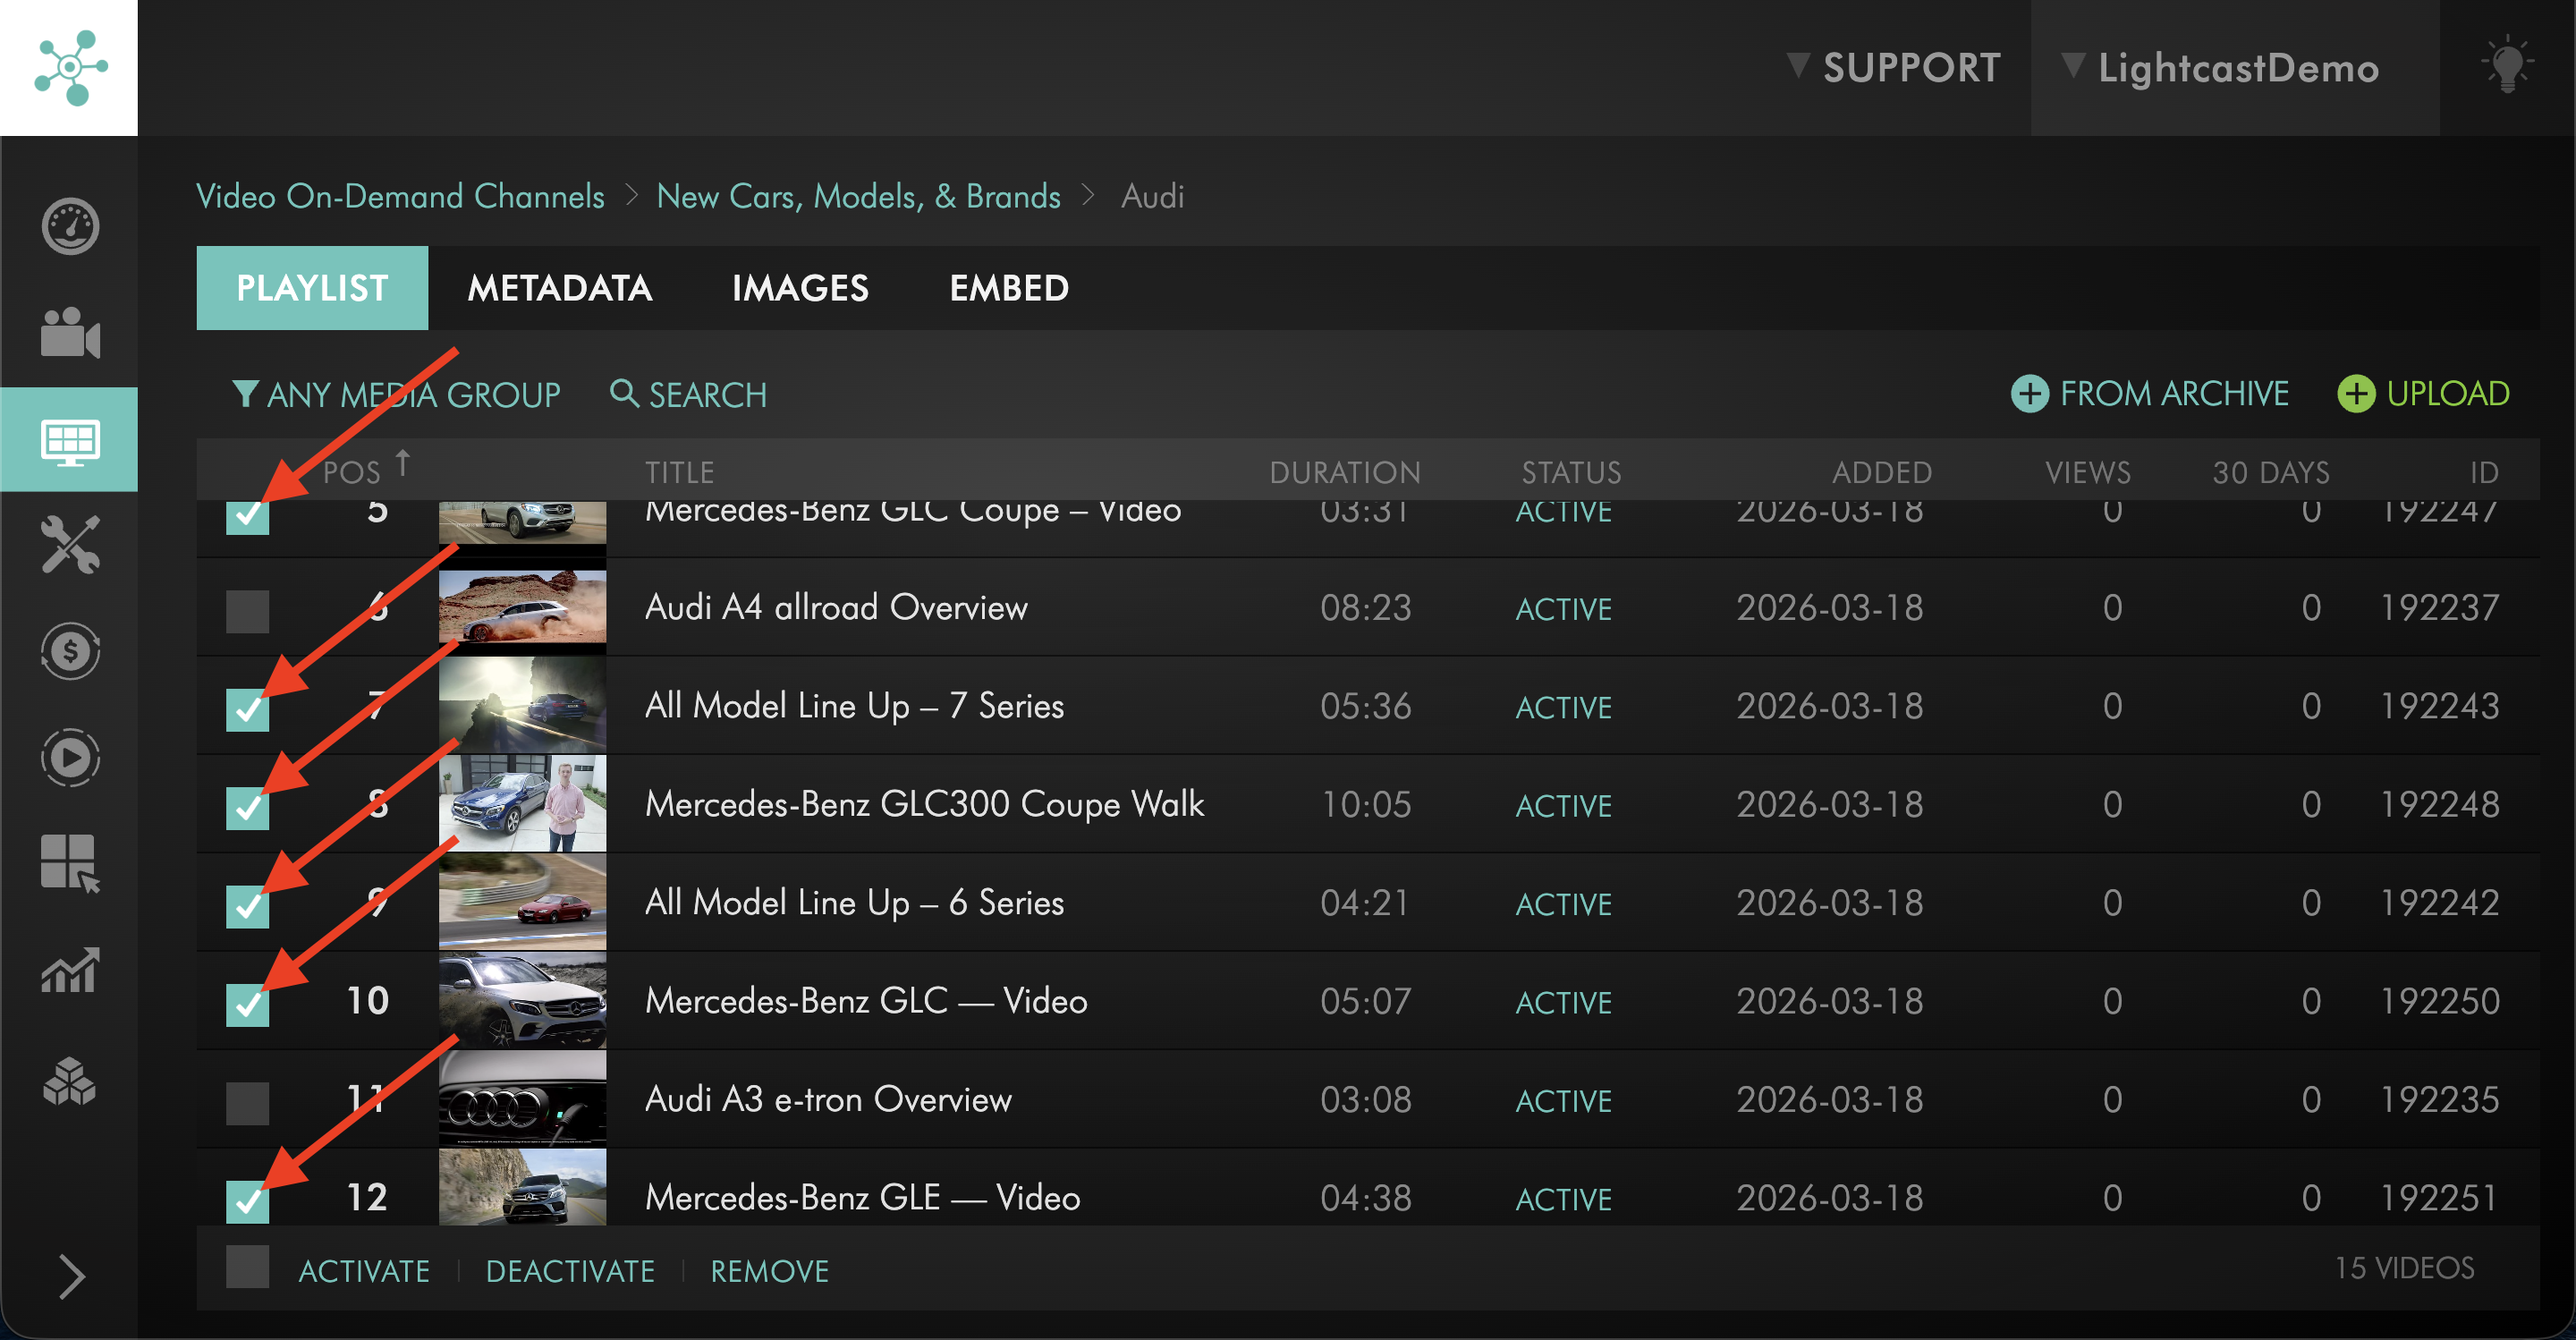
Step 2
Select the media items you want to remove.
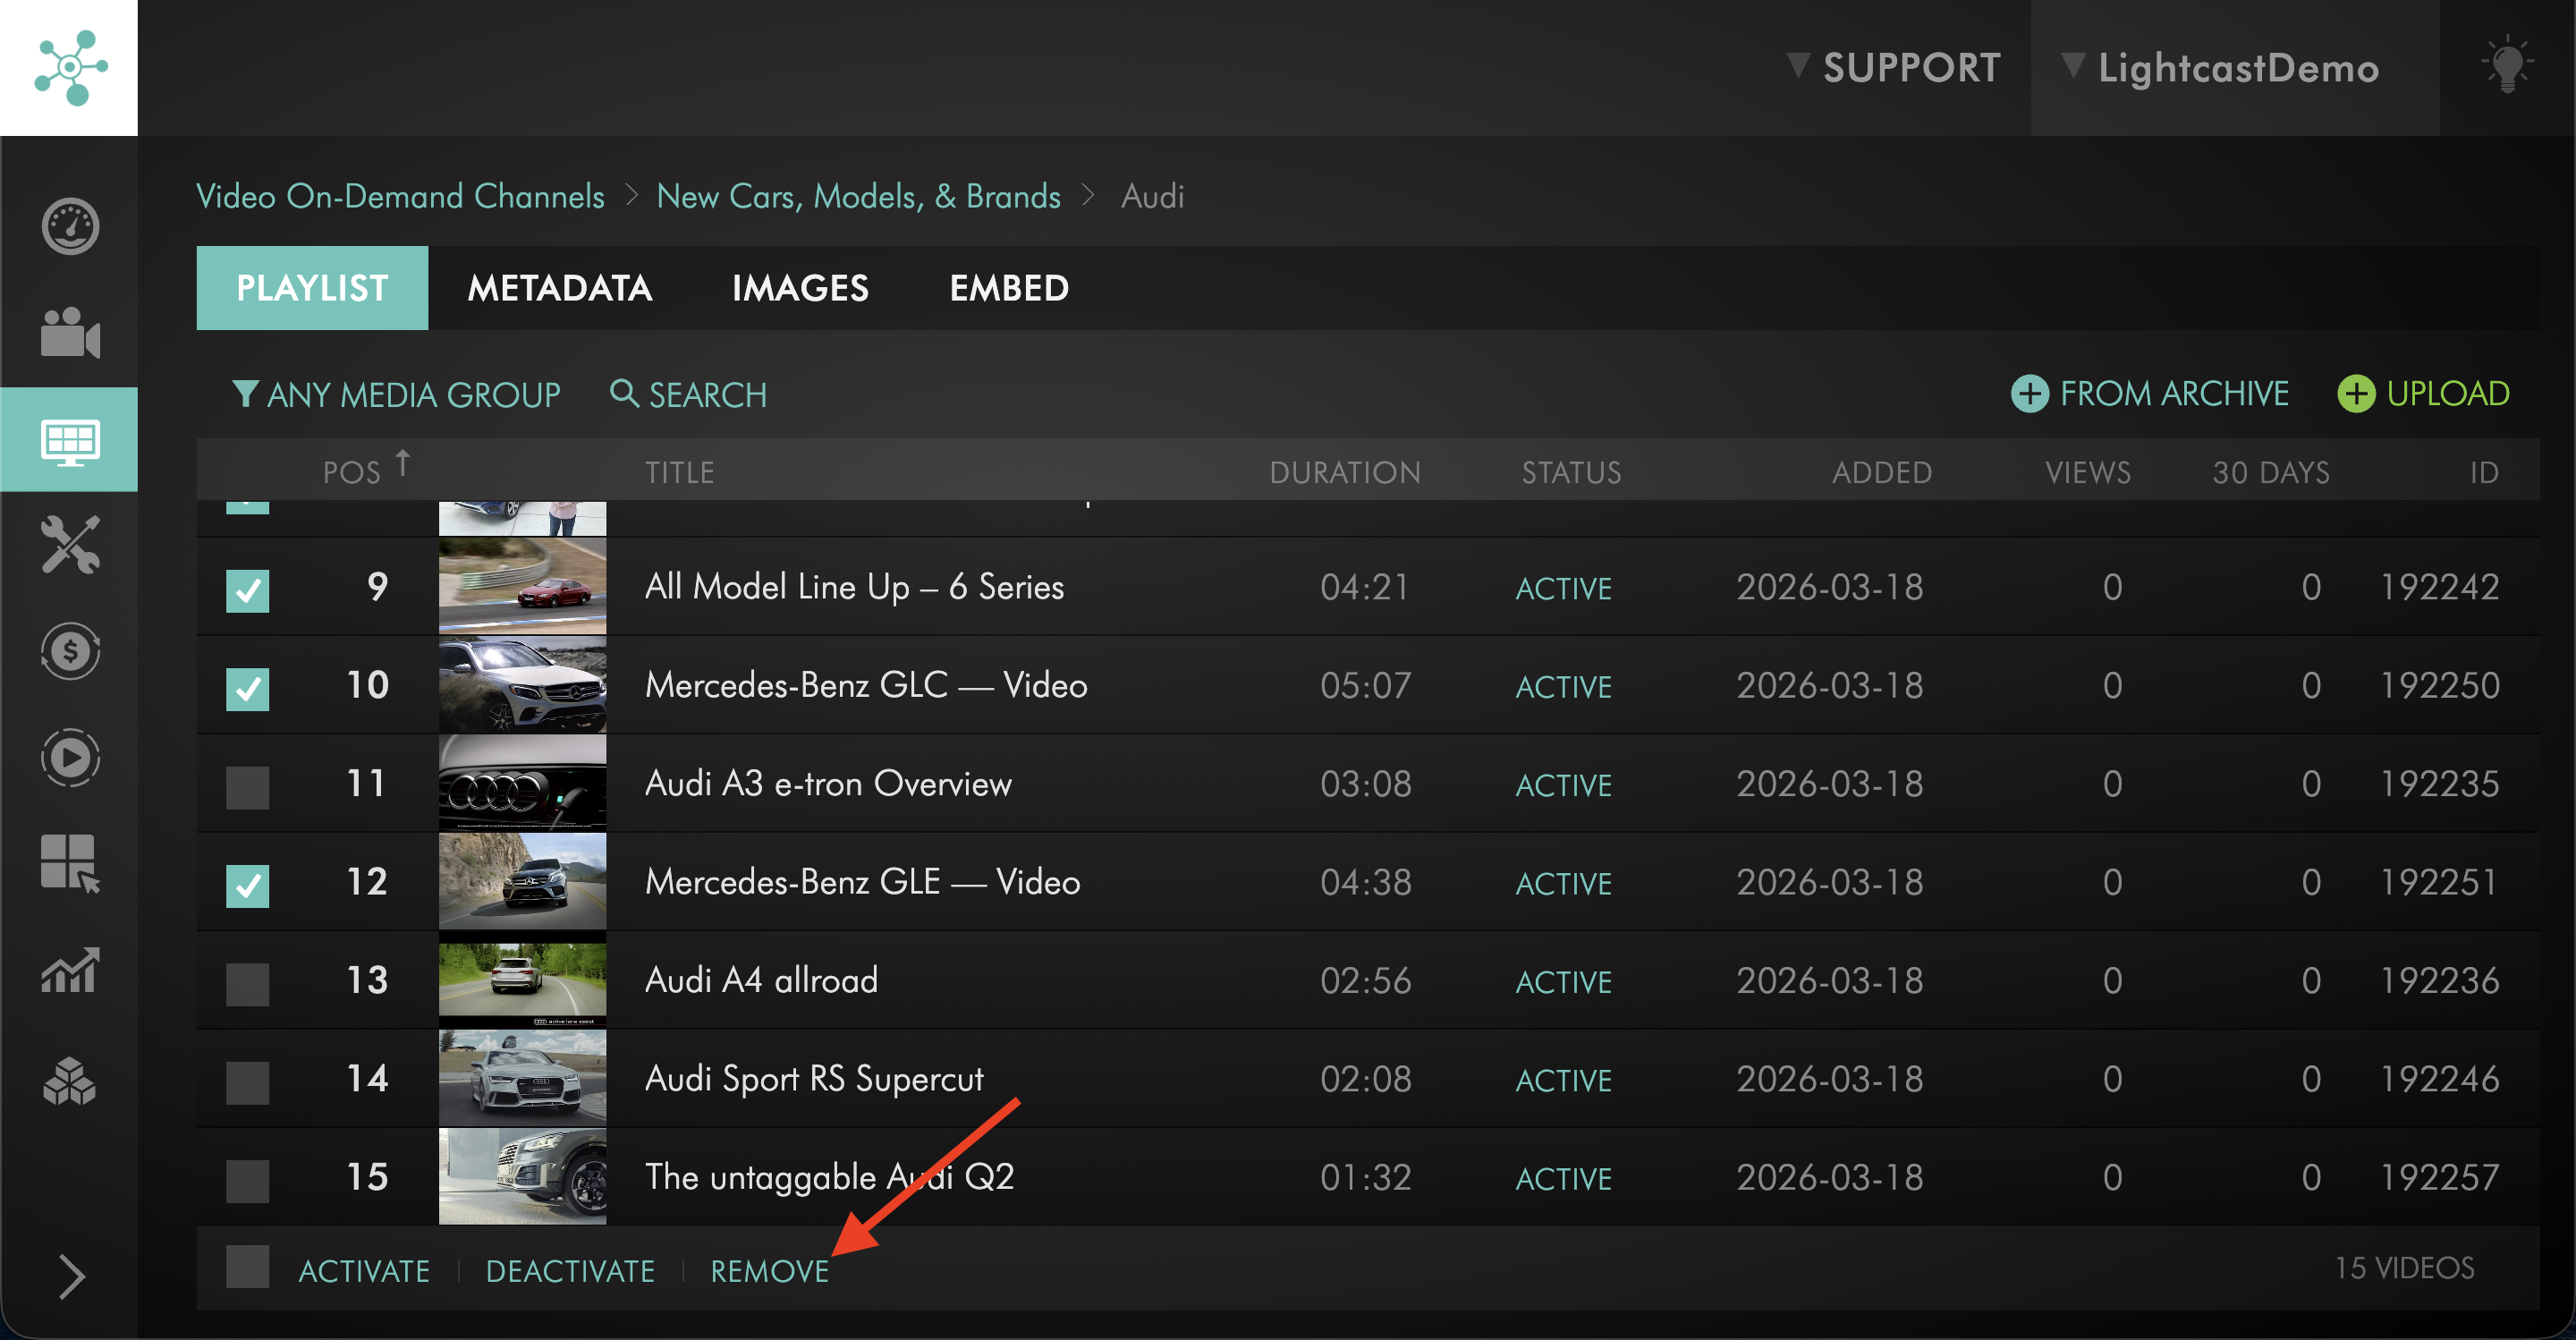
Step 3
Click Remove at the bottom of the page.
How do I move media from one Sub-Channel to another?
Step 1
Open the Sub-Channel you want to move media from.
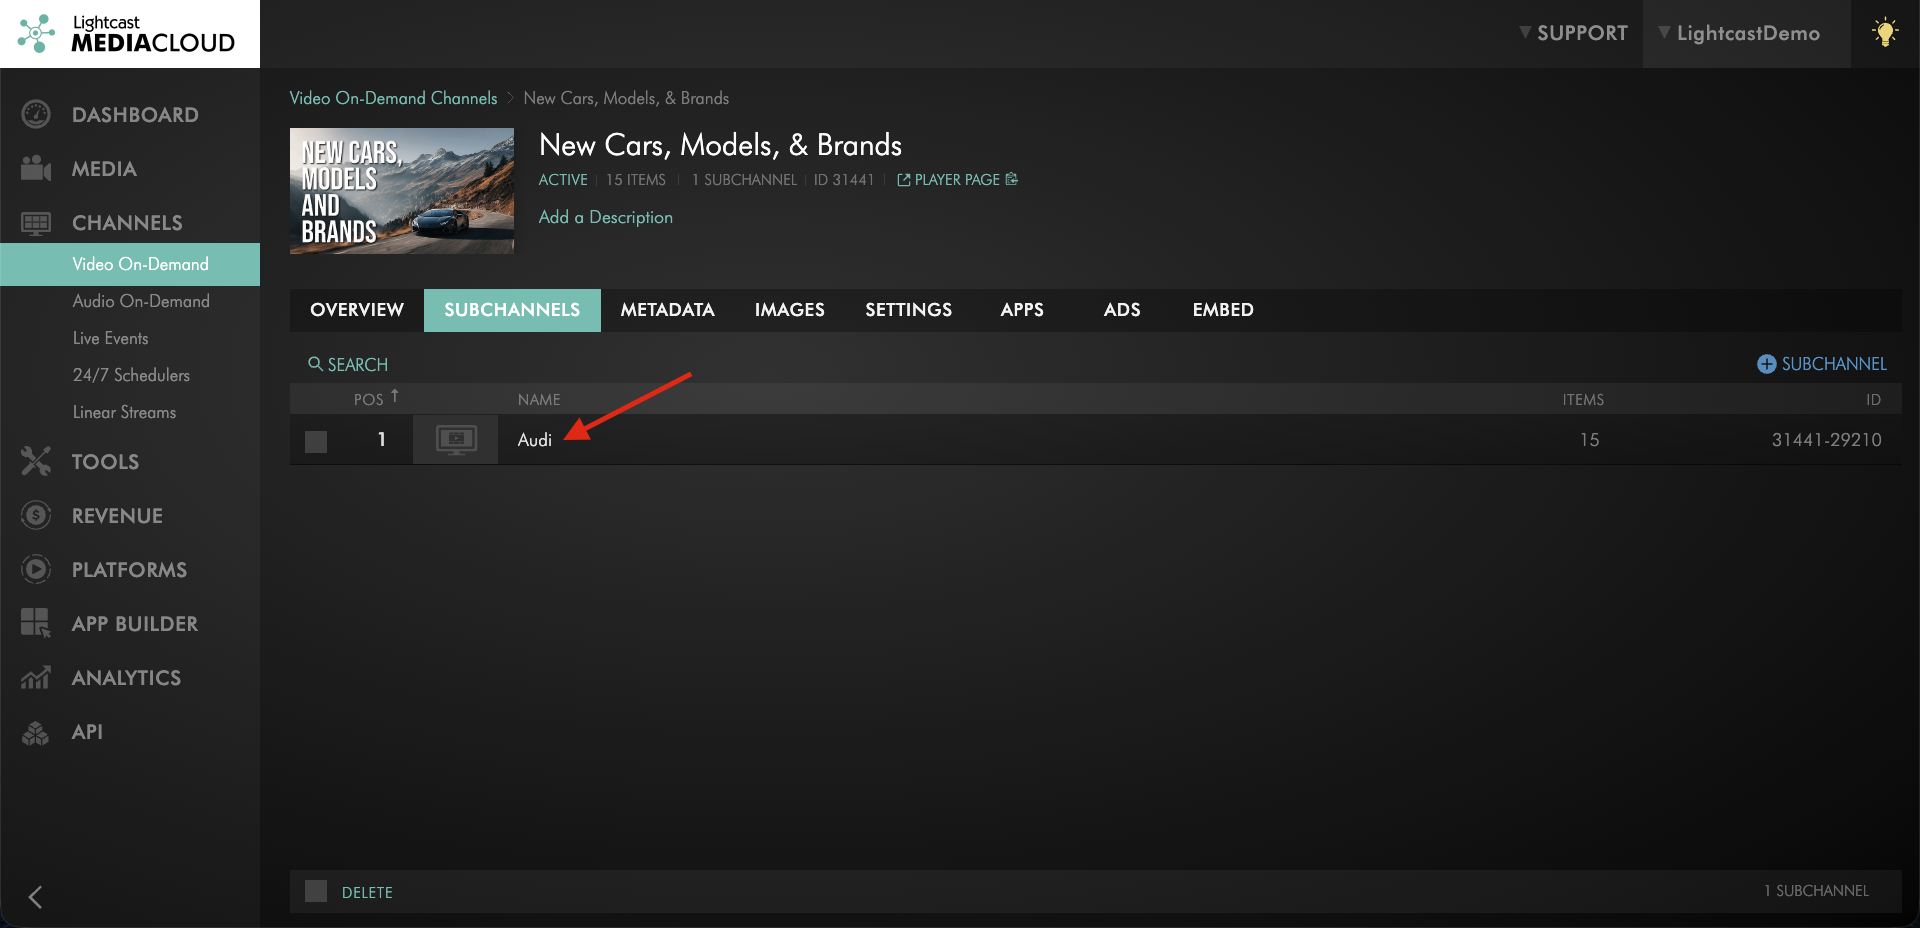
Step 2
Select the media items you want to move.
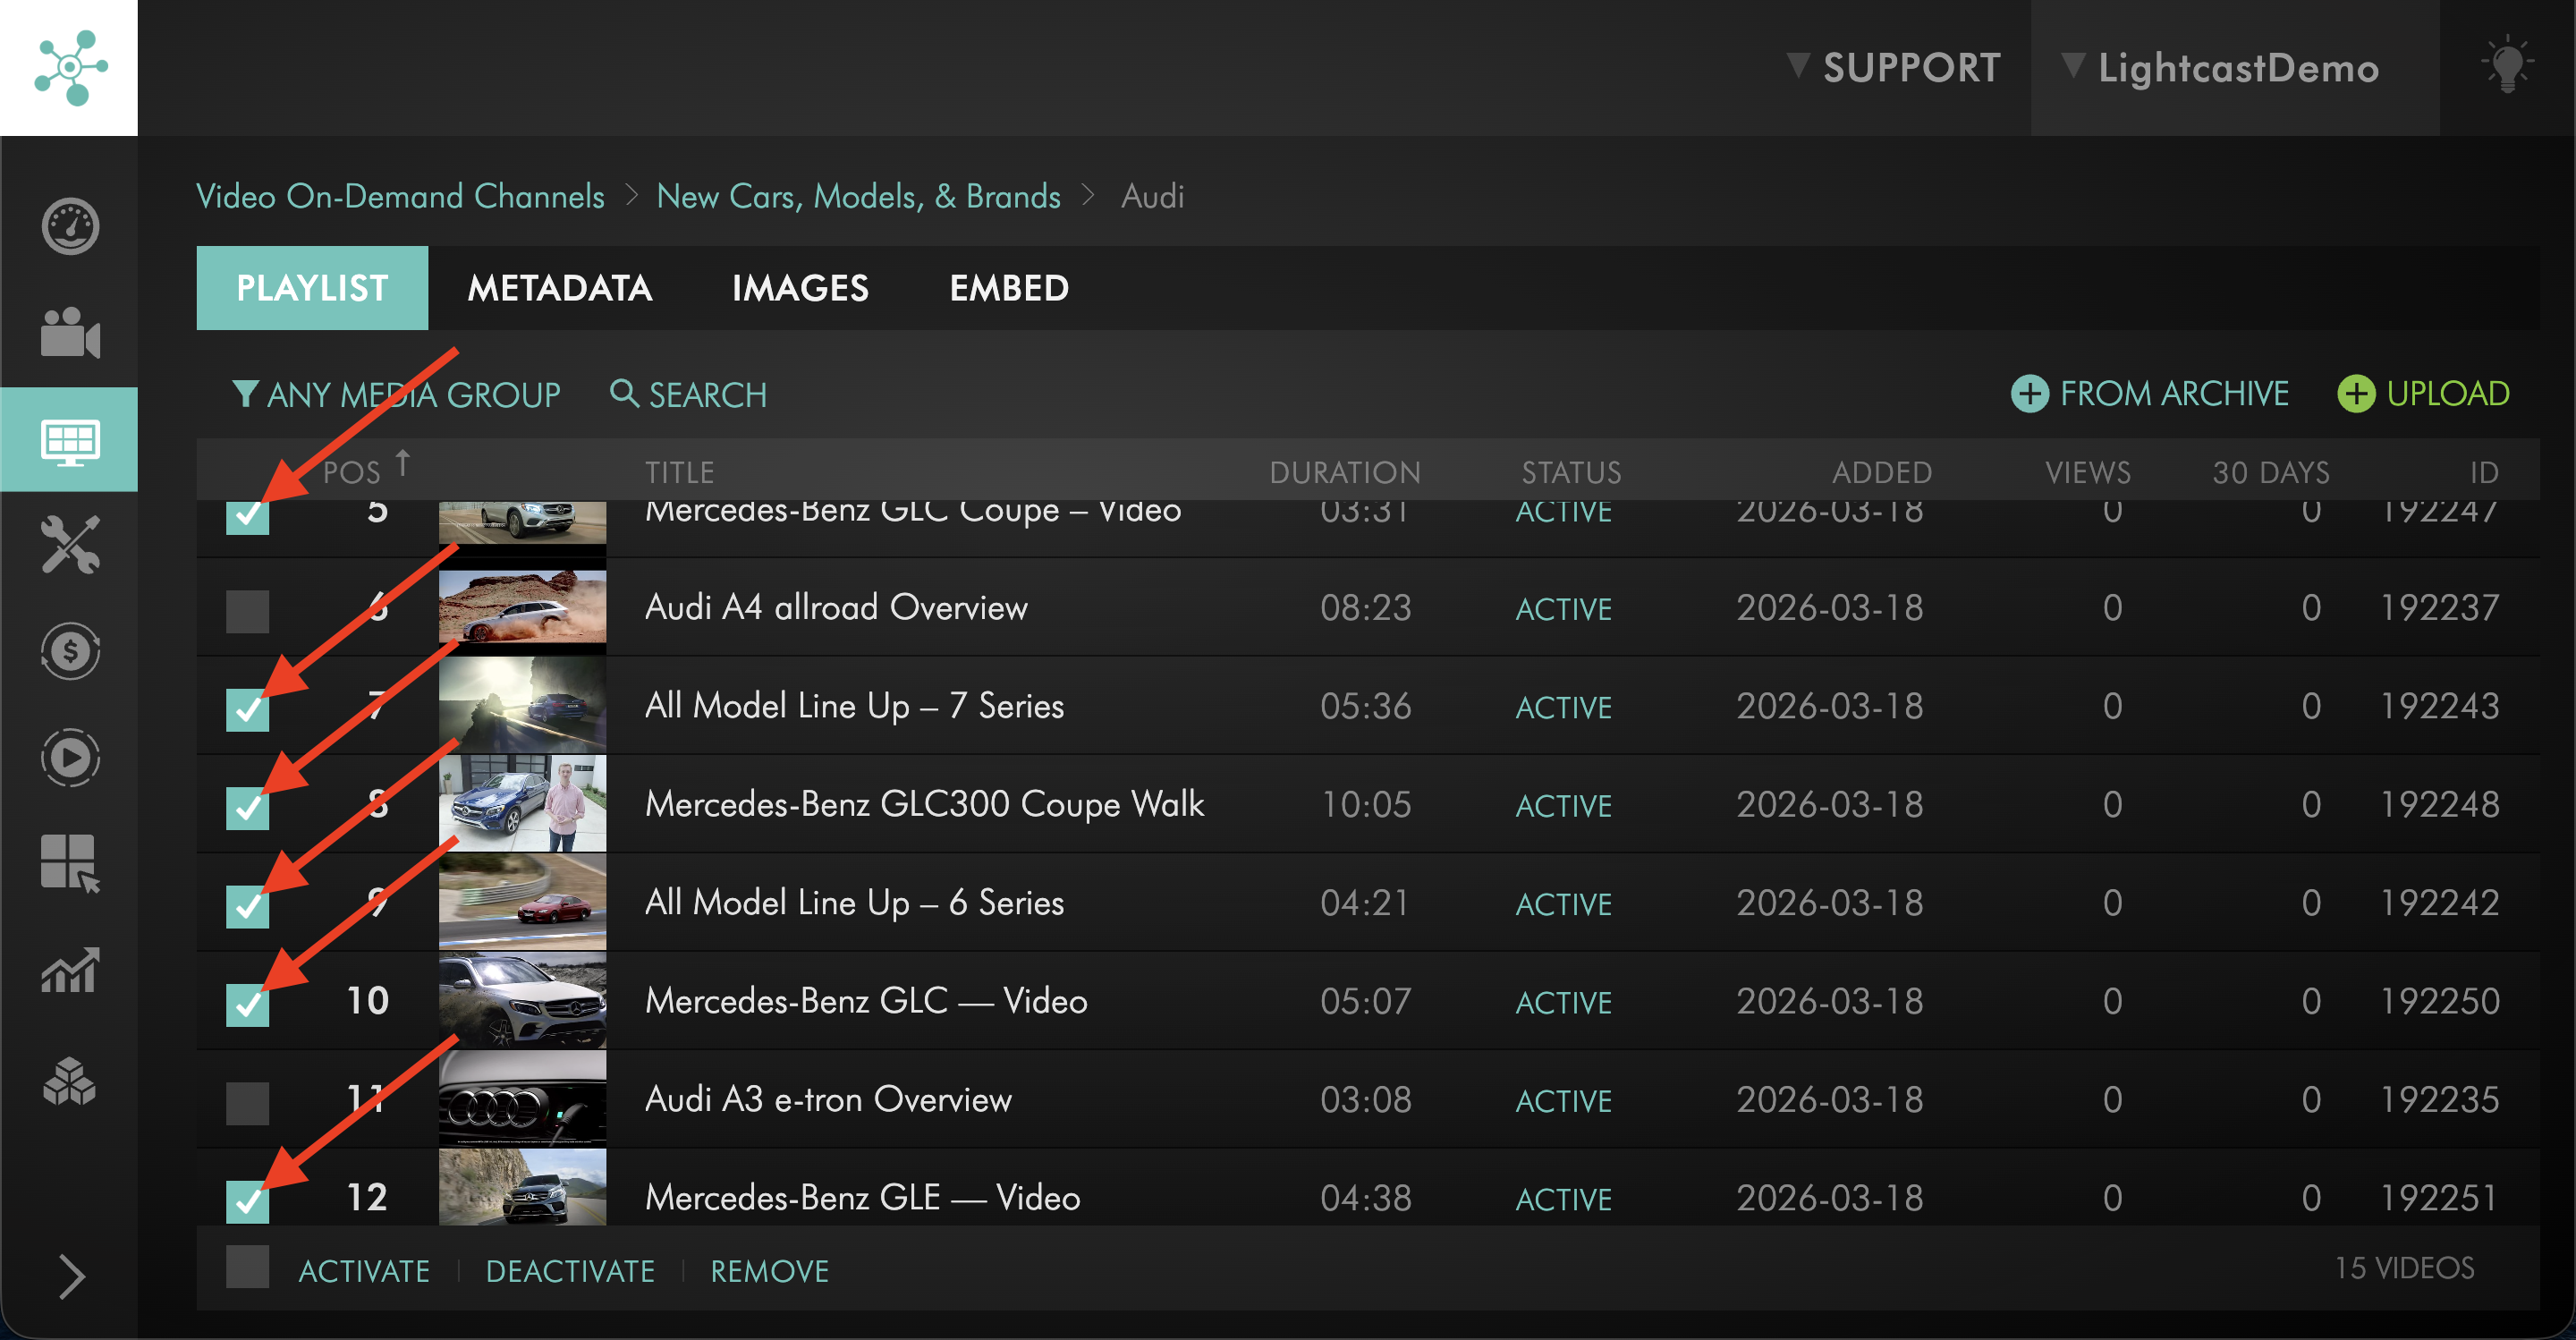
Step 3
Click Remove at the bottom left to remove those items from the current Sub-Channel.
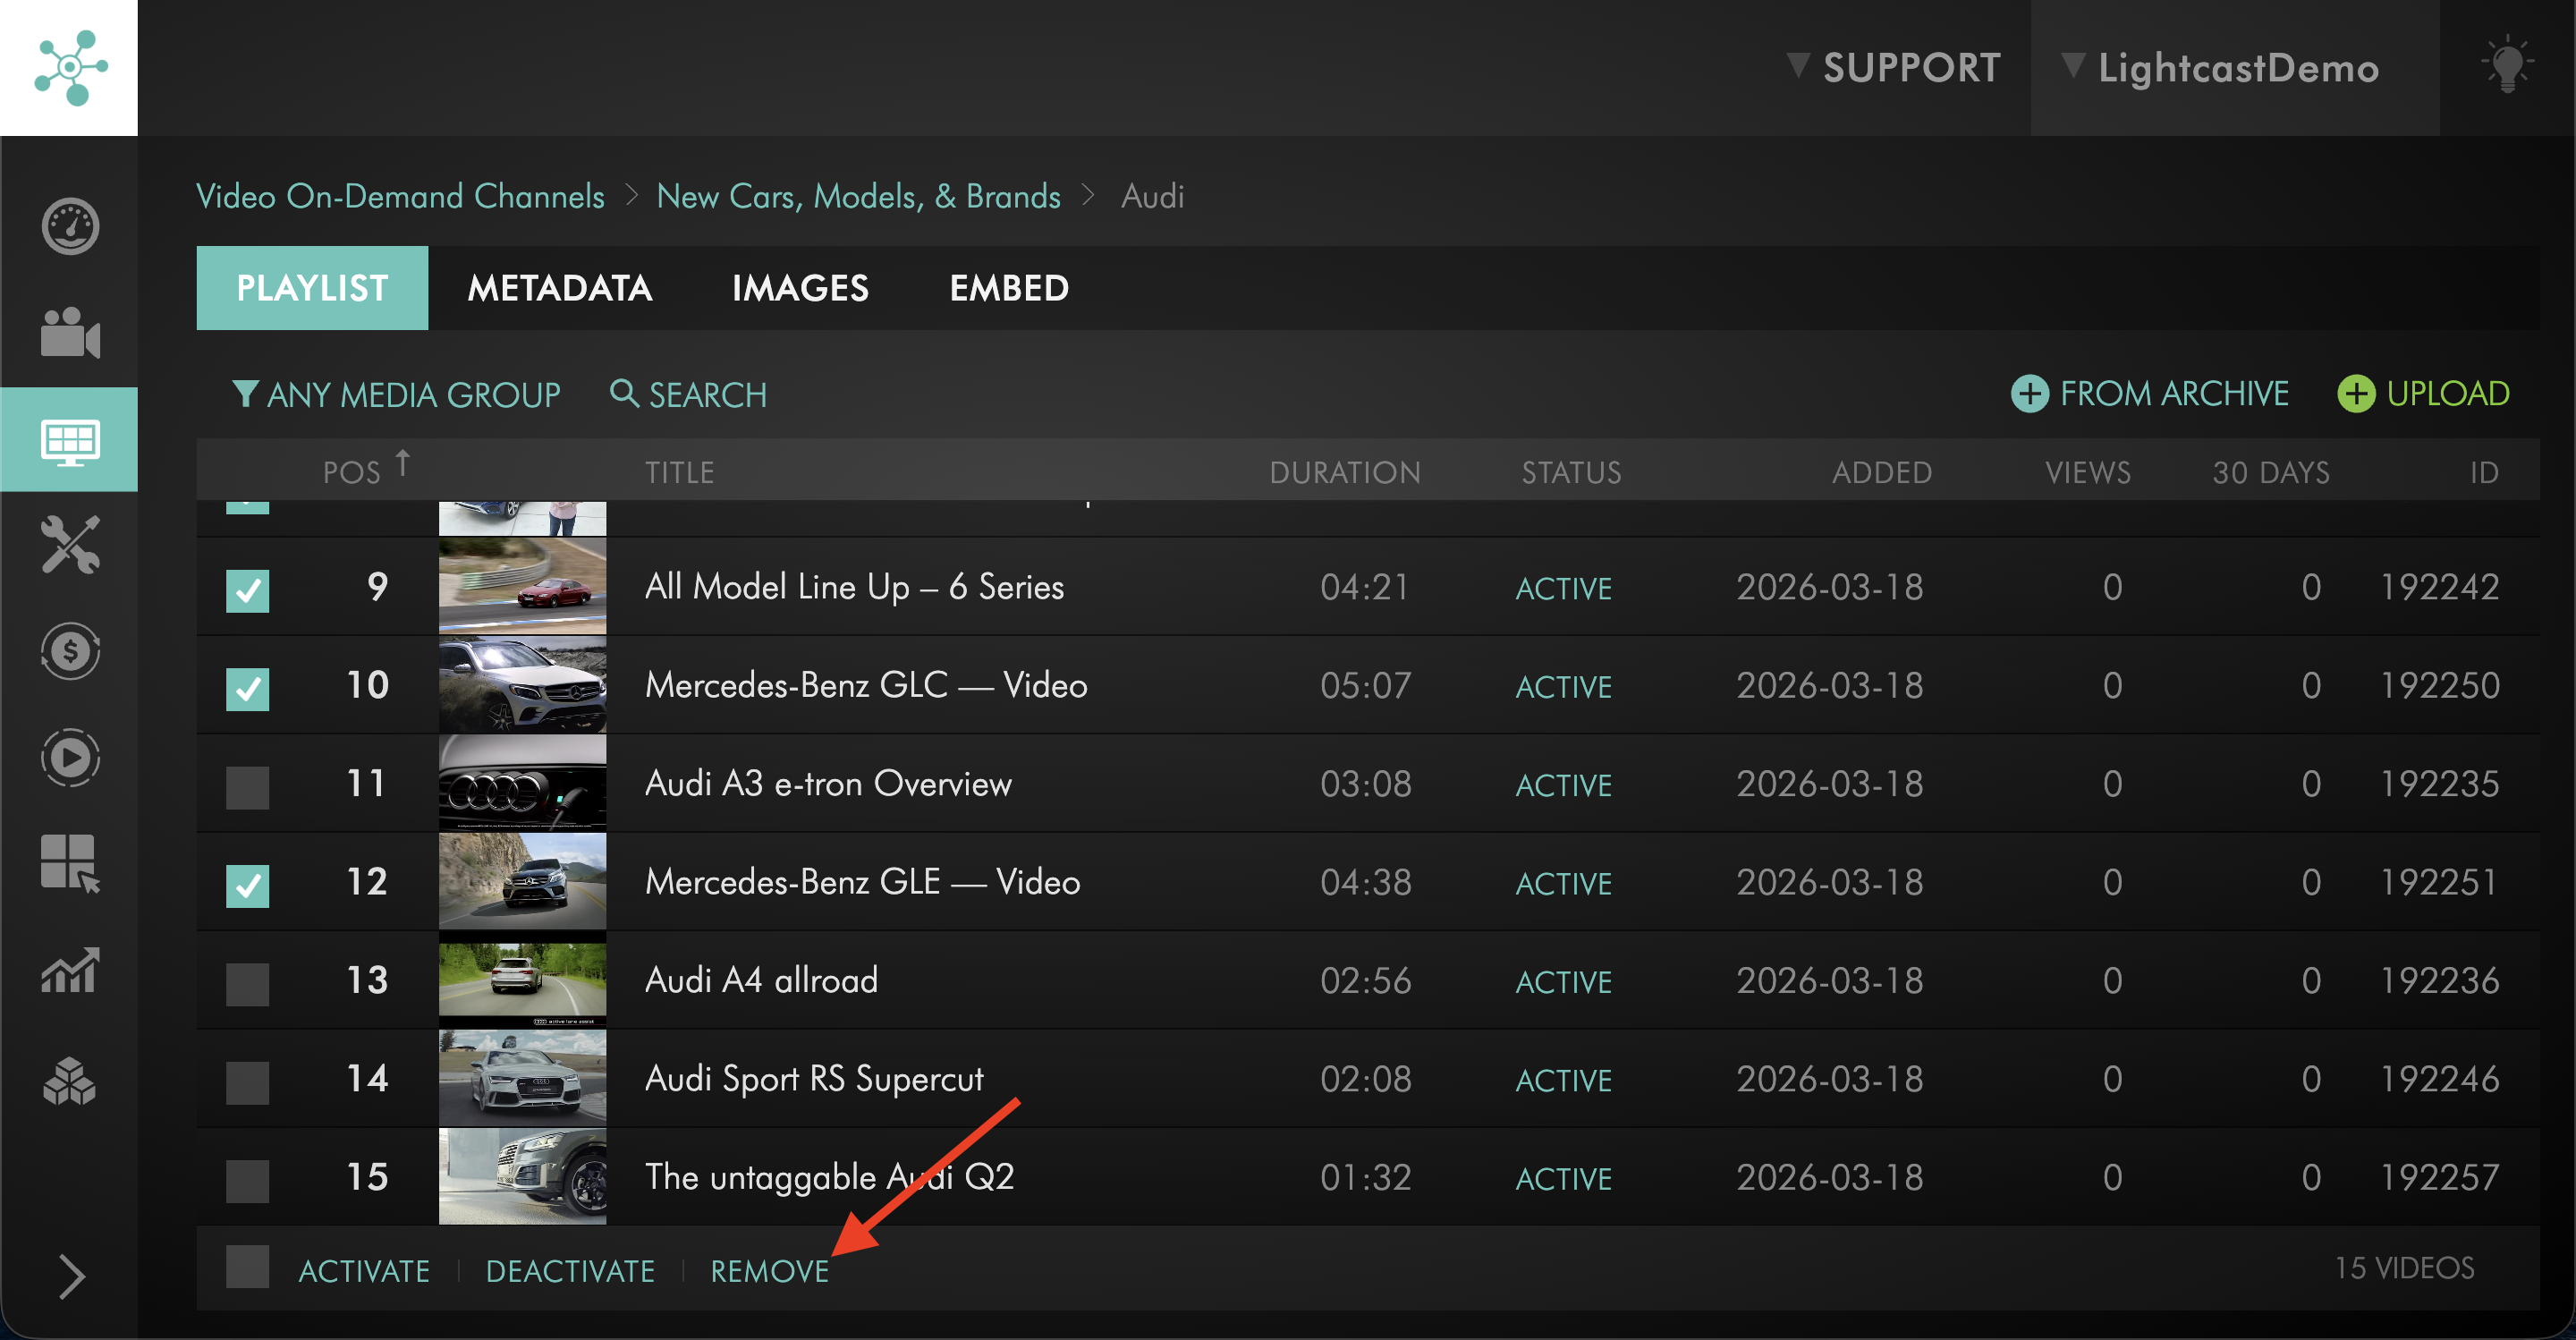
Step 4
Open the Sub-Channel you want to move the media to.
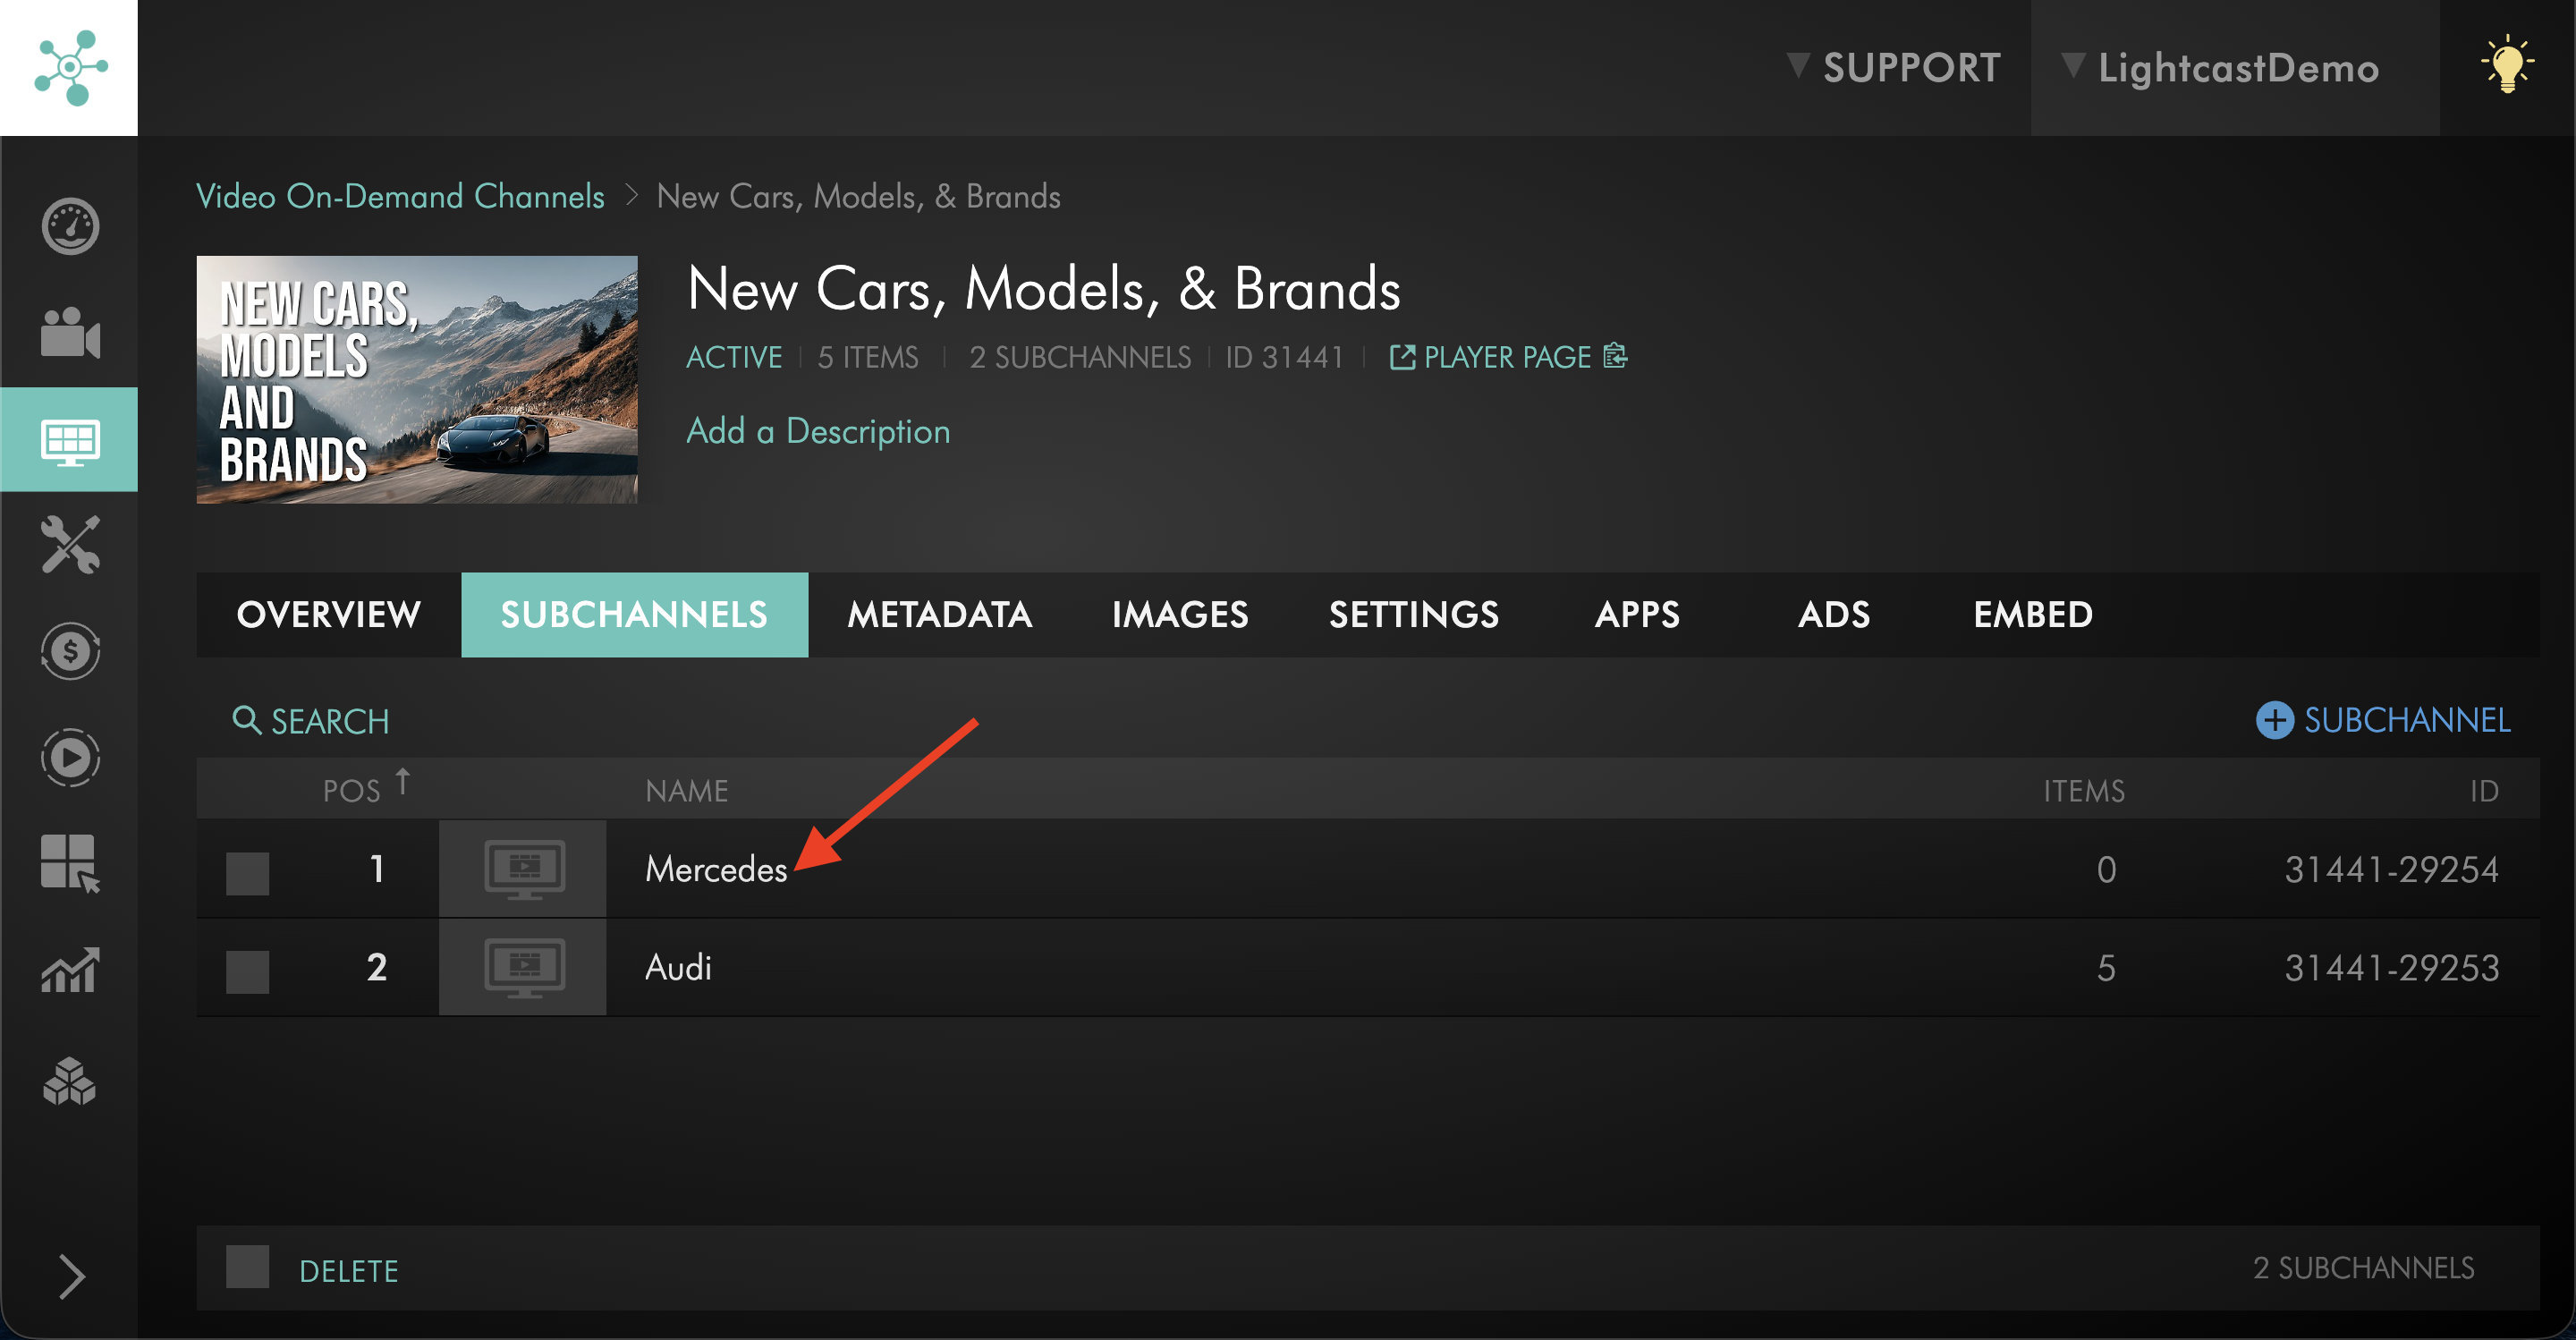
Step 5
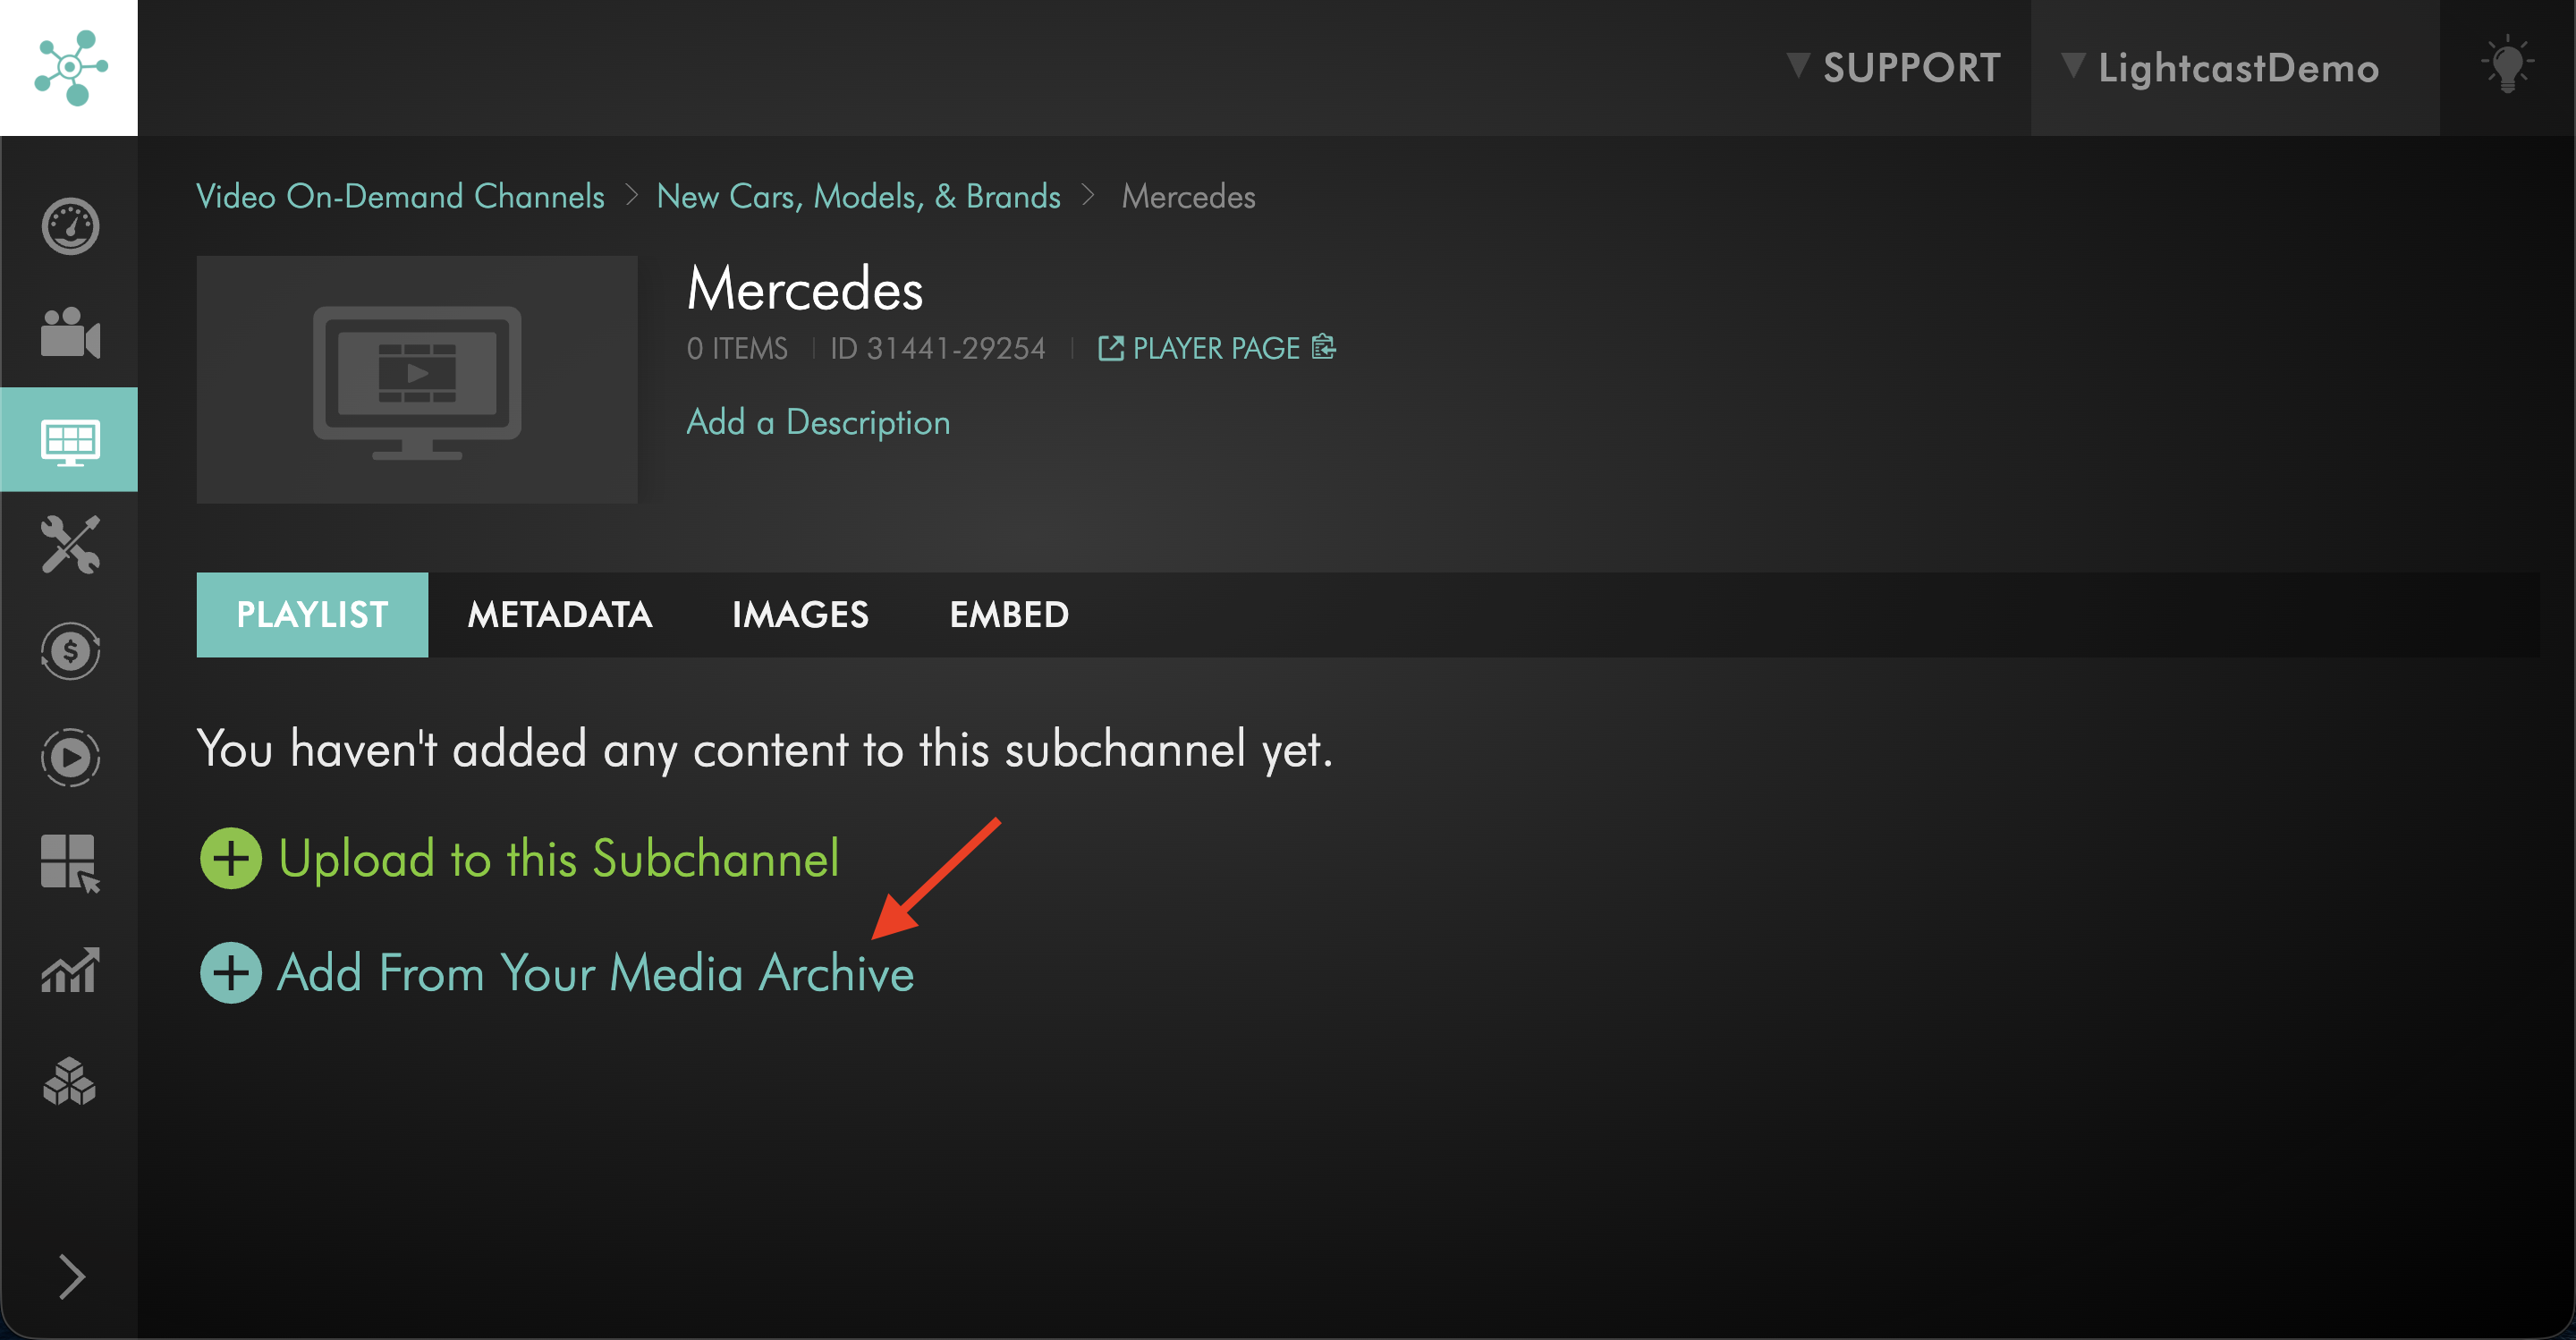
Click + Add From Your Media Archive.
Step 6
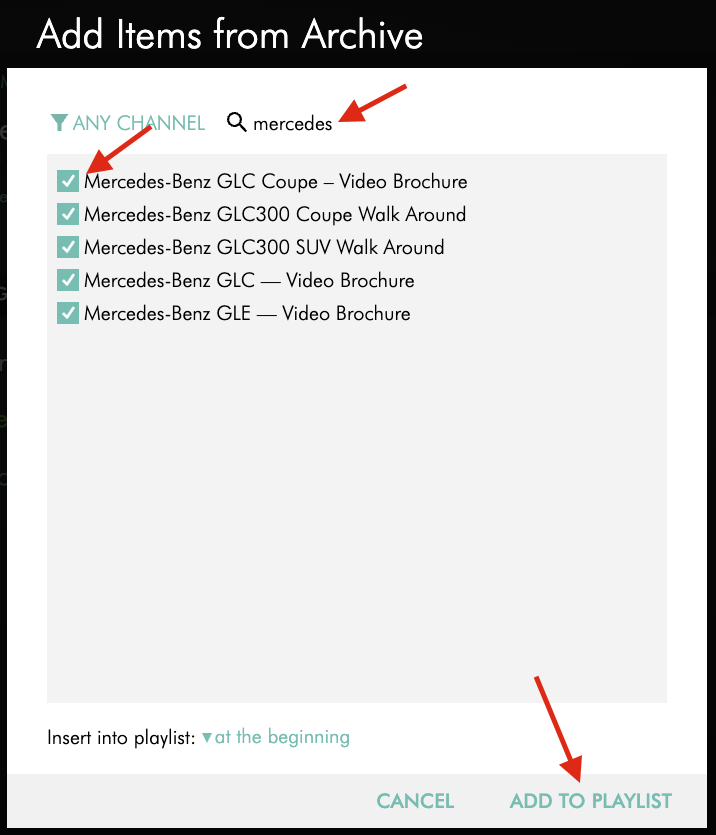
Select the media items you want to assign to that Sub-Channel and click ADD TO PLAYLIST.
If you want to move most or all media from one Sub-Channel to another, you can use the checkbox at the bottom left to select all media in the current Sub-Channel before clicking Remove.
How should I organize a large library?
Organize your Channels and Sub-Channels in the way that makes the most sense for your viewers and your internal workflow. Common ways to organize content include:
topic
series
speaker
year
ministry
event type
theme
If one Channel is becoming too large, either divide it into Sub-Channels or create additional Channels for major content groupings.
FAQs
Should I use a Channel or a Sub-Channel?
Use a Channel for a main library and a Sub-Channel for a smaller section within that library.
Can I create Sub-Channels in both AOD and VOD Channels?
Yes. Sub-Channels can be used in both Audio On-Demand (AOD) and Video On-Demand (VOD) Channels.
What happens when I create my first Sub-Channel?
All media currently assigned to that parent Channel will automatically be moved into the first Sub-Channel.
Can I move media from one Sub-Channel to another?
Yes. Remove the media from the current Sub-Channel, then add it to the new Sub-Channel using + From Archive.
What is the best way to organize a large library?
A good approach is to use Channels for main libraries and Sub-Channels for smaller groupings within those libraries. Organize content in a way that is easy for viewers to understand and browse.
Should I add thumbnails to my Sub-Channels?
Yes, if your apps support Sub-Channels. Sub-Channel thumbnails can improve navigation and presentation in connected publishing platforms.
Pricing
Sub-Channels are available on POWER packages and up.
If you don't have access to this feature, you can upgrade to one of our latest plans or contact your account manager.