
How to create a Pay-Per-View product
Overview
This article explains how to create additional Pay-Per-View (PPV) products in the Media Cloud after Lightcast has completed the initial PPV service configuration and created your first PPV product.
Prerequisites
Before creating a Pay-Per-View product, make sure:
Lightcast has completed the initial PPV service configuration for your account and created your first PPV product.
You have access to the REVENUE → Pay-Per-View section of your Media Cloud account.
You have set up the LIVE, VOD, and/or AOD Channel(s) you want to assign to your PPV product, including the applicable content and Channel details.
You have determined your PPV ticket price and the start and end dates and times of your PPV access period.
Important: If PPV has not yet been configured for your account, complete the PPV Agreement Customer Support will send you with the information Lightcast needs to configure your initial PPV service and PPV product.
How it works
After Lightcast configures your initial PPV service and first PPV product, you can create and manage additional PPV products directly in the Media Cloud.
Each PPV product defines the content viewers are purchasing and the period during which ticket holders can access it. When creating a product, you configure information such as:
Product name and description
Ticket price
PPV access period
Applicable LIVE, VOD, and/or AOD Channel(s)
The PPV access period controls when ticket holders can access the content included with the product.
Instructions
Step 1
Log in to your Media Cloud account.
Step 2
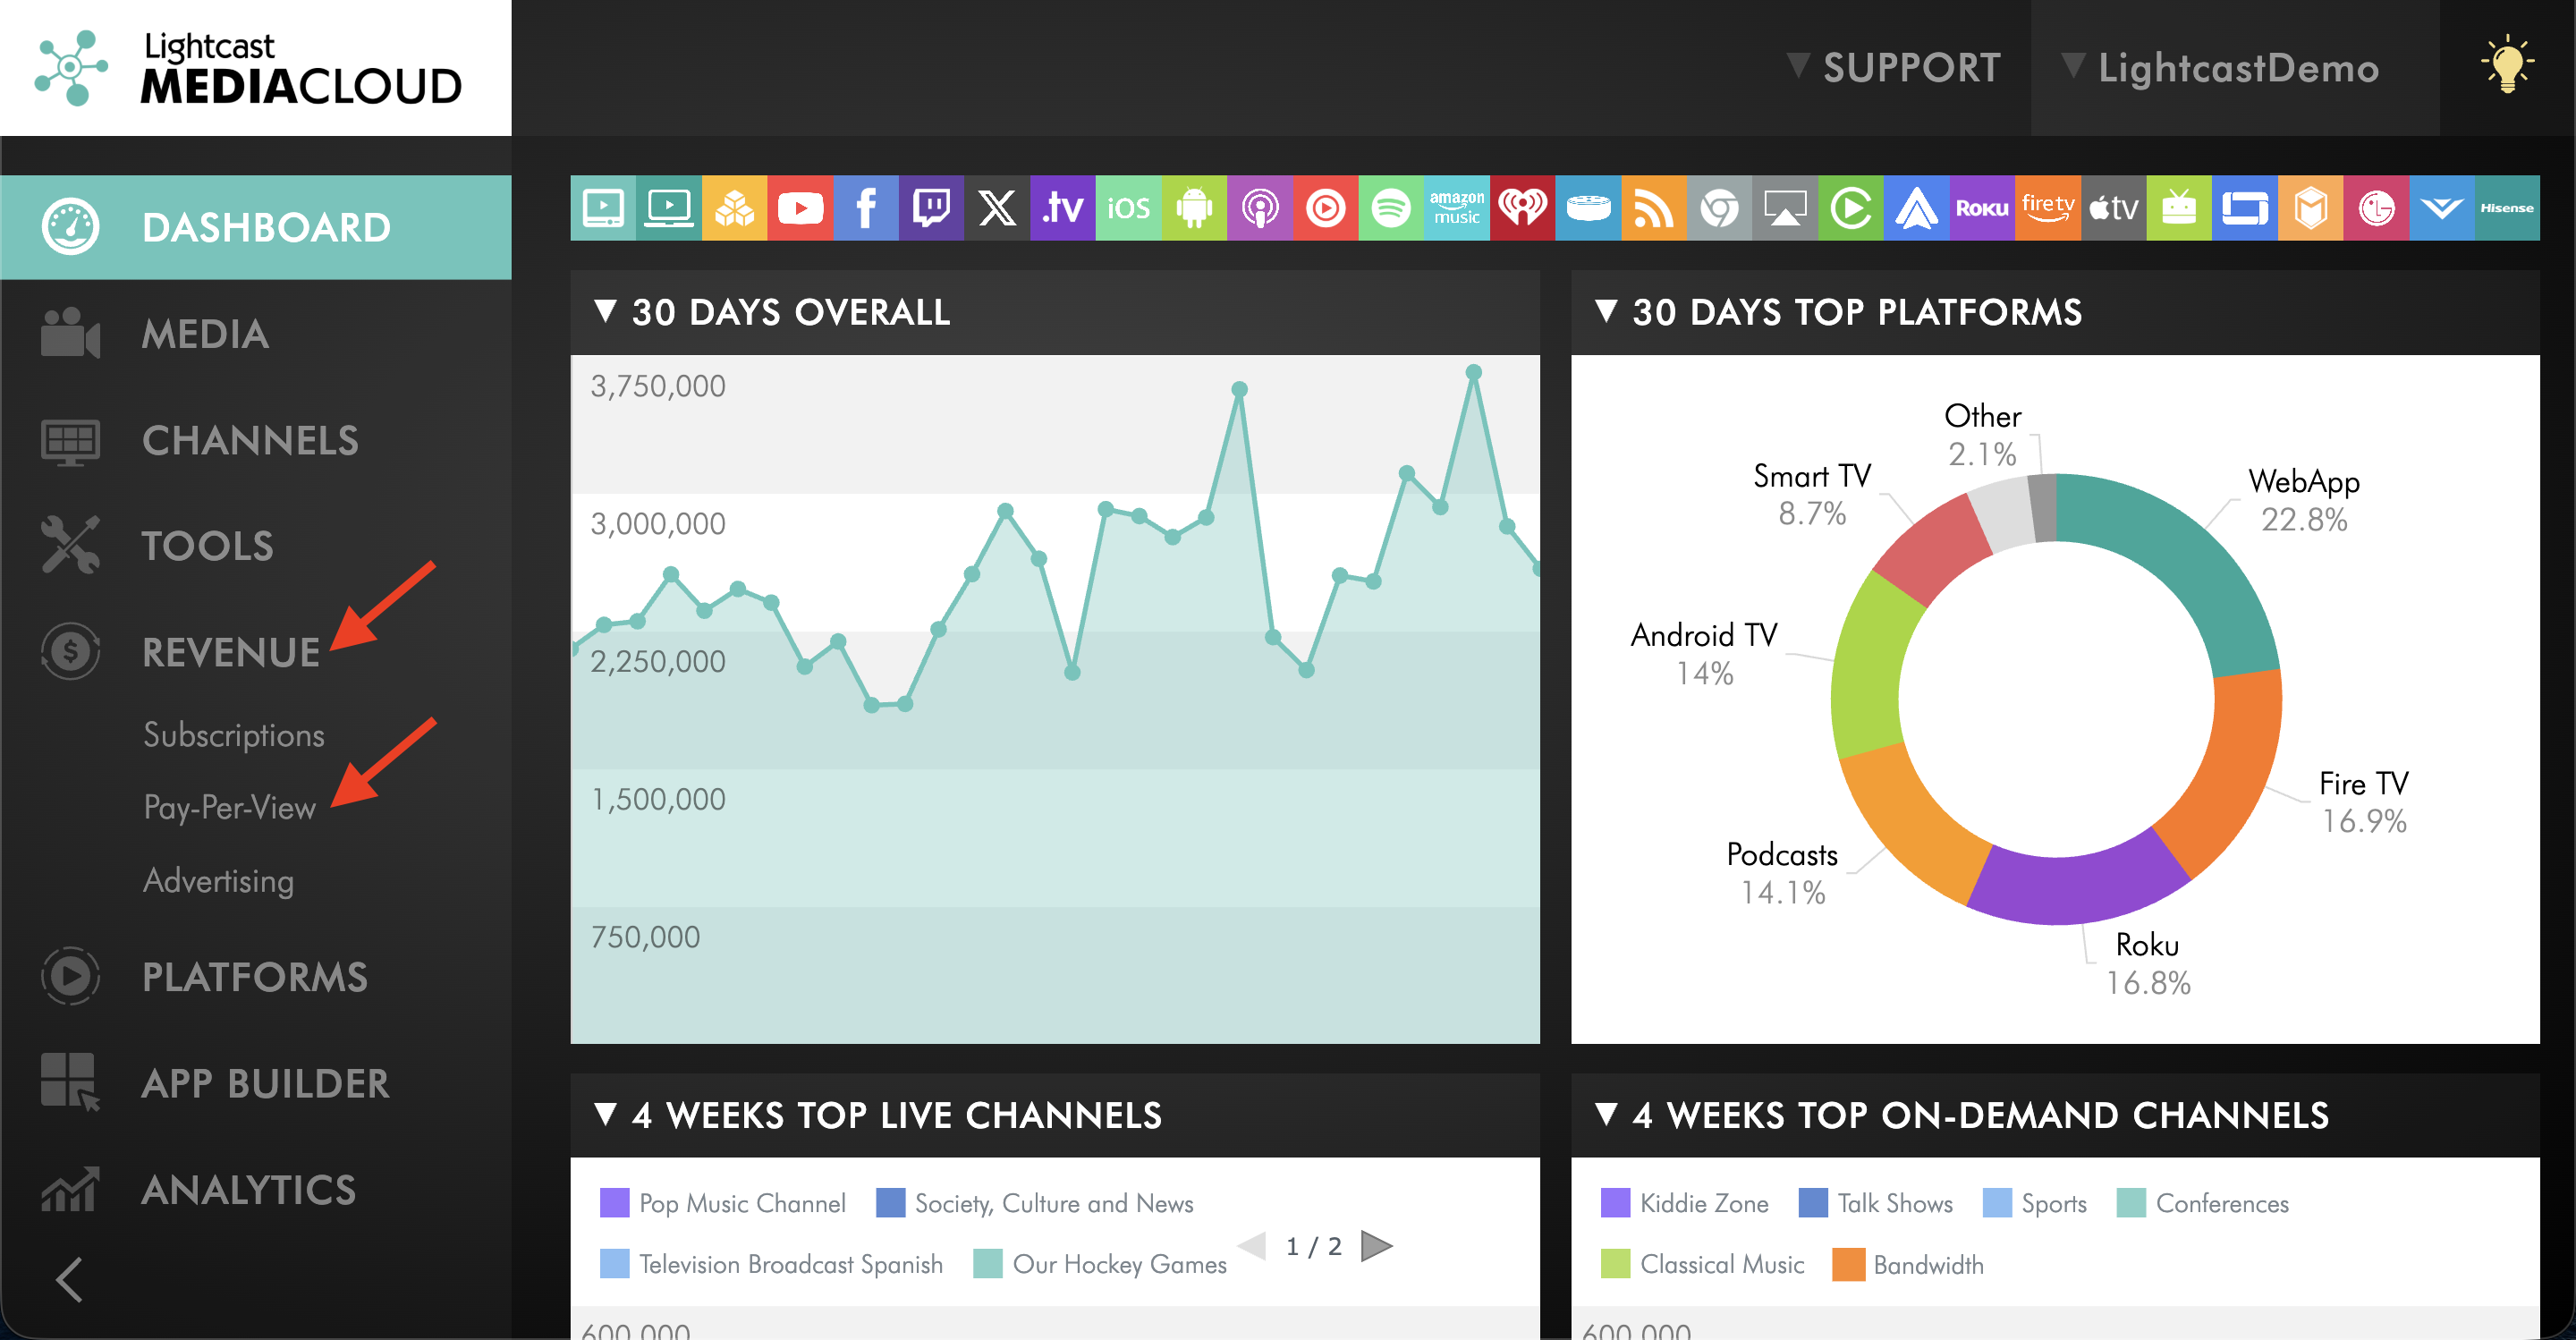
Select REVENUE from the left-hand menu, then select Pay-Per-View.
Step 3
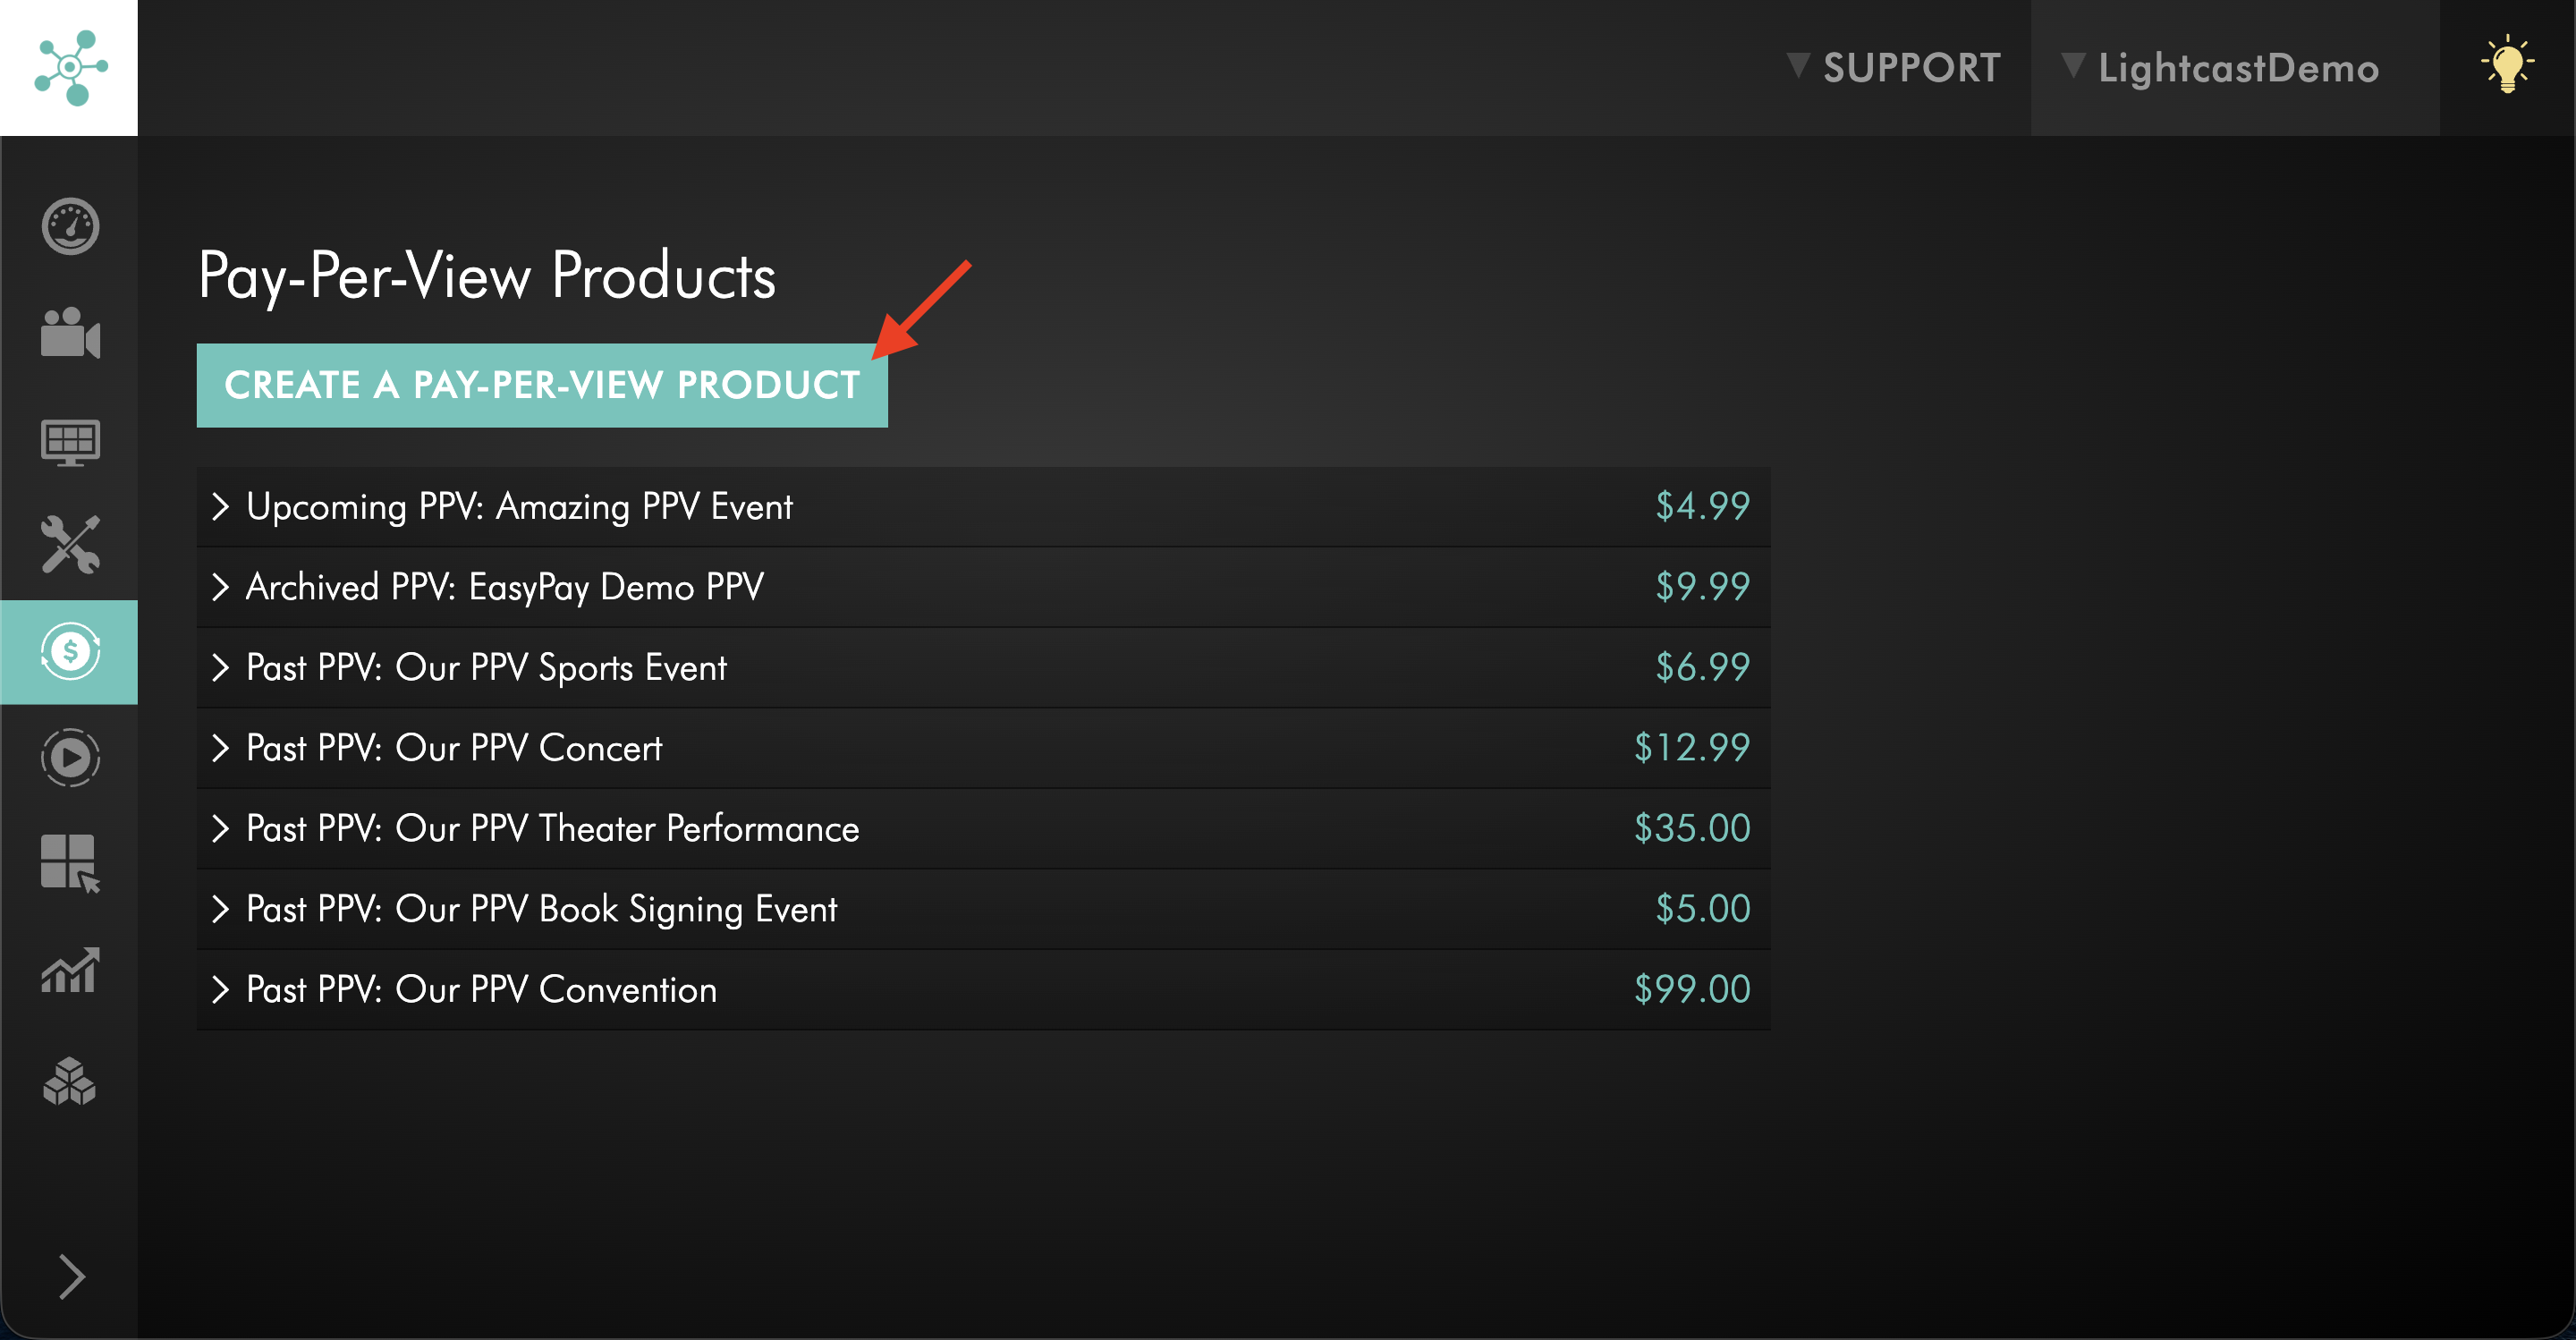
Click Create A Pay-Per-View Product.
Step 4
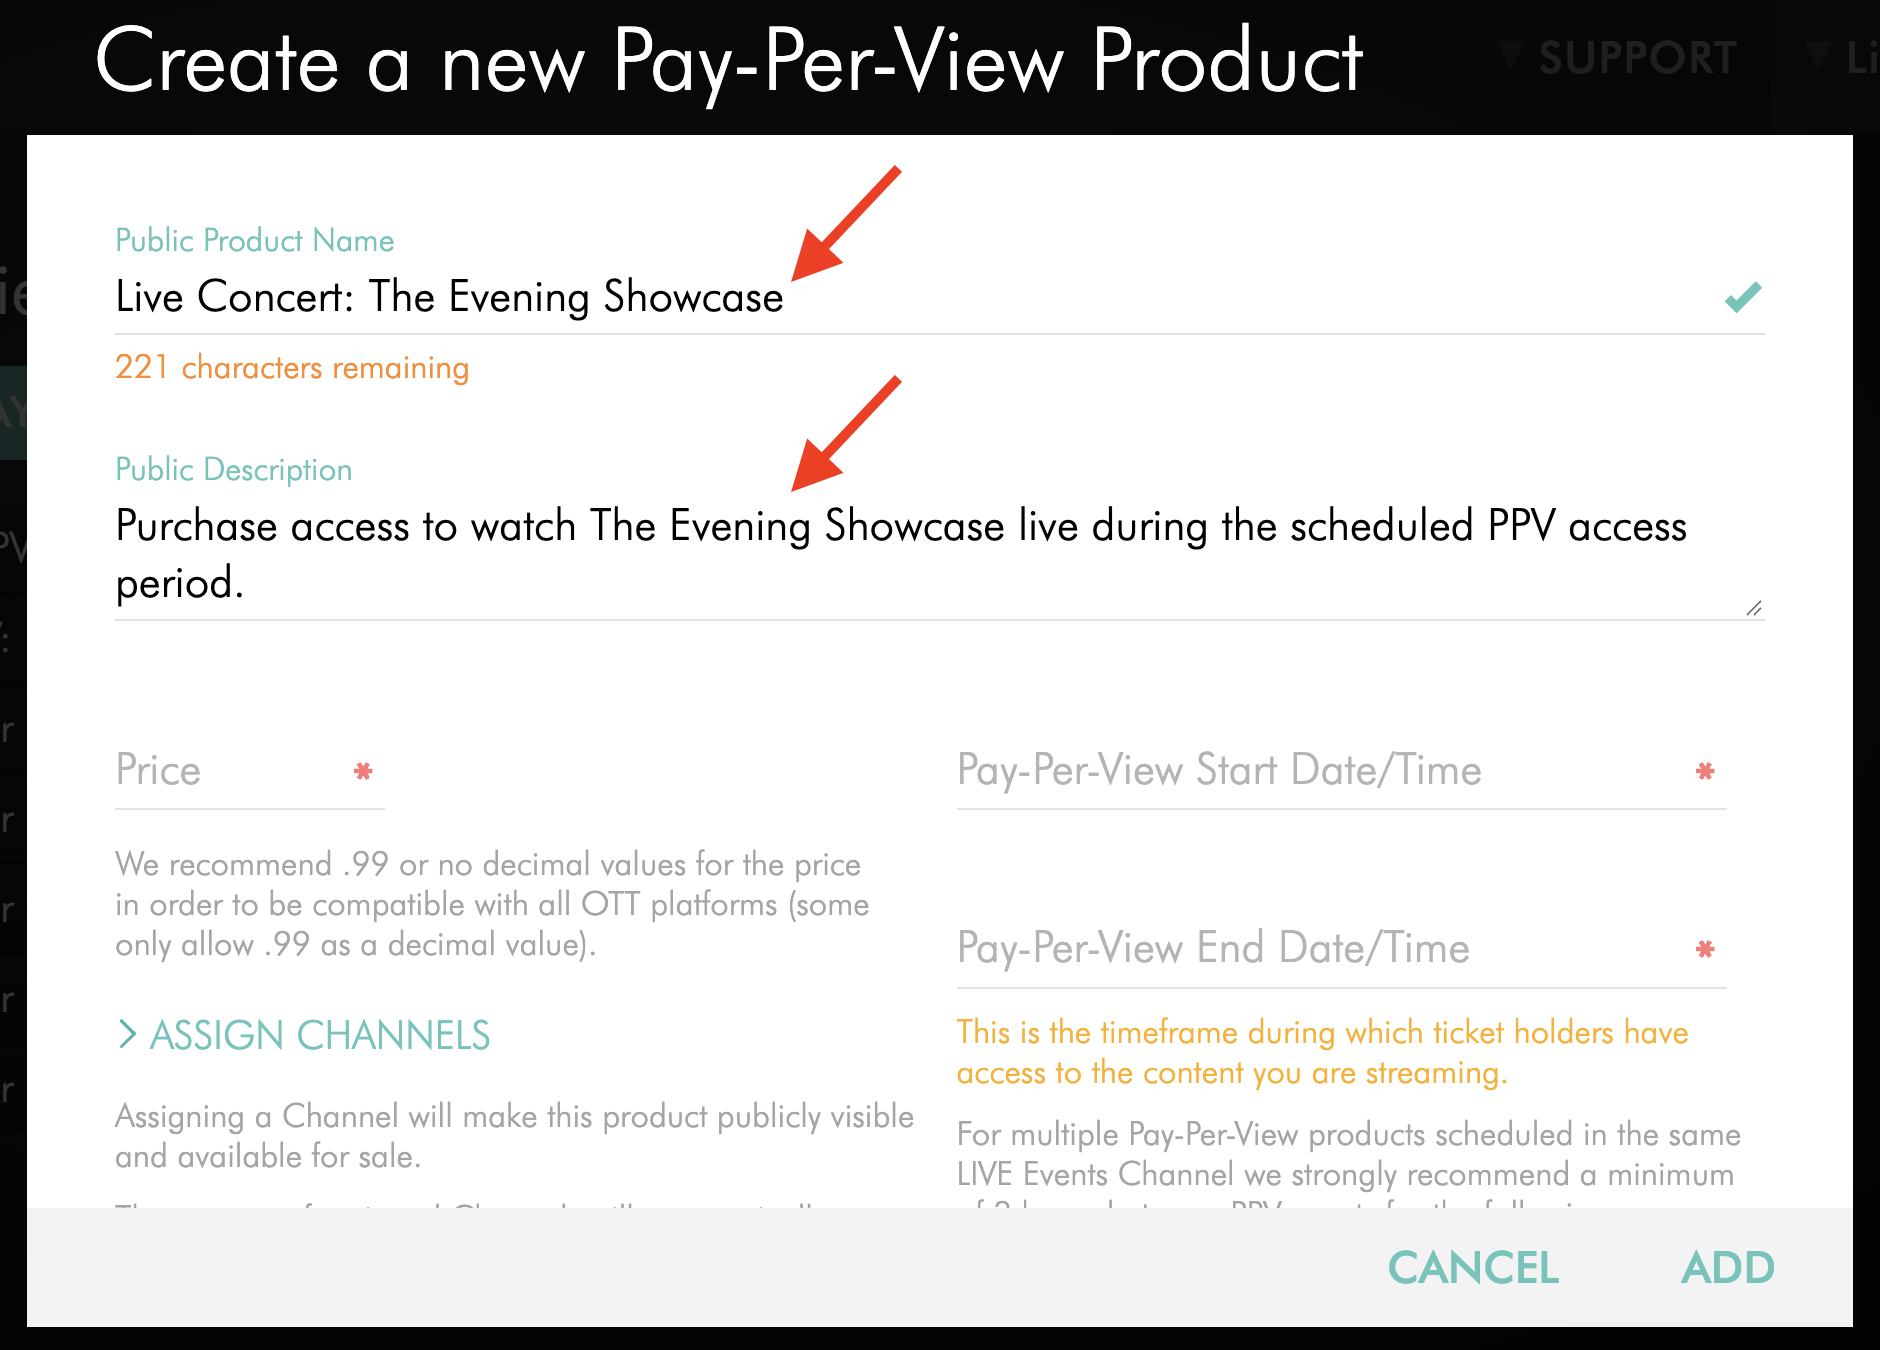
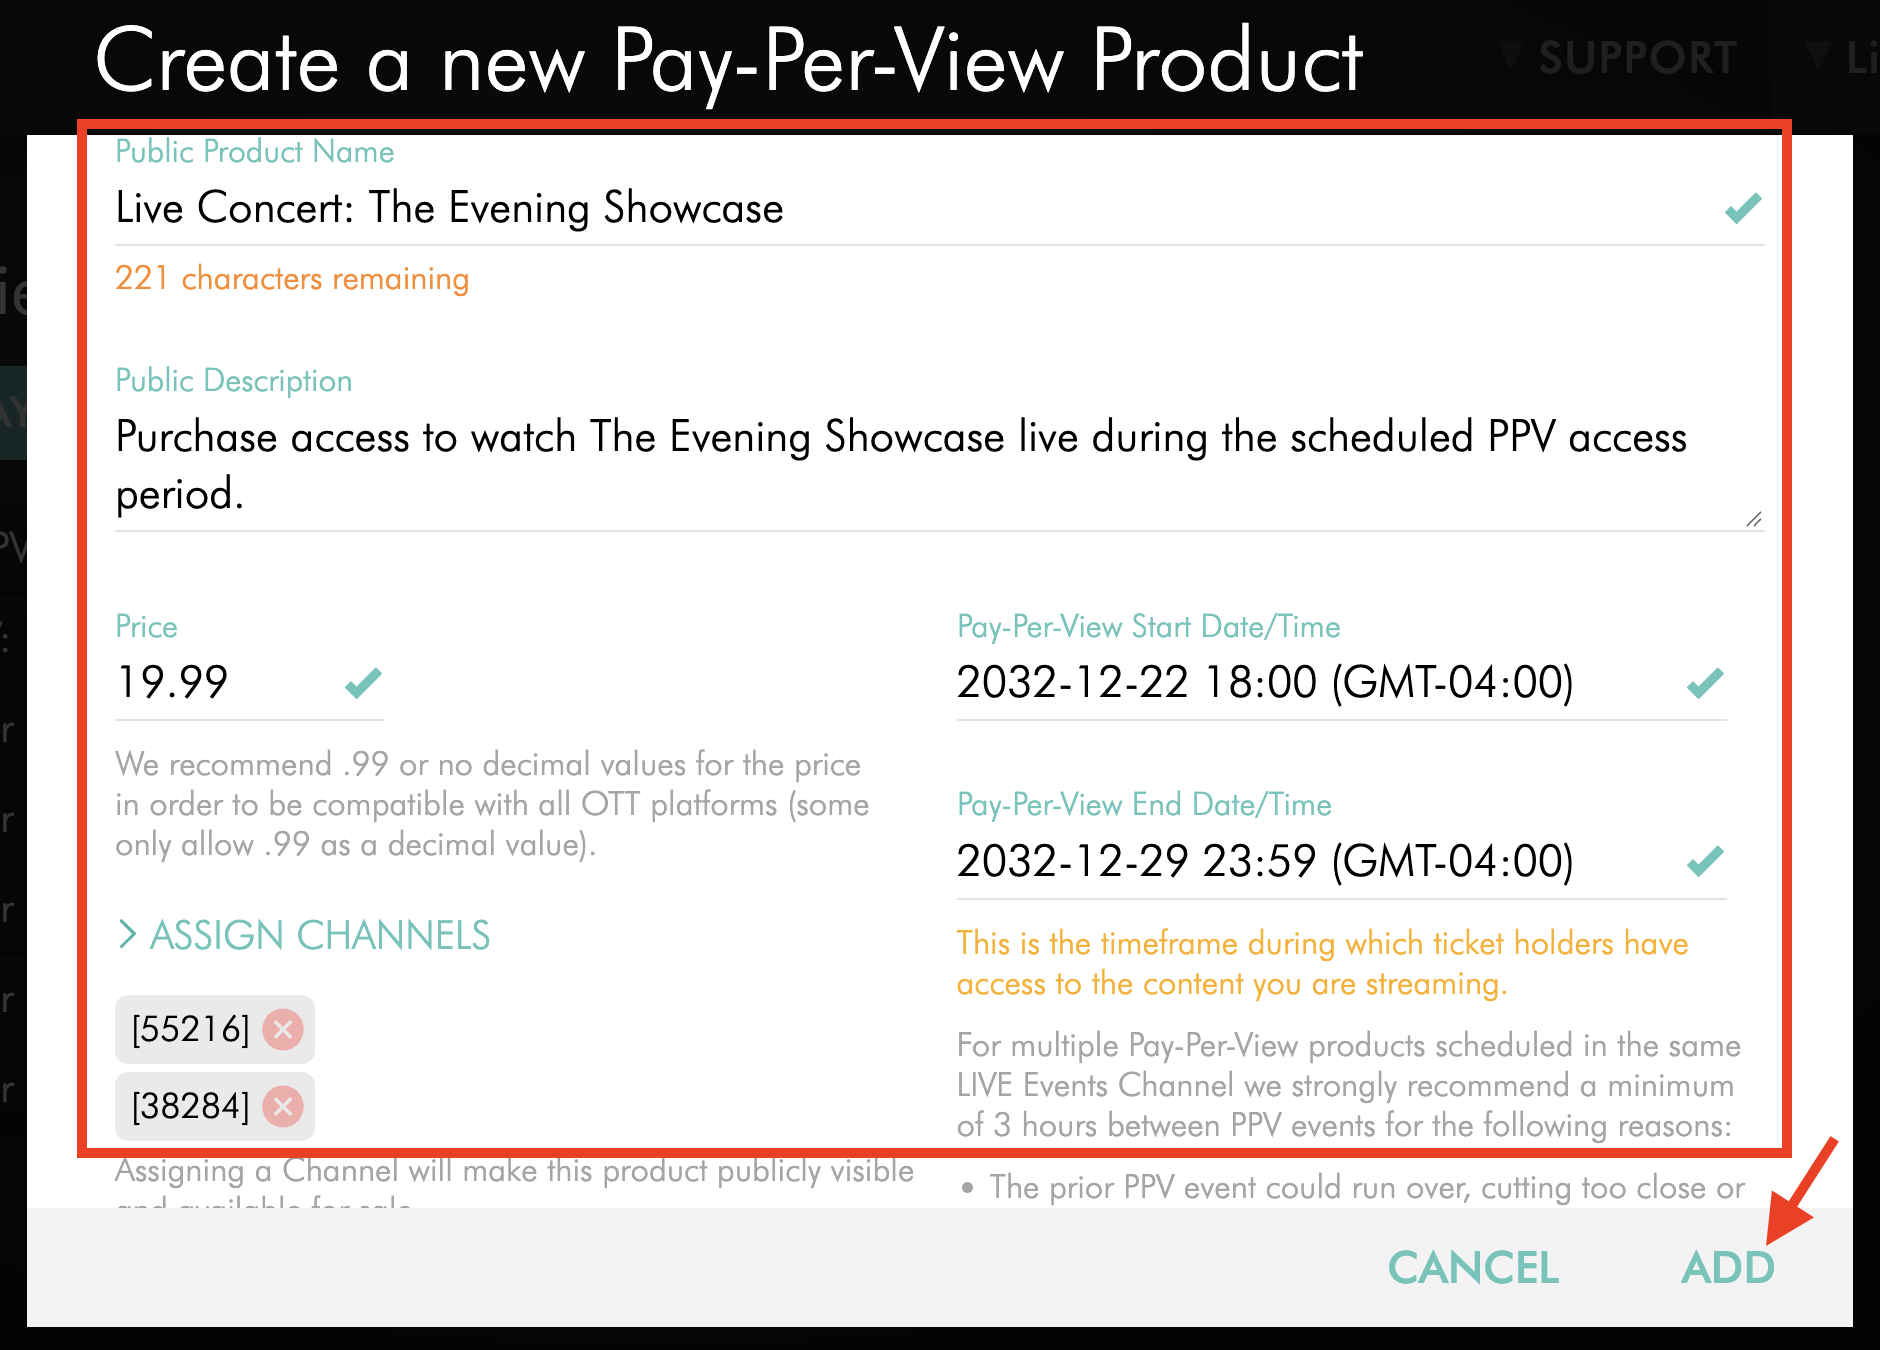
Enter the Public Product Name and Public Description.
Use clear information that helps viewers understand what they are purchasing. If the product is for a scheduled Live Event, consider including the event date and time in the product name and/or description.
Step 5
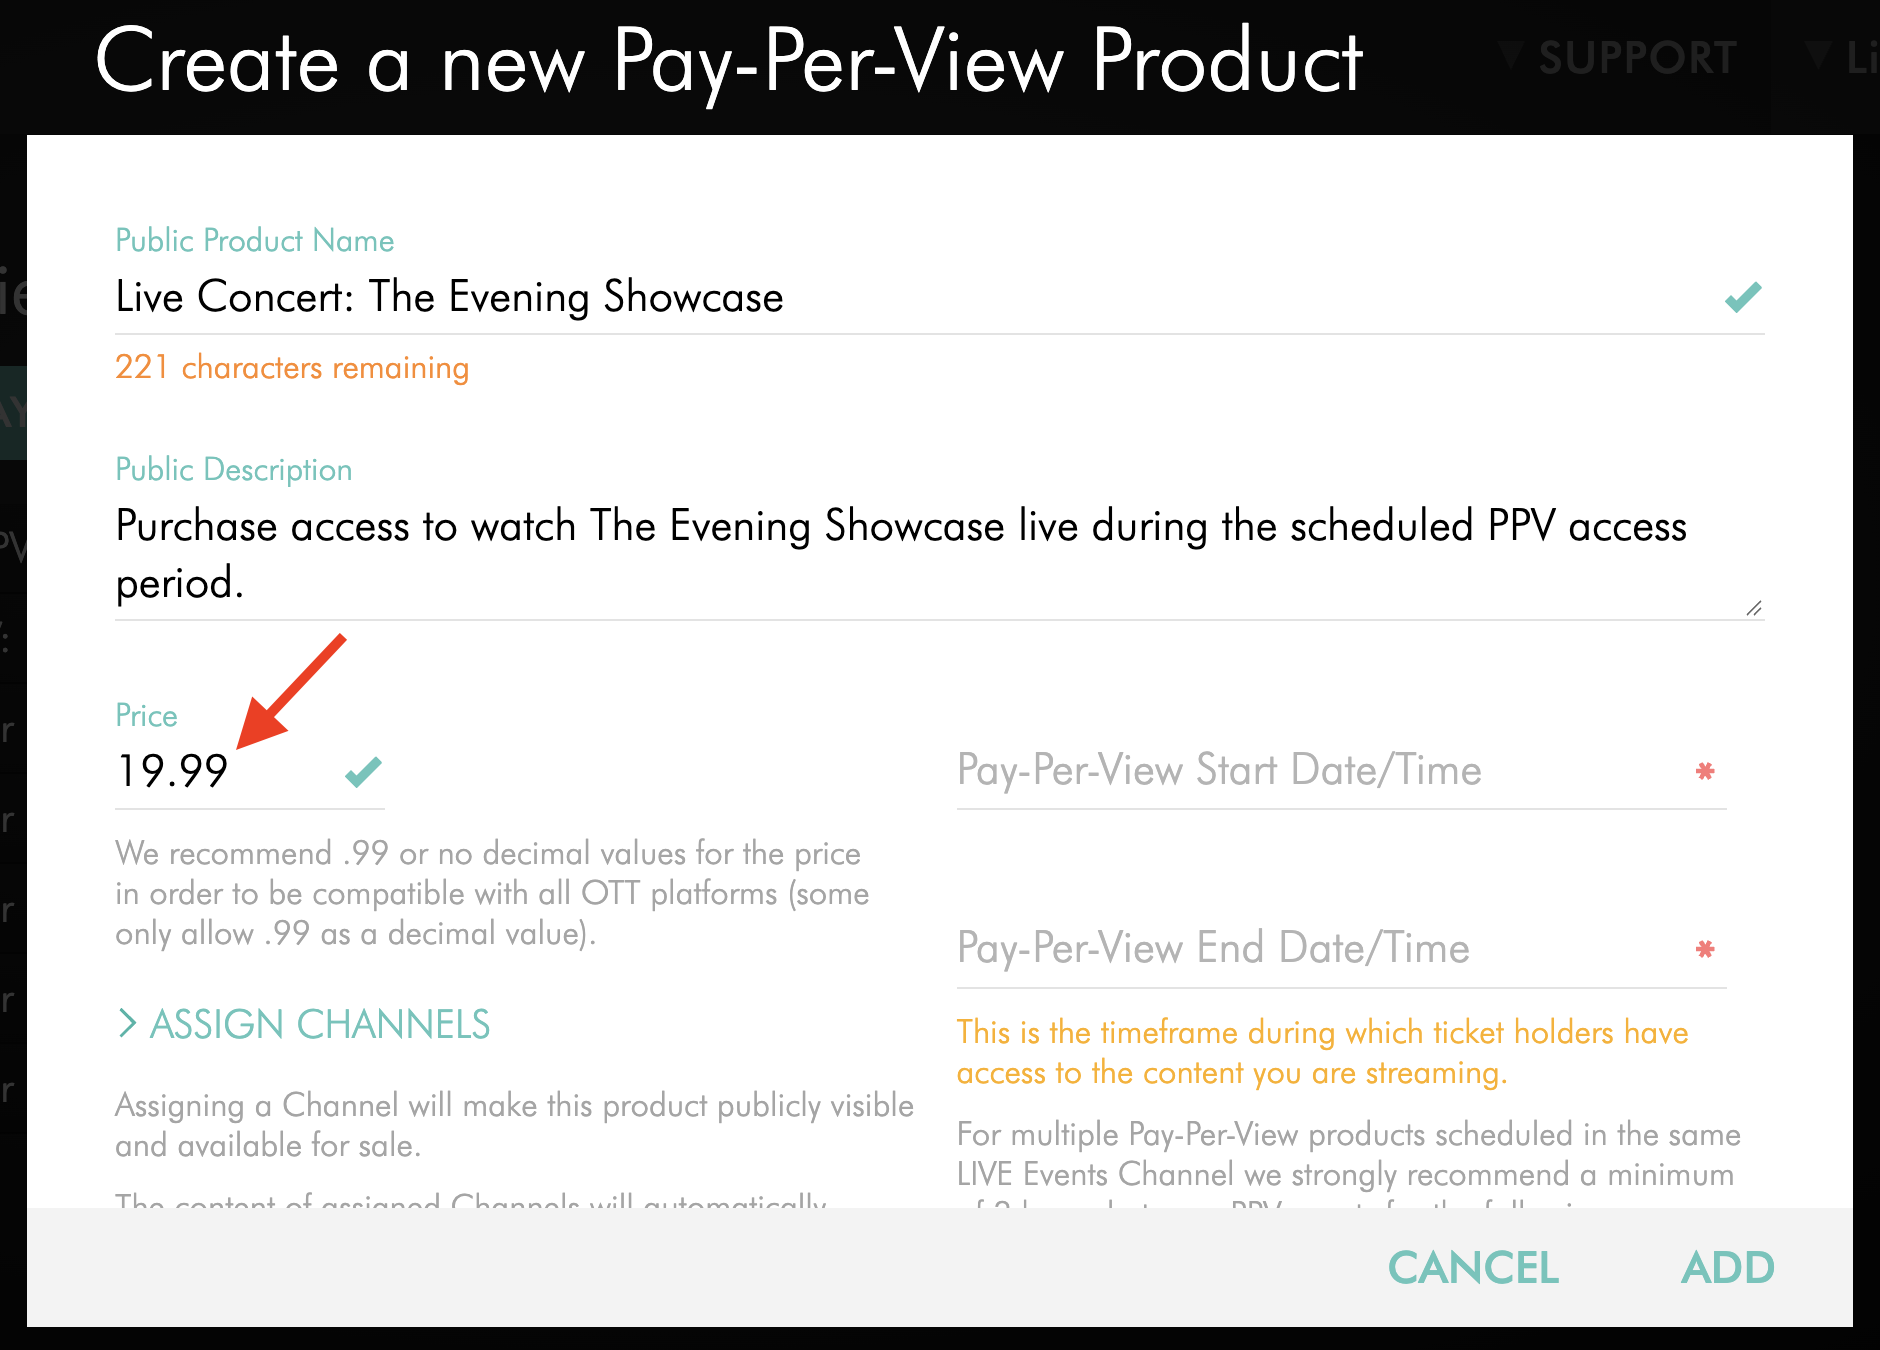
Enter the PPV ticket Price.
The minimum PPV ticket price is $4.99. Lightcast recommends setting PPV ticket prices above $10.00 to help maximize your revenue per ticket after applicable transaction fees.
Step 6
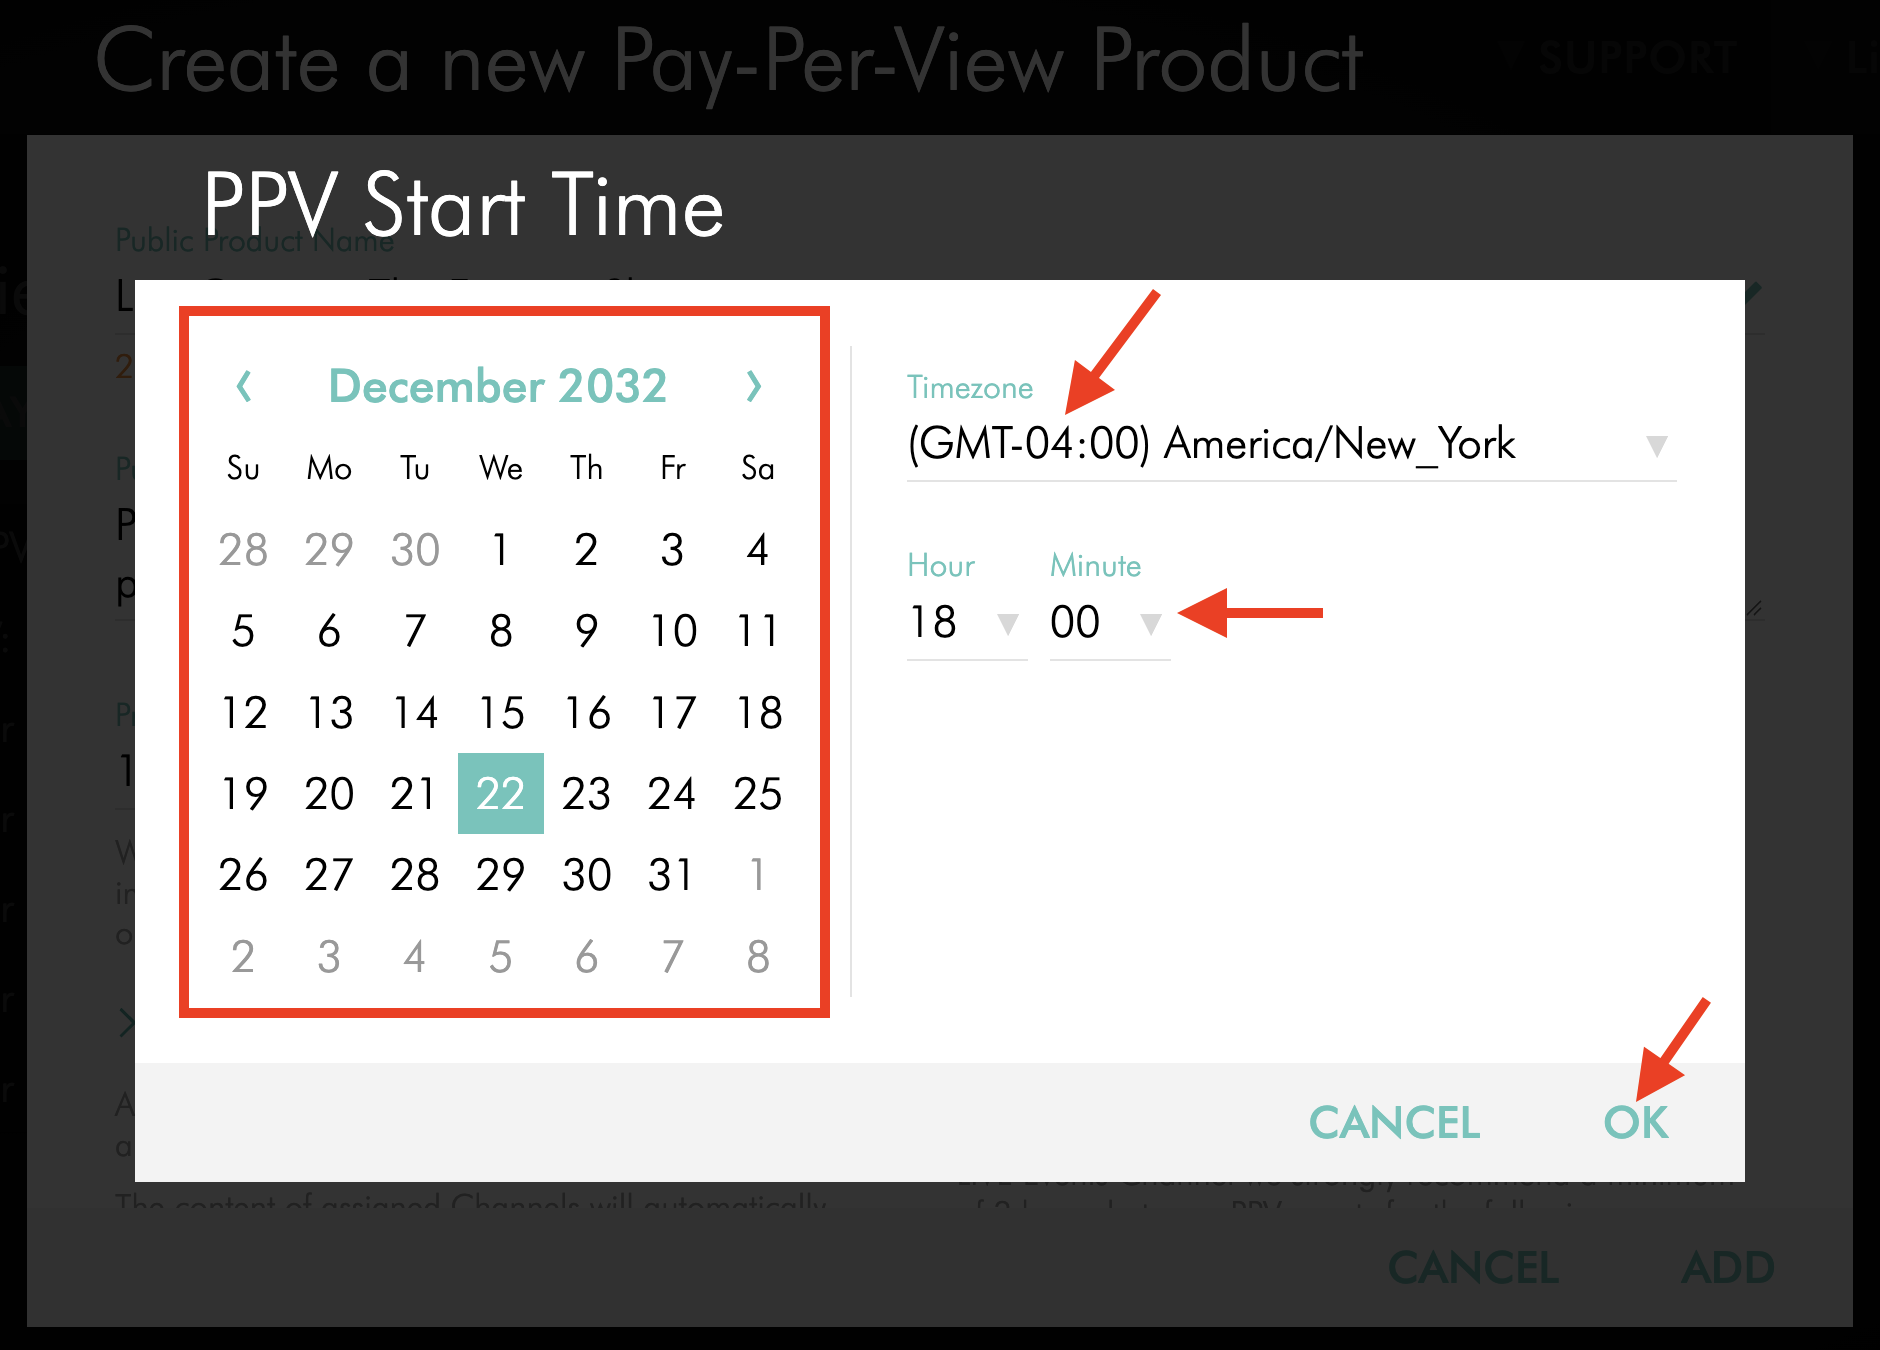
Select the PPV Start Date/Time.
Select the date, time zone, hour, and minute when ticket holders should begin having access to the PPV product, then click OK.
Note: The PPV Start Date/Time determines when ticket holders can begin accessing the content, not when ticket sales begin. Tickets can be purchased before the PPV access period begins once the PPV product is publicly available for sale.
Step 7
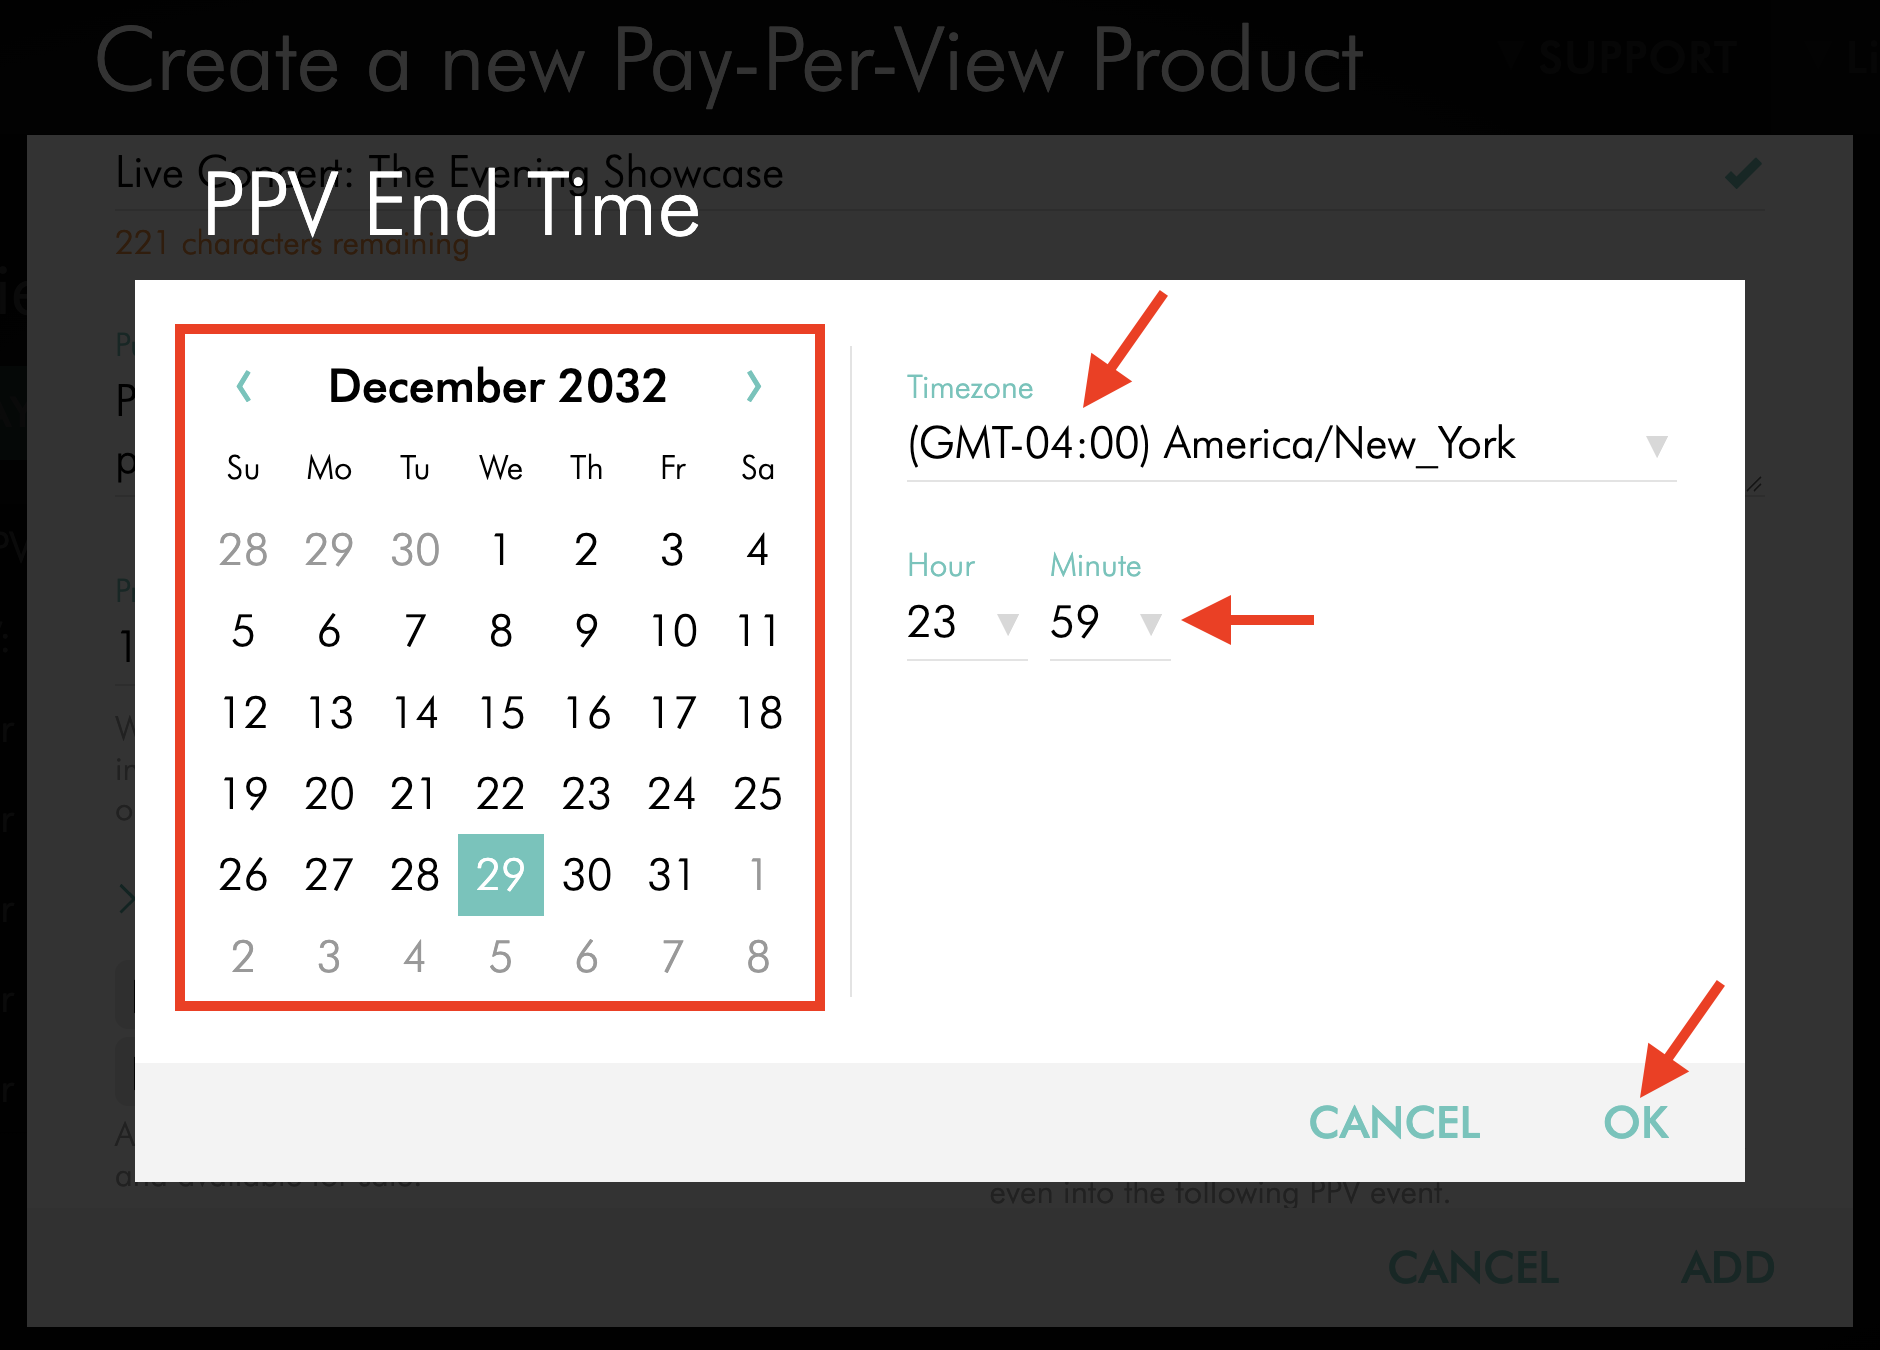
Select the PPV End Date/Time.
Select the date, time zone, hour, and minute when access to the PPV product should end, then click OK.
The period between the PPV Start Date/Time and PPV End Date/Time is the PPV product access period.
Important: Verify that you have selected the correct time zone for both the start and end dates. If your PPV product includes a Live Event, allow sufficient time for the entire event, including potential delays or extensions. If you also offer a post-event on-demand version, make sure the access period includes the intended on-demand viewing window.
Step 8
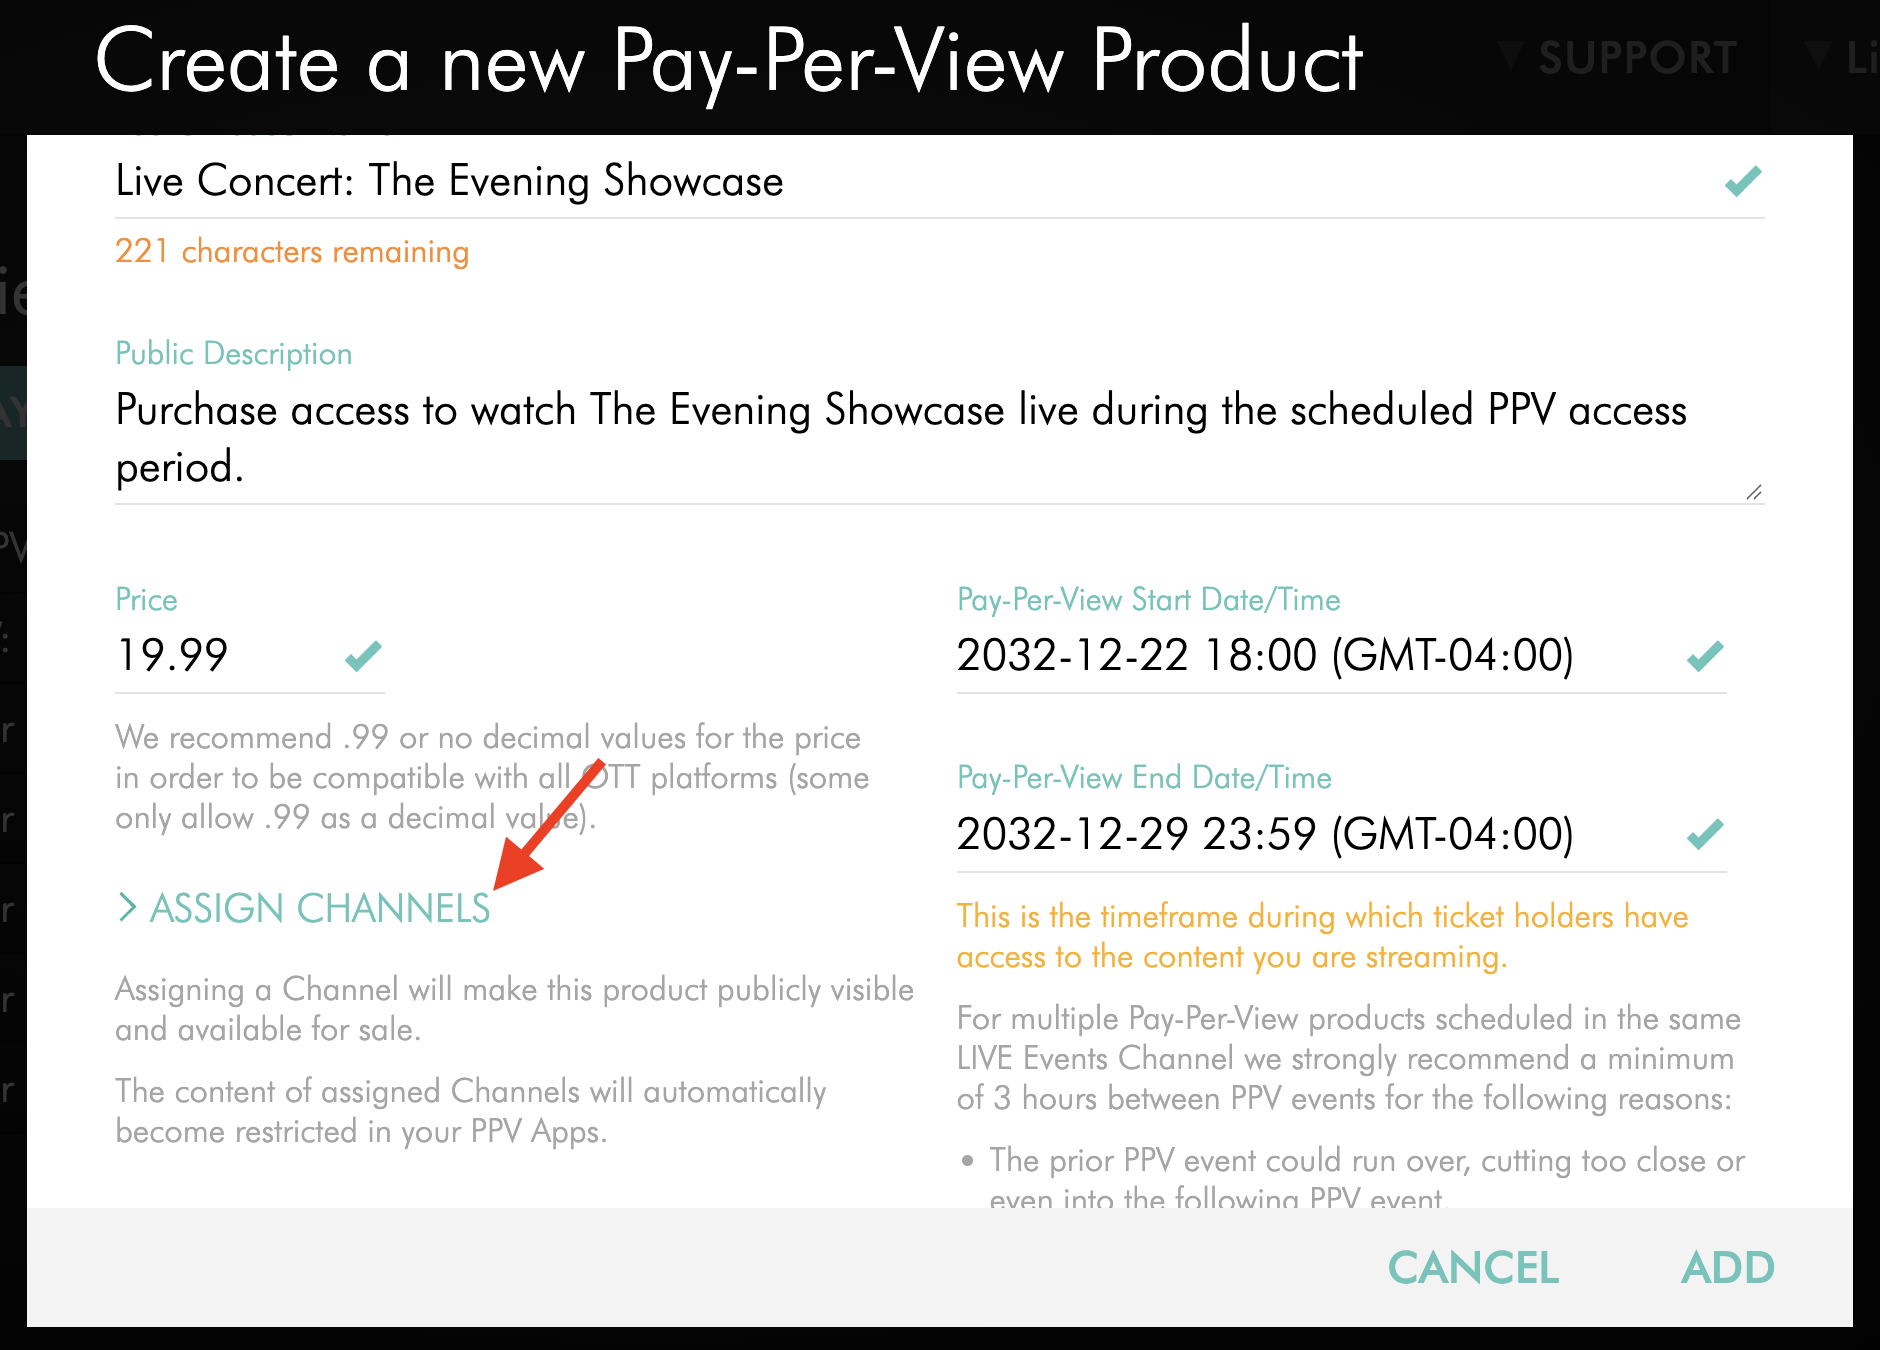
Click ASSIGN CHANNELS.
Step 9
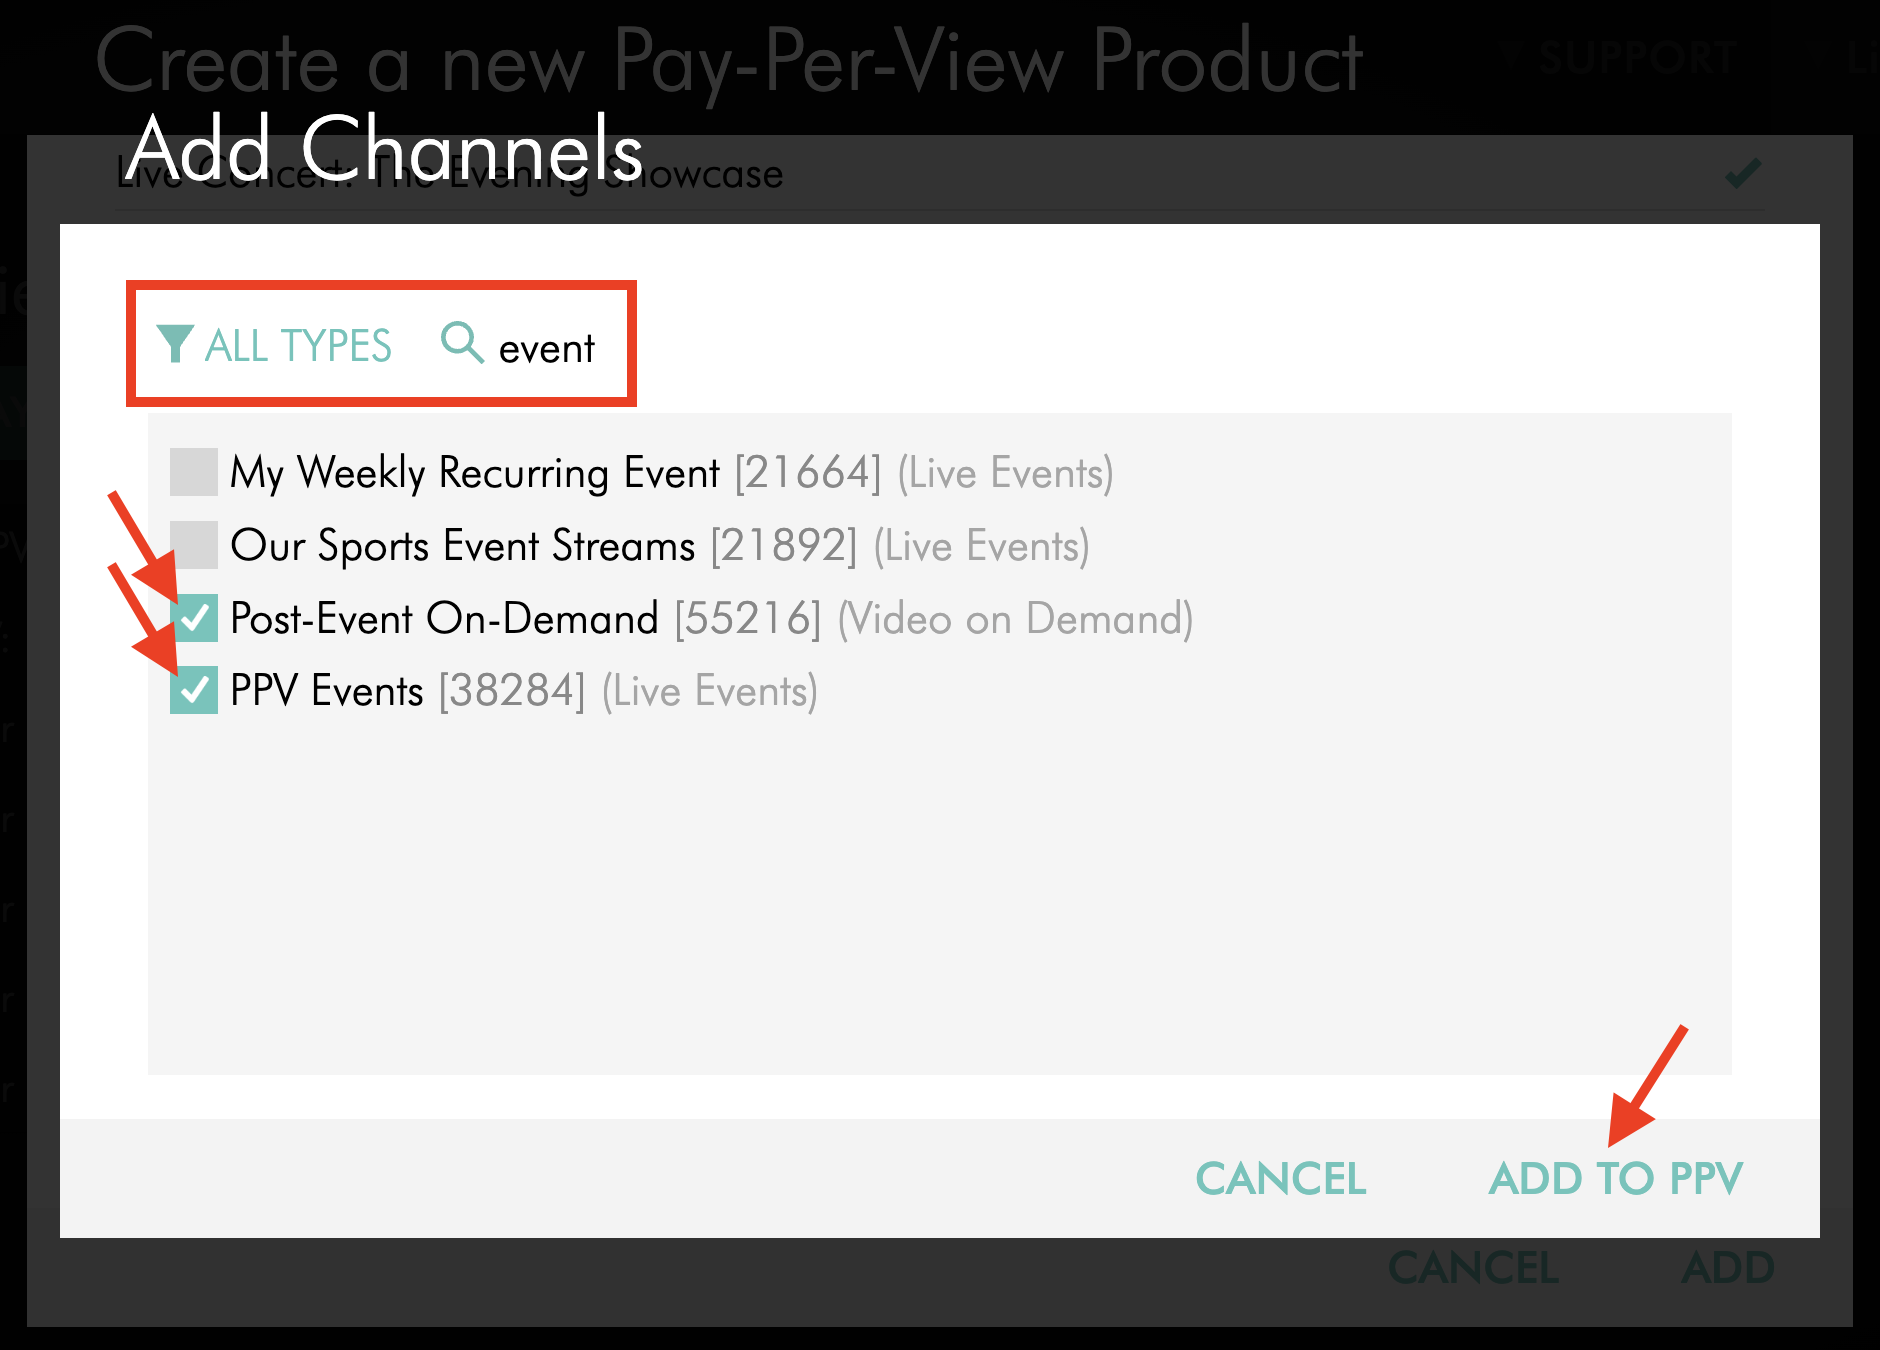
Use the Channel type filter and/or SEARCH field to find the LIVE, VOD, and/or AOD Channel(s) you want to include with the PPV product.
Select the applicable Channel(s), and then click ADD TO PPV.
The assigned Channels determine which content ticket holders can access with their PPV purchase.
Before assigning a Channel, make sure it contains only the content you intend to include with the PPV product.
Important: Once a PPV product is created or saved with a Channel assigned, PPV access restrictions apply to that Channel immediately.
If the Channel was previously available for free, viewers must purchase the applicable PPV product to access it during the configured PPV access period.
If the Channel is also included in a subscription product, viewers with an active subscription that includes the Channel can continue accessing it without purchasing the PPV product separately.
If a previously free Channel is removed from the PPV product, it becomes freely accessible again.
If a PPV Live Event will also include a post-event on-demand version, assign both the applicable LIVE Channel and VOD Channel to the same PPV product so ticket holders can access both with one purchase.
Step 10
Review the PPV product details and click ADD to create the product.
Important: Once the PPV product has been created with its assigned Channels, it becomes publicly available for sale. Access to the assigned Channel content within your PPV-enabled apps is controlled by the viewer’s applicable access rights, such as a PPV ticket or an existing subscription that includes the same Channel.
Step 11
Verify your PPV product.
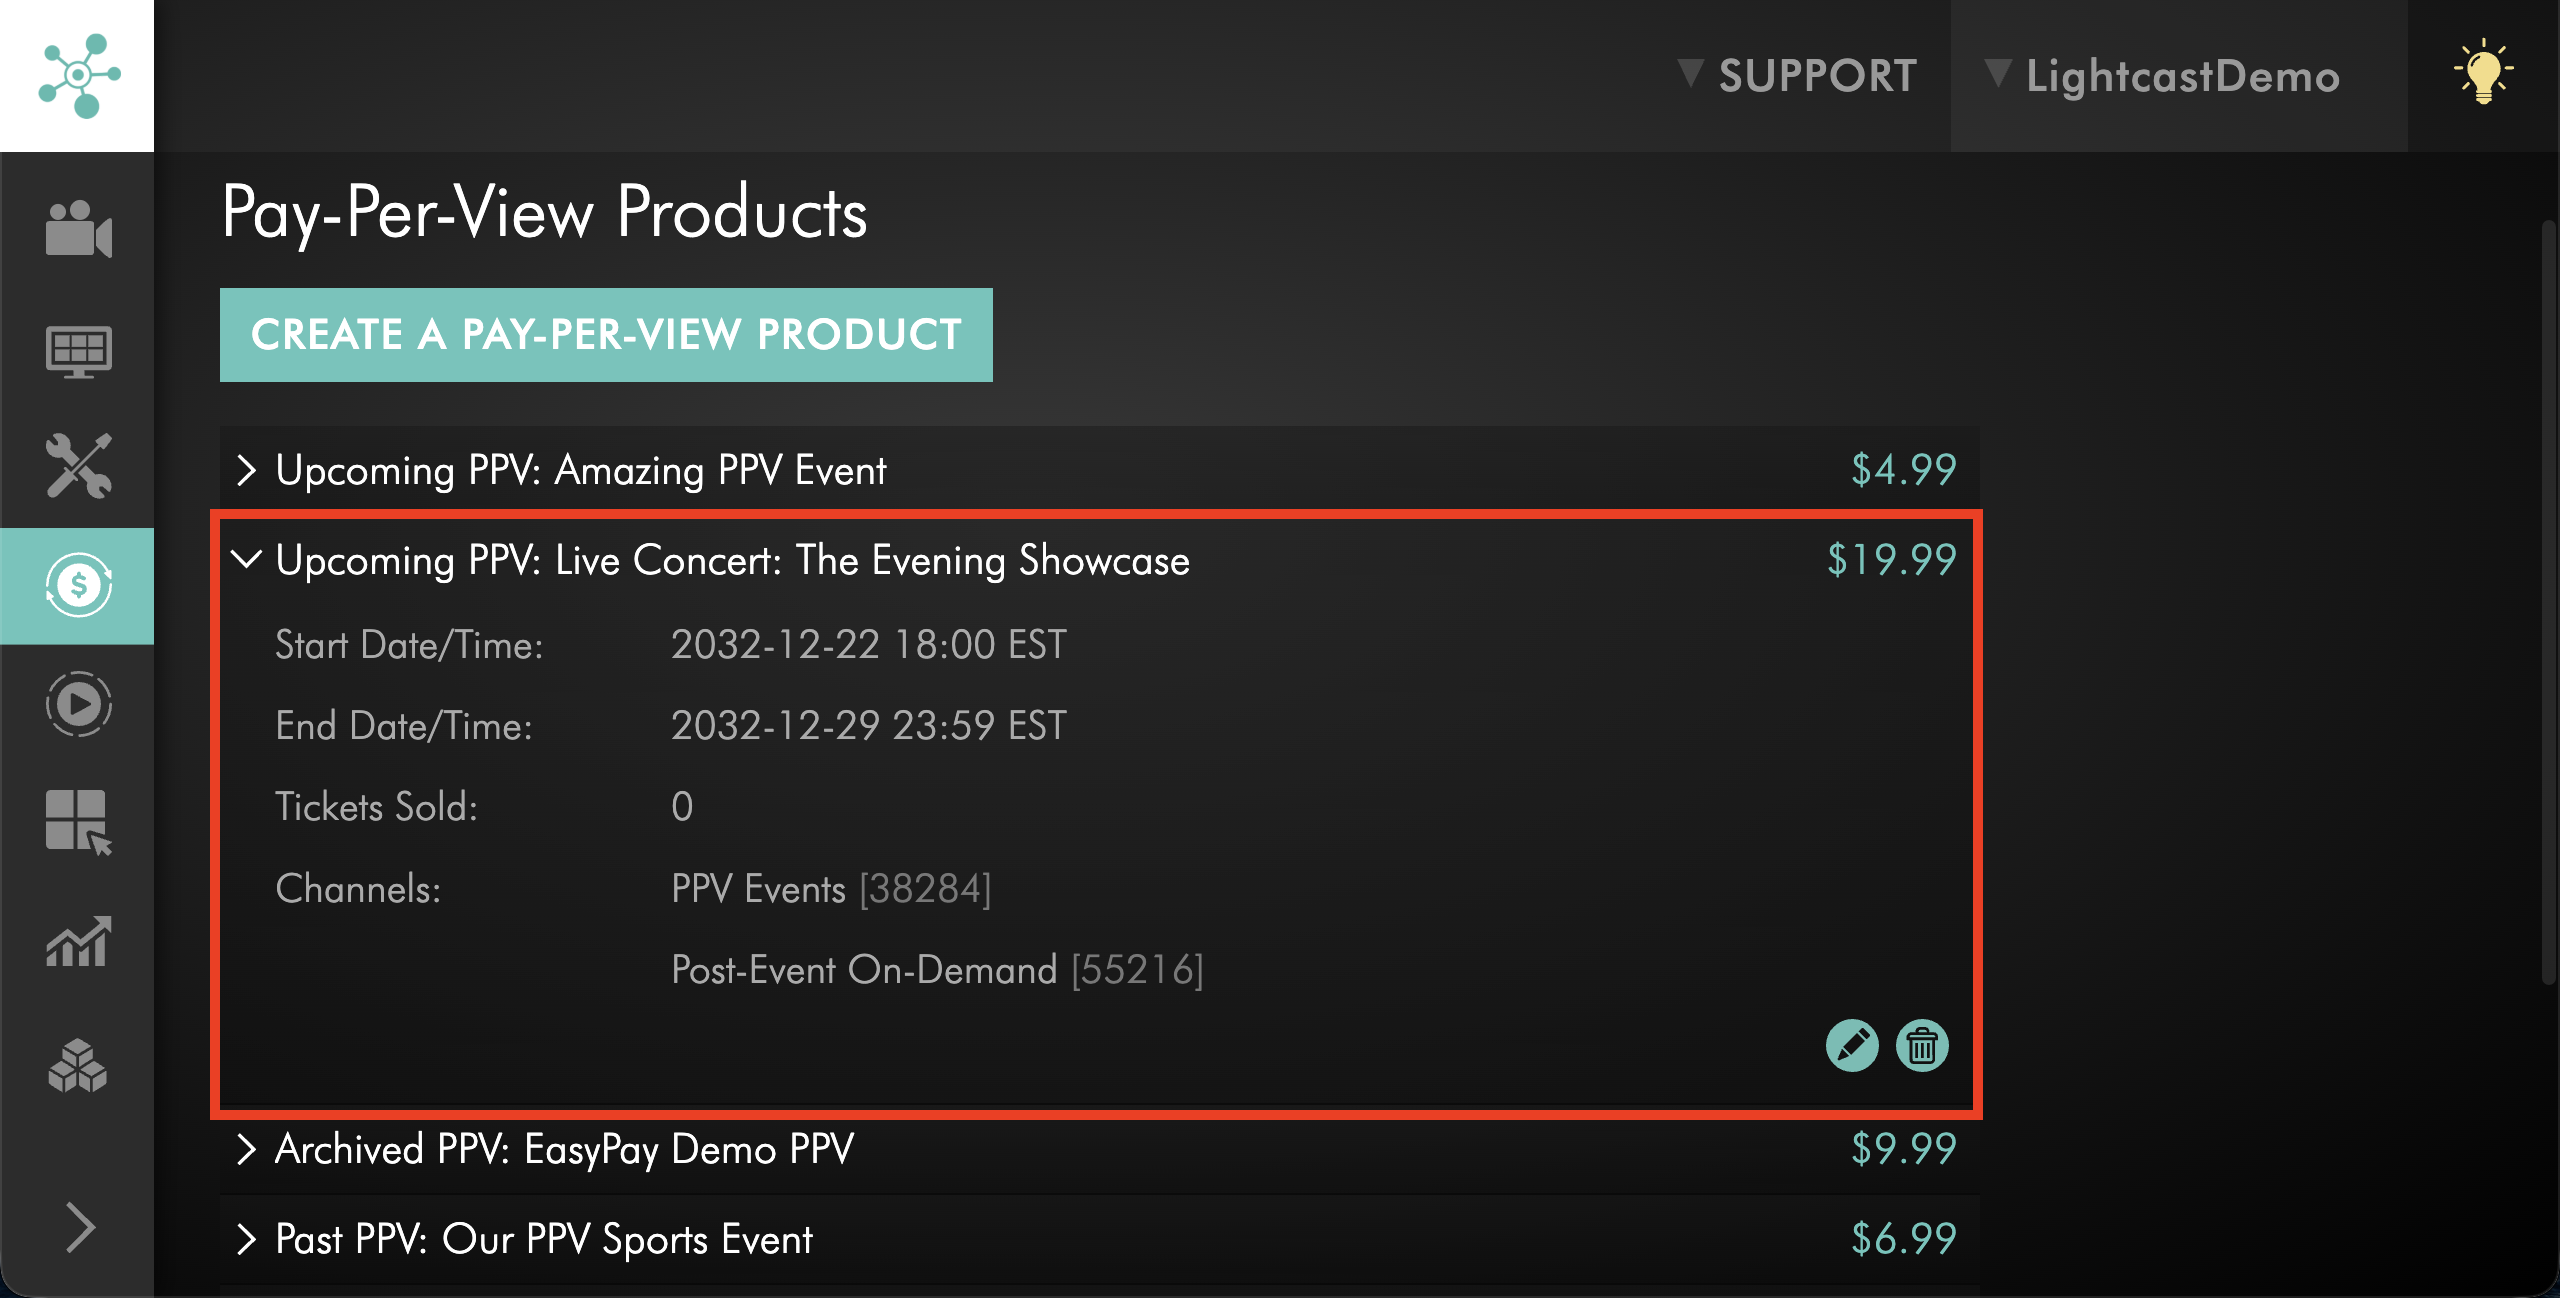
After creating the PPV product, review its details in the Pay-Per-View section of the Media Cloud.
Confirm that:
The Public Product Name, Public Description, and ticket Price are correct.
The PPV Start Date/Time and PPV End Date/Time, including the selected time zone, are correct.
The correct LIVE, VOD, and/or AOD Channel(s) are assigned.
Check your PPV-enabled app to confirm that the product is displayed as intended before promoting ticket sales to your audience.
FAQs
Can more than one Channel be assigned to a Pay-Per-View product?
Yes. A PPV product can include applicable LIVE, VOD, and/or AOD Channels.
For example, a PPV Live Event can include both the LIVE Channel and a VOD Channel containing the post-event on-demand version.
What does the Pay-Per-View access period control?
The PPV access period determines when ticket holders can access the LIVE, VOD, and/or AOD content assigned to the PPV product.
All viewers who purchase the same PPV product receive access according to that configured period, regardless of when they purchase their ticket.
Does the Pay-Per-View Start Date/Time control when tickets go on sale?
No. The PPV Start Date/Time determines when ticket holders can begin accessing the content.
Tickets can be purchased before the PPV access period begins once the PPV product is publicly available for sale.
Can a Pay-Per-View product include a Live Event and its on-demand version?
Yes. Assign both the applicable LIVE Channel and the VOD Channel containing the post-event version to the same PPV product.
Access to both is controlled by the PPV product access period.
For more information, see How to offer on-demand access after a Pay-Per-View Live Event.
Can a Pay-Per-View product be edited after it is created?
Yes. After creating a PPV product, you can manage its available settings from the Pay-Per-View section of the Media Cloud.
For detailed instructions, see How to manage a Pay-Per-View product.
Does Lightcast need to create each new Pay-Per-View product?
No. Lightcast configures your initial PPV service and first PPV product. After that setup is complete, you can create and manage additional PPV products directly in the Media Cloud.