
How to use Live Broadcasts in the 24/7 Scheduler
Overview
This article explains how to schedule and manage Live Broadcasts in a 24/7 Scheduler Channel in the Media Cloud. It also explains how Live Broadcasts fit into your continuous programming schedule and how to prepare your encoder for the broadcast.
When to use Live Broadcasts
Use Live Broadcasts when you want to include live programming from an encoder at a specific time within your 24/7 Scheduler programming lineup.
A Live Broadcast is scheduled as part of your programming and reserves that time for the incoming live stream.
Before you begin
Before scheduling a Live Broadcast:
Make sure Live Broadcasts are enabled for your 24/7 Scheduler Channel.
Make sure your encoder is configured and ready to send an RTMP stream.
Have the Channel's Stream Key and CDN Access Point available.
Make sure the time period where you want to add the Live Broadcast is empty in the Scheduler.
Schedule the Live Broadcast before the applicable 24/7 Scheduler update deadline.
How it works
A Live Broadcast reserves a specific time in your 24/7 Scheduler programming for a live stream sent from your encoder.
Live Broadcasts can only be added to an empty portion of the schedule. You cannot drag a Live Broadcast duration onto a time period that already contains scheduled programming.
Your programming schedule determines when the Live Broadcast begins and ends. At the scheduled start time, the Playout System switches to the incoming live stream. At the scheduled end time, it switches to the next scheduled program, which takes priority even if your encoder is still sending the live stream.
Important: Live Broadcasts are subject to the 24/7 Scheduler update deadline. Changes for the following day must be completed by 11:45 PM US Eastern Time on the previous day. Same-day schedule changes are not supported.
To learn more, see Understanding 24/7 Scheduler update deadlines.
Before the Live Broadcast begins, configure your encoder to send the live stream to your 24/7 Scheduler Channel using the Channel's RTMP credentials. You will need the Stream Key and CDN Access Point.
Only RTMP ingestion is supported for Live Broadcasts in the 24/7 Scheduler.
To learn how to locate these credentials, see How to find your LIVE Channel stream credentials.
Begin sending the stream from your encoder shortly before the scheduled Live Broadcast so the stream is available when the Live Broadcast time slot begins.
When no live stream is received
The Playout System switches to the scheduled Live Broadcast time slot even if no stream is being received from your encoder.
If no live stream is available, the stream stops during the reserved Live Broadcast time slot and the player displays an error because there is no stream available to play.
The Playout System switches to the next scheduled program when the Live Broadcast time slot ends.
When a Live Broadcast runs longer than scheduled
When the scheduled Live Broadcast time ends, the Playout System switches to the next scheduled program, even if your encoder is still sending the live stream.
Important: The Live Broadcast does not automatically extend if your event runs longer than scheduled.
Schedule additional time at the end of your Live Broadcast when the event may run longer than expected.
LIVE-to-VOD recording
A Live Broadcast within a 24/7 Scheduler Channel cannot be recorded as an individual event using LIVE-to-VOD directly from the Scheduler Channel.
If you want to create a VOD recording of the broadcast, schedule the same stream in a separate Live Events Channel with LIVE-to-VOD enabled. Configure your encoder to send the stream to both the 24/7 Scheduler Channel and the Live Events Channel.
The 24/7 Scheduler Channel uses the stream as part of your linear programming, while the separate Live Events Channel creates the LIVE-to-VOD recording.
To learn more, see How to enable LIVE-to-VOD recording.
Instructions
Schedule a Live Broadcast in the 24/7 Scheduler
Step 1
Log in to your Media Cloud account.
Step 2
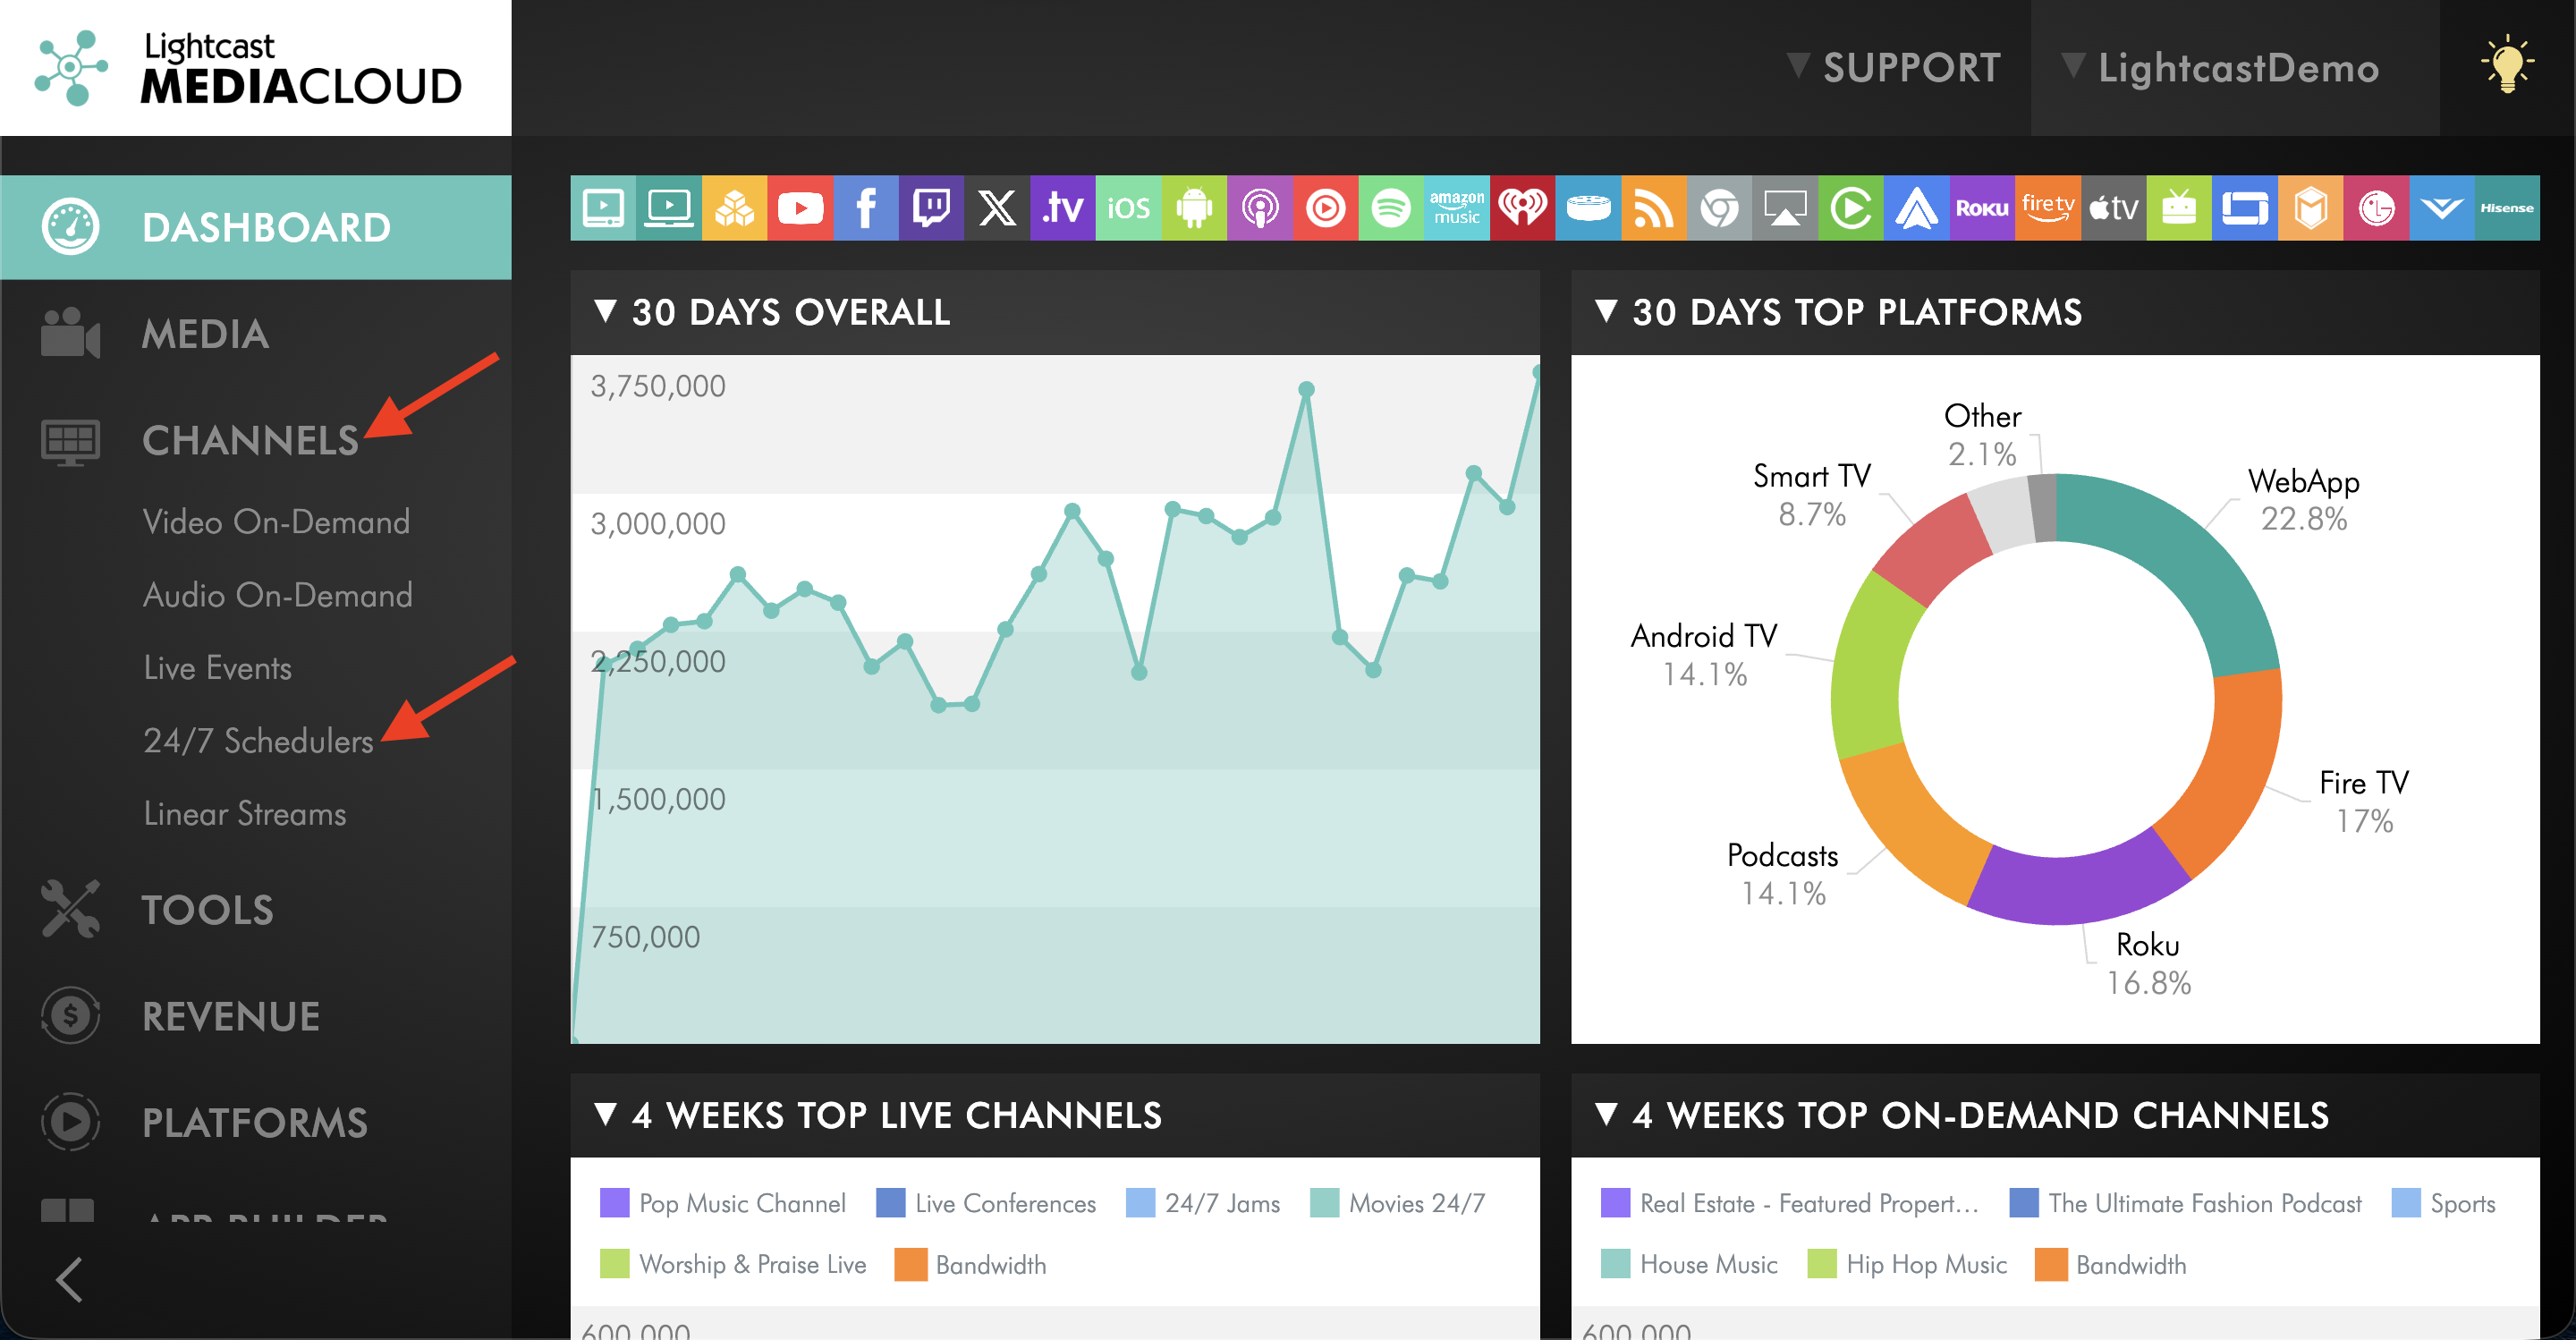
Go to CHANNELS and select 24/7 Schedulers.
Step 3
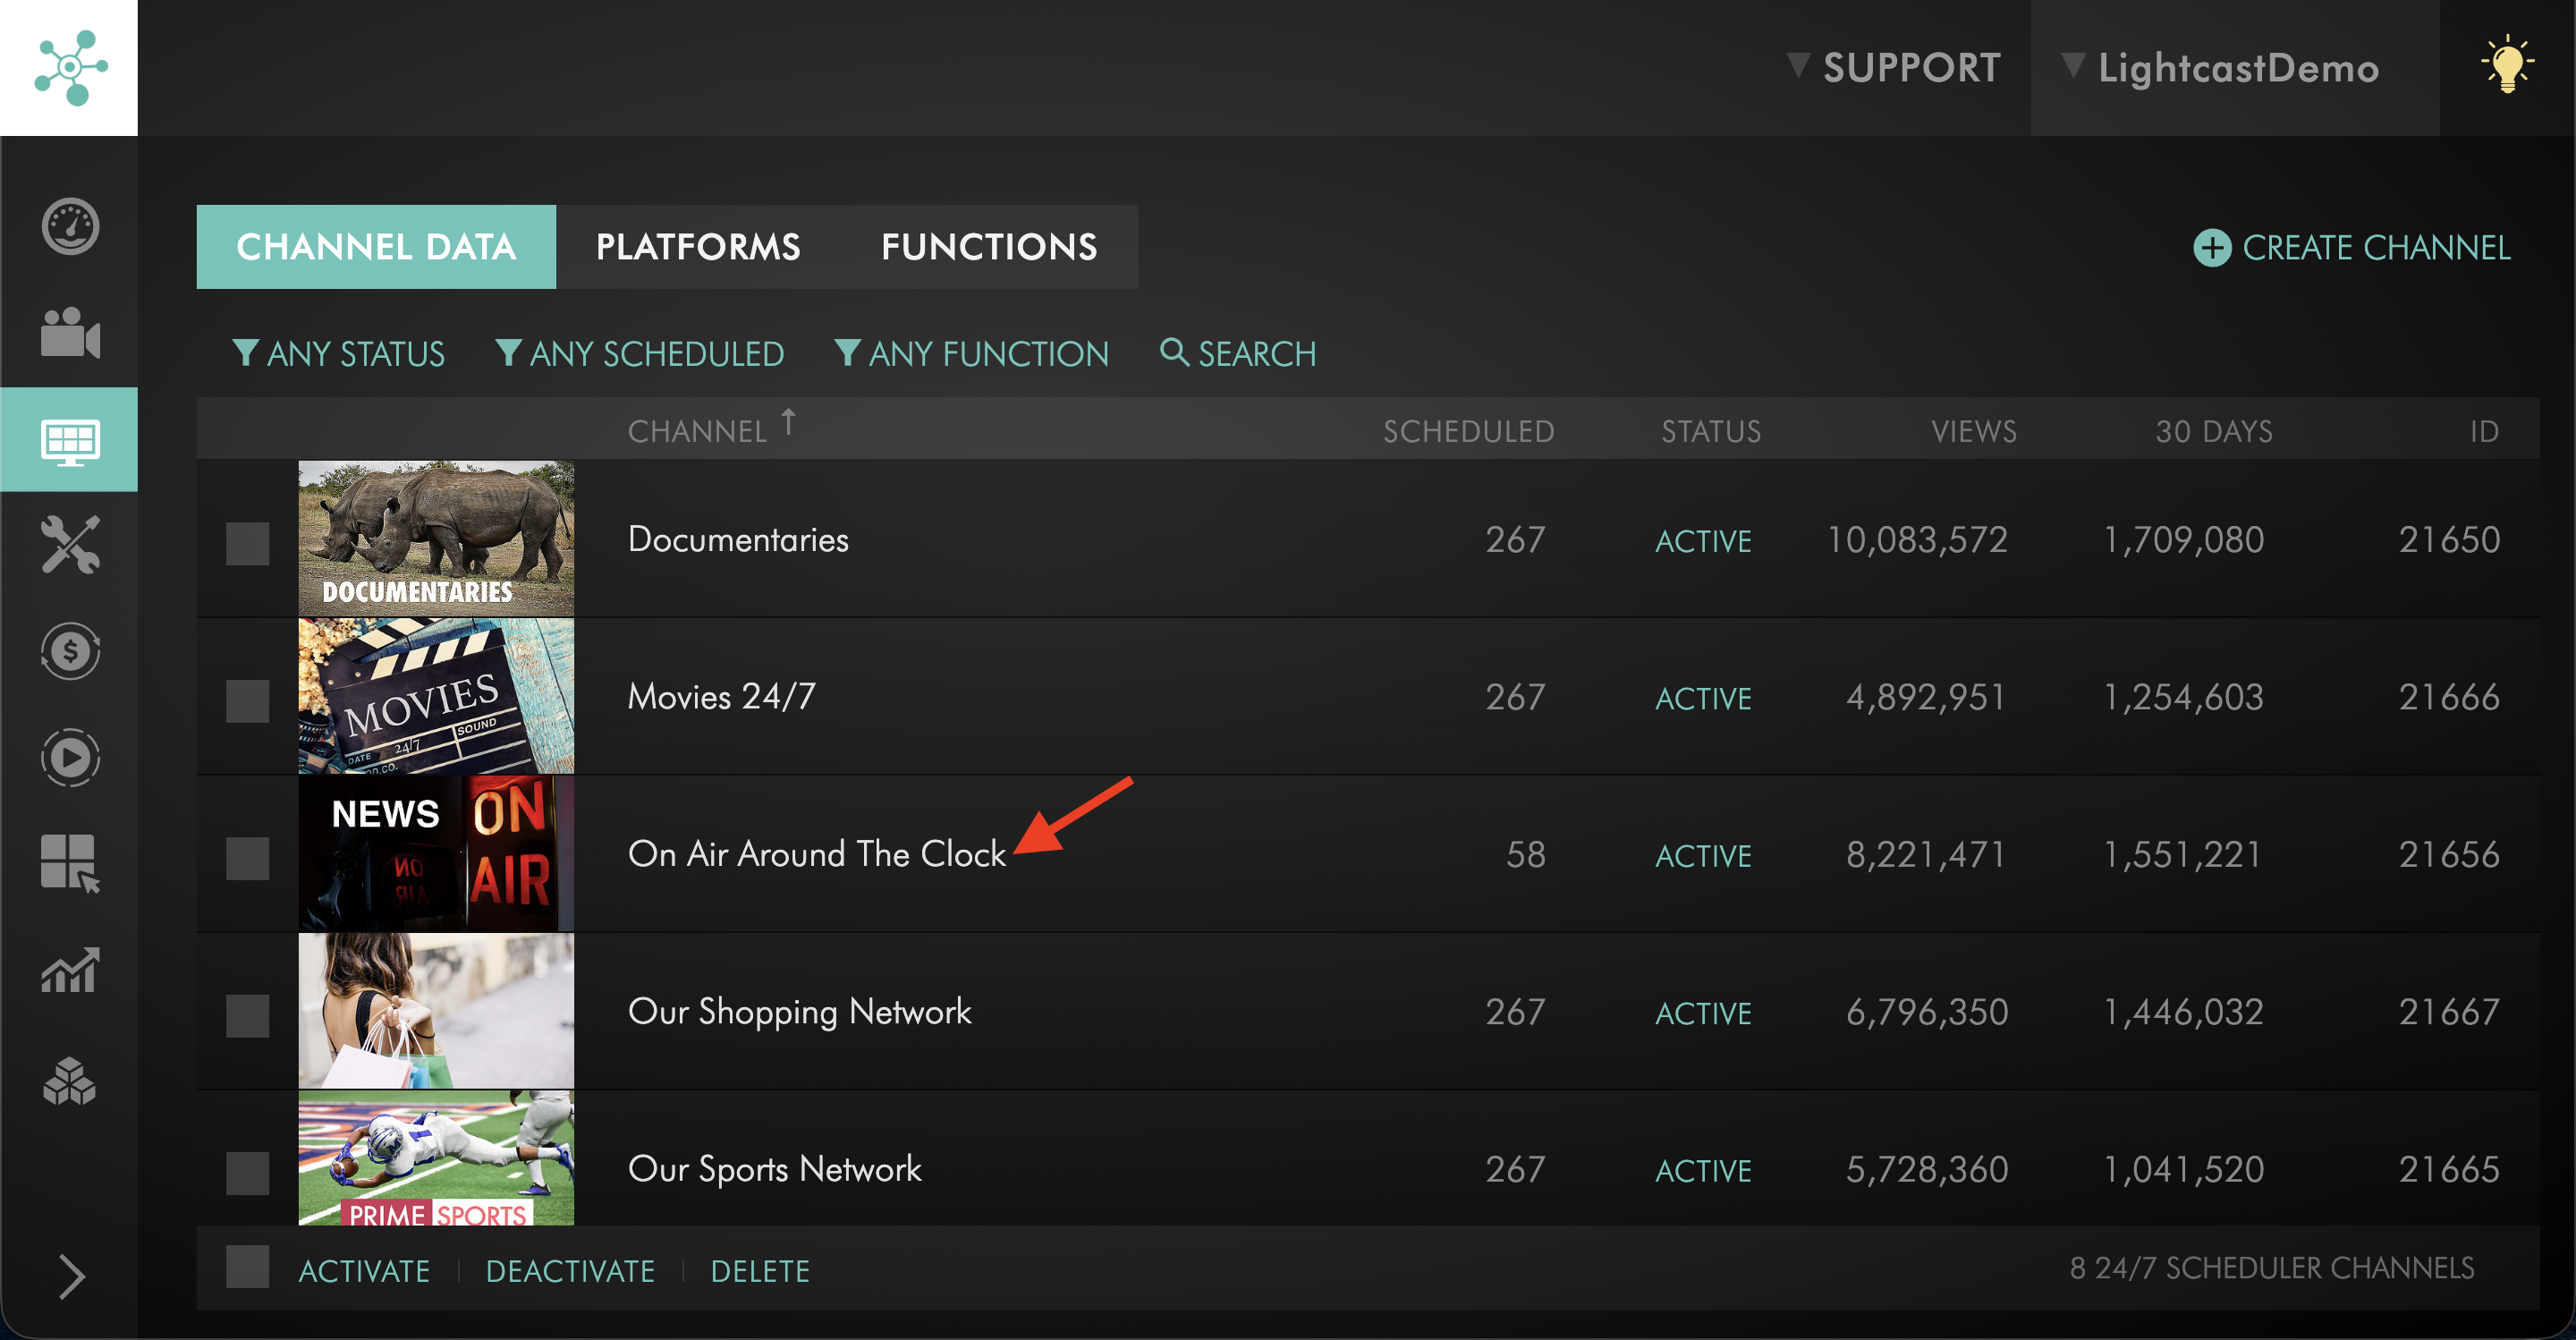
Select the 24/7 Scheduler Channel where you want to schedule the Live Broadcast.
Step 4
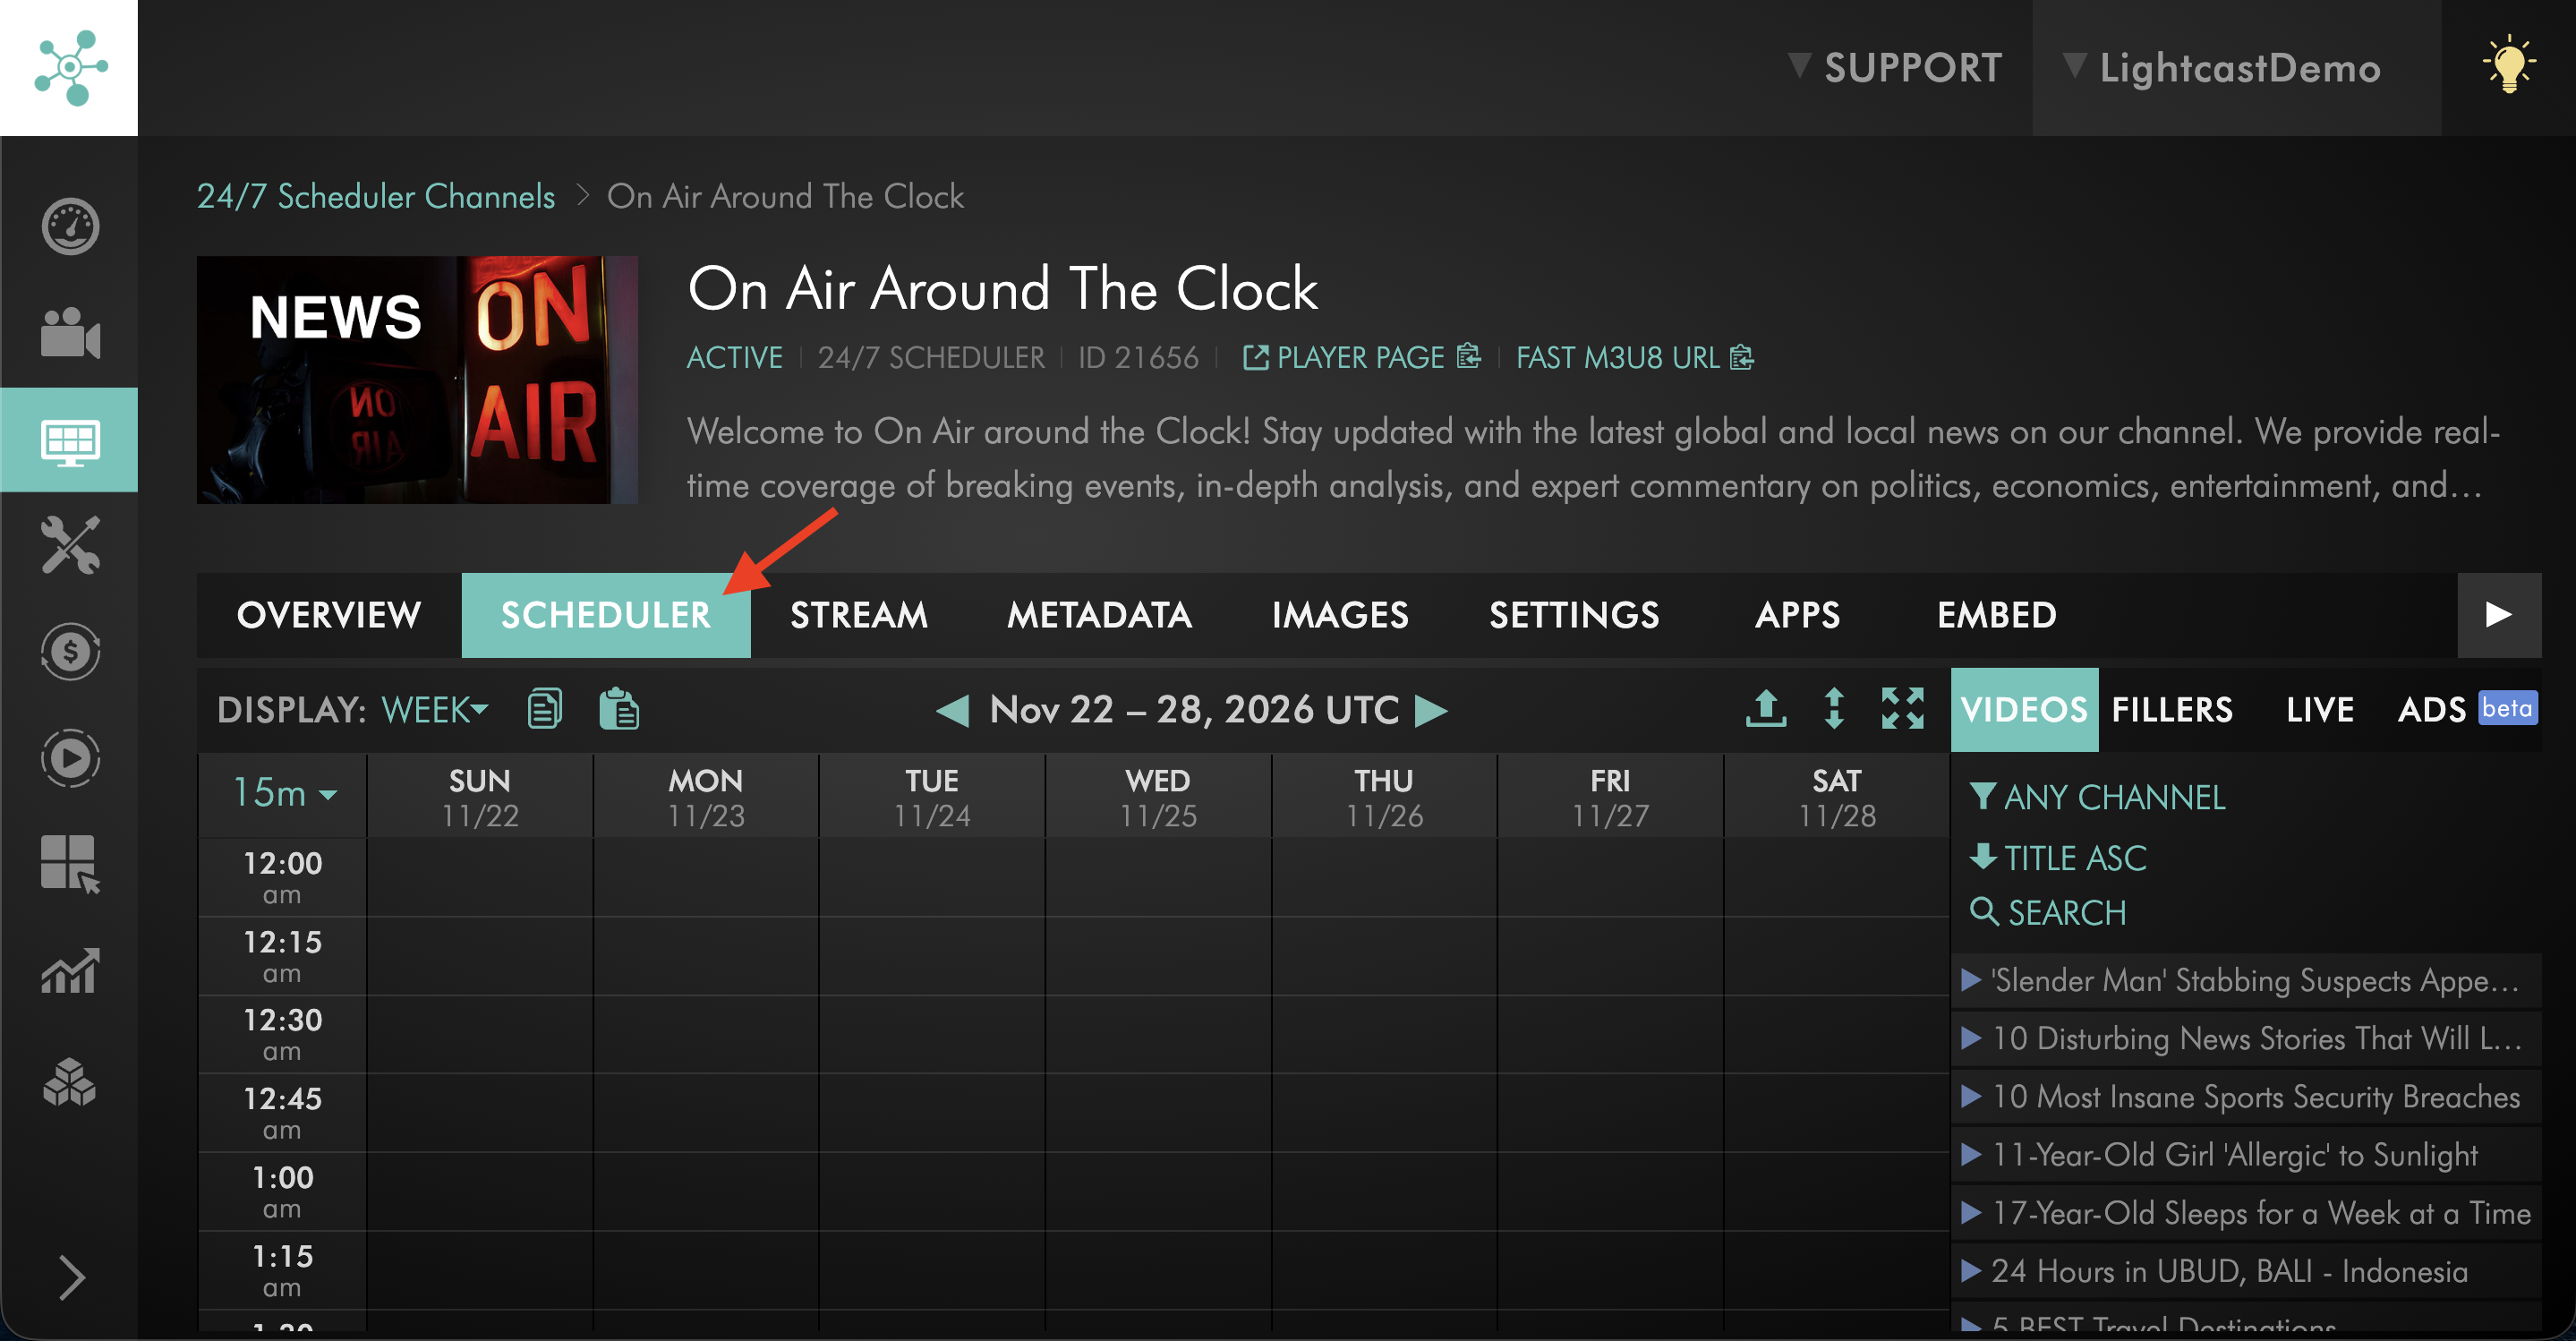
Open the SCHEDULER tab.
Step 5
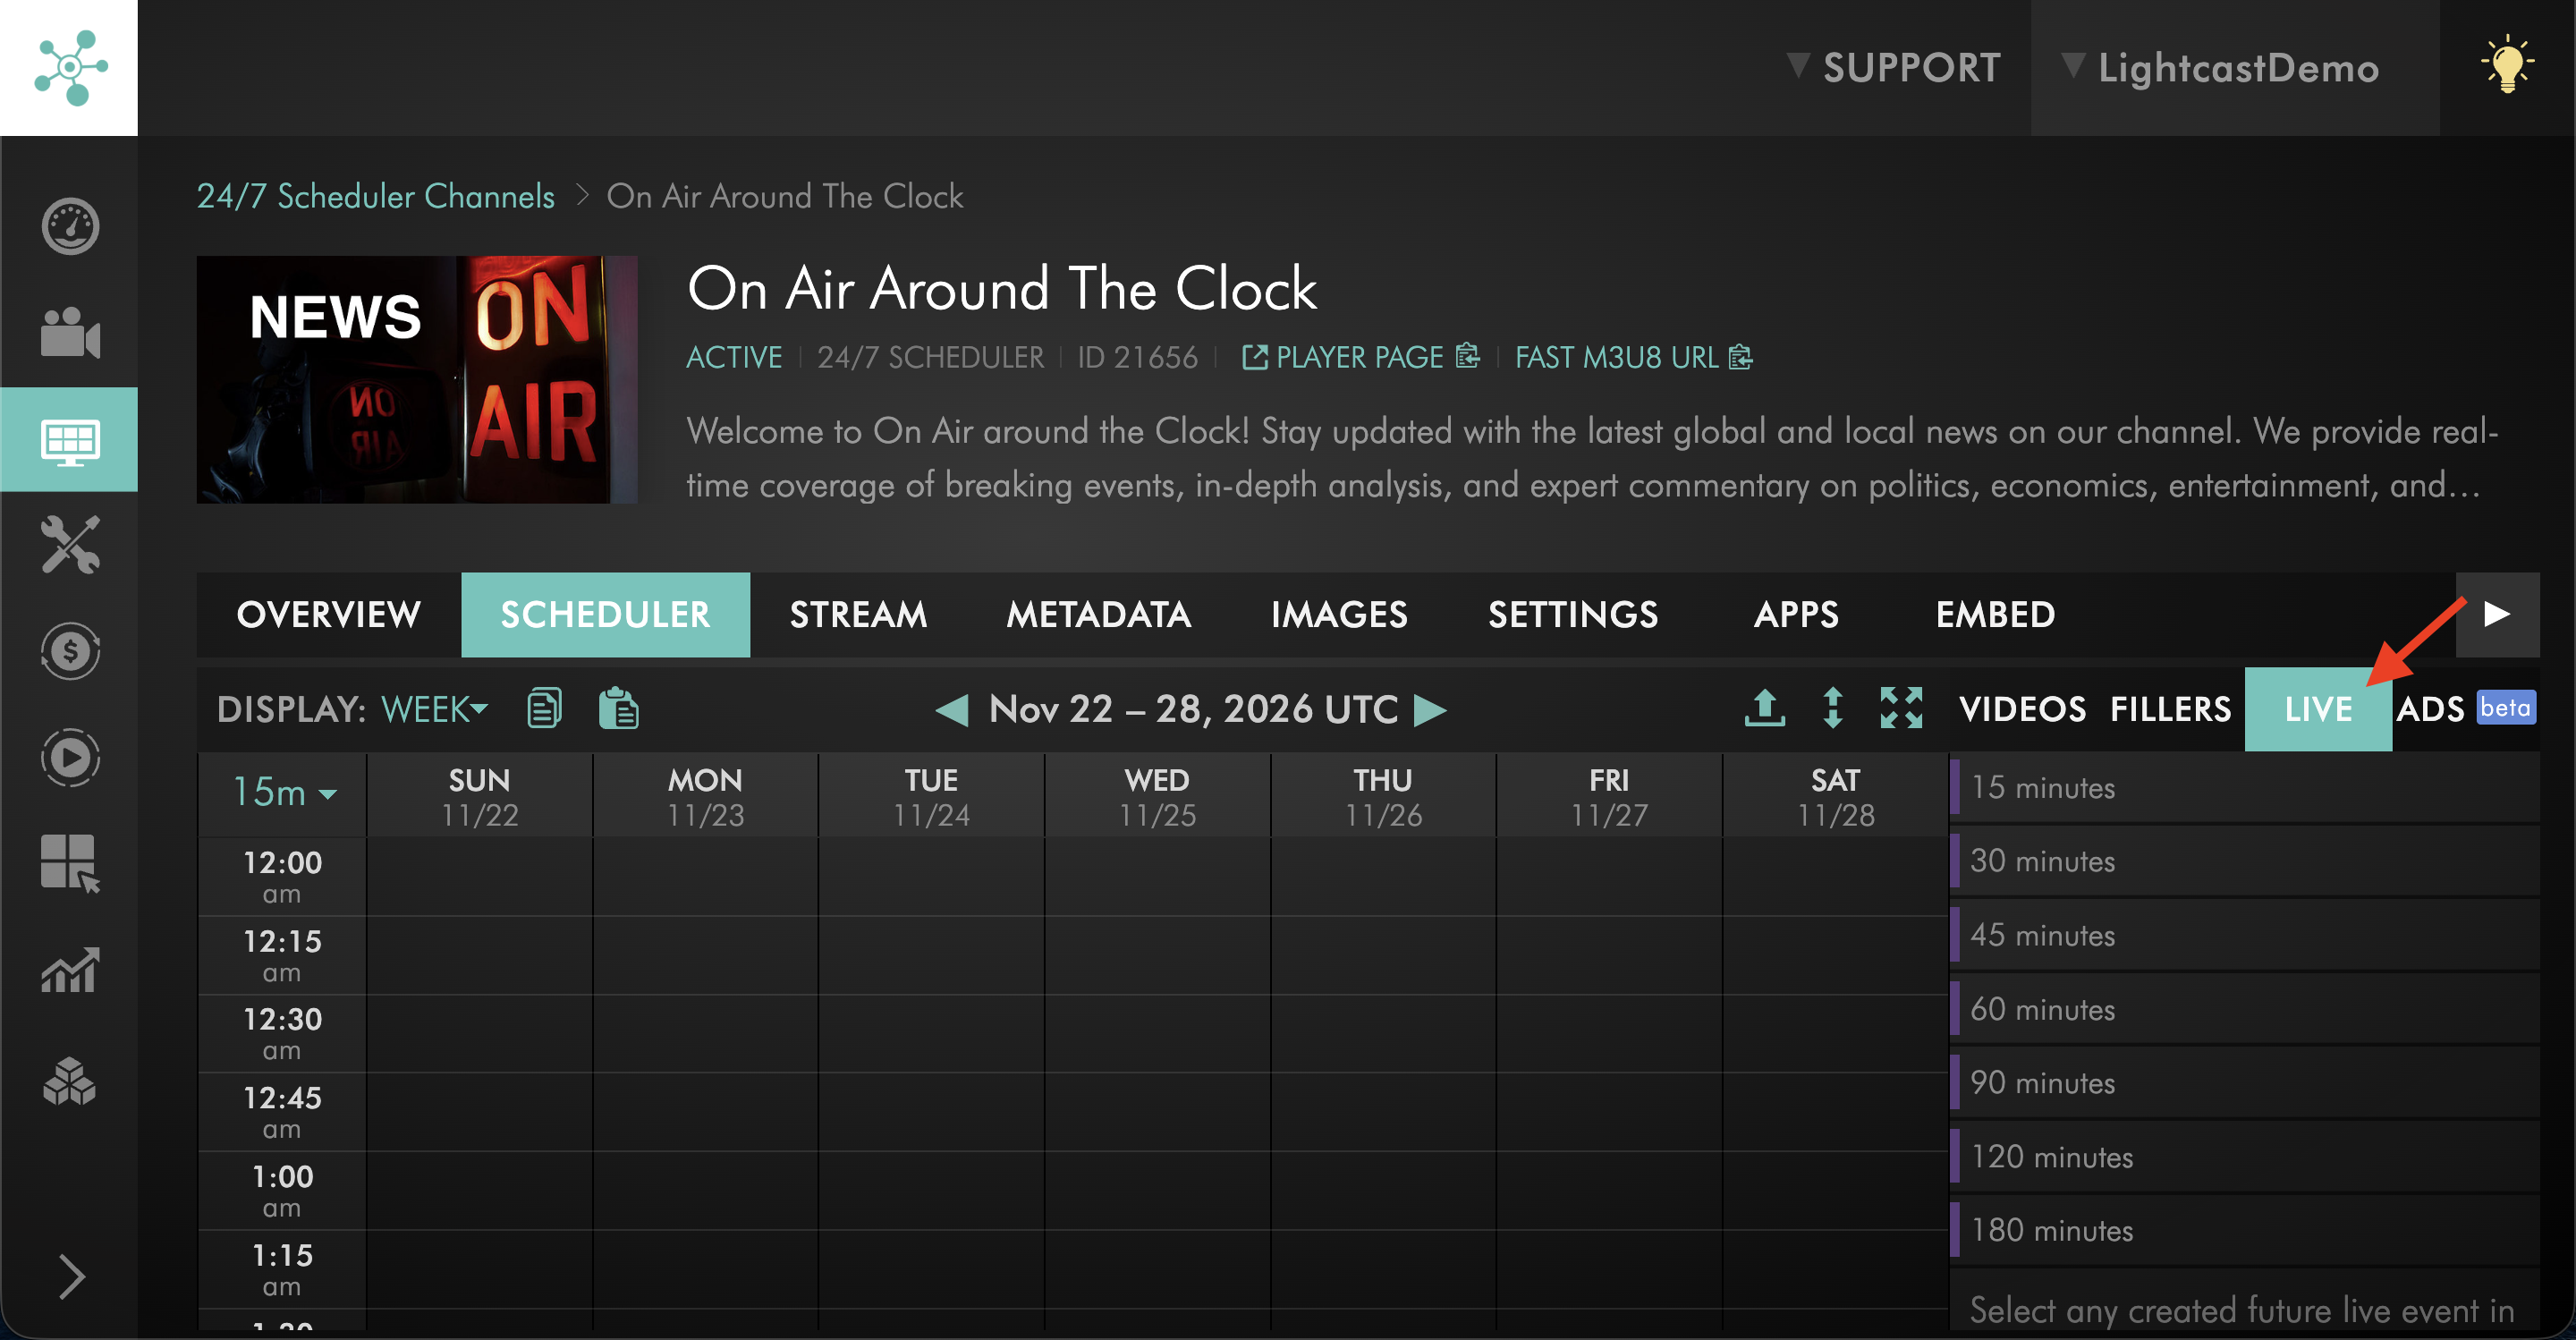
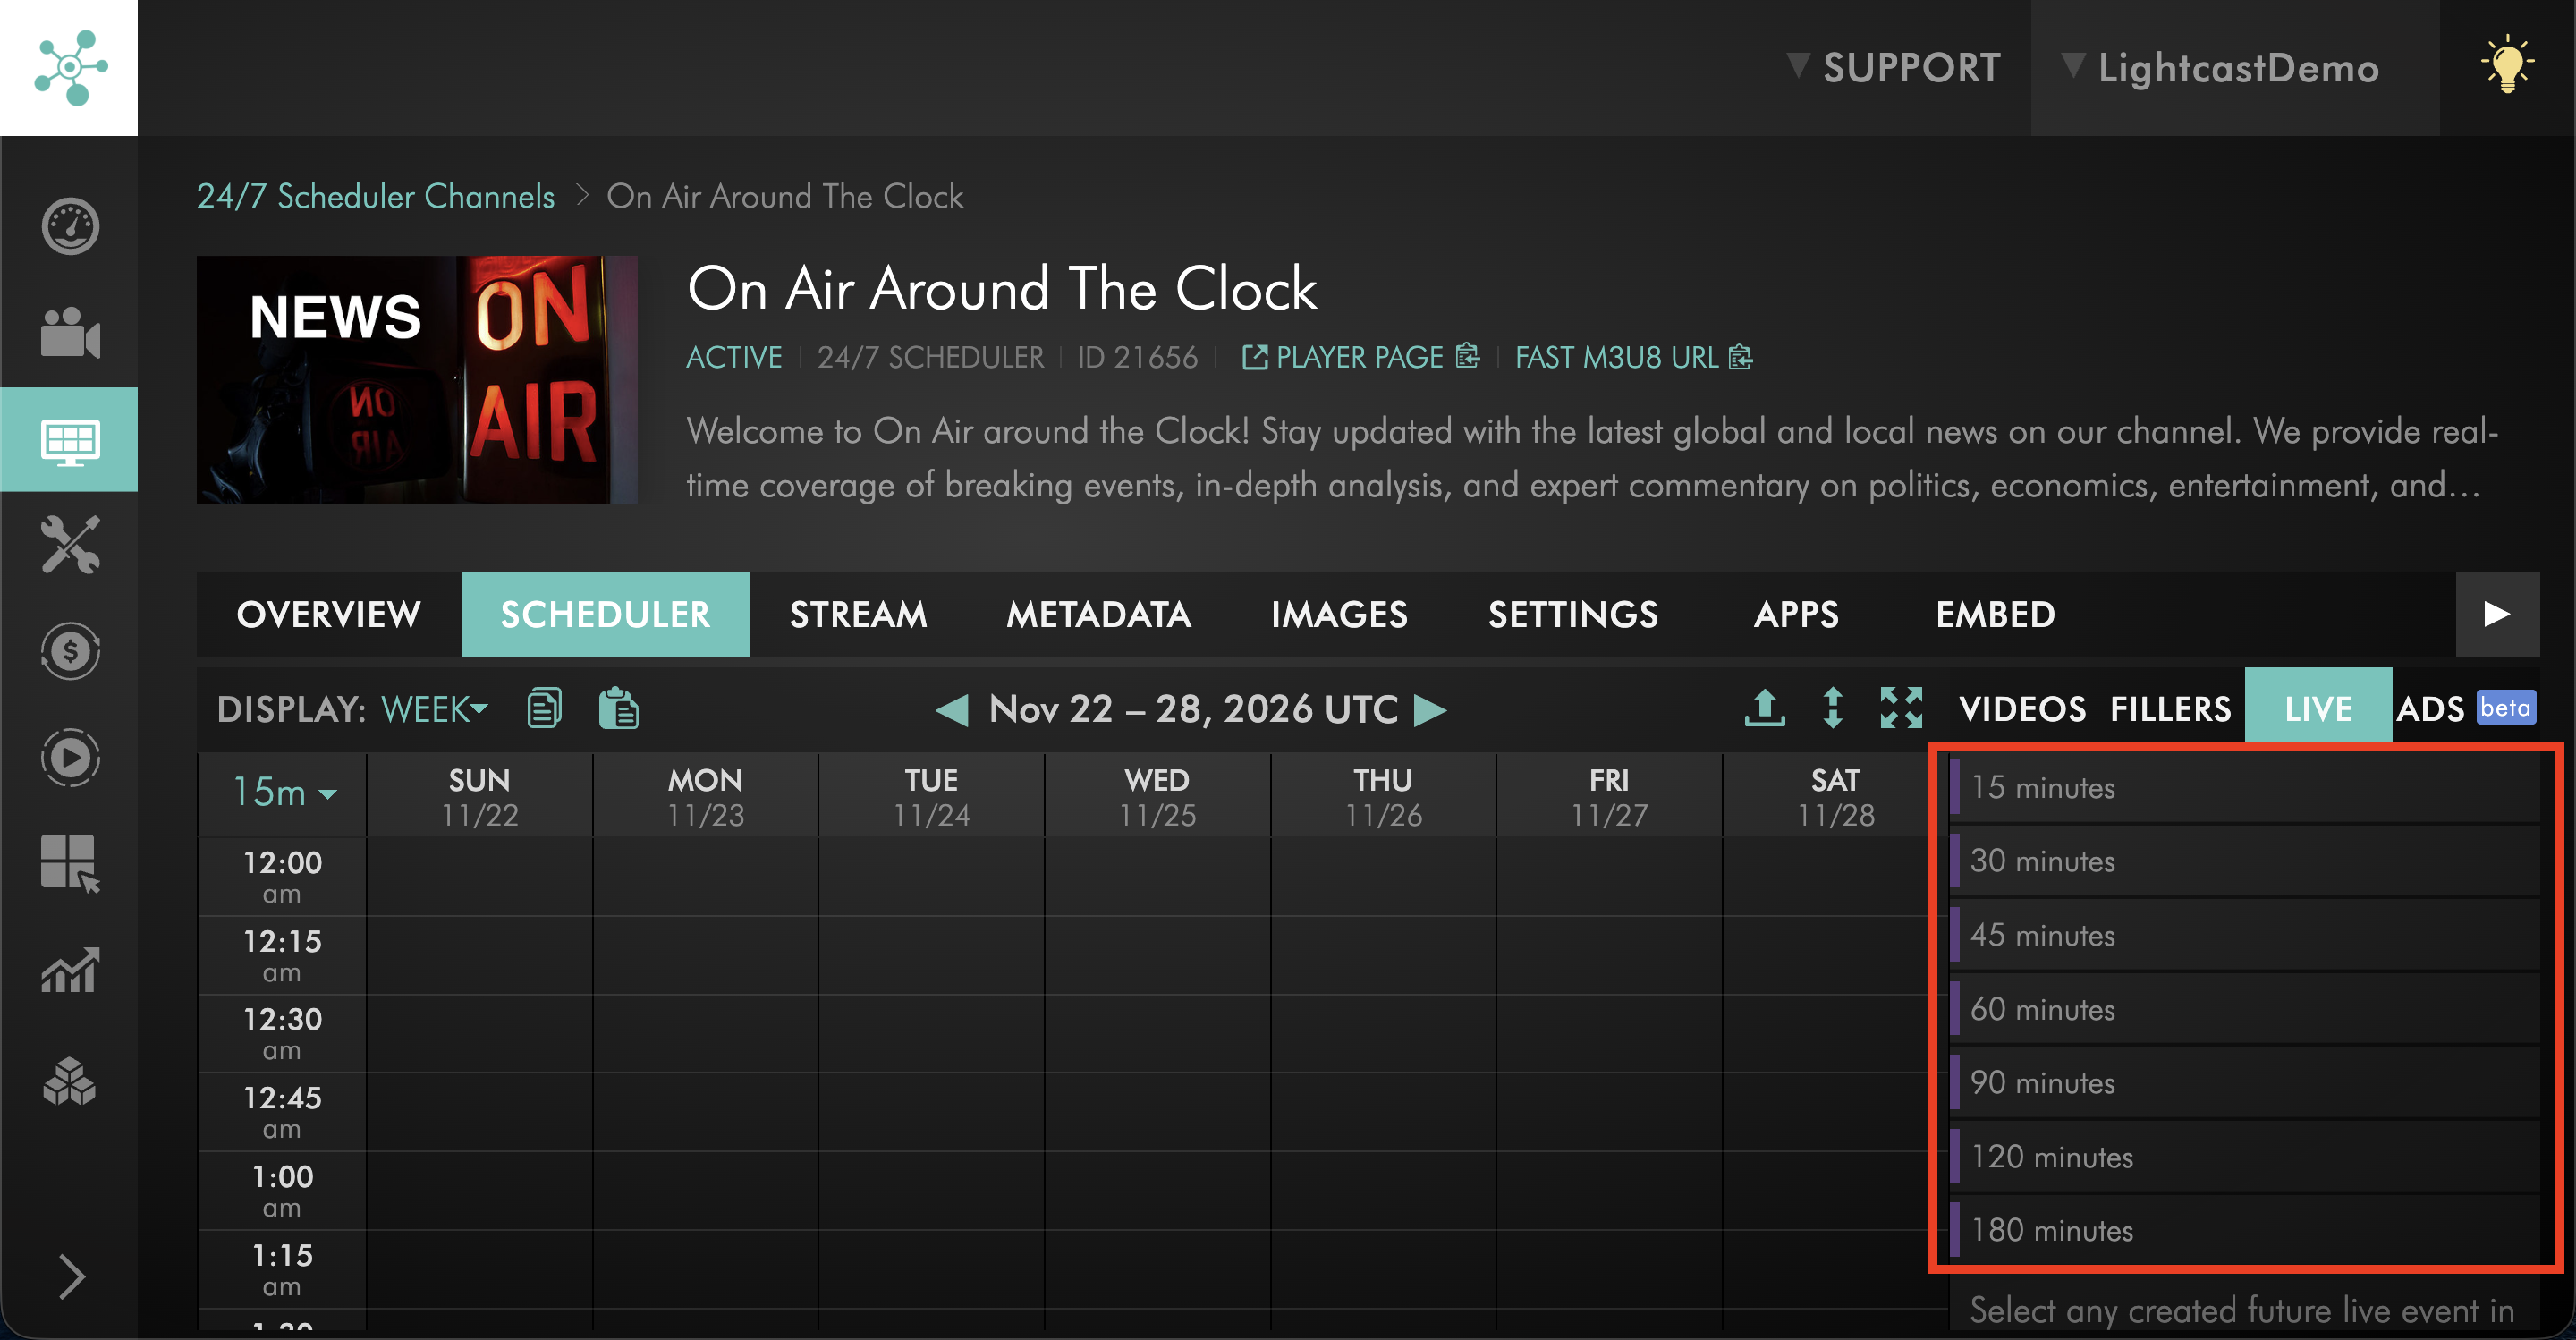
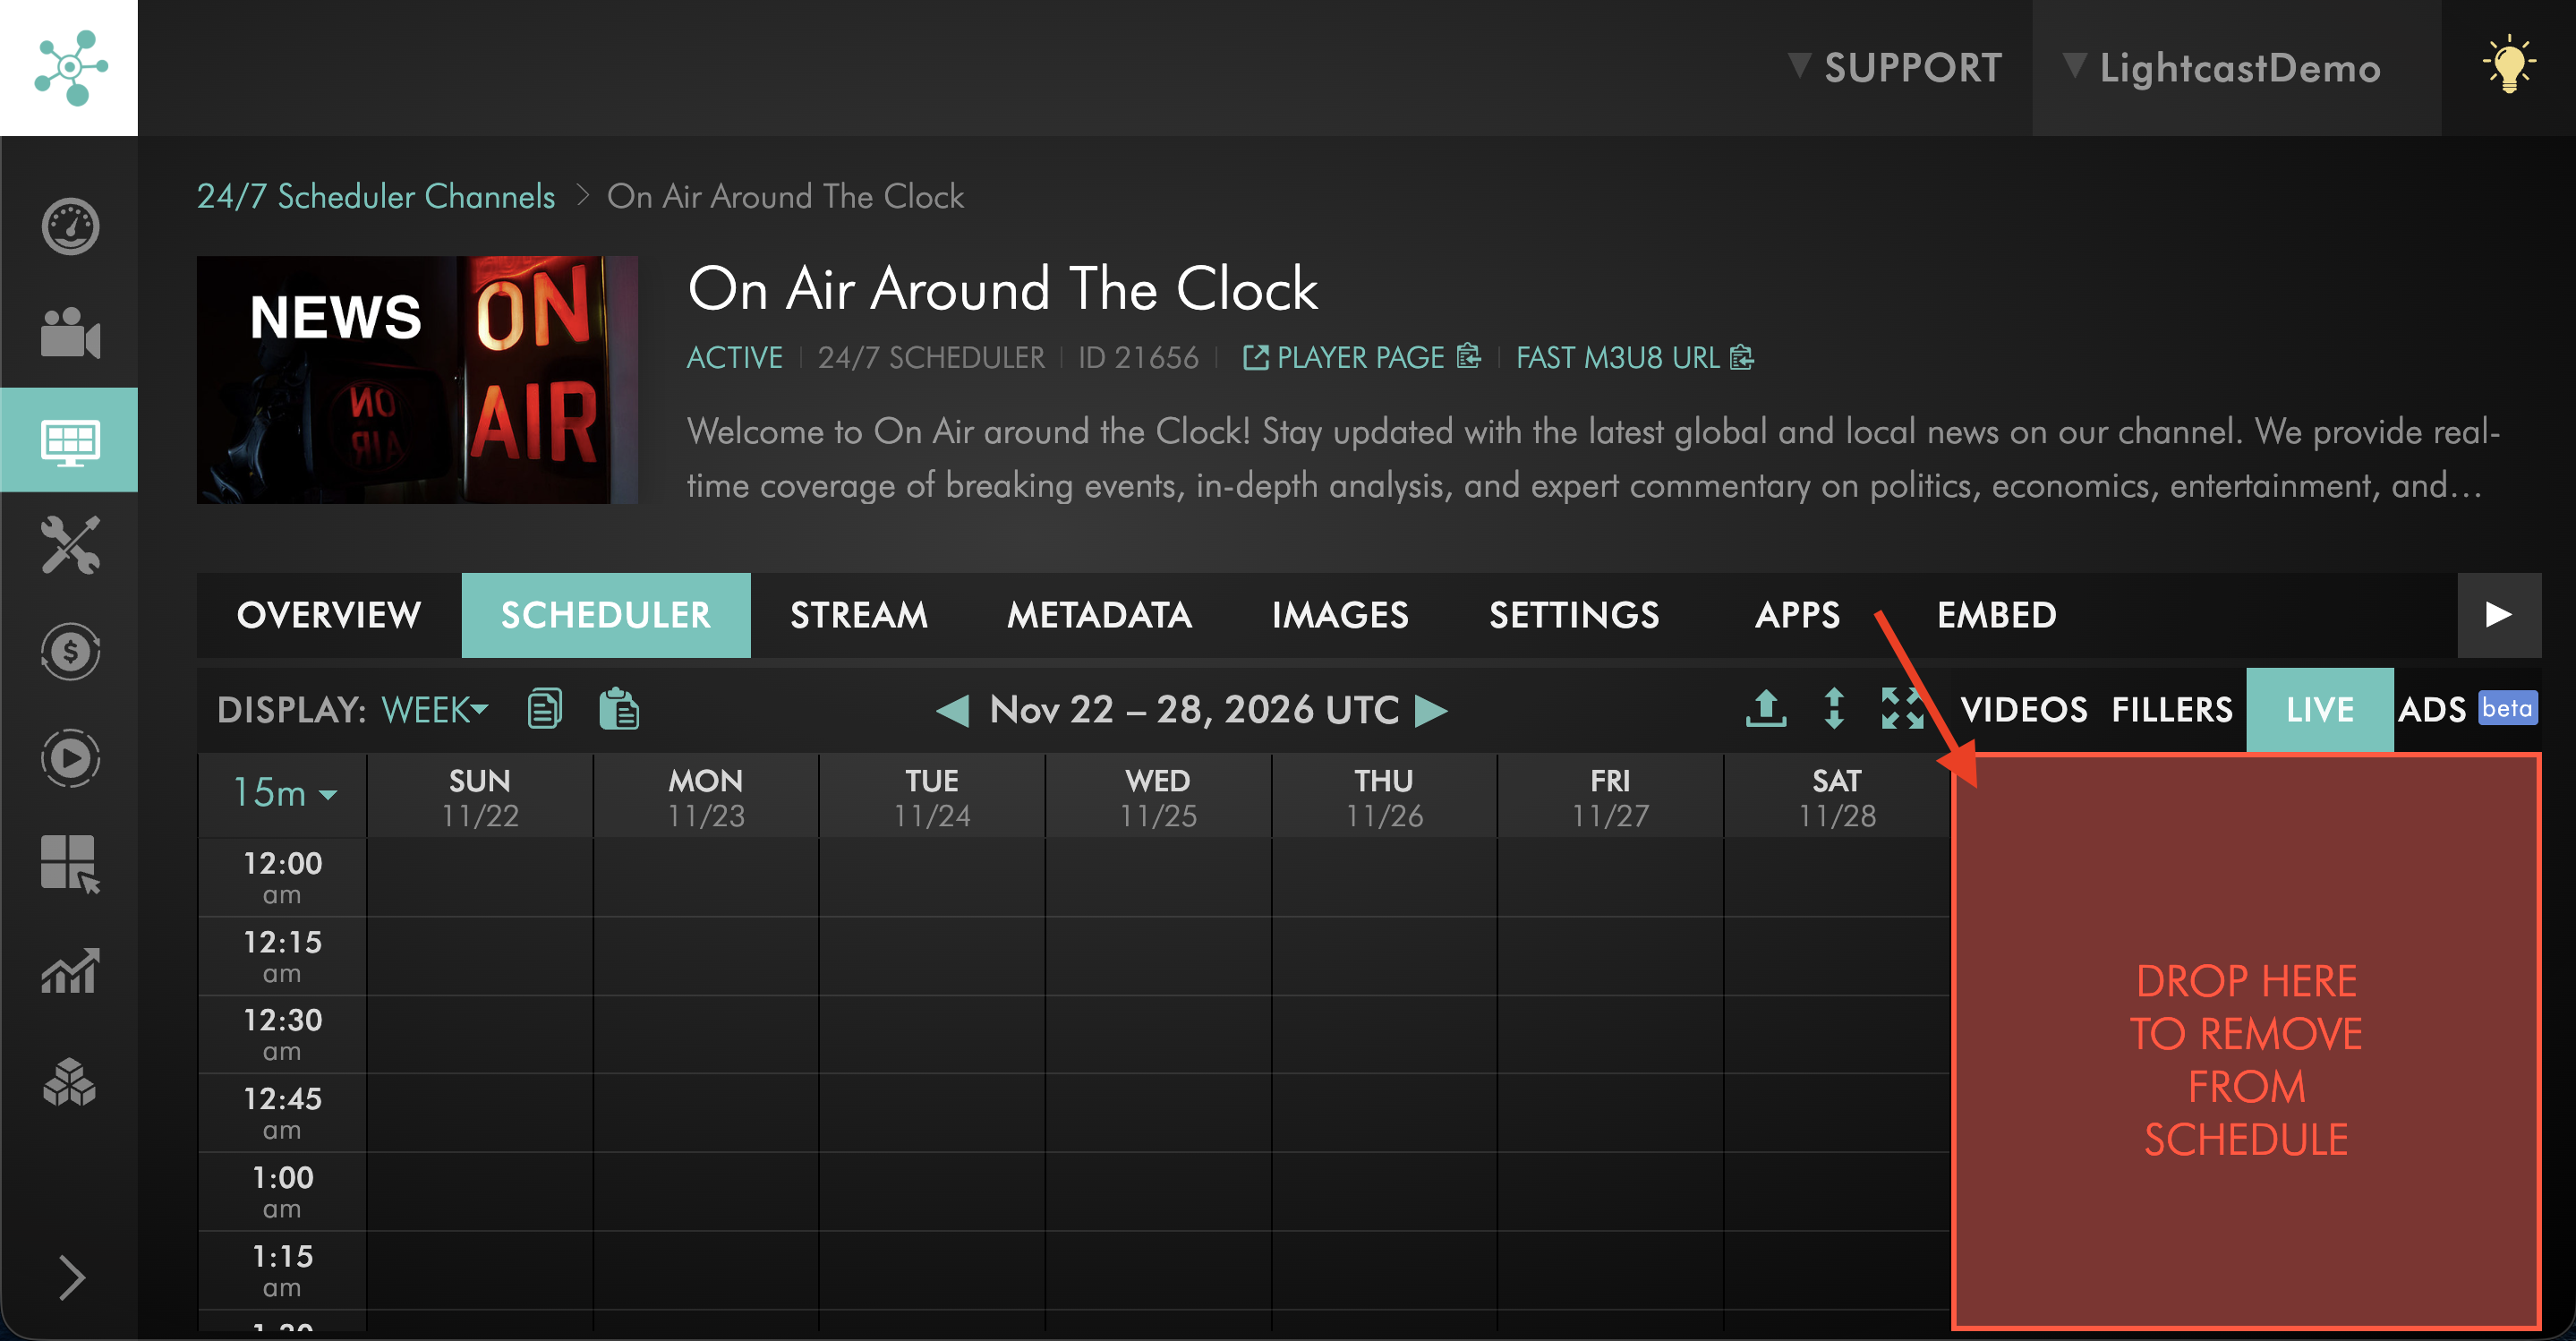
Select LIVE.
Step 6
Select the duration you want to schedule.
Available durations include 15 minutes, 30 minutes, 45 minutes, 60 minutes, 90 minutes, 120 minutes, and 180 minutes.
Choose a duration that includes enough time for the expected broadcast and any additional buffer you may need at the end.
Step 7
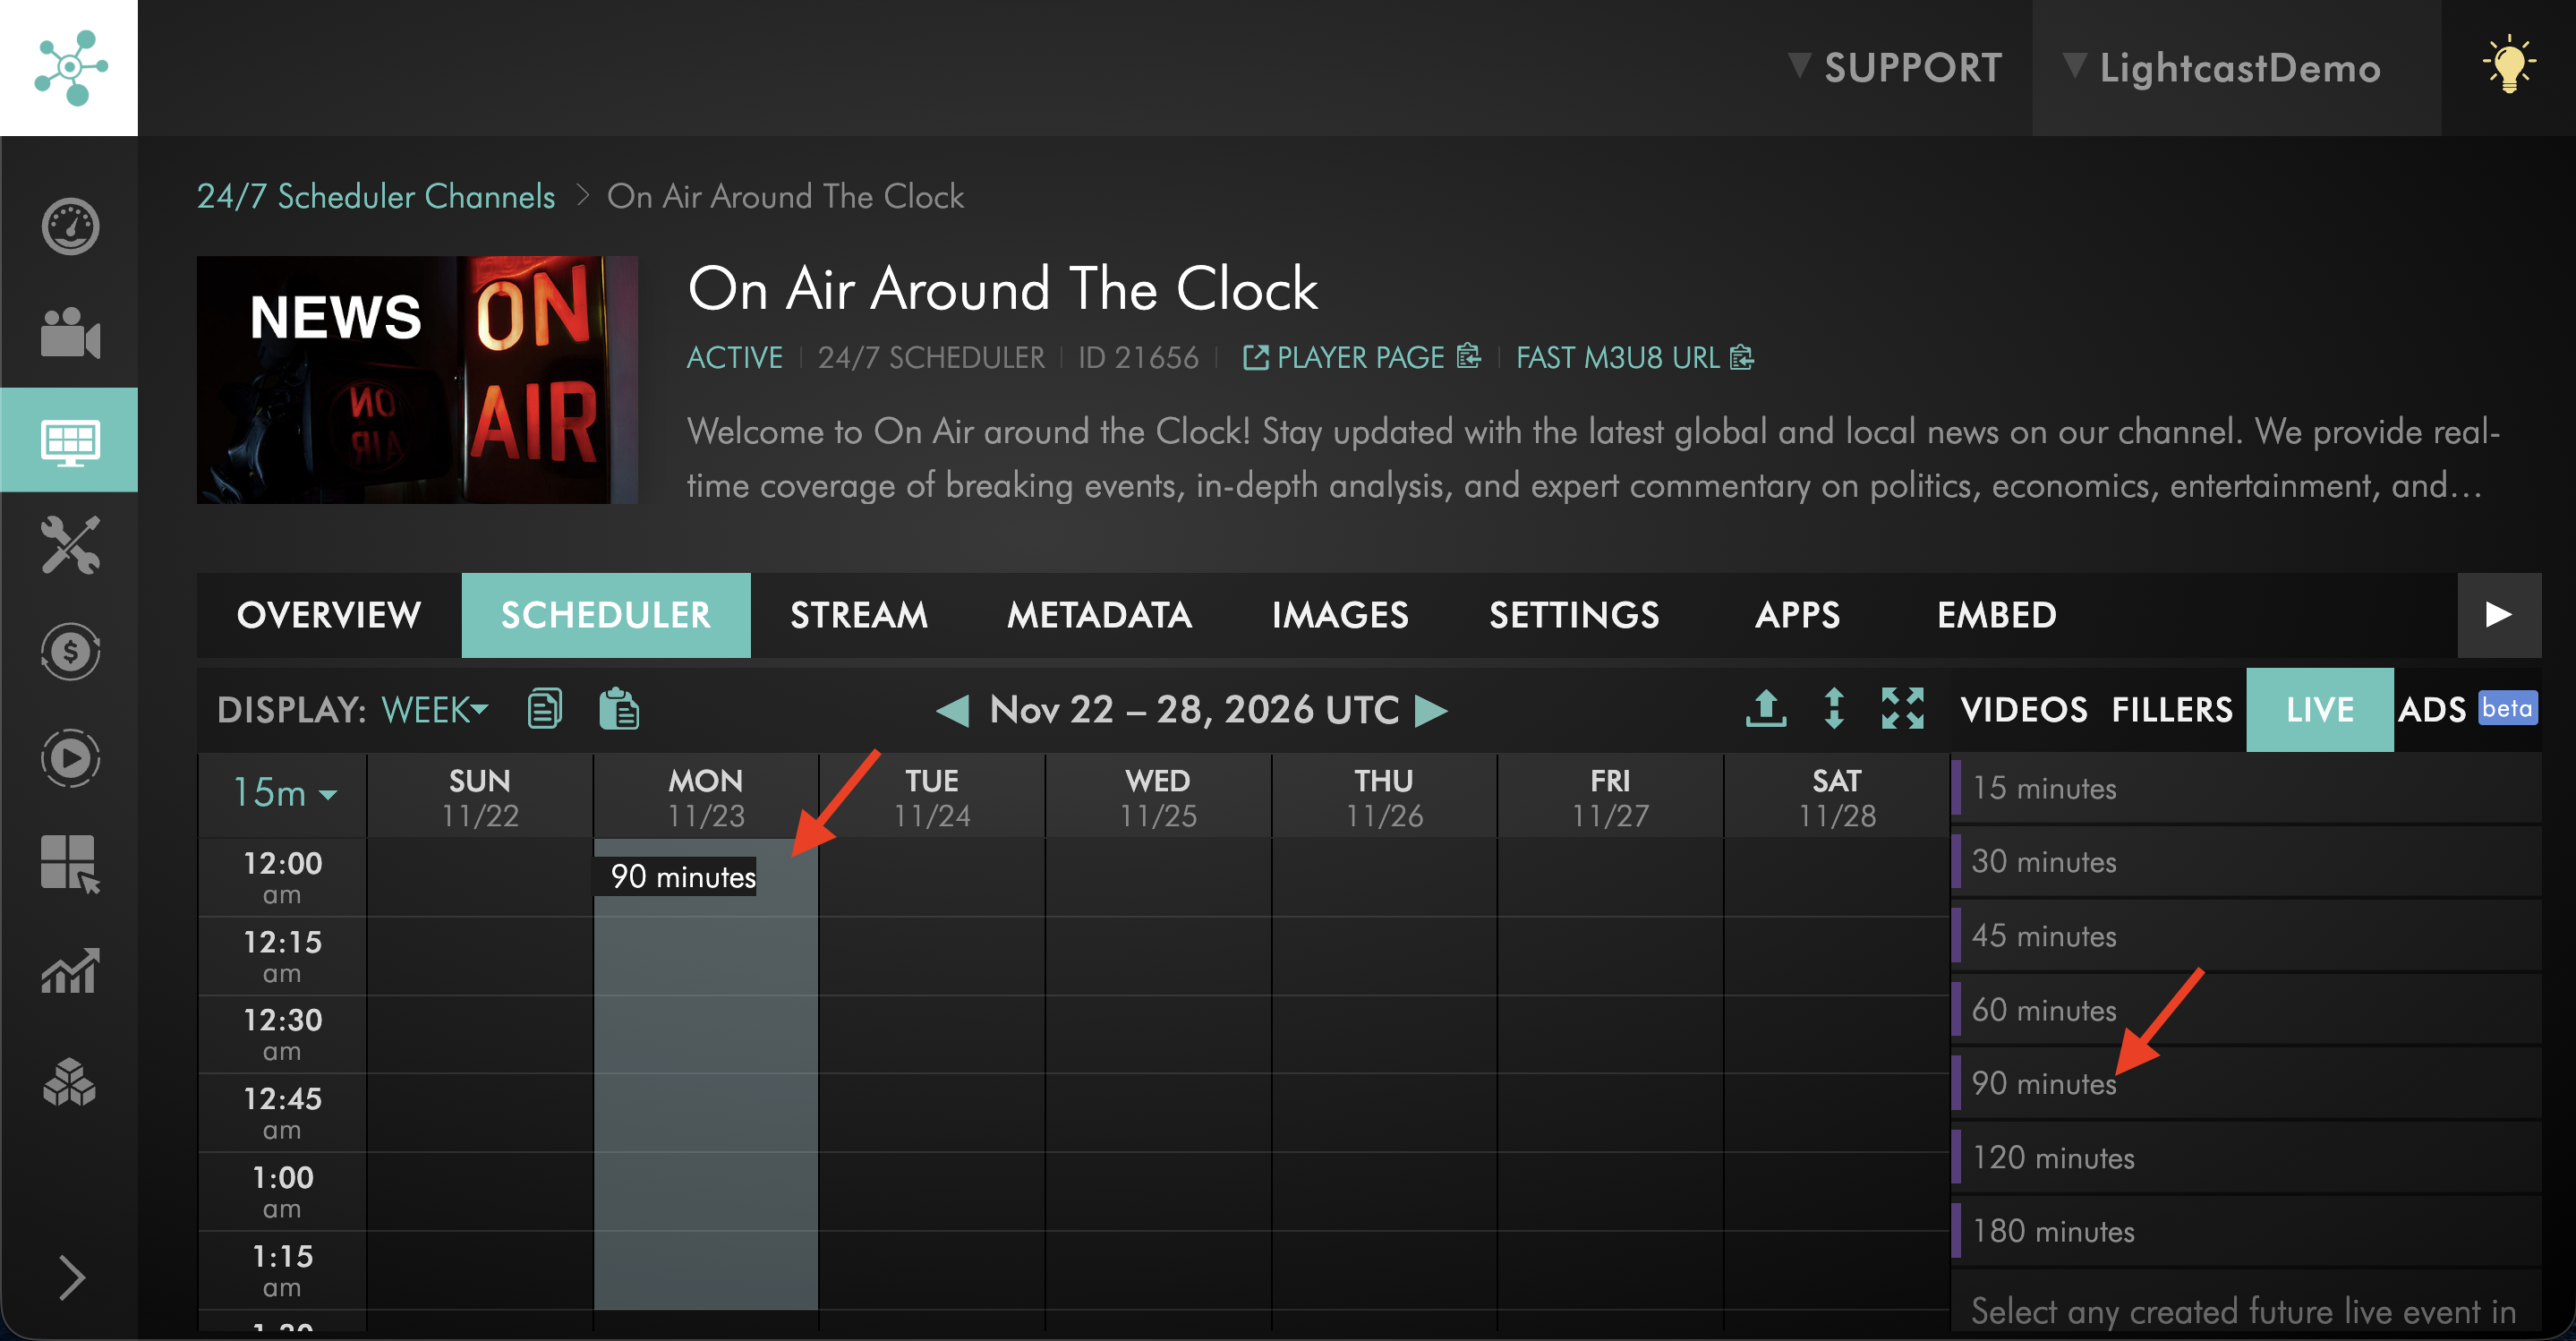
Drag and drop the selected duration onto the desired date and start time in the Scheduler.
Step 8
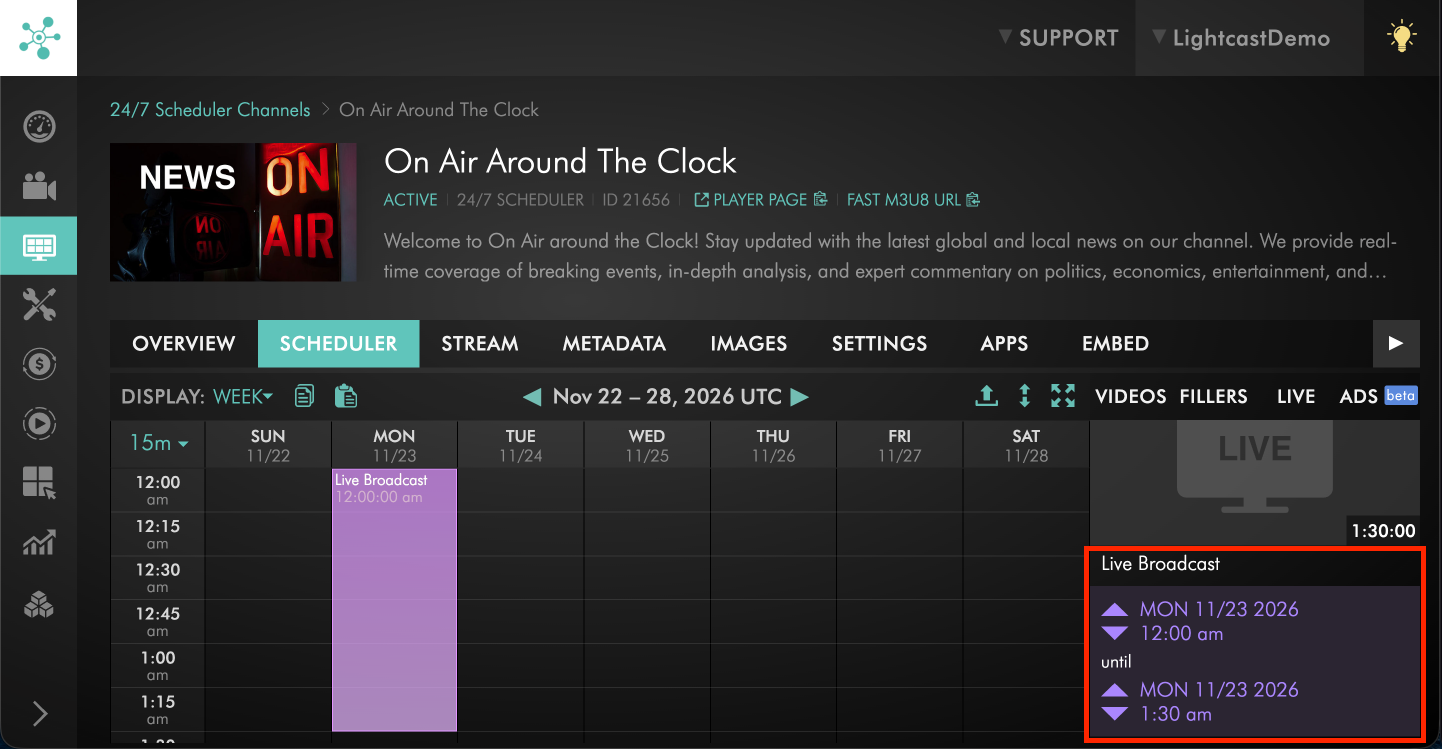
Select the scheduled Live Broadcast to review its start and end date and time.
Adjust a scheduled Live Broadcast
Step 1
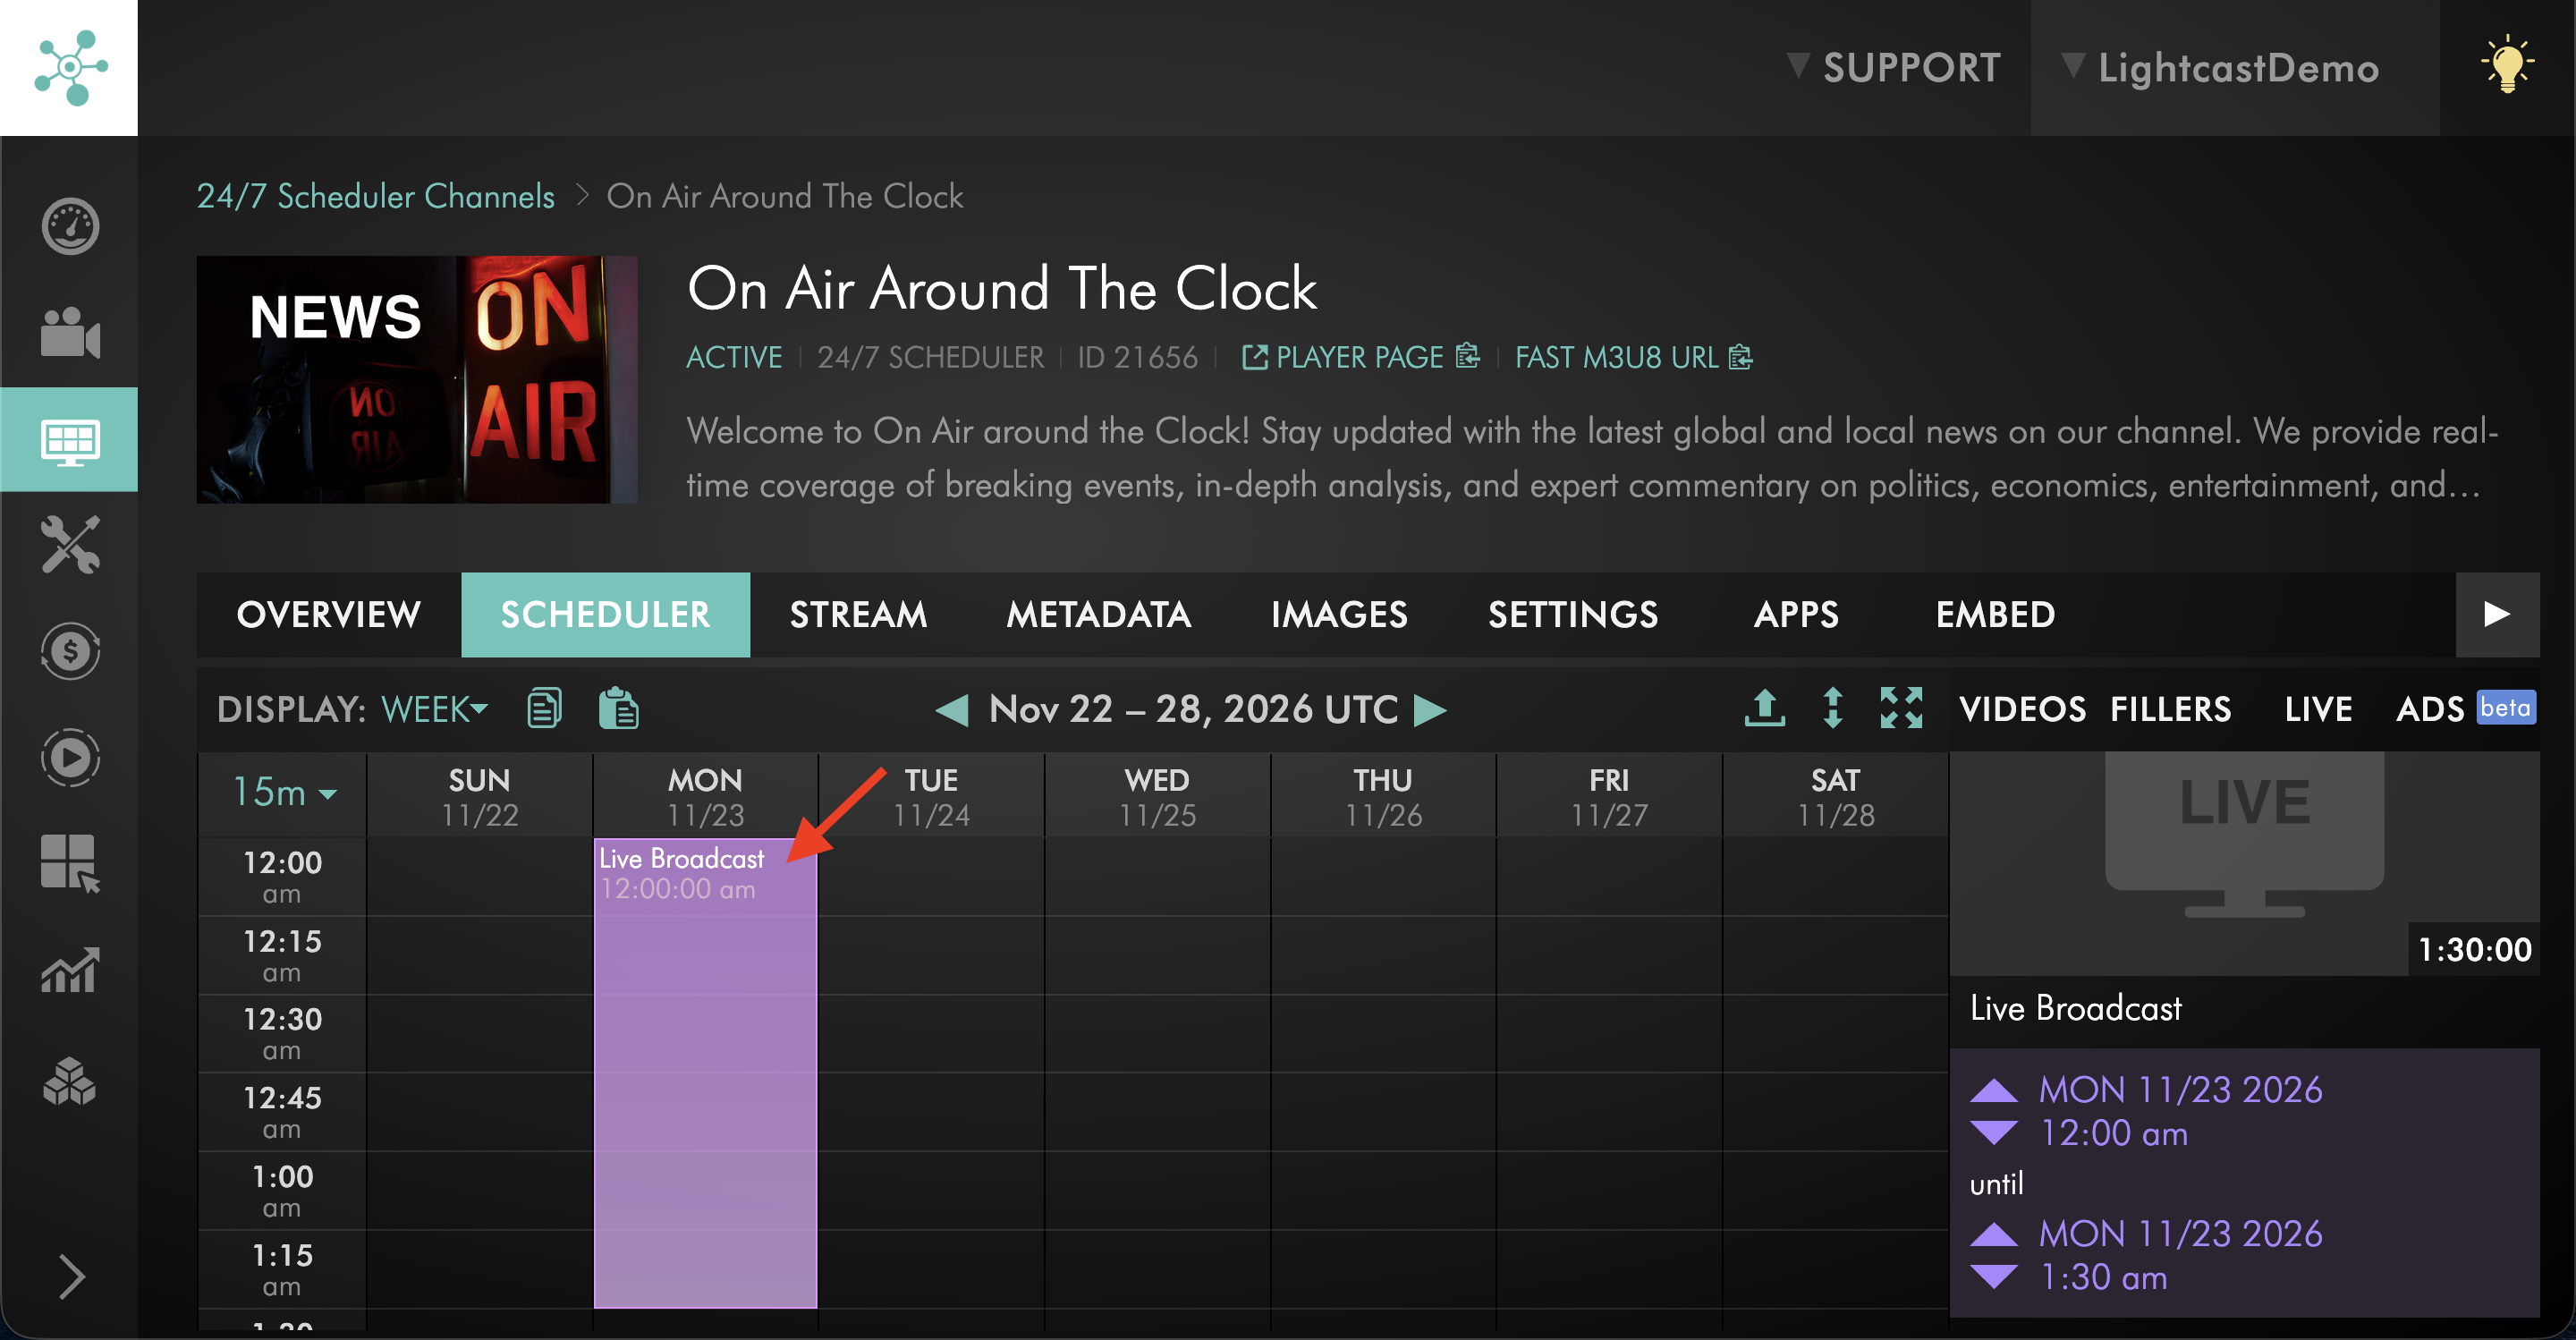
Select the scheduled Live Broadcast you want to adjust.
Step 2
To move the Live Broadcast to a different scheduled time, drag and drop it onto the desired date and time in the Scheduler.
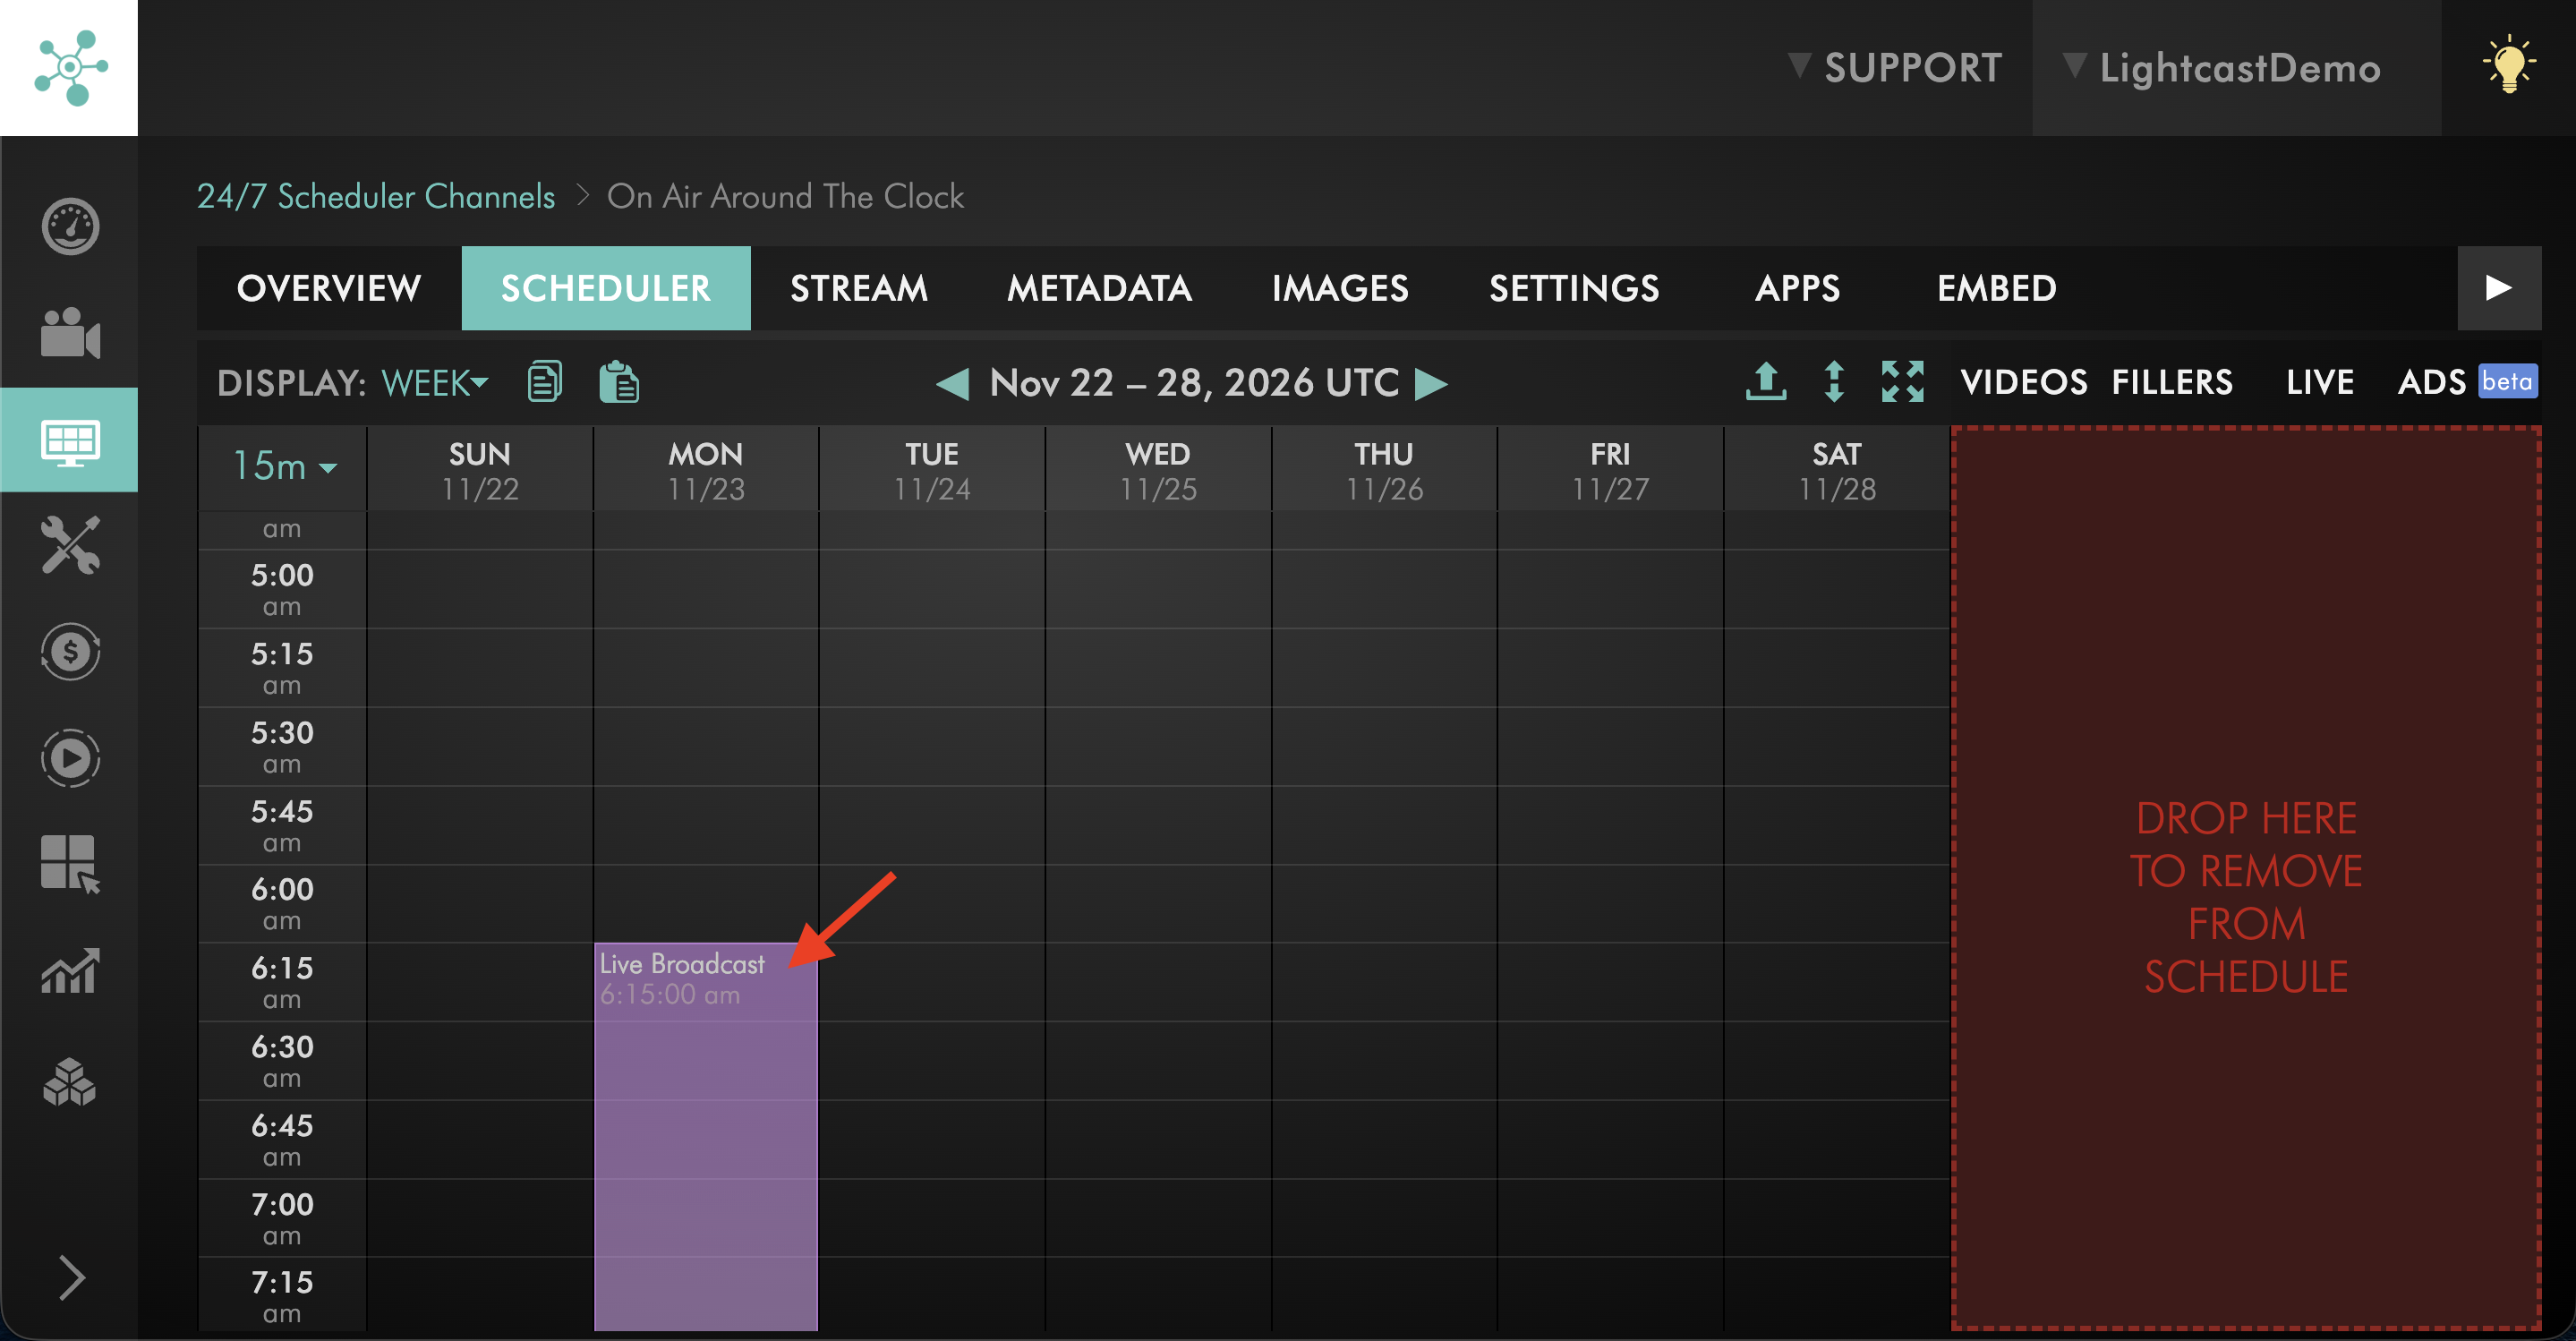
Step 3
To make more precise adjustments, select the Live Broadcast and use the arrow controls in the details panel to adjust the start or end date and time.
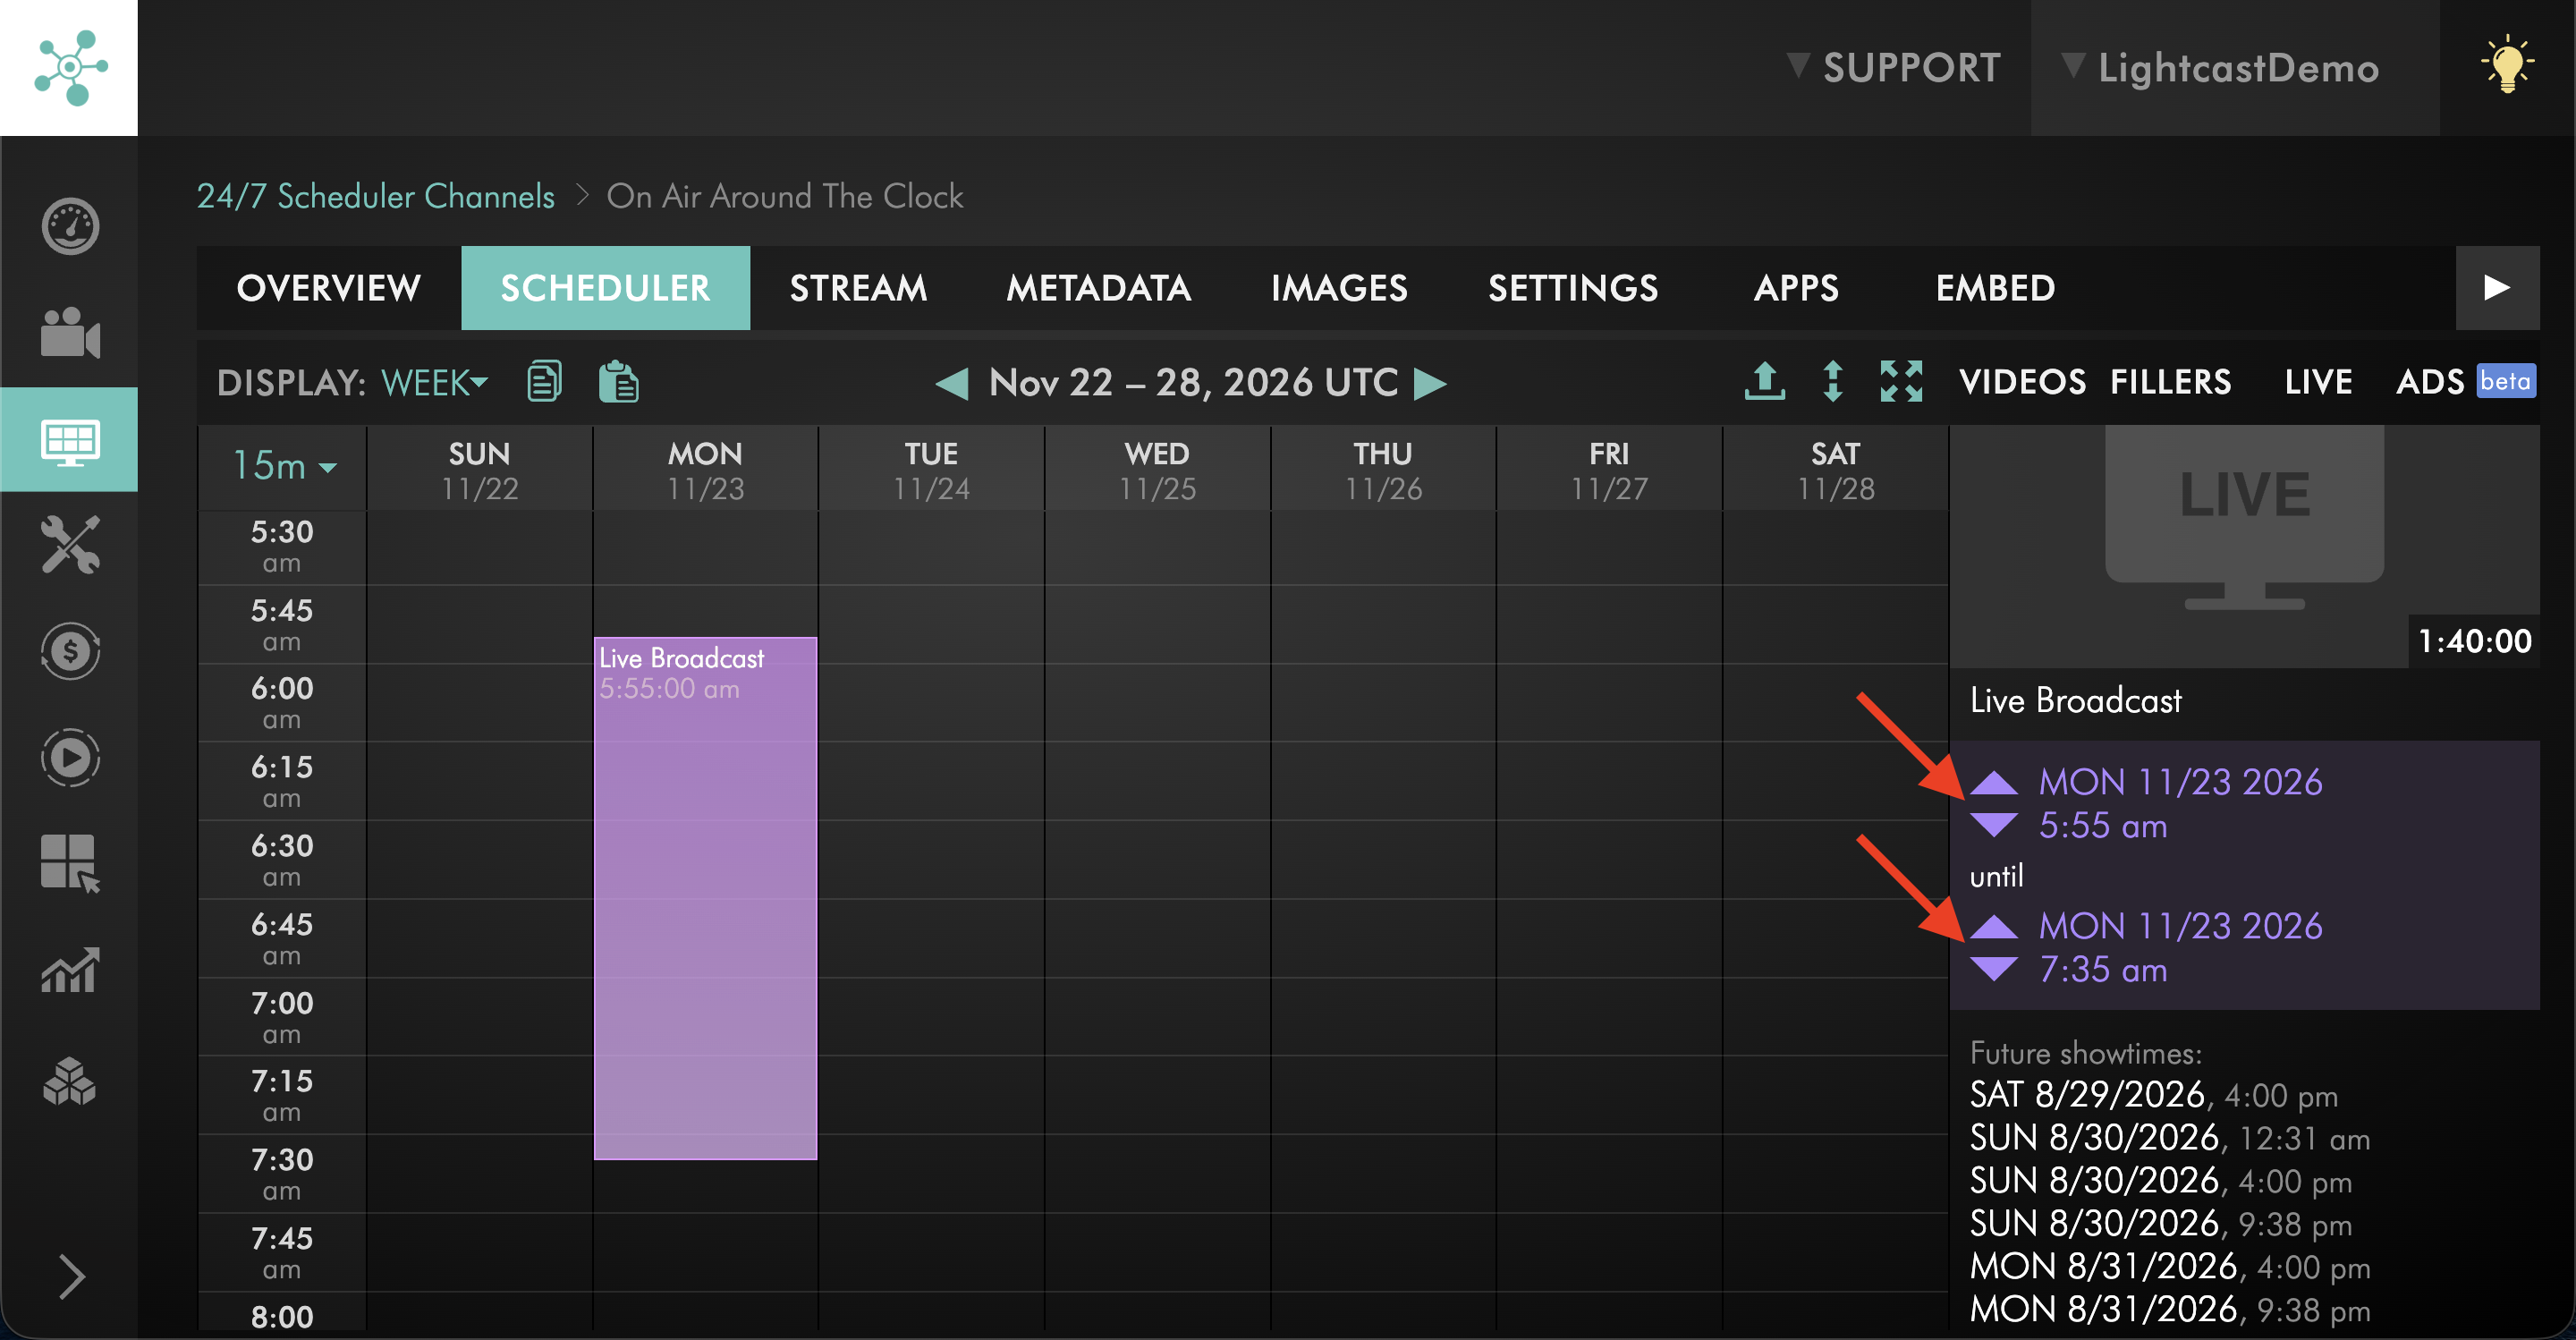
Step 4
Review the displayed start and end date and time to confirm the Live Broadcast is scheduled correctly.
Schedule adjustments must be completed before the applicable 24/7 Scheduler update deadline. Same-day schedule changes are not supported.
To learn more, see Understanding 24/7 Scheduler update deadlines.
Remove a scheduled Live Broadcast
Step 1
Locate the Live Broadcast you want to remove from the schedule.
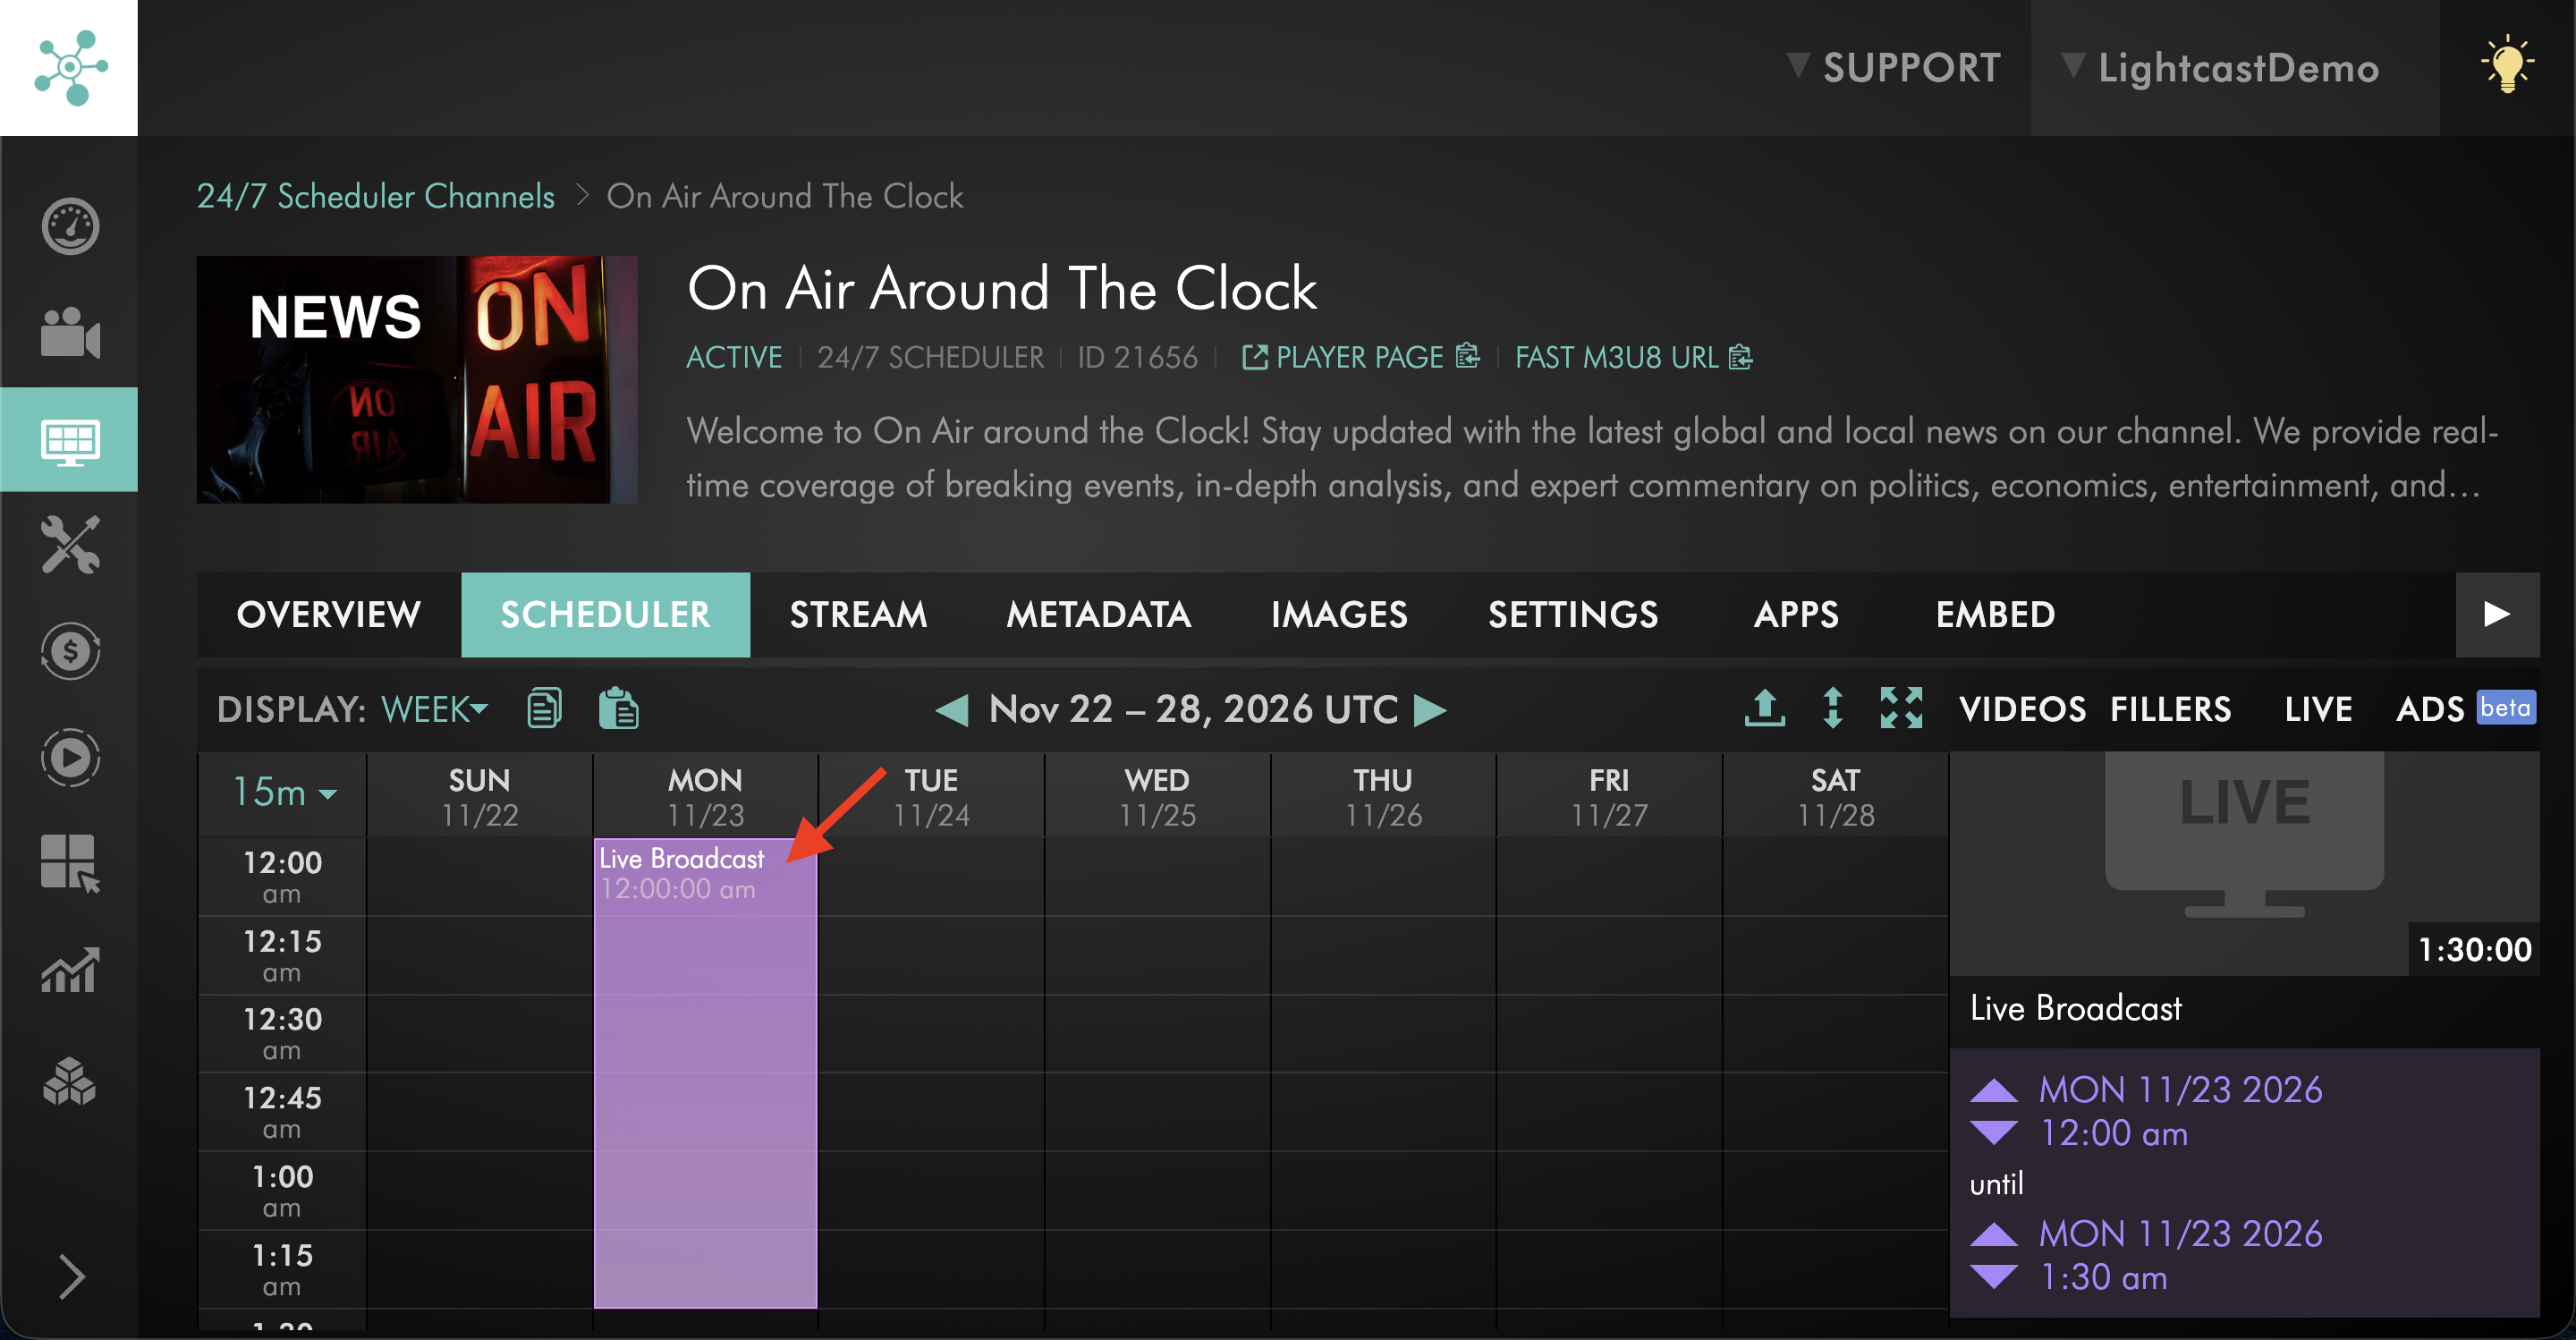
Step 2
Drag the Live Broadcast toward the right side of the Scheduler where the DROP HERE TO REMOVE FROM SCHEDULE area appears.
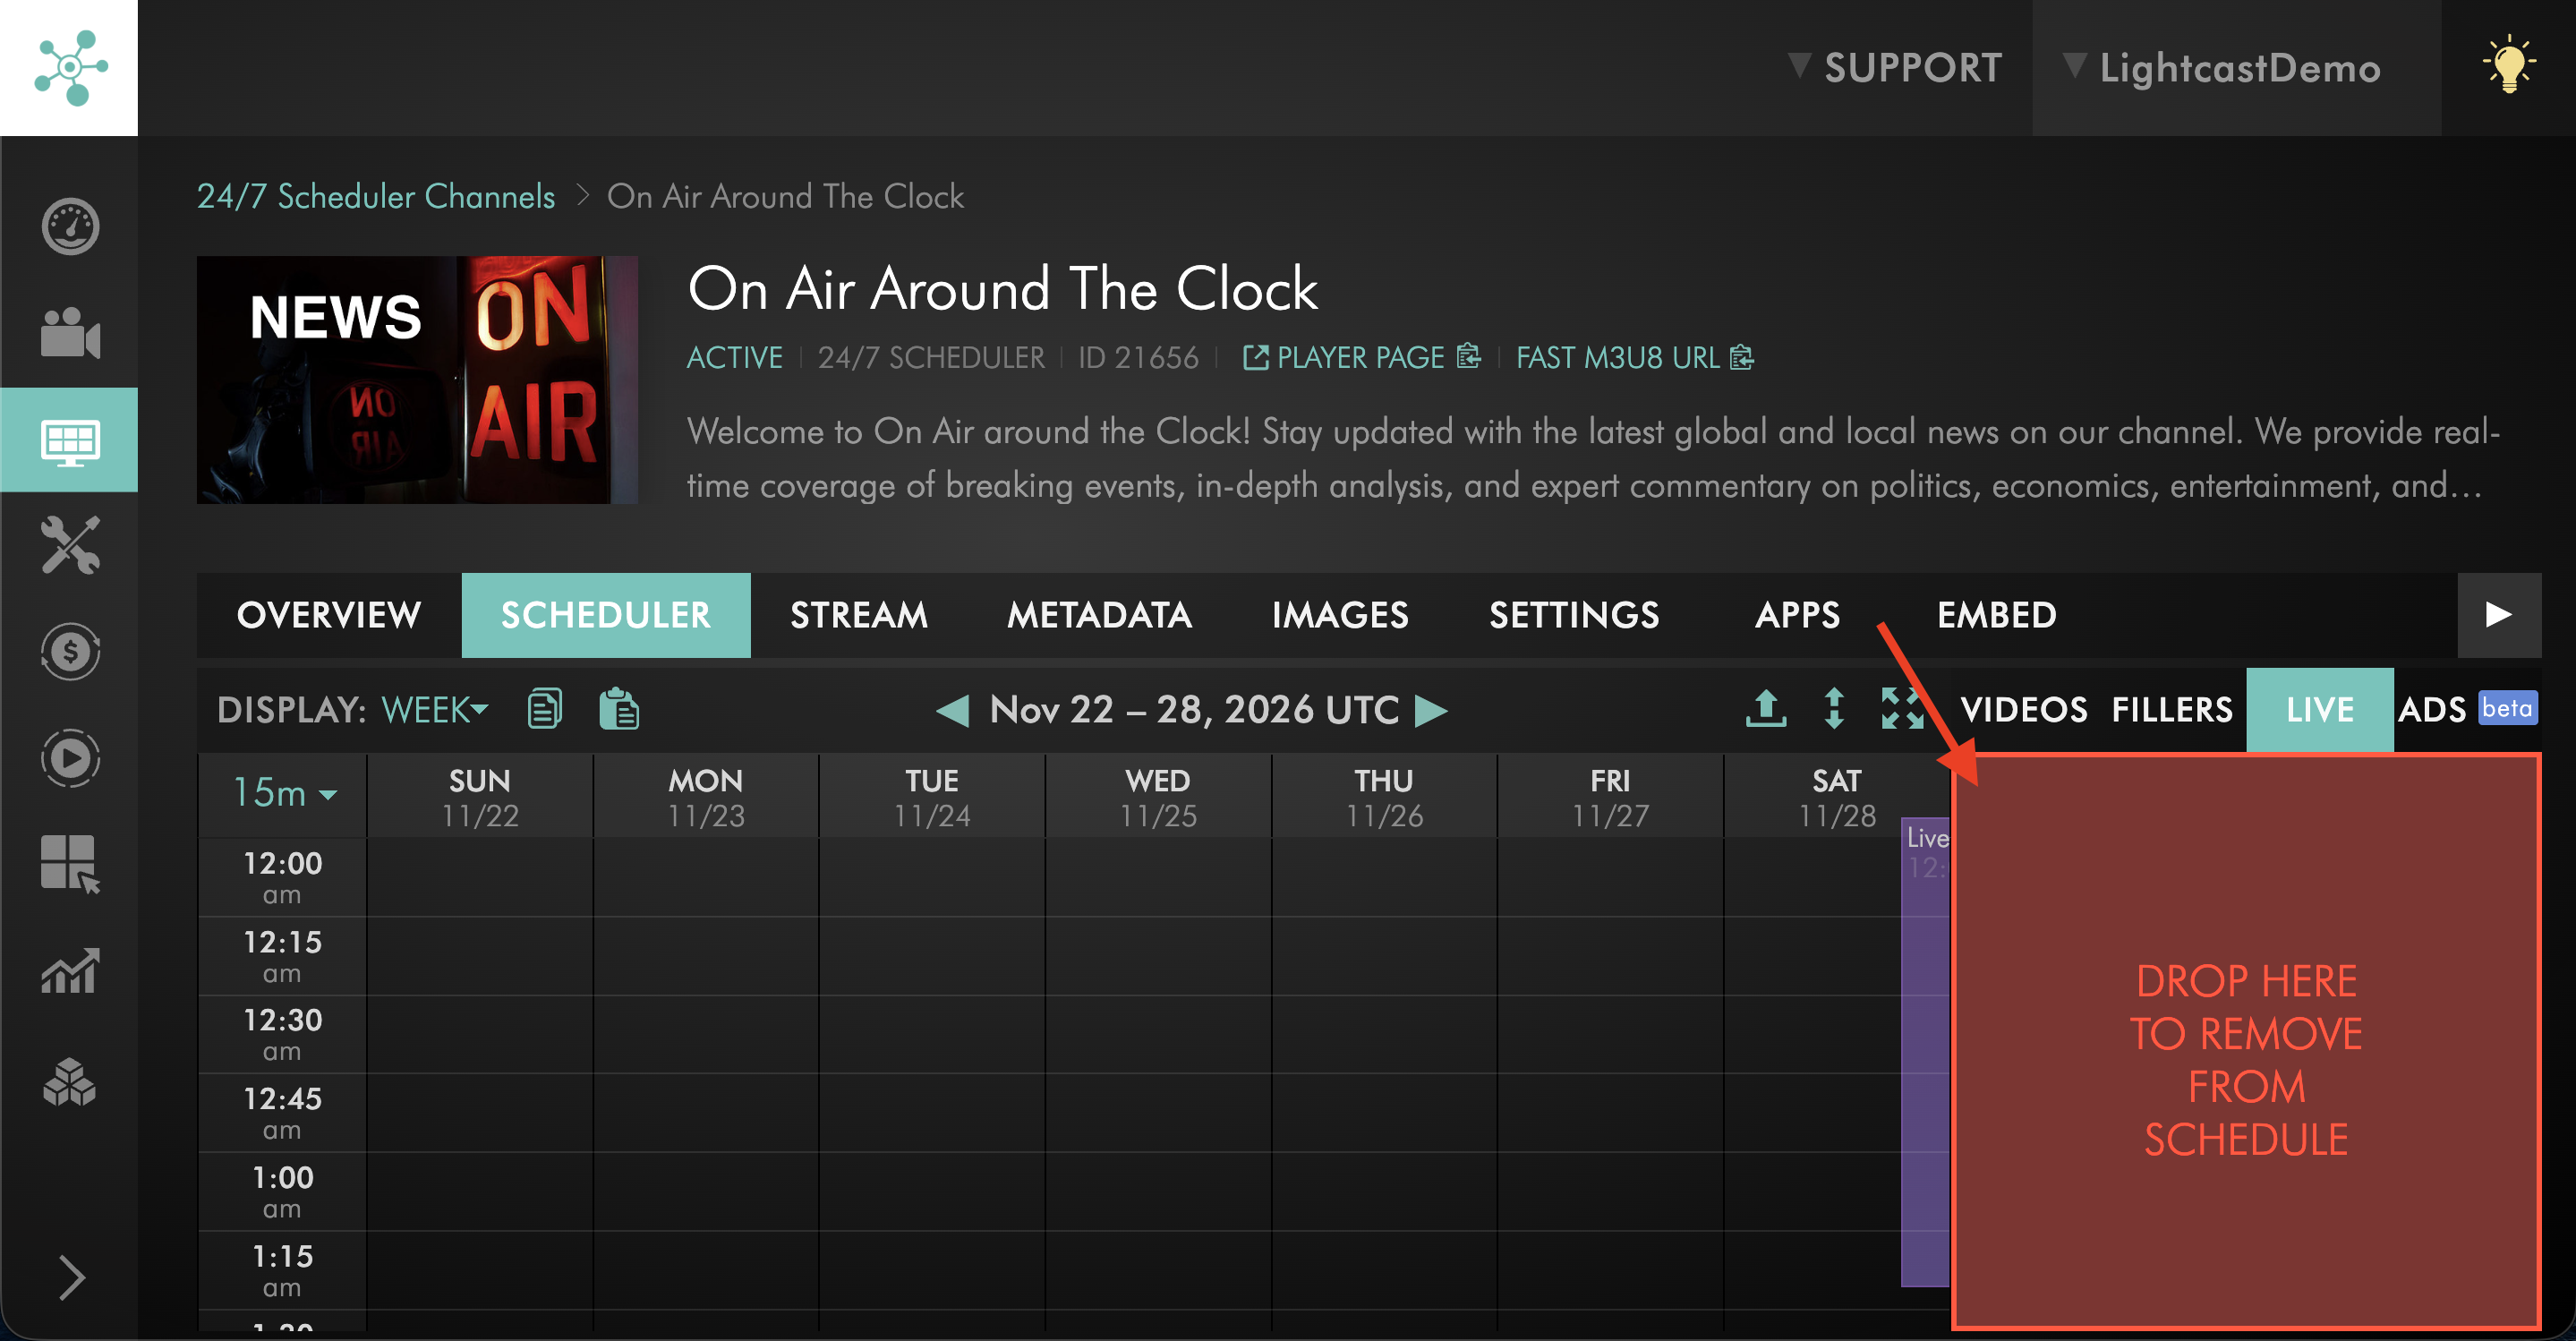
Step 3
Drop the Live Broadcast into the DROP HERE TO REMOVE FROM SCHEDULE area.
The Live Broadcast is removed from the programming schedule.
Configure your encoder for the Live Broadcast
Before your scheduled Live Broadcast begins, configure your encoder to send the stream to your 24/7 Scheduler Channel.
24/7 Scheduler Live Broadcasts use the Stream Key and CDN Access Point available from the Channel's STREAM tab.
Step 1
Follow the instructions in How to find your LIVE Channel stream credentials to locate your 24/7 Scheduler Channel's Stream Key and CDN Access Point and enter them into the appropriate fields in your encoder.
Step 2
Begin sending the stream from your encoder shortly before the scheduled Live Broadcast.
Keep your encoder connected for the duration of the Live Broadcast.
FAQs
Does a scheduled Live Broadcast replace other content in the 24/7 Scheduler?
No. A scheduled Live Broadcast is added as part of your programming lineup and must be placed into an empty portion of the schedule.
You cannot place a Live Broadcast duration over content that is already scheduled for that time.
Can I schedule a Live Broadcast over programming that is already in the Scheduler?
No. The Live Broadcast duration must be added to an empty time period in the schedule.
If programming already occupies the time where you want to add the Live Broadcast, adjust your schedule first so the required time is available.
What happens if the encoder does not send a stream during a scheduled Live Broadcast?
The Playout System still switches to the scheduled Live Broadcast time slot.
If no stream is being received, the stream stops and the player displays an error because there is no stream available to play.
The Playout System switches to the next scheduled programming when the Live Broadcast time slot ends.
What happens if a Live Broadcast continues beyond its scheduled end time?
The Live Broadcast does not automatically extend.
When the scheduled Live Broadcast time ends, the Playout System switches to the next scheduled program, even if your encoder is still sending the live stream.
How can I avoid cutting off a Live Broadcast that runs longer than expected?
Schedule additional buffer time at the end of the Live Broadcast.
This gives the Live Broadcast additional time before the next scheduled program begins.
Can I schedule a Live Broadcast for a duration other than the preset options?
Yes. Start with one of the available preset durations, then select the scheduled Live Broadcast and use the arrow controls in the details panel to adjust its start or end date and time.
Any adjustments must be completed before the applicable 24/7 Scheduler update deadline.
Can a scheduled Live Broadcast be extended on the same day?
No. Same-day schedule changes are not supported after the schedule has been finalized for playout.
Plan the Live Broadcast time slot in advance and include enough buffer for possible delays or overtime.
To learn more, see Understanding 24/7 Scheduler update deadlines.
Can I use SRT for a Live Broadcast in the 24/7 Scheduler?
No. Live Broadcasts in the 24/7 Scheduler support RTMP ingestion.
Can a Live Broadcast in the 24/7 Scheduler be recorded using LIVE-to-VOD?
Not directly from the 24/7 Scheduler Channel.
To create a VOD recording, schedule the same stream in a separate Live Events Channel with LIVE-to-VOD enabled and send the live stream to both Channels.
Why is a separate Live Events Channel required for LIVE-to-VOD recording?
LIVE-to-VOD records an individual Live Event.
A Live Broadcast in the 24/7 Scheduler is used as part of the Channel's continuous linear programming, so a separate Live Events Channel is required to create the individual LIVE-to-VOD recording.
Does sending the stream to a separate Live Events Channel affect the 24/7 Scheduler broadcast?
No. If your encoder supports sending the stream to multiple destinations, you can send the same live feed to the 24/7 Scheduler Channel for playout and to the Live Events Channel for LIVE-to-VOD recording.
Which stream credentials should I use for a 24/7 Scheduler Live Broadcast?
Use the Stream Key and CDN Access Point for the 24/7 Scheduler Channel where the Live Broadcast is scheduled.
For instructions, see How to find your LIVE Channel stream credentials.
Pricing
The 24/7 Scheduler and Playout System is available on POWER packages and above for a fee.
If you don't have access to this feature, you can upgrade to one of our latest plans or contact your account manager.
The Live Broadcasts feature is available as an additional feature for 24/7 Scheduler Channels. Additional fees apply. Current pricing is displayed in the LIVE tab of your 24/7 Scheduler.