
How to schedule a Live Event
Overview
This article explains how to schedule a Live Event in the Media Cloud.
It also explains how scheduled Live Events are used for player countdowns, event information, event-specific statistics, and publishing to supported external platforms such as Facebook, YouTube, and Twitch.
When to schedule a Live Event
Use a scheduled Live Event when your live stream has a defined start time and end time.
Scheduling a Live Event is recommended when you want to:
Display a countdown on the Live Event player
Show the event title and description on the player
Track statistics and Video Minute usage for a specific Live Event
Make the event available on supported apps and publishing destinations that require scheduled events
Publish the live stream to supported social or external platforms
Some apps and publishing destinations require a scheduled Live Event with a defined start and end time before the event can be made available to viewers or published to the destination.
For more information about publishing to supported social platforms, see How to send your live stream to Facebook, How to send your live stream to YouTube, or How to send your live stream to Twitch.
How it works
A Live Event is scheduled inside a Live Events Channel. The Live Event includes the event title, description, start time, end time, timezone, and optional event image.
Before the scheduled start time, supported players and publishing destinations may use the event details to display the event countdown, title, description, and event image.
When the scheduled start time is reached, the Live Event can display the live stream if your encoder is actively sending the stream to the correct Live Events Channel. Scheduling a Live Event does not start the stream from your encoder. You must still configure your encoder and send the live stream to the correct Live Events Channel. For more information, see How to set up and ingest a Live Event stream.
The scheduled end time tells supported players and publishing destinations when the event is expected to end, but it does not stop your encoder. Stop your encoder when your live broadcast is finished.
After the Live Event is created, the Media Cloud assigns it a unique Event ID. If you contact Customer Support about a specific Live Event, providing the Event ID can help identify the event.
Instructions
Step 1
Log in to your Media Cloud account.
Step 2
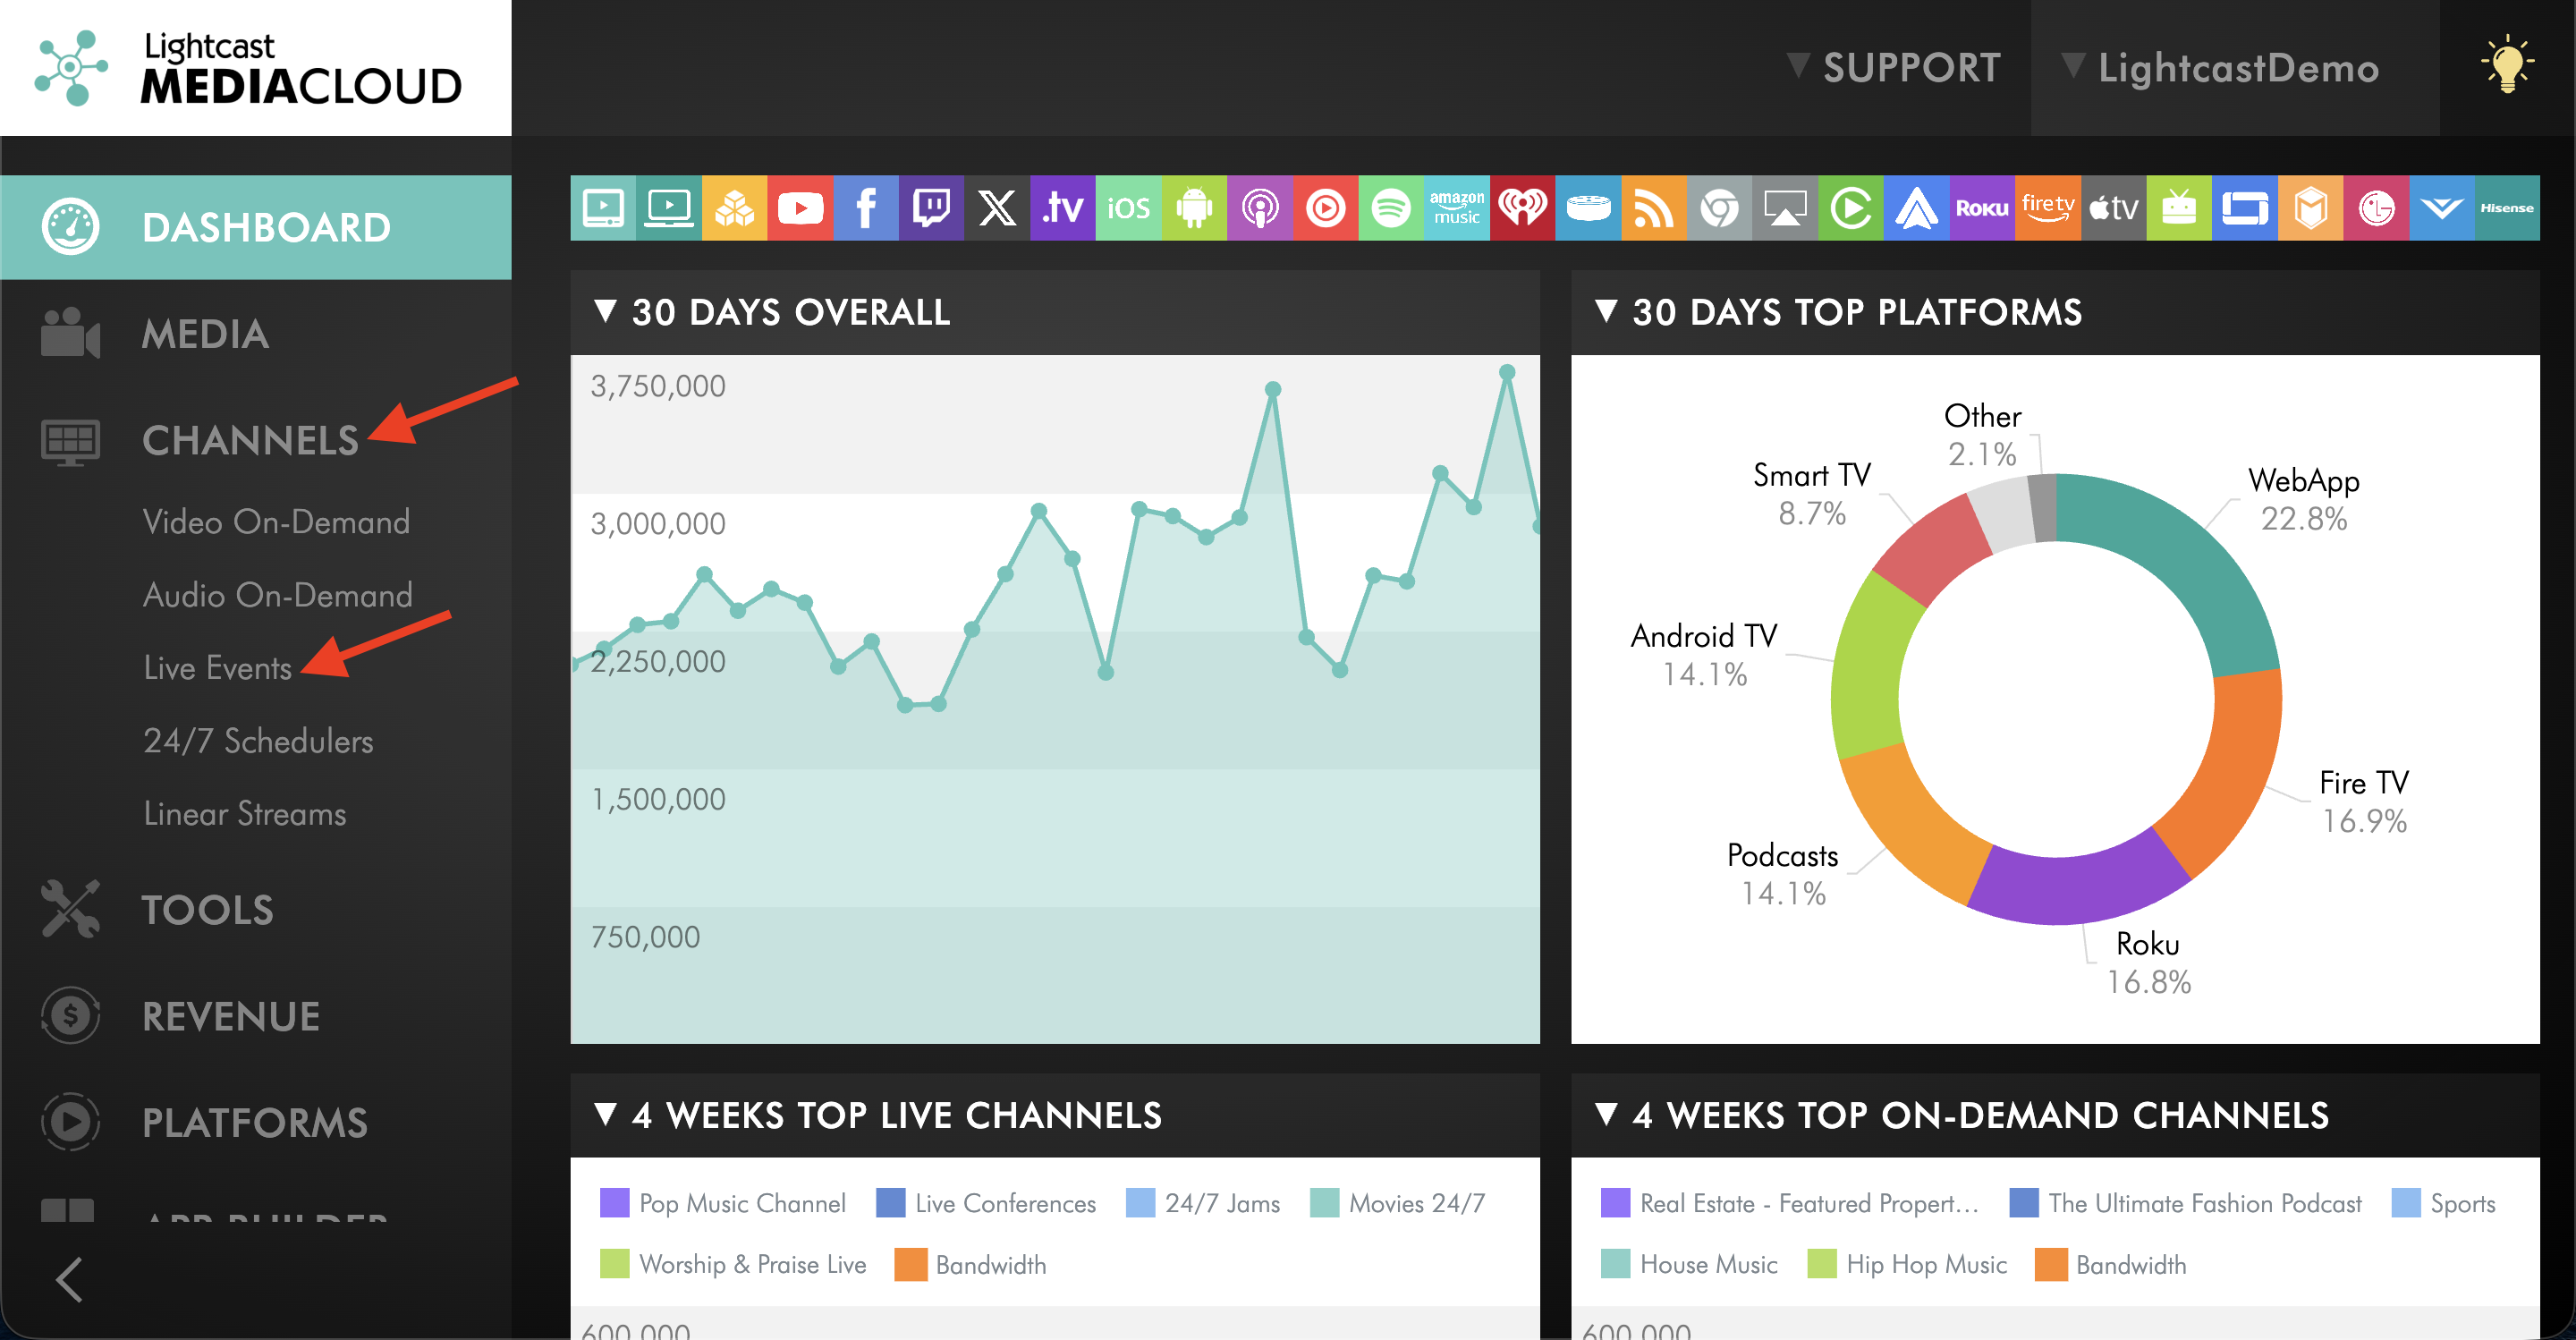
Go to CHANNELS and click Live Events.
Step 3
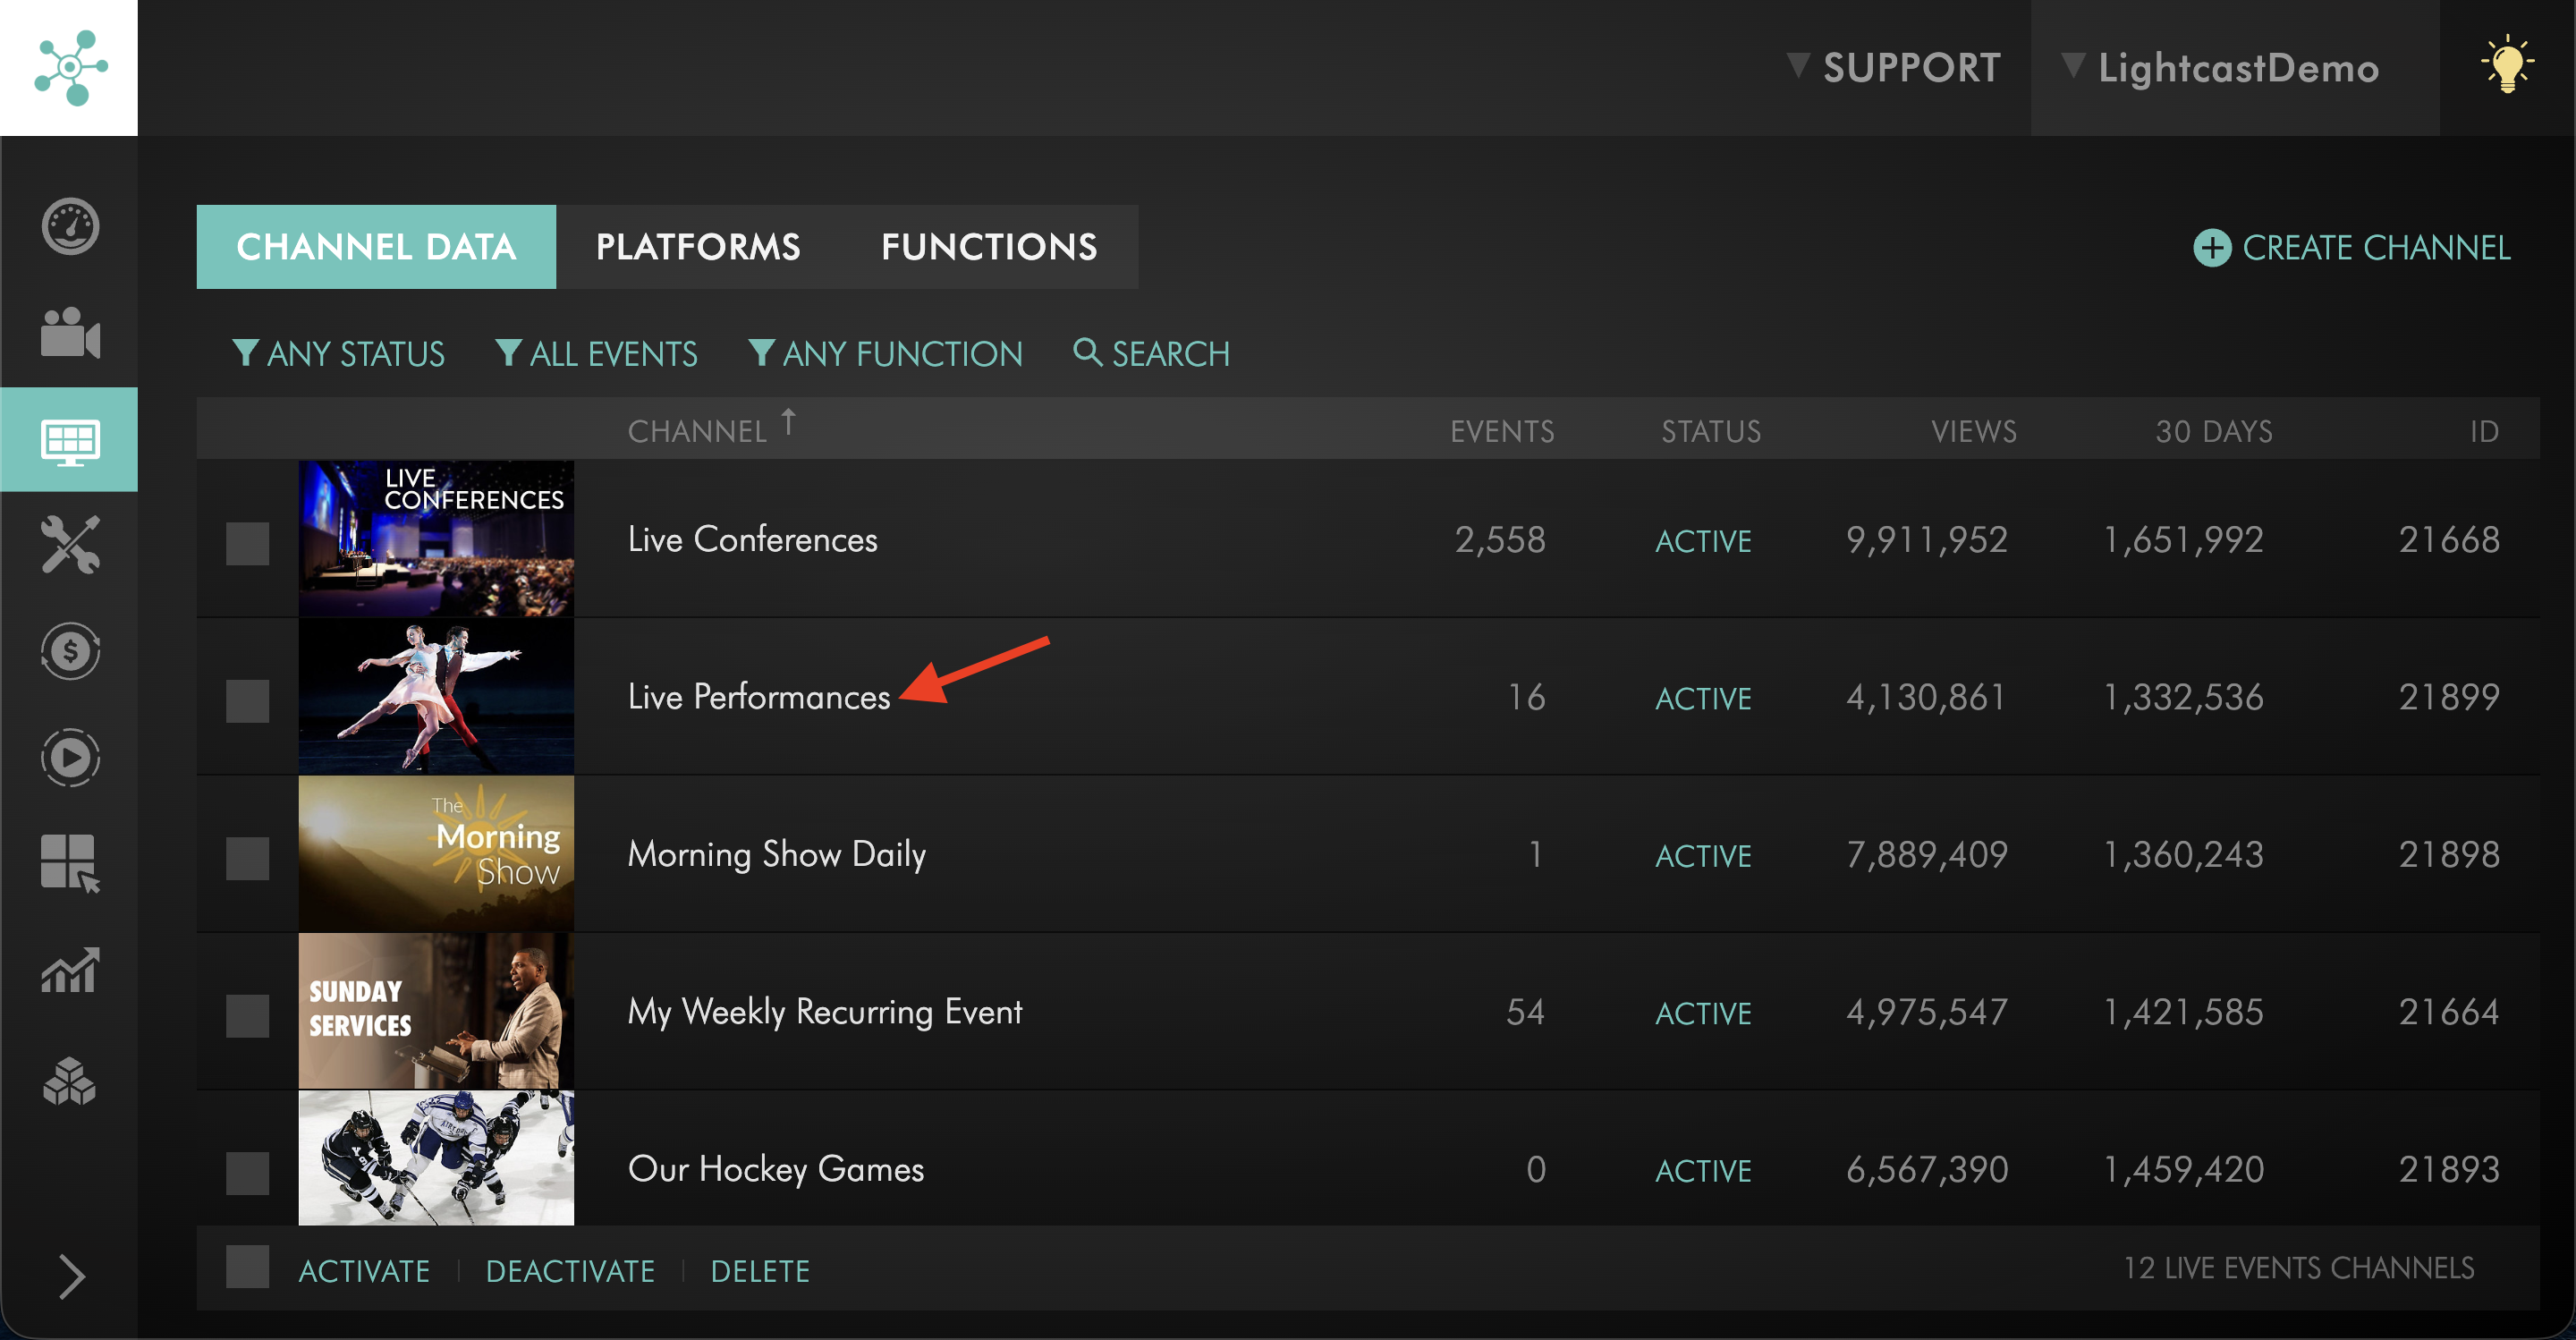
Select the Live Events Channel where you want to schedule the event.
Step 4
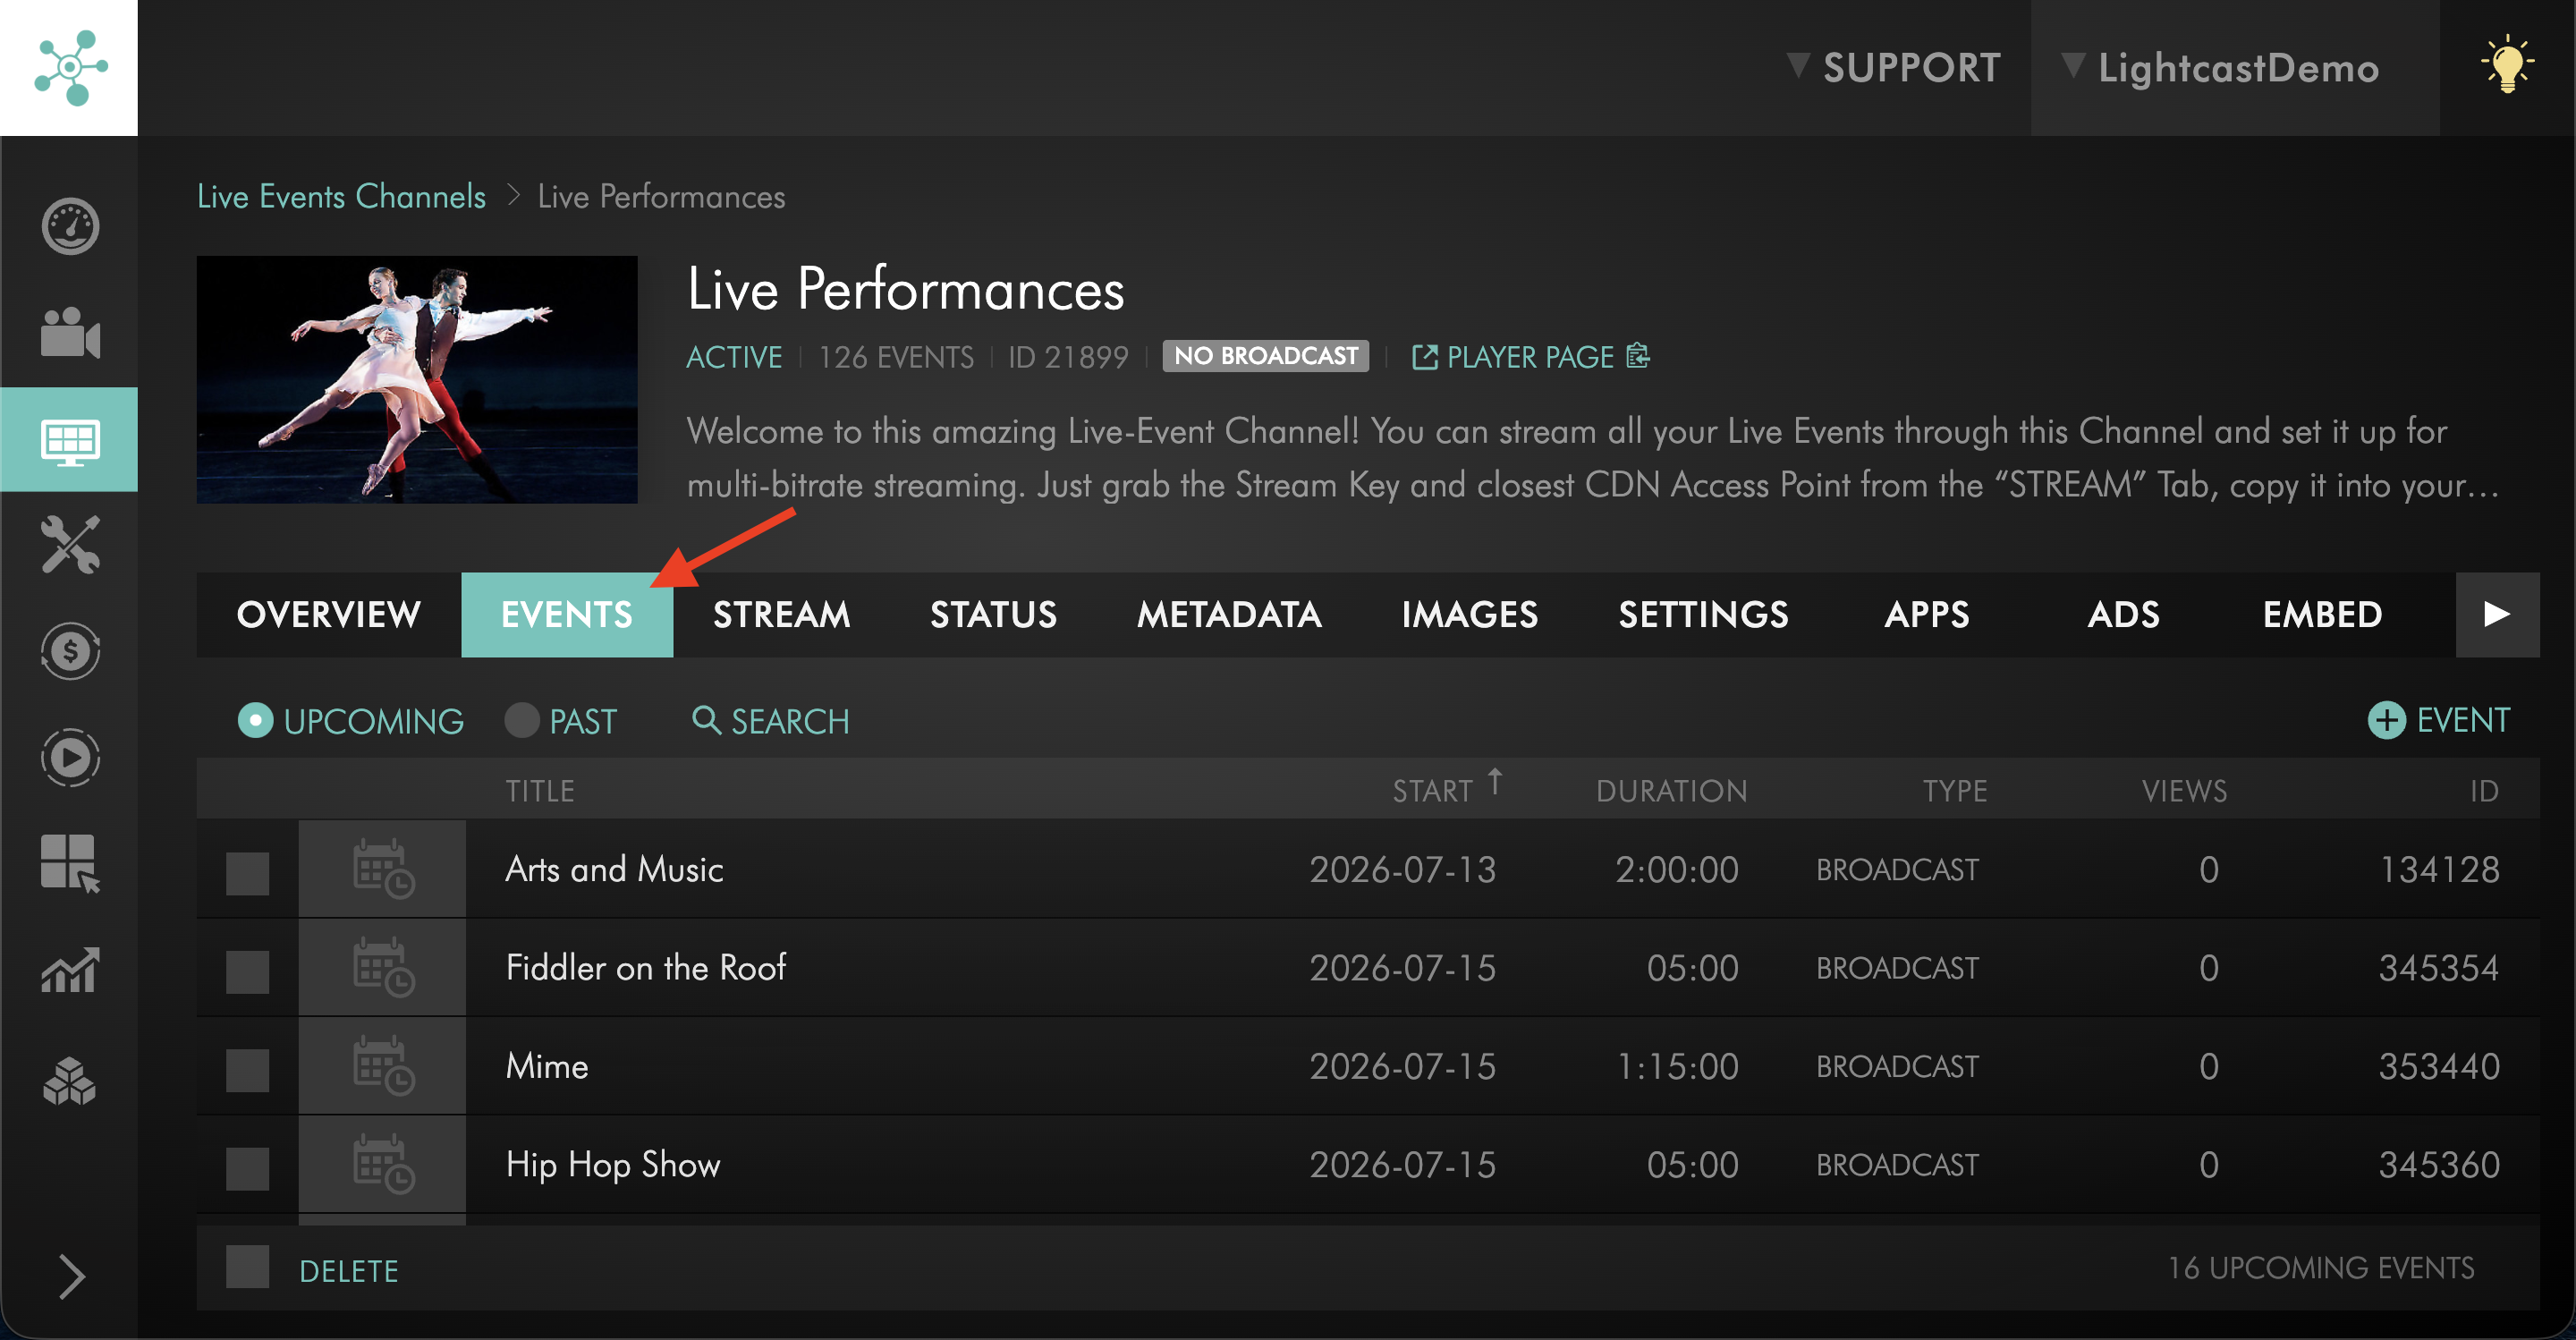
Open the EVENTS tab.
Step 5
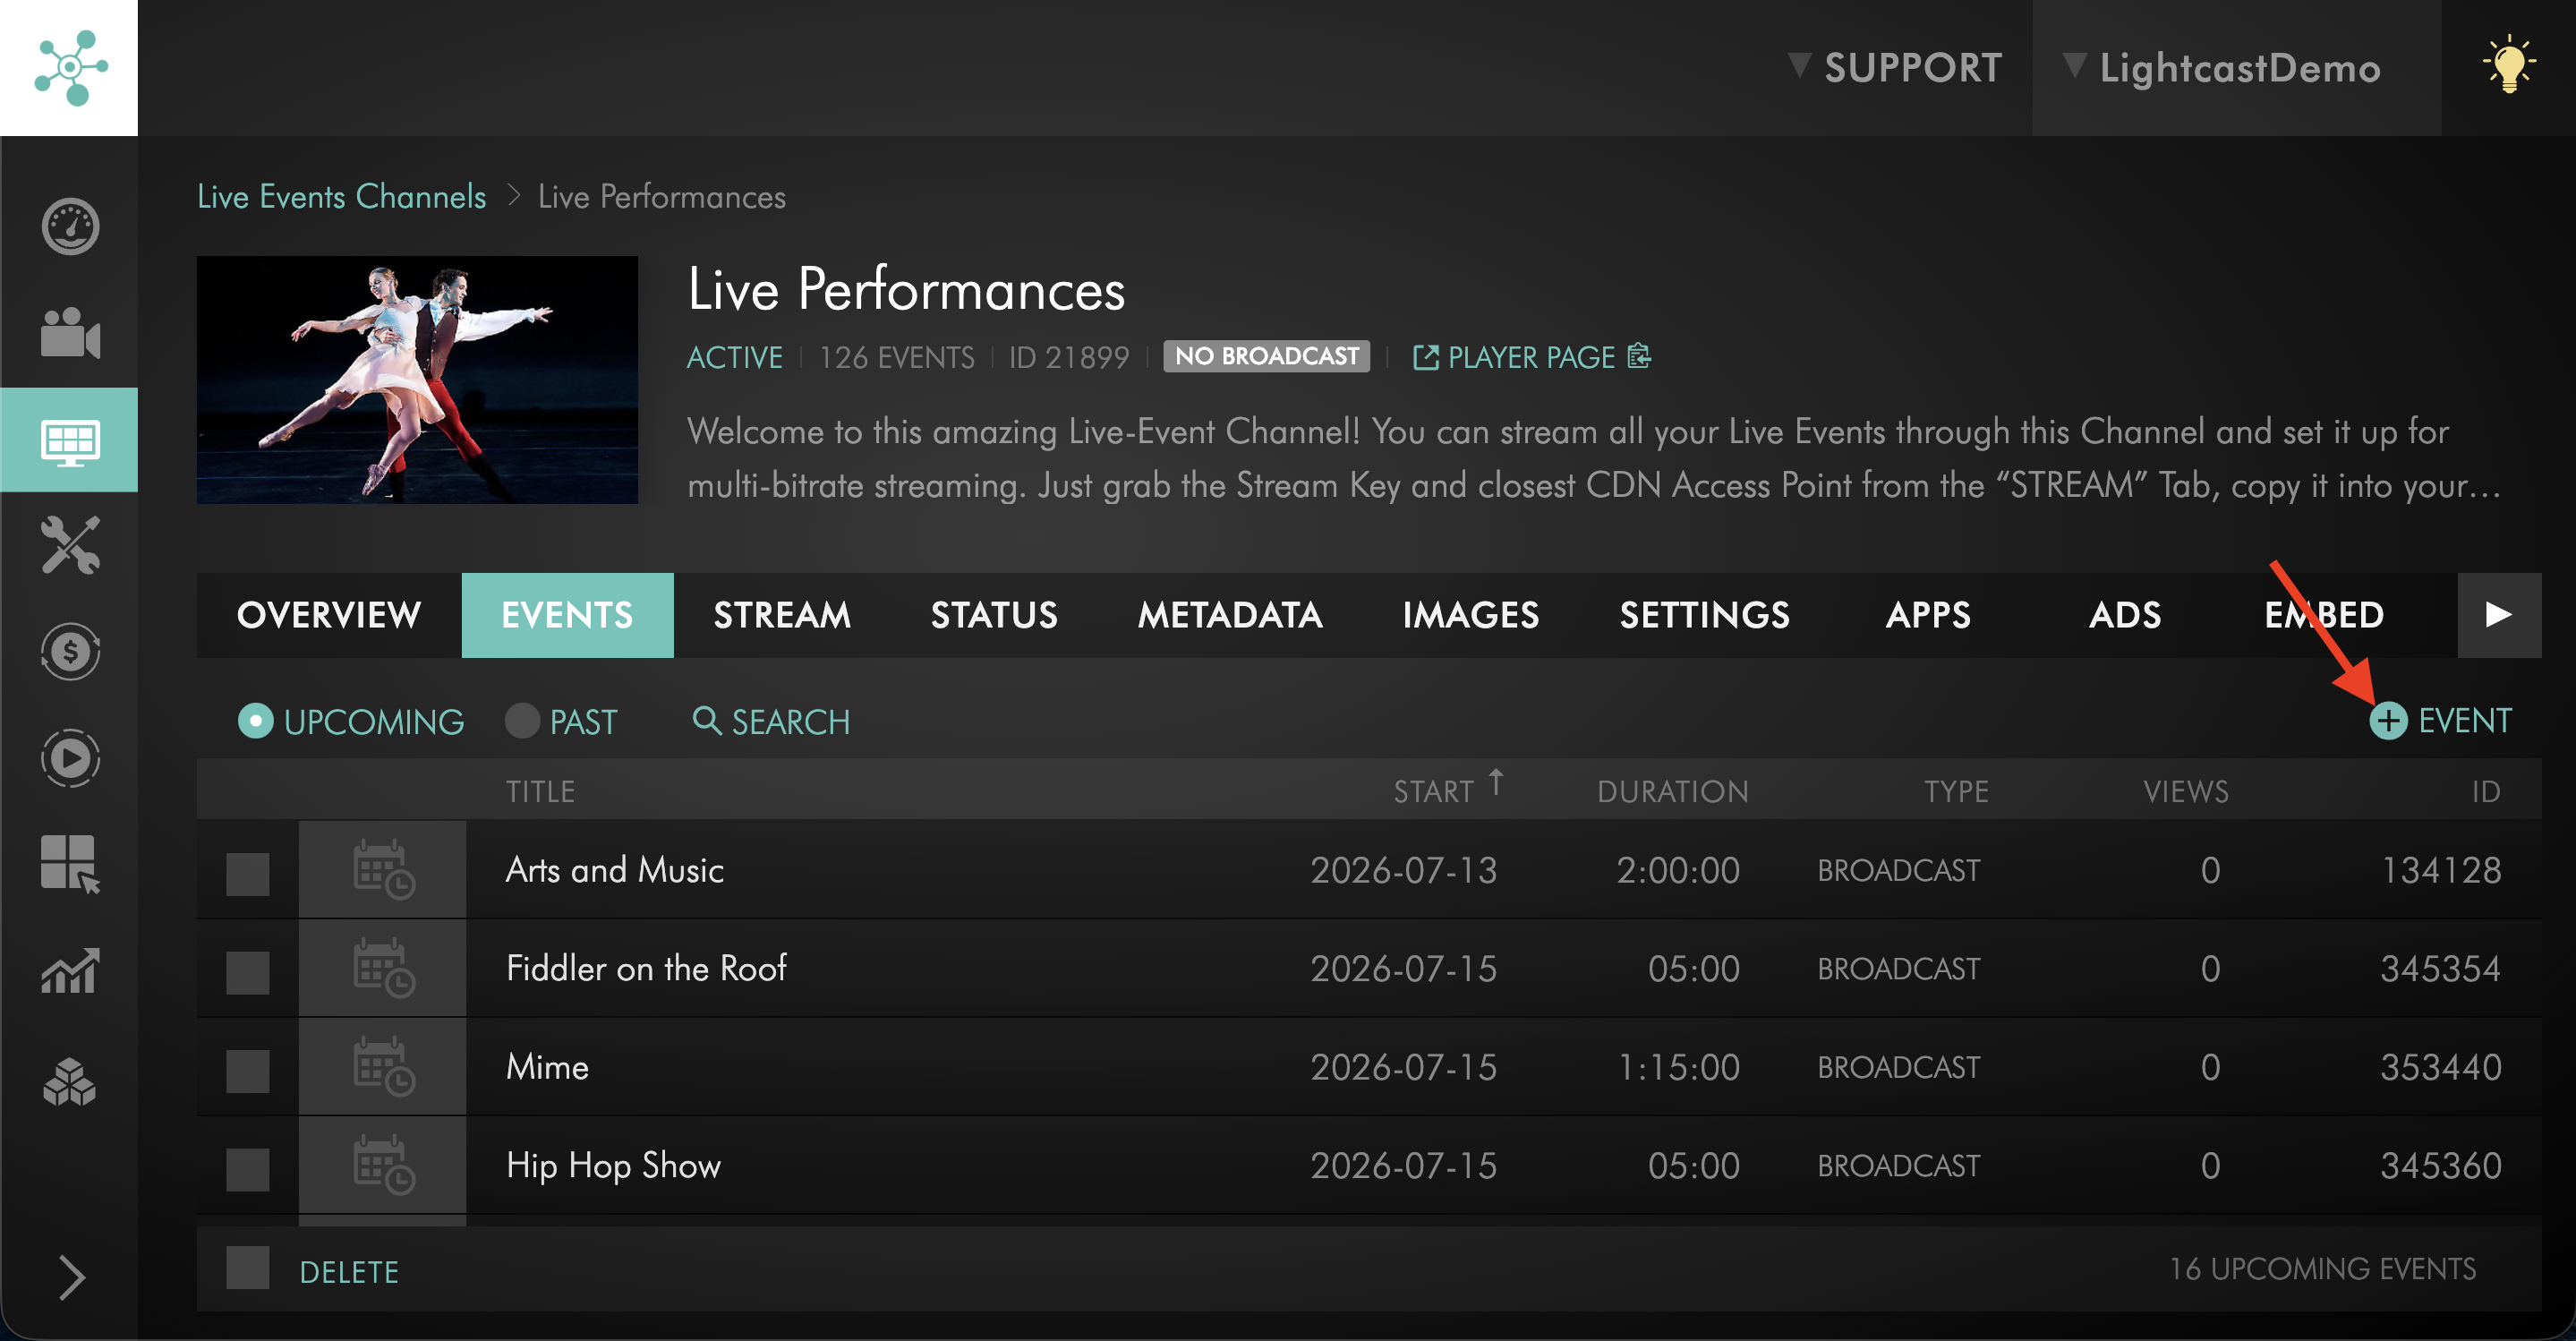
Click + EVENT.
Step 6
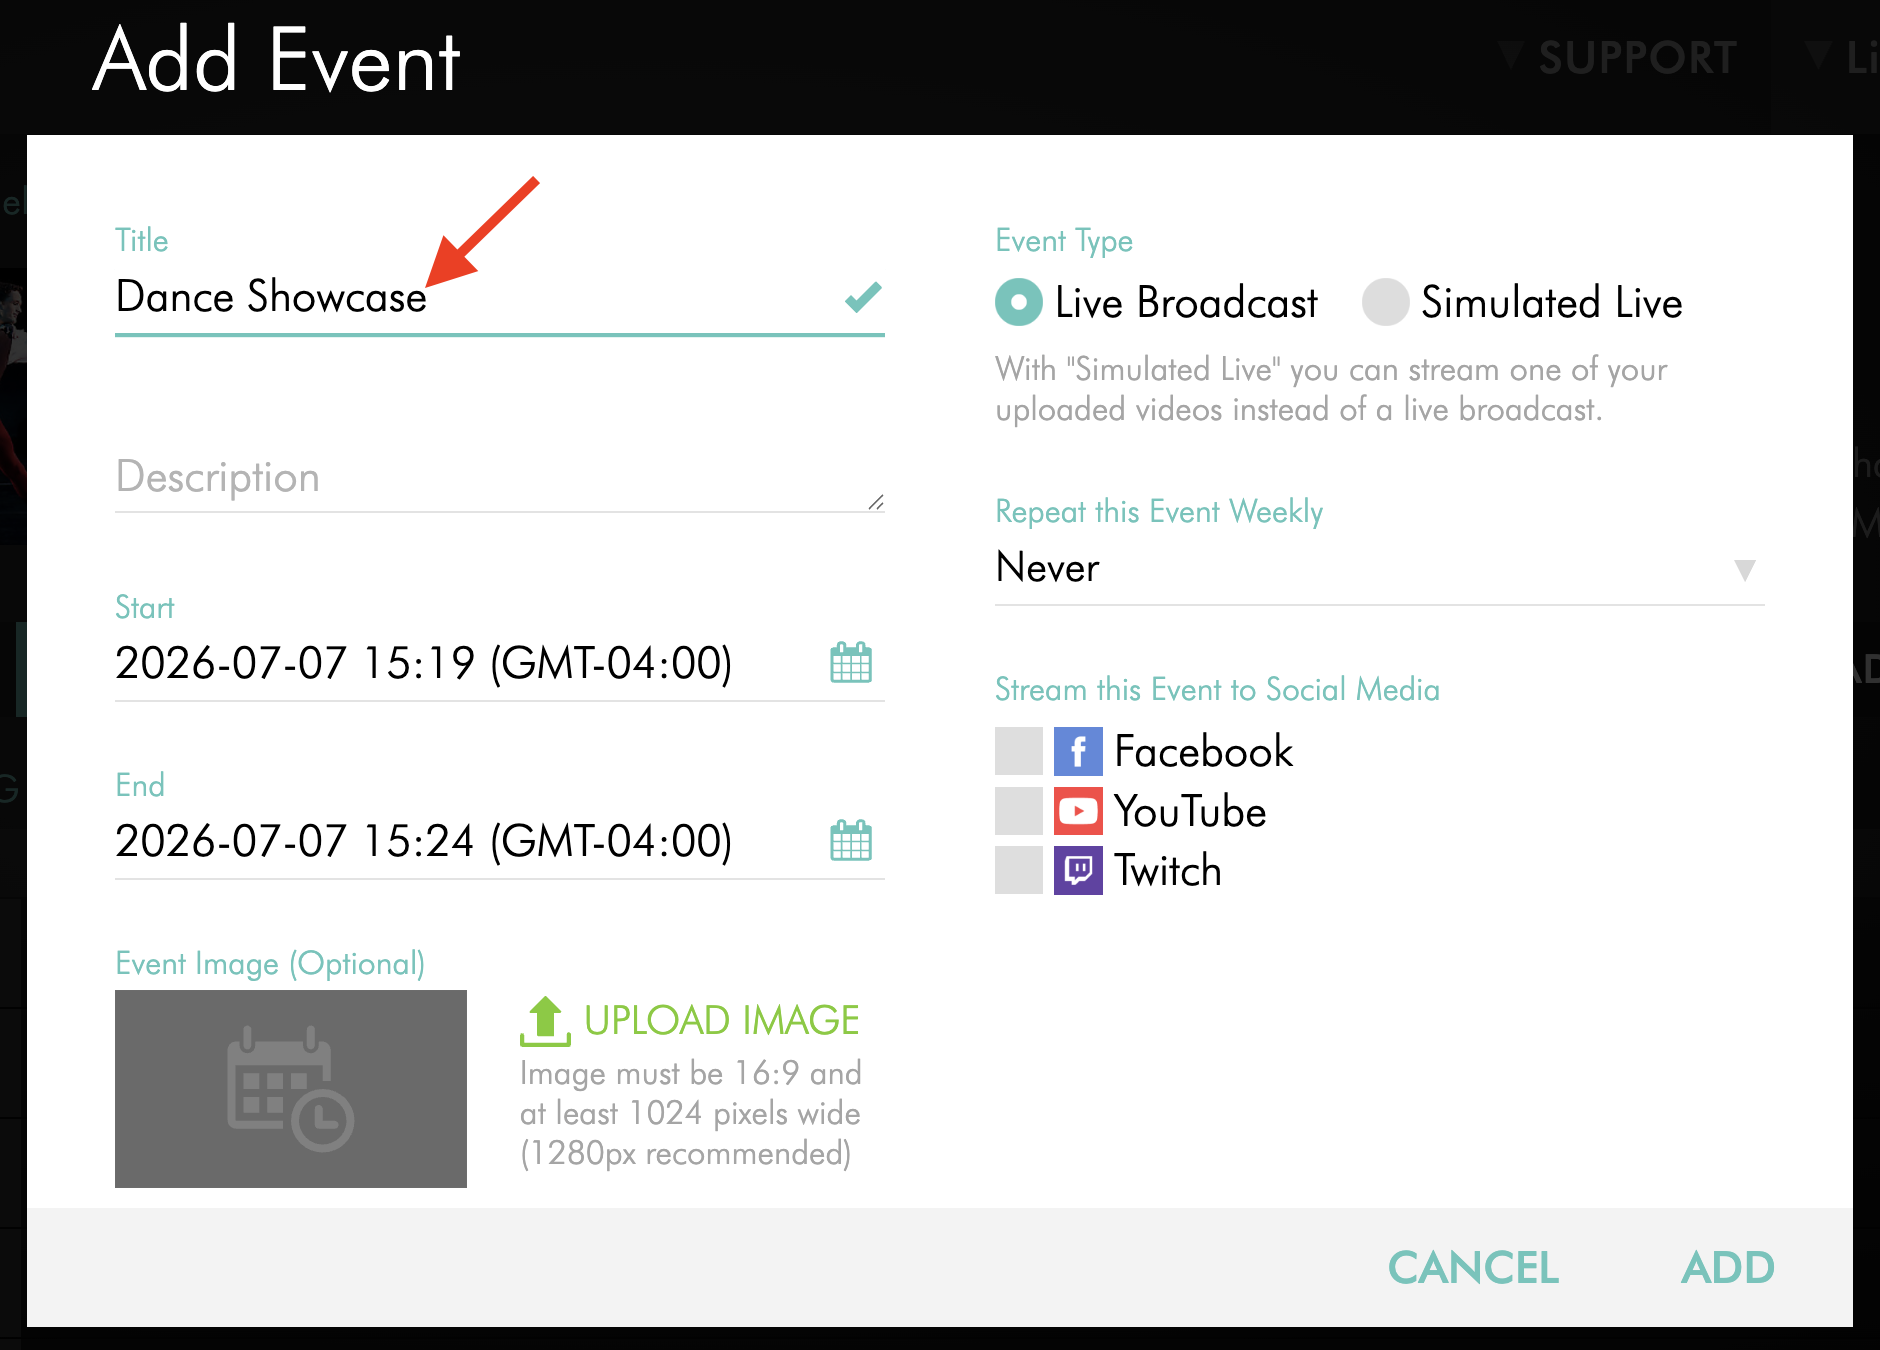
Enter the event Title.
Use a clear title that helps viewers recognize the live event.
Step 7
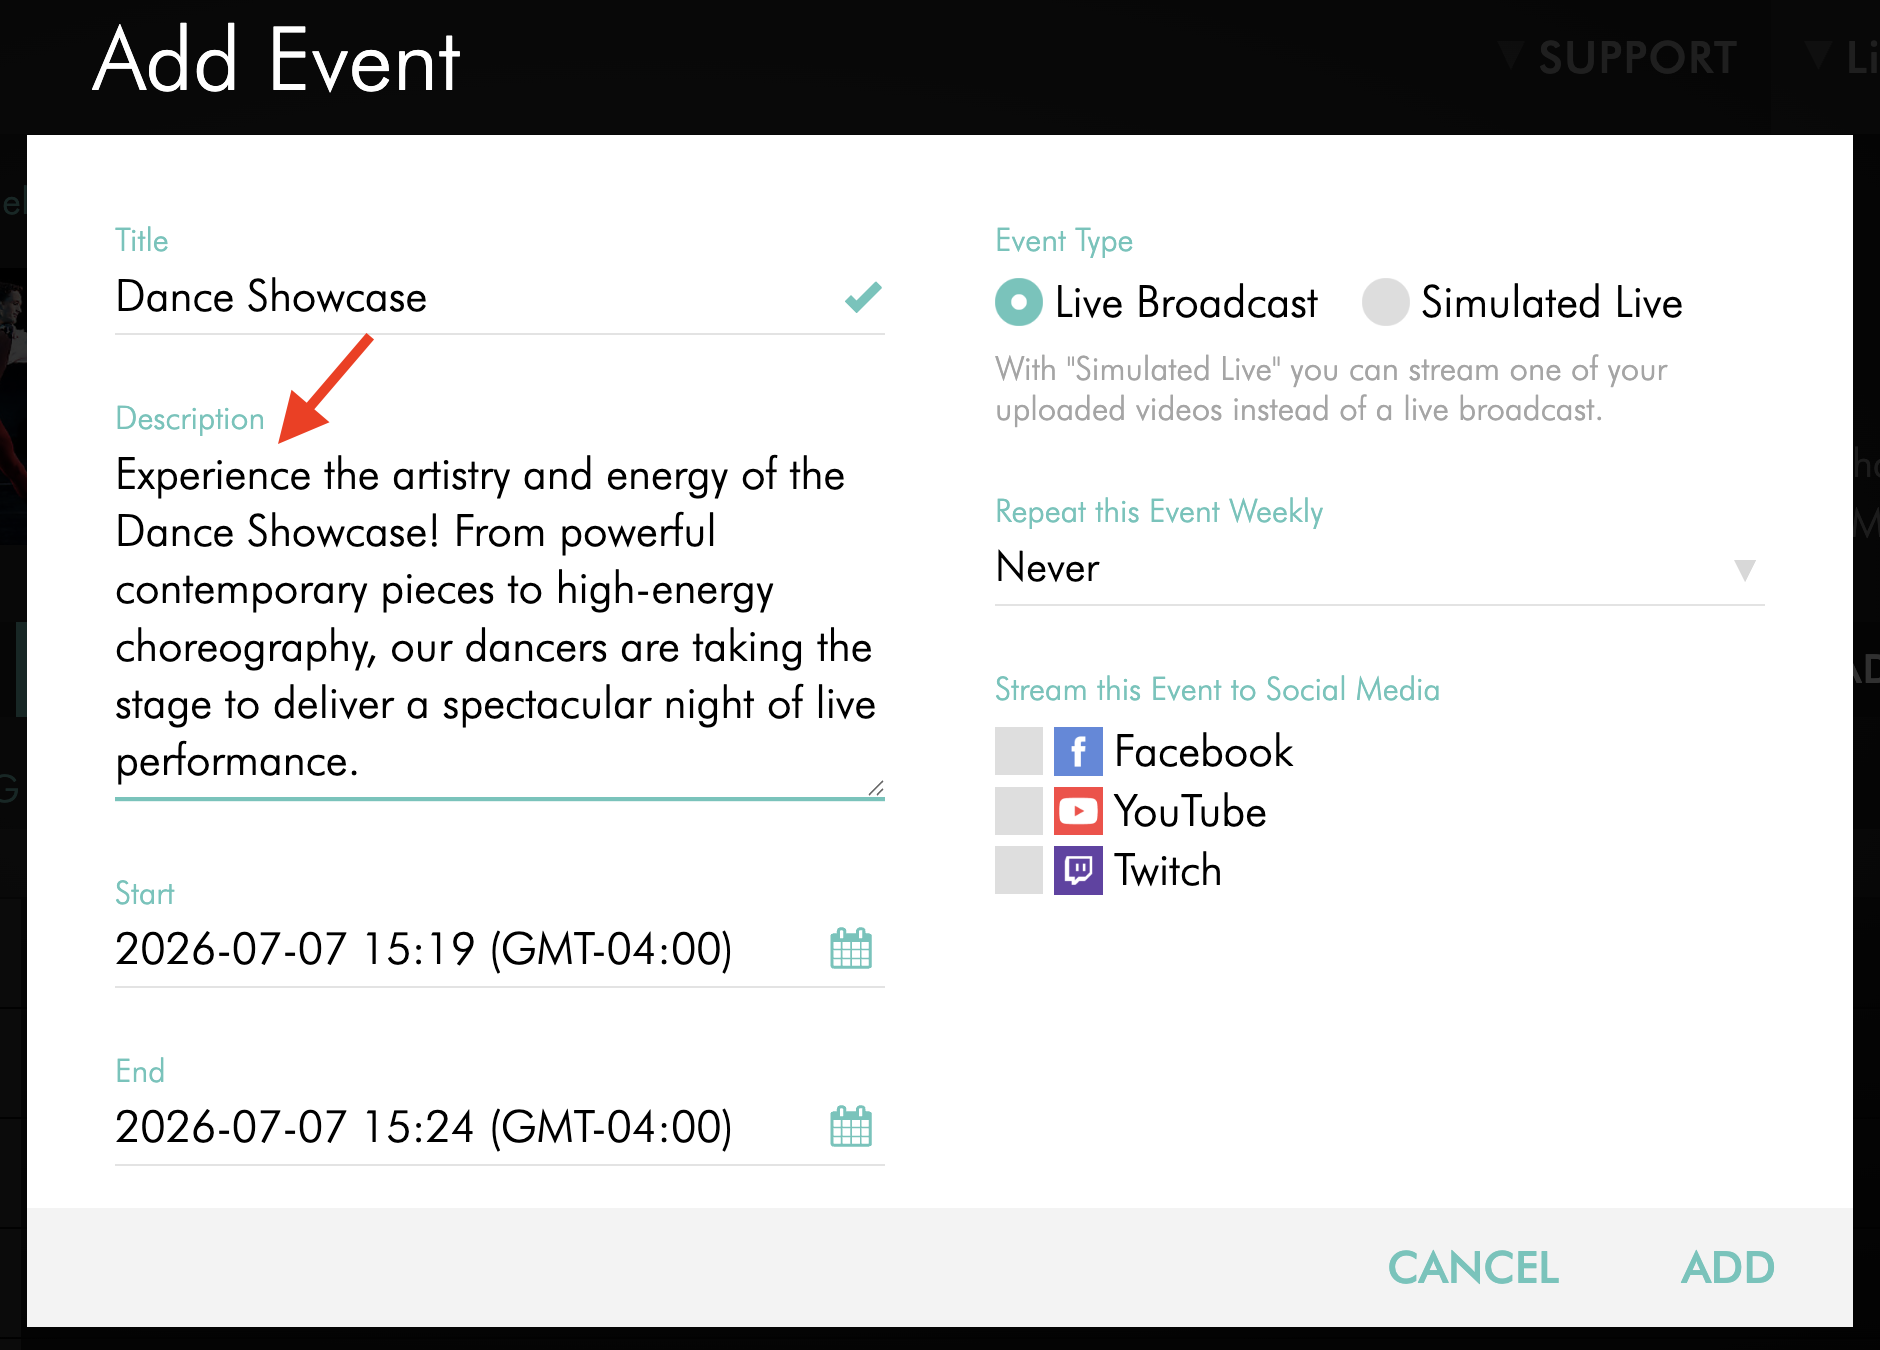
Enter the event Description.
The description should briefly explain what viewers can expect from the live event.
Step 8
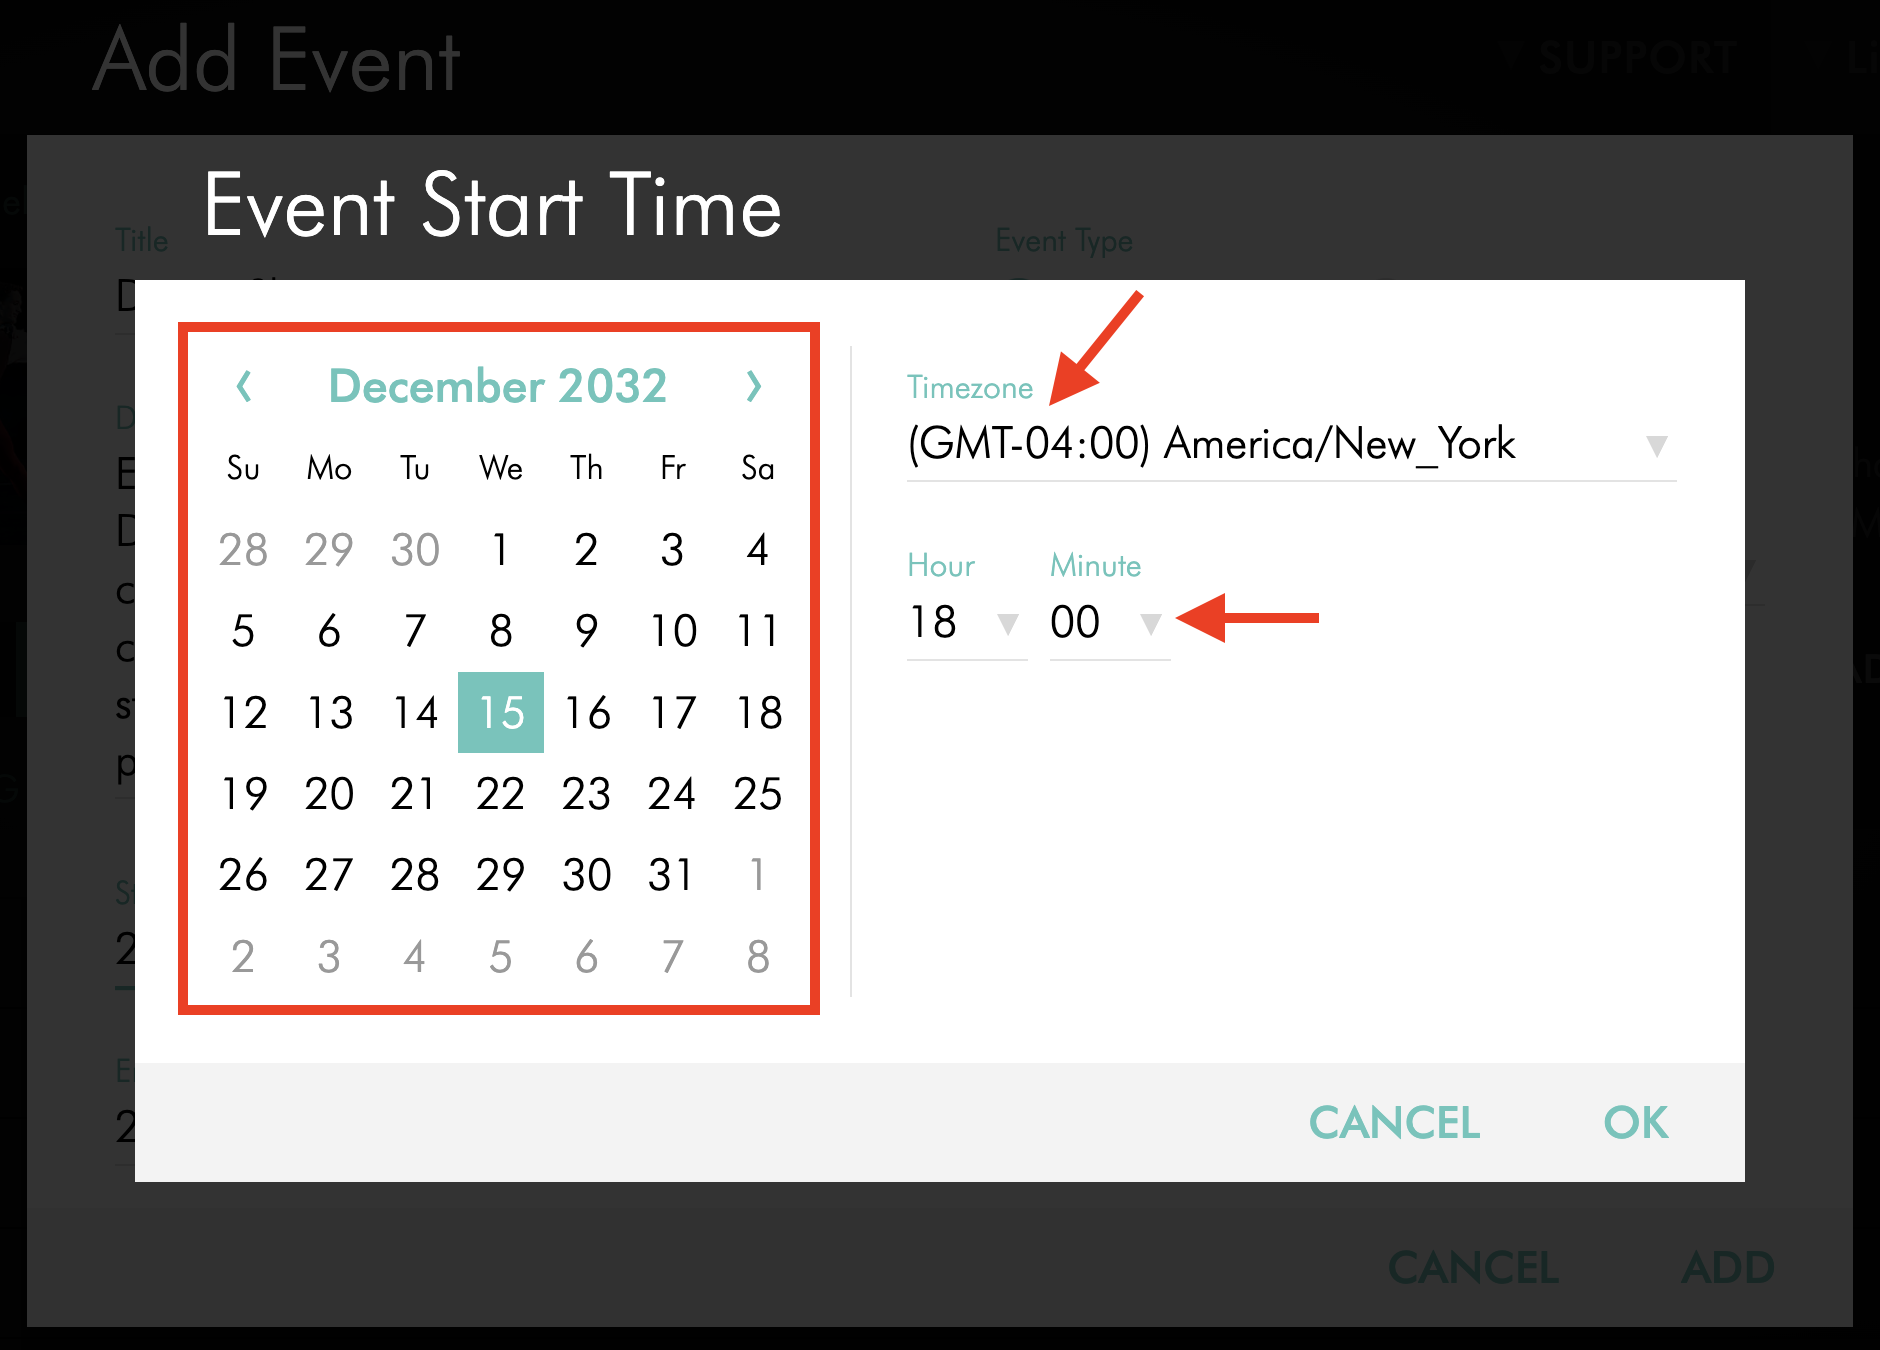
Set the event Start Date, Time, and Timezone.
Confirm the timezone shown for the Live Event before selecting the start time.
Step 9
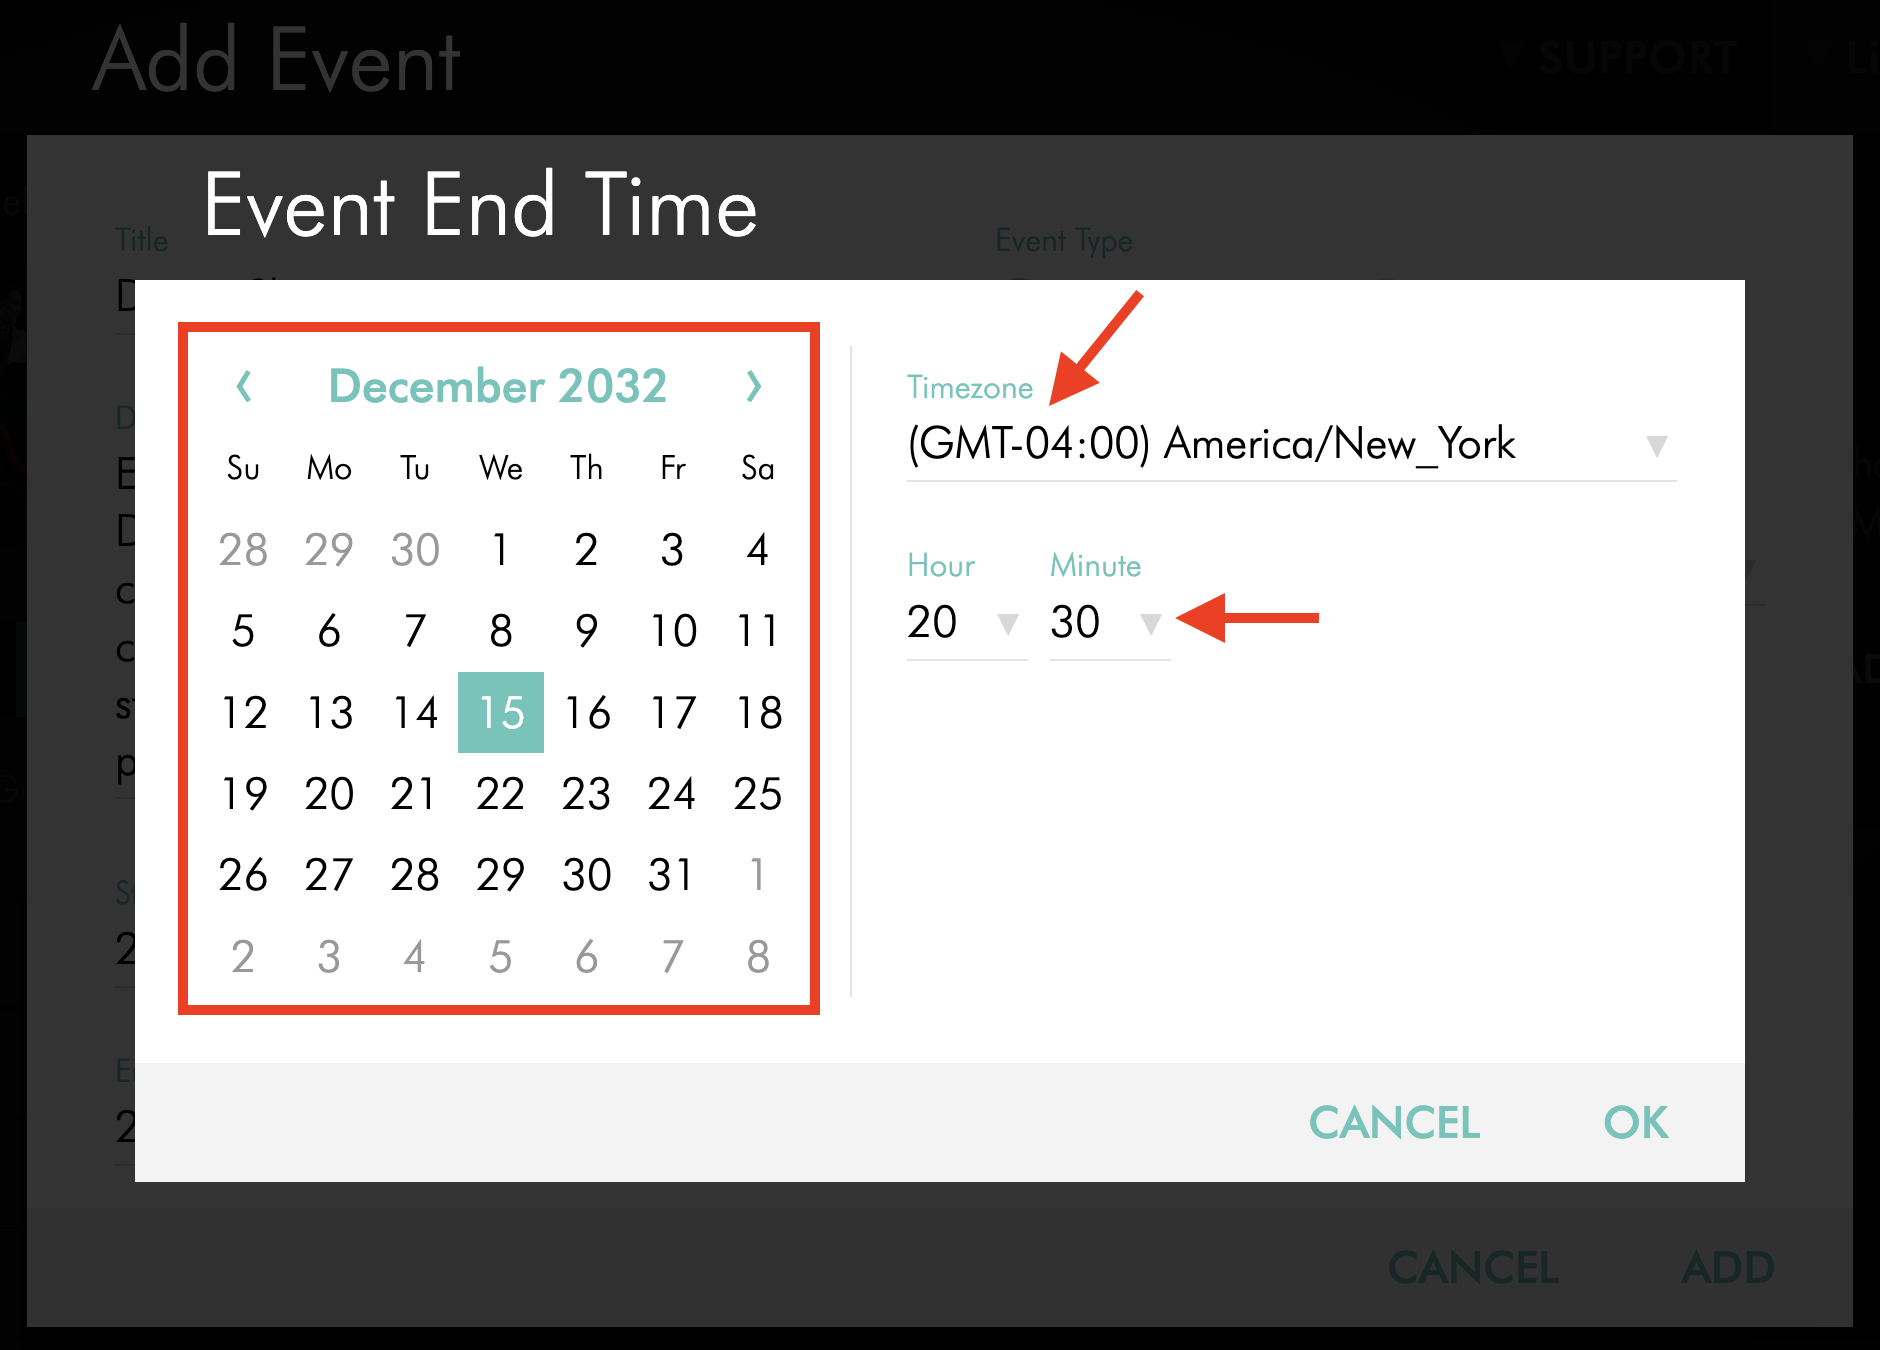
Set the event End Date, Time, and Timezone.
Review the start time, end time, and timezone carefully before saving the event. An incorrect date, time, or timezone can cause the countdown or scheduled event time to display incorrectly.
Important: Scheduling a Live Event does not automatically start or stop your encoder. Make sure your encoder is configured and ready to send the stream to the Live Events Channel before the scheduled start time. Stop your encoder when your live broadcast is finished. For more information, see How to set up and ingest a Live Event stream.
Step 10
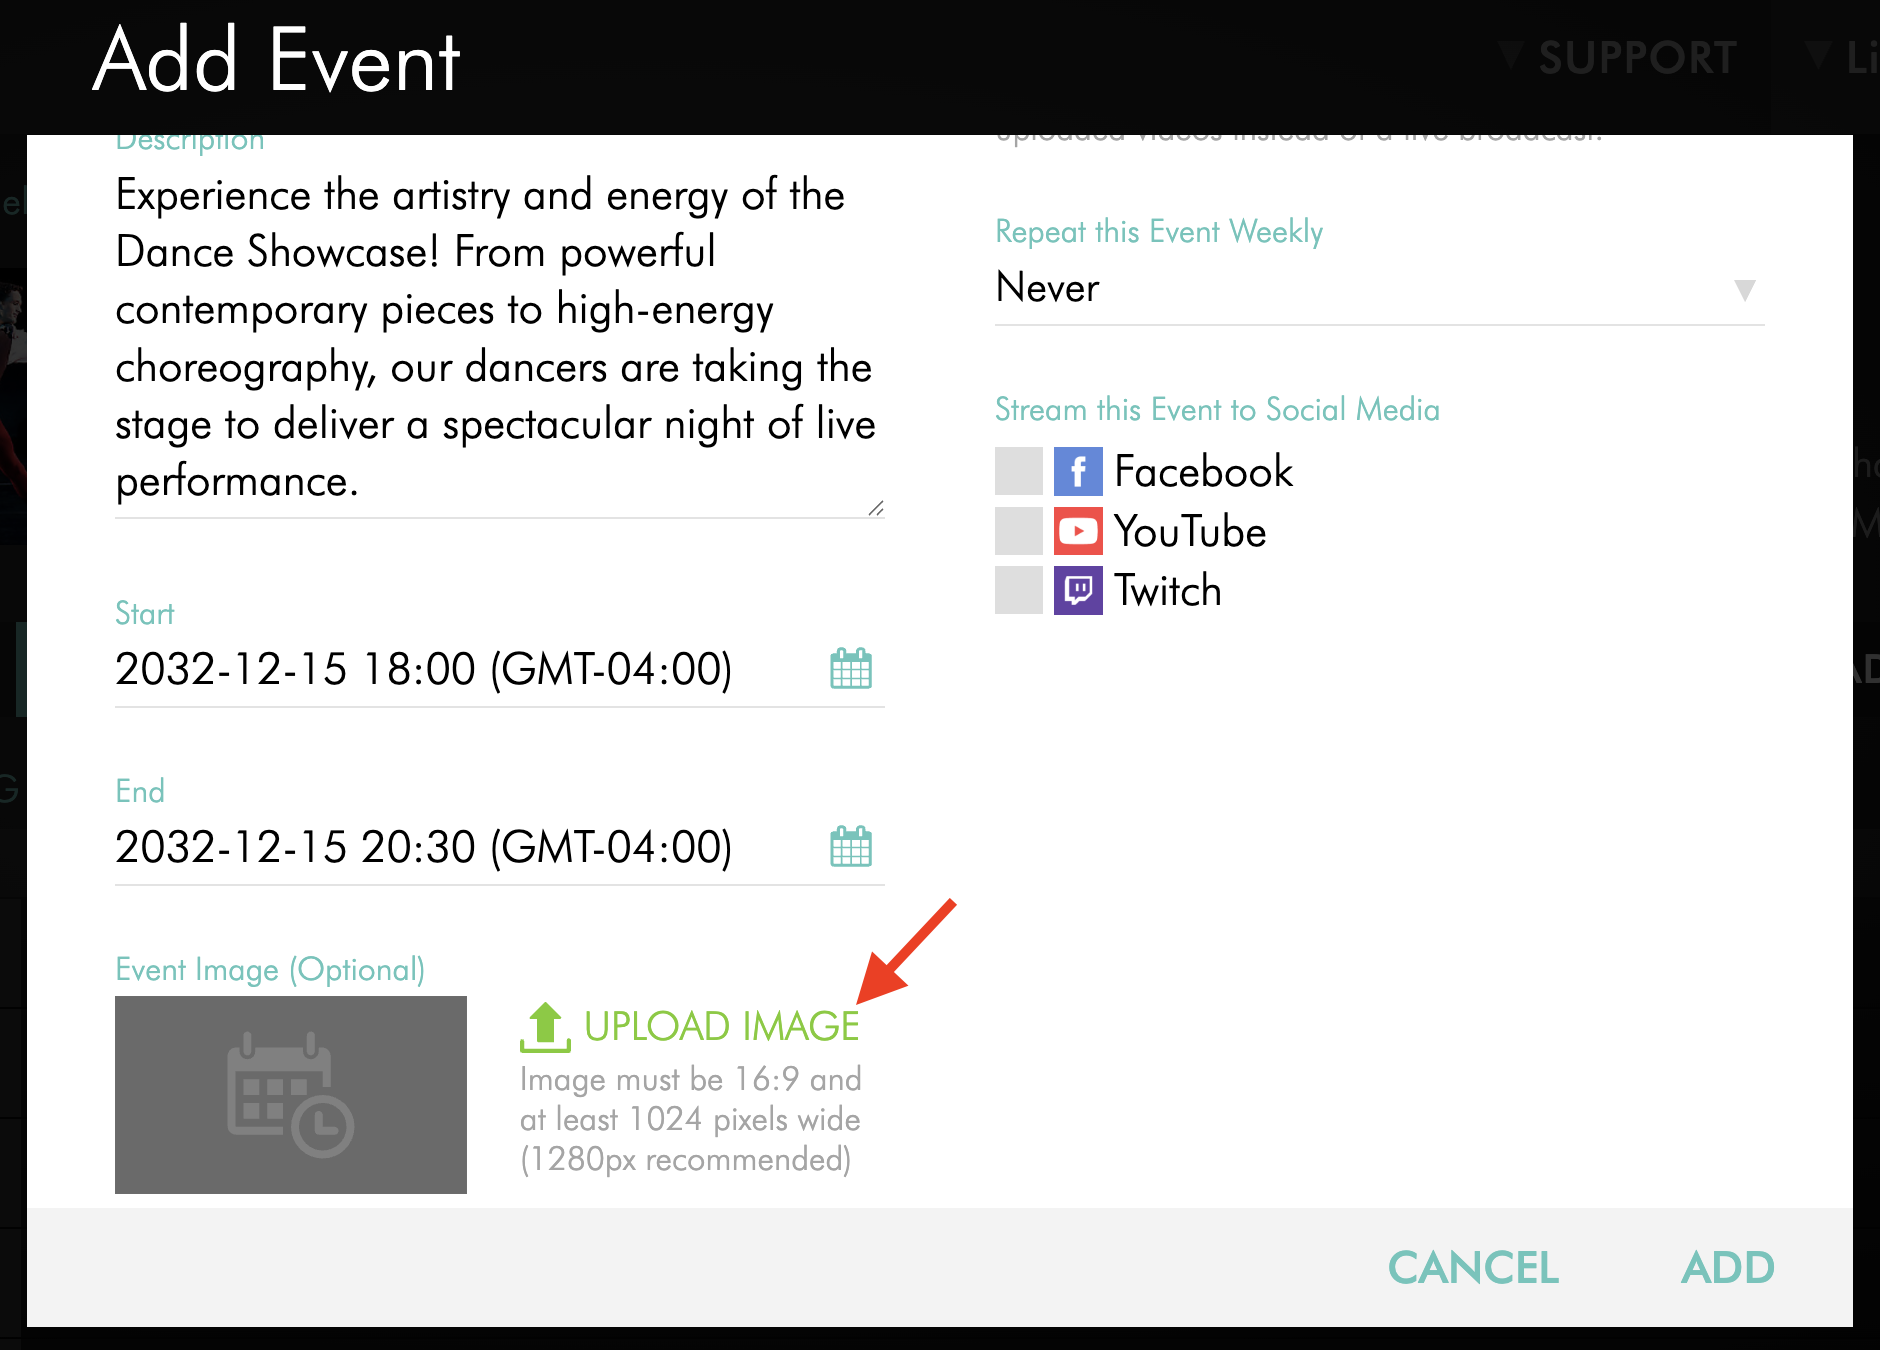
Optional: Upload an Event Image.
An event image can be used for the countdown display and supported event listings. To learn more, see How to add Live Event images.
Step 11
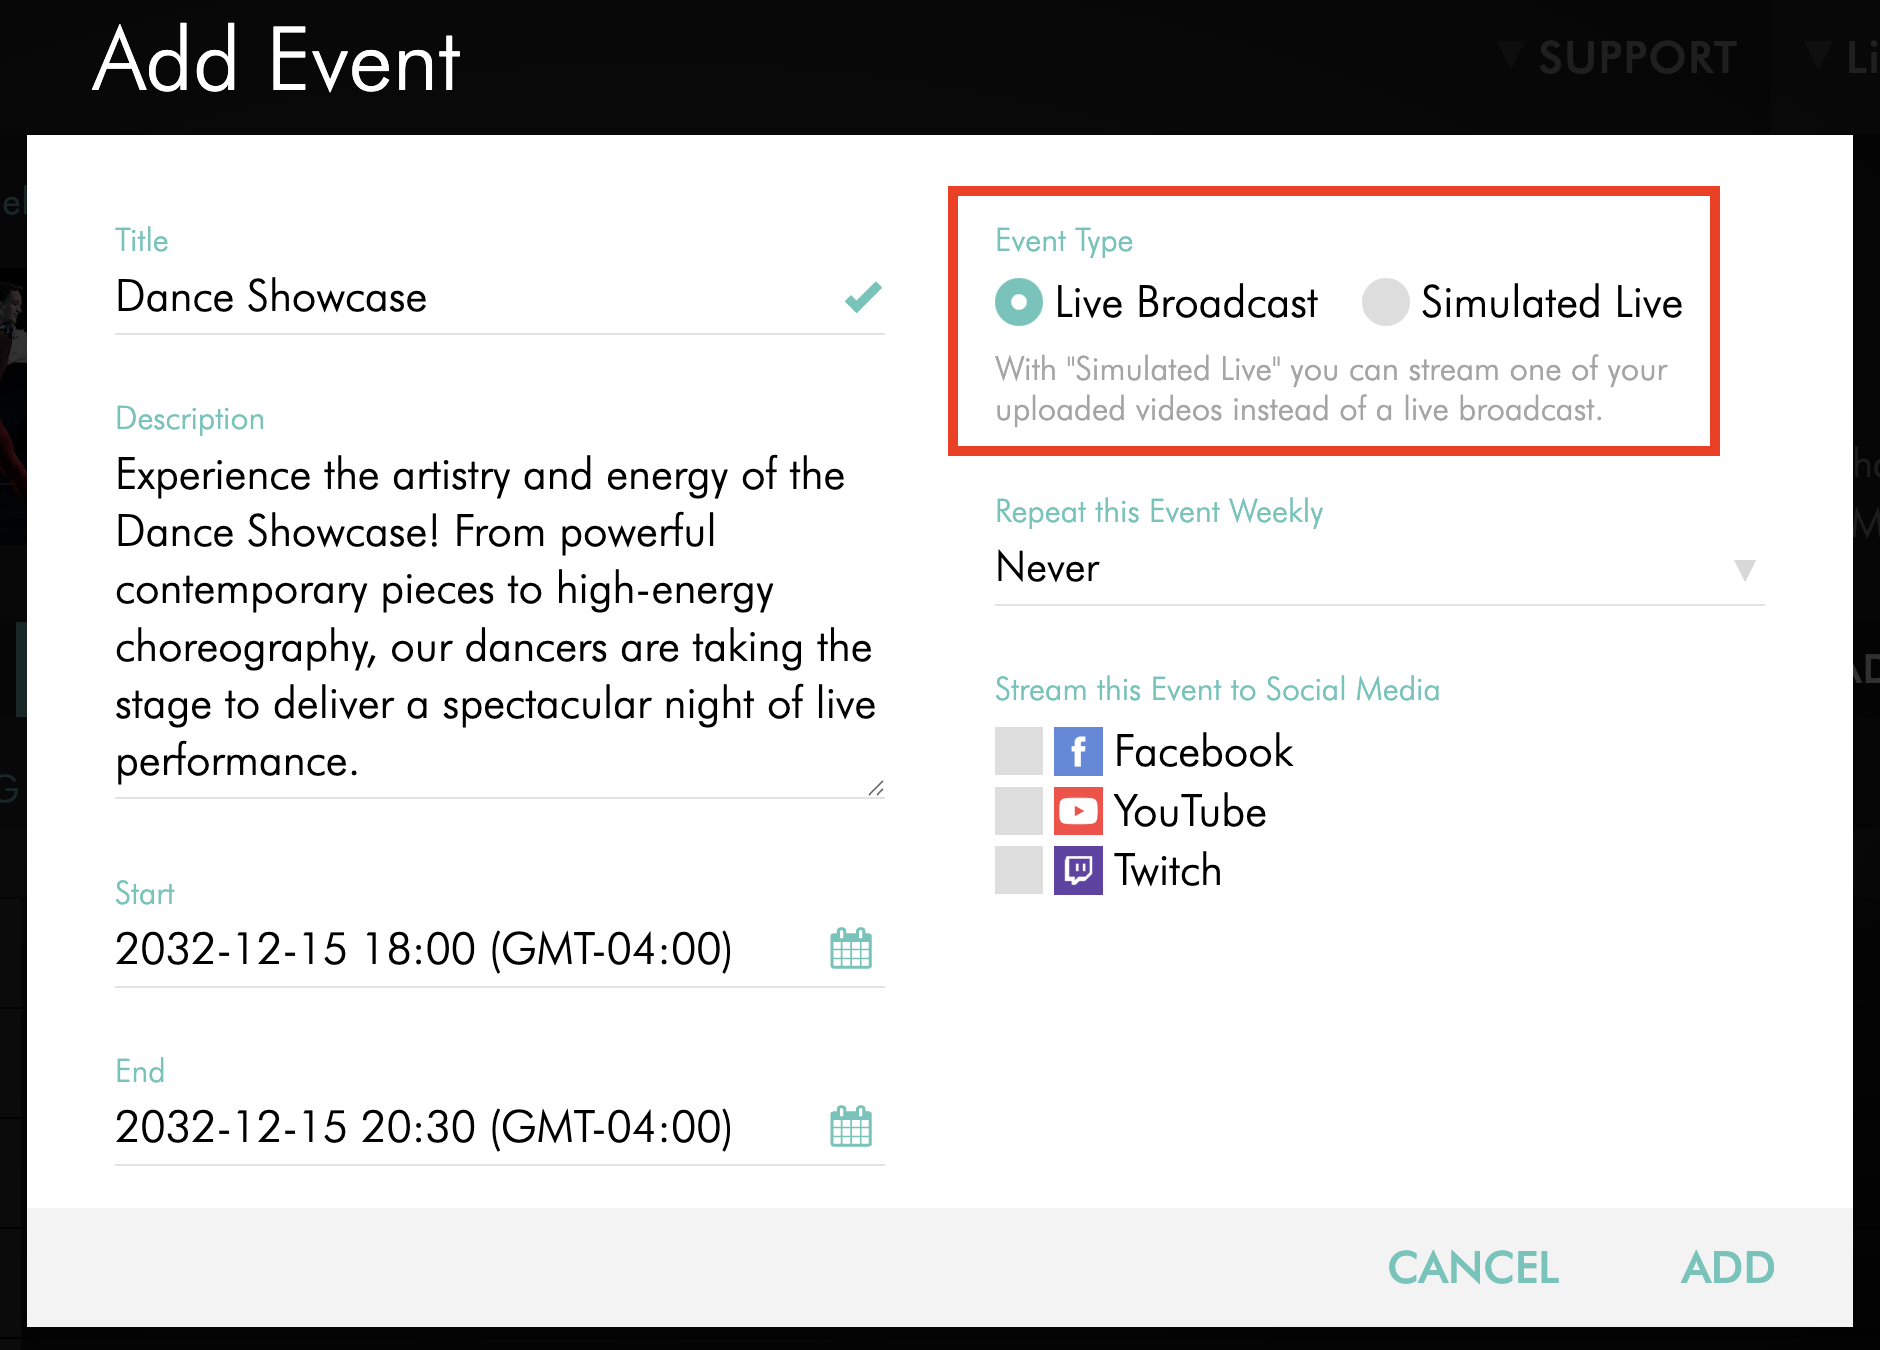
Select an Event Type.
For more information about Simulated Live broadcasts, see Understanding Simulated Live Events.
Step 12
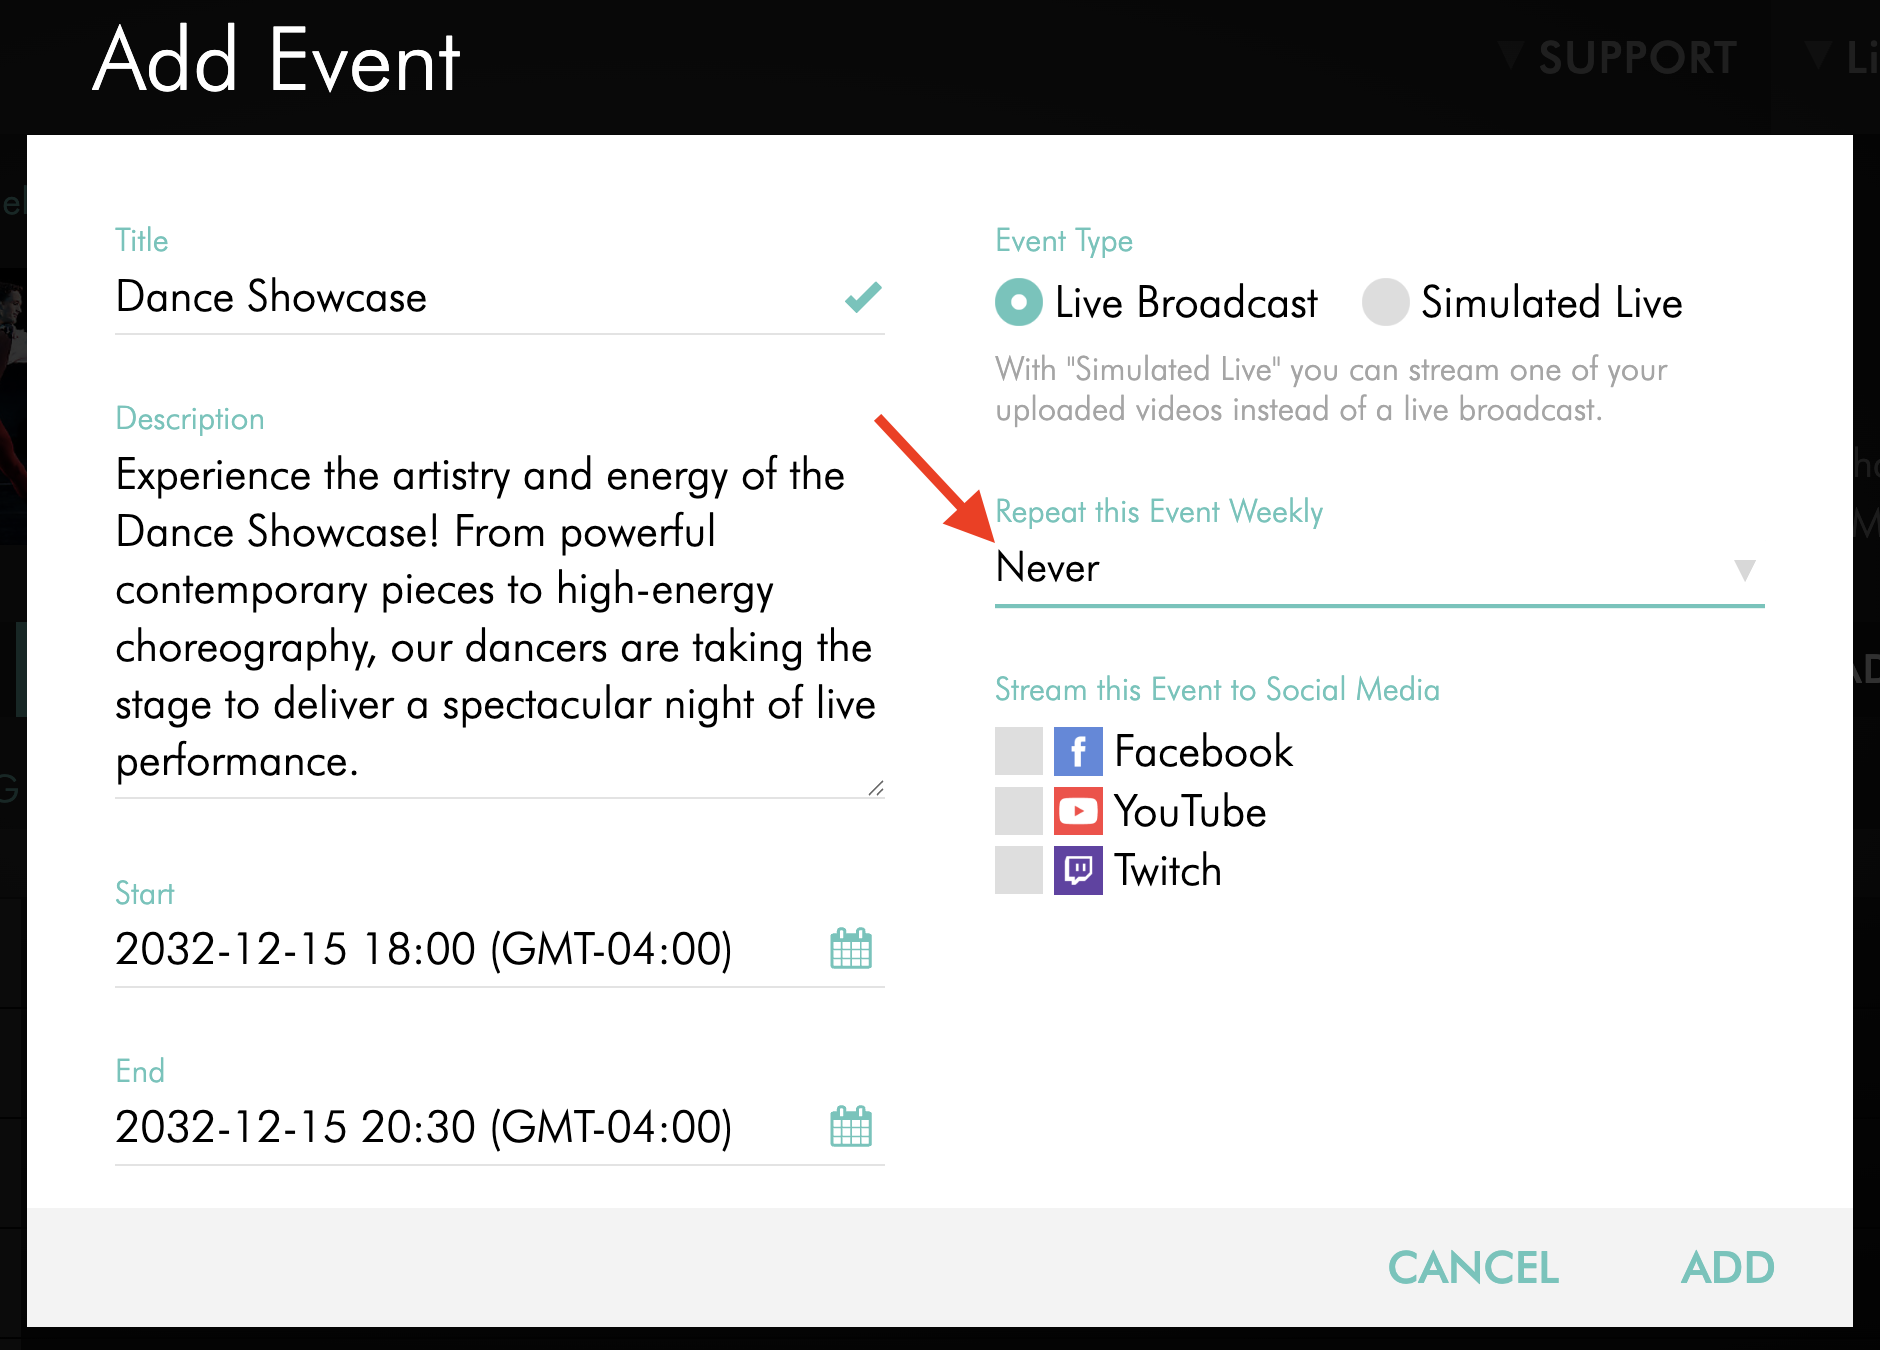
Optional: If this will be a weekly recurring event, select how many times the event should repeat.
Step 13
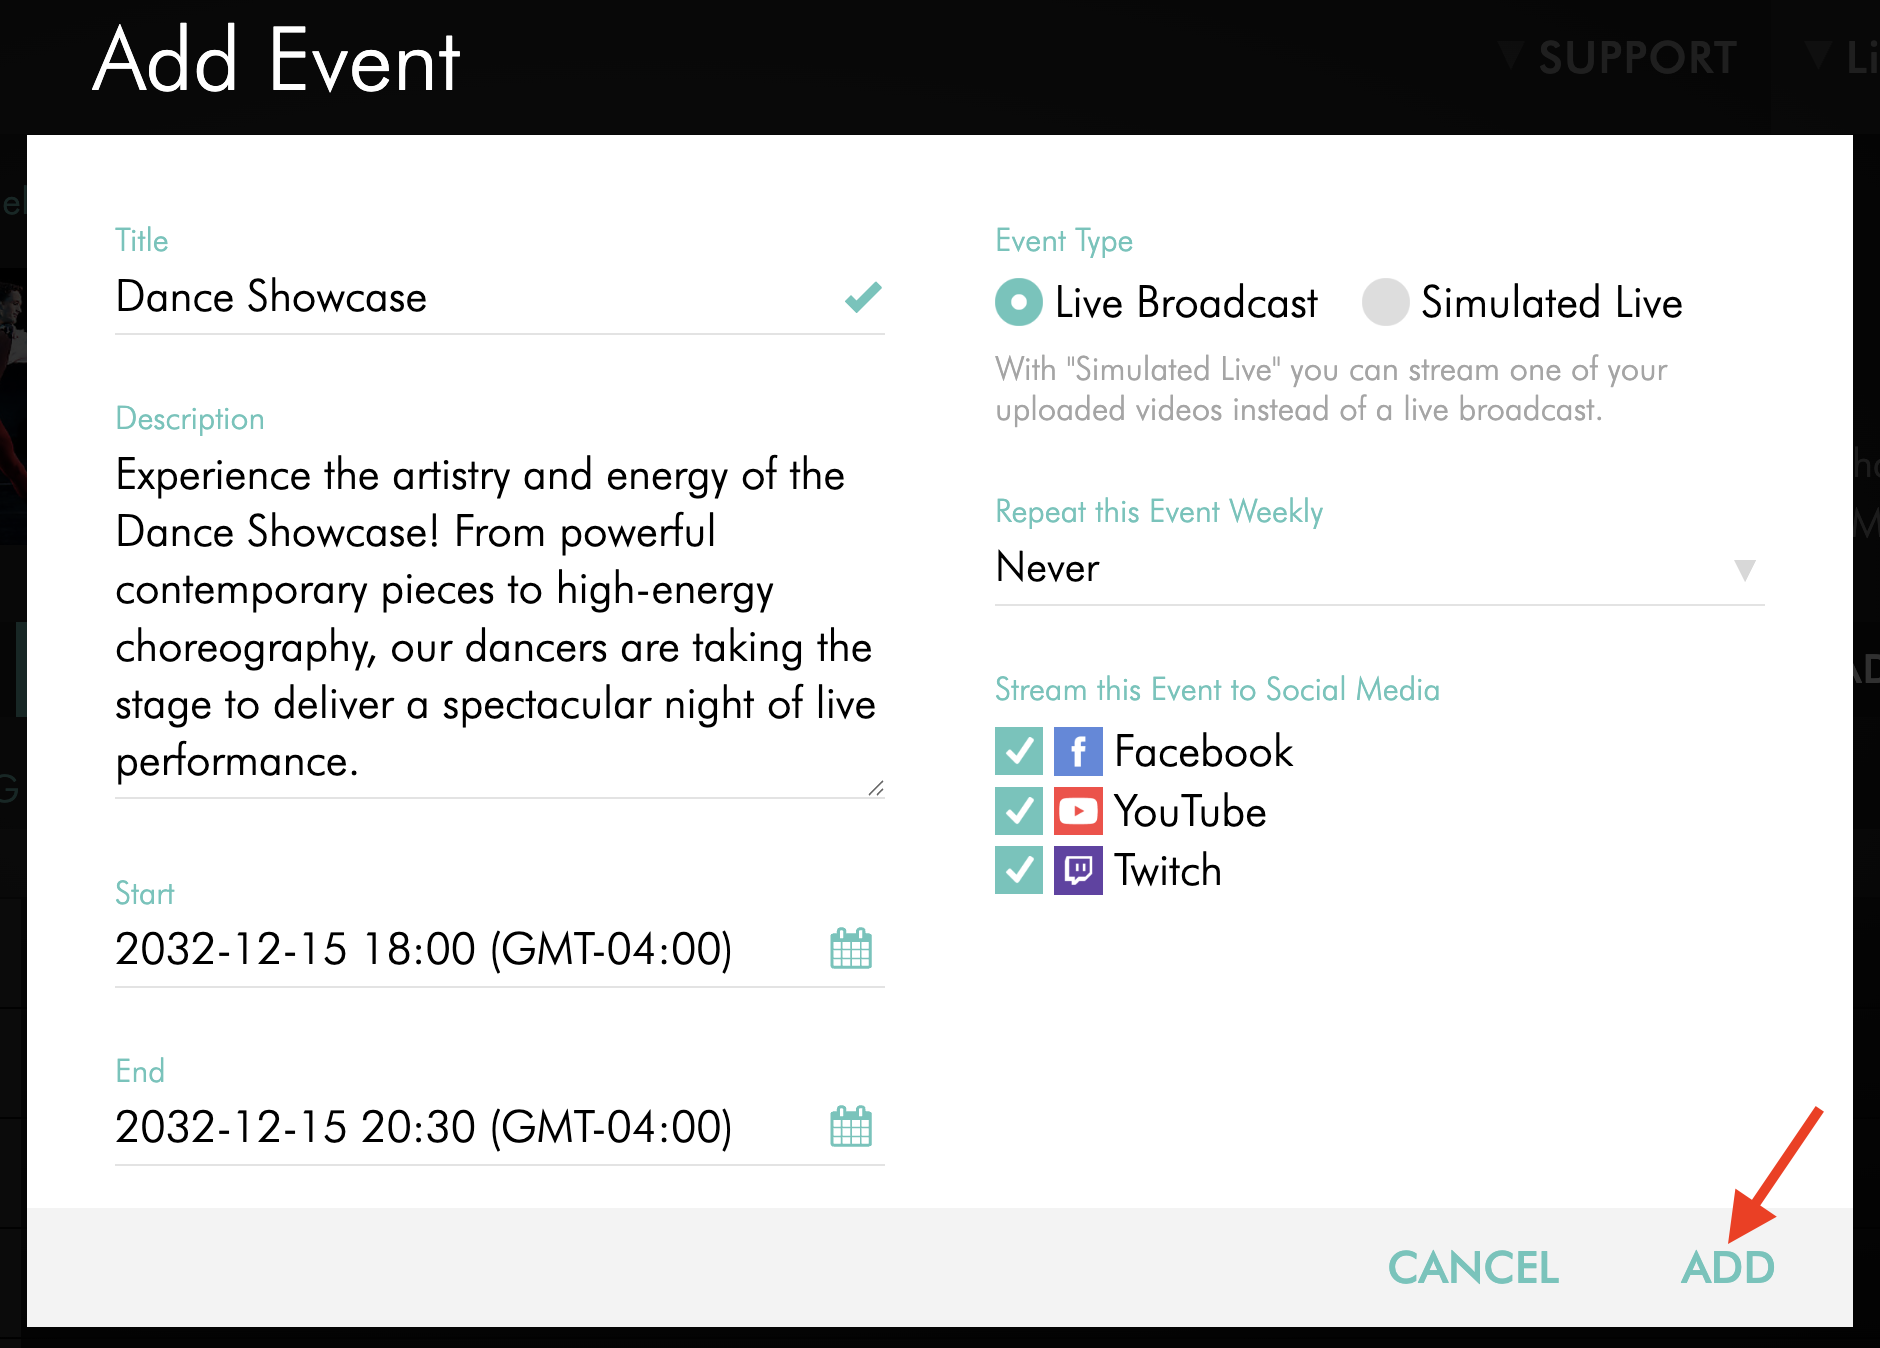
Optional: Select any available social media publishing options for the event.
For more information about live streaming to Facebook, see How to send your live stream to Facebook.
For more information about live streaming to YouTube, see How to send your live stream to YouTube.
For more information about live streaming to Twitch, see How to send your live stream to Twitch.
Step 14
Click ADD to save the Live Event.
Step 15
Start streaming from your encoder before the scheduled event start time.
Starting a few minutes early gives you time to confirm that the stream is connecting correctly and that audio and video are working as expected.
For more information, see How to set up and ingest a Live Event stream.
FAQs
Why should a Live Event be scheduled before streaming?
Scheduling a Live Event helps the Media Cloud prepare the event for countdown display, event-specific details, statistics, and supported publishing destinations. It also helps viewers see when the live stream is expected to begin.
Does scheduling a Live Event start the stream automatically?
No. Scheduling the event does not start the stream from your encoder.
You must configure your encoder and send the stream to the correct Live Events Channel.
Does the scheduled end time stop my encoder?
No. The scheduled end time does not stop your encoder.
The scheduled end time tells supported players and publishing destinations when the event is expected to end. Stop your encoder when your live broadcast is finished.
When does the live stream start broadcasting?
The live stream starts broadcasting when your encoder sends a stream to the correct Live Events Channel, as long as the Live Events Channel is embedded, added to your apps, or connected to the appropriate publishing destination.
Why is the countdown not displaying on the player?
The countdown displays when a Live Event has been created with the correct date, start time, end time, and timezone.
If the event was created recently, clear your browser cache or allow time for the updated countdown to appear.
Why is the event title or description not displaying on the player?
The event title and description are pulled from the scheduled Live Event.
Make sure the Live Event has been created in the correct Live Events Channel and that the title and description were saved.
Why are event-specific statistics not available?
Event-specific statistics are available when the stream is associated with a scheduled Live Event.
If you stream without creating a Live Event, the Media Cloud may not be able to separate that broadcast into event-specific statistics.
Why is a scheduled live stream not available on some devices or platforms?
Some apps and publishing destinations require a Live Event with a scheduled start and end time before the stream can display correctly.
Make sure the Live Event has been scheduled in the correct Live Events Channel and that your encoder settings meet the recommended requirements for the devices and platforms you want to support.
What is an Event ID?
An Event ID is a unique identifier assigned to each scheduled Live Event.
If you contact Customer Support about a specific Live Event, providing the Event ID can help identify the event.