
How to assign audio files to a specific Audio On-Demand (AOD) Channel
Overview
This article explains how to assign existing audio content to a specific Audio On-Demand (AOD) Channel in the Media Cloud.
When to use this article
Use this article when the audio file has already been uploaded to the Media Cloud and you want to add it to an AOD Channel playlist.
This article is helpful when you want to:
add existing audio items from the Channel’s PLAYLIST tab by clicking + FROM ARCHIVE
assign existing audio items from the Audio Archive to an AOD Channel
assign an individual media item from its CHANNELS tab to an AOD Channel
How it works
An Audio On-Demand (AOD) Channel in the Media Cloud is used to organize and deliver on-demand audio content.
To learn more about the purpose of Channels and how they are used, see Understanding Video On-Demand (VOD), Audio On-Demand (AOD), and LIVE Channels (and Channel IDs).
When you add or assign an existing audio item, the item is placed into the Channel playlist without creating a new upload. This means those options do not use additional upload-related Storage or Transcoding.
You can assign an existing audio item to an AOD Channel from the Channel’s PLAYLIST tab, from the Audio Archive, or from that media item’s CHANNELS tab.
Instructions
Option 1: Add existing audio items from the Channel’s PLAYLIST tab
Step 1
Log in to your Media Cloud account.
Step 2
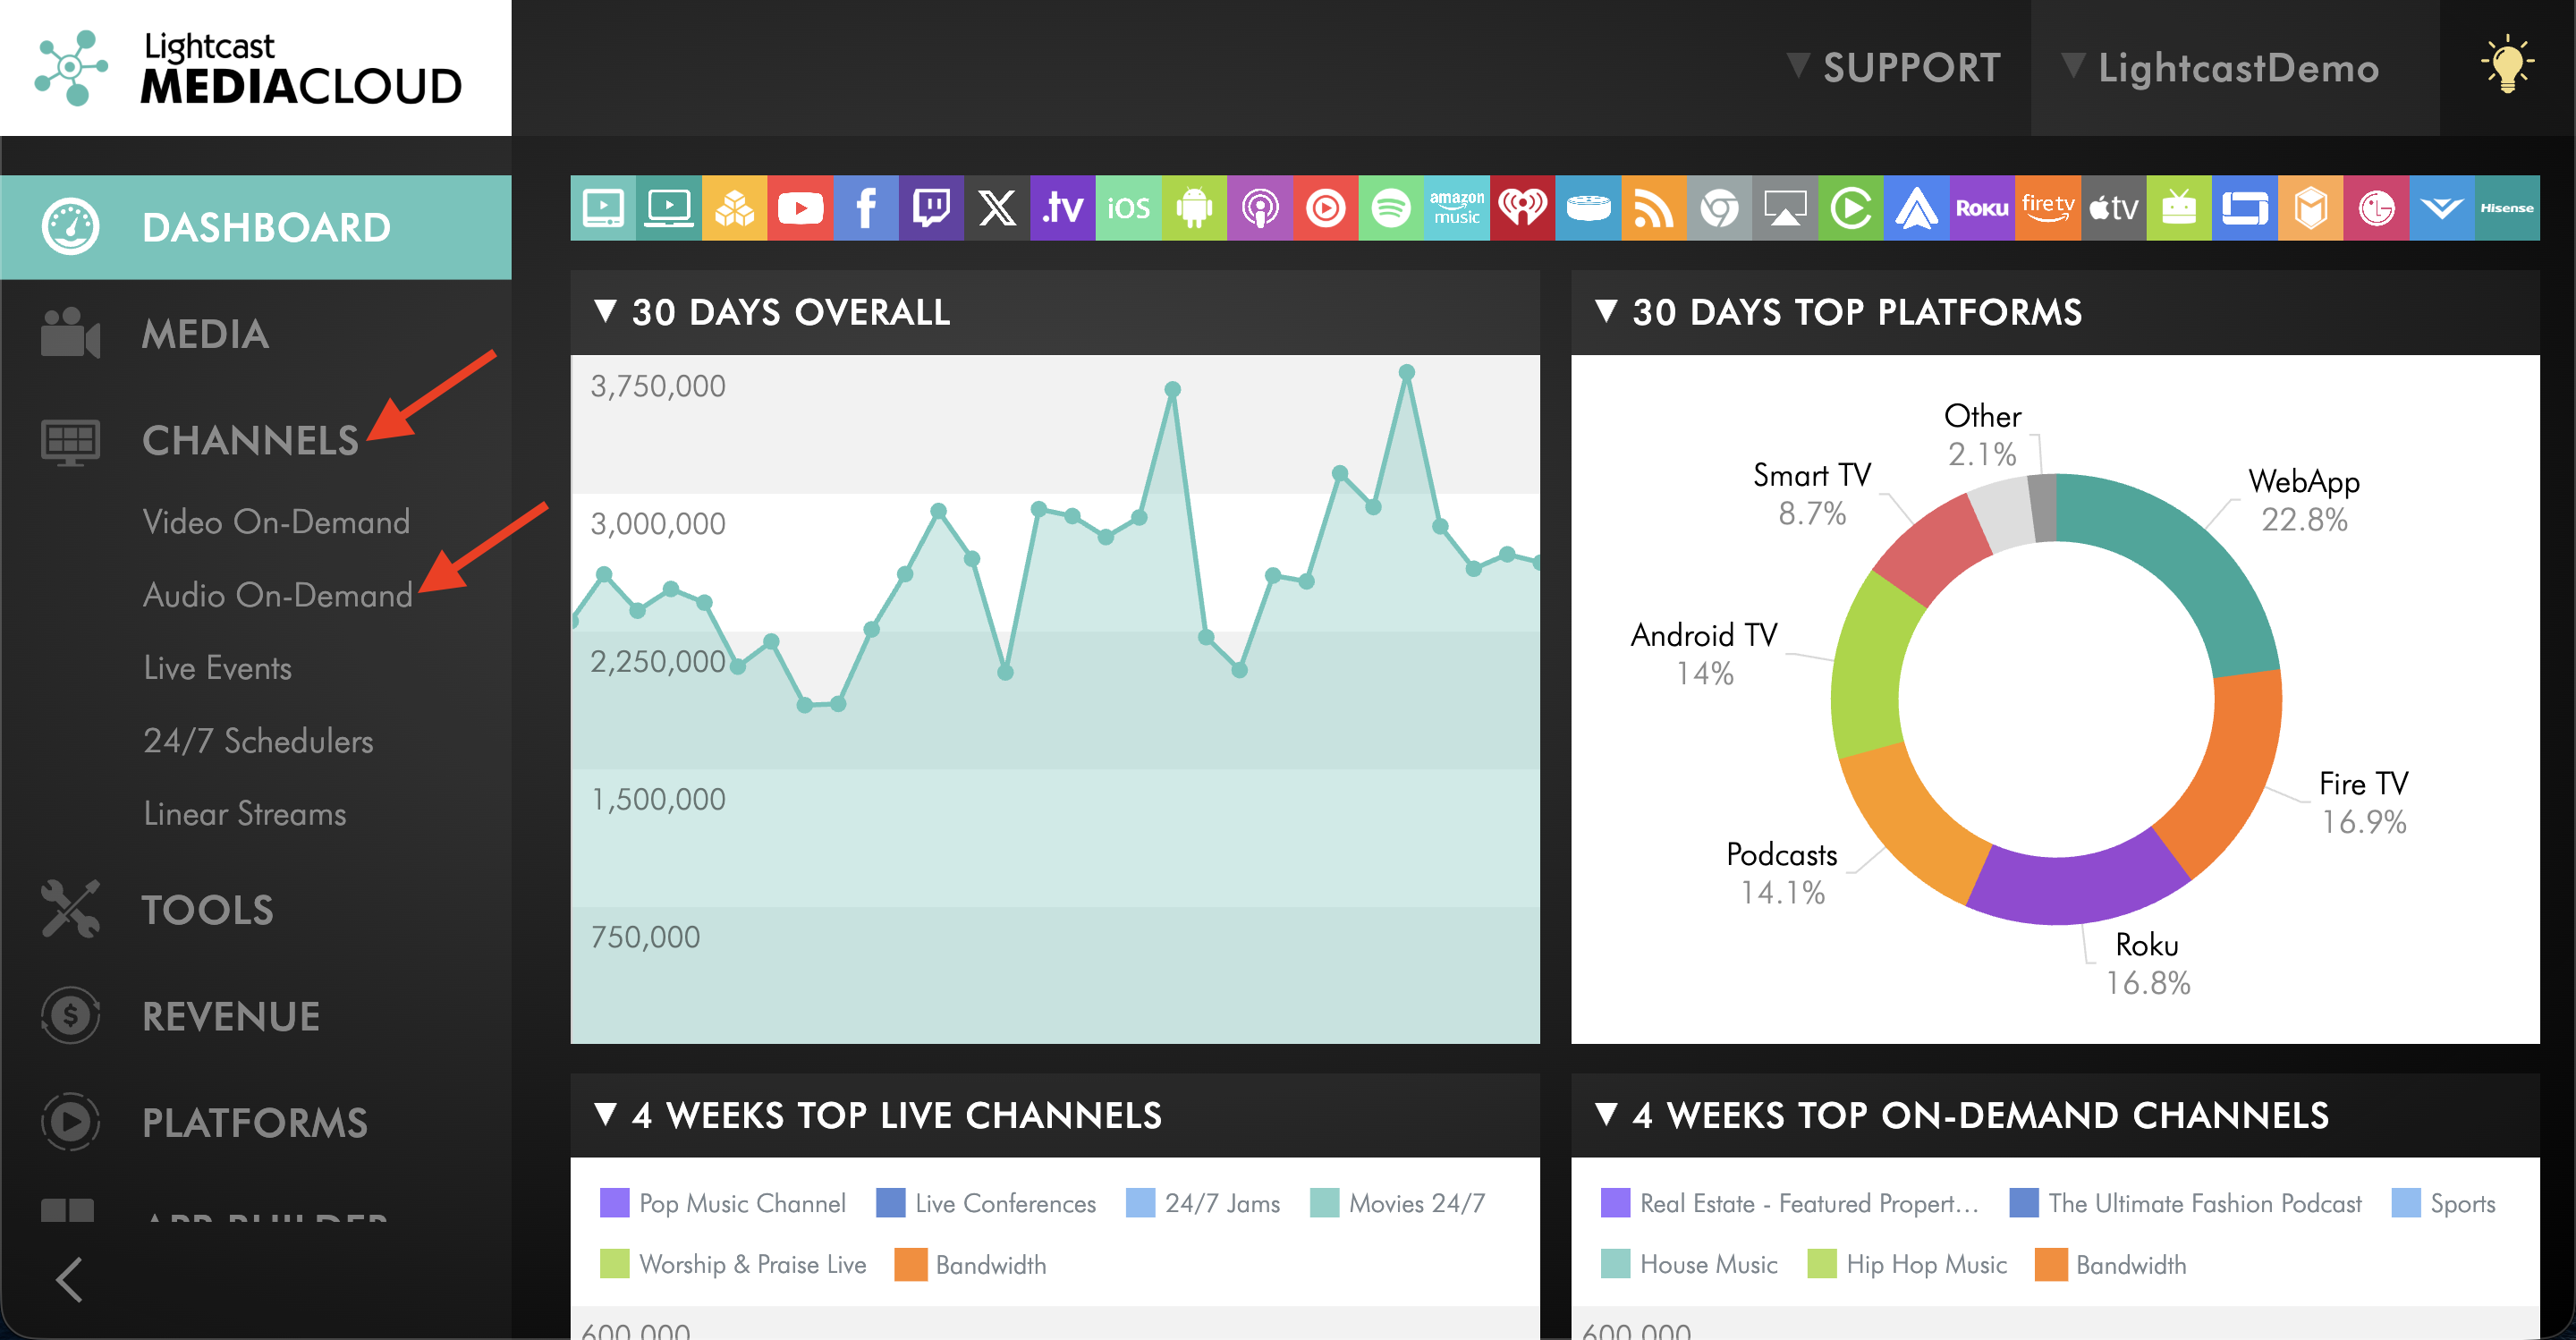
Go to CHANNELS and then Audio On-Demand.
Step 3
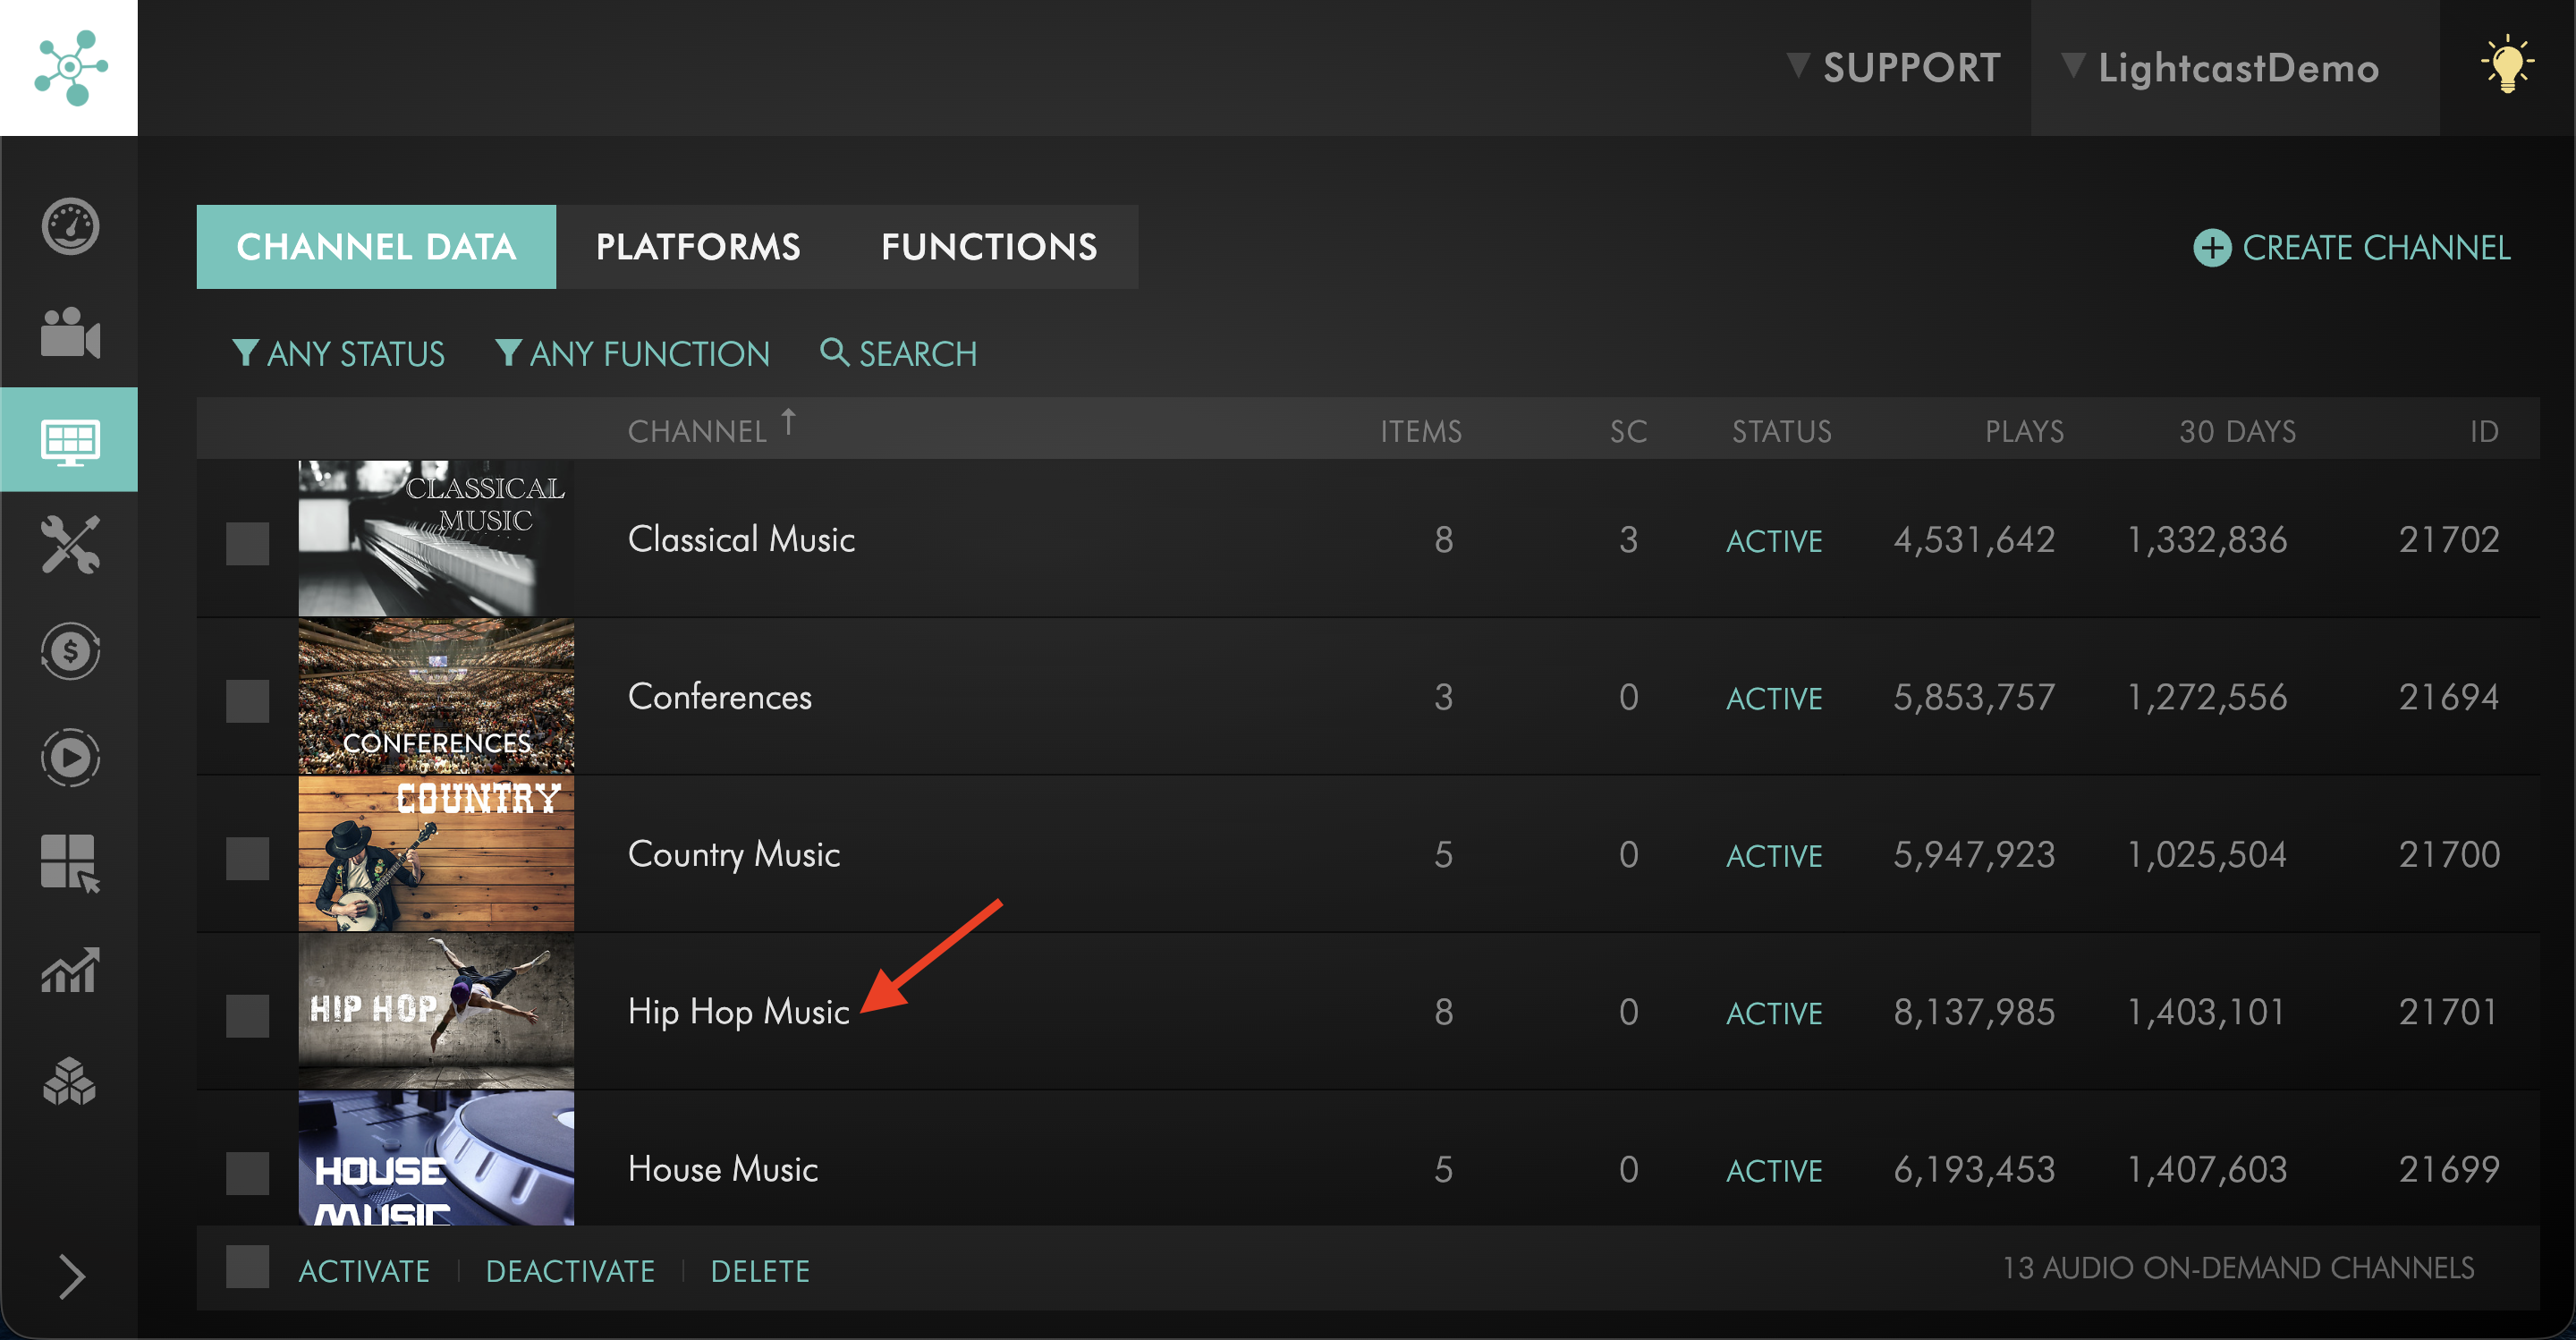
Select the AOD Channel where you want to add content.
Step 4
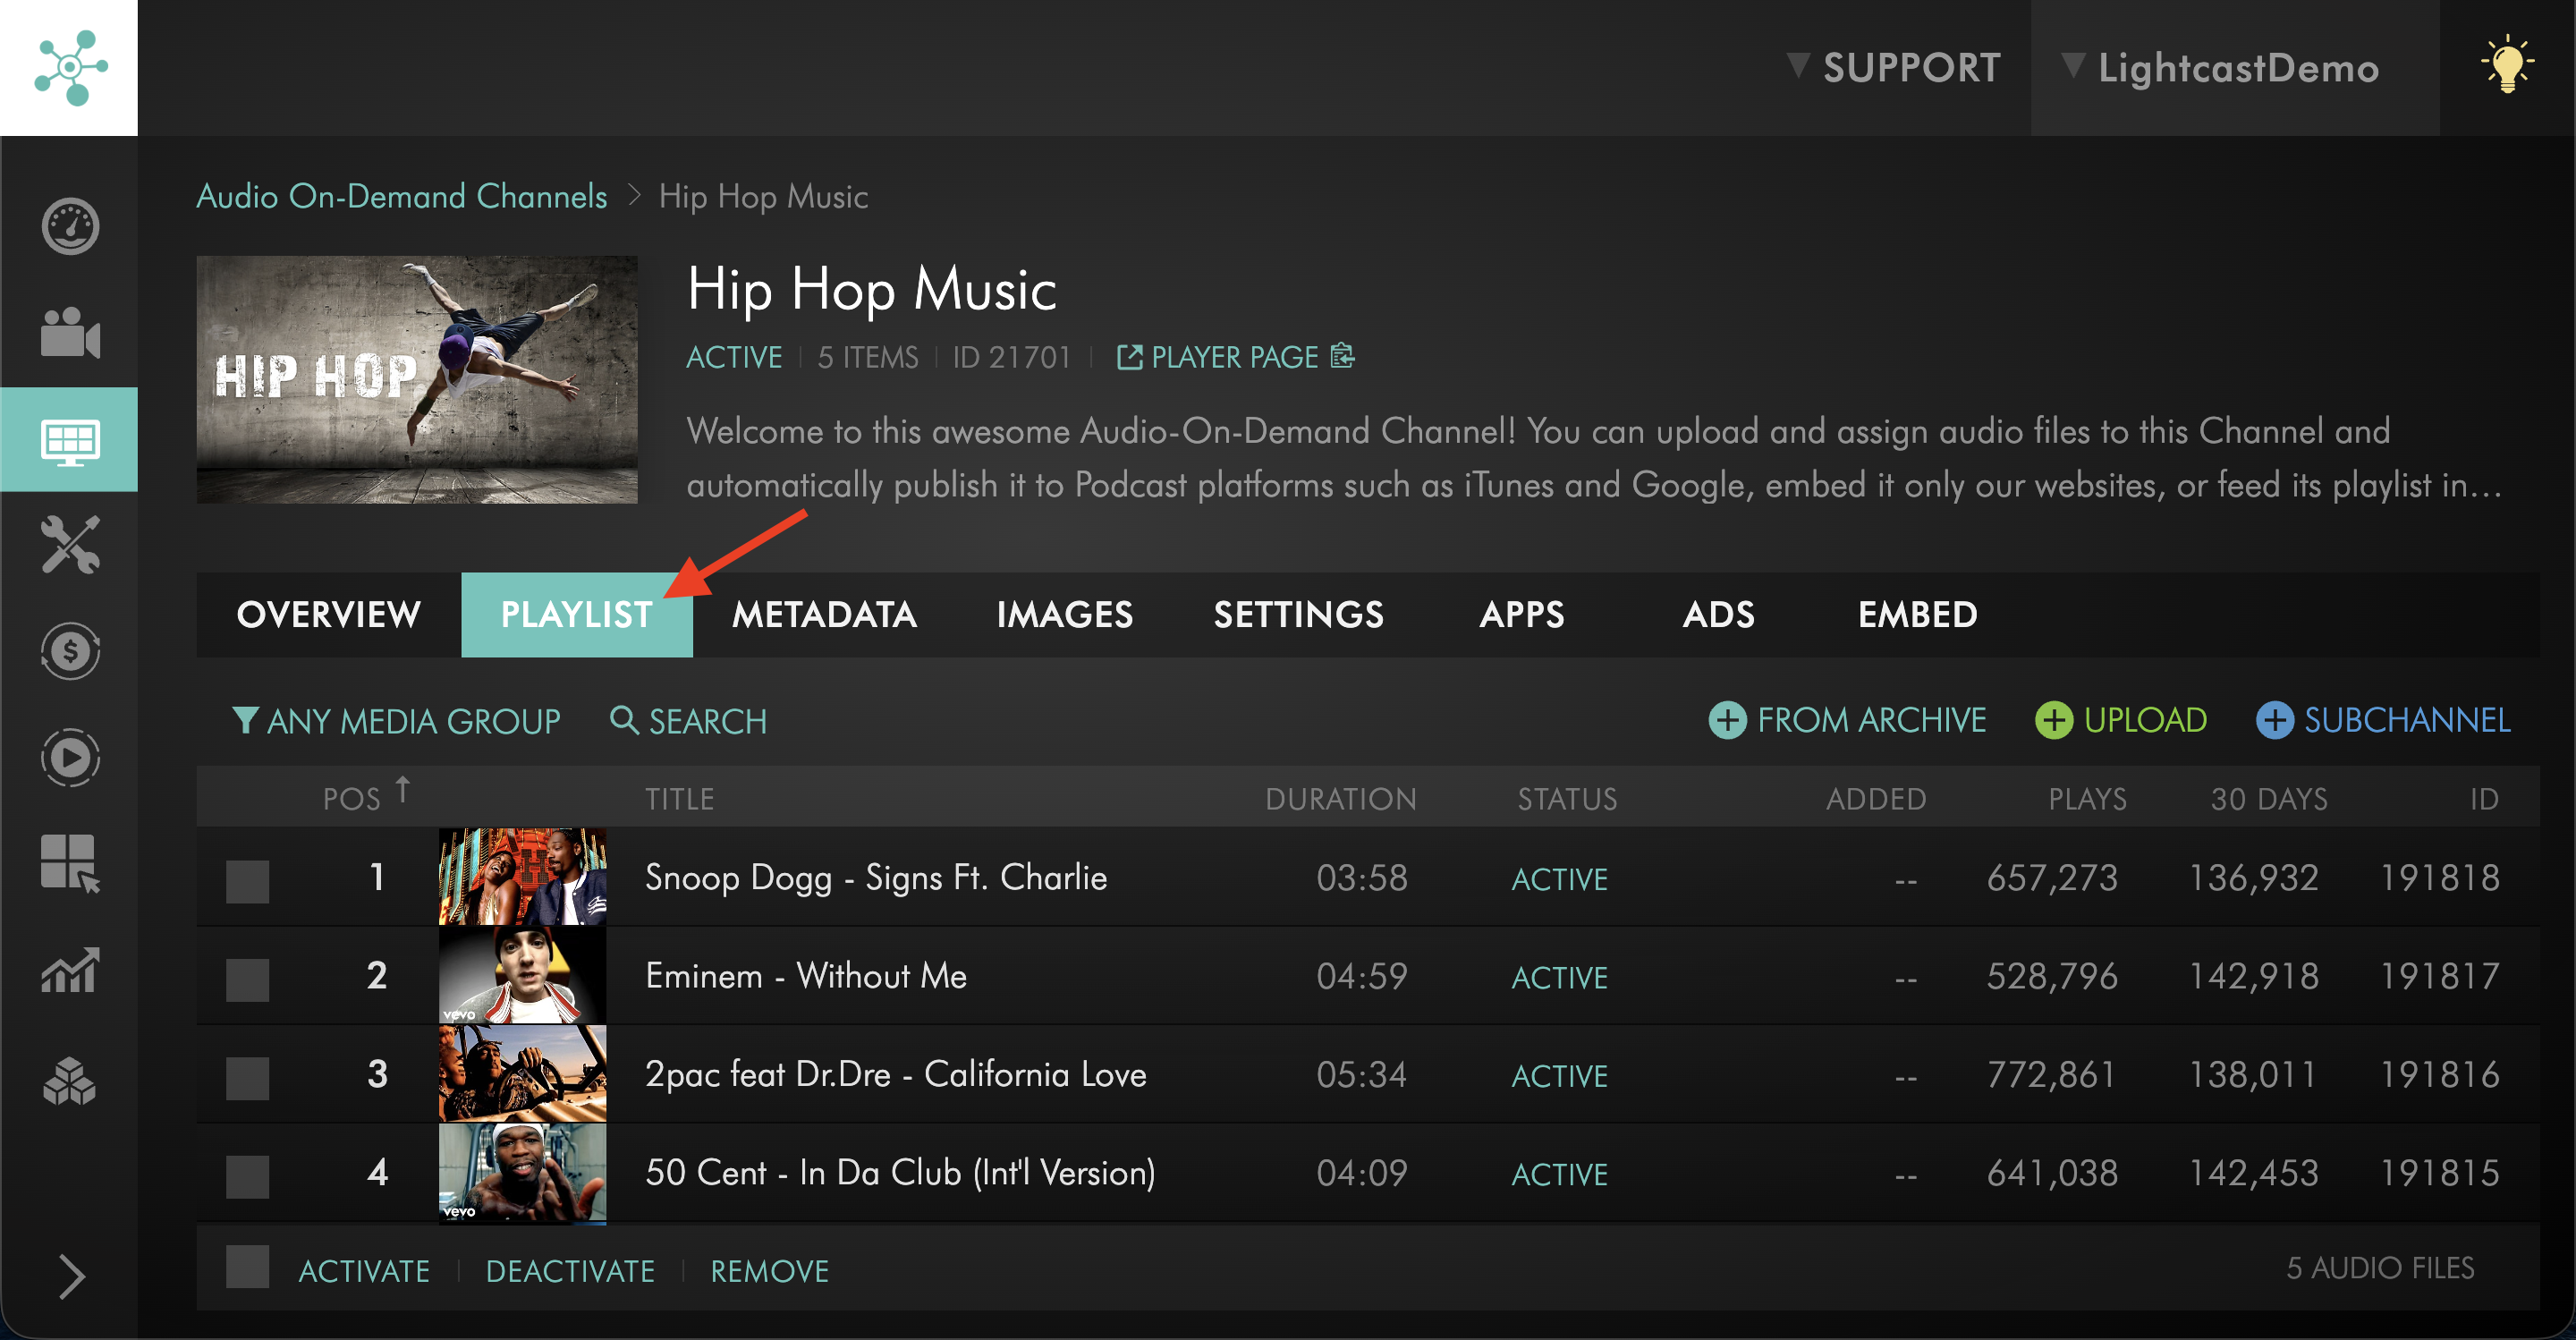
Switch to the PLAYLIST tab.
Step 5
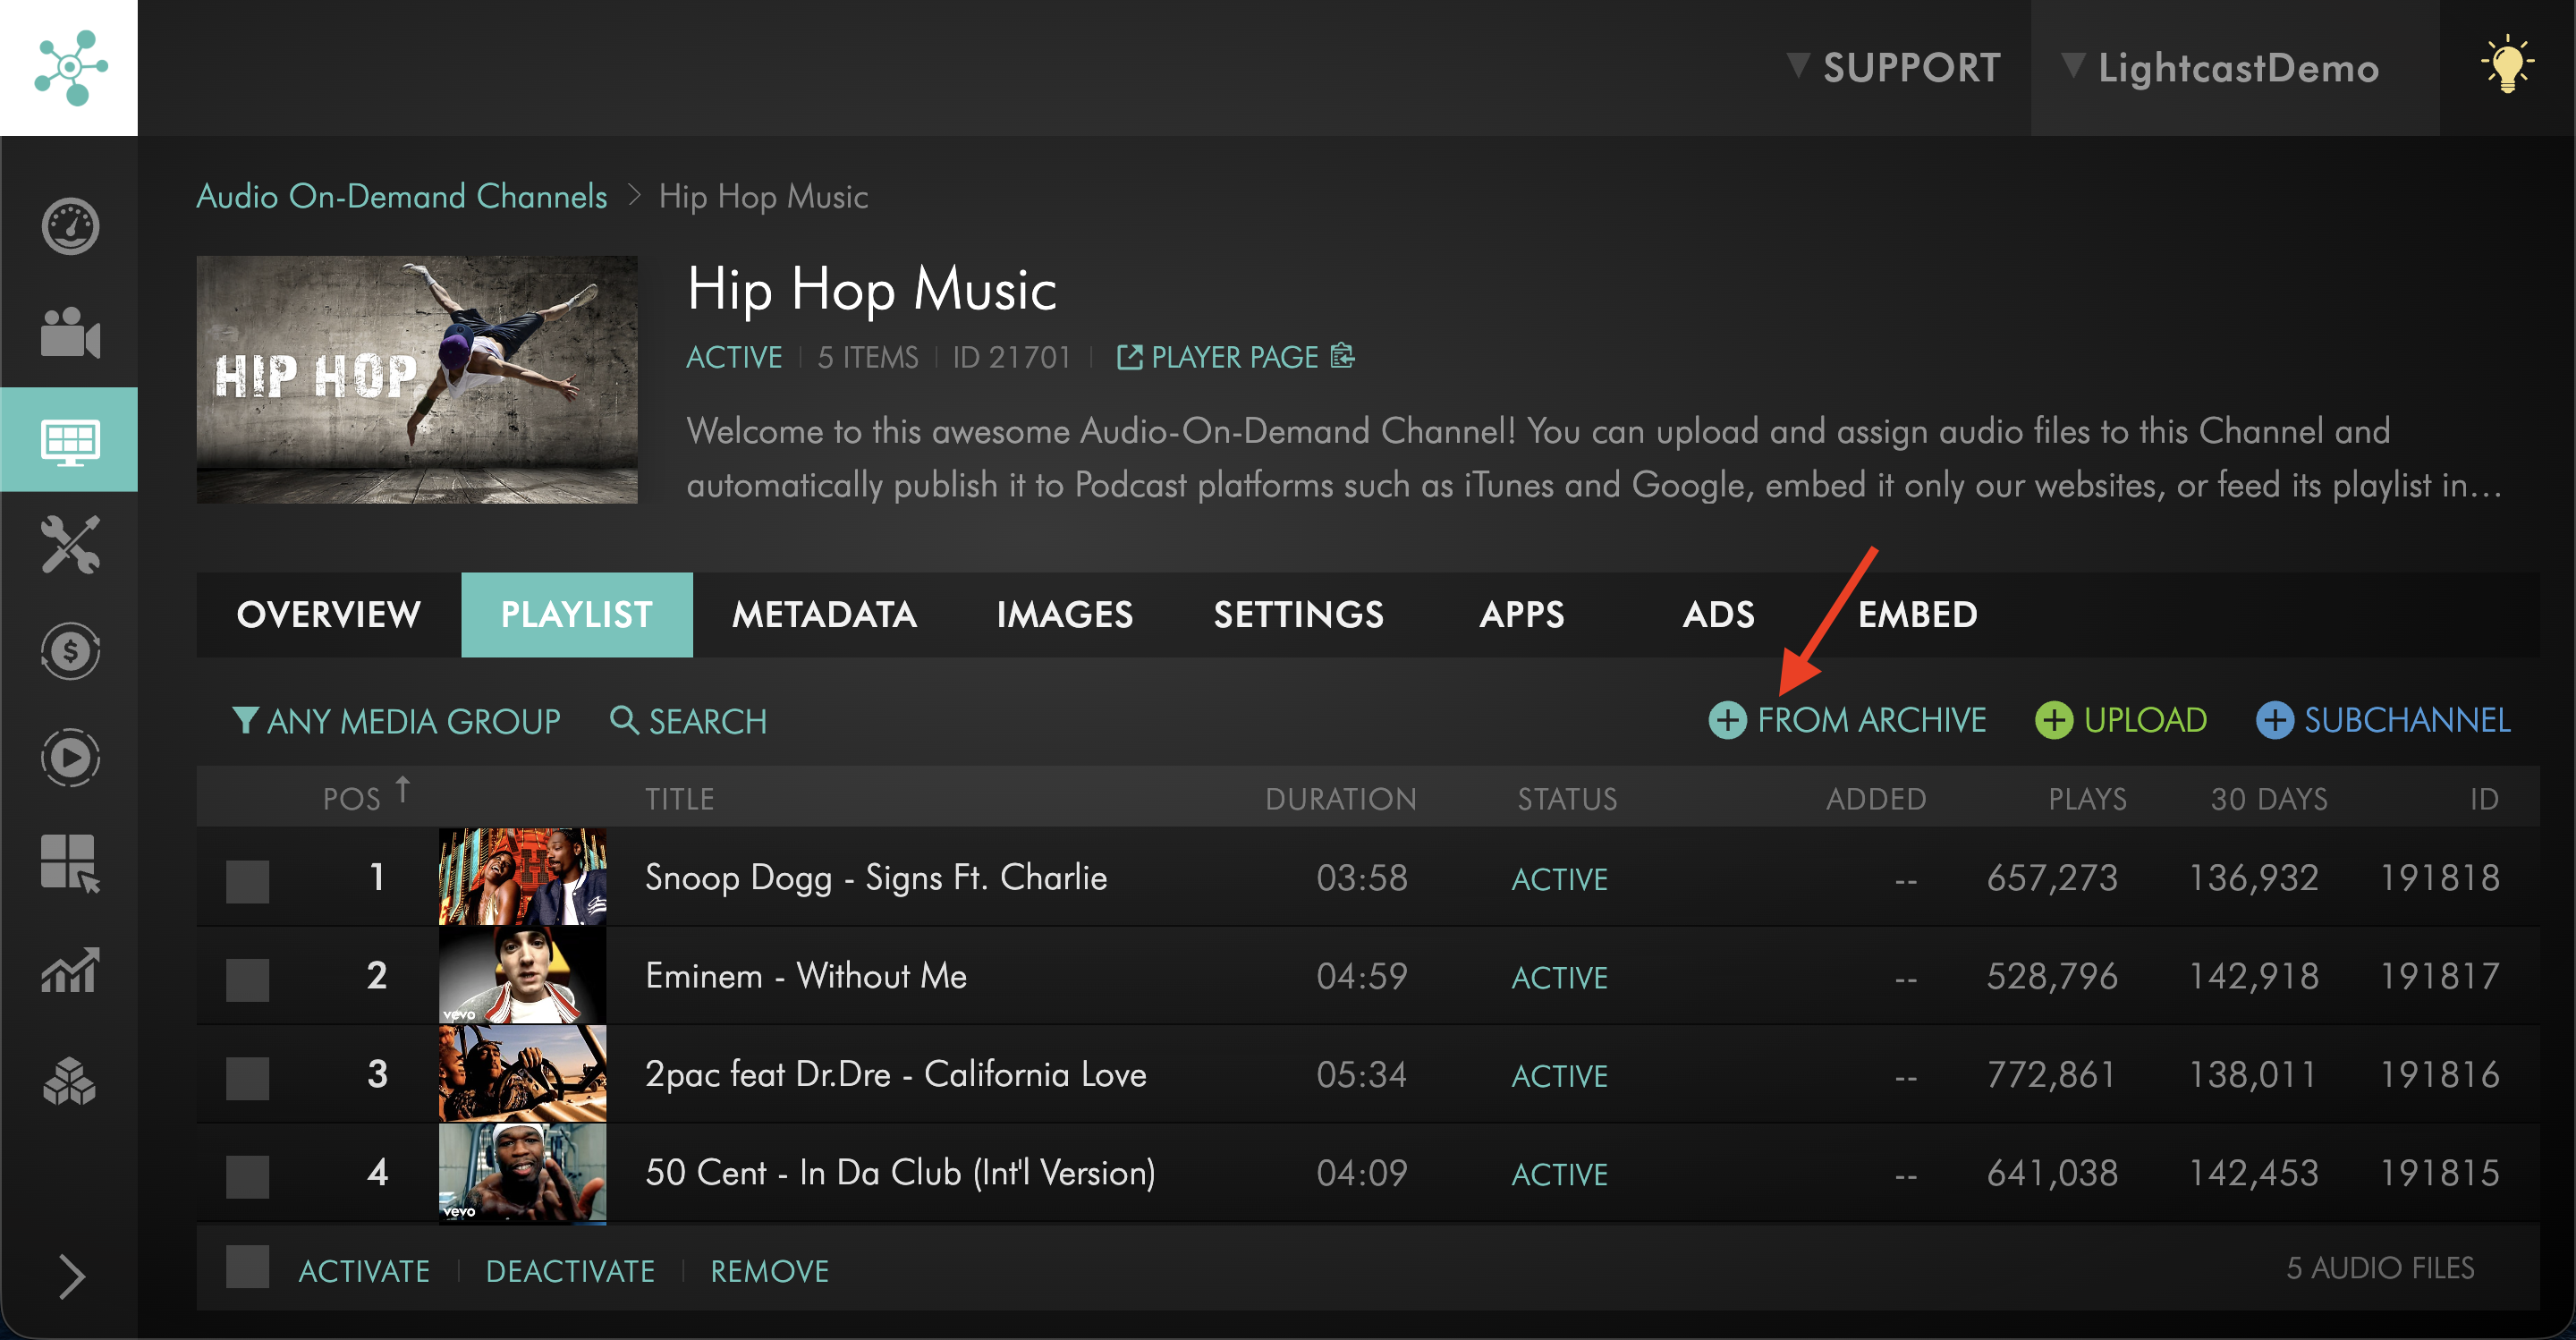
Click + FROM ARCHIVE.
Step 6
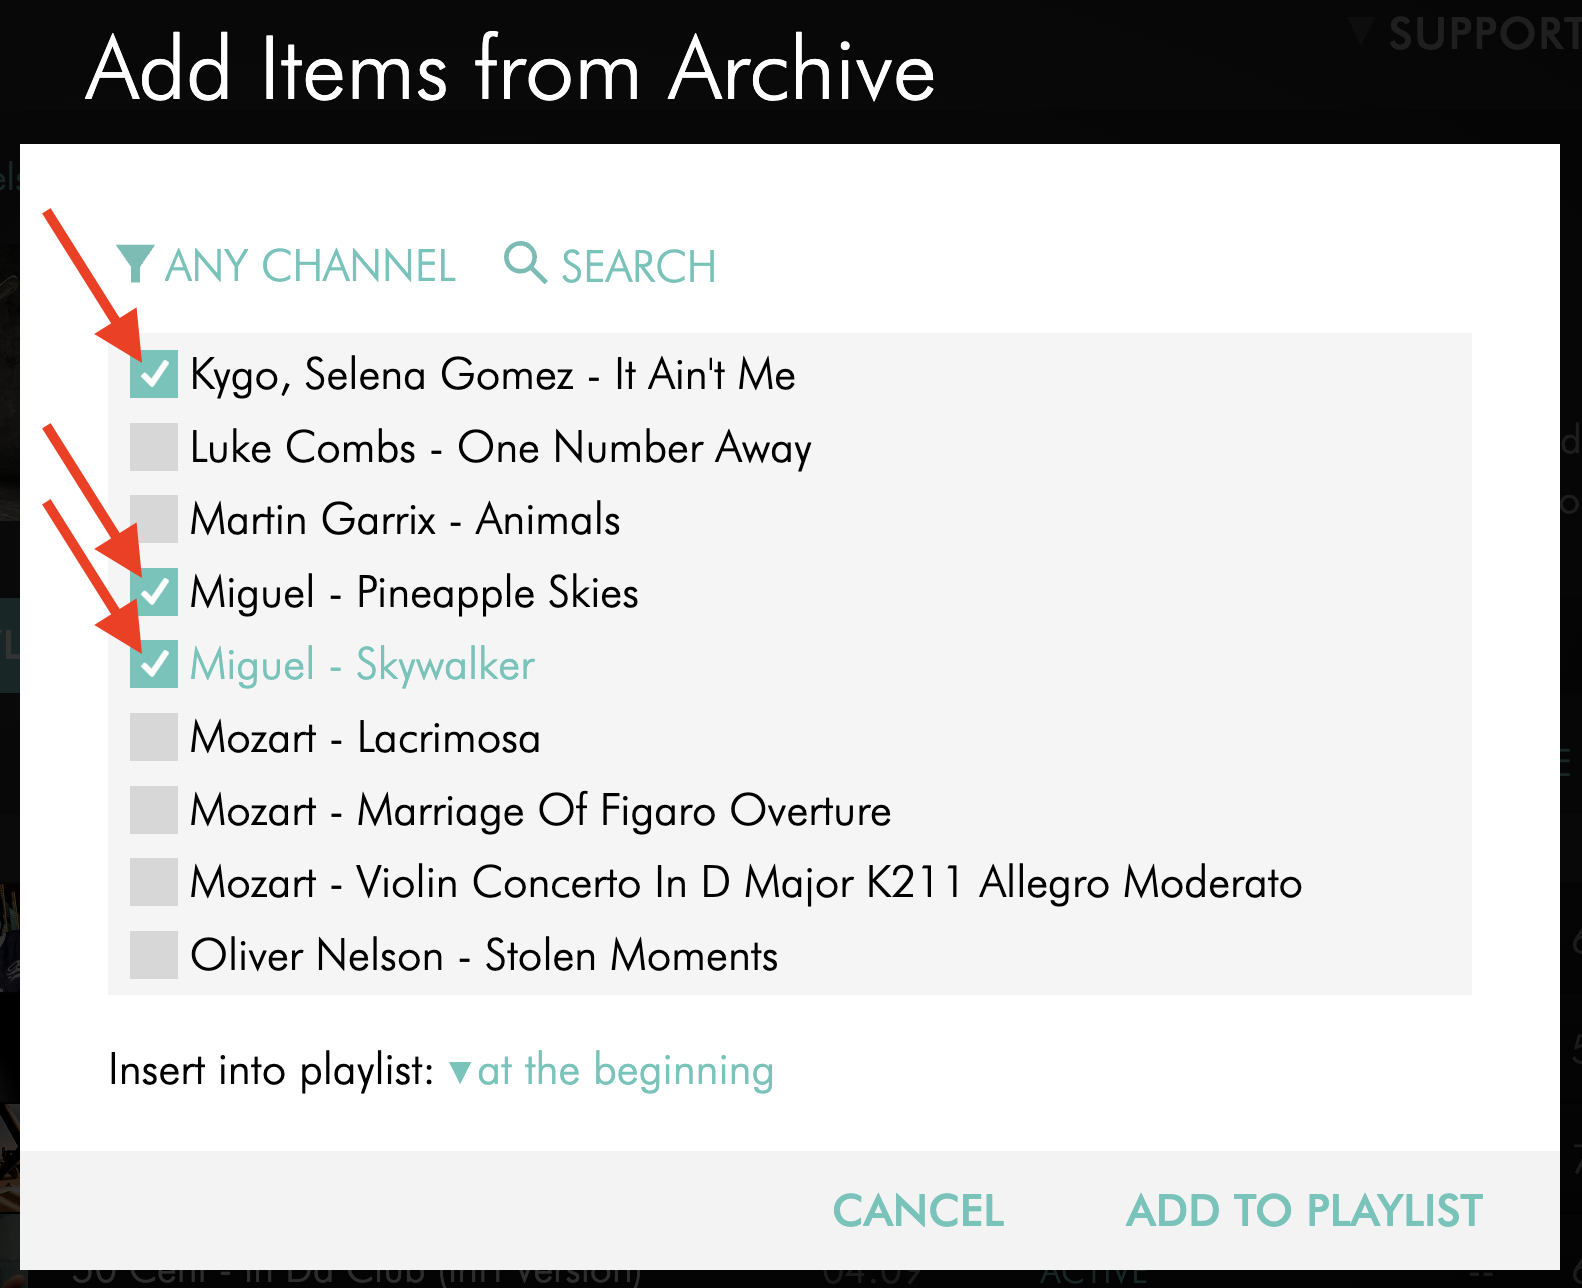
In the pop-up window, select the audio items that you want to add.
Step 7
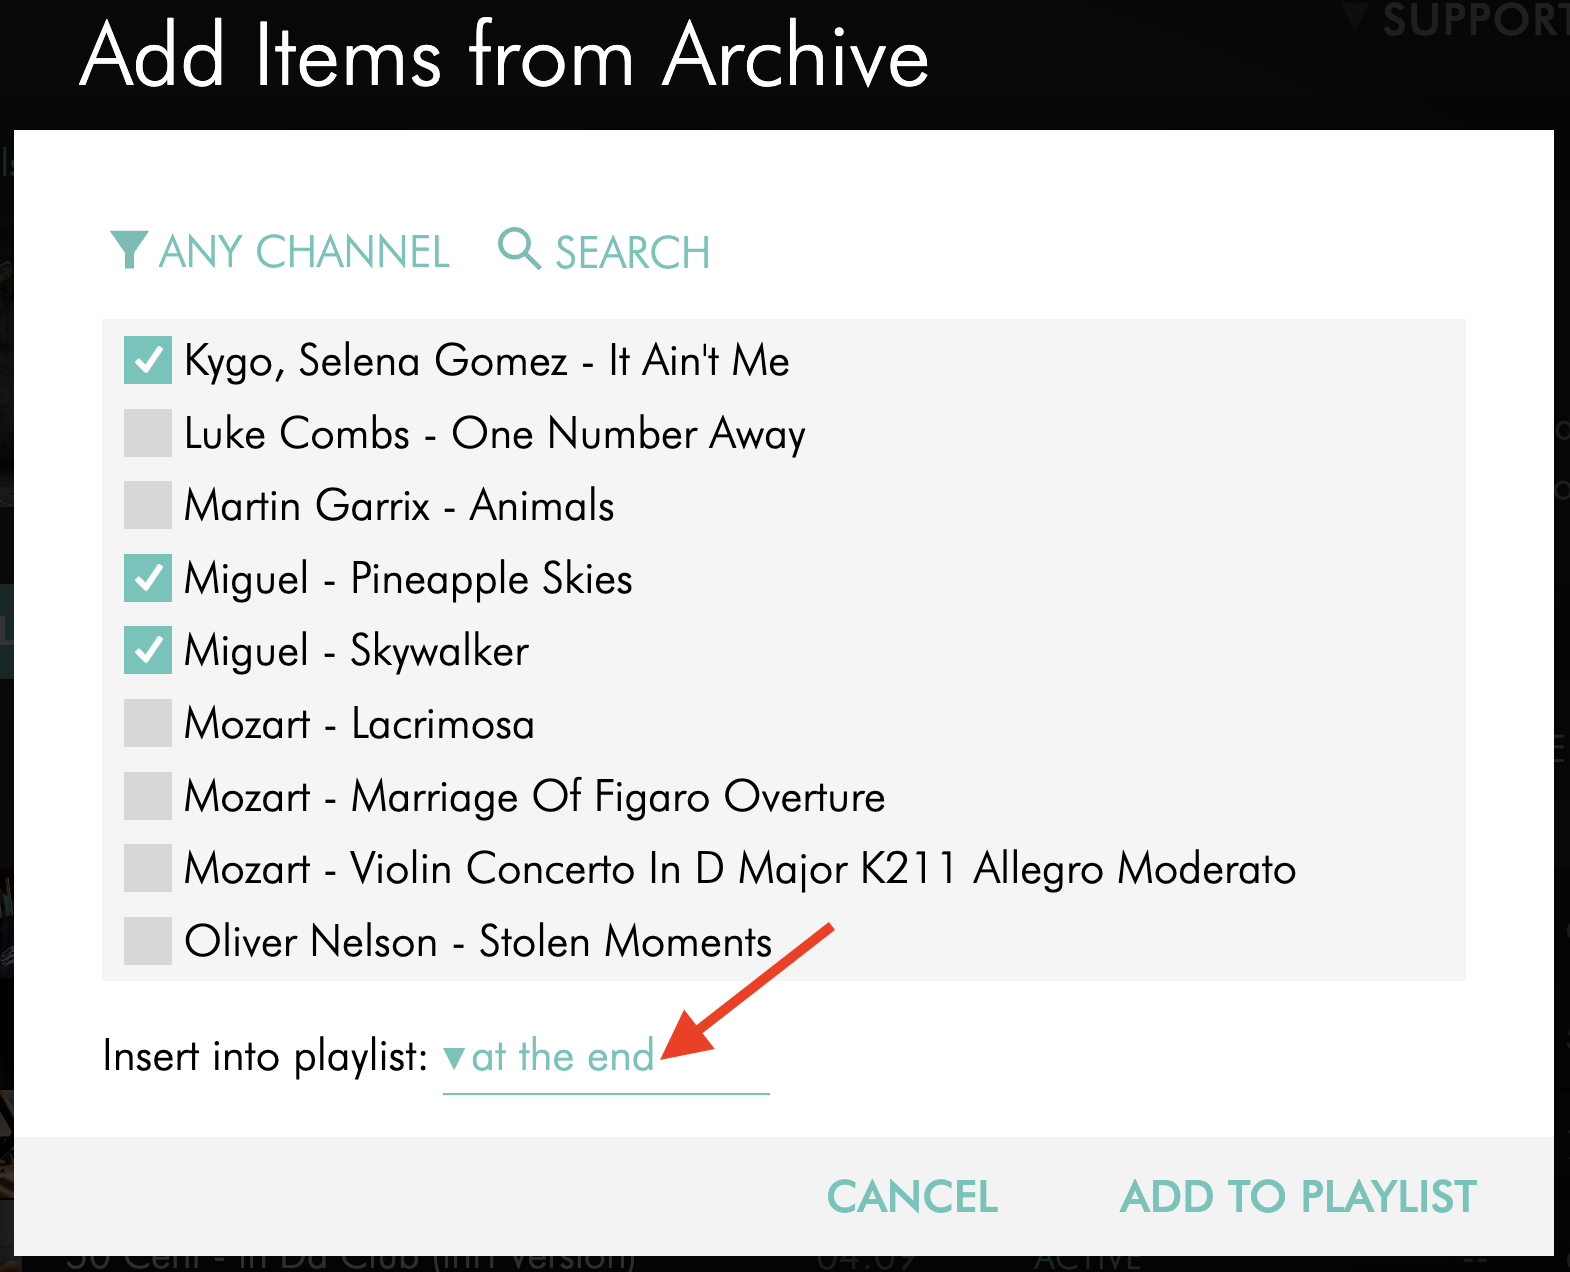
Select the playlist position for the content.
at the beginning places the content at the beginning of the Channel playlist.
at the end places the content at the end of the Channel playlist.
Step 8
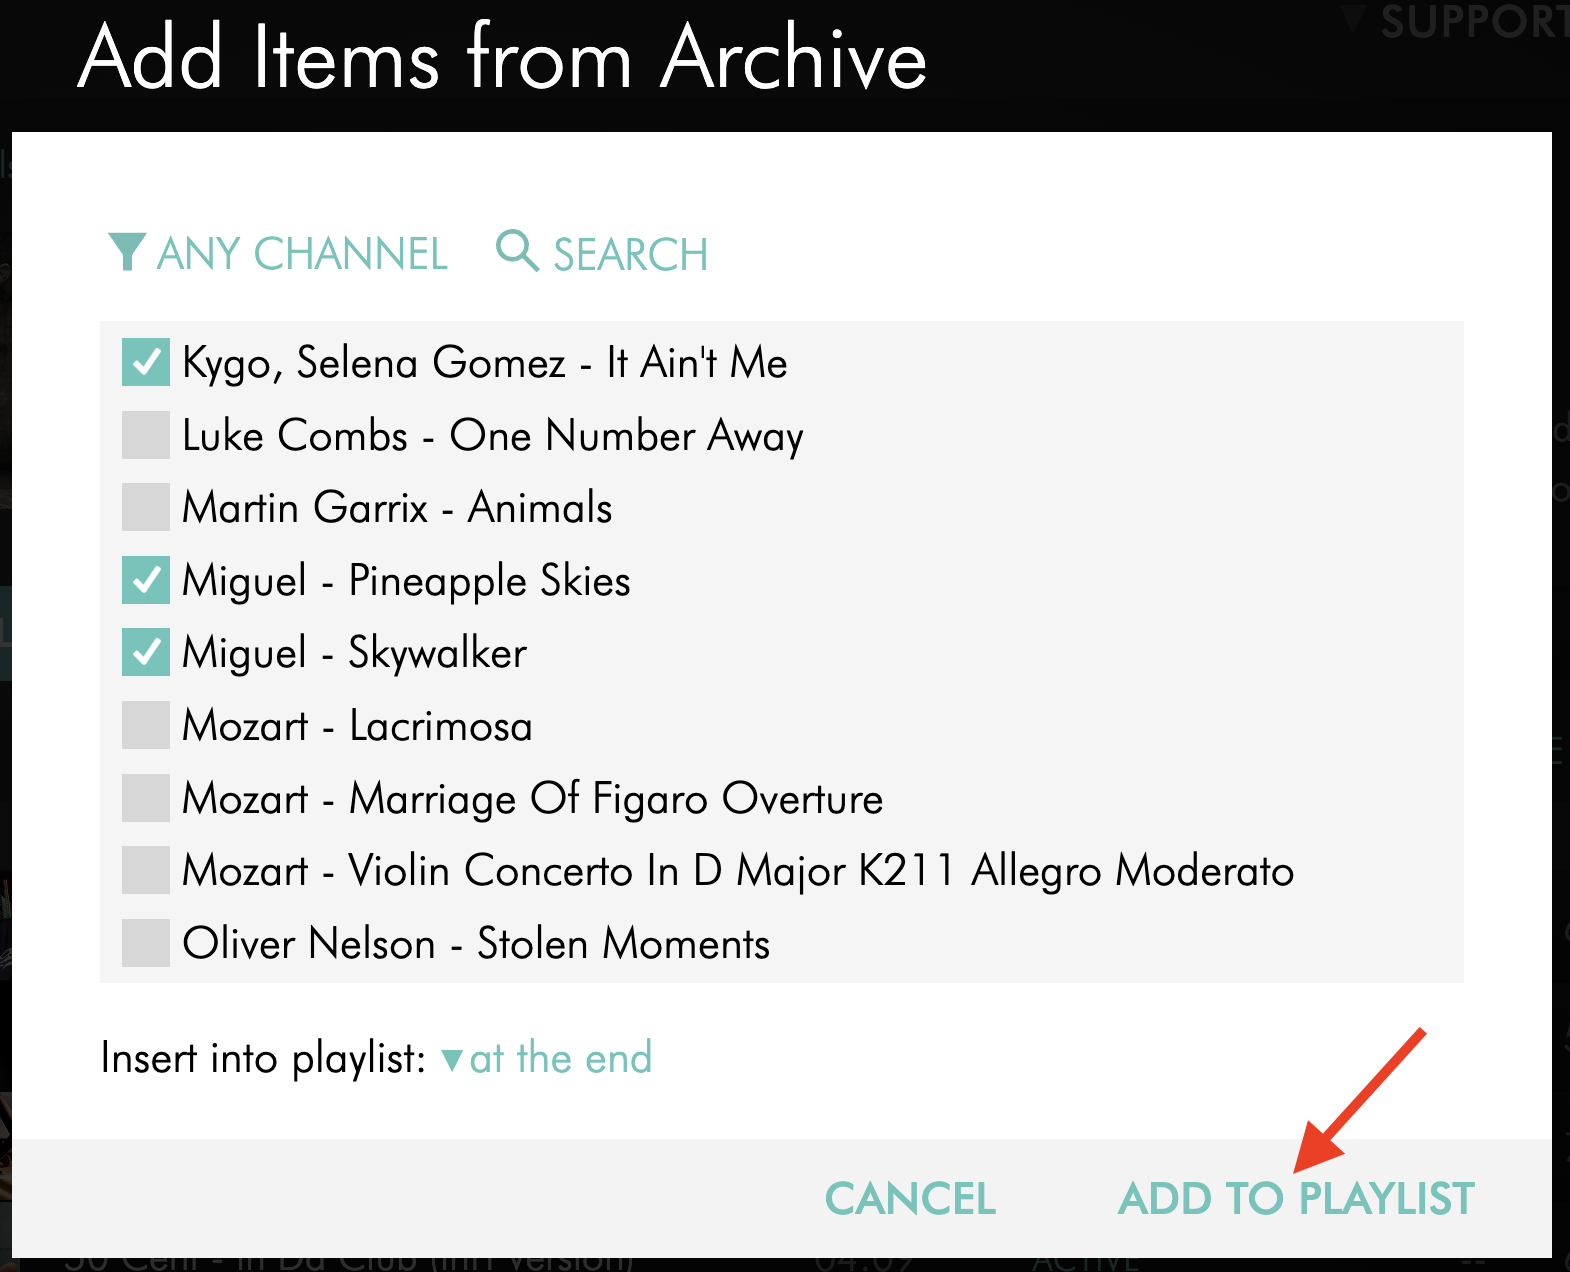
Click ADD TO PLAYLIST.
Option 2: Assign existing audio items from the Audio Archive to an AOD Channel
Step 1
Log in to your Media Cloud account.
Step 2
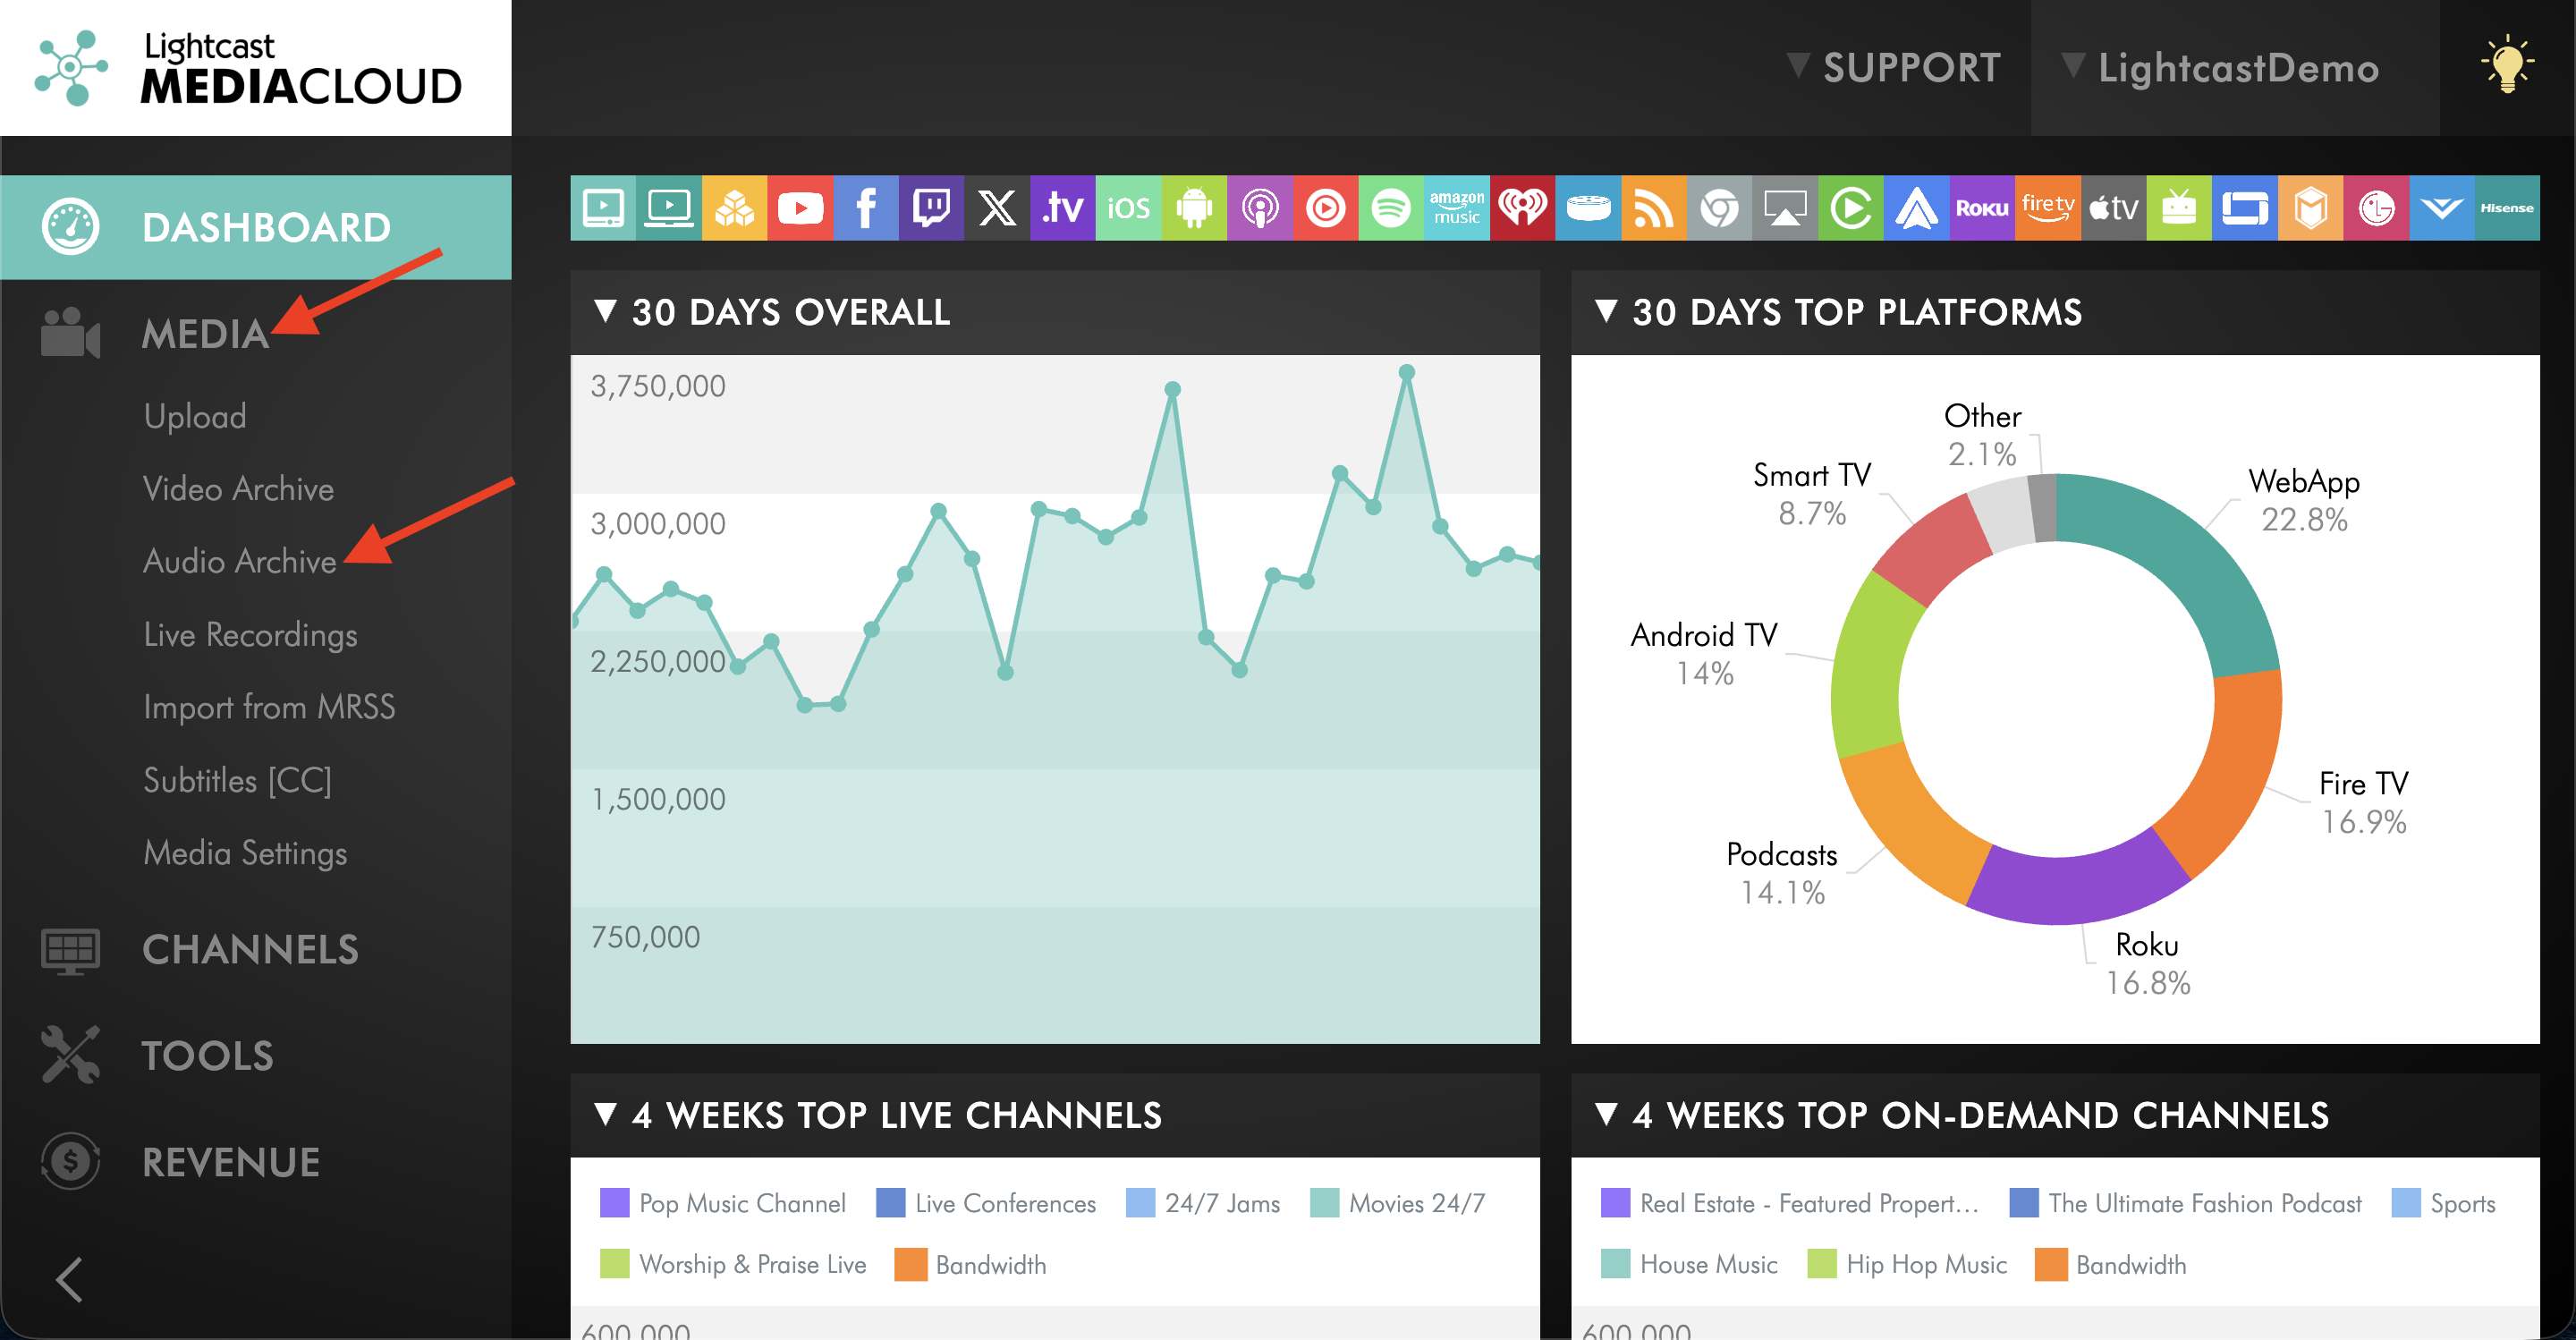
Go to MEDIA and then Audio Archive.
Step 3
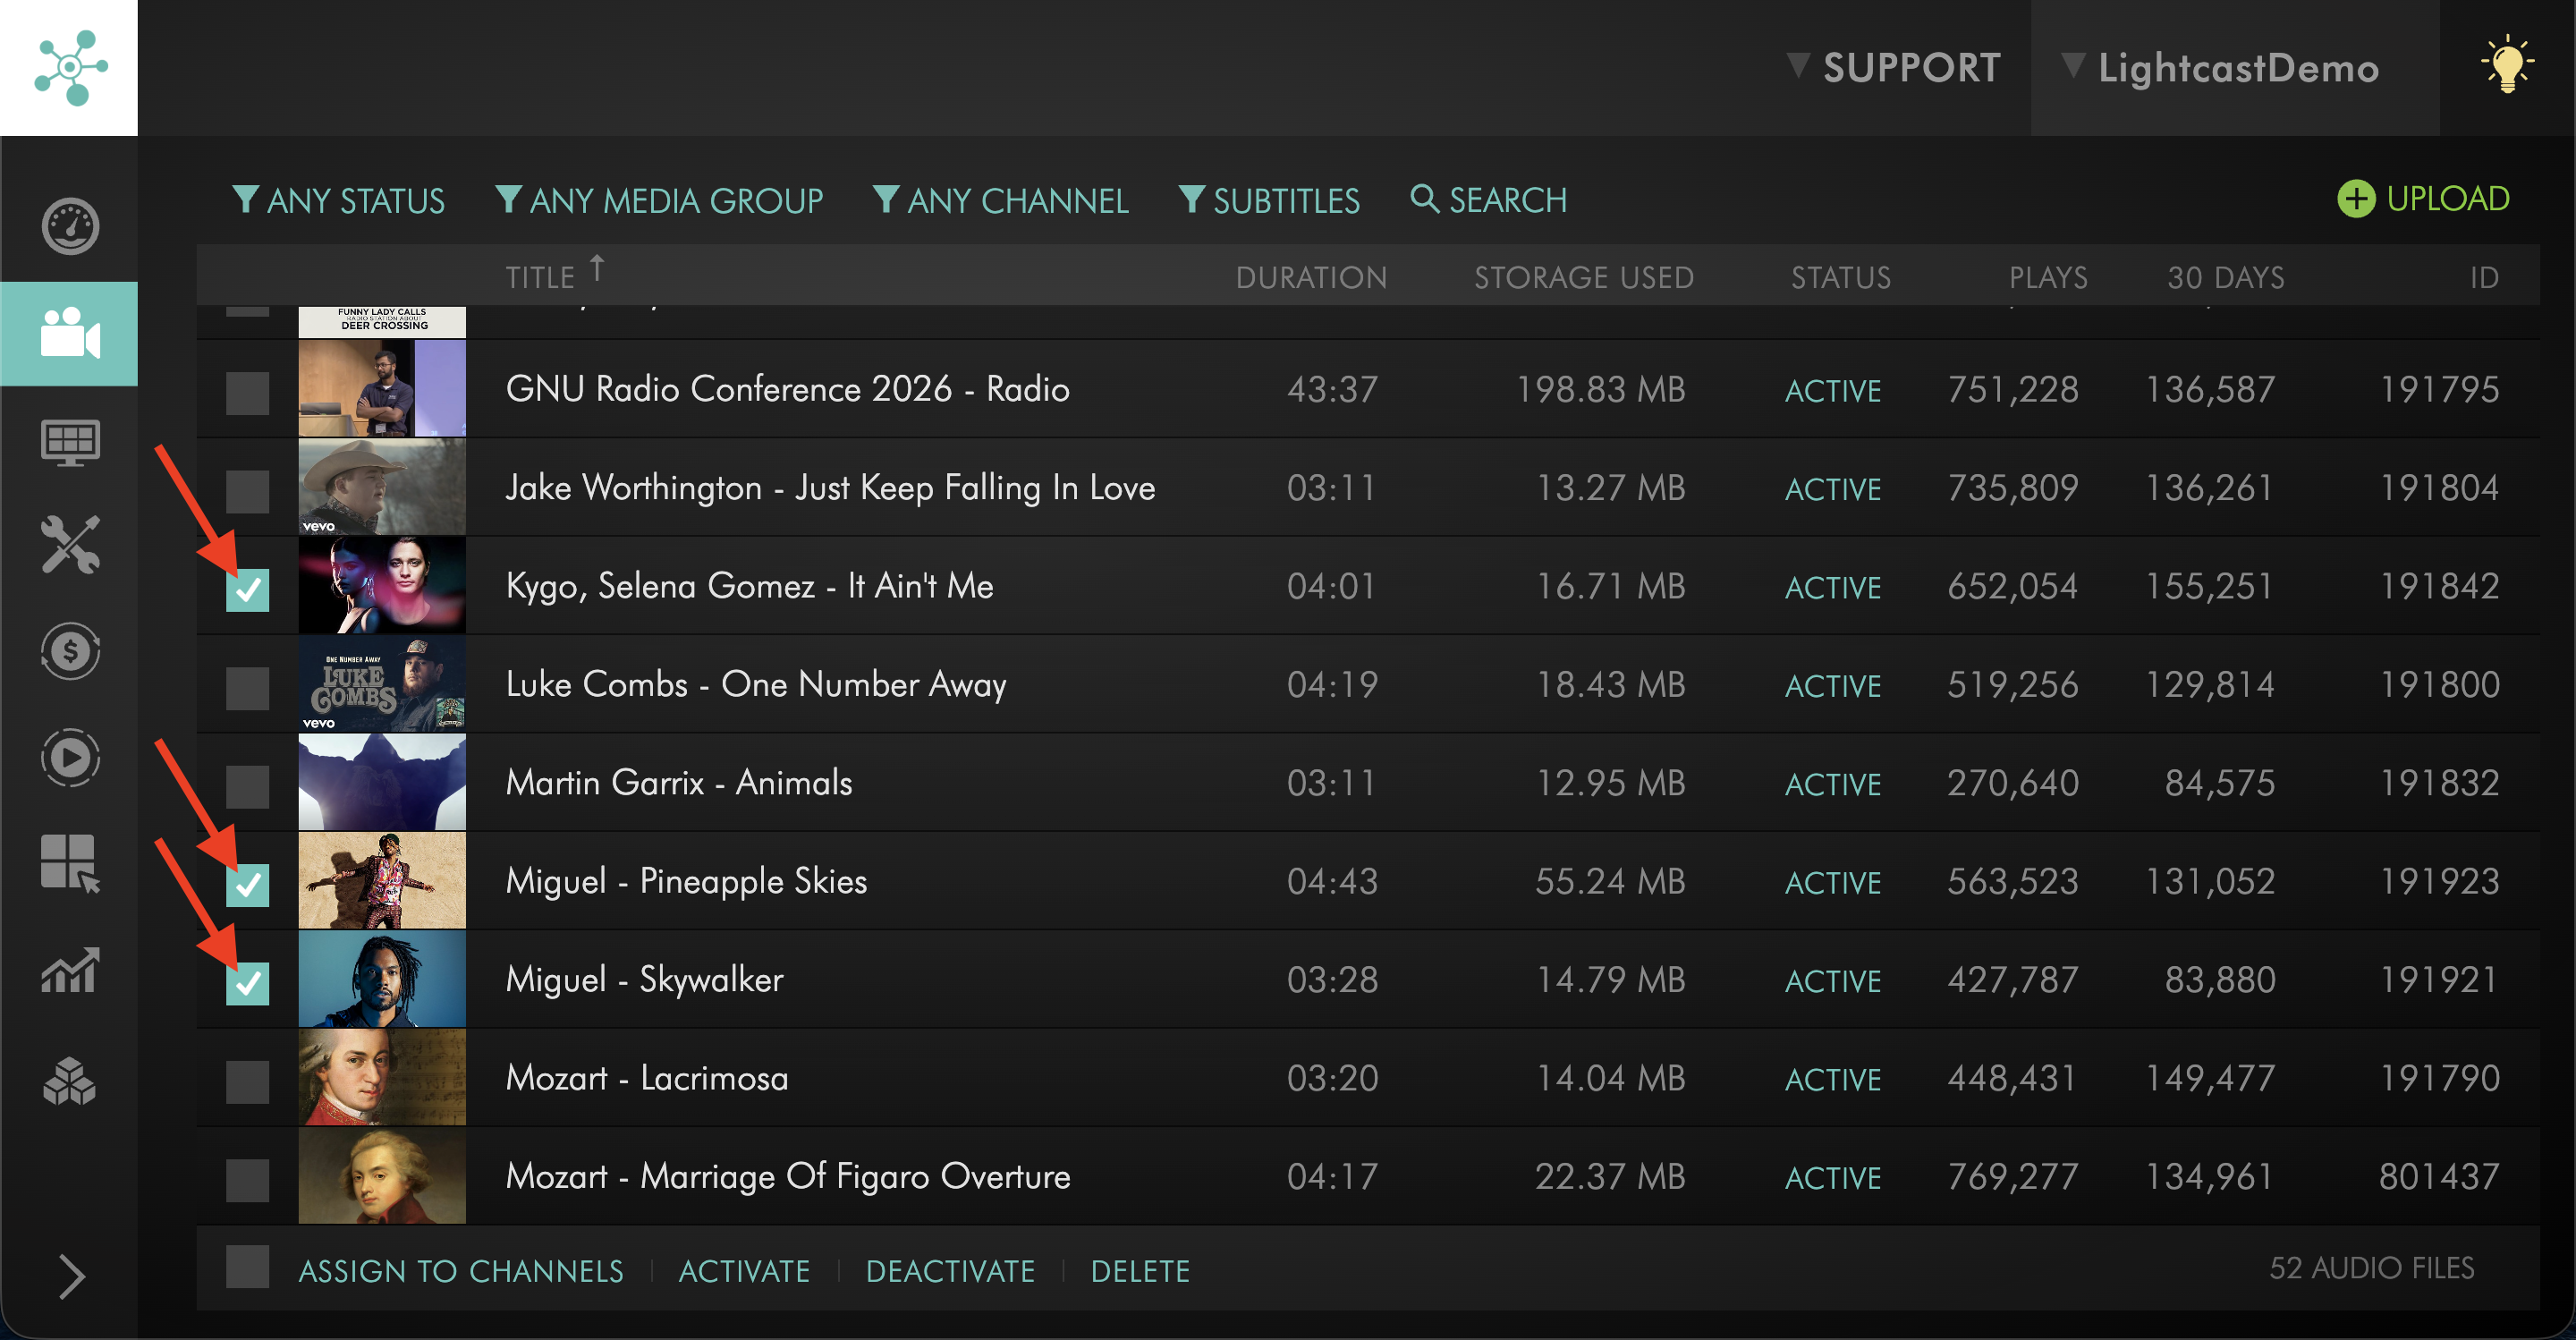
Select the checkbox next to the audio item or audio items that you want to assign.
Step 4
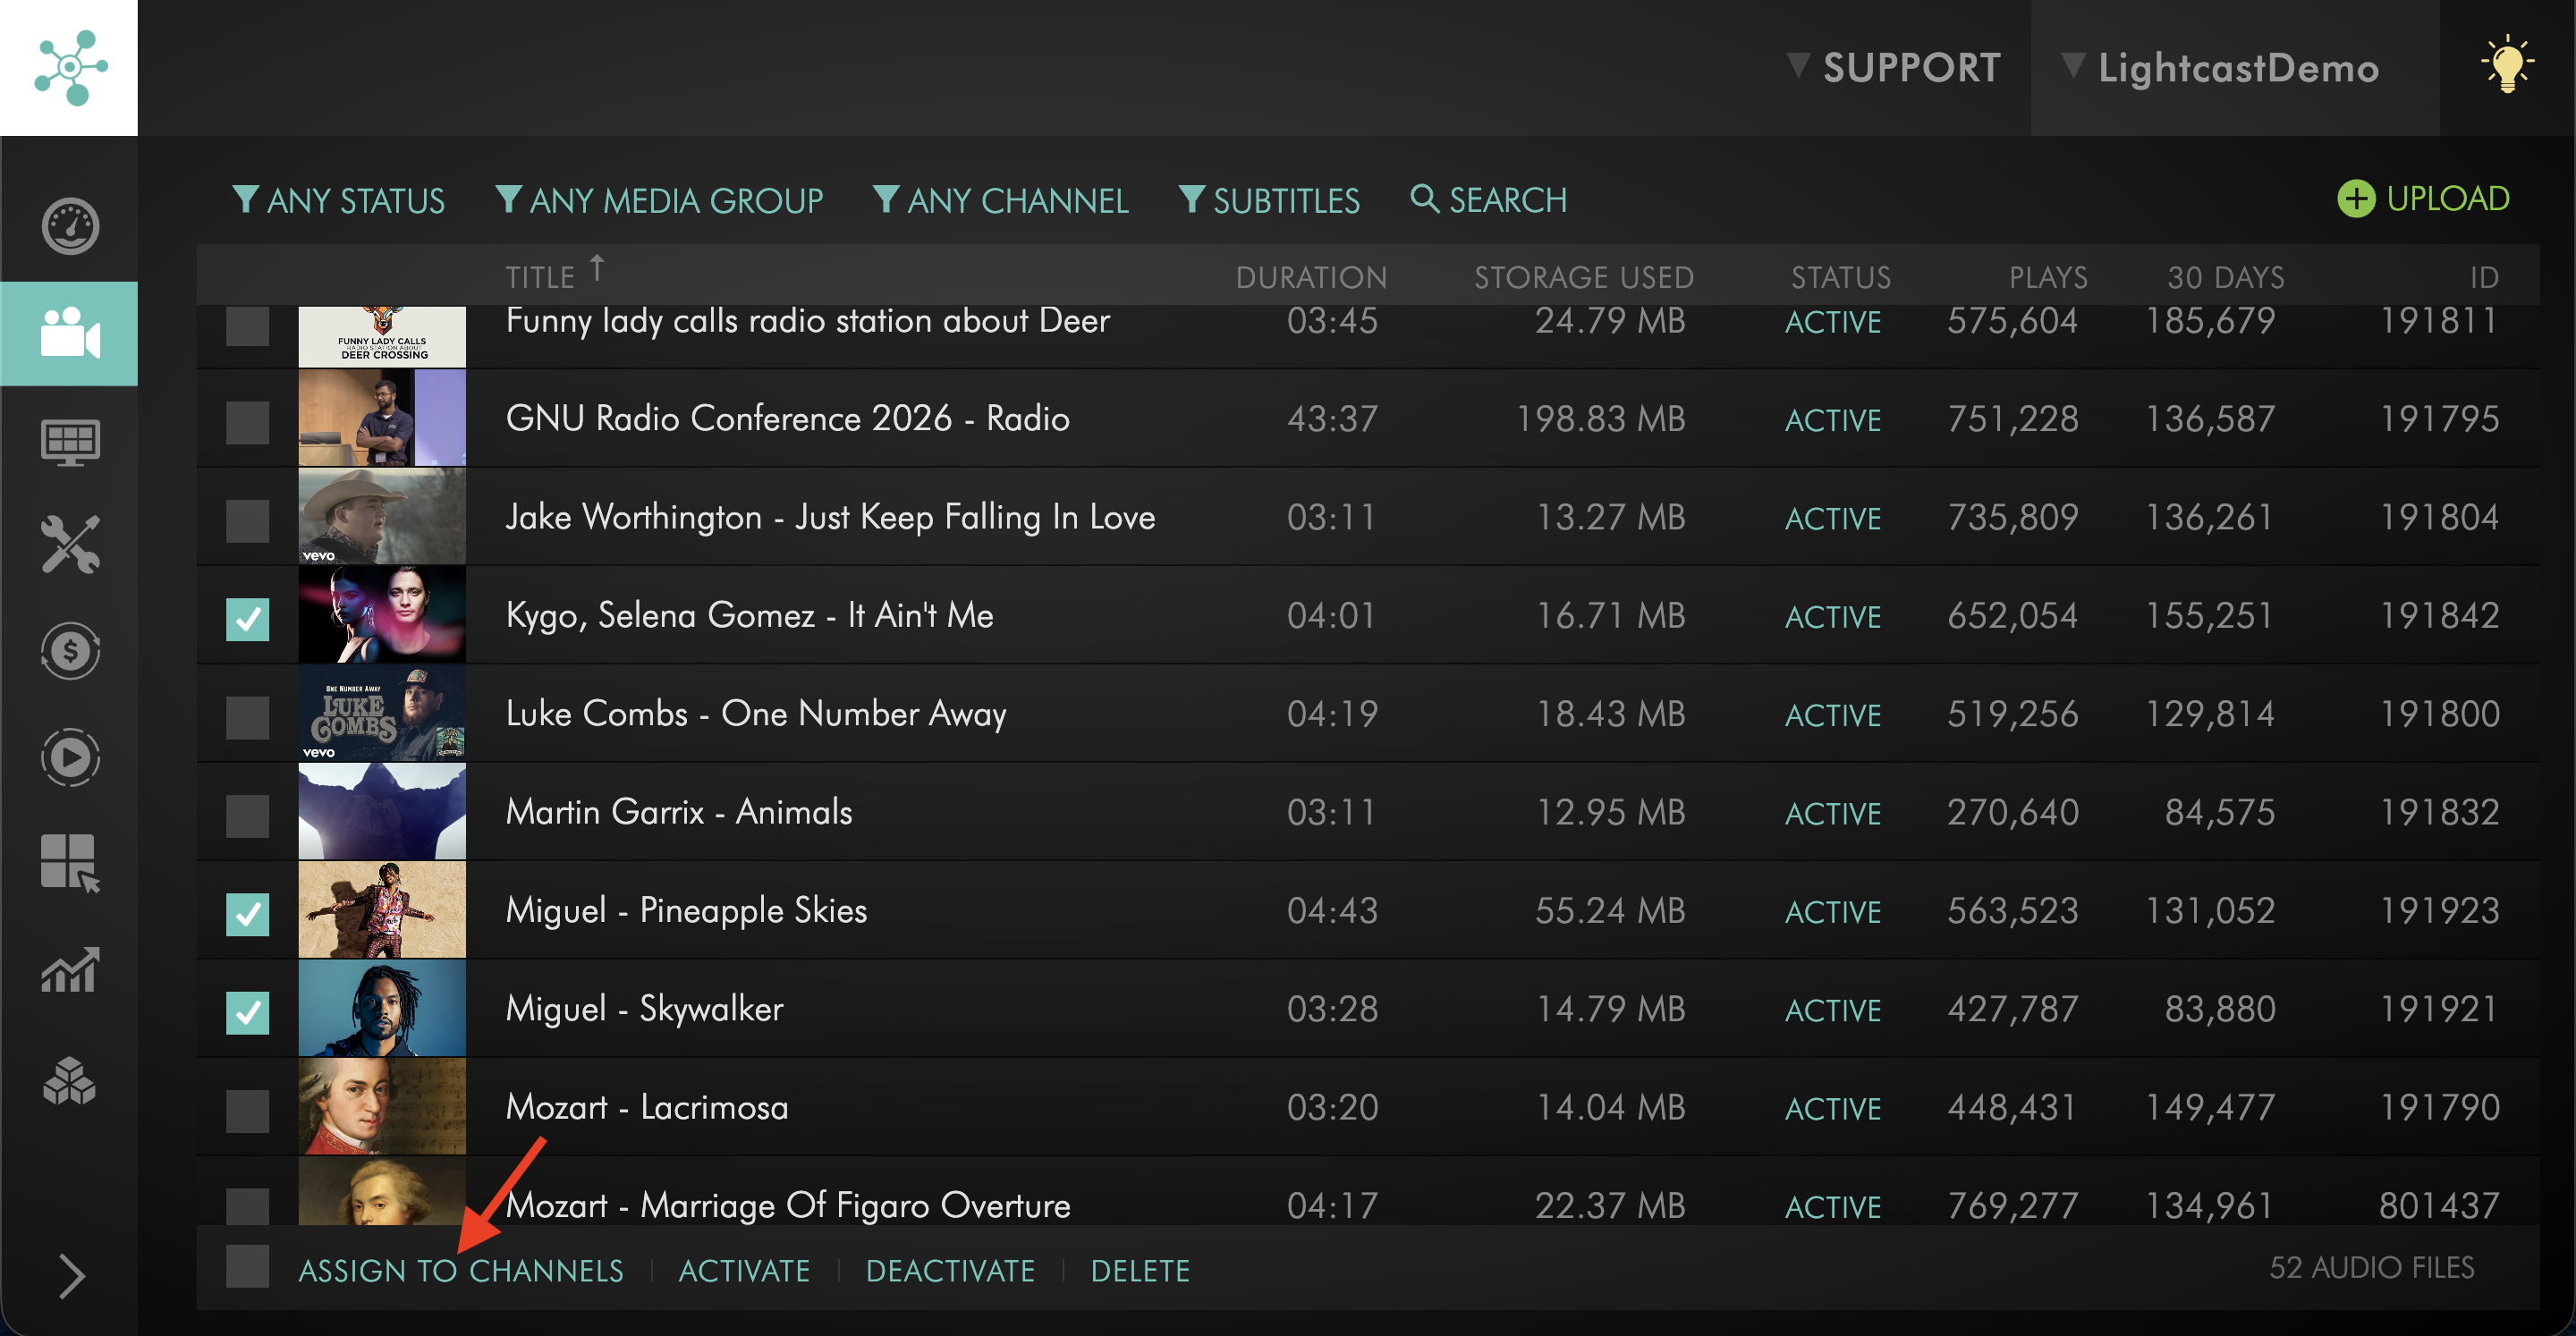
Click ASSIGN TO CHANNELS.
Step 5
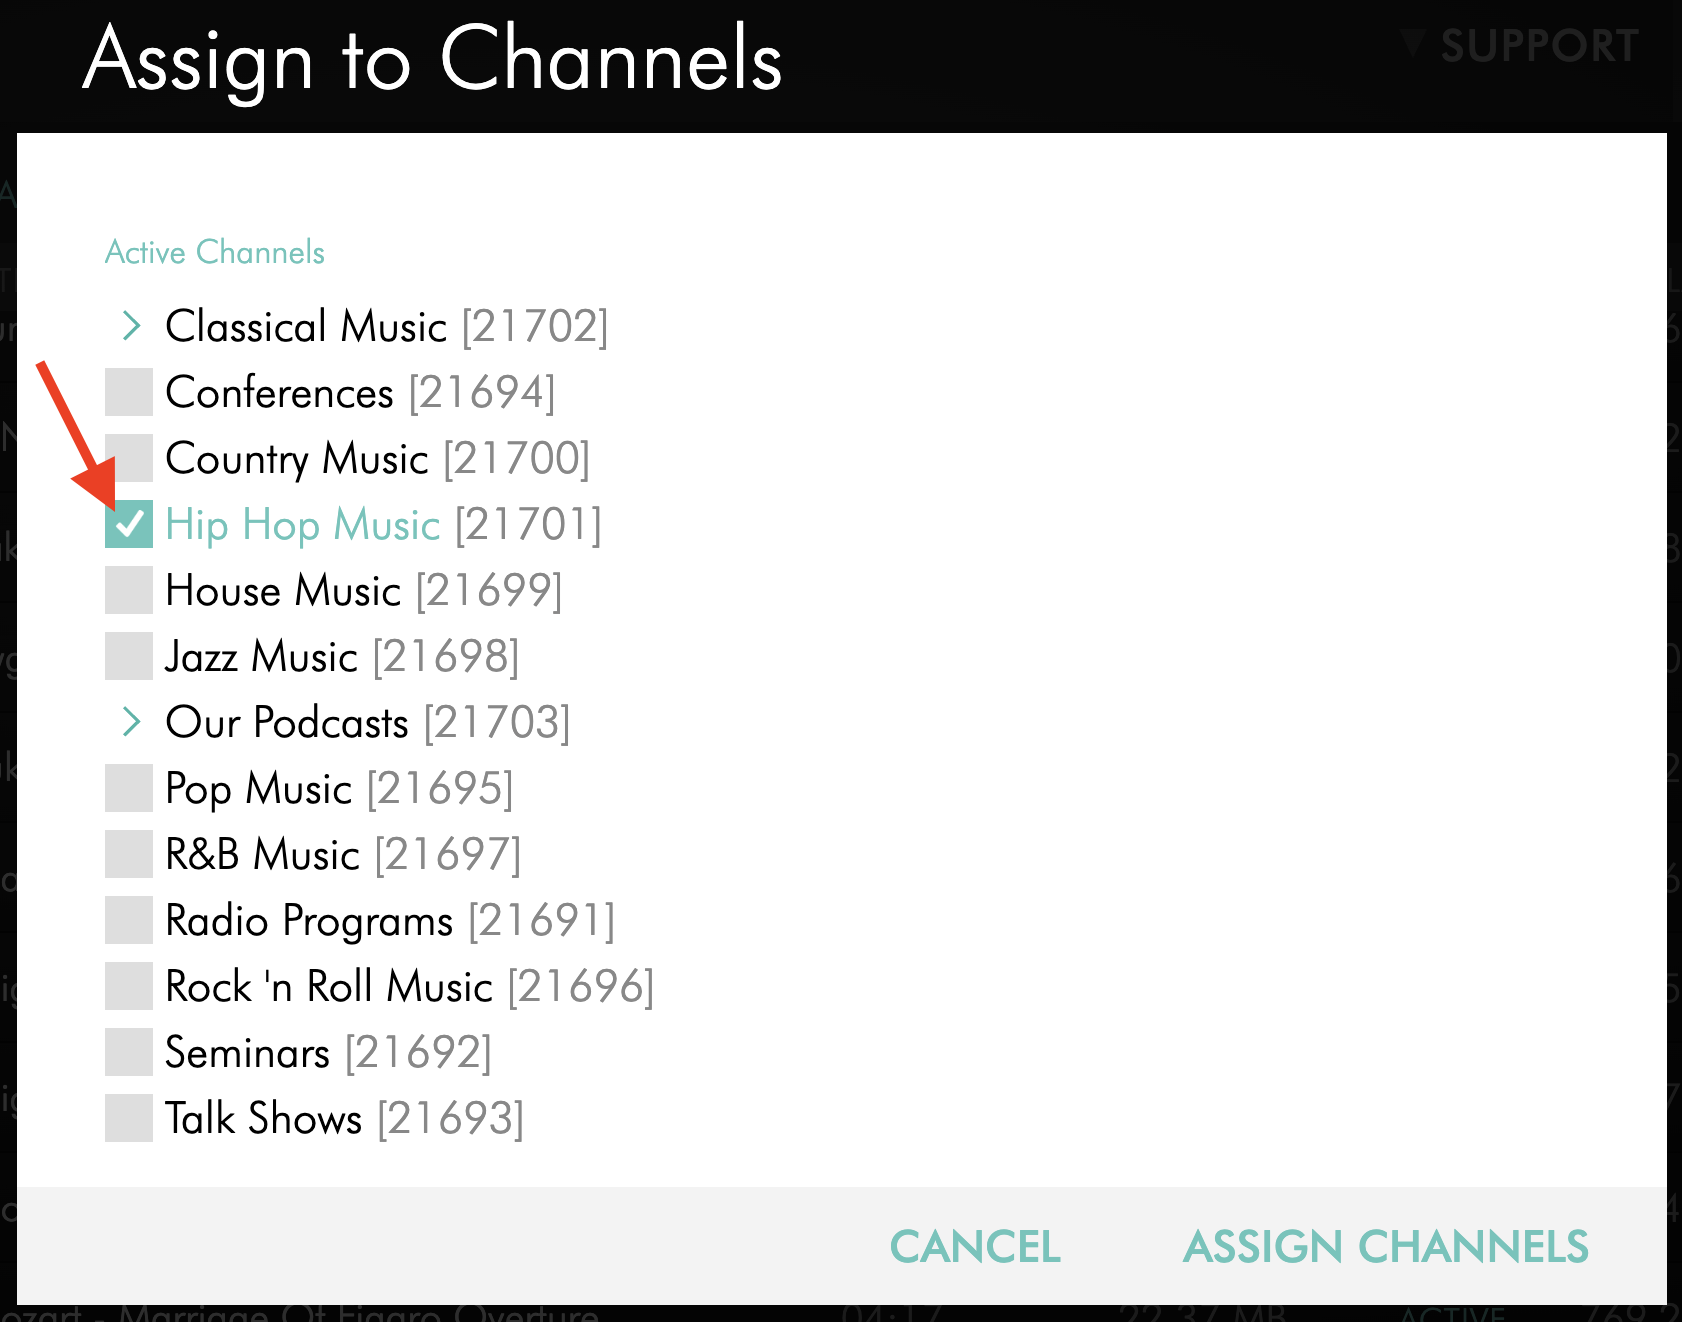
In the pop-up window, select the AOD Channel where you want to add the content.
Step 6
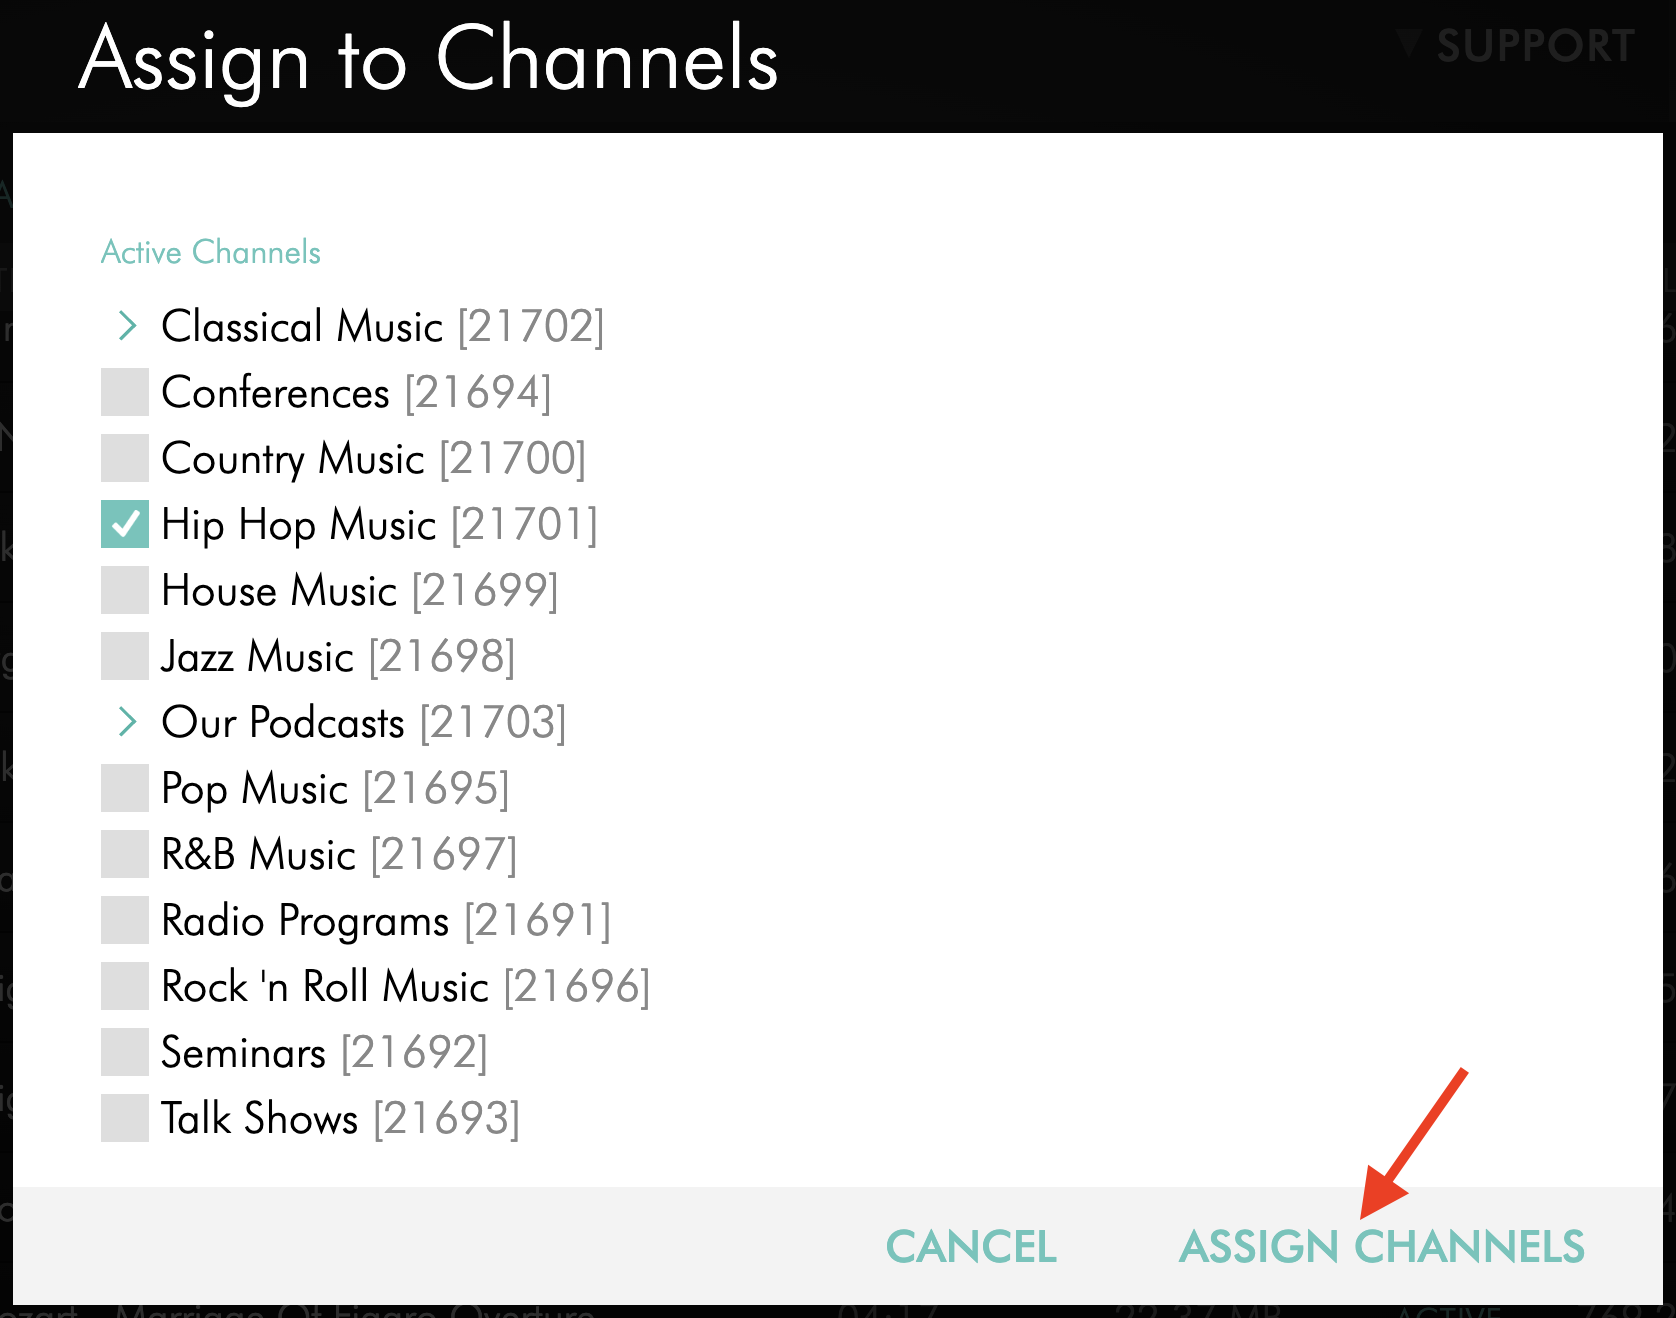
Click ASSIGN CHANNELS.
Option 3: Assign an individual media item from its CHANNELS tab to an AOD Channel
Step 1
Log in to your Media Cloud account.
Step 2
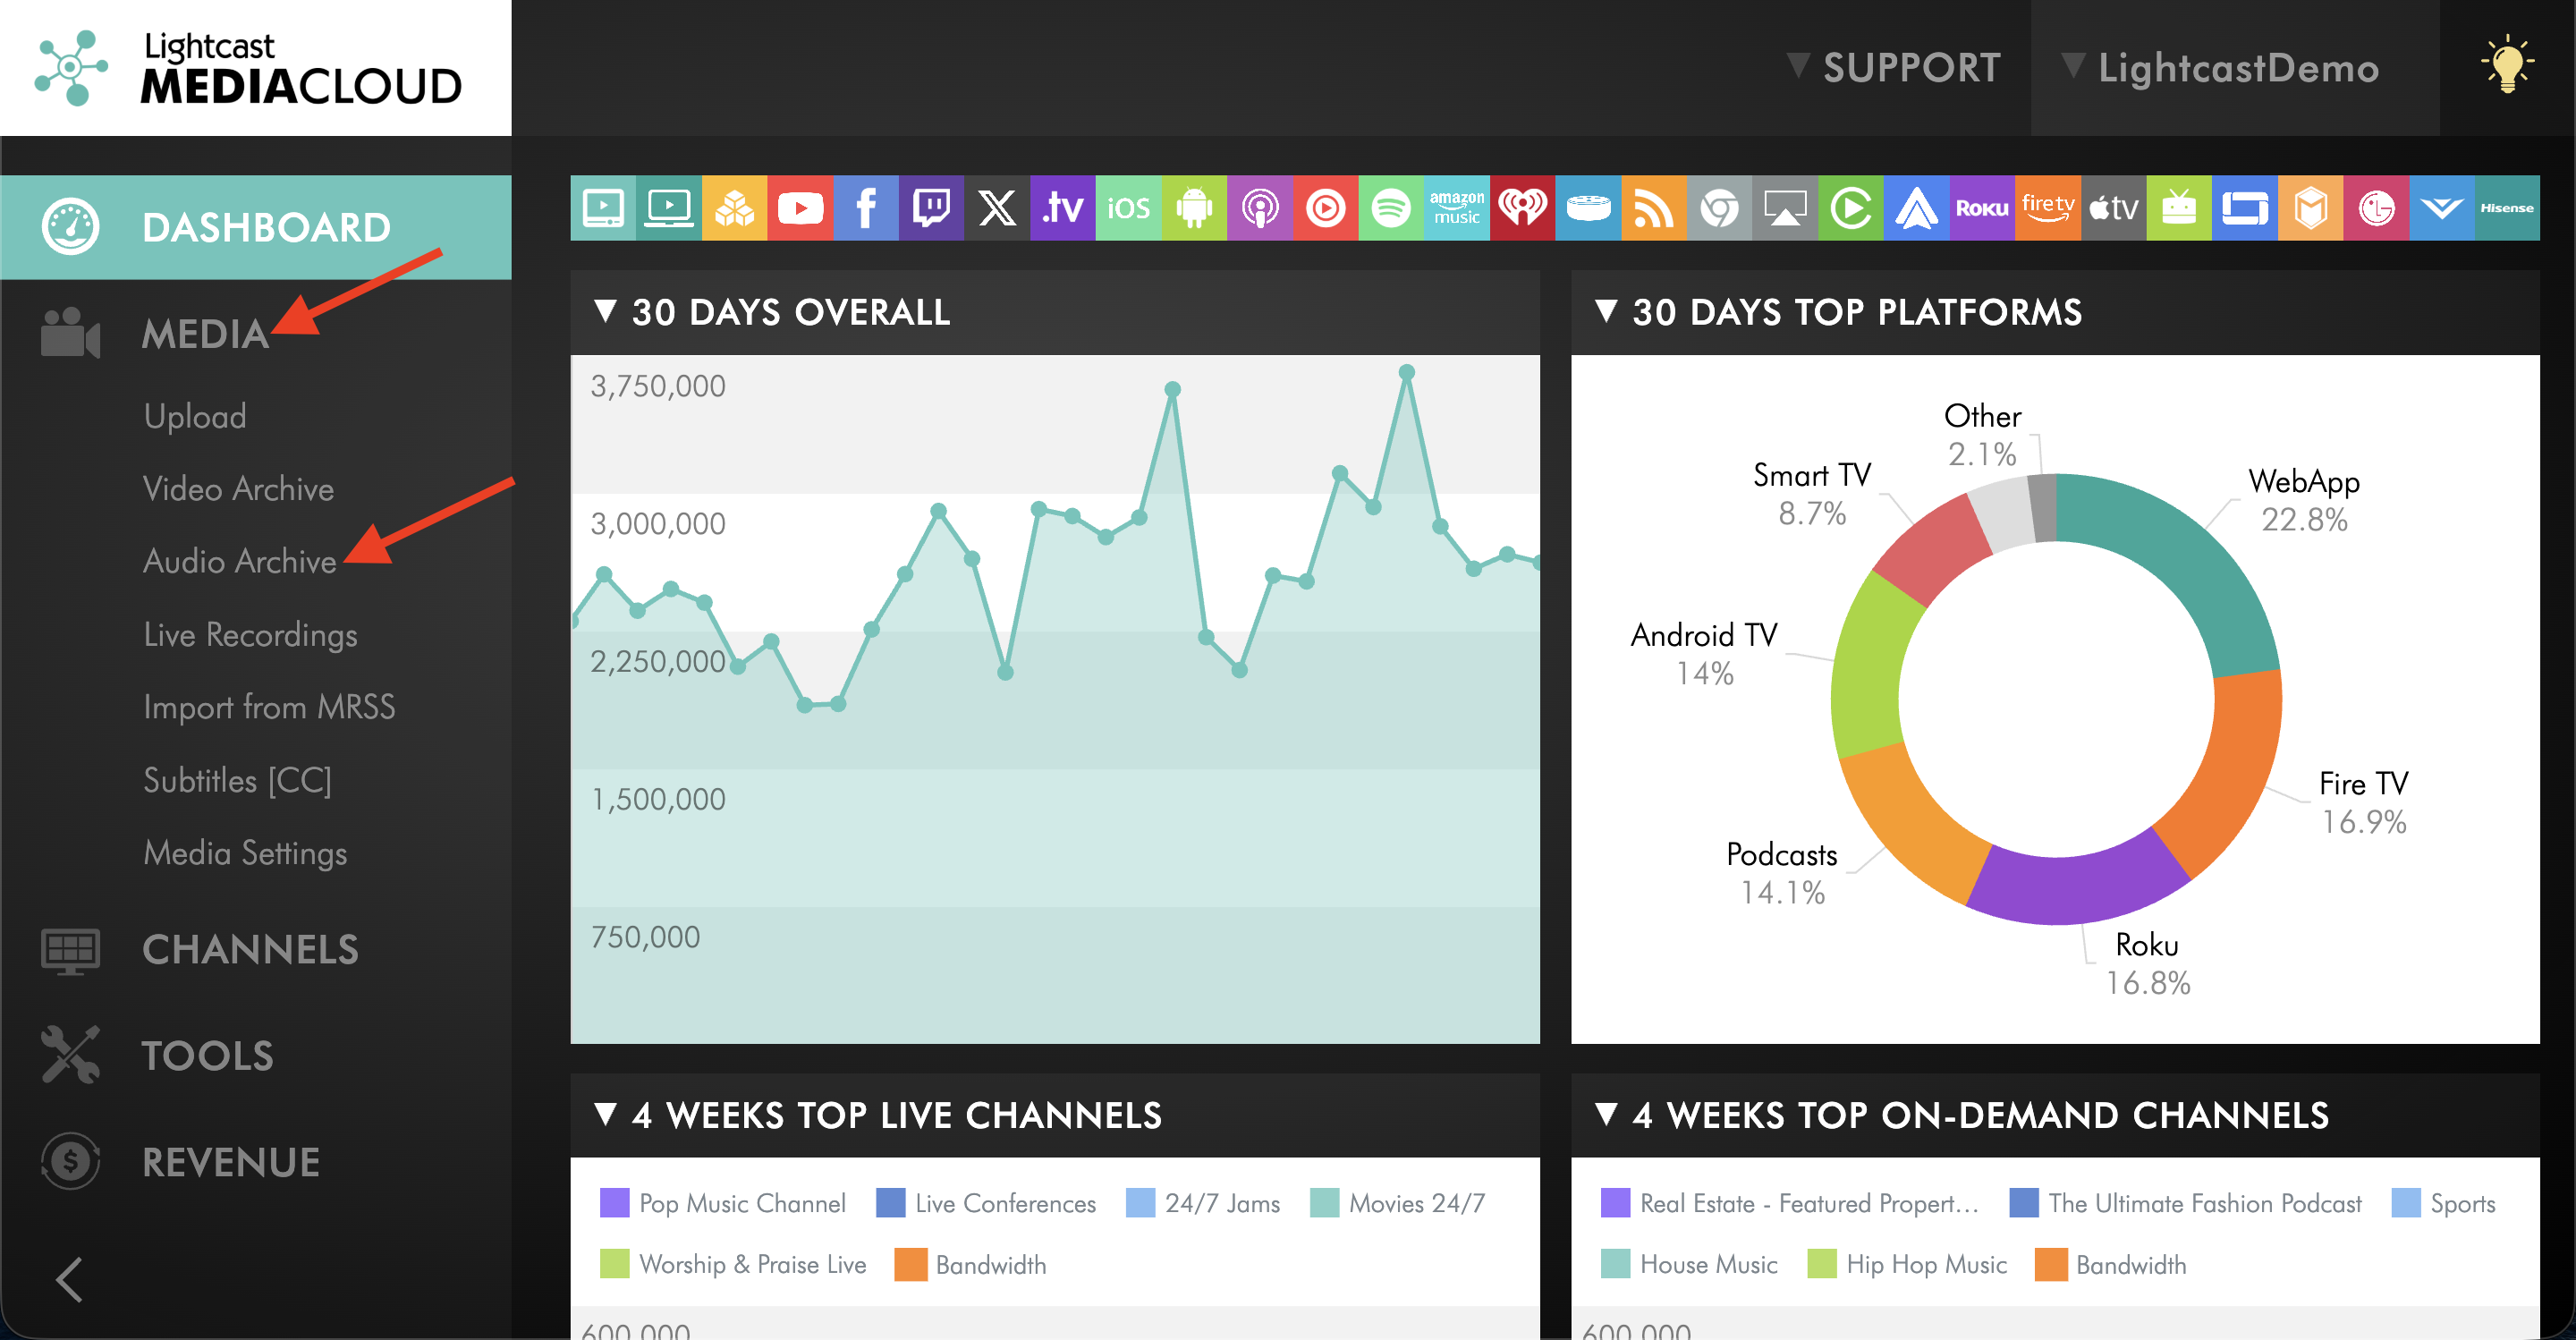
Go to MEDIA and then Audio Archive.
Step 3
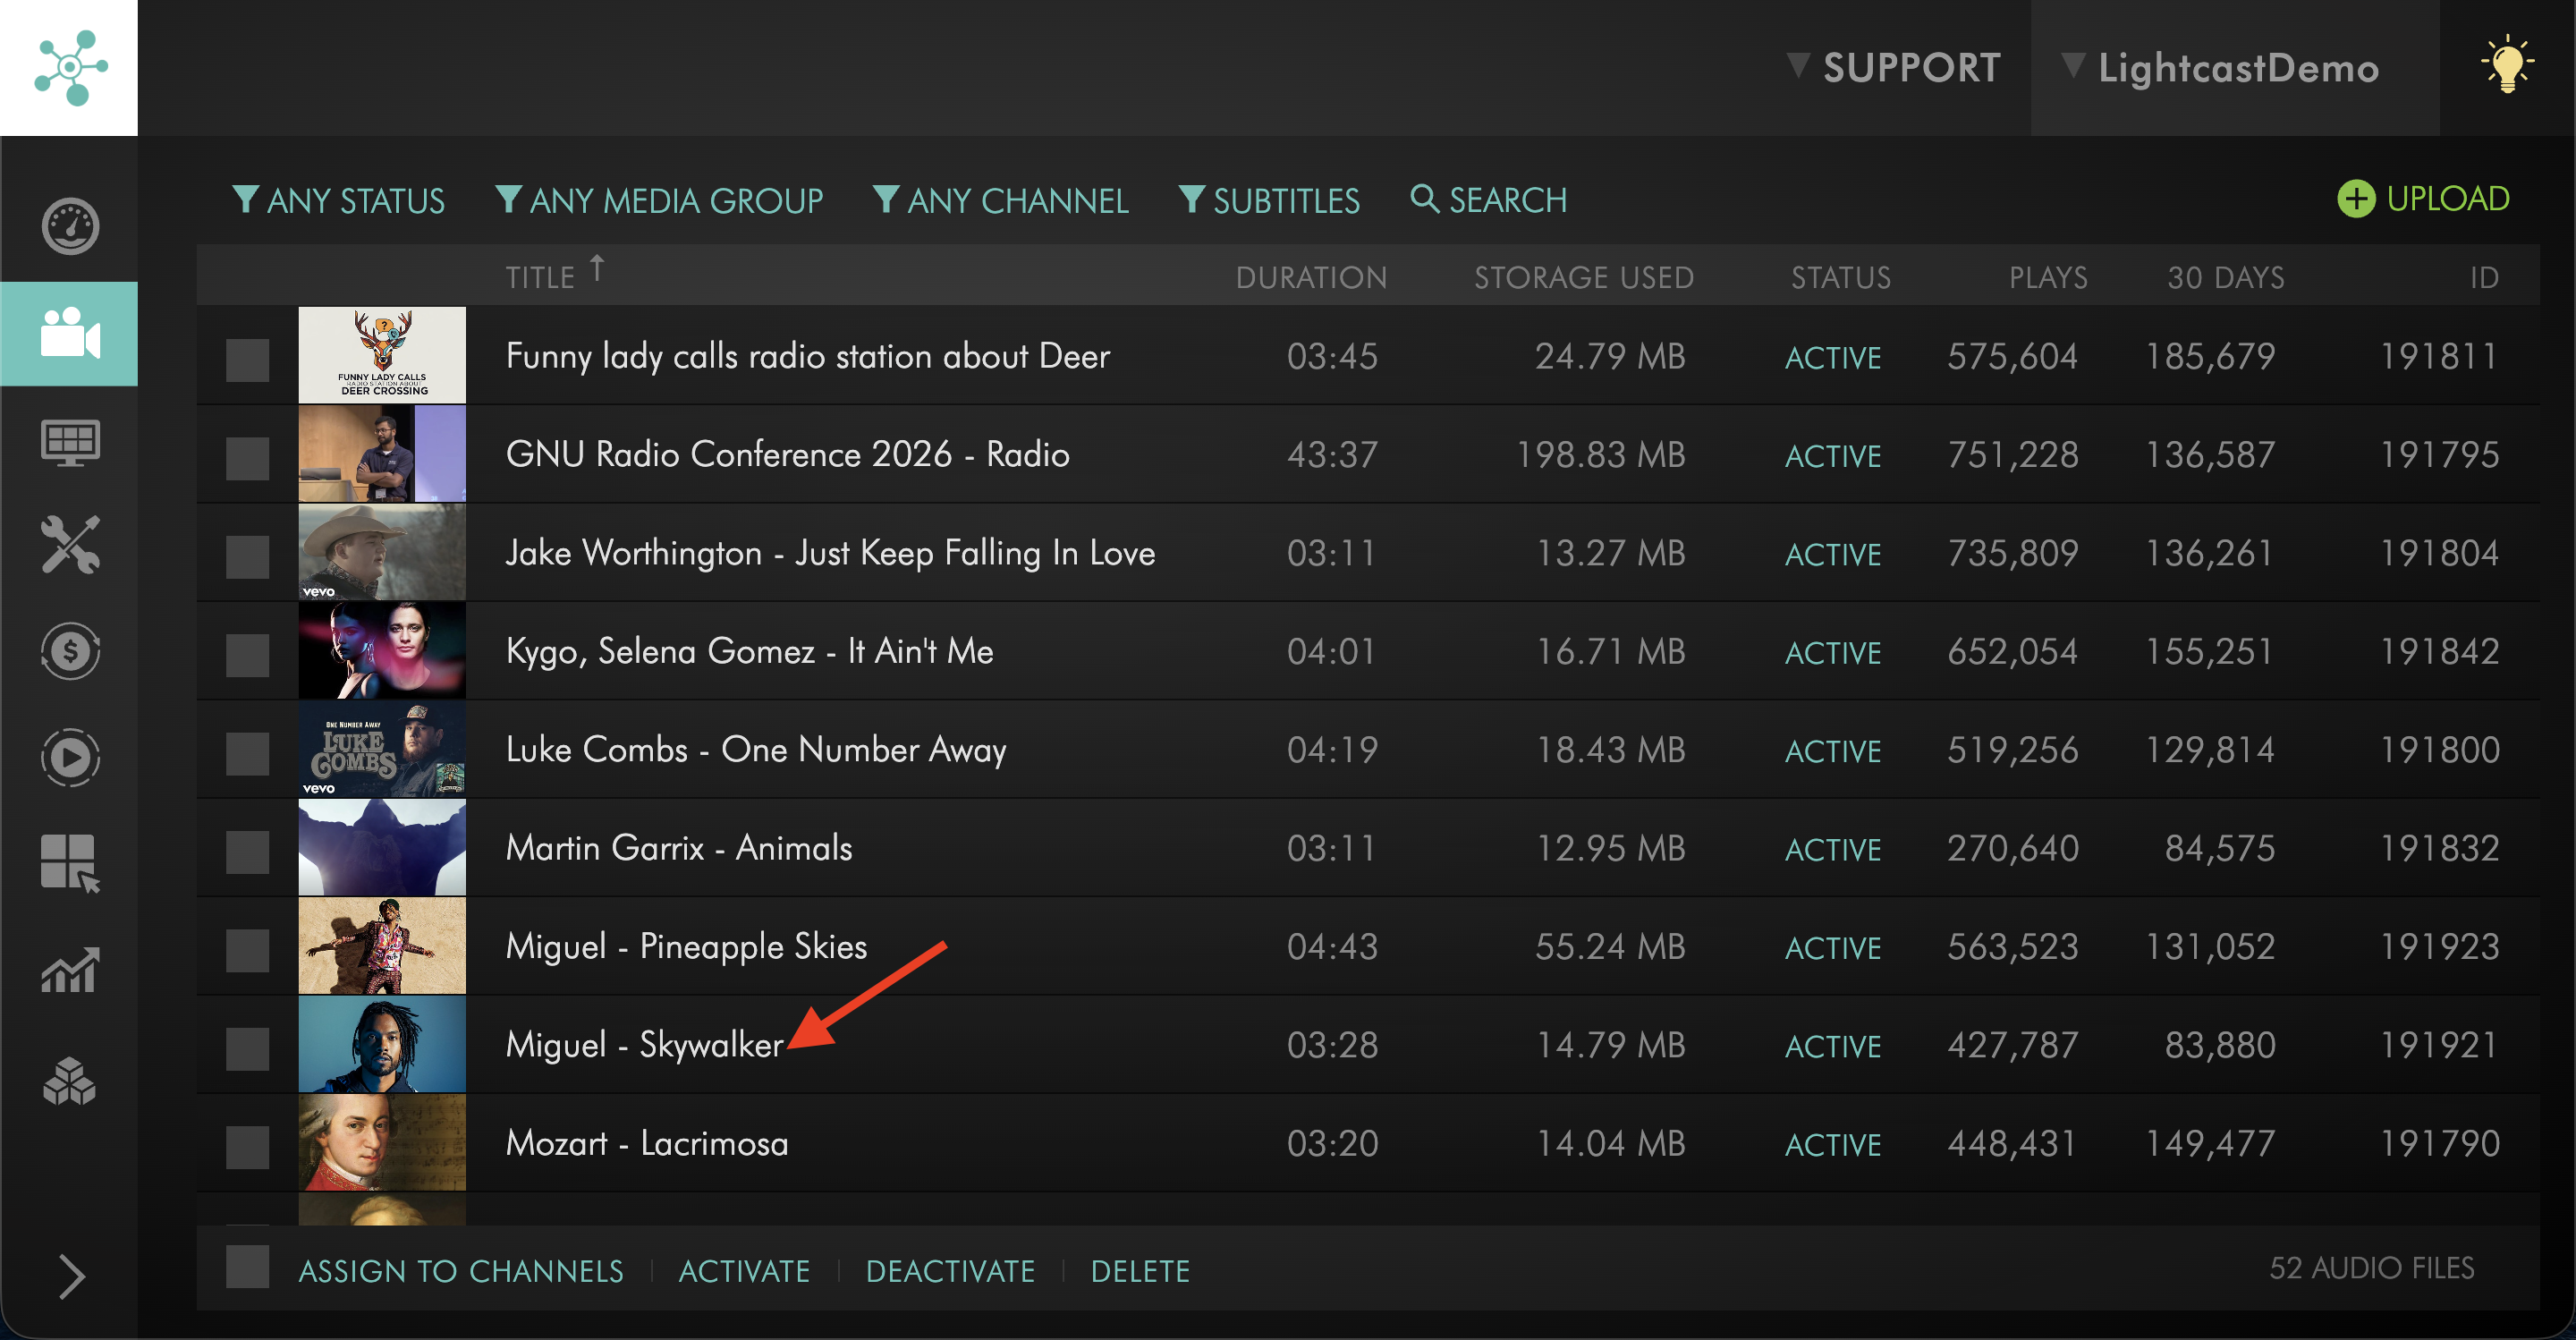
Select the audio item.
Step 4
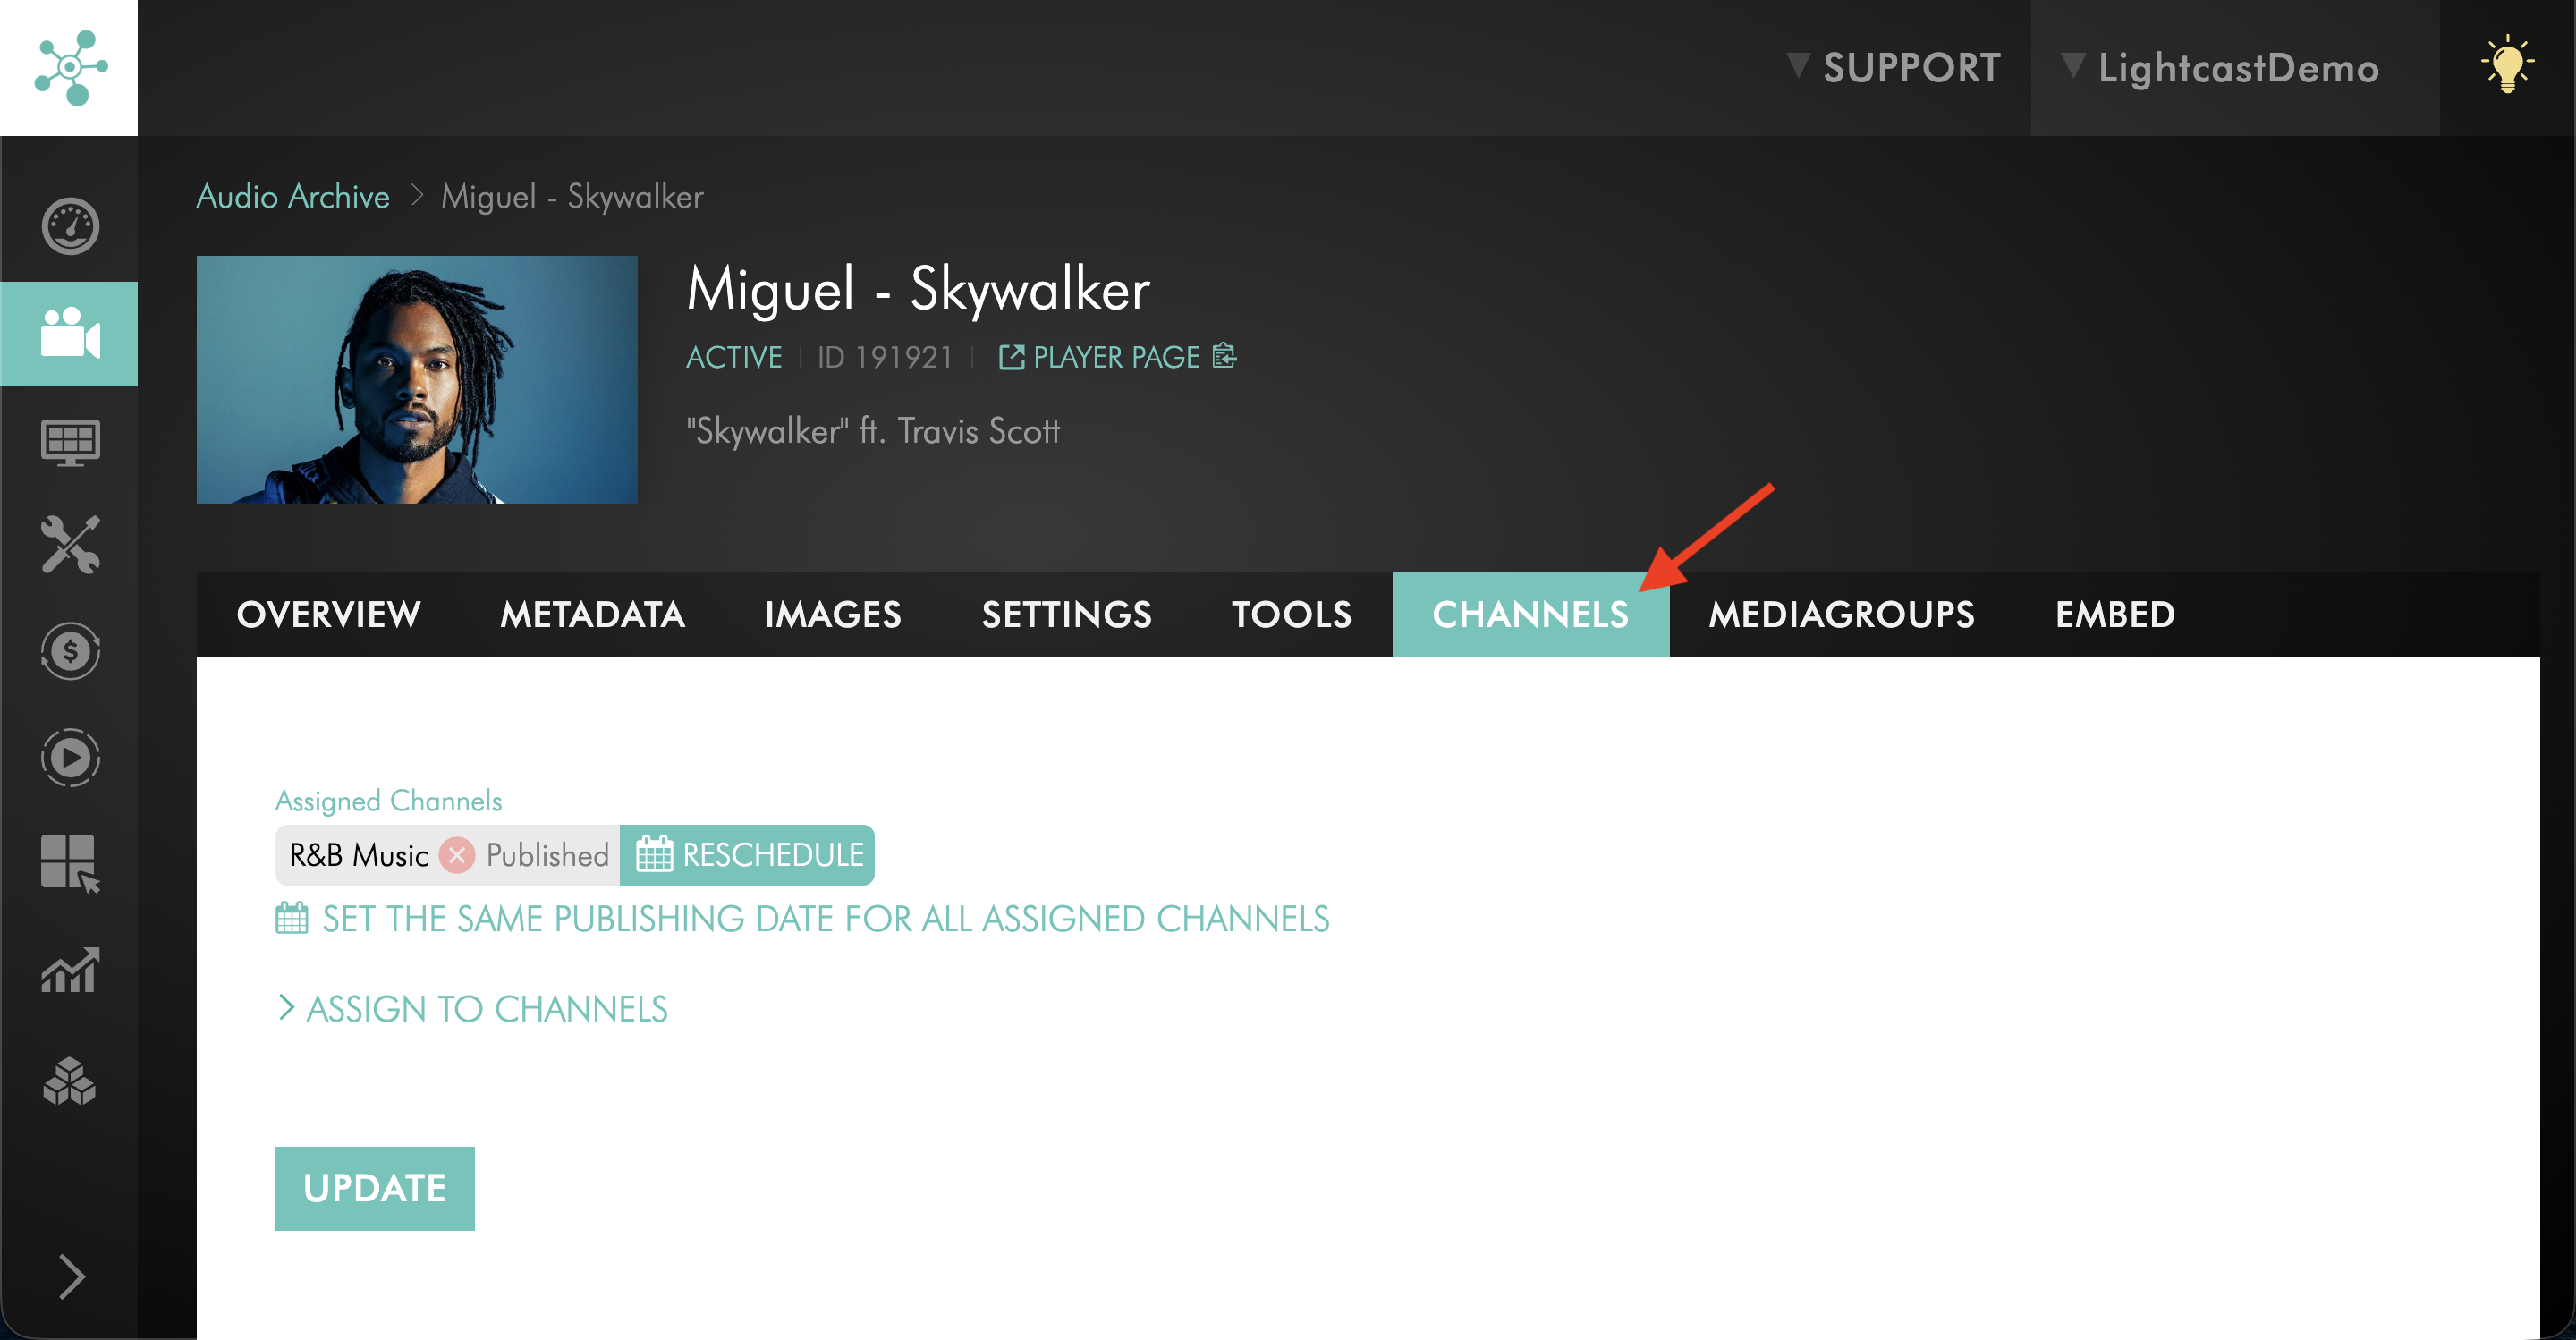
Switch to the CHANNELS tab.
Step 5
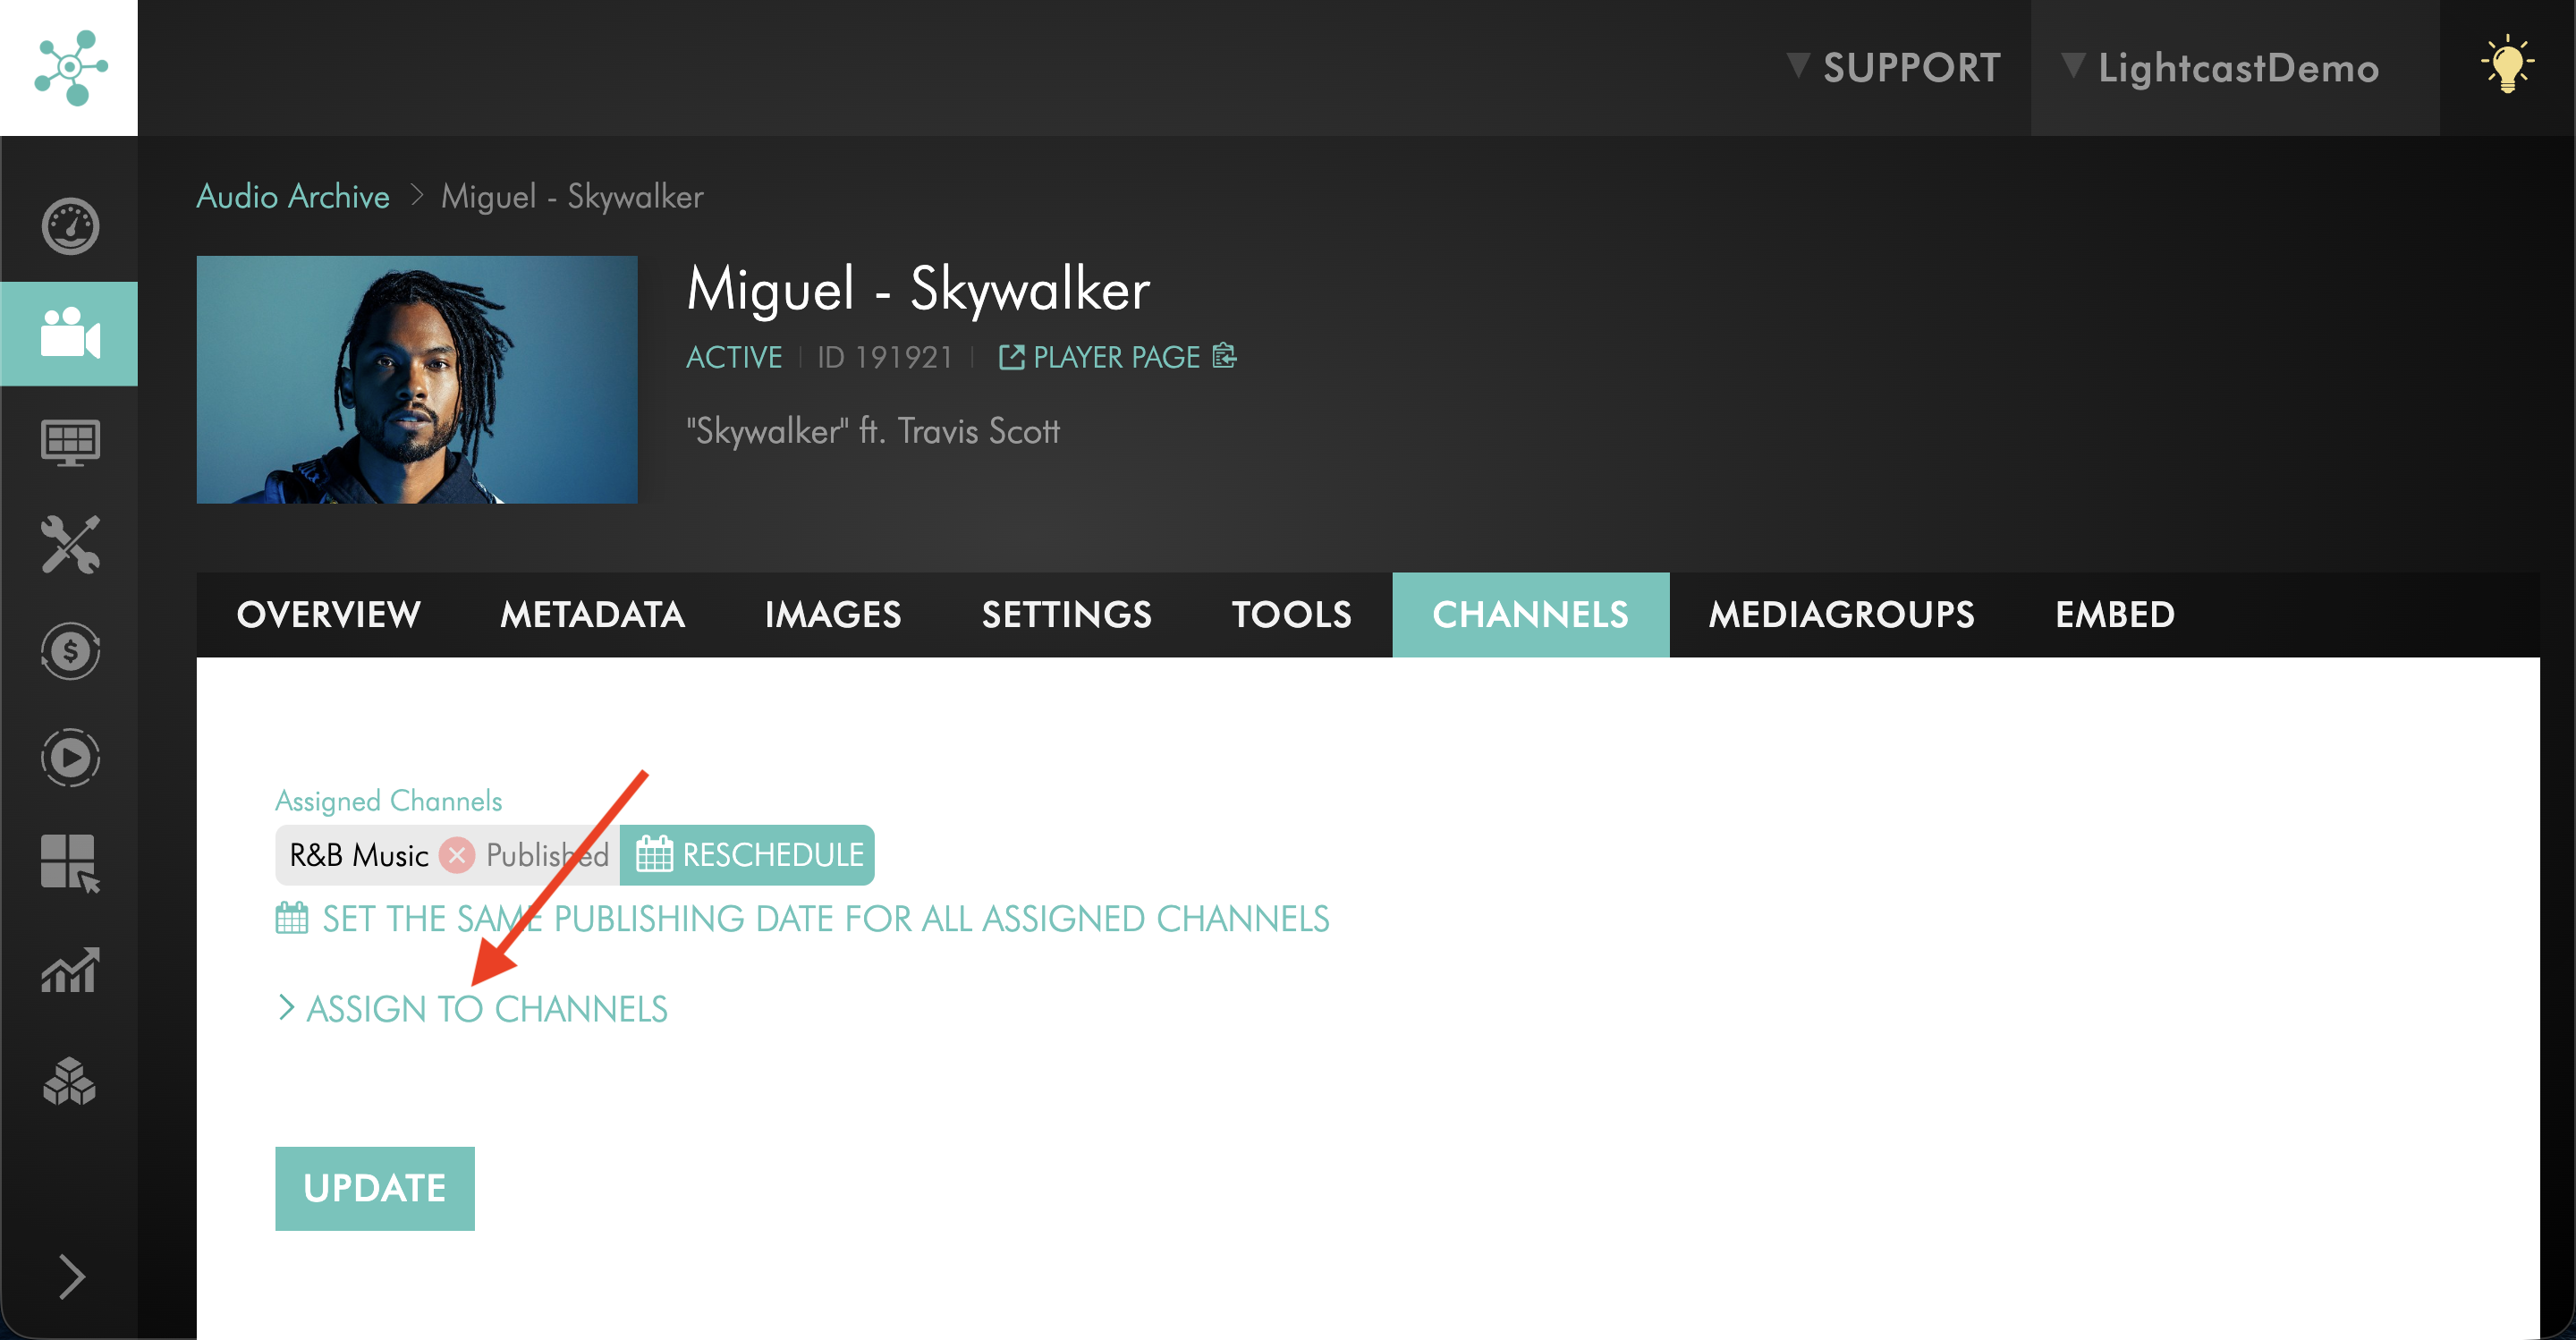
Click ASSIGN TO CHANNELS.
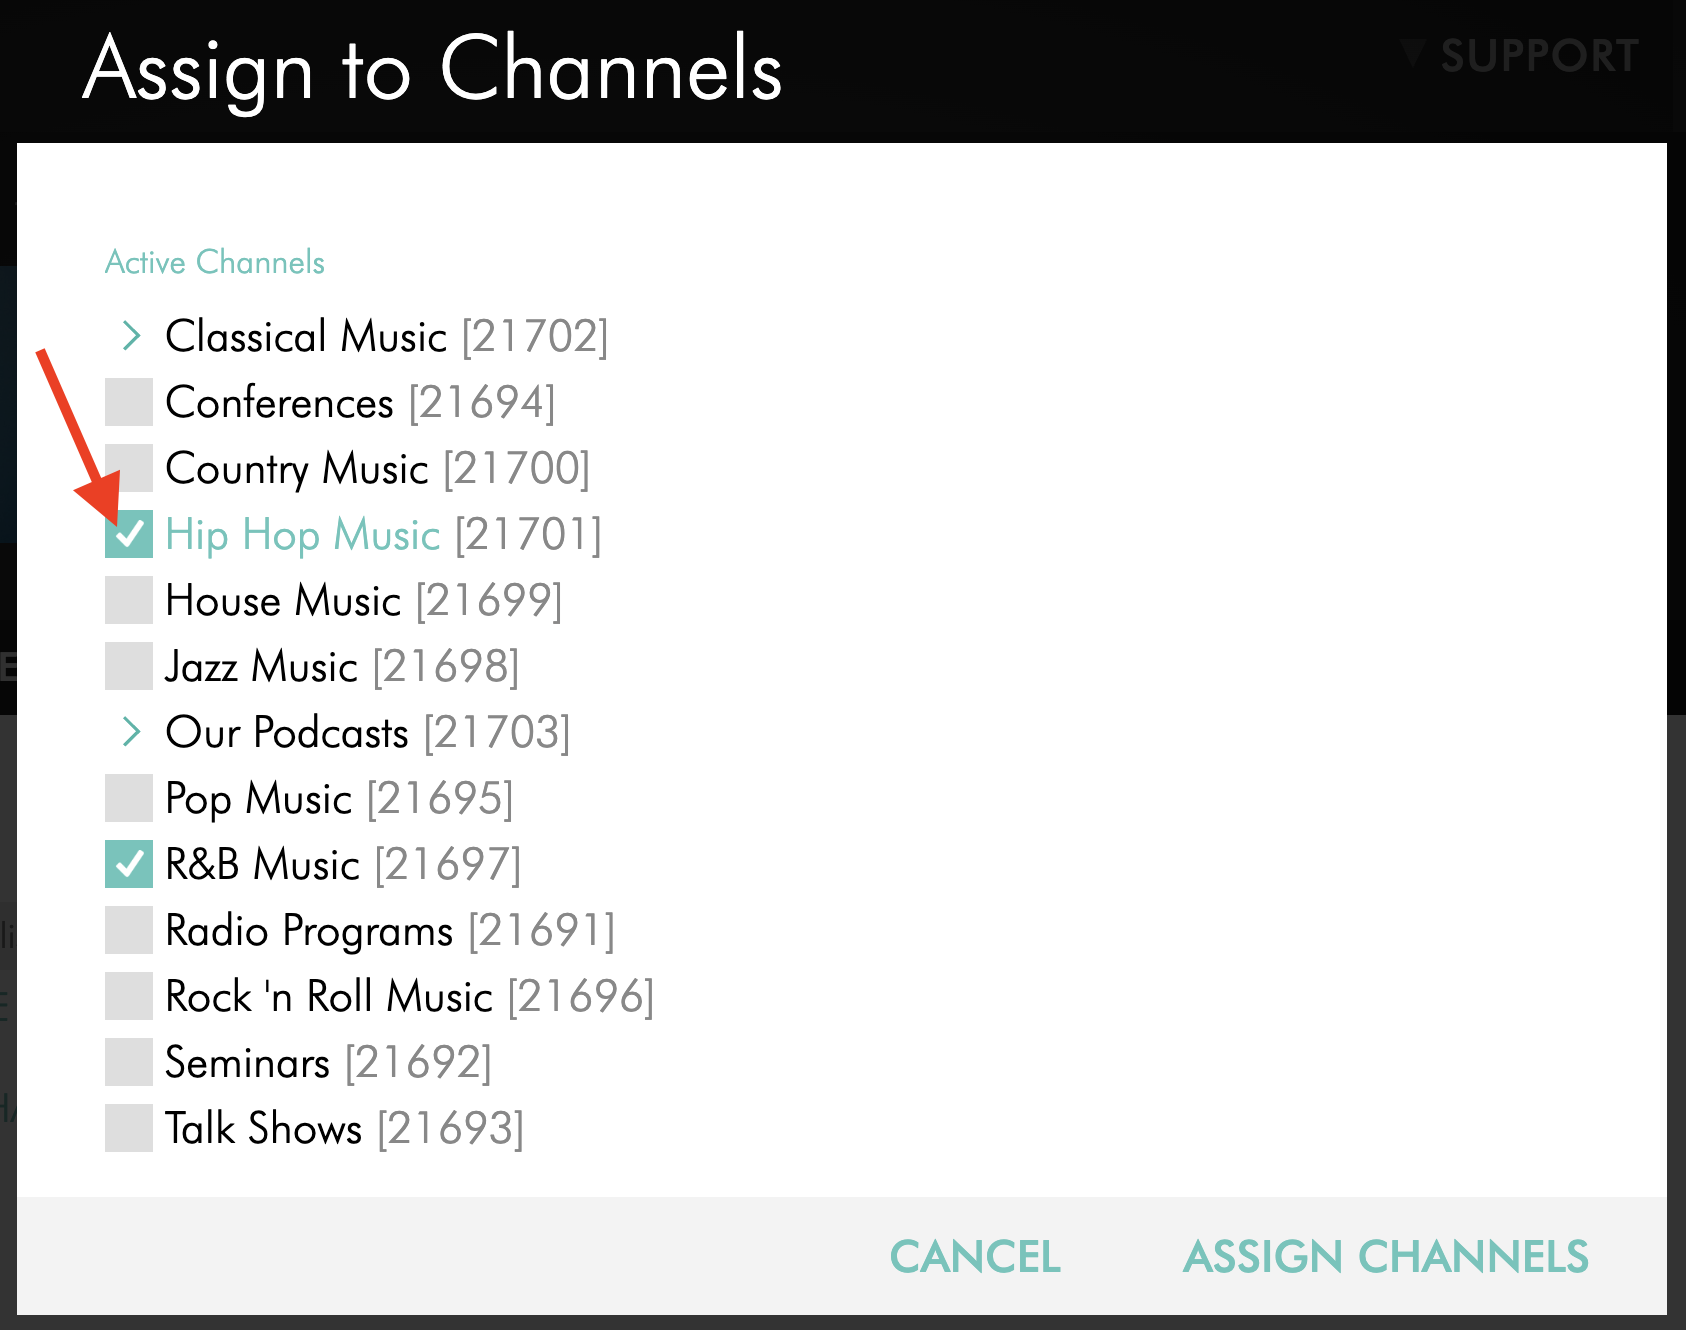
Step 6
In the Channel assignment pop-up window, select the AOD Channel where you want to publish the media item.
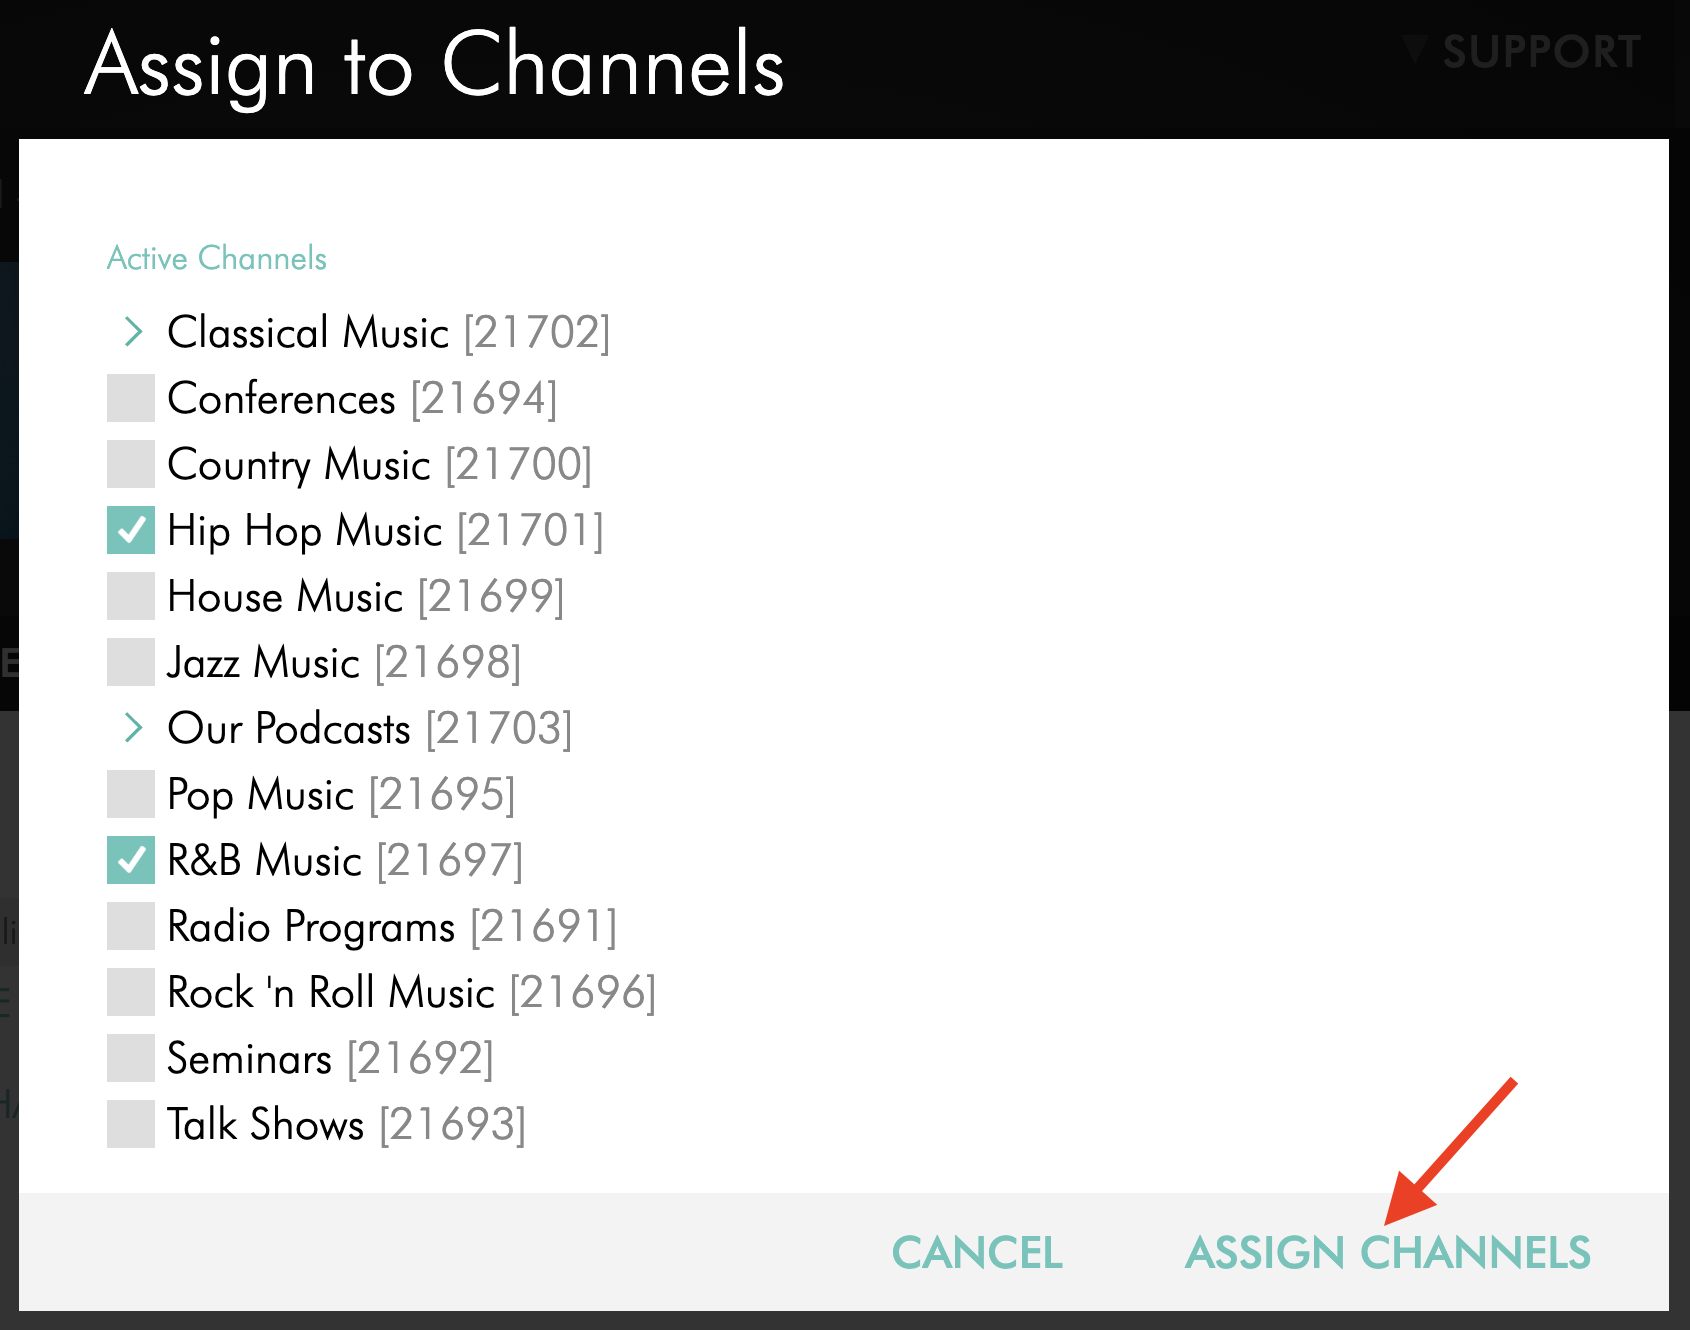
Step 7
Click ASSIGN CHANNELS.
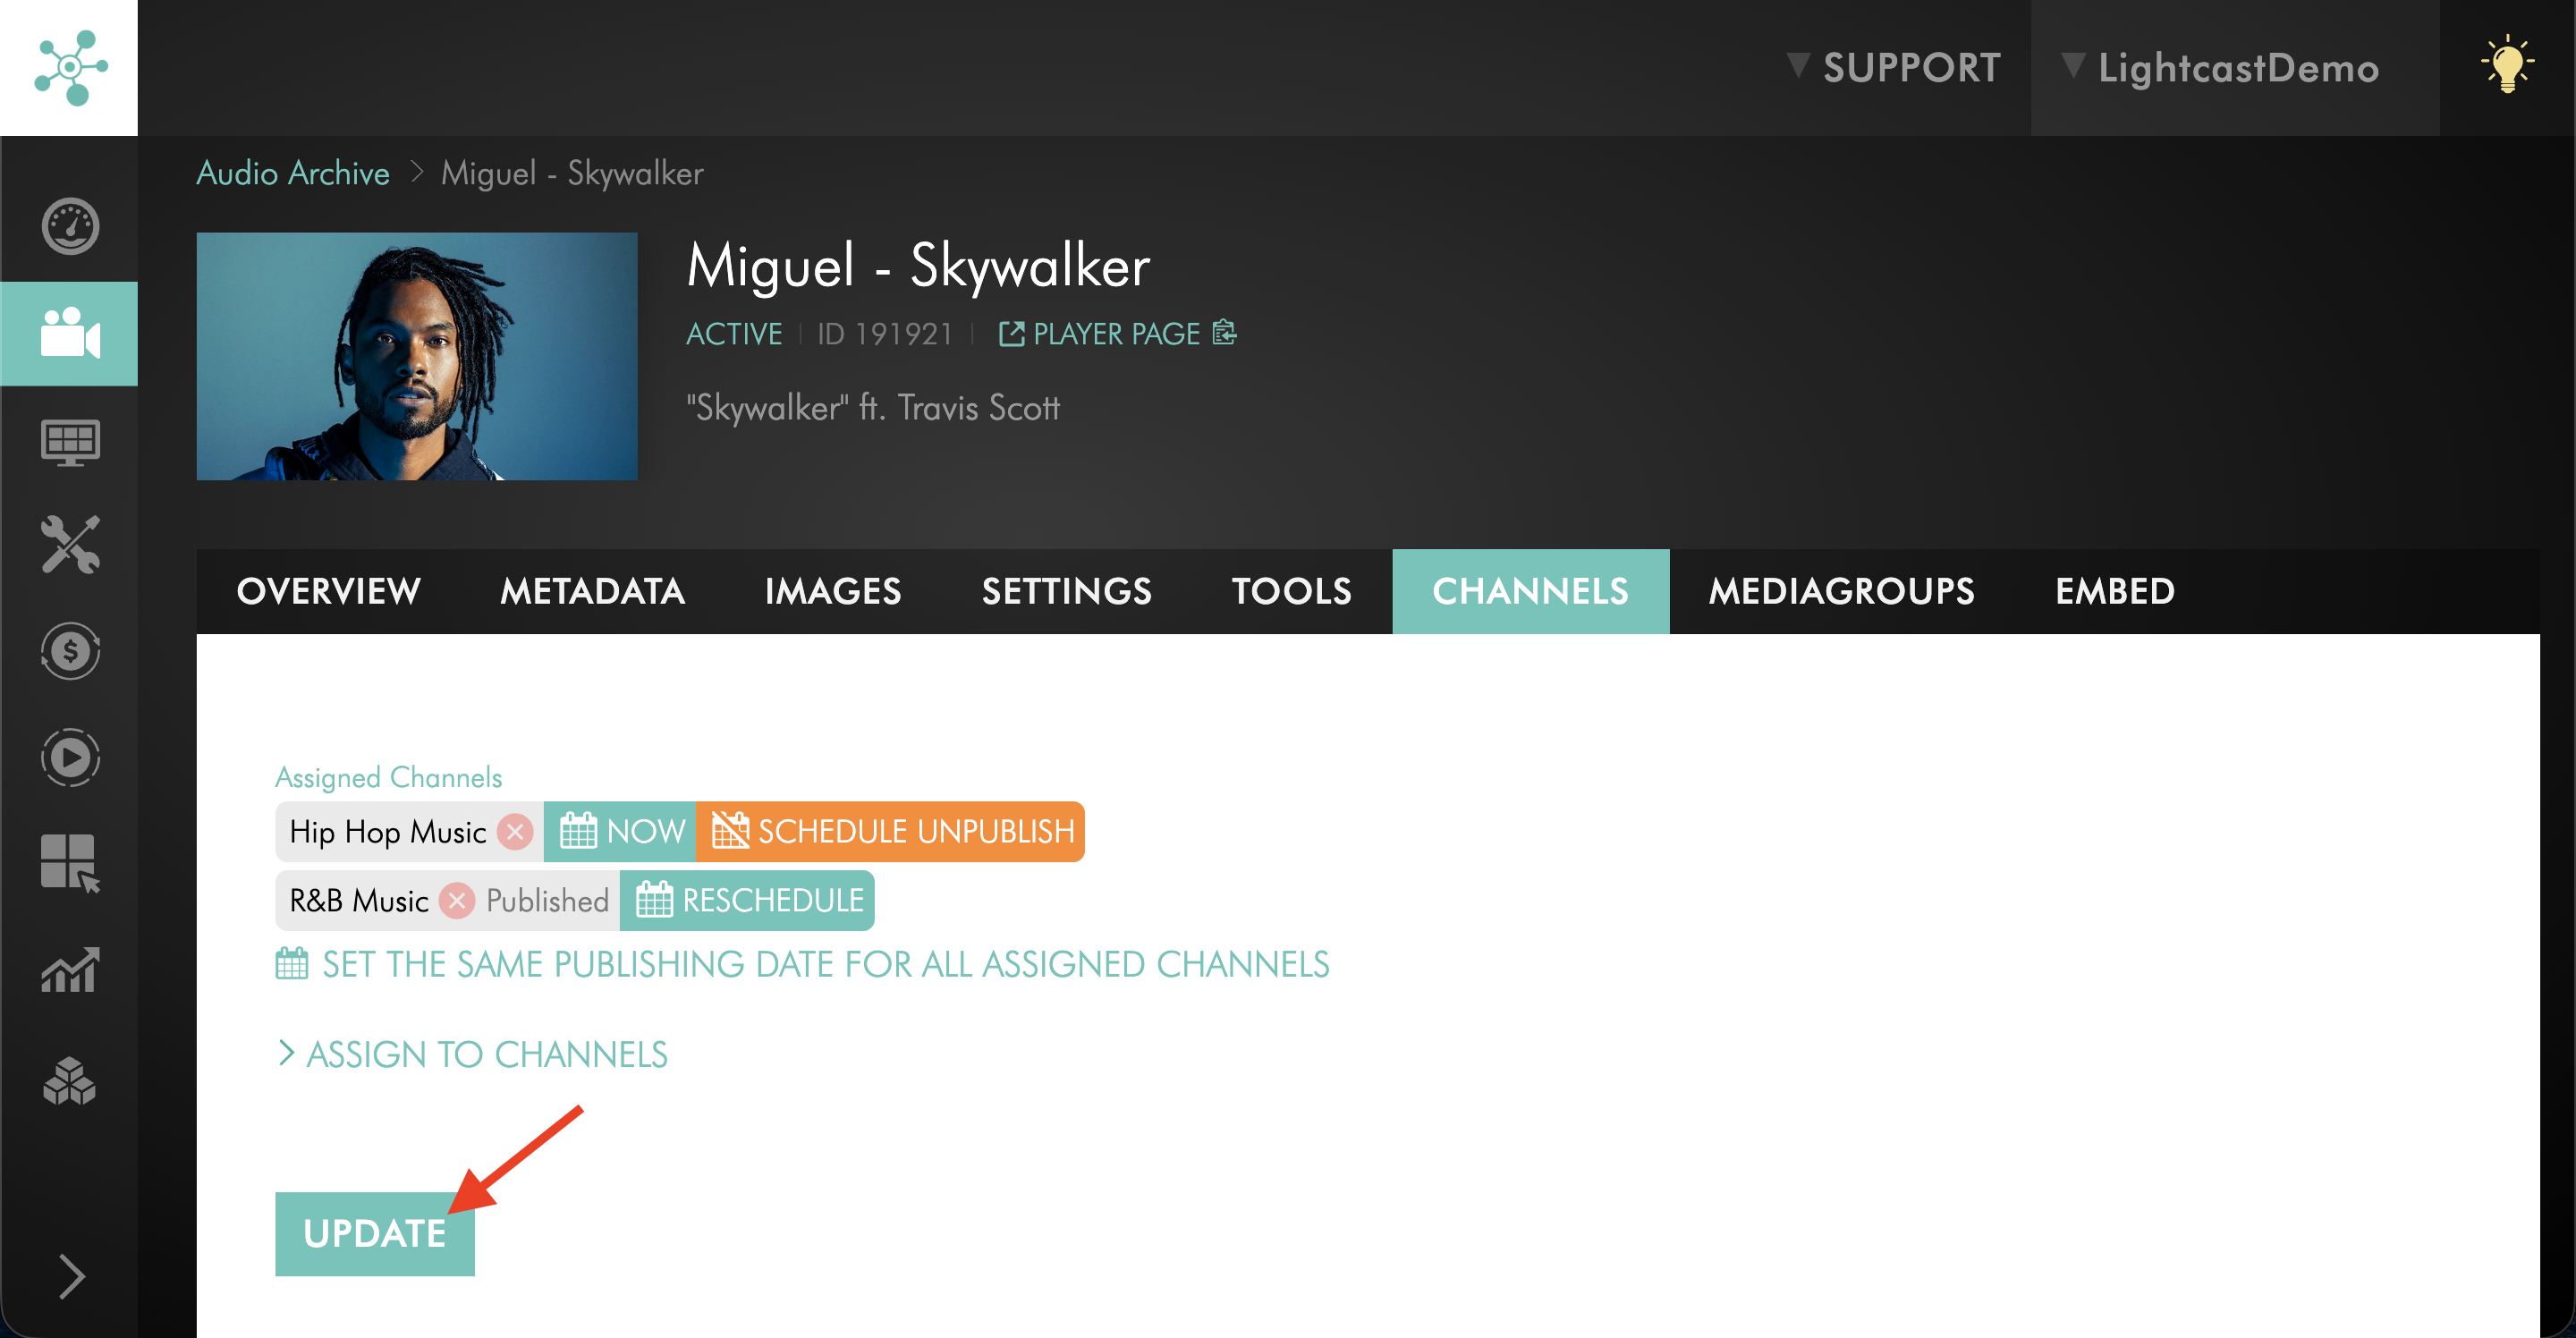
Step 8
Click UPDATE to save the Channel assignment.
FAQs
Can I assign content to an AOD Channel without uploading it again?
Yes. You can add existing audio items from the Channel’s PLAYLIST tab by clicking + FROM ARCHIVE, assign them from the Audio Archive, or assign an individual item from its CHANNELS tab.
What is the difference between uploading and assigning content?
Assigning adds an existing audio item to an AOD Channel playlist without creating a new upload.
Uploading adds a new file from your computer into the Media Cloud.
When should I use + FROM ARCHIVE?
Use + FROM ARCHIVE when the audio item has already been uploaded to the Media Cloud and you want to add it while working inside that AOD Channel’s PLAYLIST tab.
When should I assign content from the Audio Archive?
Use the Audio Archive when you want to select one or more existing audio items first and then assign them to an AOD Channel.
When should I use the media item’s CHANNELS tab?
Use the media item’s CHANNELS tab when you are already viewing one specific audio item and want to assign that item directly to an AOD Channel.
Does assigning content create a duplicate media file?
No. Assigning existing content places the audio item into the AOD Channel playlist. It does not create a new upload.
Can I remove audio from an AOD Channel later?
Yes. You can remove audio from the Channel’s PLAYLIST tab or unassign it from the audio item’s CHANNELS tab.
To learn more, see How to unassign or remove audio from an Audio On-Demand (AOD) Channel.